Forum Replies Created
-
AuthorPosts
-
ArtisticAdam
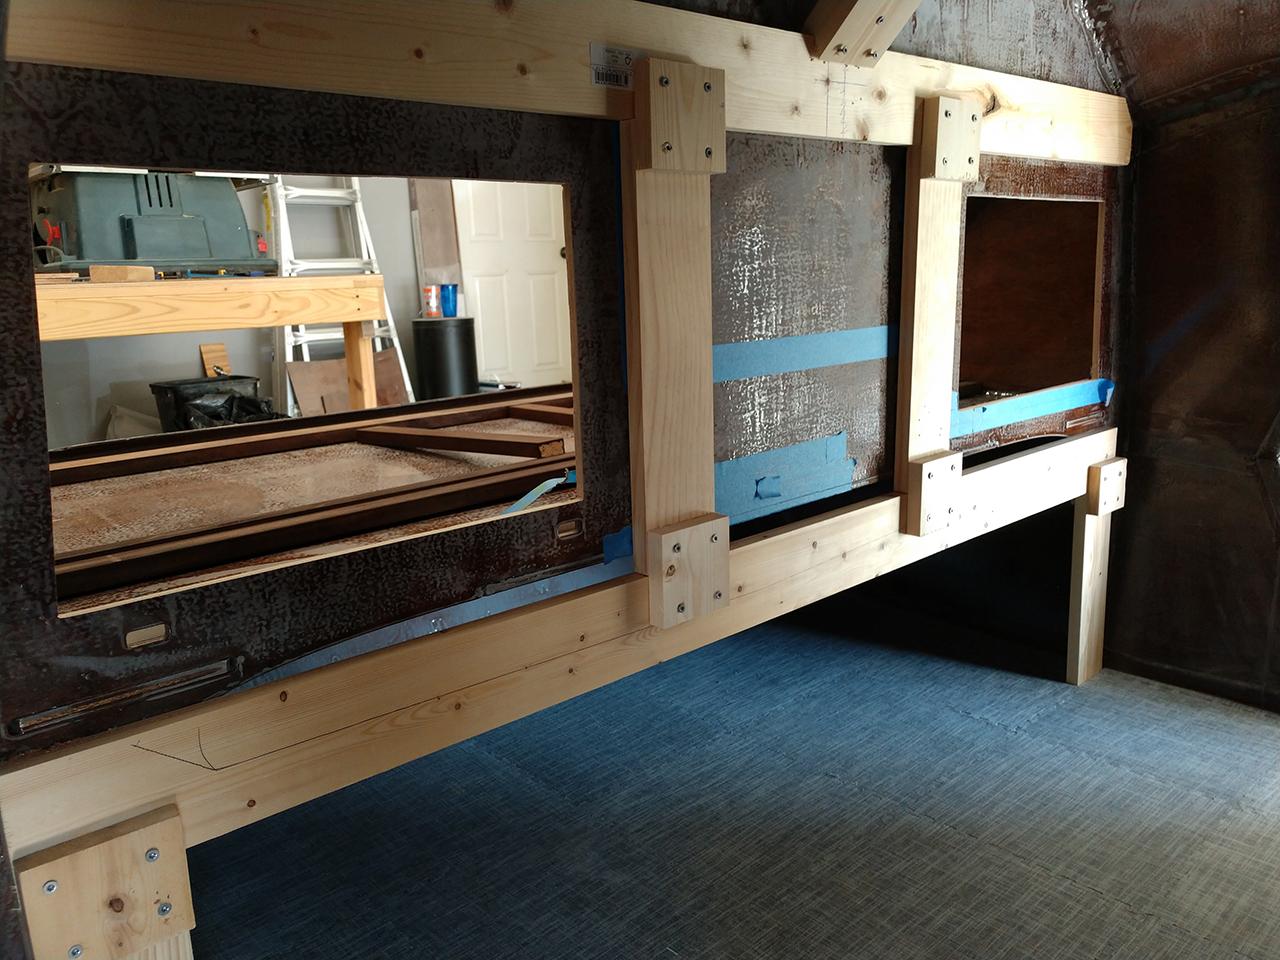
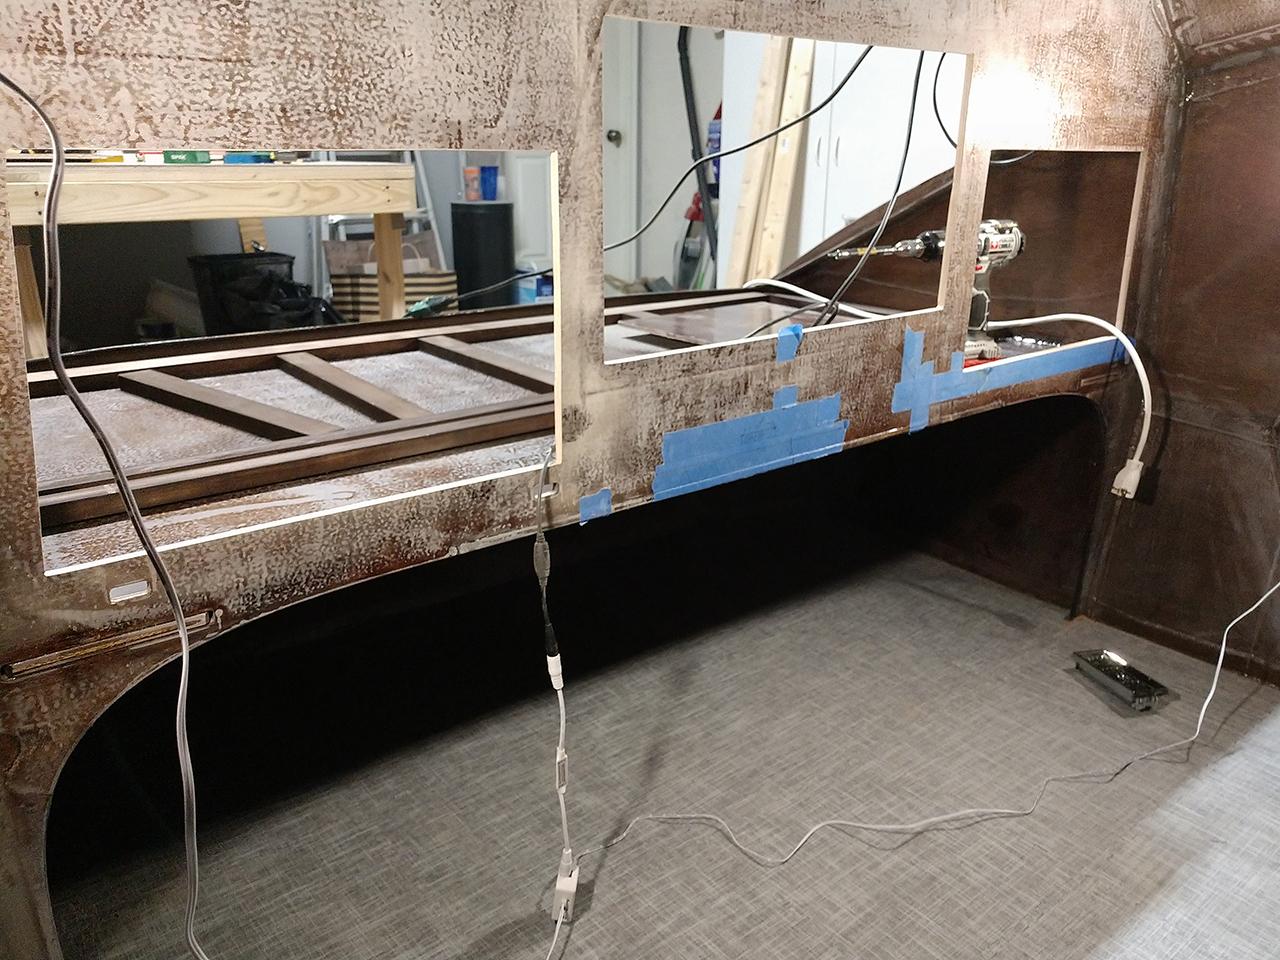
ParticipantProgress Update (Time Spent To Date ~180 hrs): I took a weekend to overhaul my workspace so progress was slow. Doors temporarily mounted using the metal hinges from Southco https://www.southco.com/en-us/n6 Galley underside framework started and bulkhead cutouts almost complete. I’ve also installed some foam tiles to make working inside the camper a little more comfortable. At this stage in the build I am almost completely off book. Next step is the construction of the left, right and center cabinet units behind the bulkhead before a final sanding & staining on the cut out edges and a final coat of epoxy on the interior.

 May 7, 2018 at 11:56 am in reply to: Install & epoxy top panels 1R & 1L b/4 installing panels 2R & 2L? #1820Participant
I’m sure you could go ahead and stitch then tape and epoxy the first seam without the other two panels in place without a problem. The indexing in the mold and wiring it down will hold its position and shape. However, I followed the steps in the manual and had no problems accessing the center seam by tipping the mold from bow to stern a little. The hardest part with the center seam was actually towards the front where its almost vertical. Tipping the mold by placing the intercostals on some paint cans made that part a lot easier (just take caution not to rack the mold frame at this step, keep it square and aligned).
I will also add a couple of tips from experience. The fiberglass tape has one edge where the weave loops back on its self called the selvage. I used a nice sharp pair of scissors to carefully trim this off just prior to laying down the strip over the seam. The selvage ends up creating a thicker edge when epoxied which will require more sanding later. Keep in mind that if you choose to go this route you will have to be a little careful of pulling loose threads.
The second tip is for when you get to the curved seams and even applies to the large fiberglass step later. Fiberglass cloth will conform to a curved surface easier if you lightly “pat” the bubbles down with your hand as apposed to forcing it with a tool or stretching it. Start from the center and work your way out by lightly patting the fabric and let the fibers move slightly to conform to the curvature. Use pushpins if you need to hold it in place but NOT tape. Tape will leave a residue and pull up loose threads.
Good Luck, and keep us posted on your progress.
ParticipantLooking good. It’s funny you mention the difficulty of getting the shelf in. For my first dry fit, after both door sills were installed, I spent a good 10 minutes trying different angles and orientations to get it in place. I eventually figured it out and had my wife record video of the procedure for future reference when I need to glue it in permanently. I’m on hold on that step until I make all of my cut-outs in the bulkhead for my cabinets and TV.
Looking at your progress for the roof hatch I assume you gave up on the option of bending it to match the curve of the shell. I’m not sure I follow your plan now but hope it works out for you.
April 6, 2018 at 10:01 am in reply to: Joint between galley Flat and bulkhead failed when plywood delaminated. #1752ParticipantFathie, I believe this is the thread you are referring to http://teardropforum.com/forums/topic/alternative-simple-electrical-system/
For the cable pass through you could get 2x simple water tight cable glands like this:
Or one designed for solar panel connections:
ParticipantIf you can pull it off without an additional bezel and curve it to the shell that would look awesome. You’re making me seriously consider cutting off my roof bezel. I’ve attached the bezel but haven’t cut the opening for the fan yet. I’m still undecided if the fan is the right choice.
I’ve worked with acrylic a fair amount and it is easy enough to heat and form. The anodized aluminum frame may be difficult and it will certainly need to be stripped and repainted after all the reshaping work. I’d check the manufacture on what type of aluminum they use, if its the wrong type it could fracture as soon as you start to stress it much.
You could scrap the aluminum and tackle it the same way CLC does the doors by making a sill out of wood.
Please keep us posted on this, and Good Luck!
ParticipantThat looks slick! Are you going to use the CLC hatch bezel? I think that may be a tad too large for the supplied bezel.
ParticipantIf you open the fan up and inspect the motor, check if the motor has 2,3,or 4 wires coming off it. If there are only 2 wires (ie red & black) I would suggest a fan controller module that does pulse width modulation (PWM). Make sure it’s rated at least 12volt and minimum 4 amp. A product similar to this one https://www.amazon.com/dp/B078YSV8PJ/ref=sspa_dk_detail_2?psc=1
You may even be able to find a controller module with a reverse setting switch, a feature not available on the Fan-Tastic 1200 but is available on the 1250. I’m not sure on the internals of the fan you have but you may be able to completely replace their control module & knob with something similar to what I previously linked. See this guys video https://www.youtube.com/watch?v=nv90gyioT_8 (Warning there is a safety cringe moment in the video at @ 1:24 )
If you do this to your fan please make sure there is also an inline fuse (some modules have them built in) if the controller fails you don’t want to start a fire.
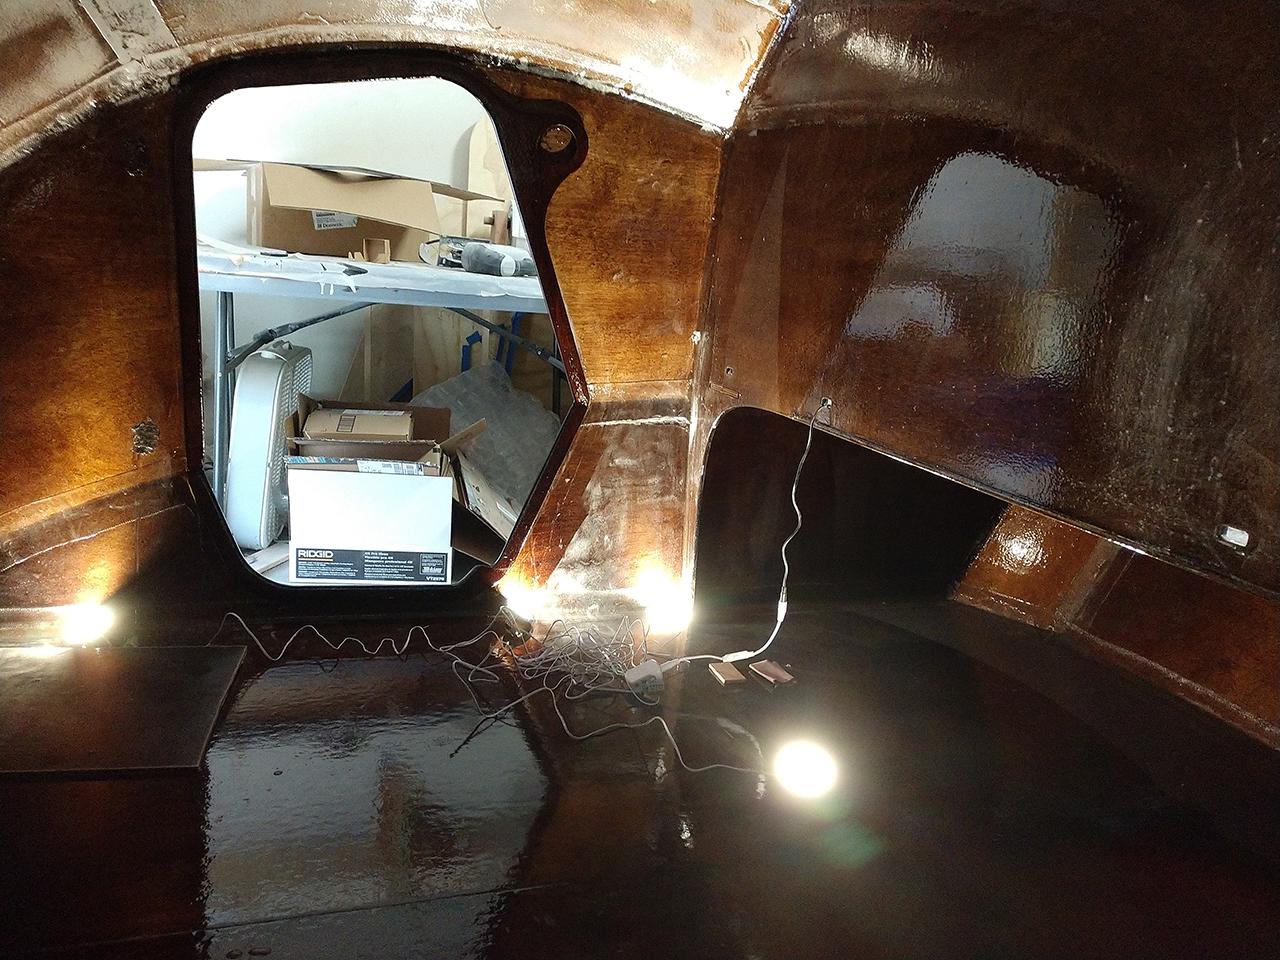
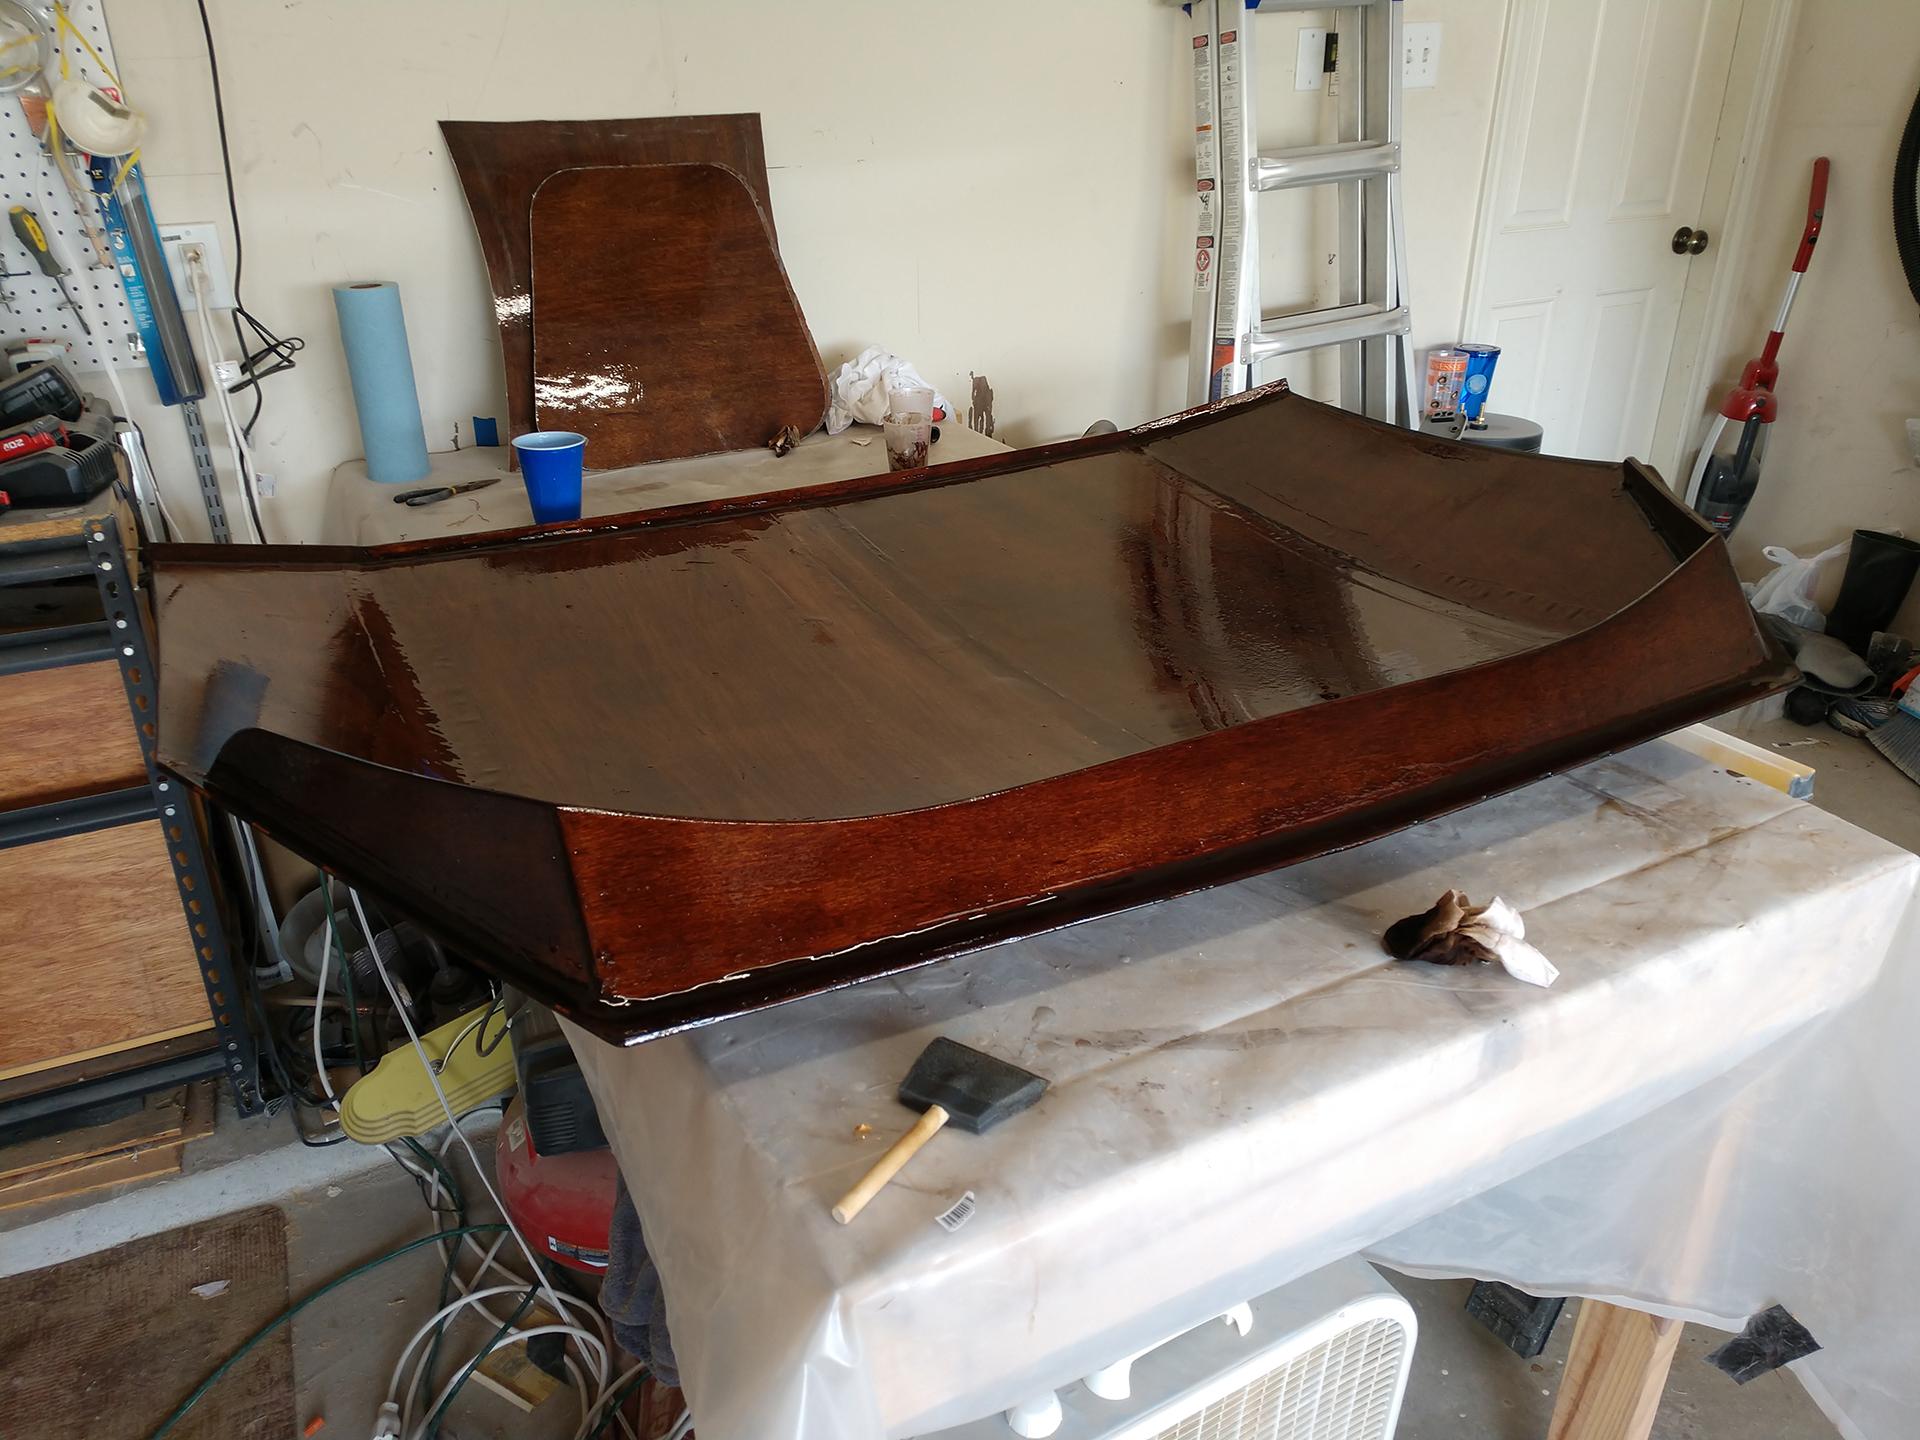
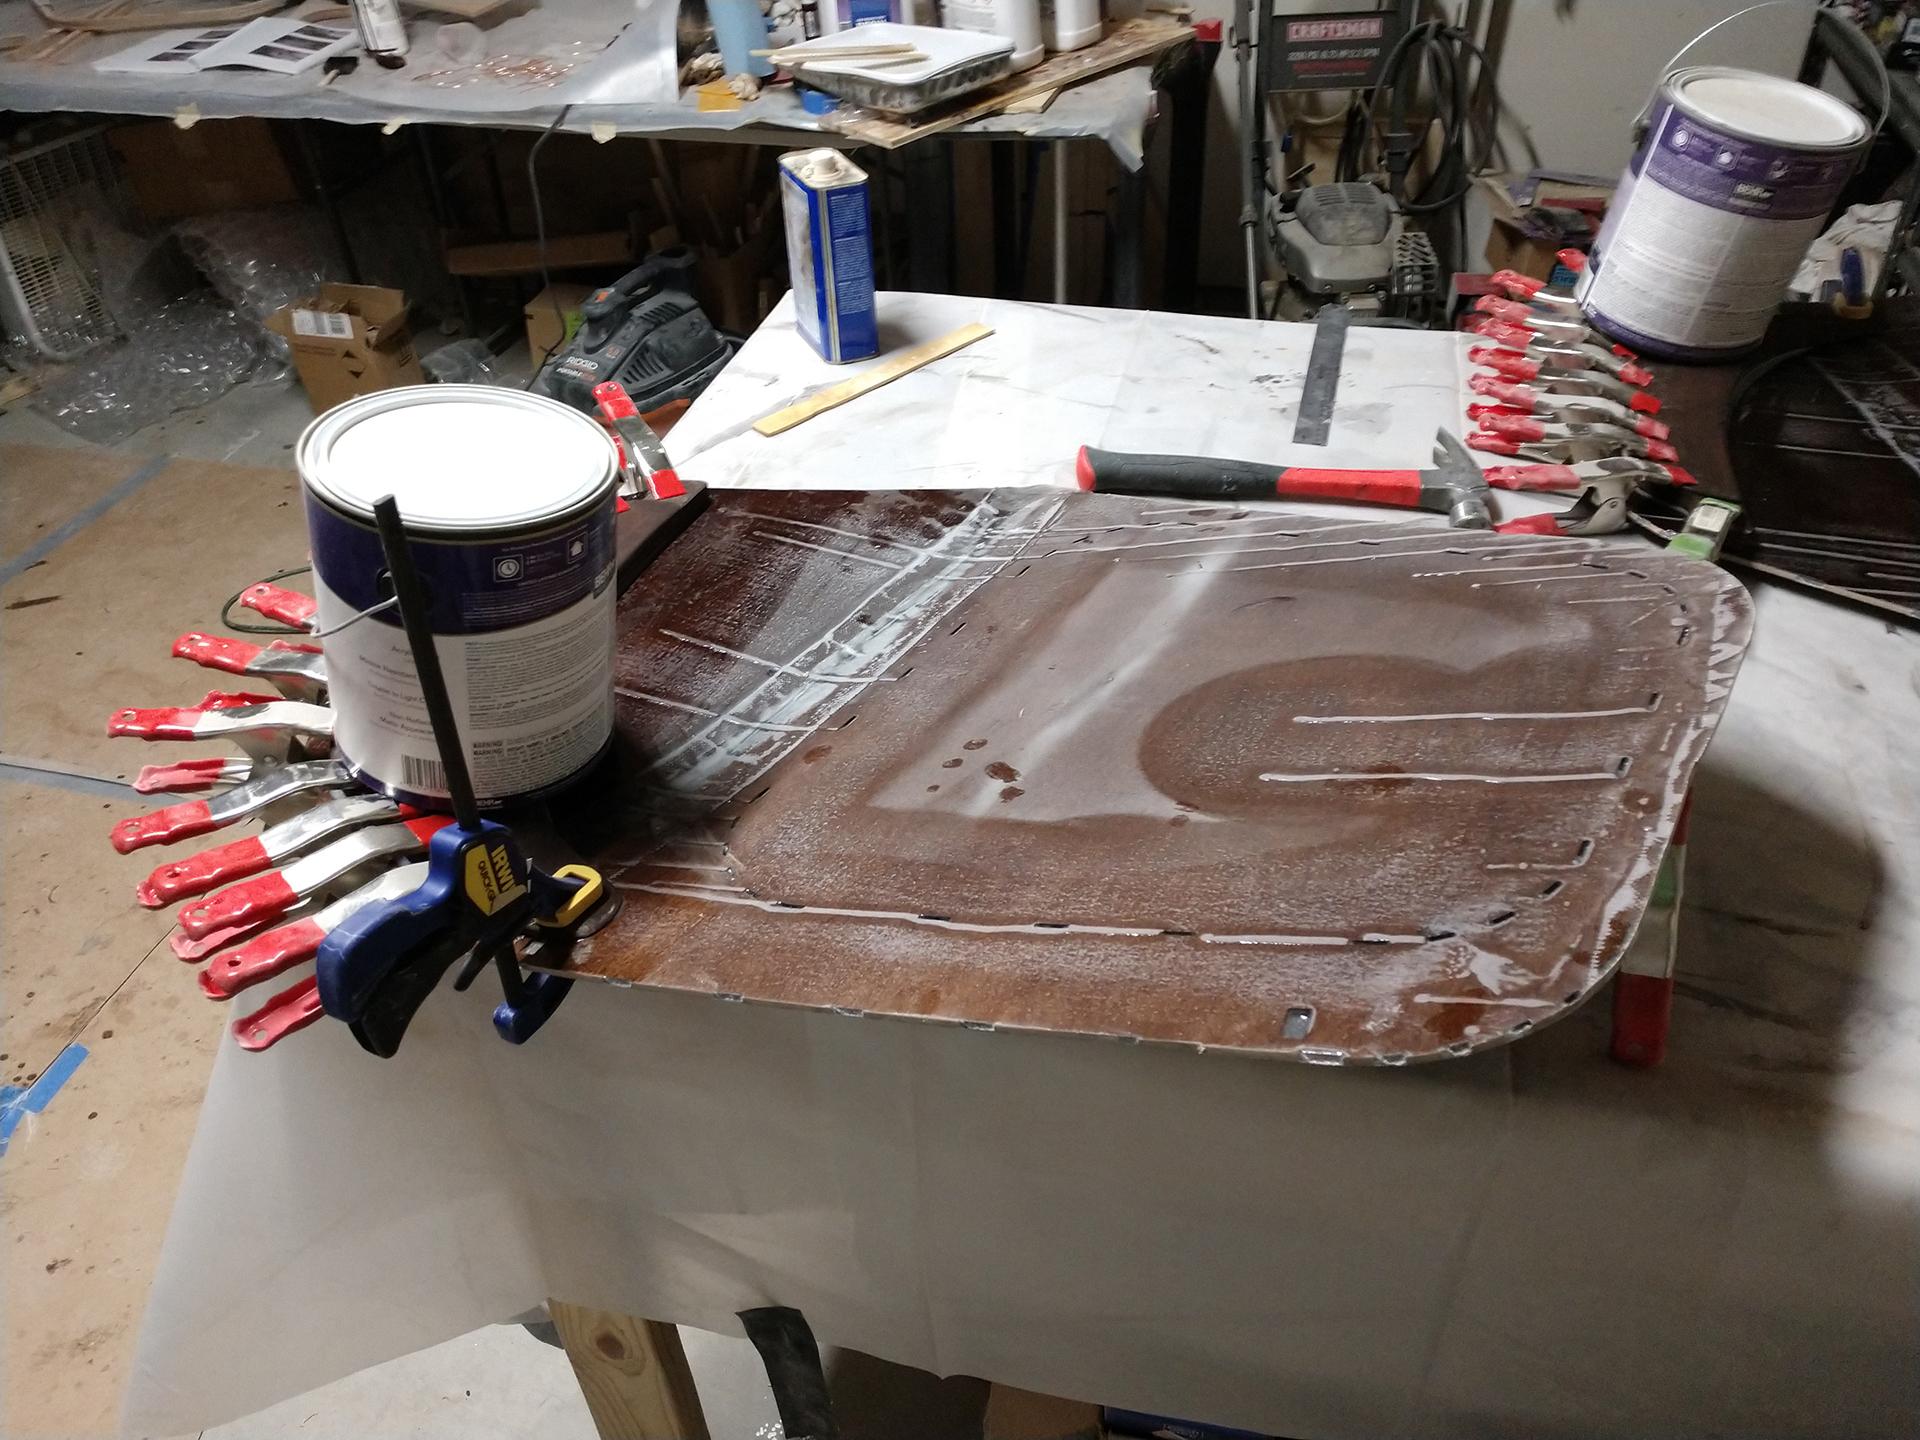
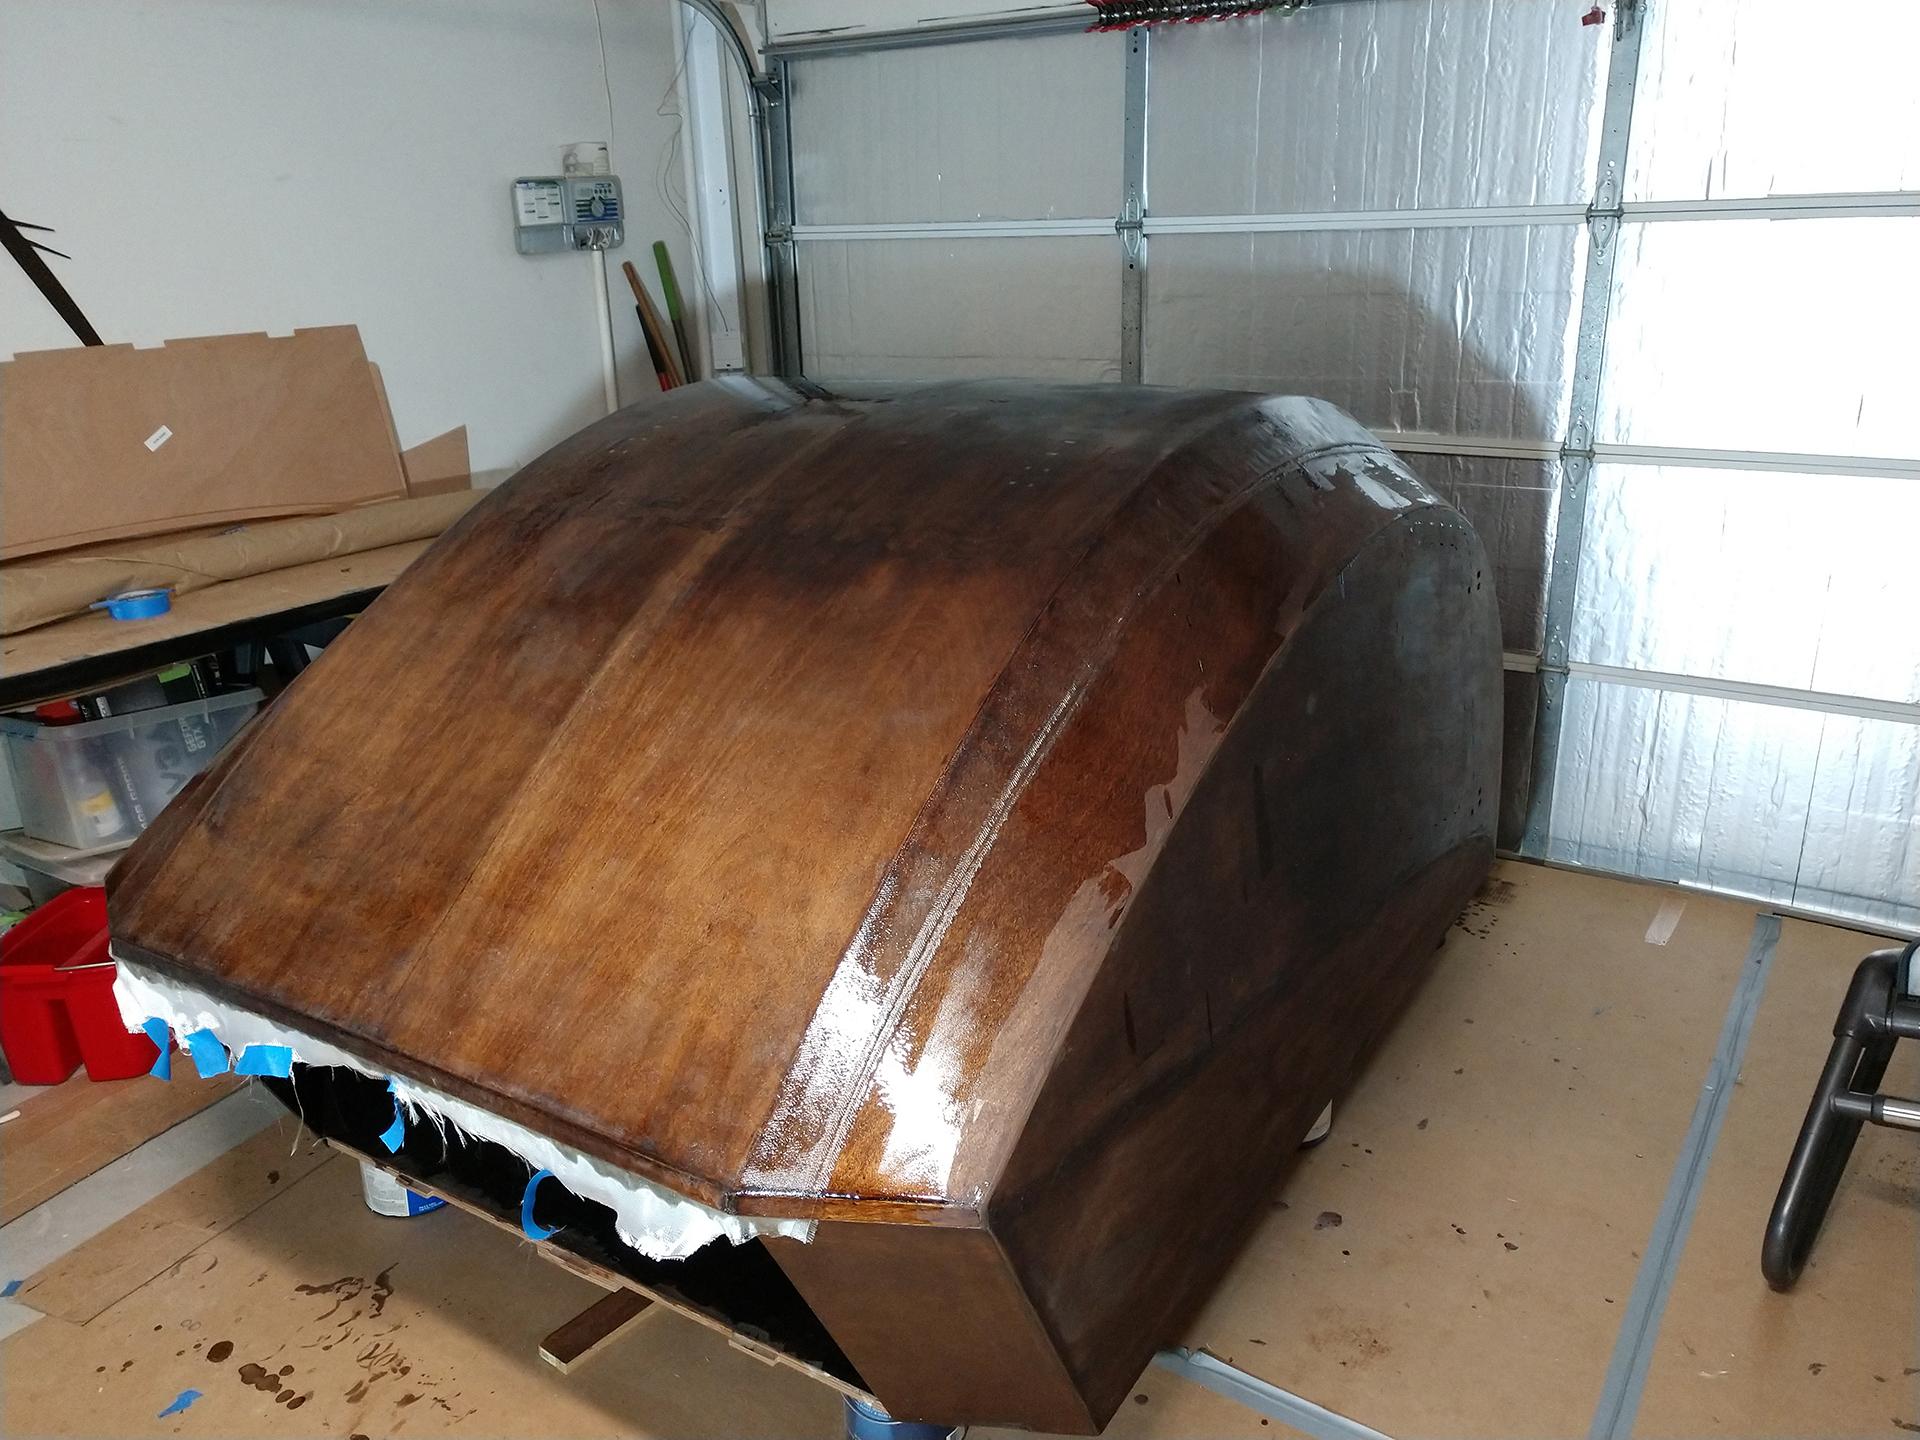
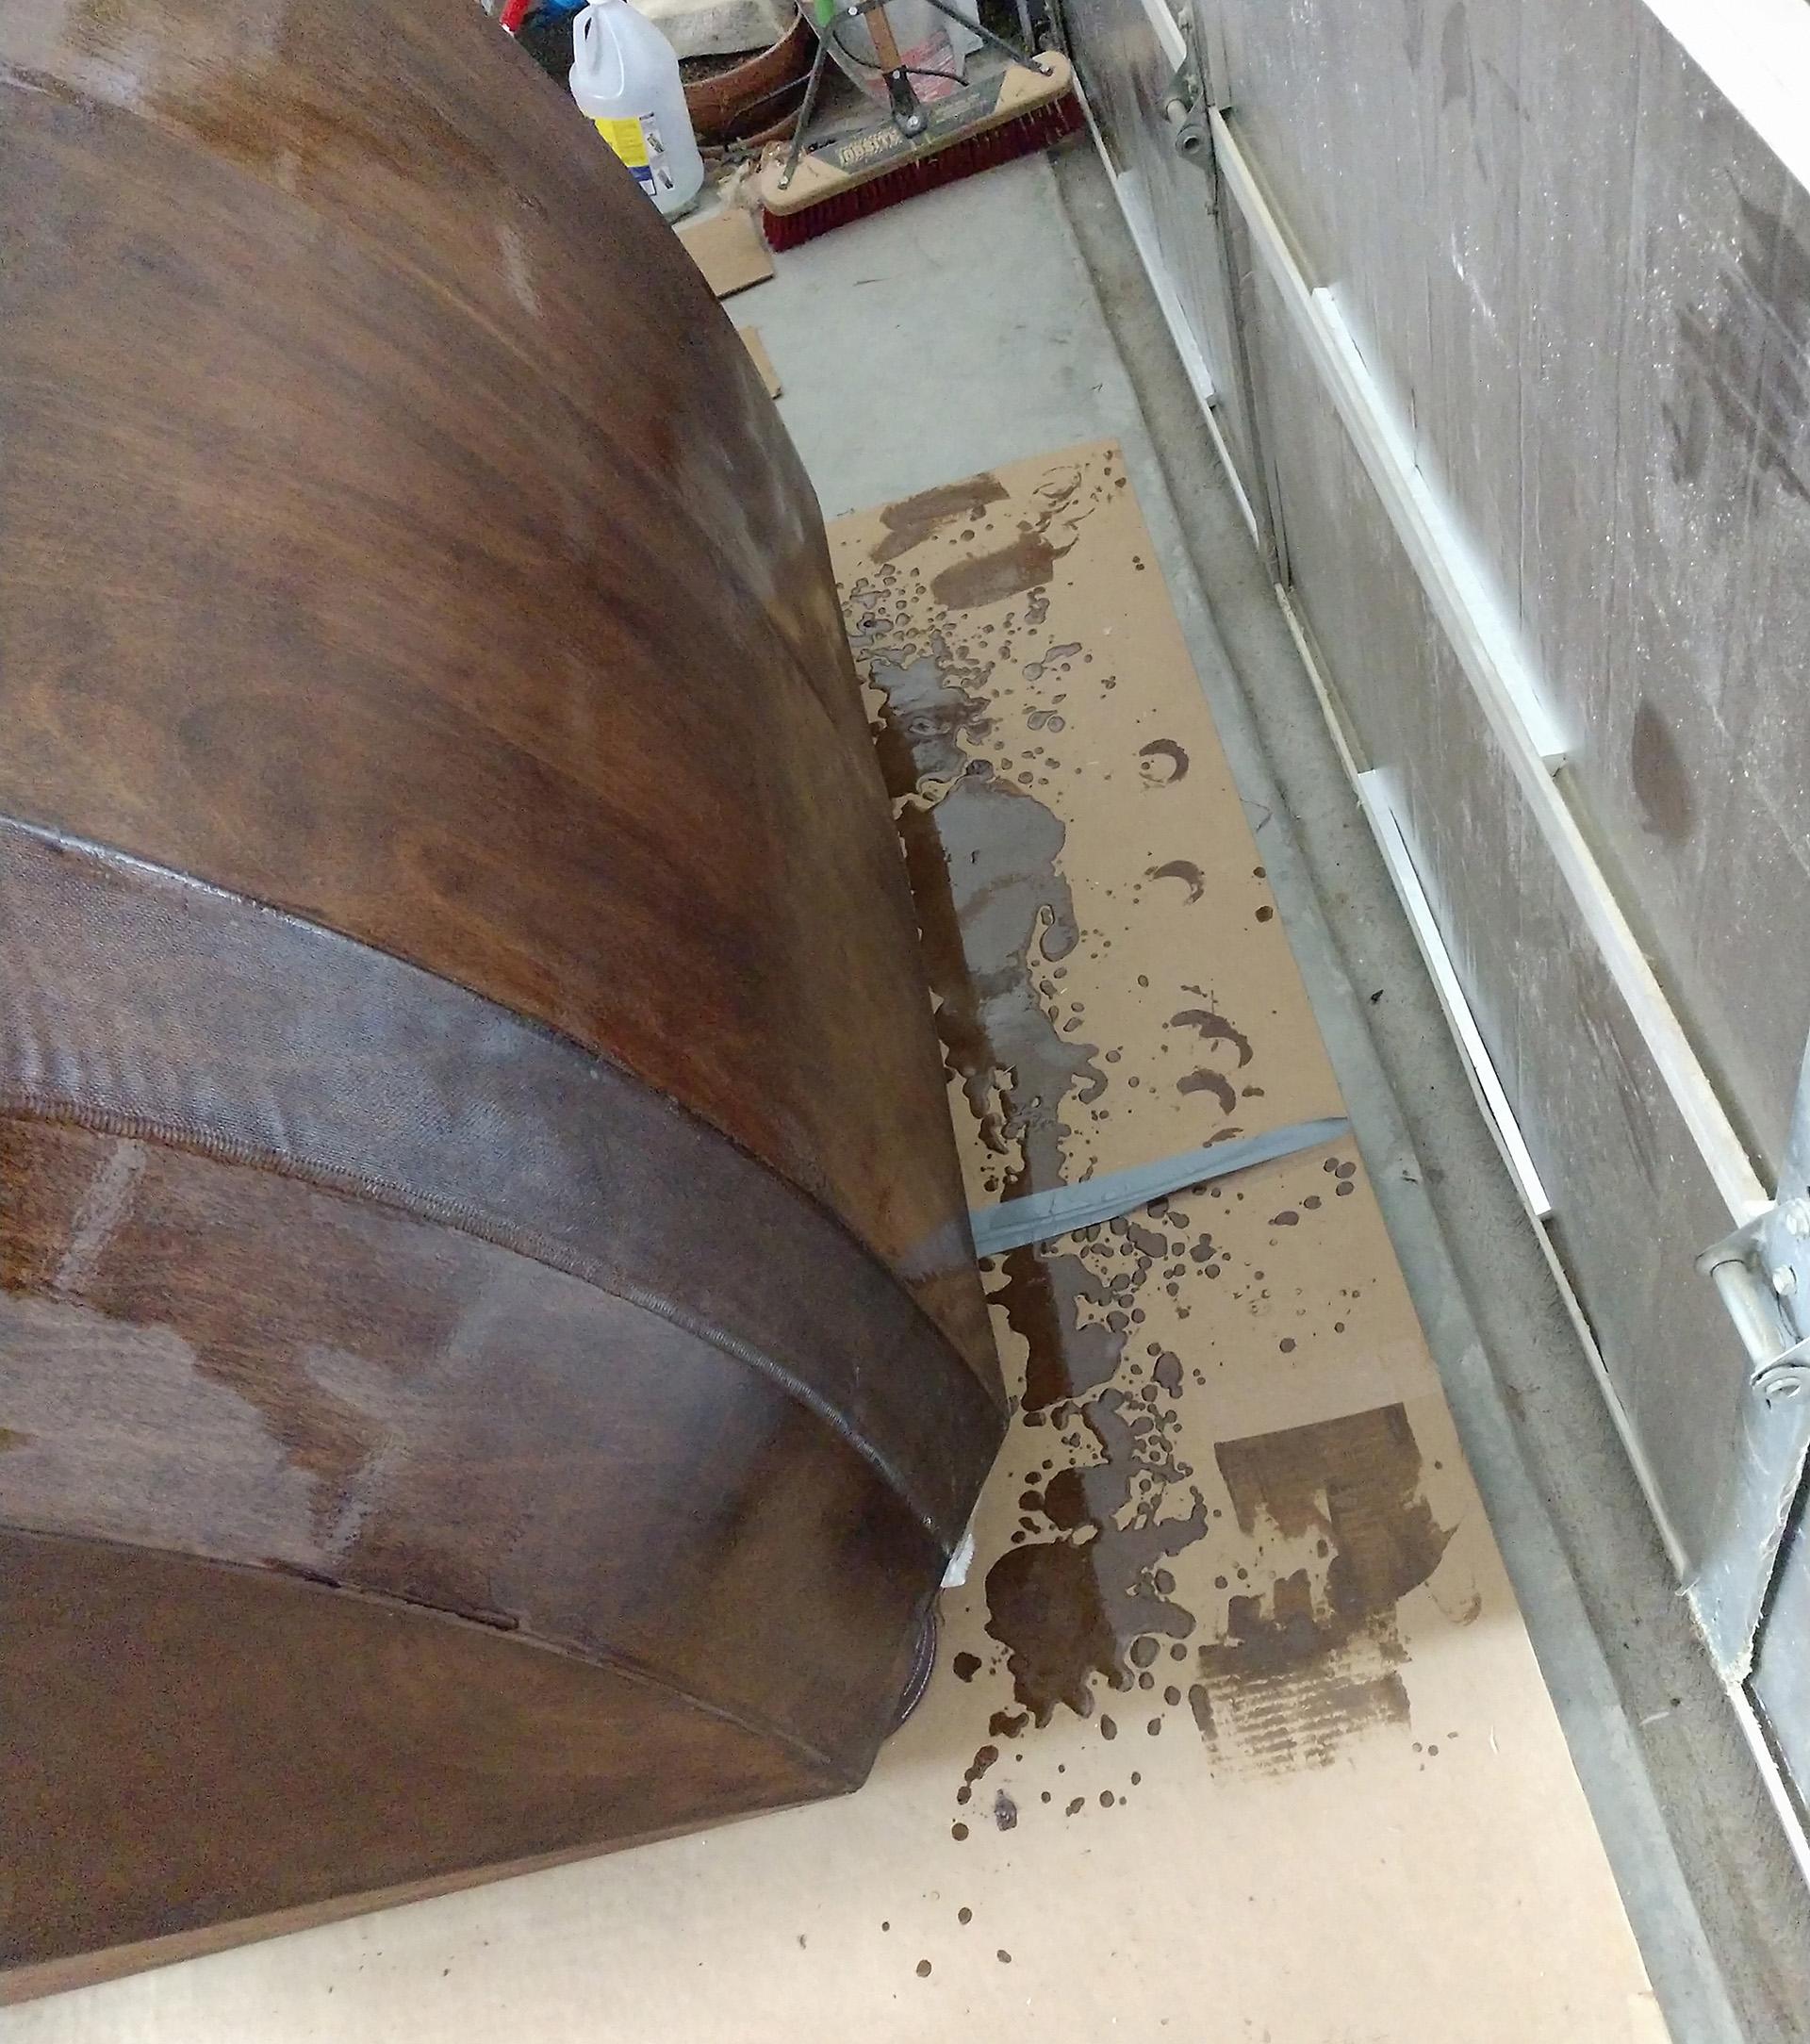
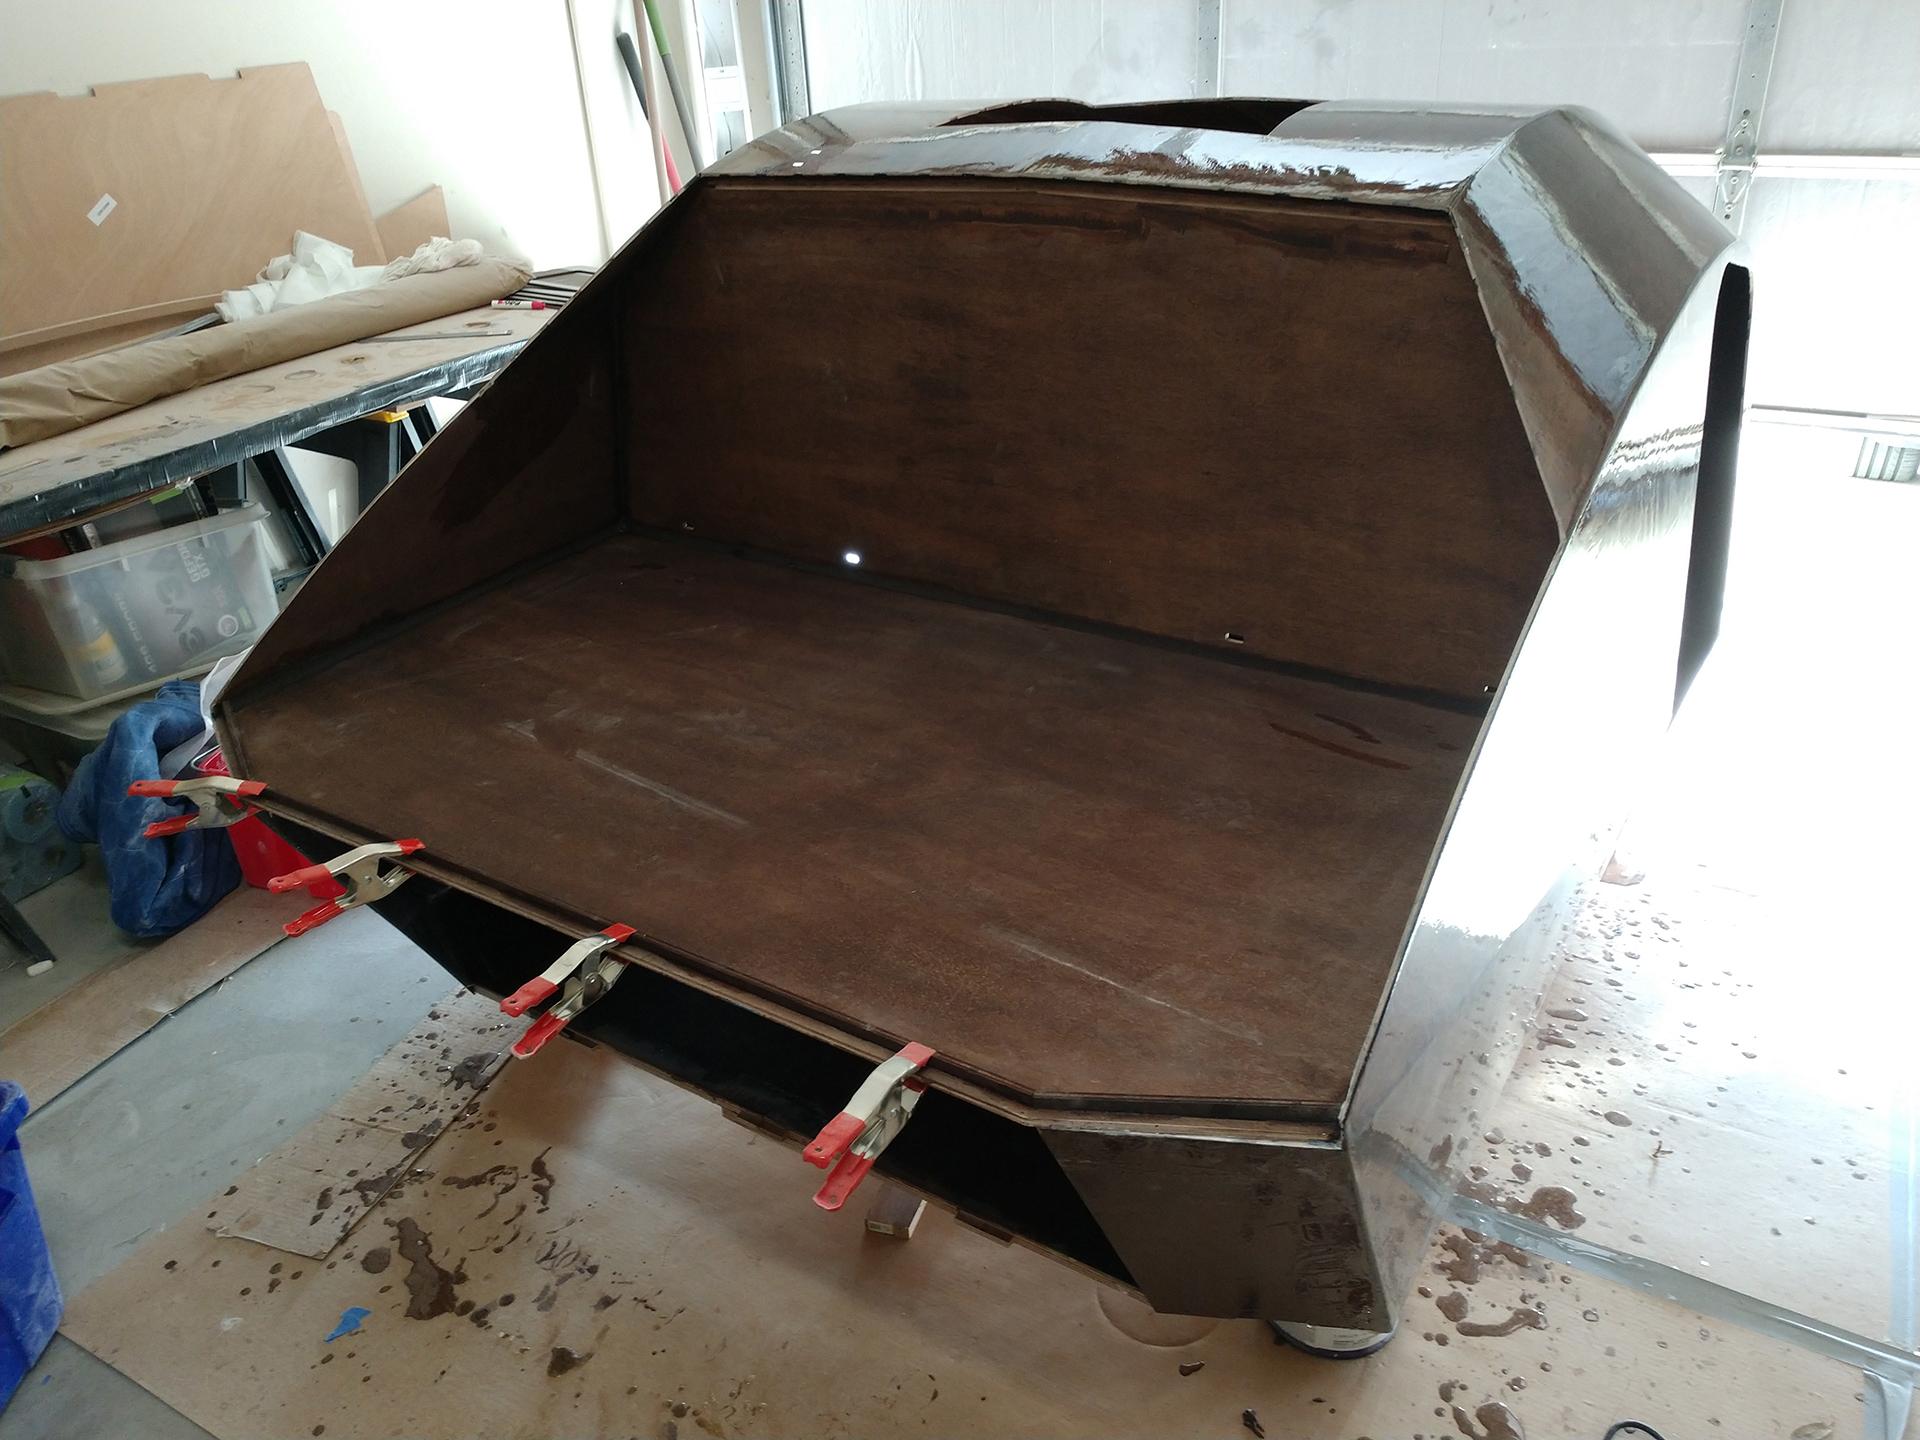
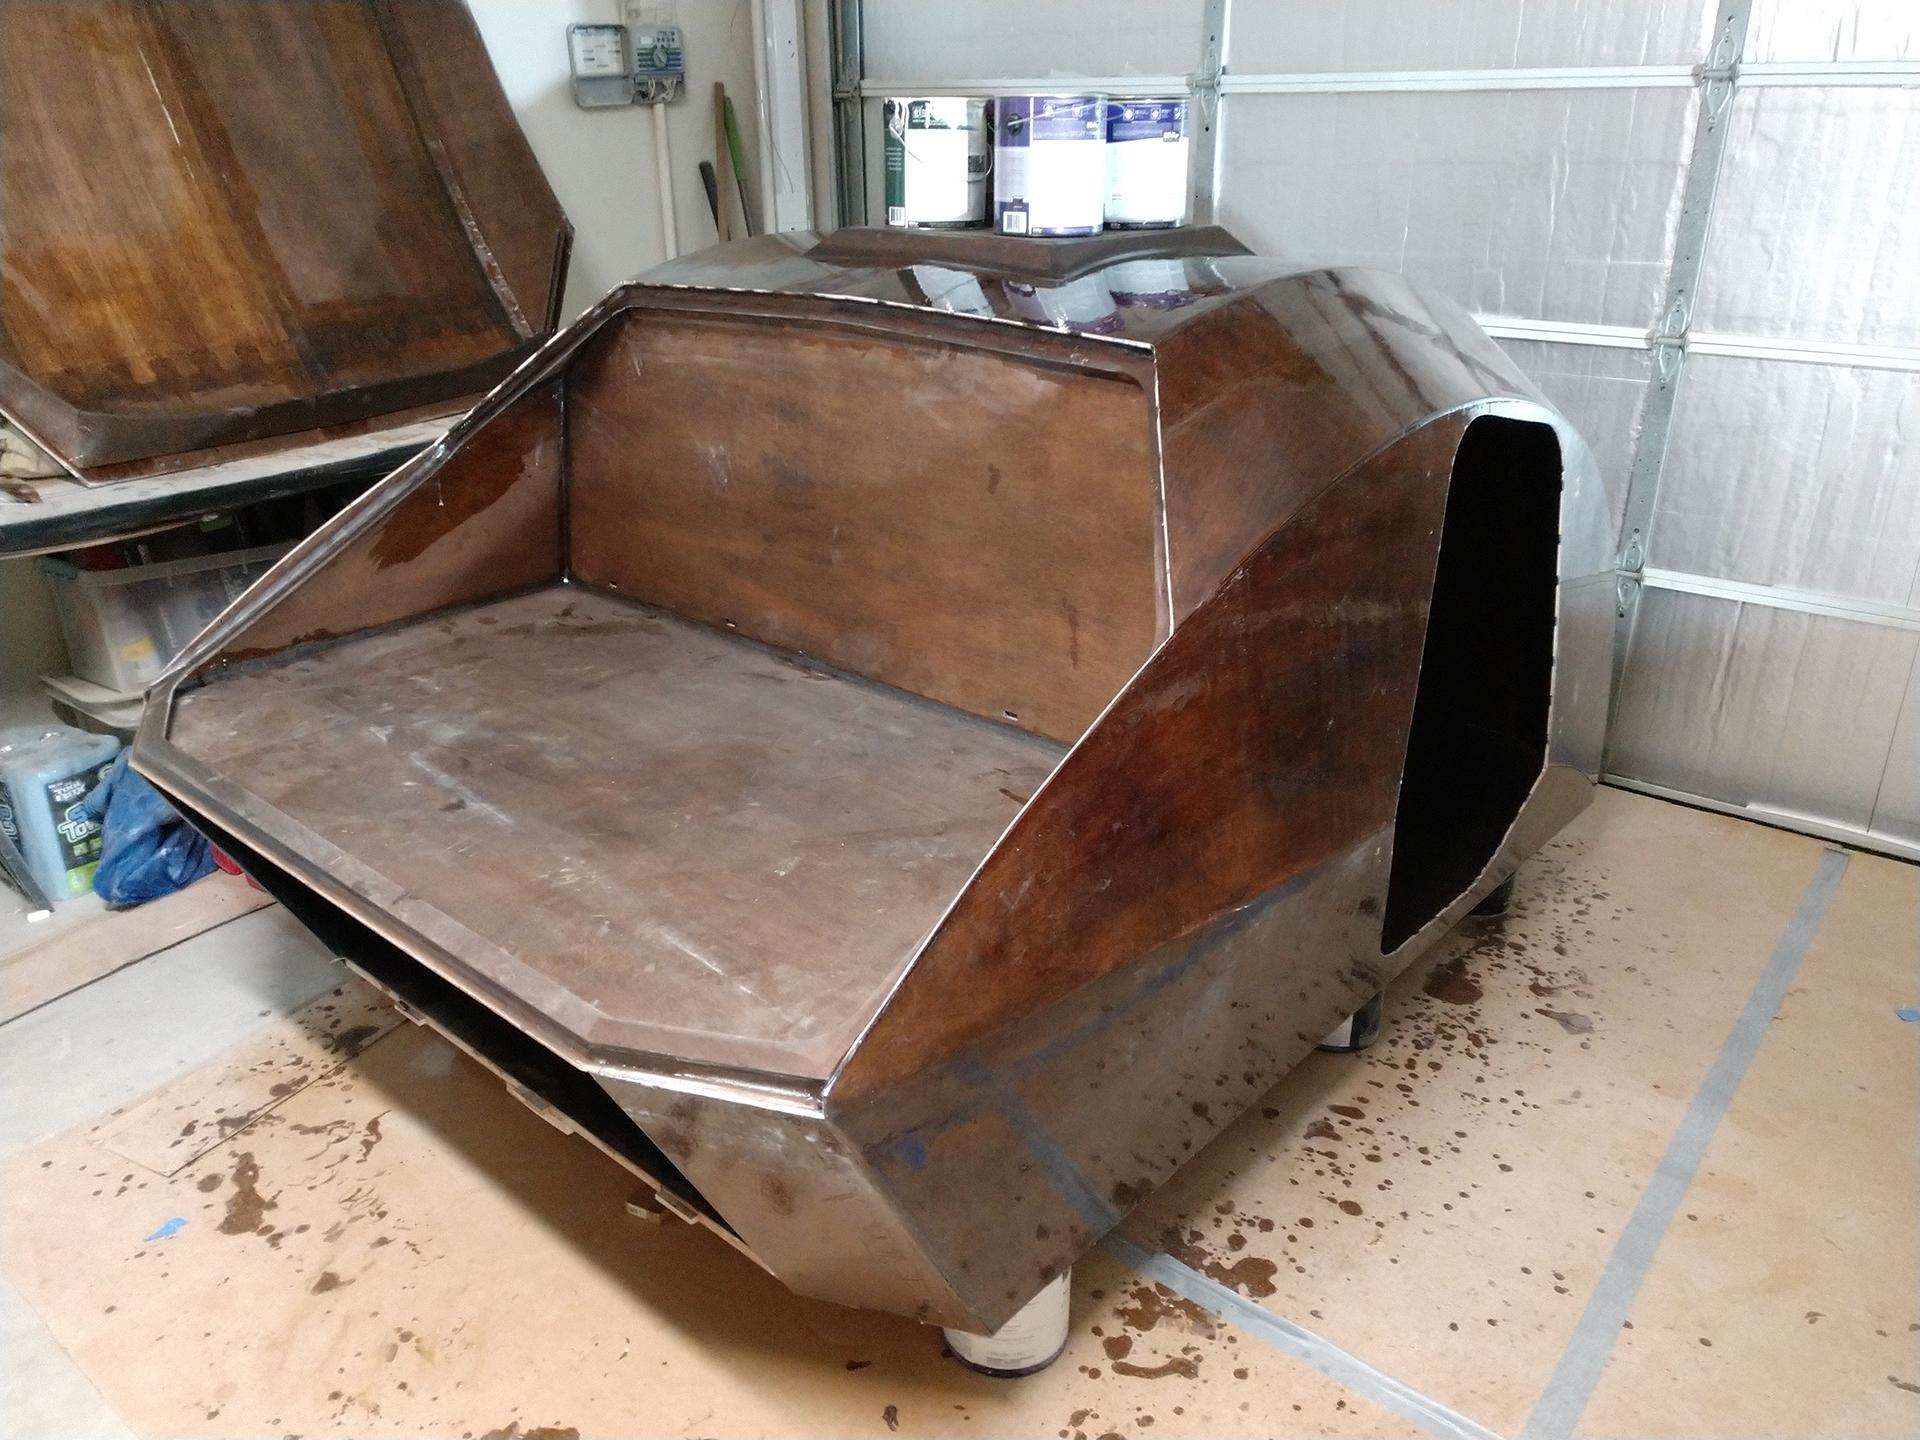
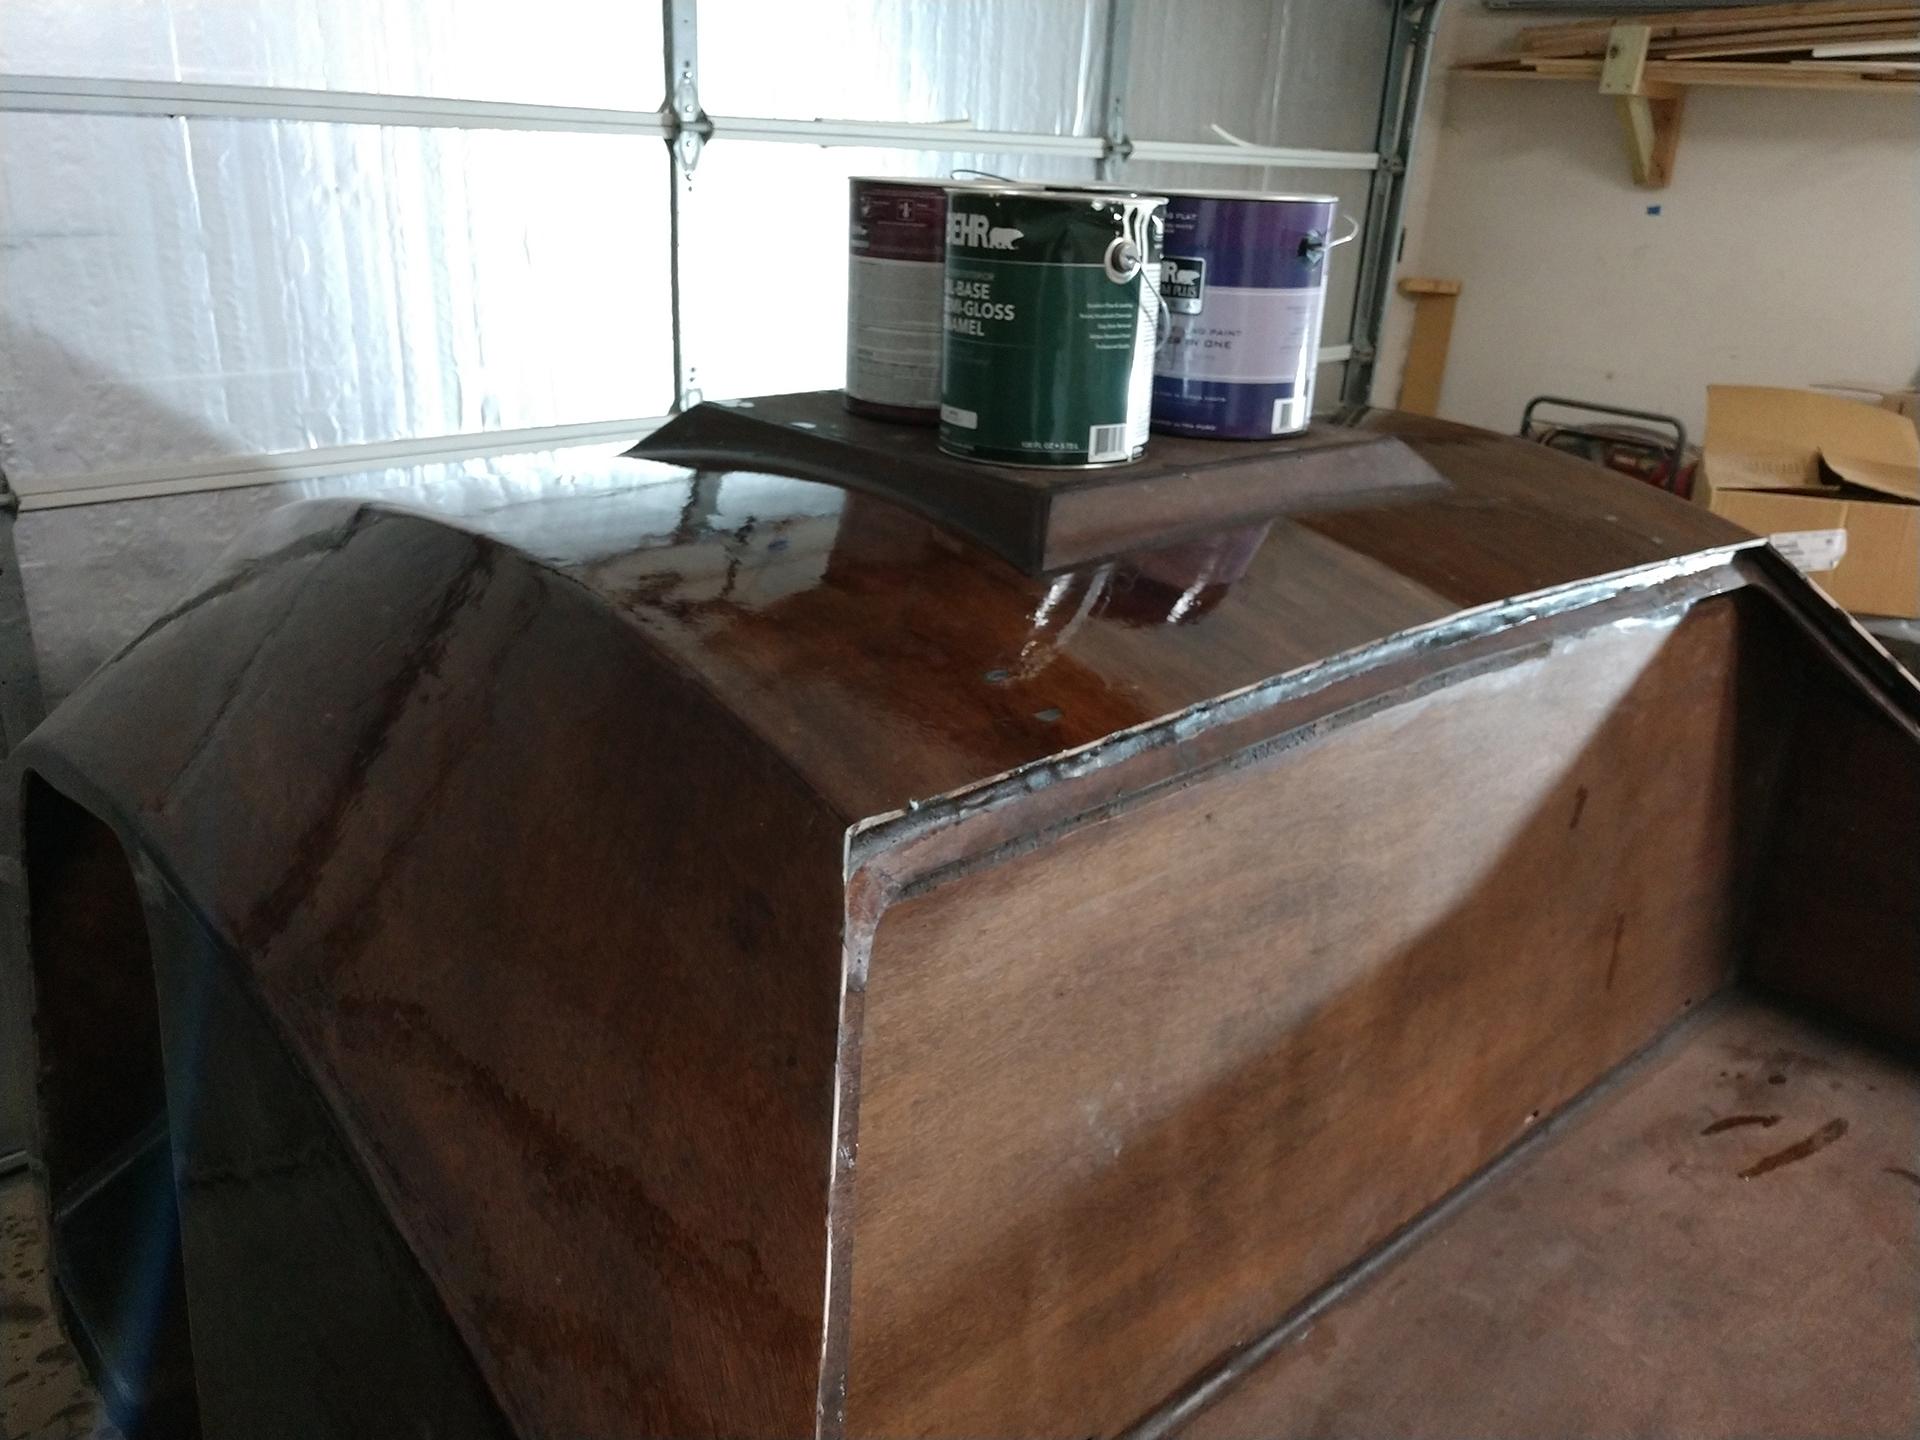
ParticipantProgress Update (Time Spent To Date ~140 hrs): Last week was productive, I was frantic about getting the last large epoxy job done before the temperatures here in Houston picked up.
Galley Hatch received its first complete coat of epoxy. You can see the window and roof hatch scraps propped up in the back. I need to figure out something fun to do with them. Any ideas?
The door stiffeners were shaped (a lot of tapering was required much more than the manual seemed to show).
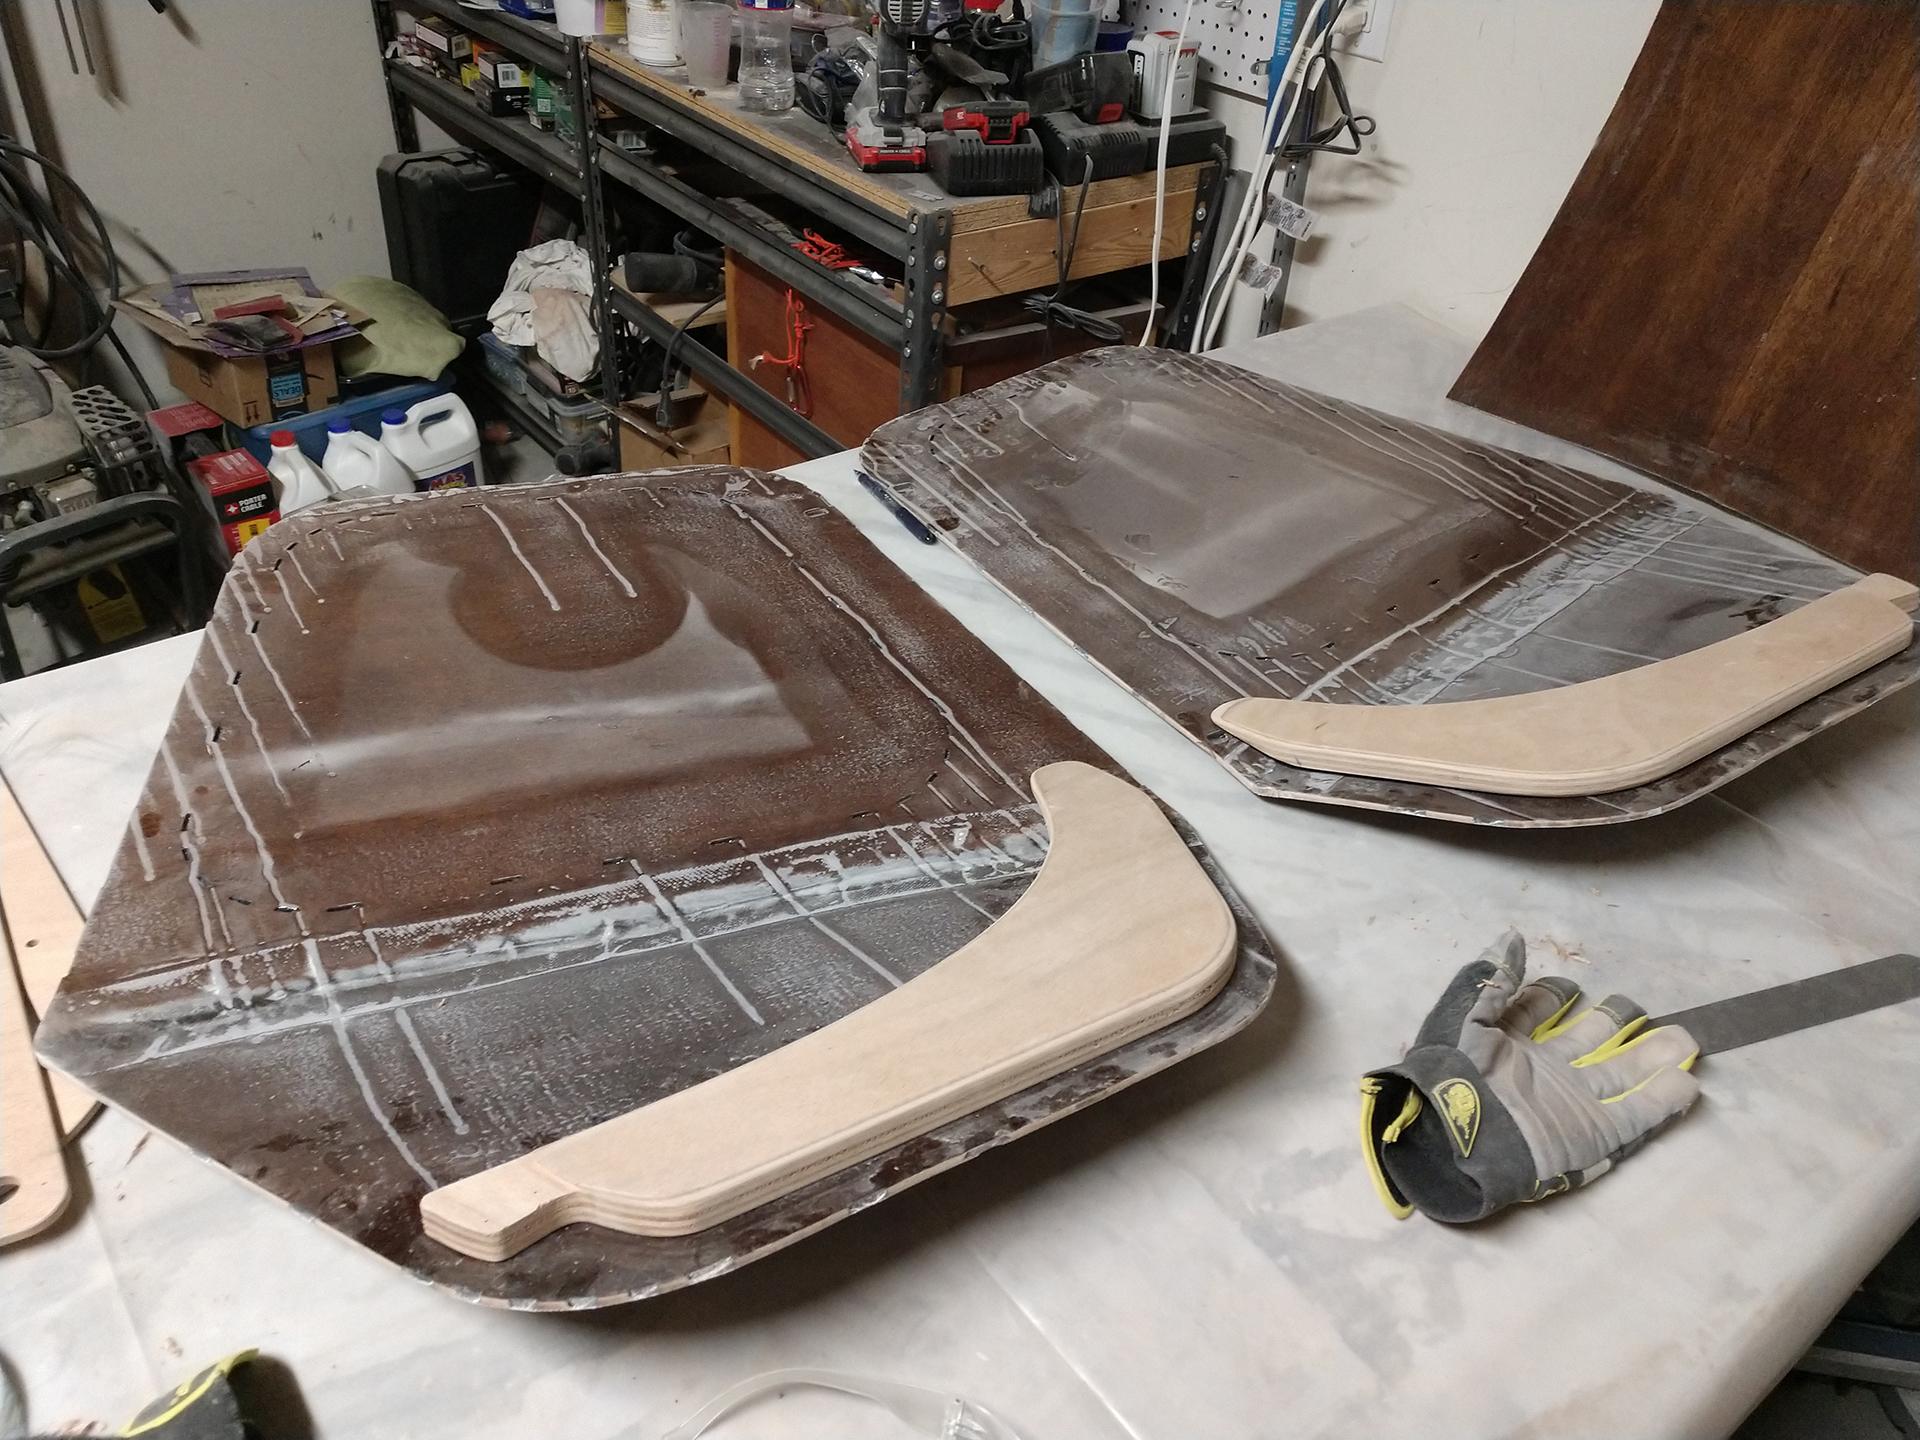
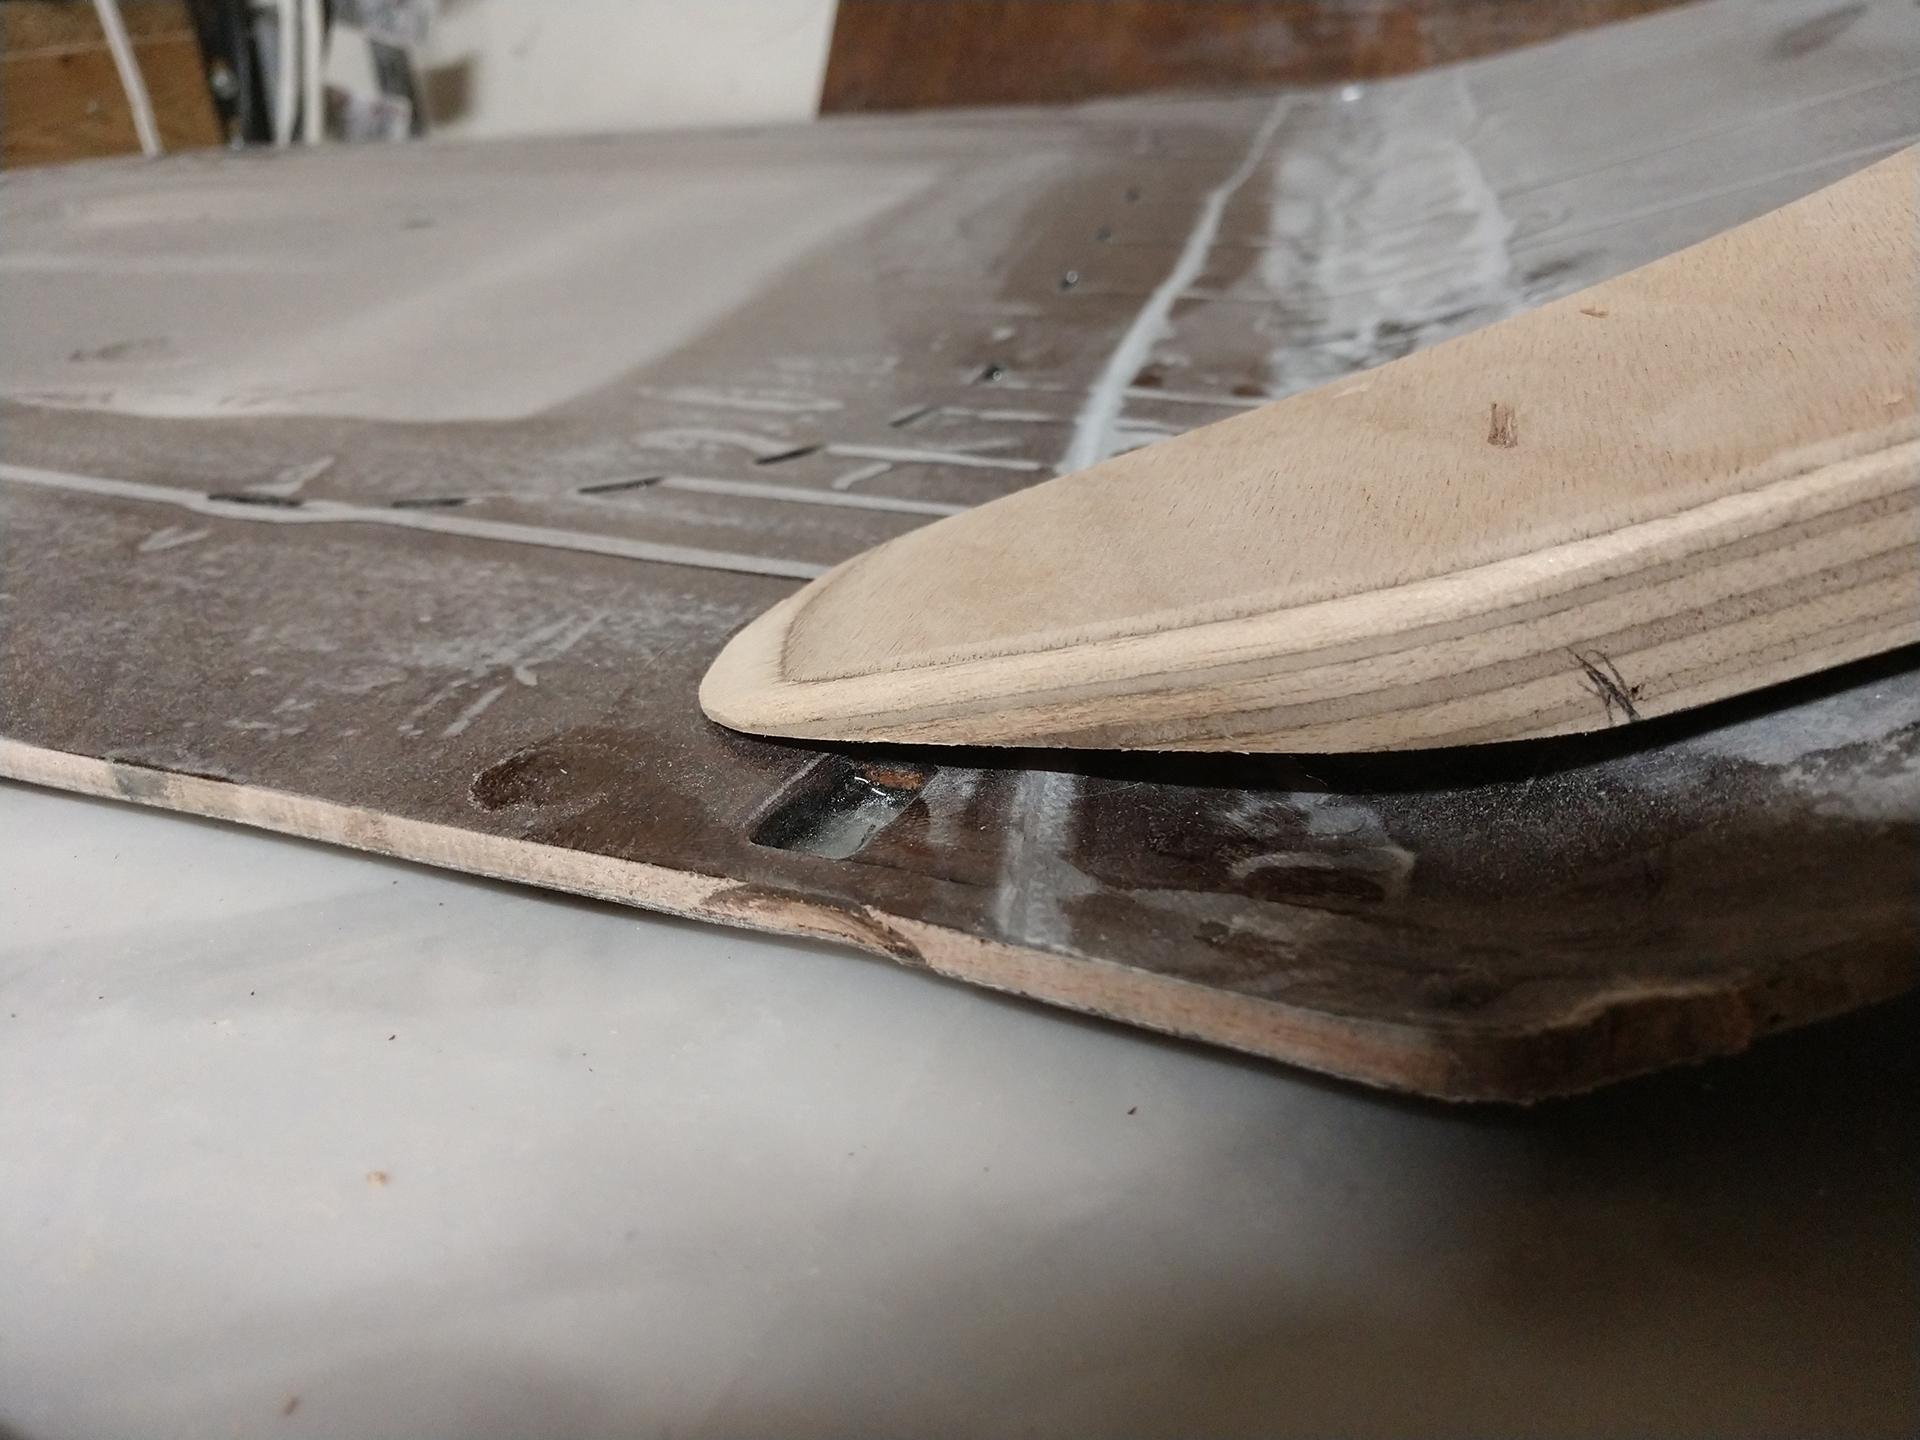
Gluing the stiffeners in was easy, I opted not to use the stitching method and instead I measured and marked their position. A little weight on the top (full paint can) and pressure from the back side with a clamp propped up kept the door in the correct shape/angle.
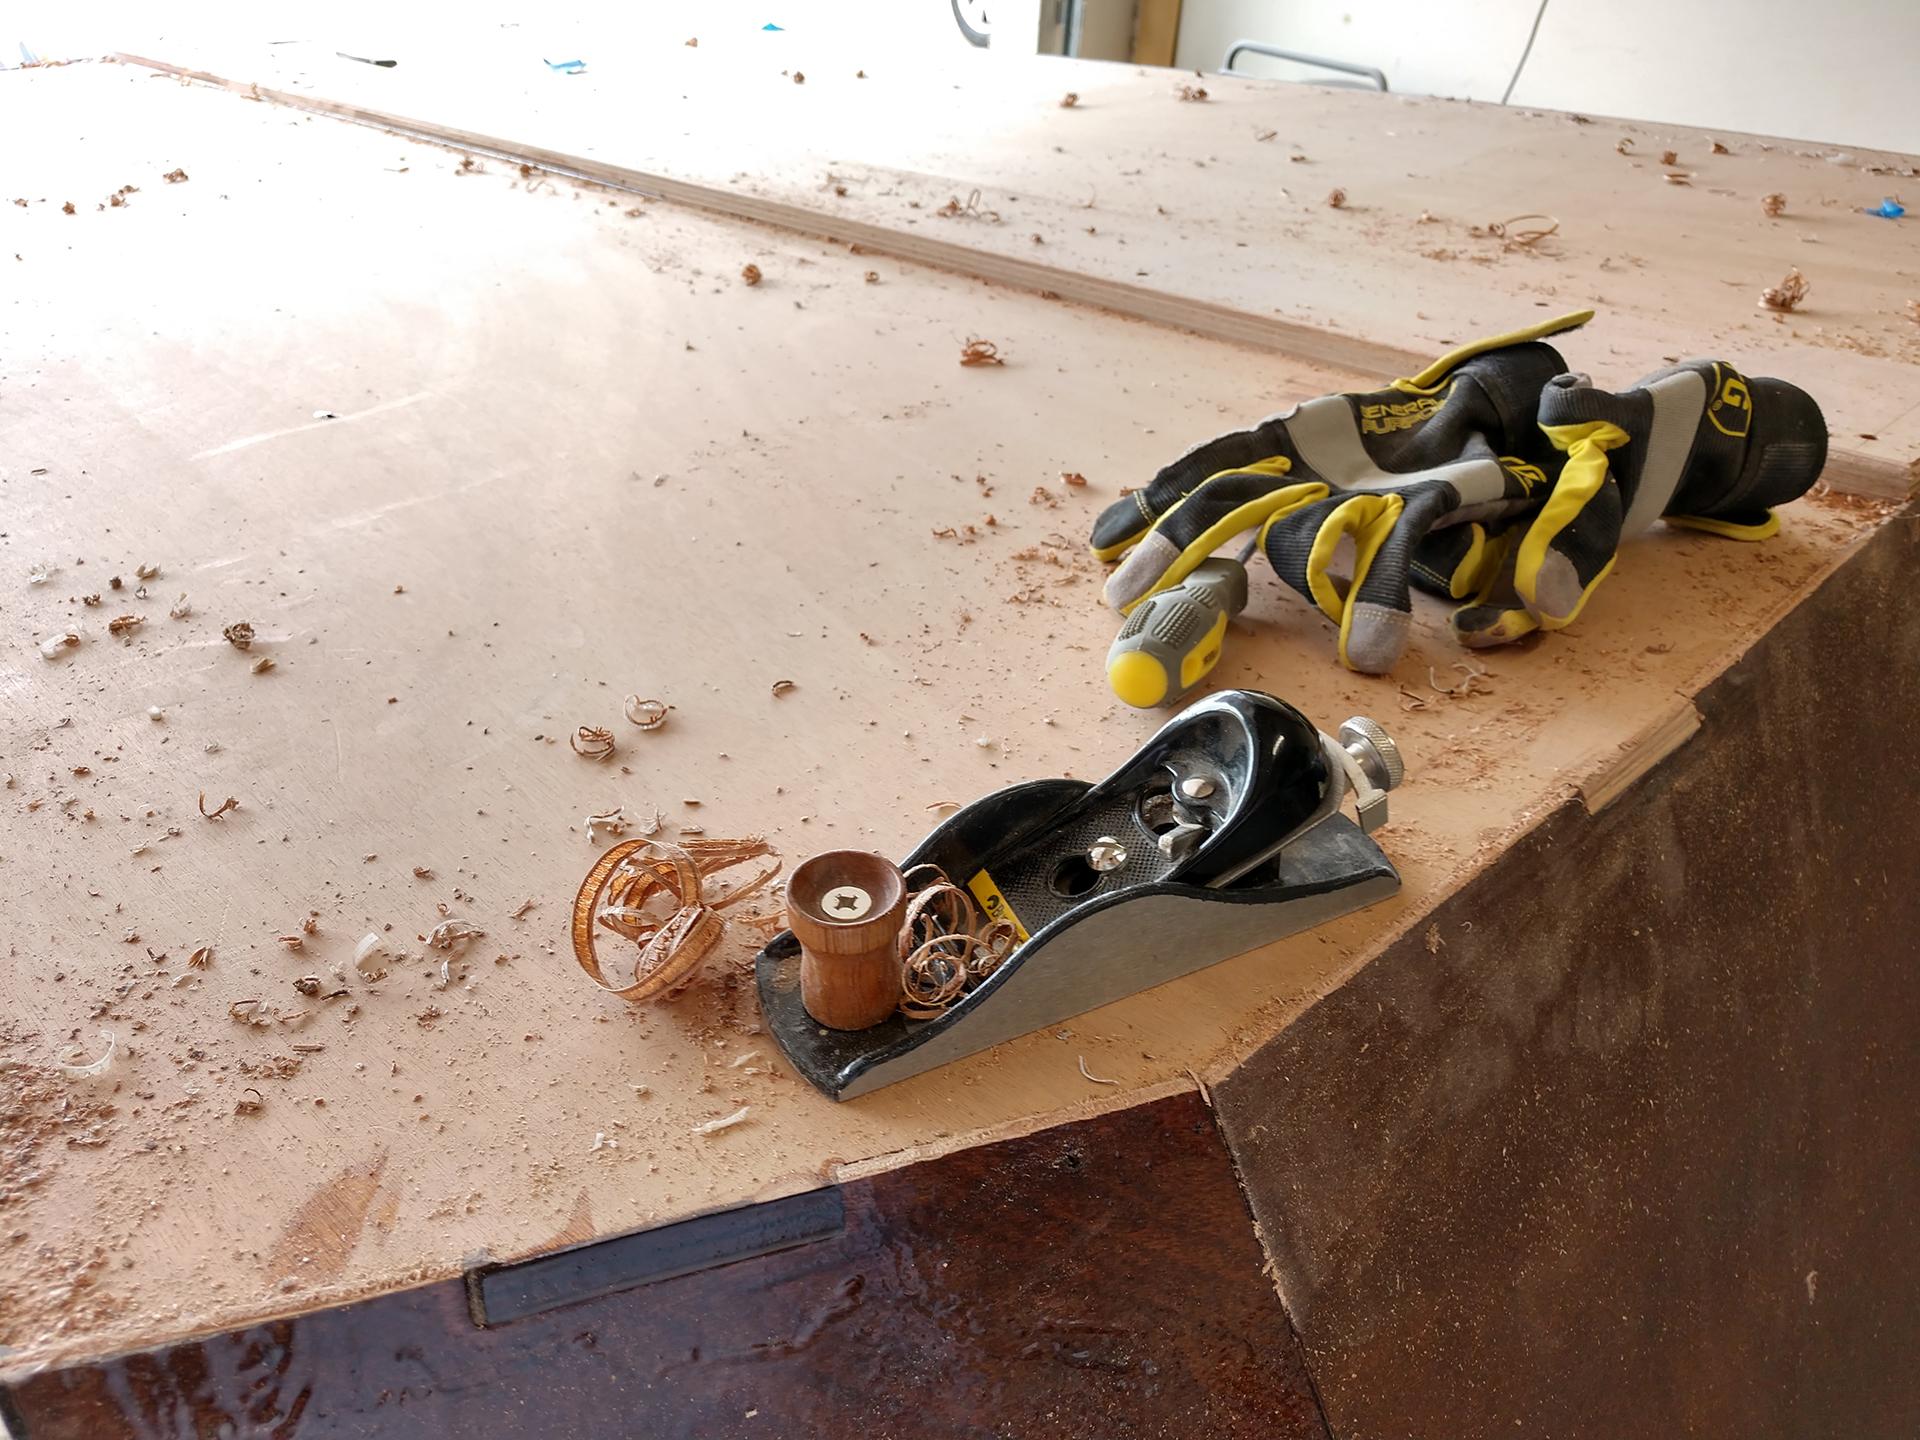
The turtle was flipped on its back. I used a Coping saw to cut away the overhanging fiberglass which was so much easier than trying to do it with a box knife.
The block plane made quick work of leveling out the shell to the bottom surface. I wish I had routered the round over on the butt-block before gluing it to the floor. The block plane and random orbital sander was used instead.
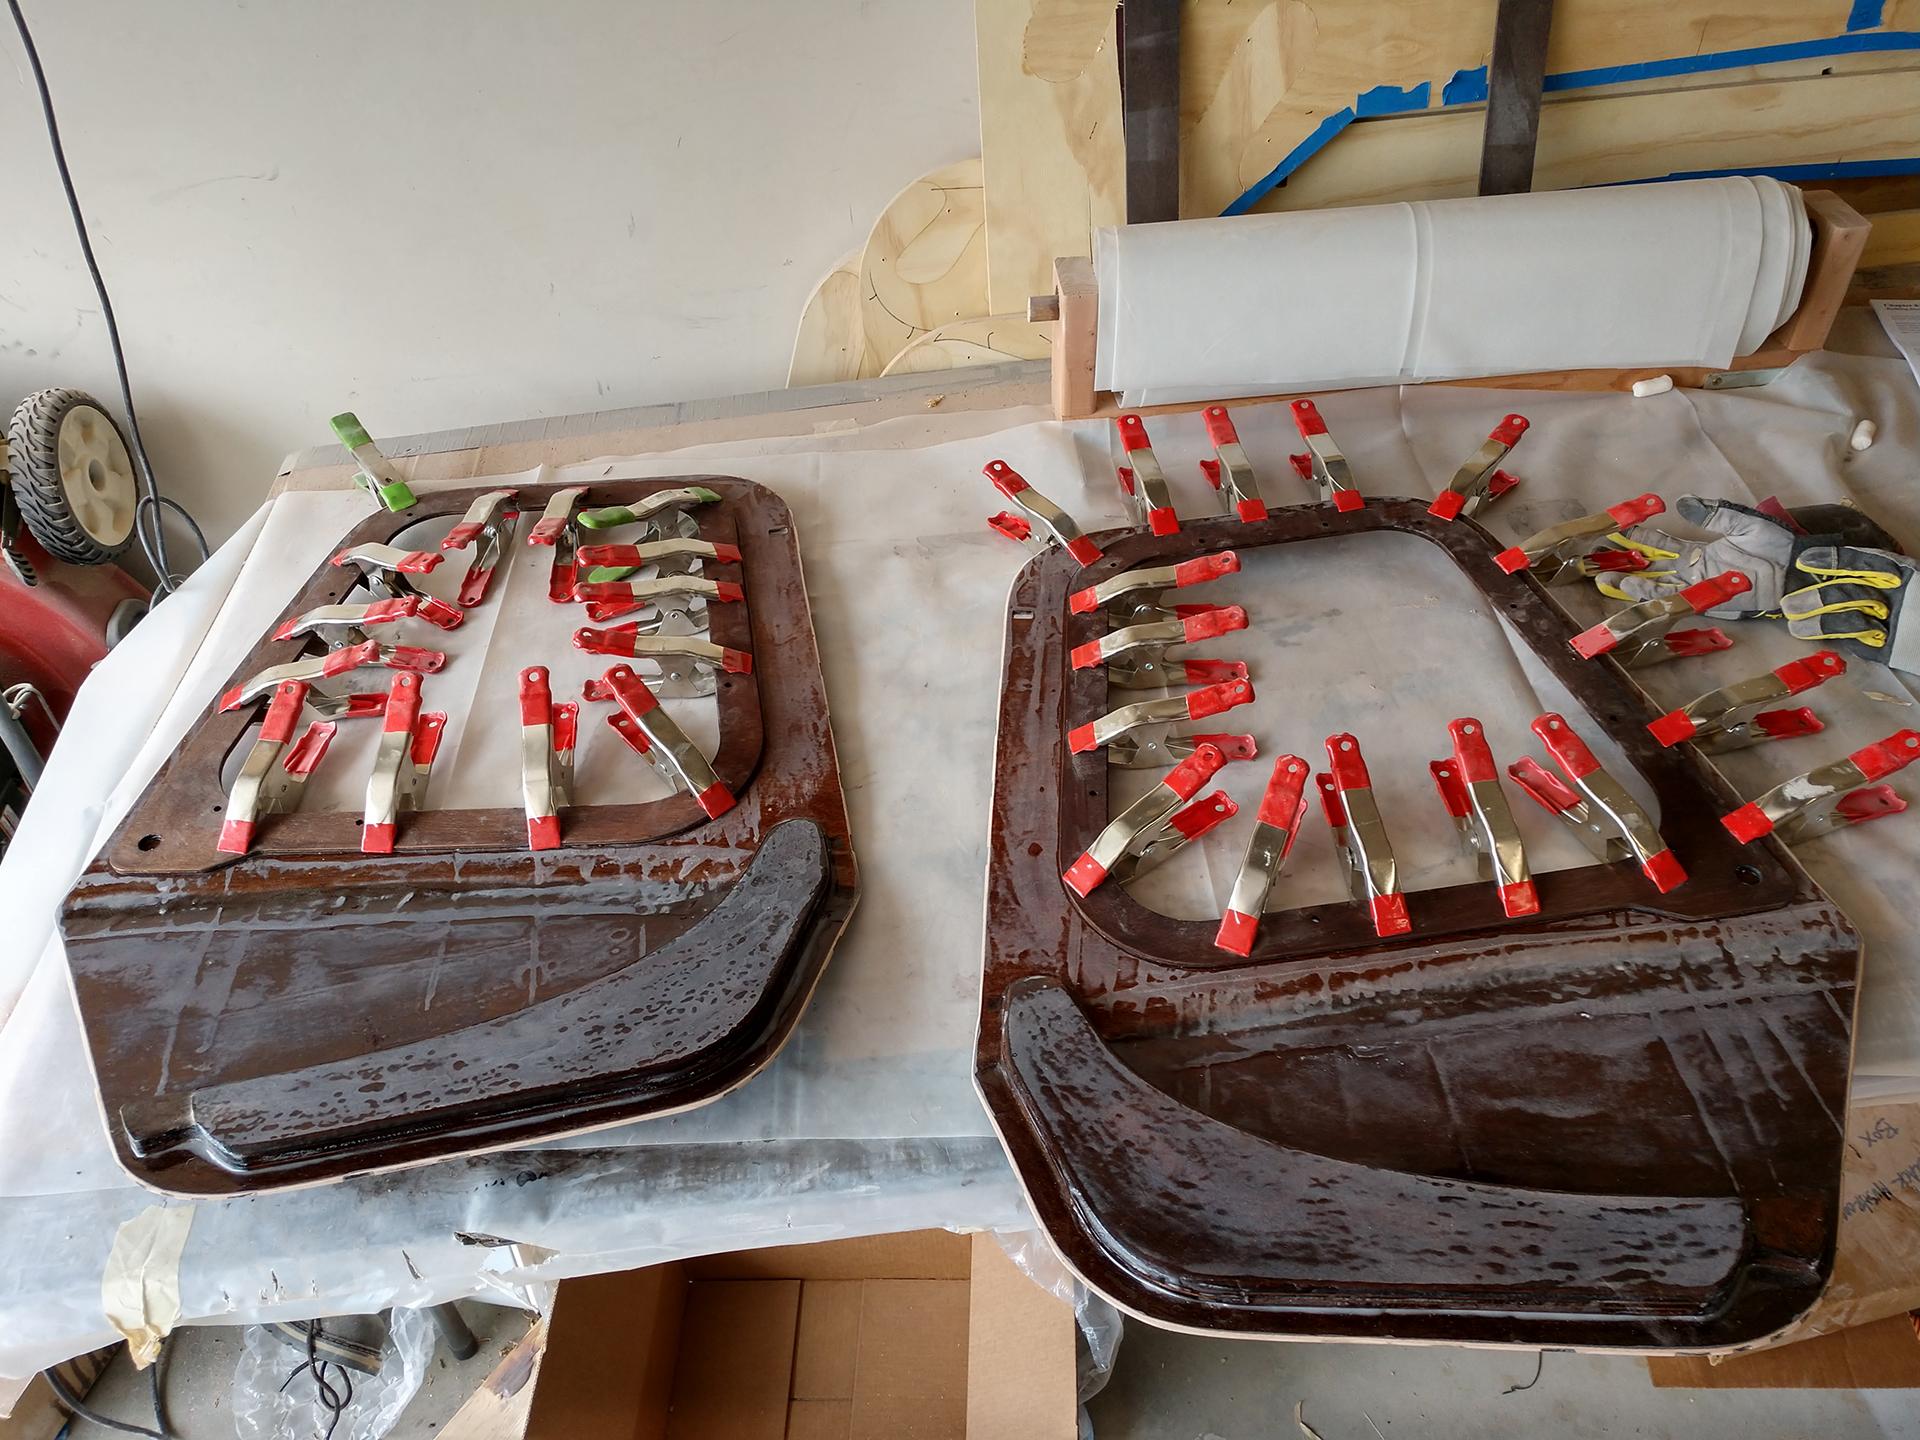
The window sills were glued to the doors after the stiffeners received their first coat of epoxy. I used all of my clamps for this…I may need more for the door sill install.
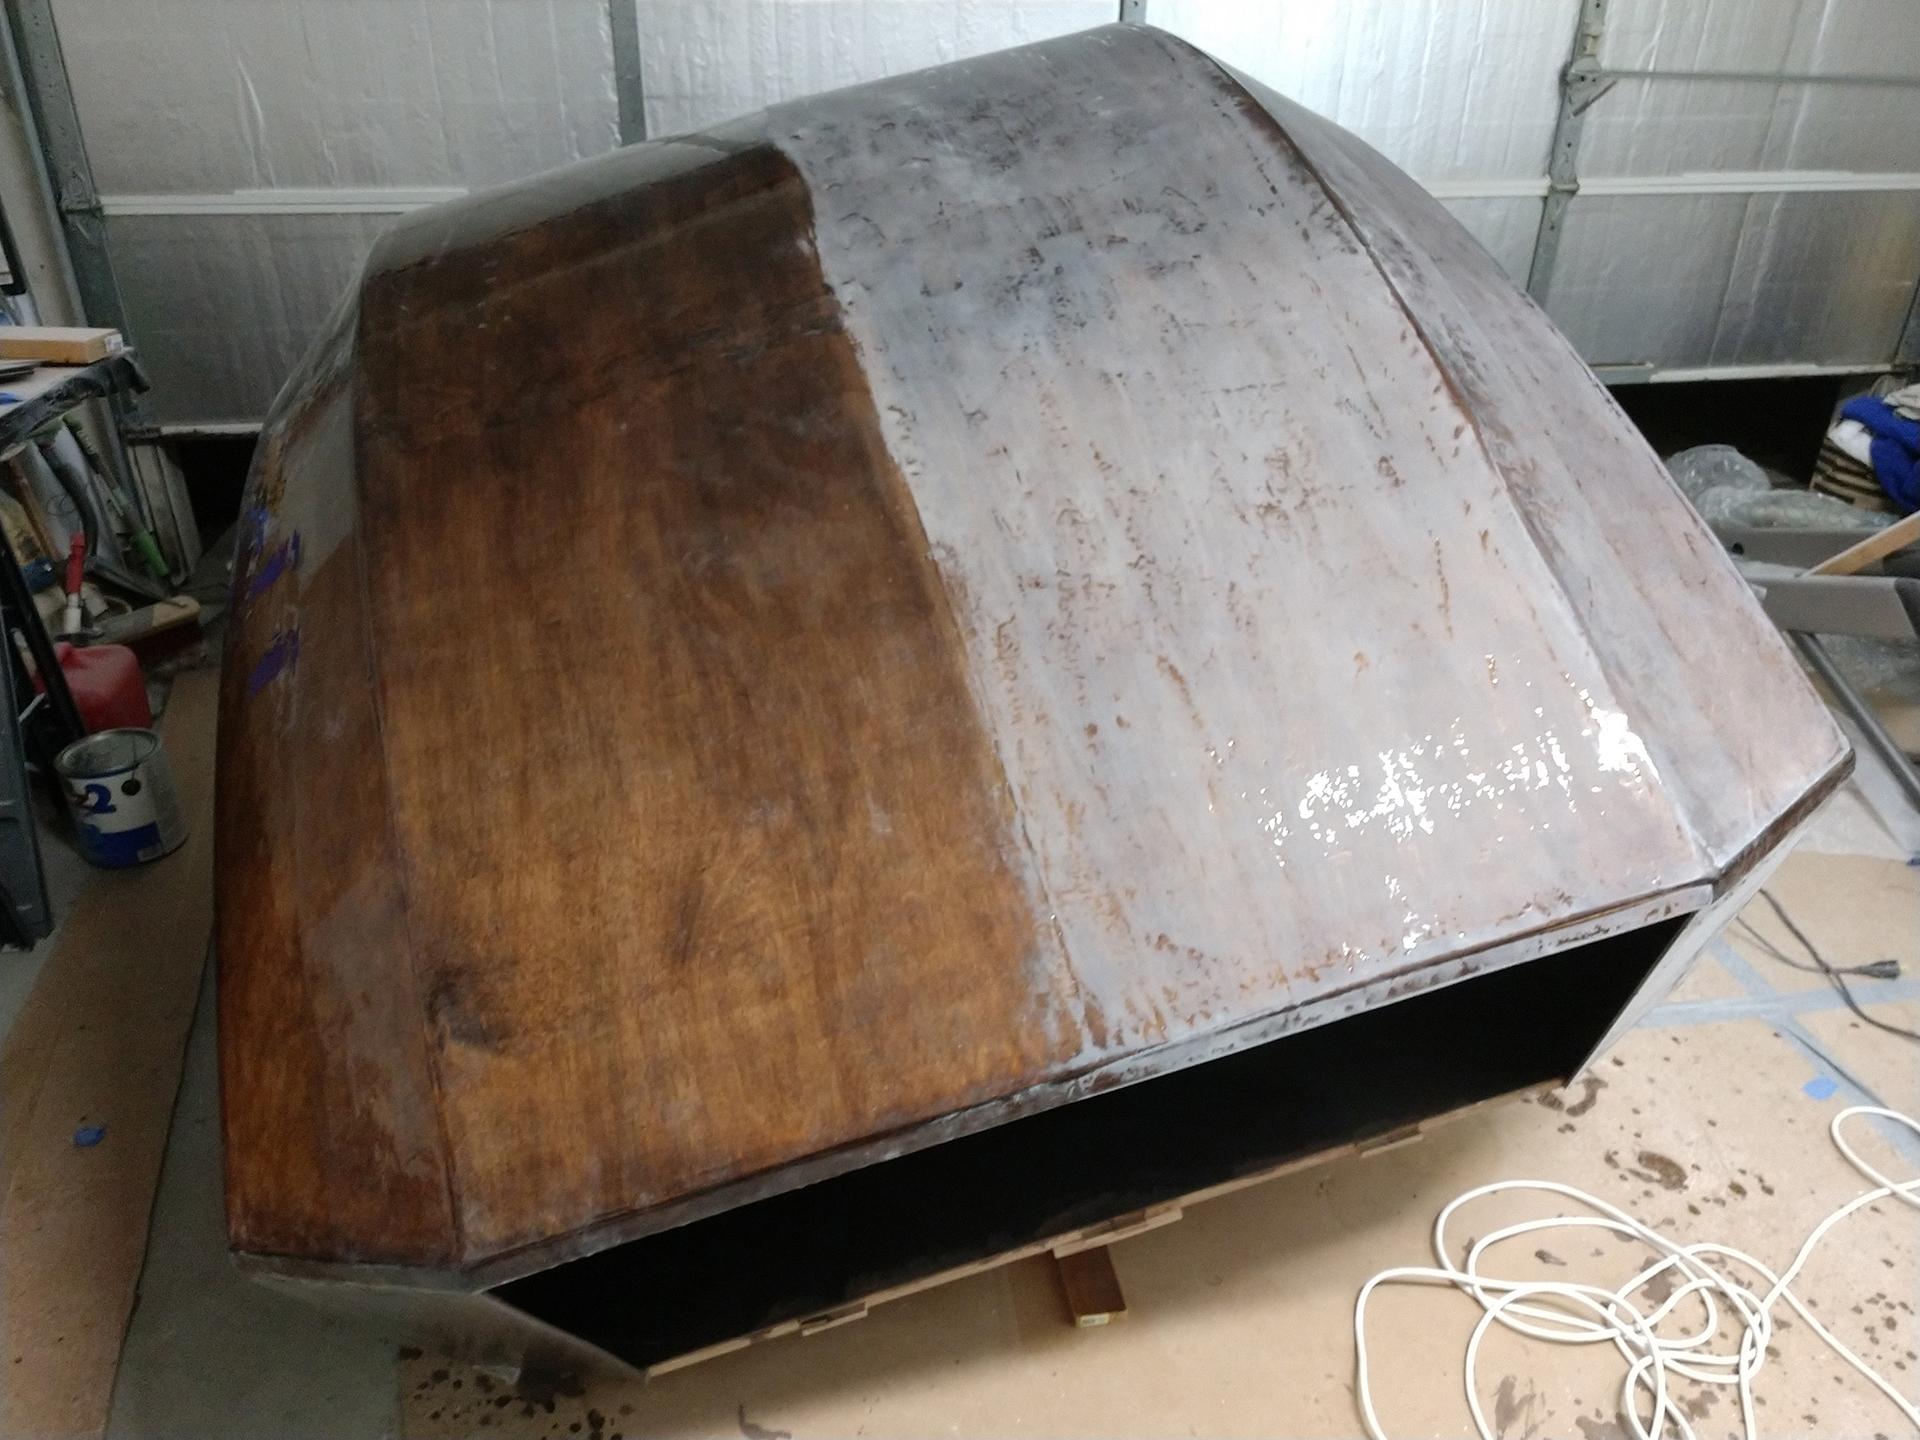
With the final shaping of the bottom complete I opted to pre-stain and dye it just in case I decide not to paint the bottom when i’m done.
After it was dyed I filled some gaps with thickened epoxy and applied the butt-block fillet.
 Participant
Looking good. Did you crawl in as soon as it was flipped?
March 13, 2018 at 3:40 pm in reply to: Joint between galley Flat and bulkhead failed when plywood delaminated. #1708ParticipantOh no! another galley flat failure, i’m glad its not a catastrophic failure and can be patched. Out of curiosity were your battery & galley module bolted down, or could they have bounced a little? There have been others on the forum with similar issues. I made a recommendation back in august on this thread http://teardropforum.com/forums/topic/anyone-using-12v-lithium-battery/
Adding the strip of glass at this point would probably be better on the galley side not cabin side. It would be less visible and offer similar strength. You could also inject some epoxy into the failed plywood cracks and use a jack under it and some weight on top to “clamp” and press it flat while it cures.
This fix however will not prevent further damage if you mount the battery in the same location. I suggested using a bolt in battery box that hangs from the bulkhead. This mounting method will support more weight than the galley flat even with an additional glass strip. The galley flat is not designed for the concentrated weight load of AGM batteries, and I hope CLC correctly addresses this issue.
I’m not familiar with their galley module but if its not already mentioned securing the module to the bulkhead or at least the galley flat will also reduce stress on this joint. This joint can support a fair amount of STATIC weight but Dynamic loads are like a hammer… and it will fail.
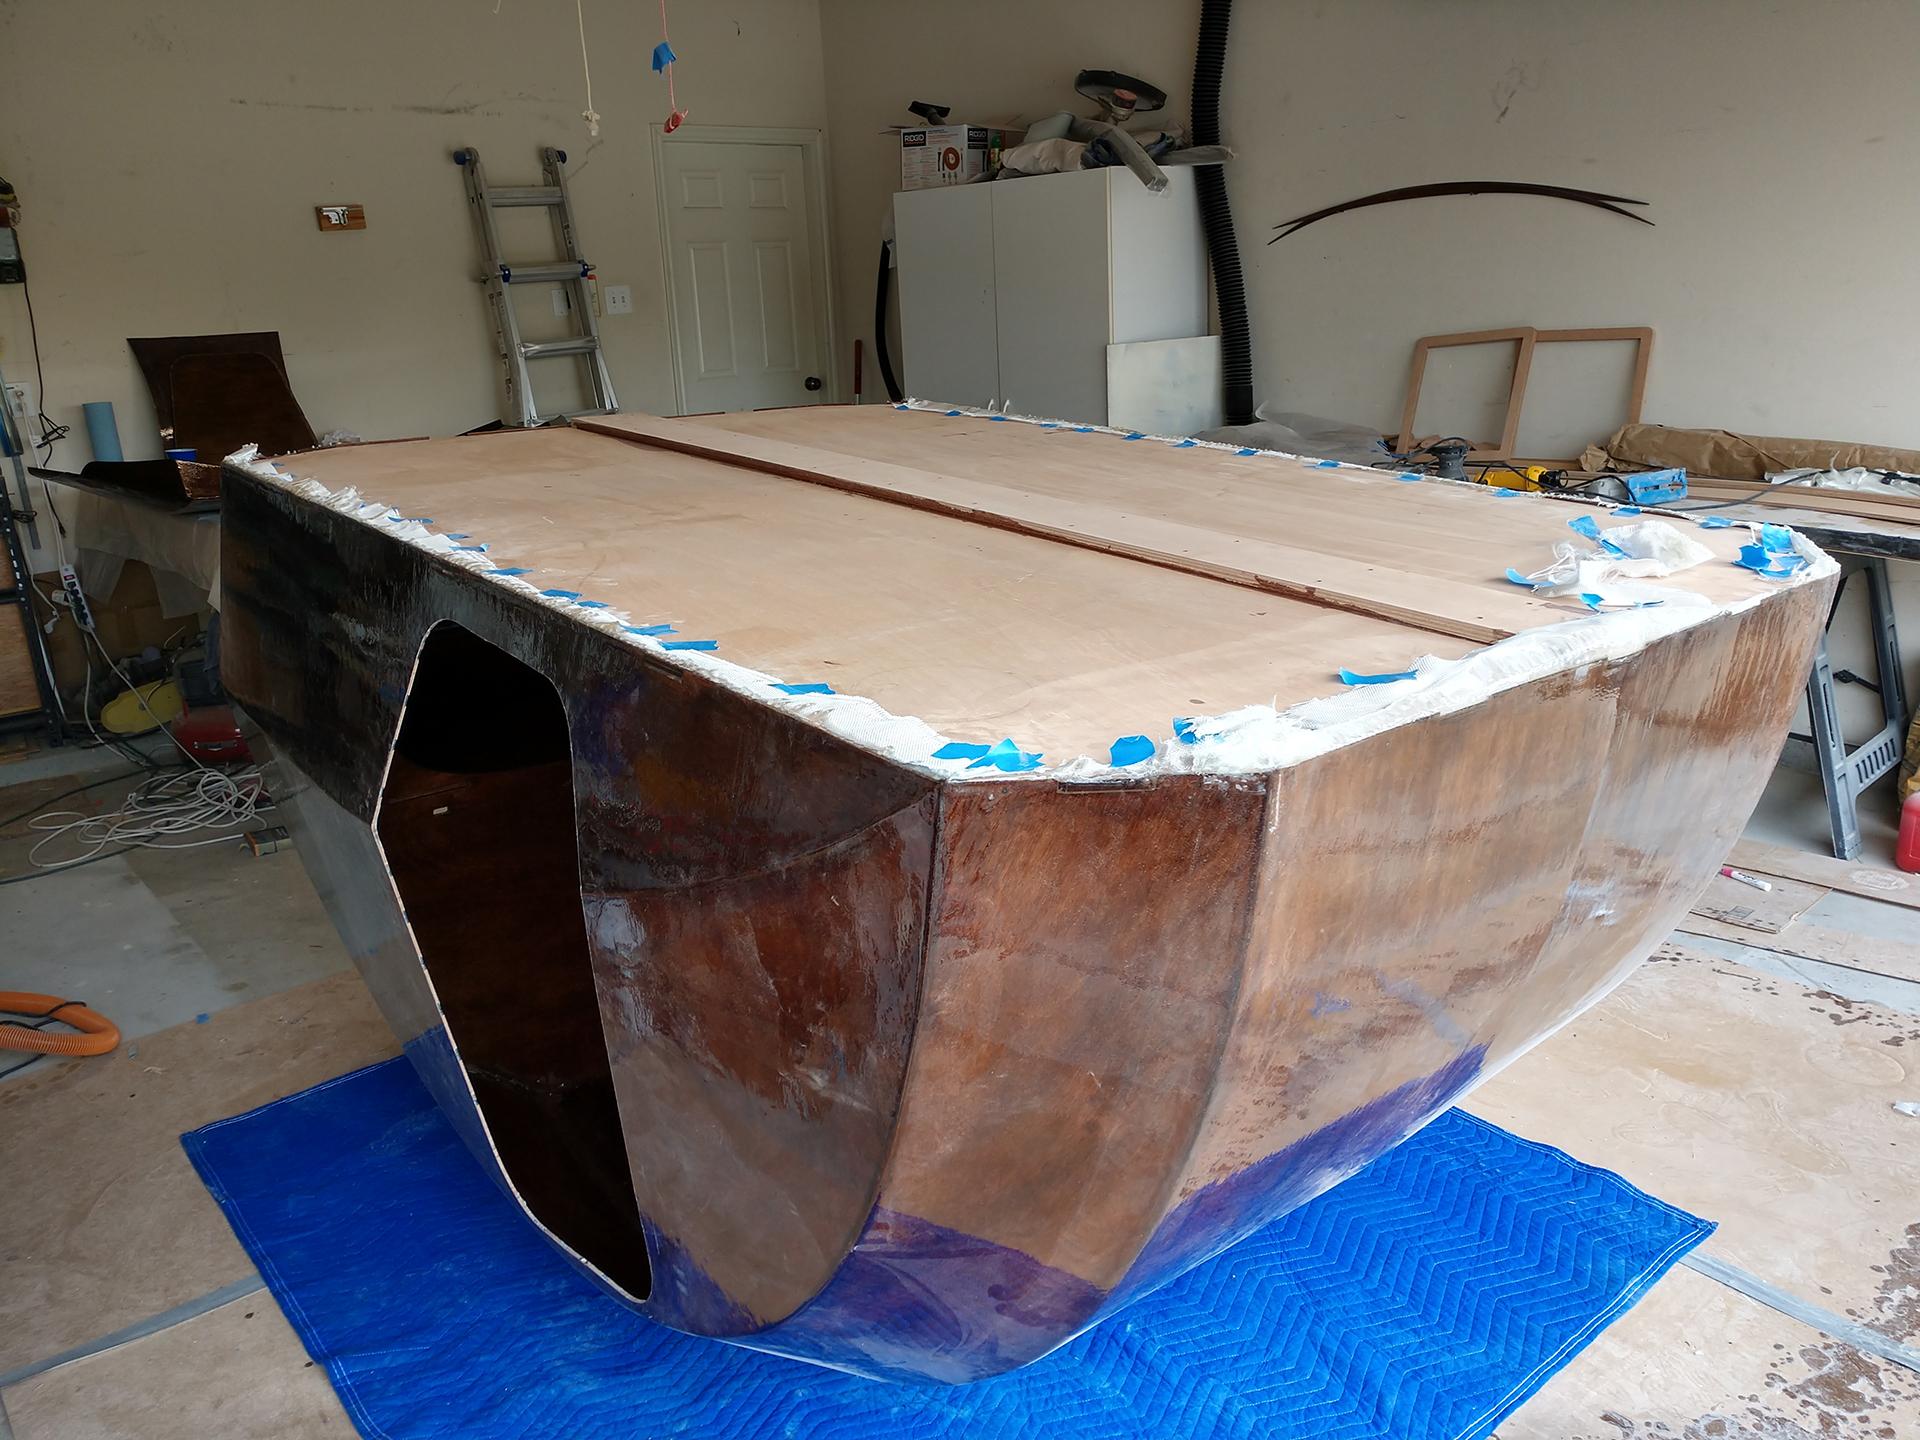
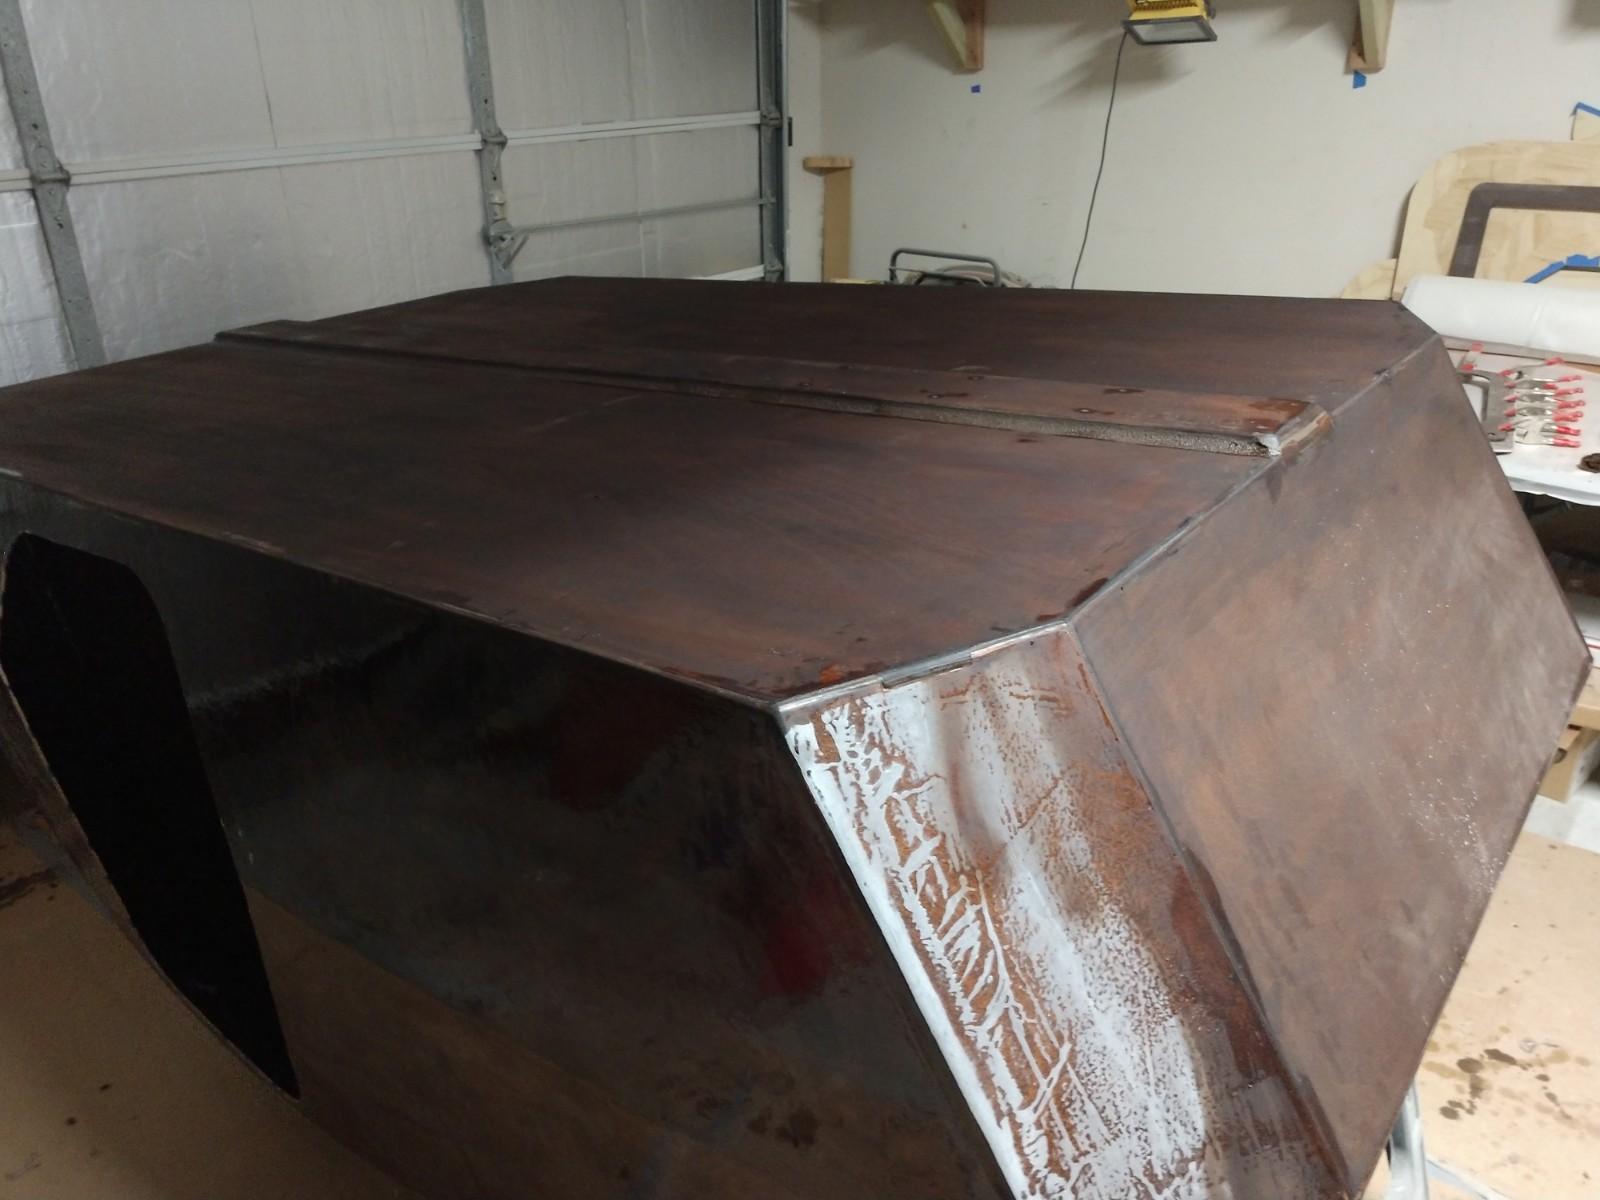
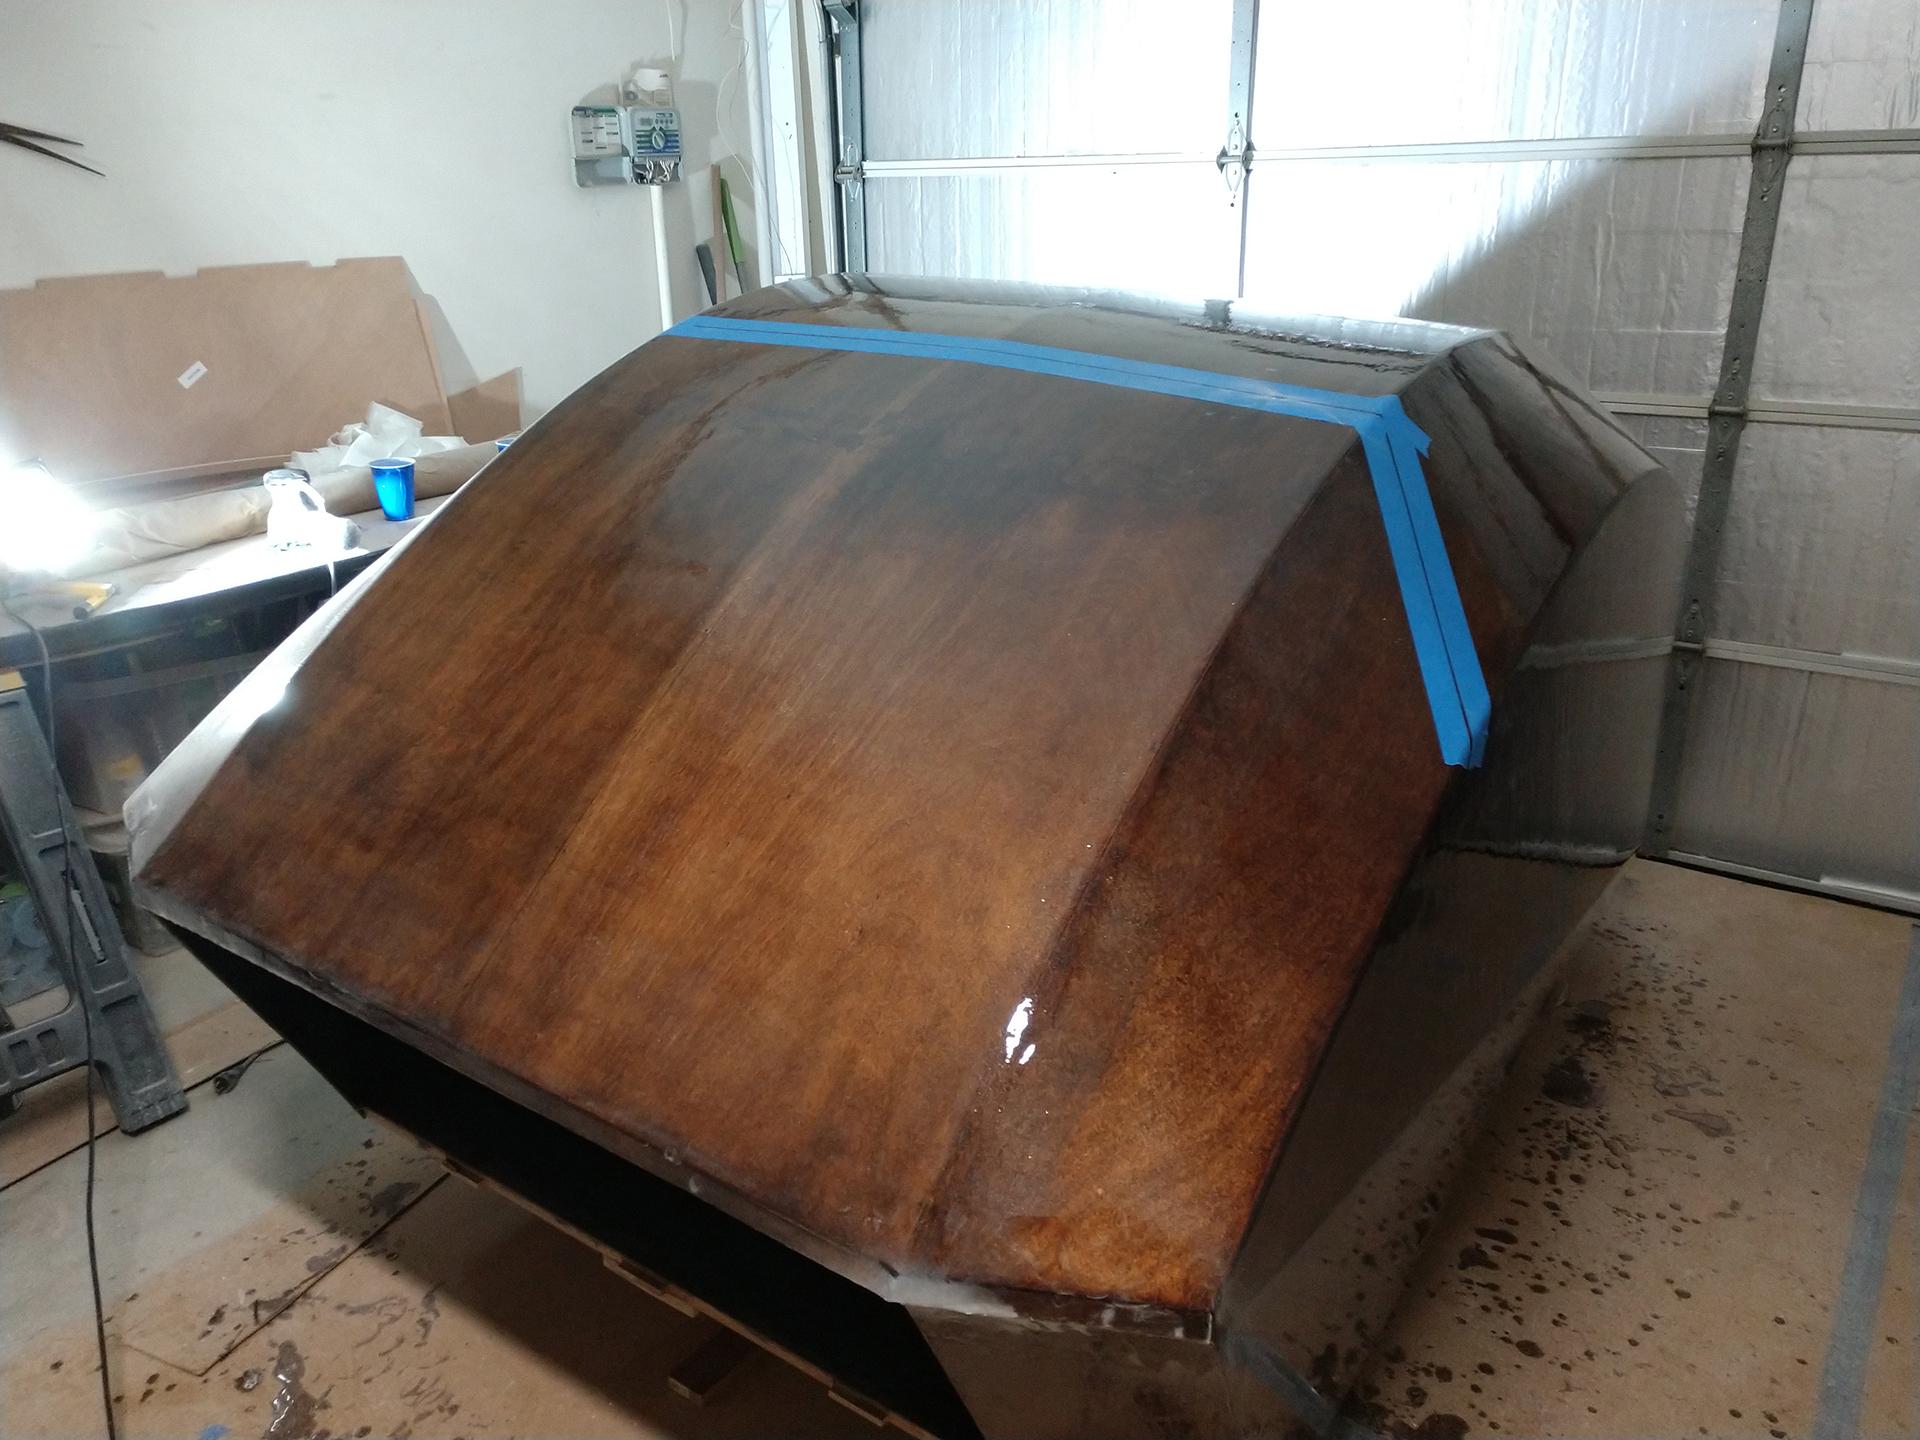
ParticipantProgress update (Time Spent To Date ~120 hrs): I’ve made some major progress since last I updated. The large fiberglass job I opted to do in two steps. There was one trick I learned during this process with the fiberglass… Don’t force the ripples in the cloth out by stretching or tugging, rather a light patting motion on the bubble/ripple will work it into shape. The fibers of the cloth are very forgiving if you take it slow and pat it down.
Sanding the top layer before the sides are glassed. There were some blemishes, mainly on the 3&4 panels at the galley hatch area. After the first coat of epoxy this area looked Foggy. I believe I overworked the resin in this area and pulled up some of the dye into it. Not much I could do to fix it at that point so I pressed on.
sides glasses and 2 coats of epoxy later

Look at that $5 mess of epoxy on the floor. Gravity was not my friend at this stage.
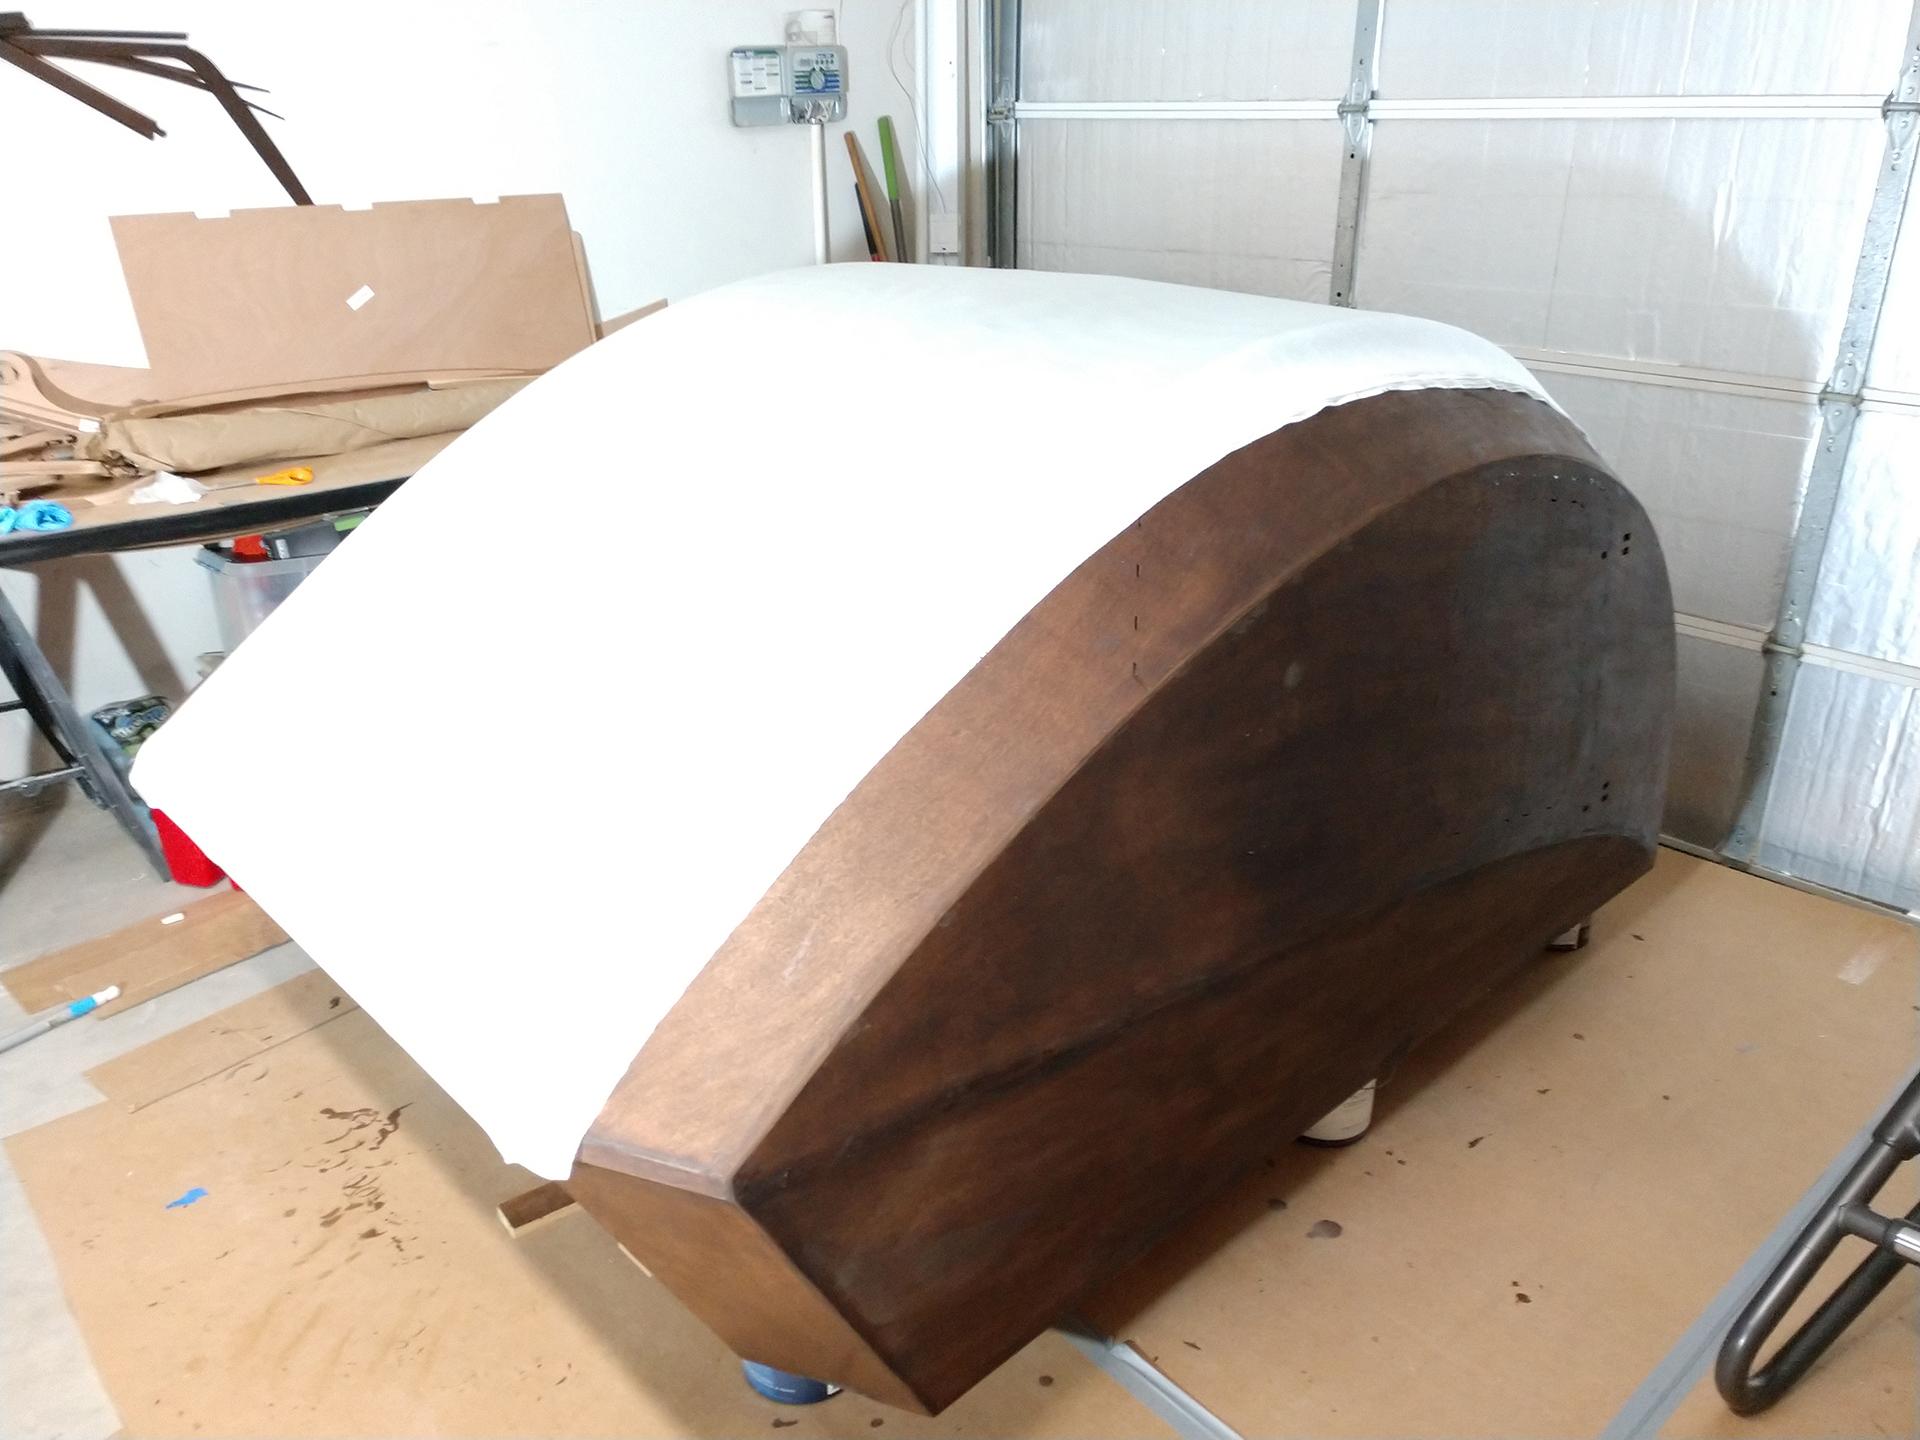
Prepping to cut the hatch out I was very nervous at this stage. Because of the darker stain on the camper it was difficult to see any guide marks. Instead I used blue tape and straddled either side of the mark with it. Using the tape like I was masking for pin stripes on a car paint job I could check my lines and tweak them here and there.
I used a skill saw and a Dremel cut off disk to start my cuts. For the doors and roof hatch I used blue tape again. This time half way through the cut to hold the door in place while I finished the other half of the cut.
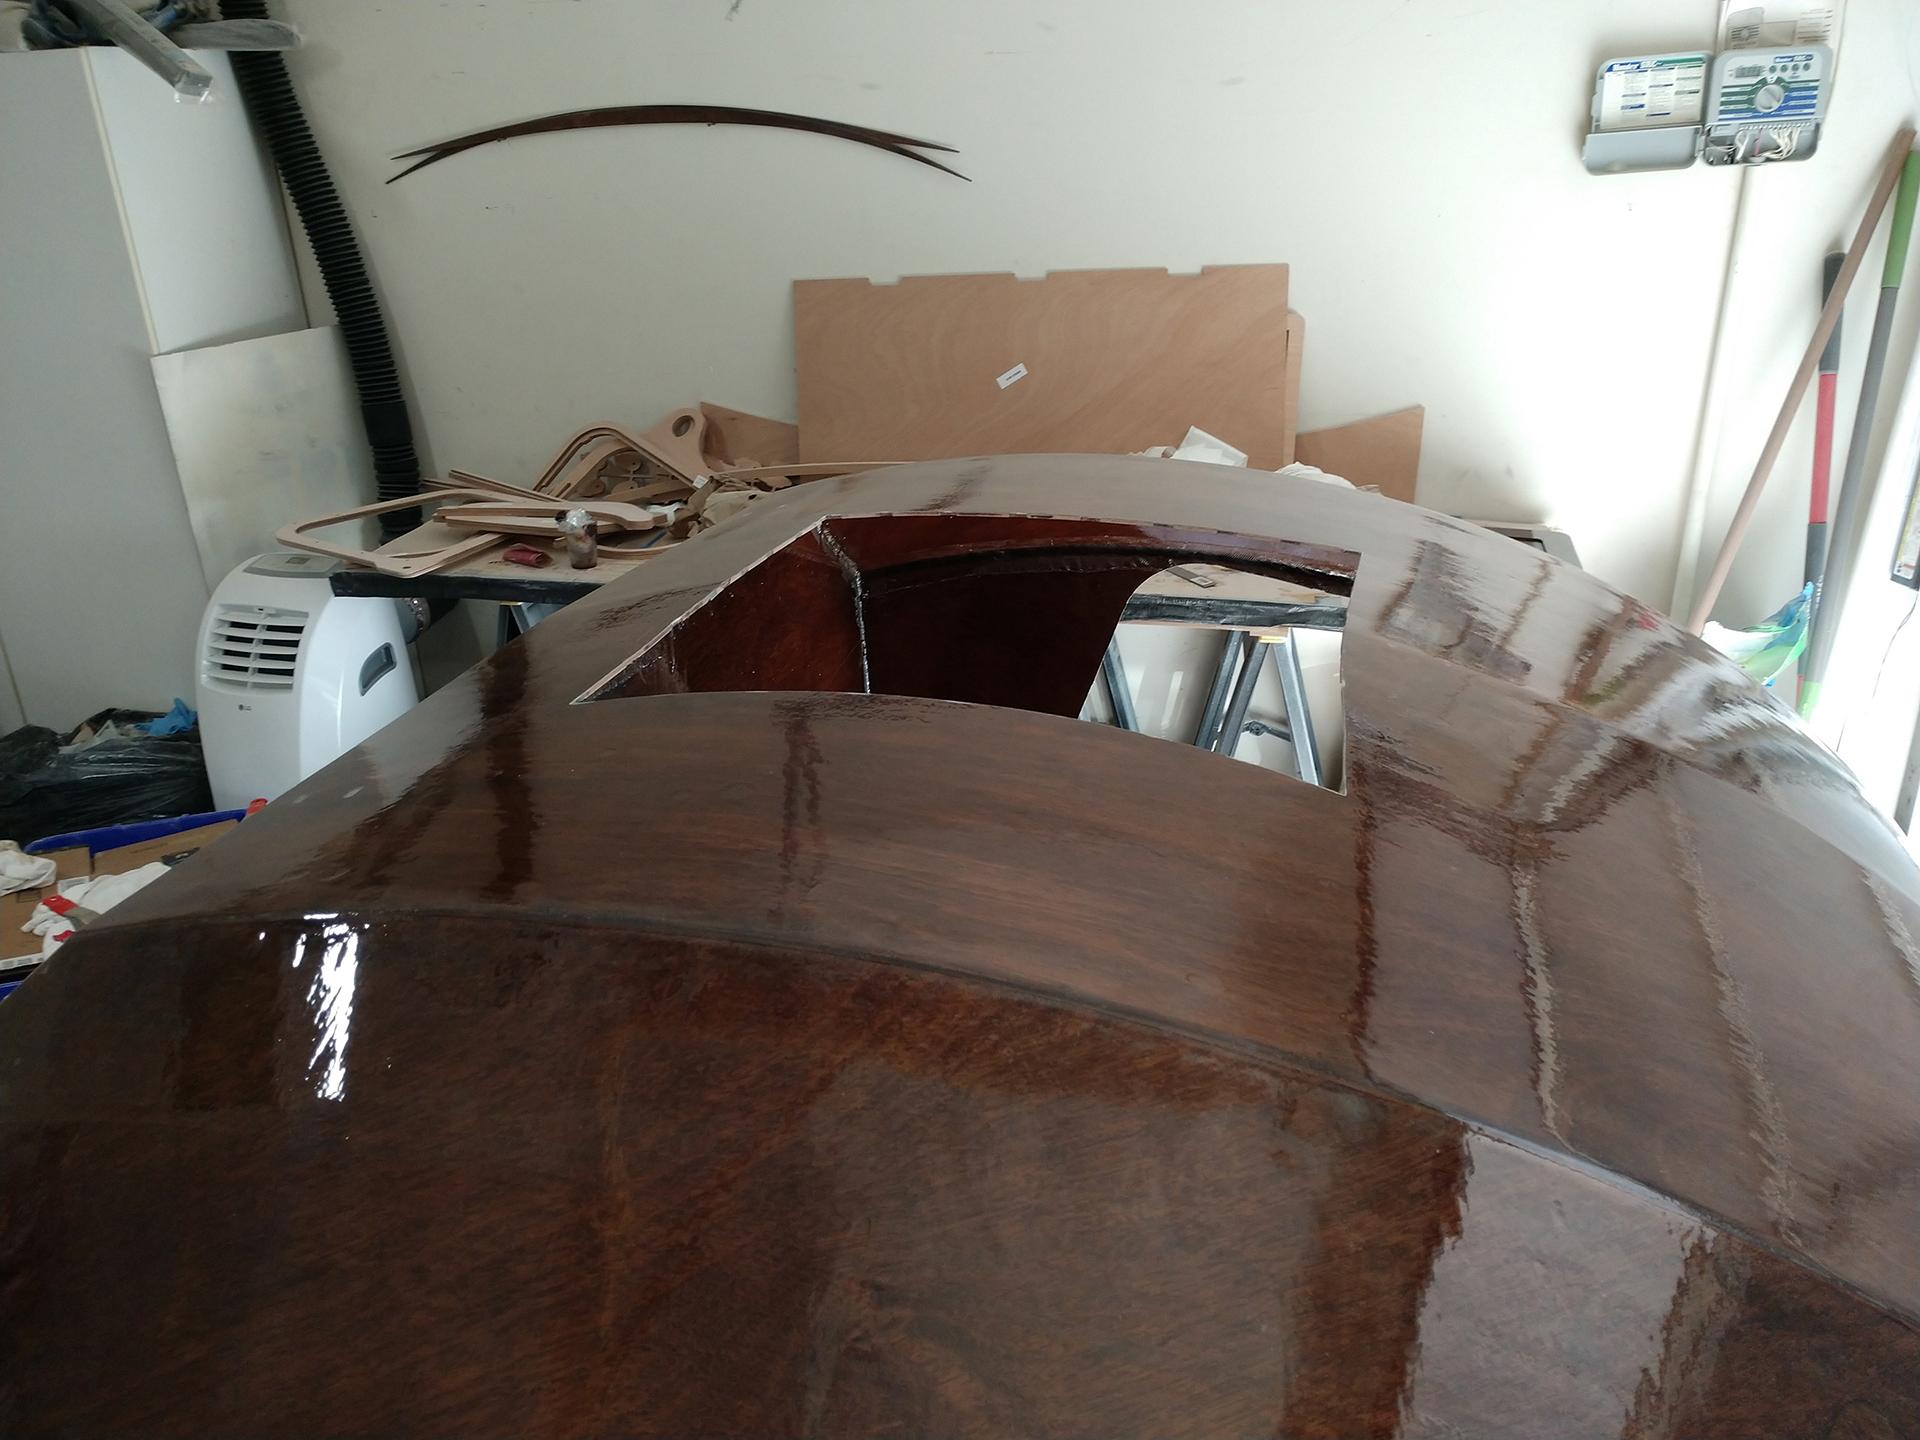
I didn’t realize how close the top of the galley hatch cut was to the bulkhead and I ended up gouging the crap out of it. Good thing I plan to have a back splash material installed there. I touched it up anyways with some left over thickened epoxy.
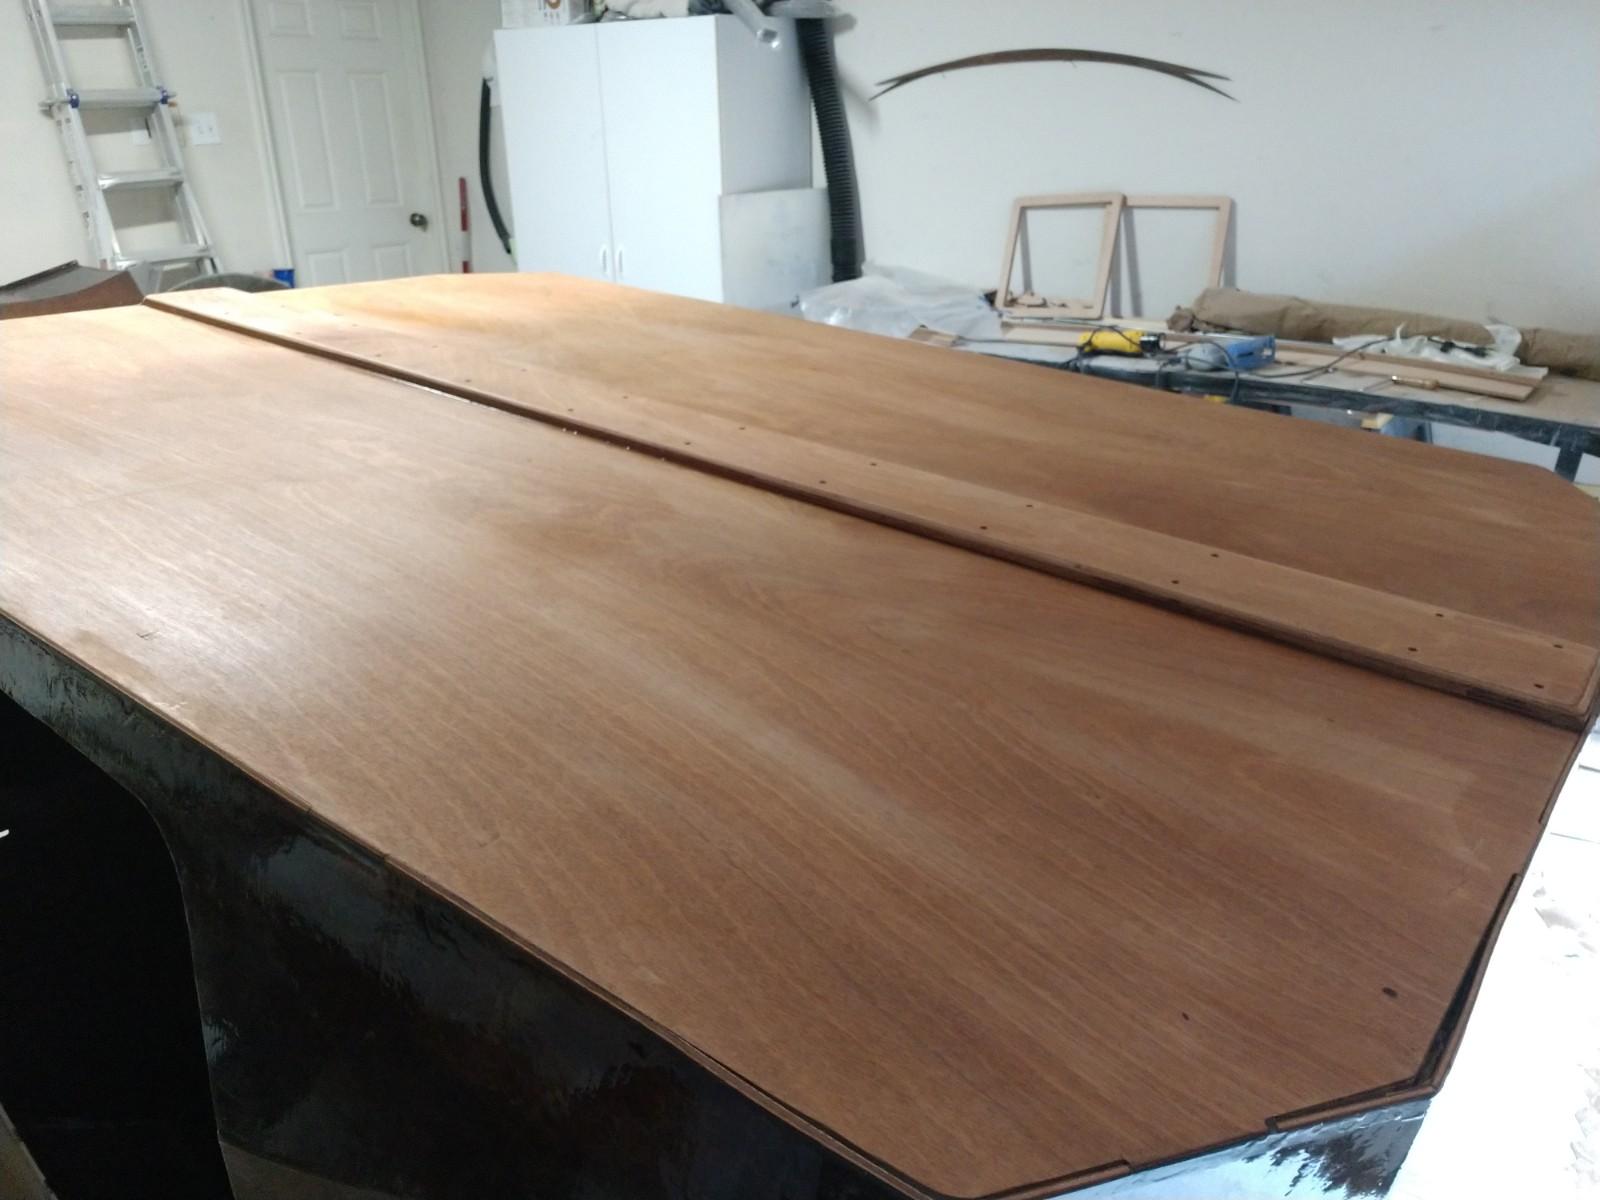
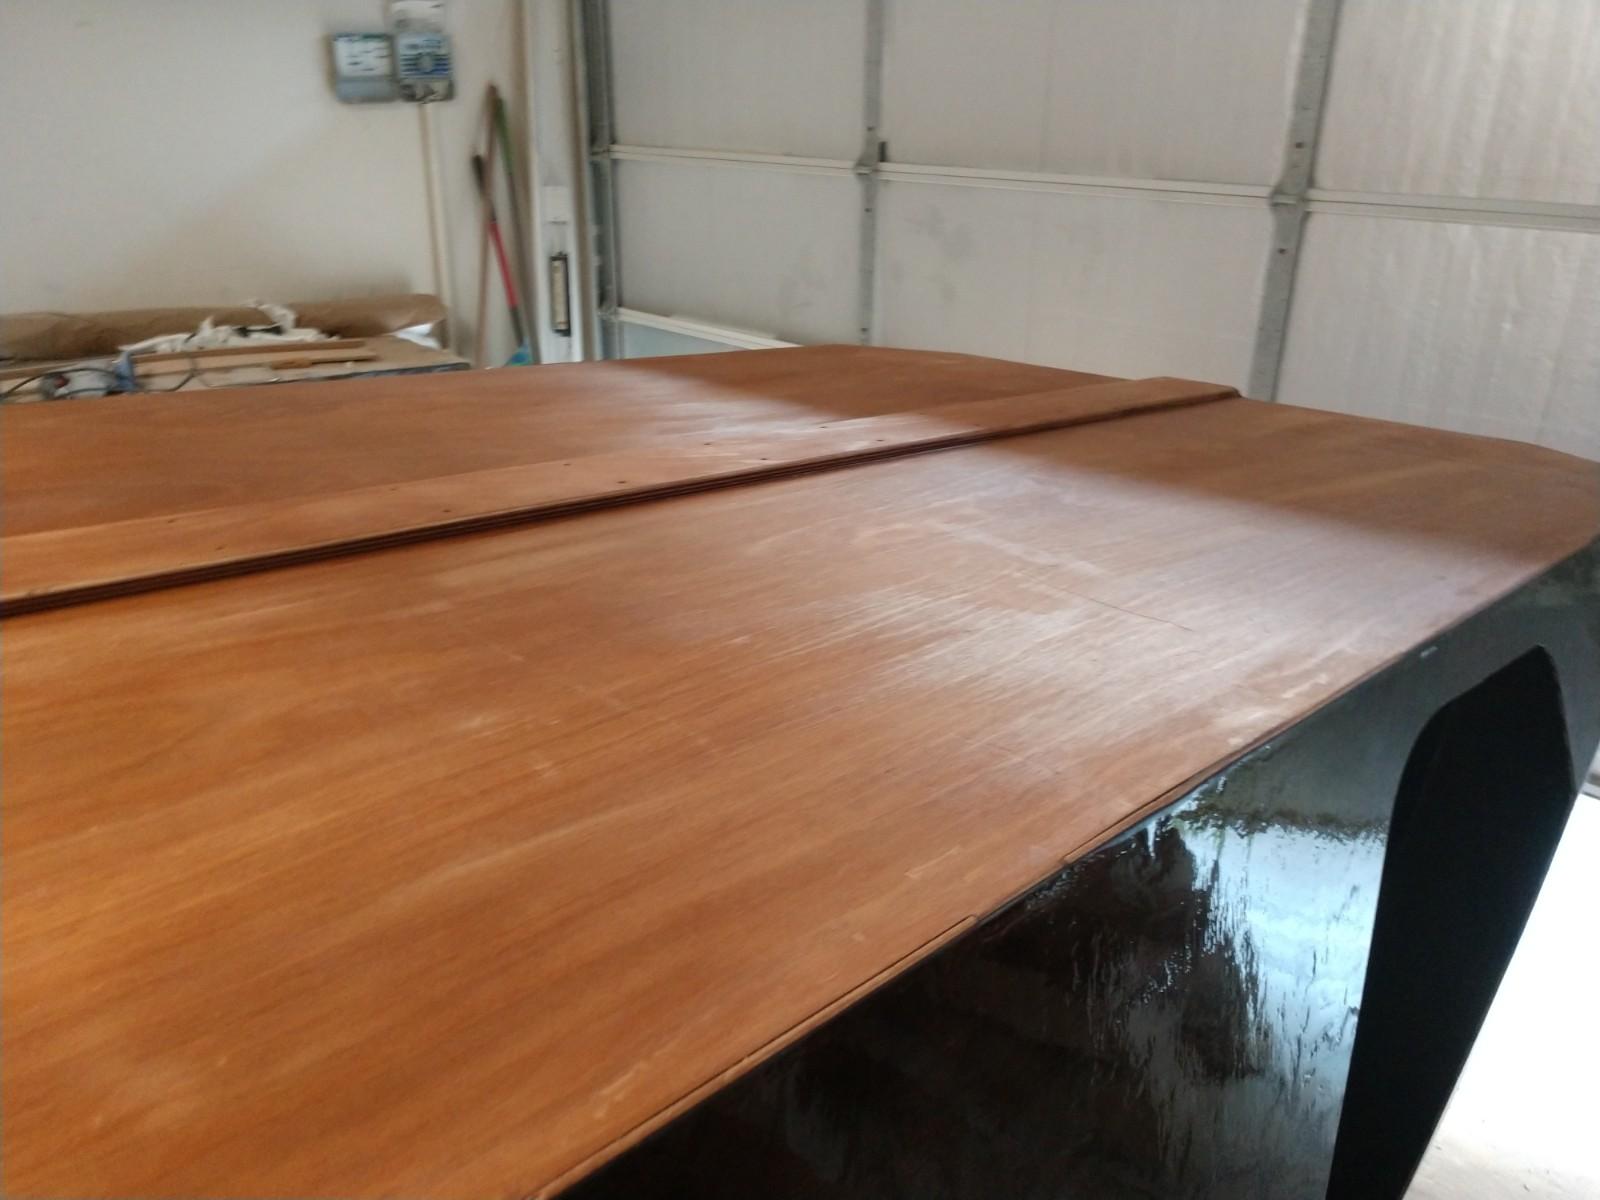
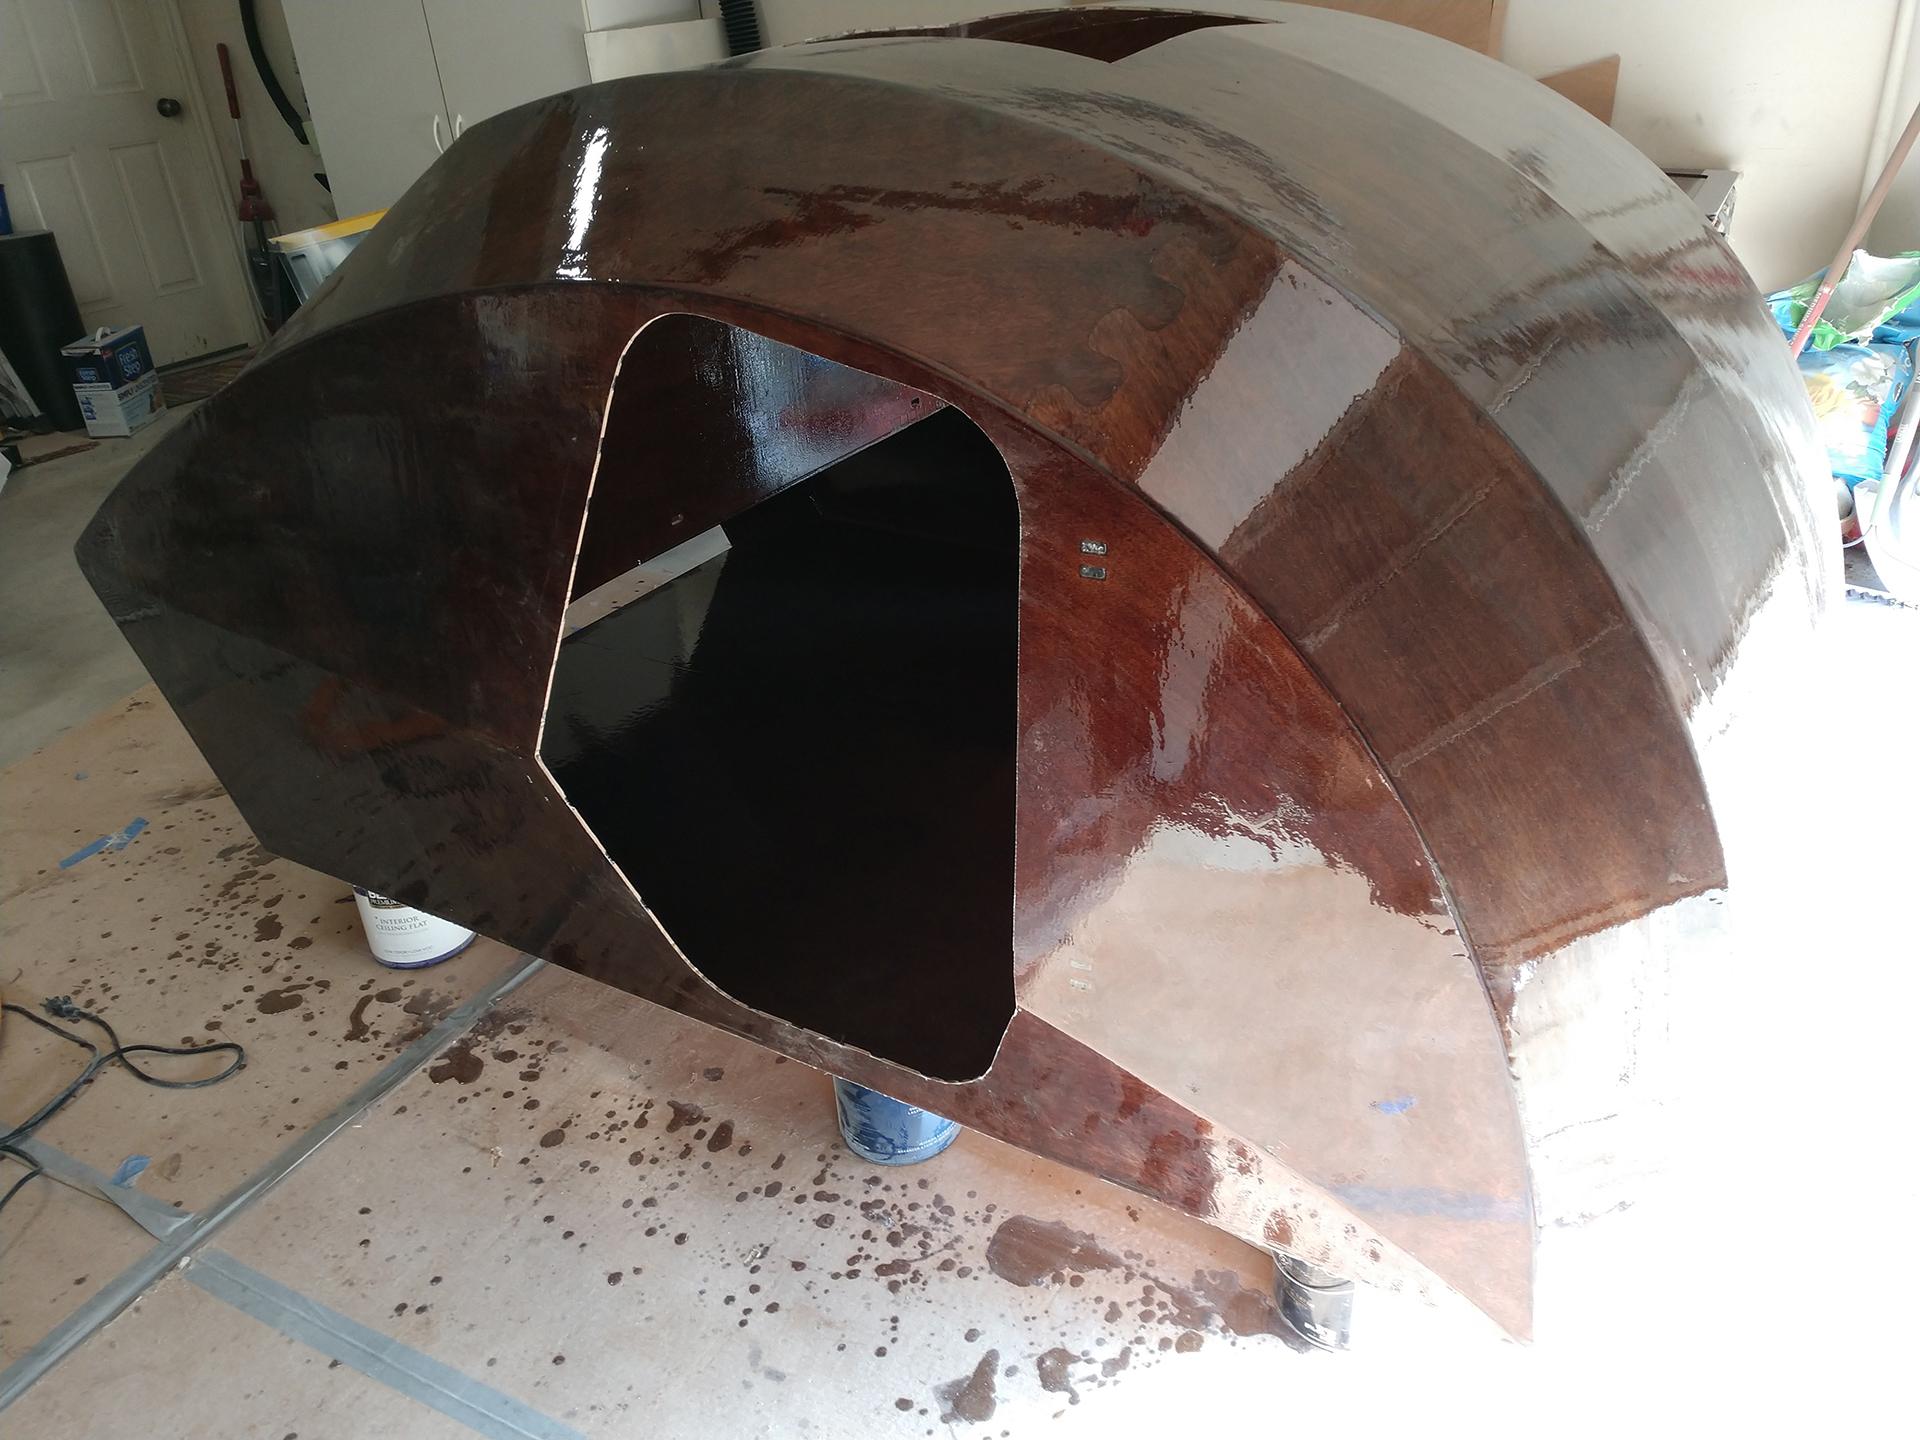
The gutter and roof hatch installs were straightforward. However I had an issue with the WIDTH of the lower gutter section as apposed to the length like the manual pointed out. I ended up cutting the puzzle joint in half and removing 1/4″~3/8″
I will be working on the doors next. I want to get the door stiffeners installed as soon as possible to maintain the door’s shape. With any luck I wont need the fabric door straps.
ParticipantGreat progress, installing the floor was an exciting part for me as well. Once I flipped the camper right side up I couldn’t wait to crawl inside. I would agree with abrightwell the FoamPro 103 3″ rollers are great and well worth the higher price. My first mistake with the build was using different rollers, the “pink ones” that left hairs behind. I had to pluck them out one by one before the epoxy set. I have used 6 rollers so far and only just finished the first fill coat of epoxy after glassing the entire shell.
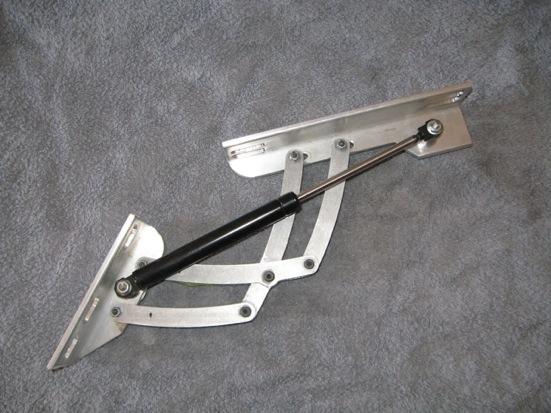
ParticipantRovineye, I can understand your concern with using hinges that may be too restrictive. The Bimini hinge however looks like it has enough play in it. If it needs some more wiggle room I could always machine down the pin a little.
The galley hatch geometry does have me scratching my head. I’m also considering using a hydraulic assist hinge for the galley hatch. The problem with this is the gutter and hatch stiffener may be in the way.
 Participant
smithn I don’t understand are you talking about coating the insides of the panels prior to stitching process. That would be a very bad idea. Many of the panels need to flex/bend and the fillets you will apply later should be done to the bare wood for proper strength and adhesion.
ParticipantI don’t have the manual in front of me but I believe there is a step for this much later in the construction after the doors are cut out. I chose to do it a bit earlier for a few reasons, mainly because I stained my camper and wanted to protect the dye as soon as possible. The dye is lifted and creates “water marks” by any drips of denatured alcohol used to clean the outside of the shell. I knew if i didn’t protect it then all of the sanding and cleaning on the outside would ruin the dye on the inside because of alcohol dripping in from the perforations.
I recommend applying epoxy anytime after the floor has been filleted & glassed to the camper shell and before the large exterior fiberglass jobs.
The other benefits you get from doing it this way is;
1) Epoxy on the inside shell before cutting out the doors will prevent any blow out of the veneer from the cutting process. Haven’t seen anyone complain about this but it’s always a worry of mine when working with veneered wood.
2)It’s easier to wipe clean the epoxied interior from the dust created by the sanding of the cured fiberglass 1&2 roof panels. Dust is the enemy to a clean and clear epoxy finish.
3) Its a good introduction to doing a large epoxy job. I believe I had to mix 4 cups to coat the inside @ 70deg Fahrenheit the first batch starts to tack up by the end. So keep it clean of runs as you work, you may not have a chance to go back to the place you started to clean up.
Drawbacks include:
1) I’m not sure if the coat of epoxy will affect the adhesion of the door stiffener, I may rough up those spots on the door before applying the stiffener.
2) If you are doing it by yourself you will be crawling in and out of the transom hole a bunch. As apposed to doing it later when you can use the doors on either side as access.
I’m sure some others who are a further along or have finished their construction could lend some input on this as well. Good Luck!
-
AuthorPosts