Forum Replies Created
-
AuthorPosts
-
ArtisticAdam
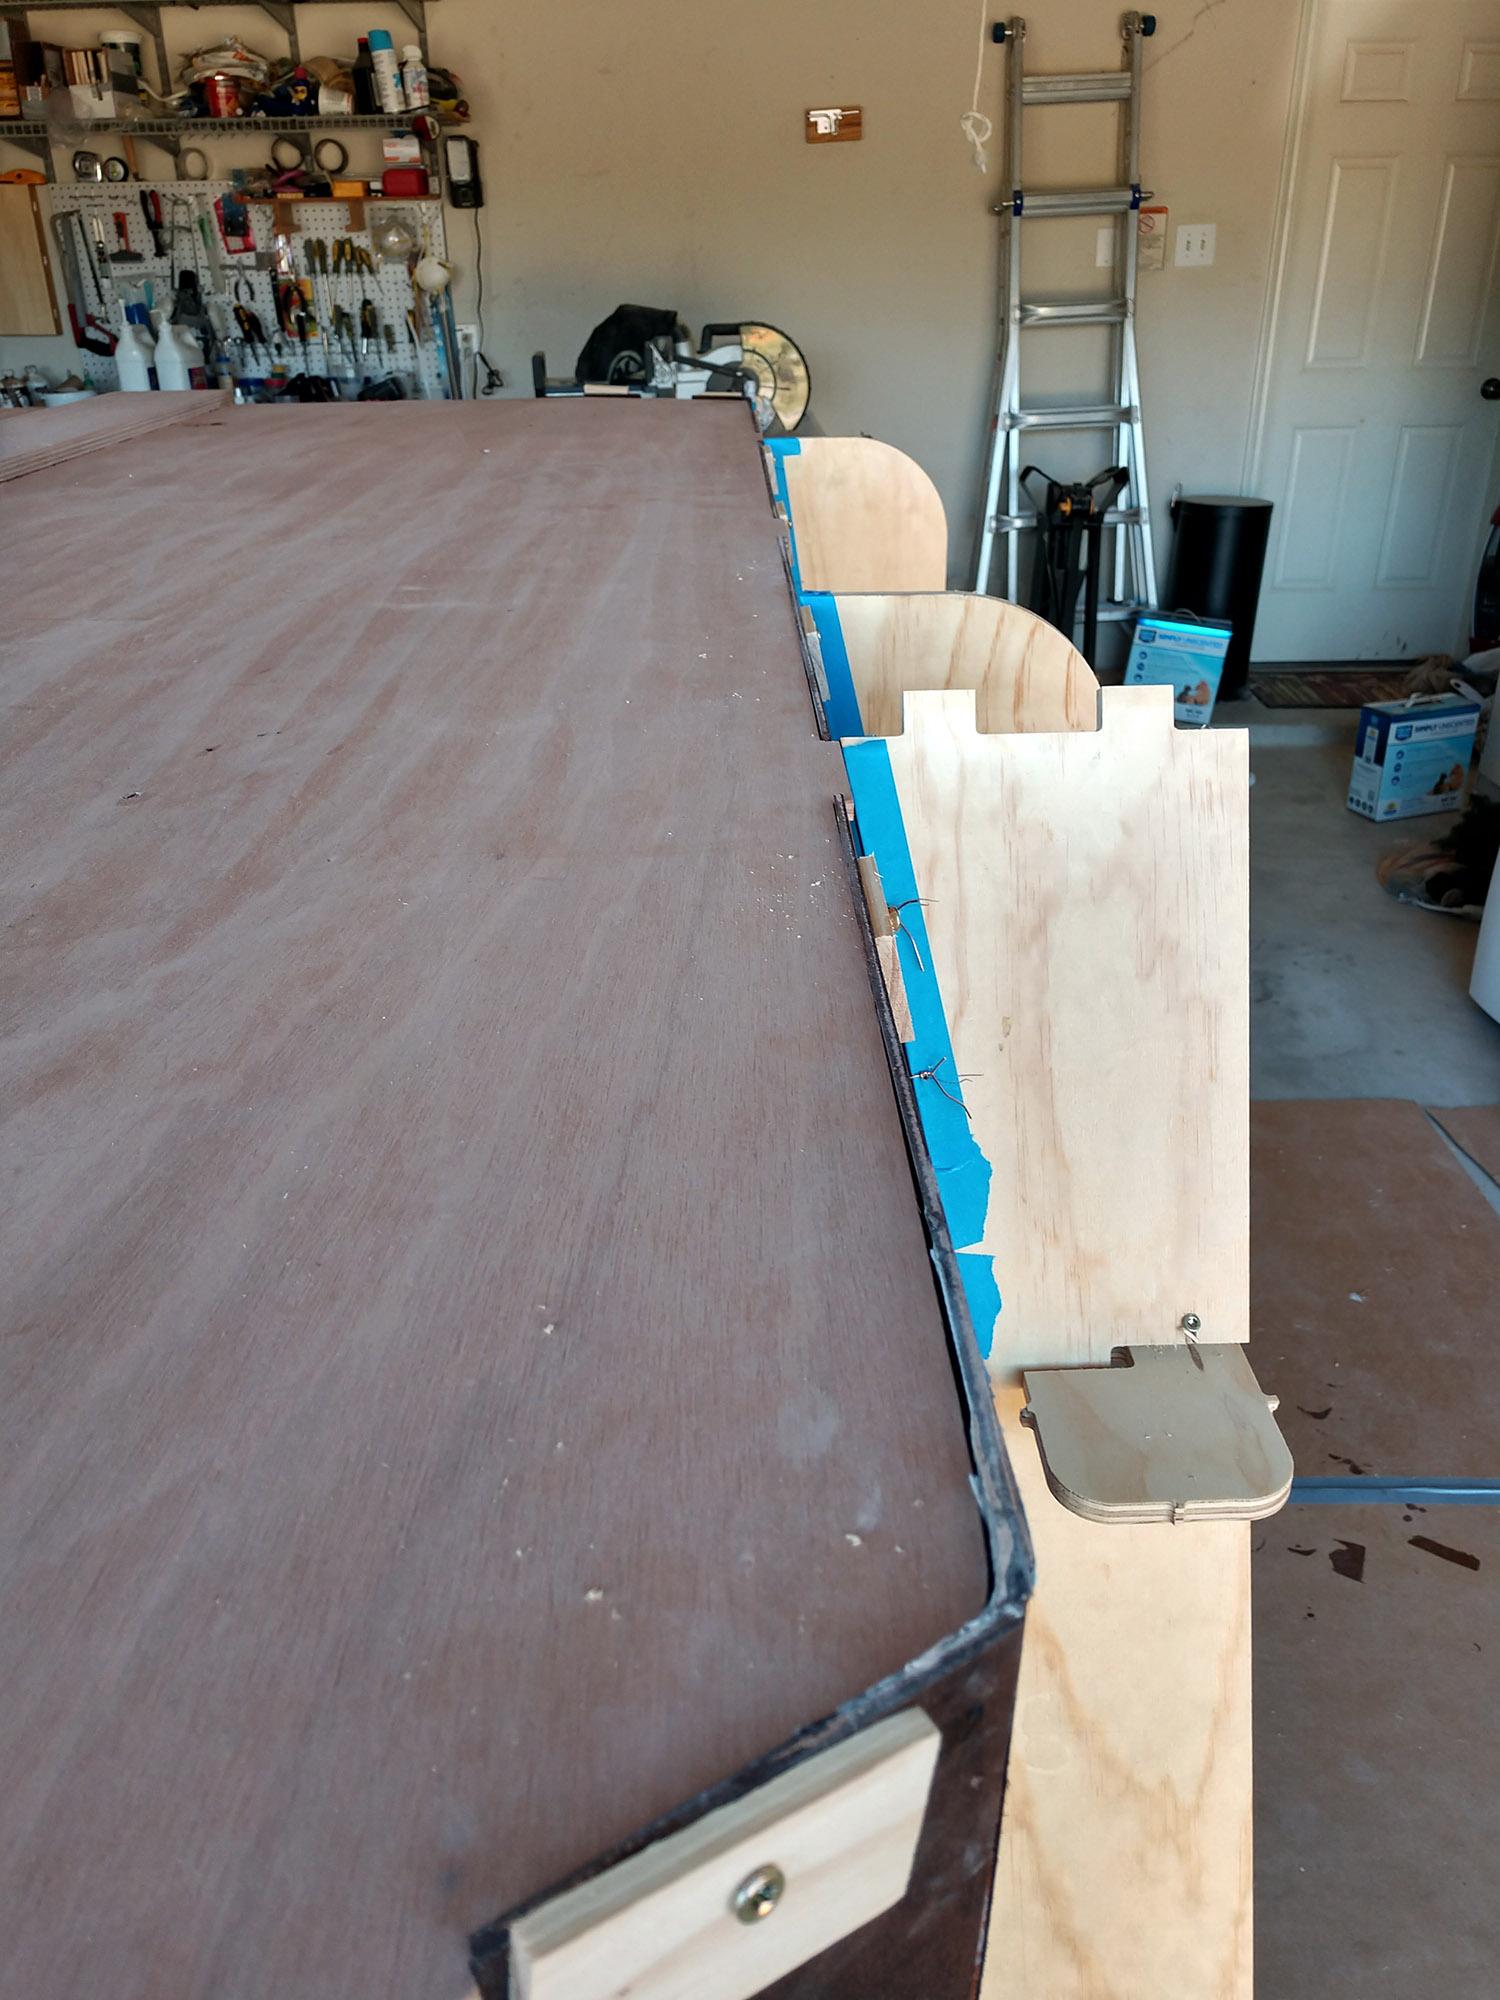
ParticipantI only needed a little bit of tweaking/sanding maybe 1/16 on one side of the galley flat. This was mainly due to some extra thickness caused by my taped seam. What I learned is #1 DON’T force it or you risk the veneer on the bottom of the galley flat blowing out. #2 make sure you take out any copper stitches that my be in the way…I took a few extras out of the side so the shell could flex a little more. #3 lift the lower side of the galley flat about 1in from where it is in your picture. Have it sit at the apex of the glass joint (the widest spot of the shell), then slip the higher side down.
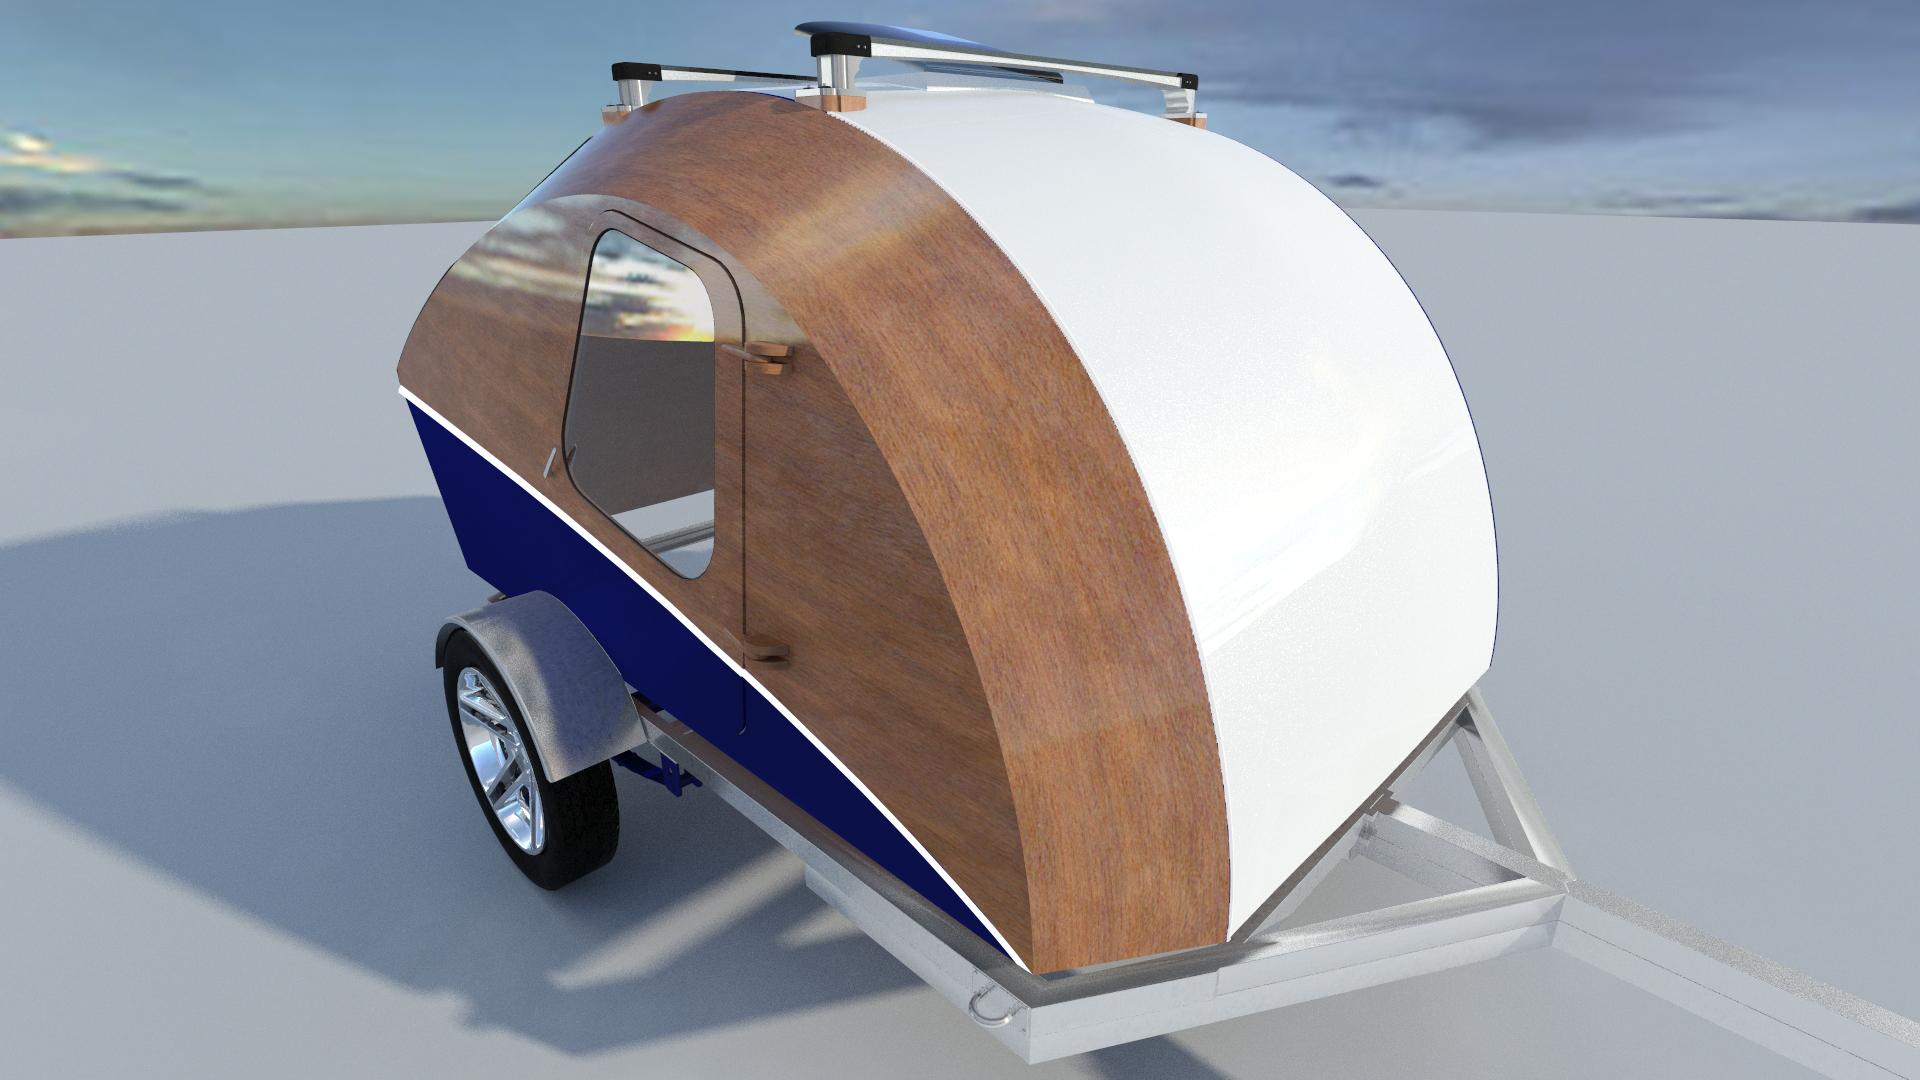
ParticipantYour right, it would be a shame to cover up all of the beautiful wood. I am partial to a two tone color scheme but your three tone isn’t bad either. I may suggest adding a pinstripe to tie the two paint colors together.
Either a Flag Blue pinstripe along the outer edge of the white:
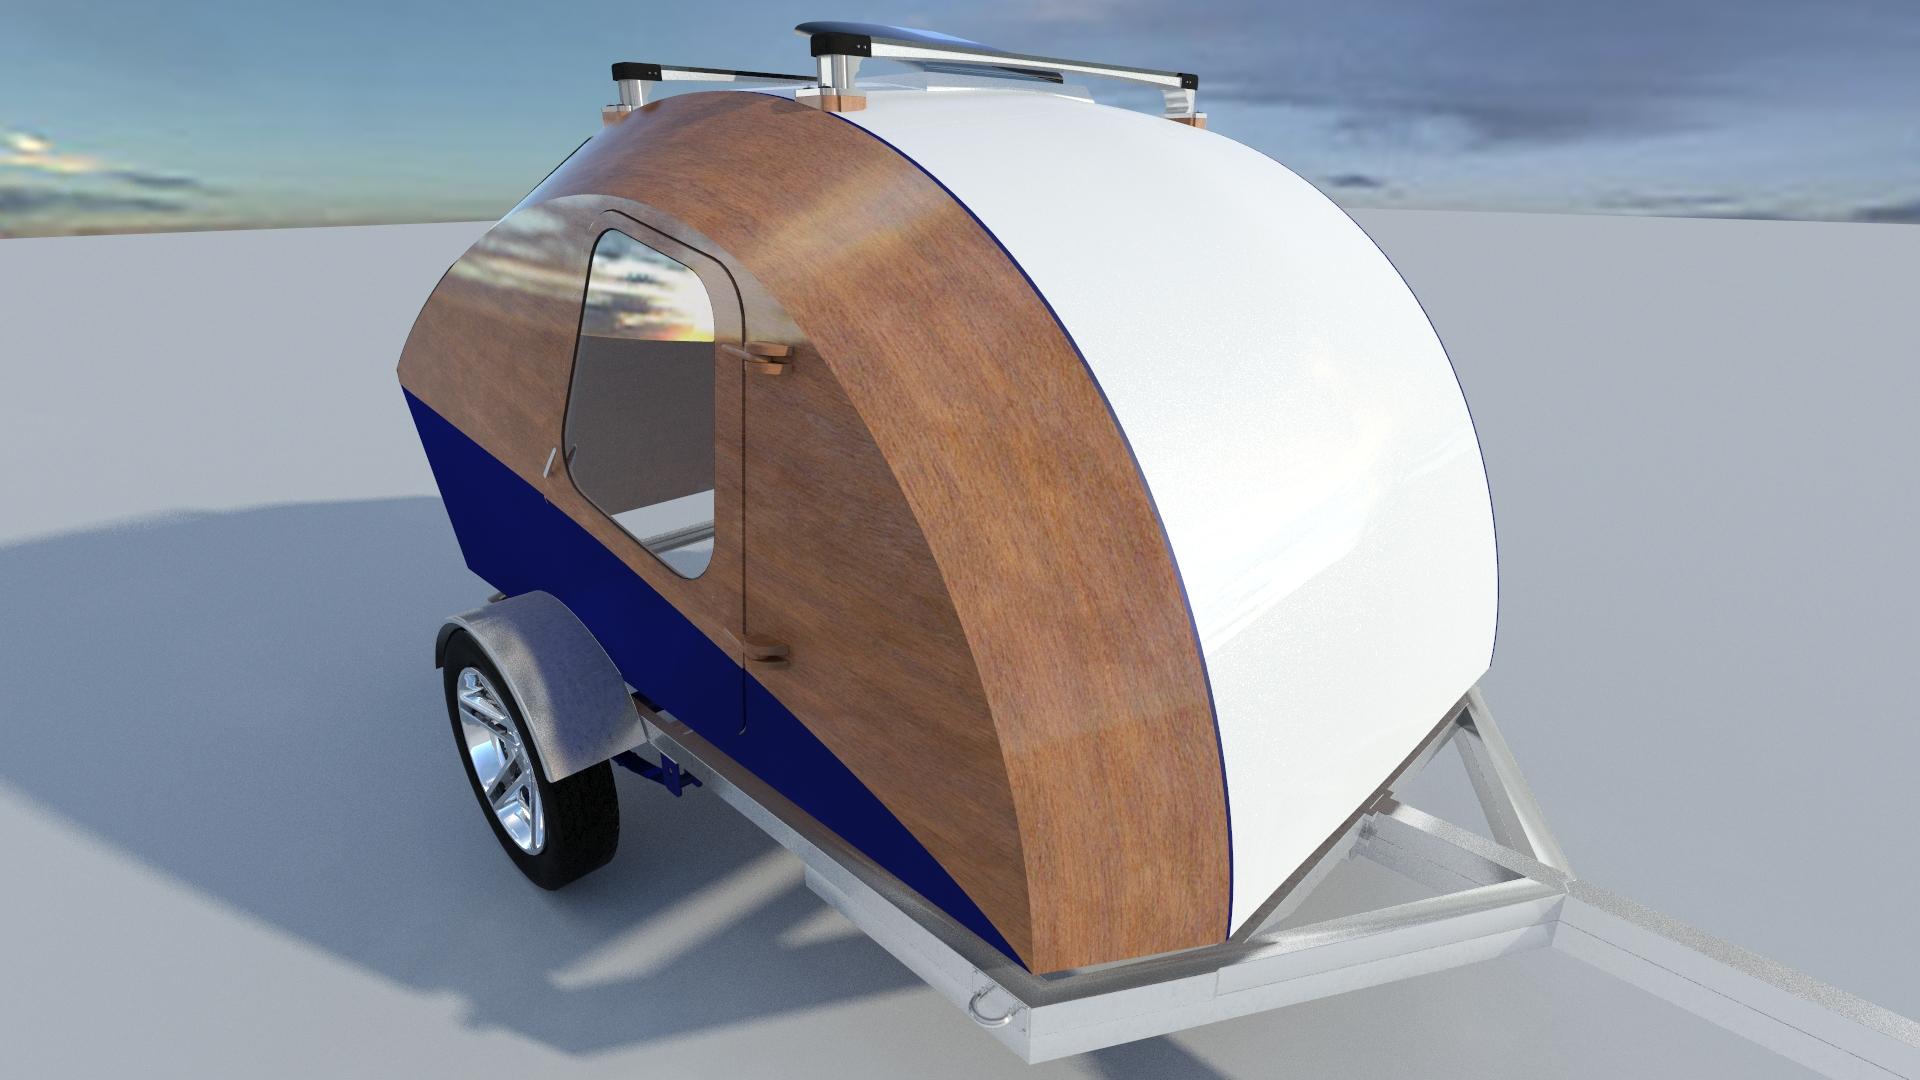
Or a pinstripe of white at the top edge of the Flag blue panel:
 Participant
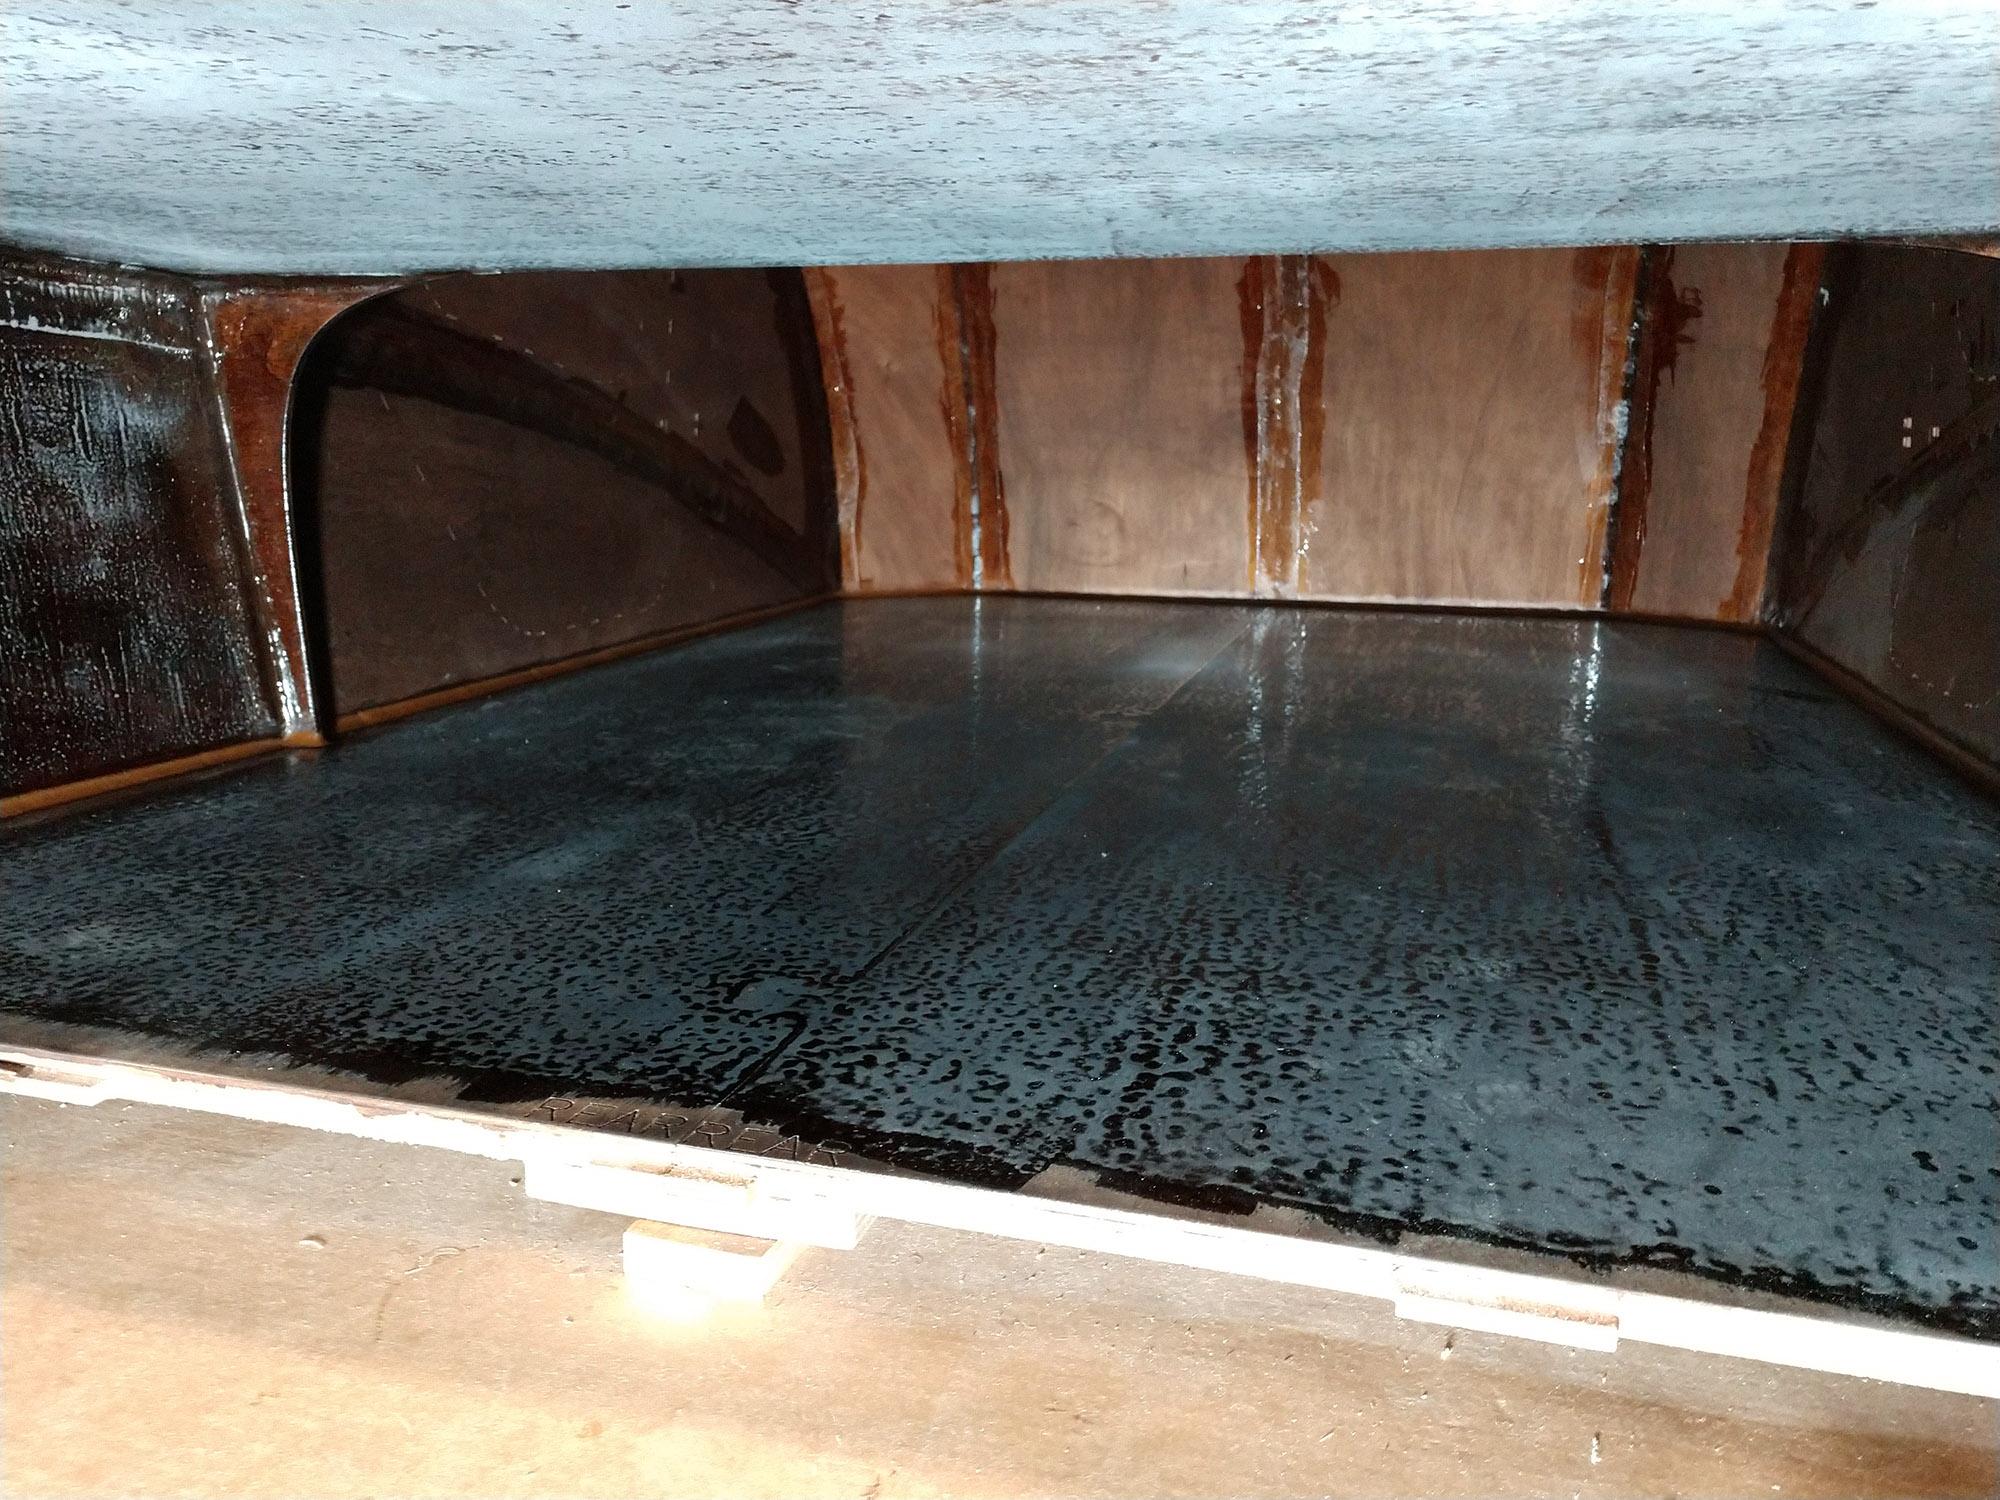
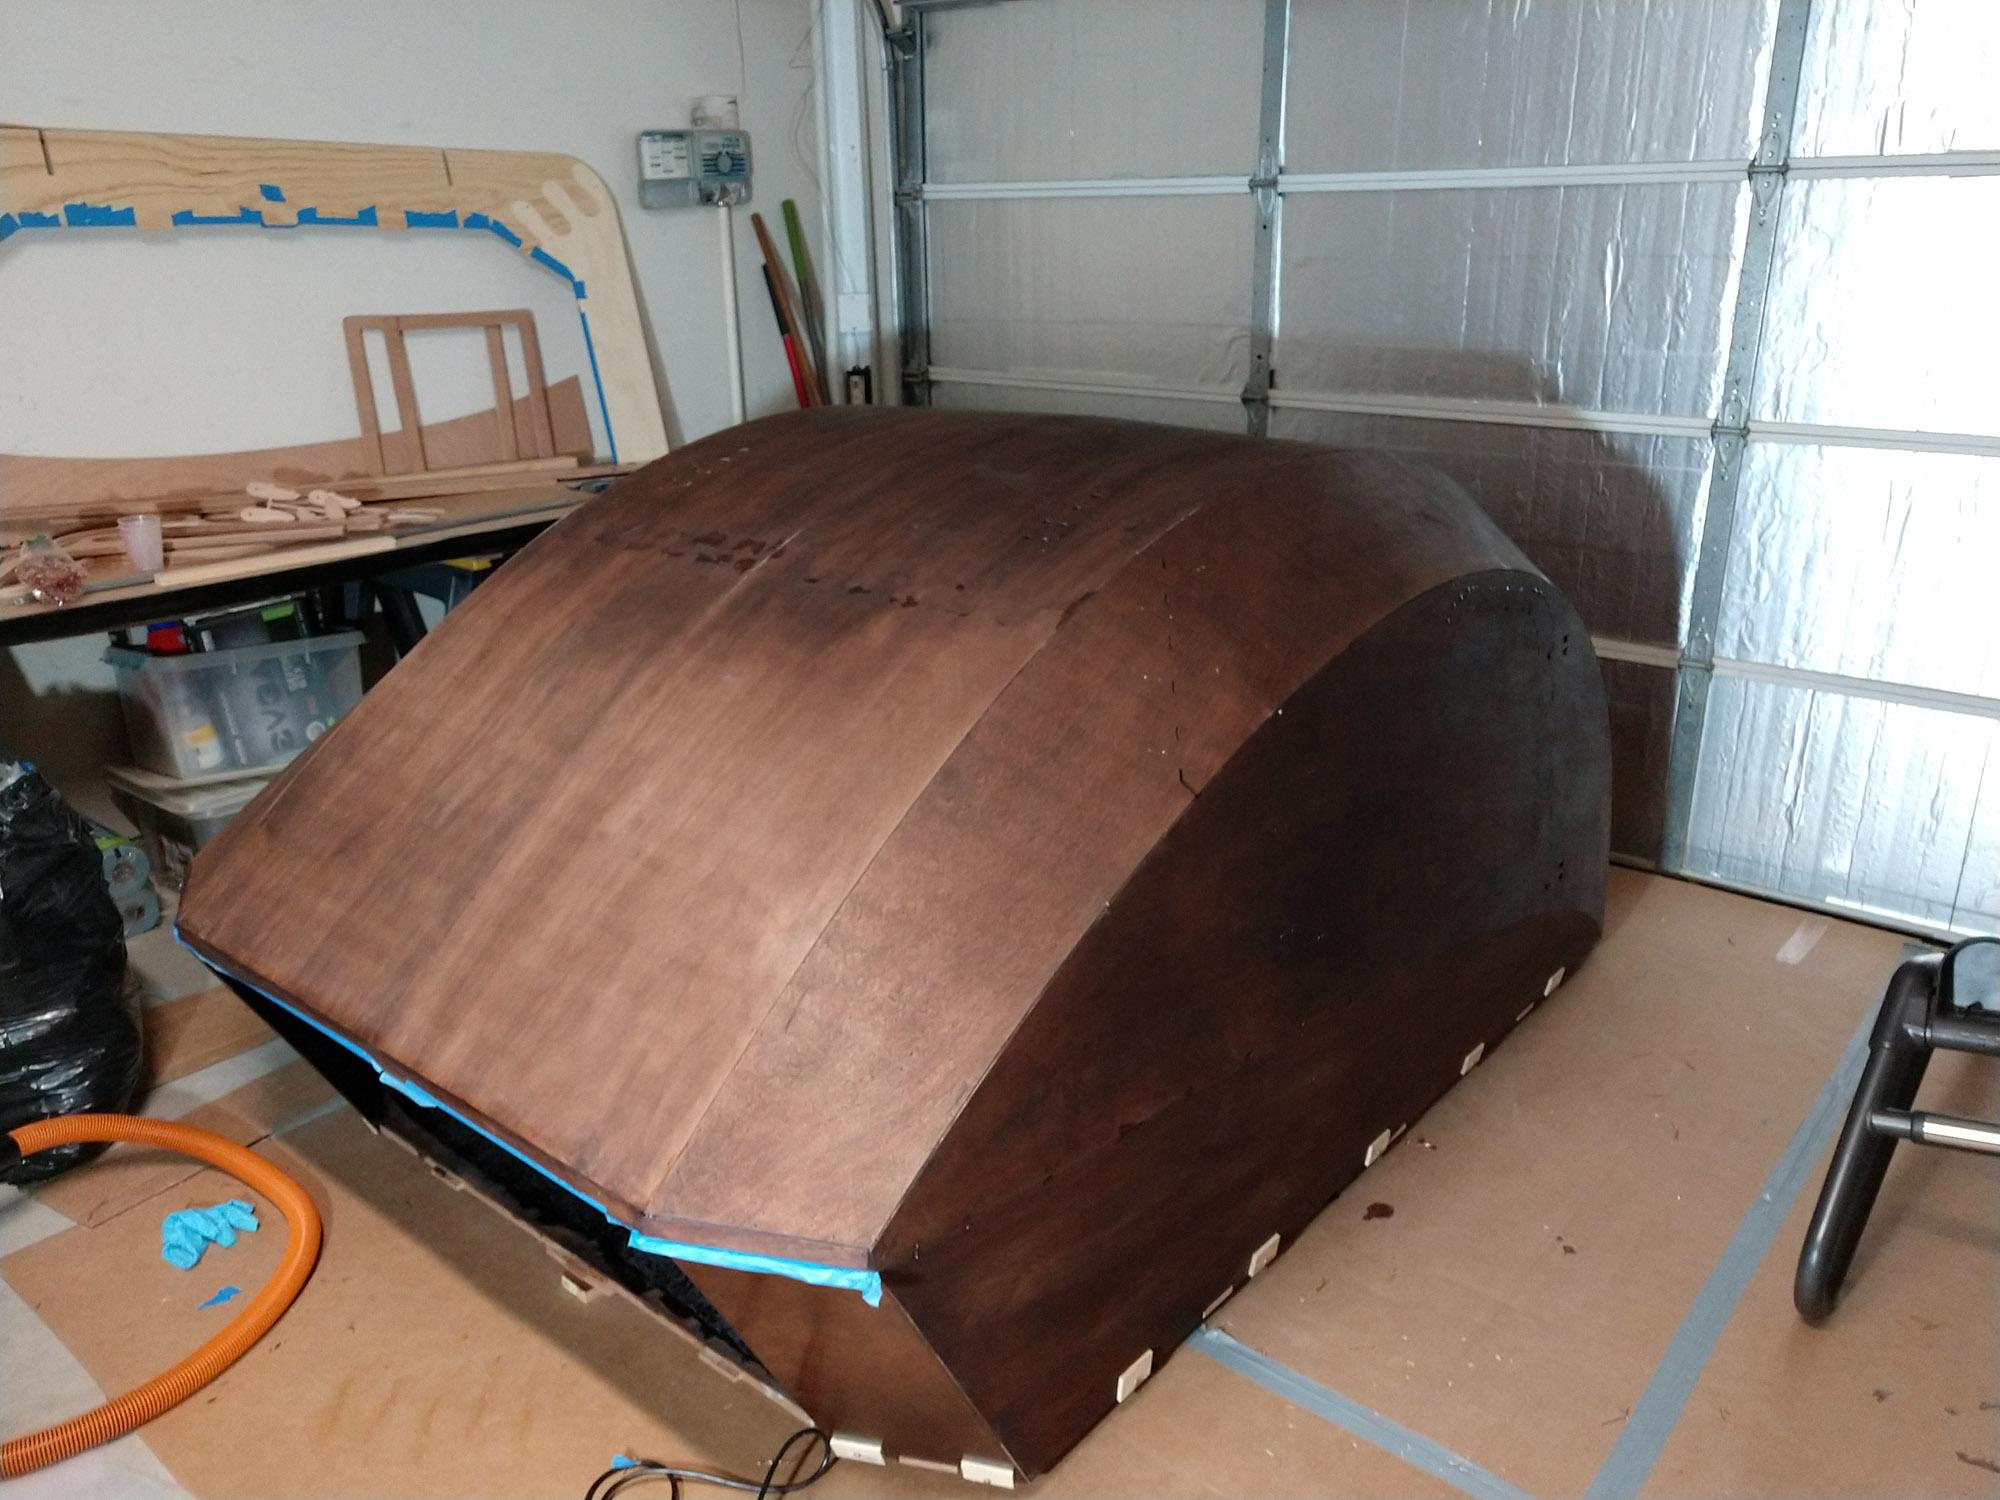
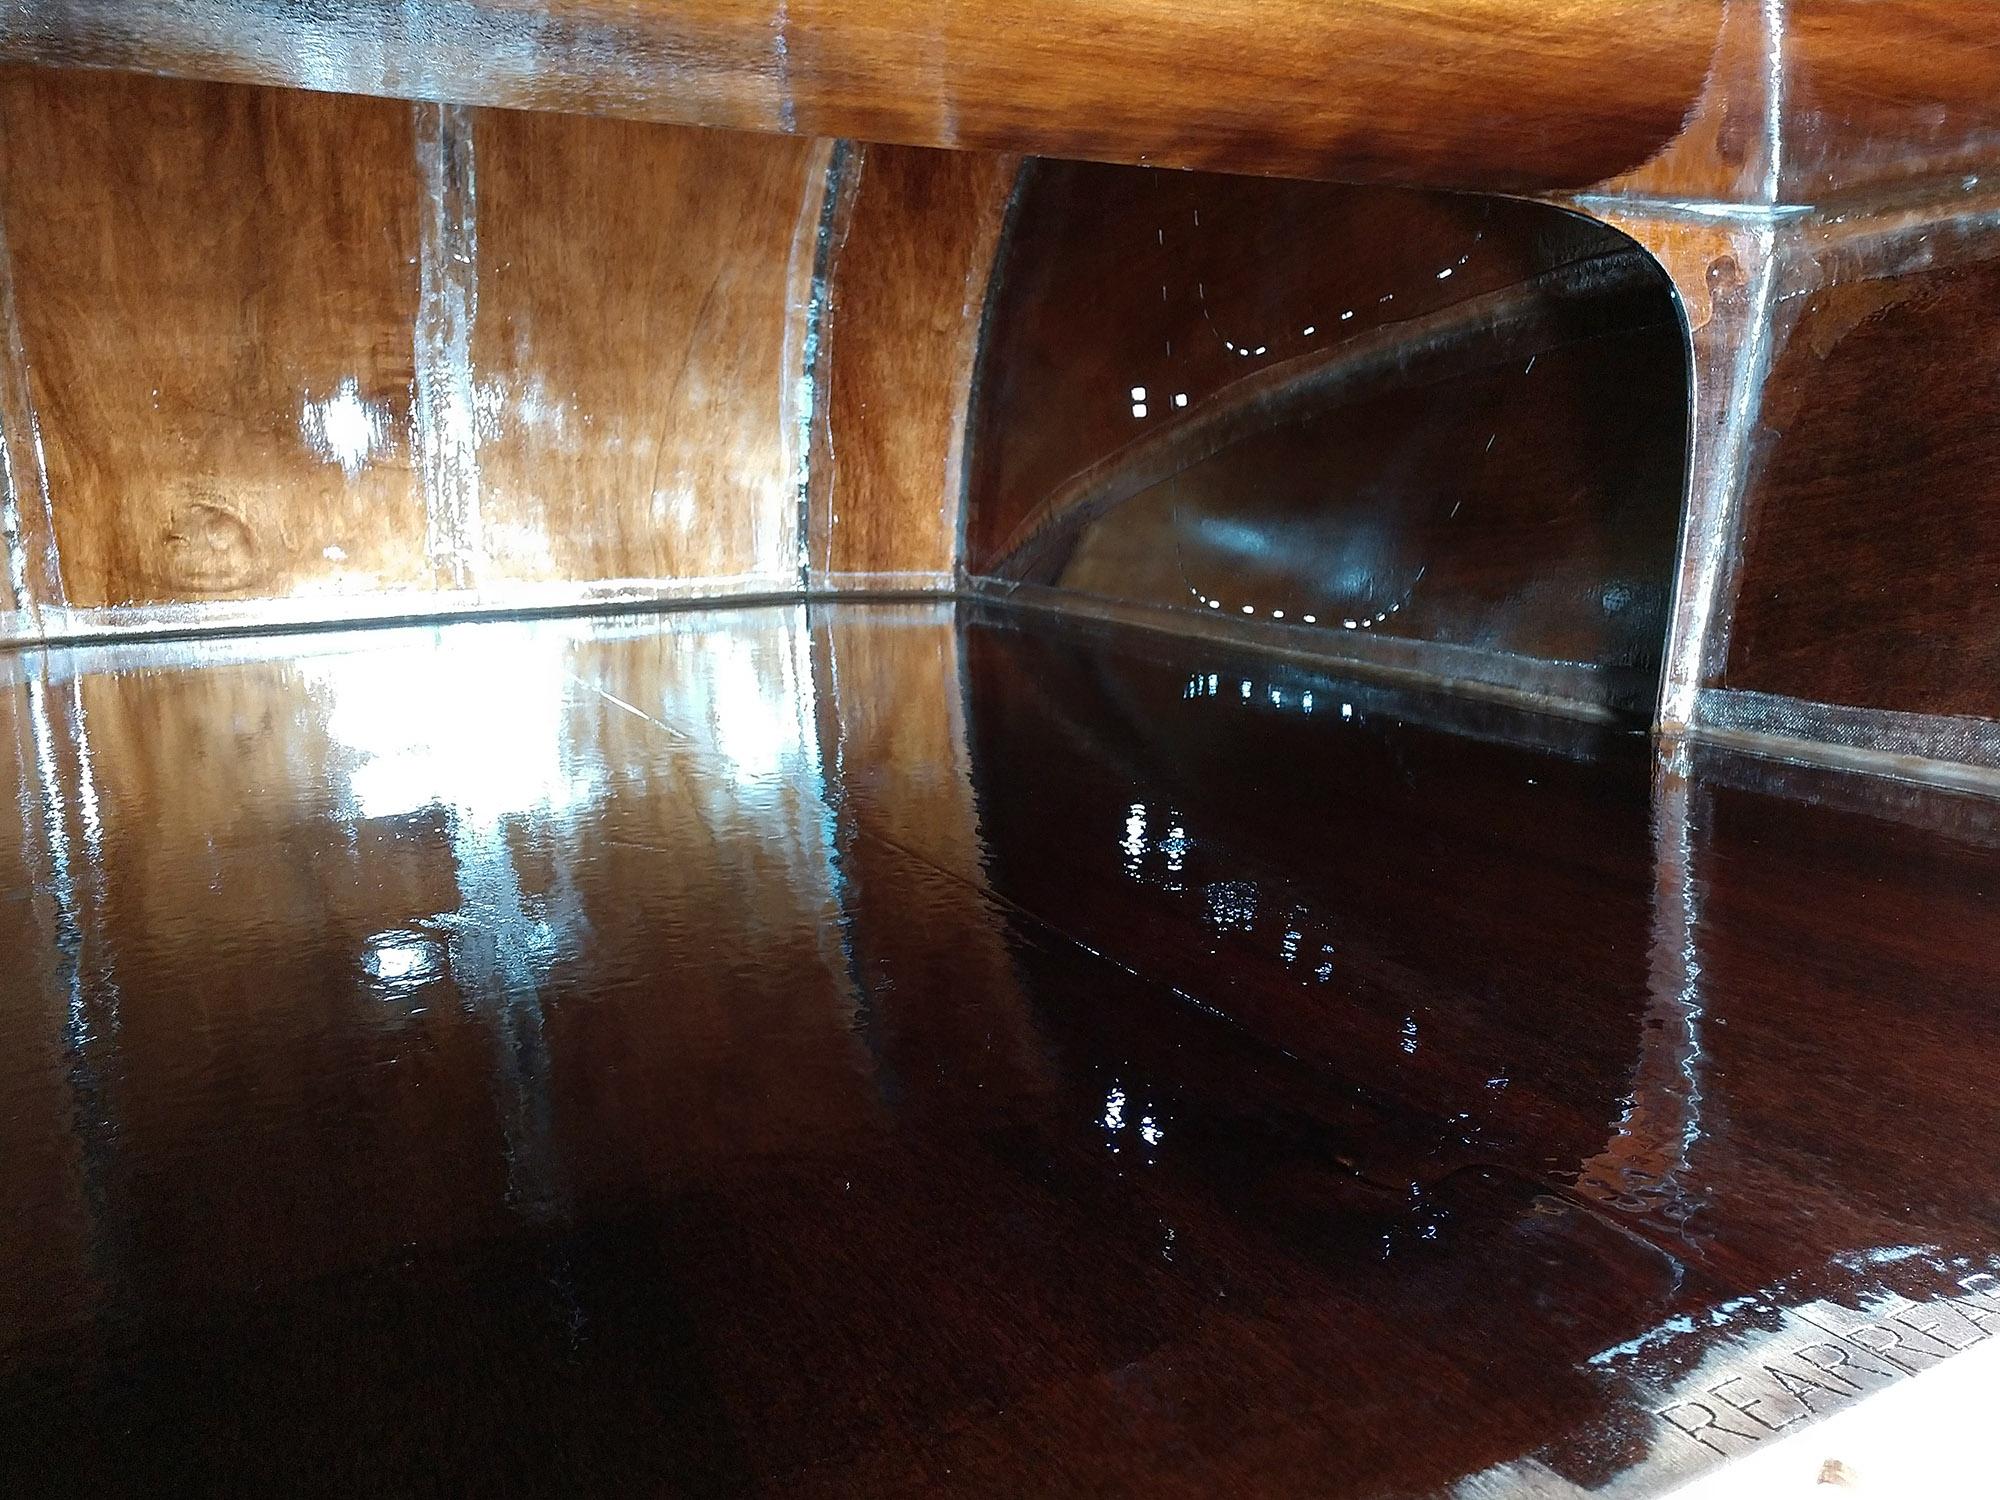
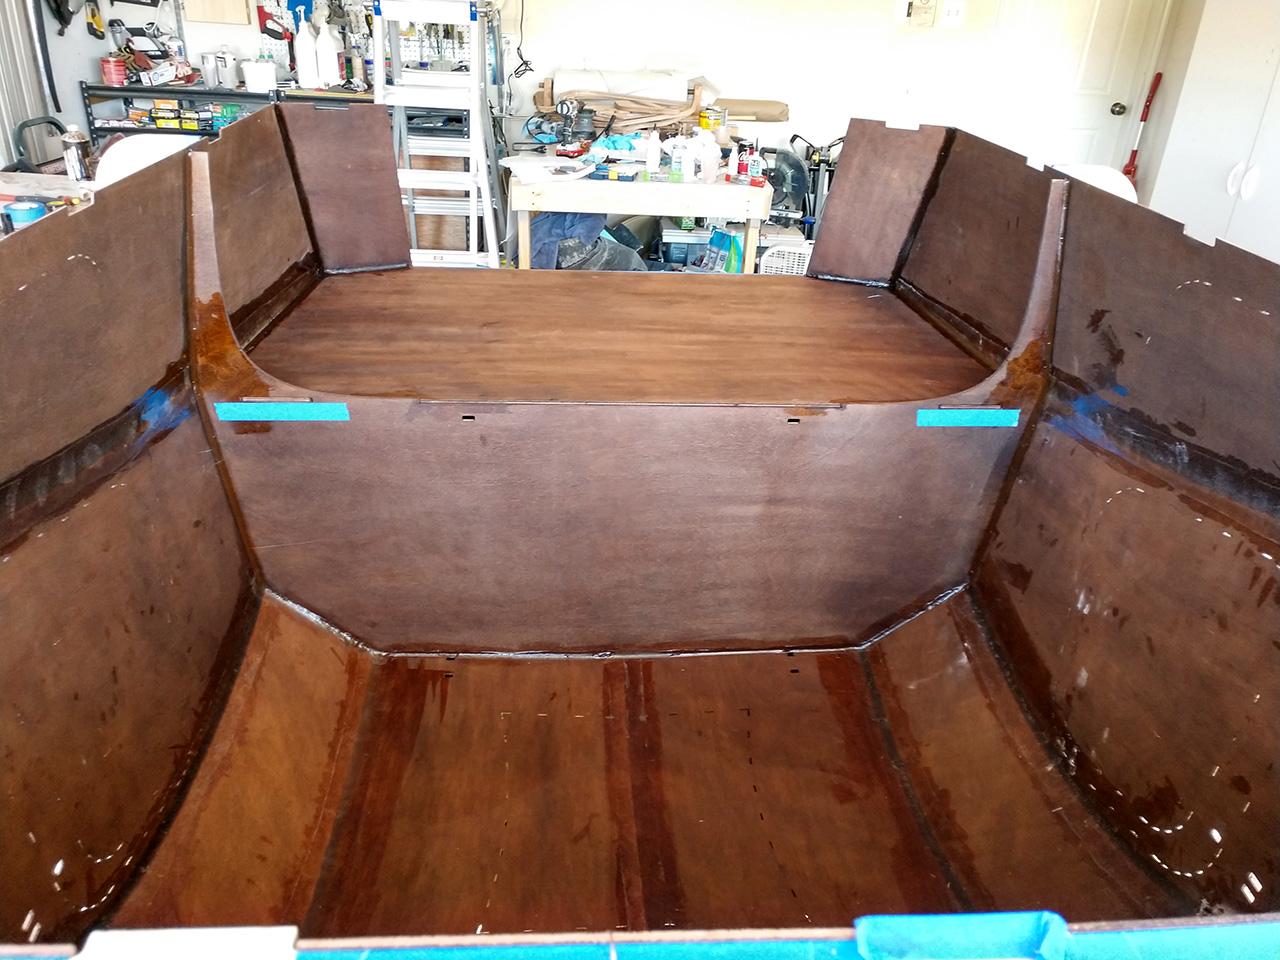
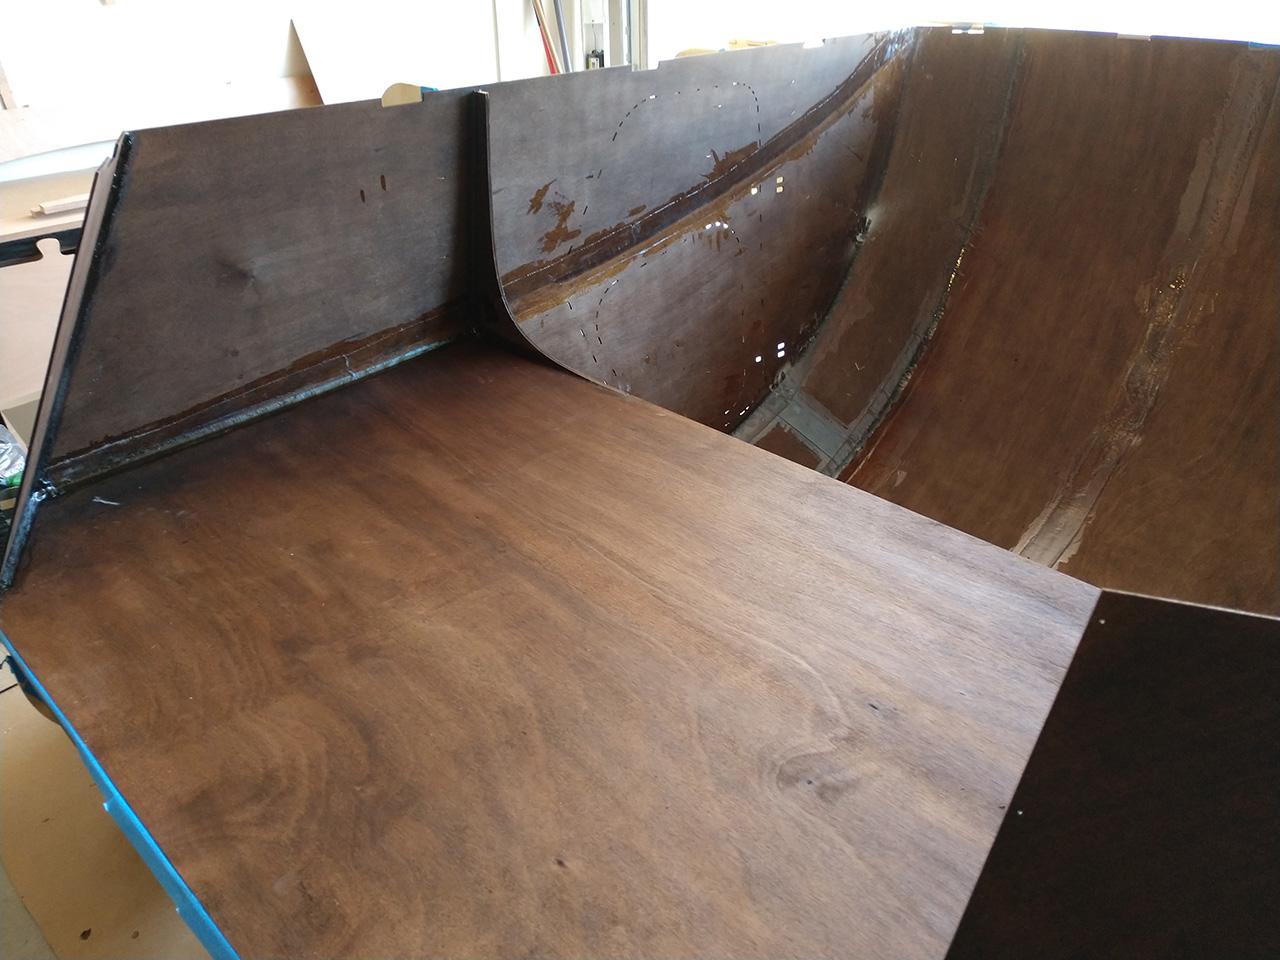
Progress update (Time Spent To Date ~79 hrs): The bottom received 2 coats of epoxy with sanding after each coat. Once that was accomplished I was able to attach the bottom to the camper shell and removed it from the mold. At this point I really had a sense for the final shape and size of the camper. It was exciting to be able to crawl inside and “test it out”. I’ve also finished the first coat of epoxy on the entire interior. The floor and bottom of the galley flat now have 3 coats of epoxy.
Next step prep the outside for the big glass job. Wish me luck.
Floor First Coat of Epoxy:
Floor Fit & Secure:
Floor Fit & Secure:
Inside Floor Fillets:
Shell Removed From Frame Mold:
Inside First Full Coat of Epoxy:
 Participant
While velcro is a great option, I highly recommend and adjustment your method. The gap between the foam and shell created by the Velcro will result in condensation on the interior of the shell. It will also greatly reduce the efficacy of the insulation. For an air barrier to work it needs to be a %100 sealed air barrier. With your setup the air can find all the gaps between foam panels and circulate behind them.
I would recommend a few strips of Velcro per panel running the full length of the panel edge in parallel with the curvature. Then between the strips of Velcro (on the foam panel) glue an additional 1/8″ of closed cell foam. This will seal up any air gap assuming your Velcro is <= 1/8″ thick.
Participanthere is a 3D cross section to help illustrate psgramps idea
 Participant
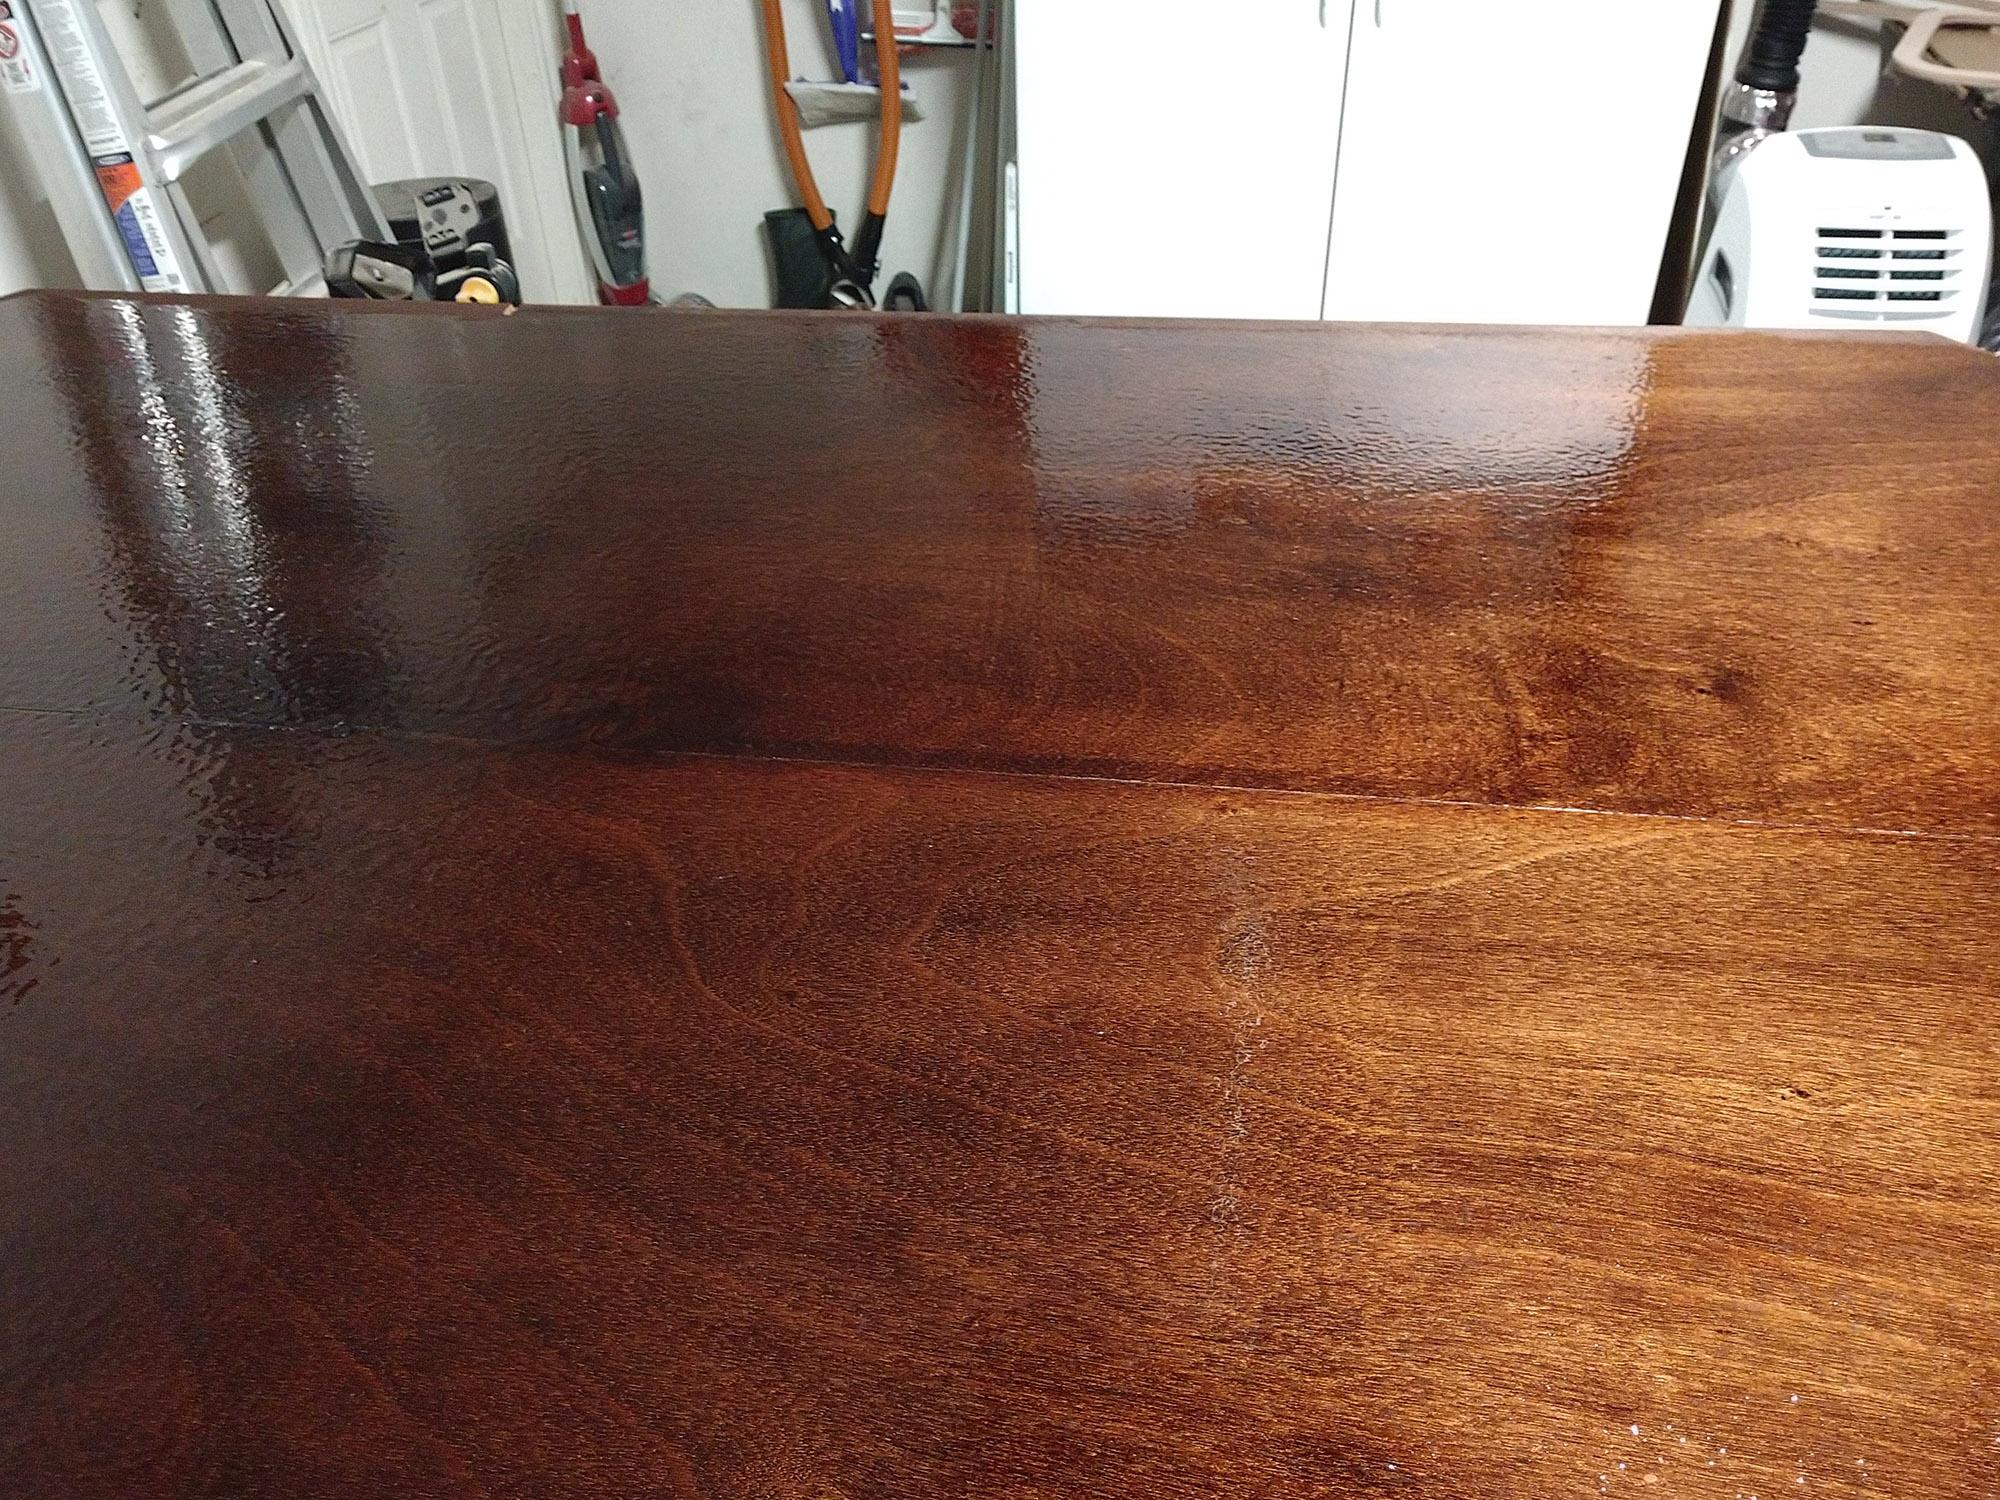
Progress update (Time Spent To Date ~50 hrs): It has finally cooled enough that I could make substantial progress. I’ve also been very successful with coloring the thickened epoxy for the fillets using the alcohol dye, and am very happy with the results. I’ve learned some lessons along the way that I should share, most of which revolve around minimizing additional sanding because I’ve dyed my parts.
1) Do not use blue tape to label your parts if they are dyed, it will lift little fibers of wood when peeled off and will require touch-up. Obviously there are areas in the build that require masking so touch-up is inevitable.
2) Thoroughly sand parts before pre-stain and dye, pay close attention to areas that had stickers from CLC’s labeling process. The stickers they use leave a heavy residue.
3) To minimize epoxy seeping through stitch holes and small gaps during panel glue-up use CA glue. The CA glue followed by the kicker will seal any gap or hole nicely. Failure to do this will result in bubbled up drips on the outside of the camper shell that will require sanding before the big glass job. I will need to buy another bottle of both CA and Kicker before the camper is finished.
4) The fiberglass ribbon supplied with the kit has one side that is thicker because of the weave. I trim this edge off carefully right before gluing it down which makes for a smoother application with less sanding in the future.
5) Be careful of vertical clearance when you flip the camper onto the transom side to do the bulkhead and galley hatch stiffener. I had room to do this in my garage but the garage door was opened during this process and hit the camper. Thankfully no damage done, but if it wasn’t propped up securely or aligned differently this could have been catastrophic.
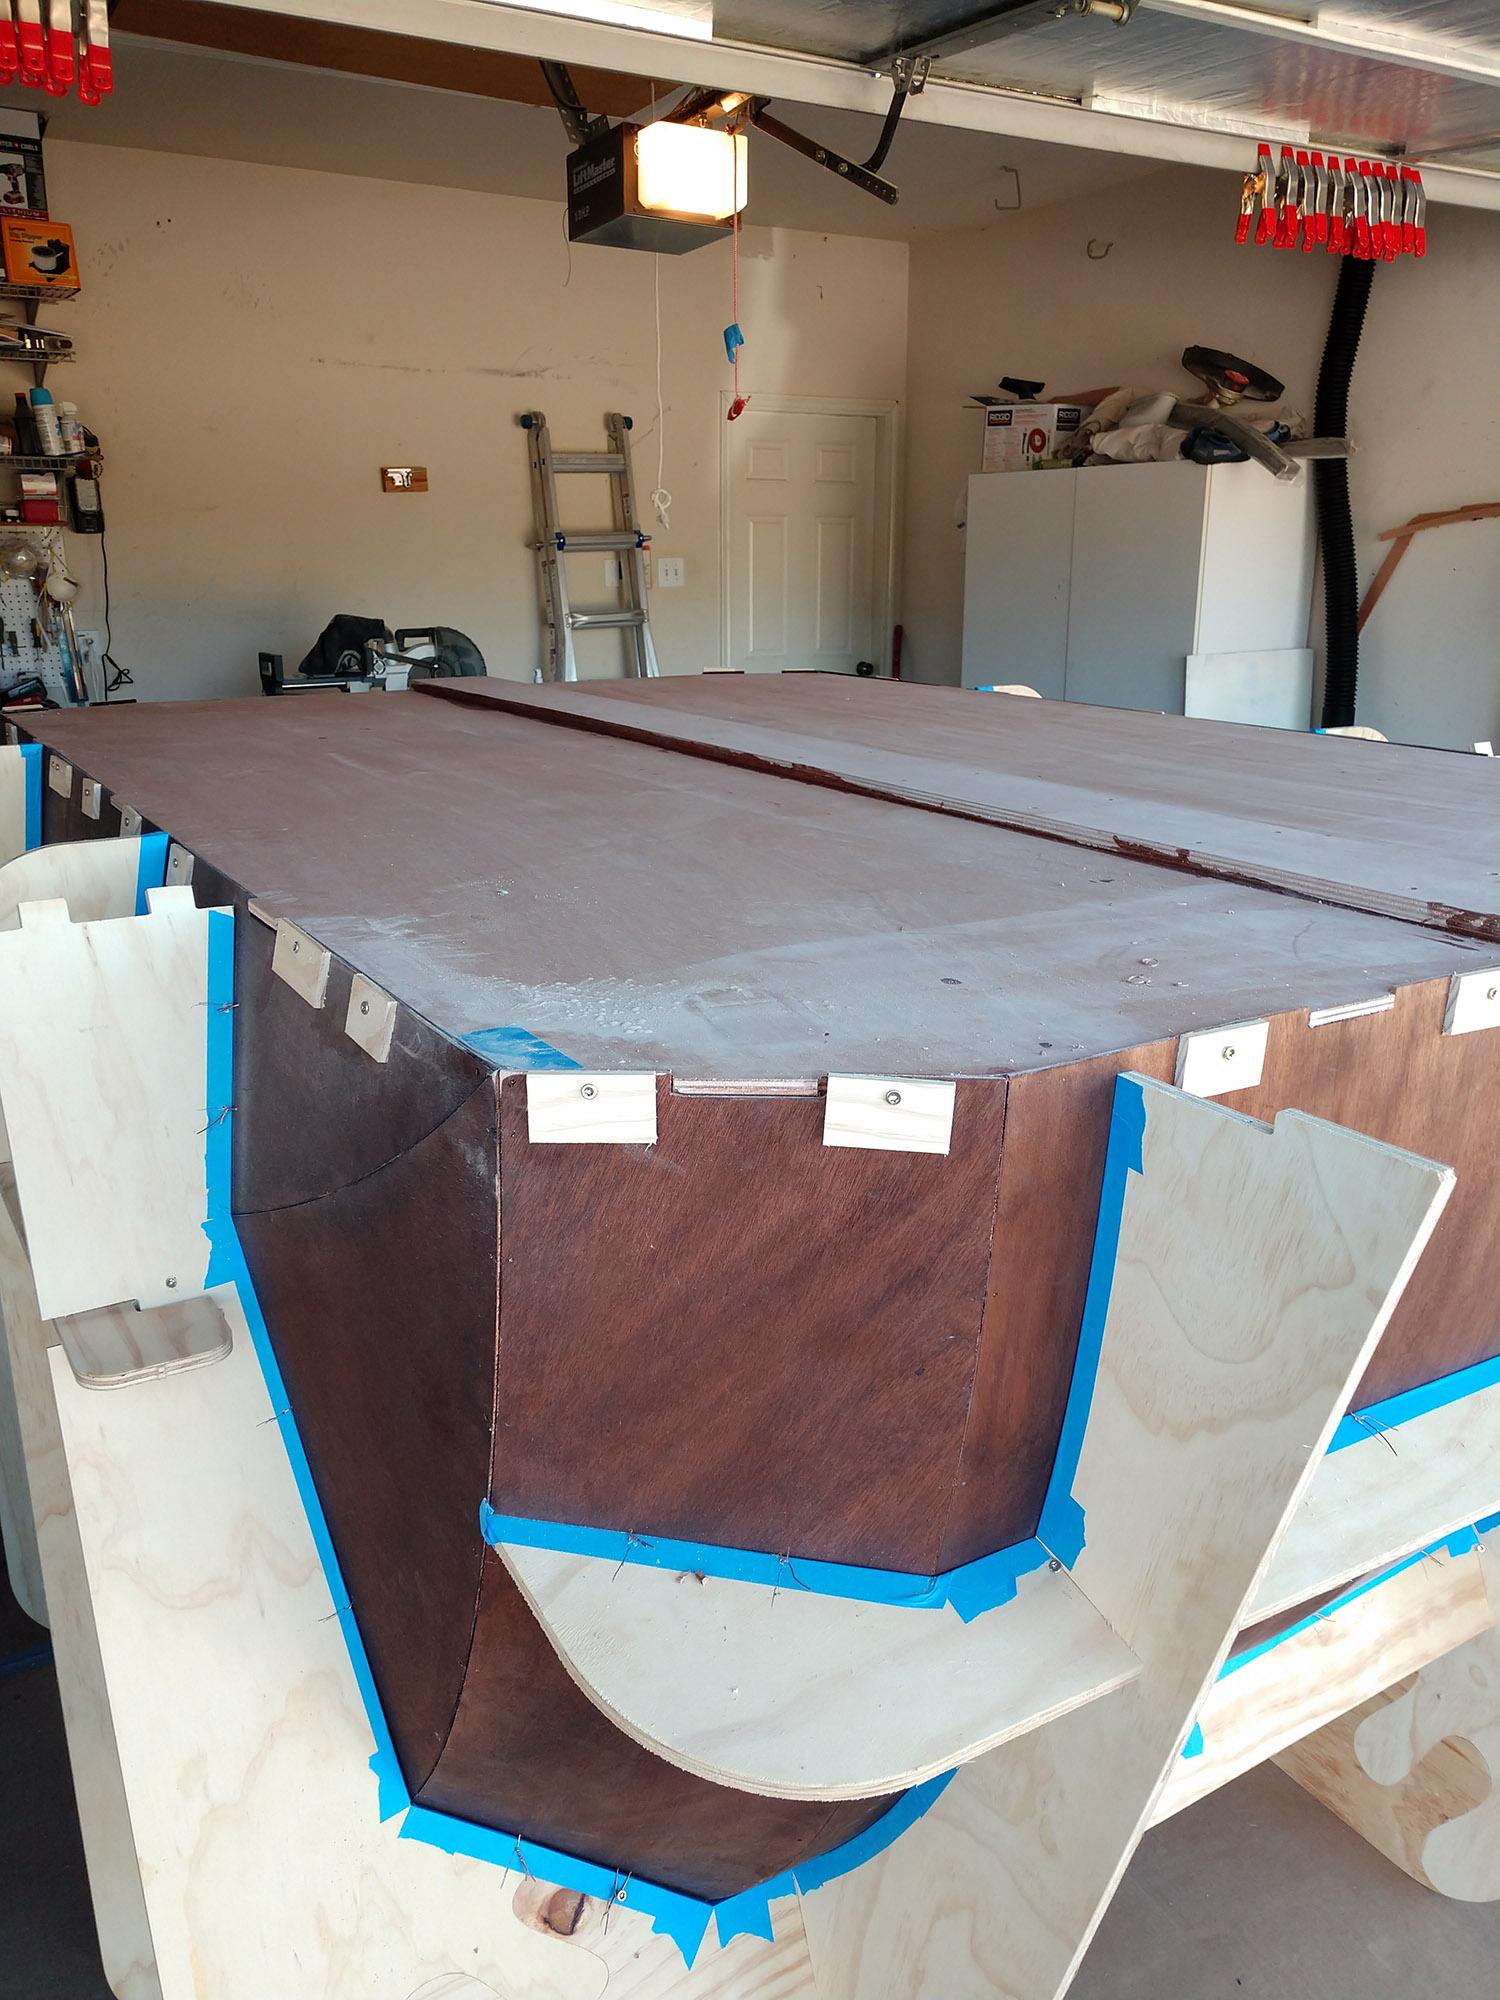
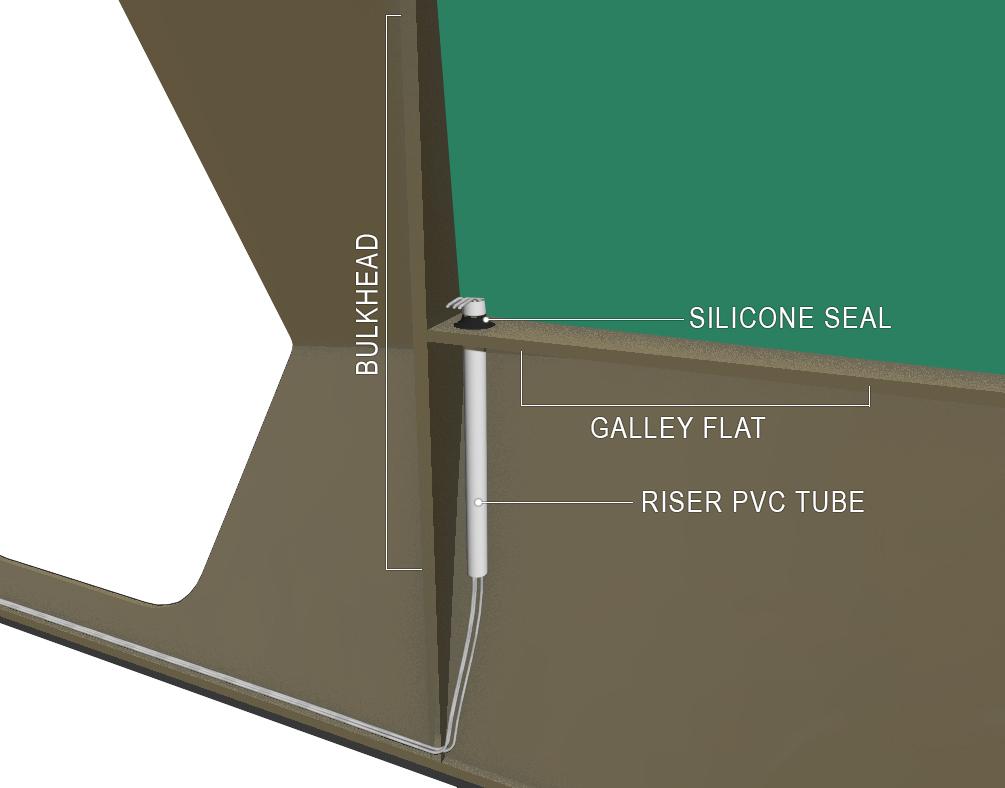
Galley Flat: Now the galley flat was a little snug. I ended up sanding the side edge just a little bit and removed two frame stitches from either side of the shell to get it to slide down perfectly. I caution anyone during this step to be very careful with the snug fit and sliding it into place. I had some blow out of the veneer where I forced it a bit too much. Luckily the epoxy fillet covered this up.
You will also notice I’ve omitted the galley stiffeners. I’ve done this because I plan to double up the galley flat on the top side. Stiffeners will be added between the doubled up layers in more strategic positions to support my custom galley module and sink, as well as creating a cable chase for electrical and plumbing. (Added bonus of a nice flat galley bottom with extra foot room)
Transom Panels: The transom left and right panels are a bit tricky to stitch and glue. These panels have no frame support and the angles and geometry are very important for the hatch to line up and transom panel to fit later. For this process I stitched the panels as instructed but also stitched the middle transom panel in temporarily until the fillets cured. This helped me align the panels and ensure the space between them fits the middle transom panel perfectly later on.
 Participant
This should help if you have the ability to measure off of a scaled 2D drawing.
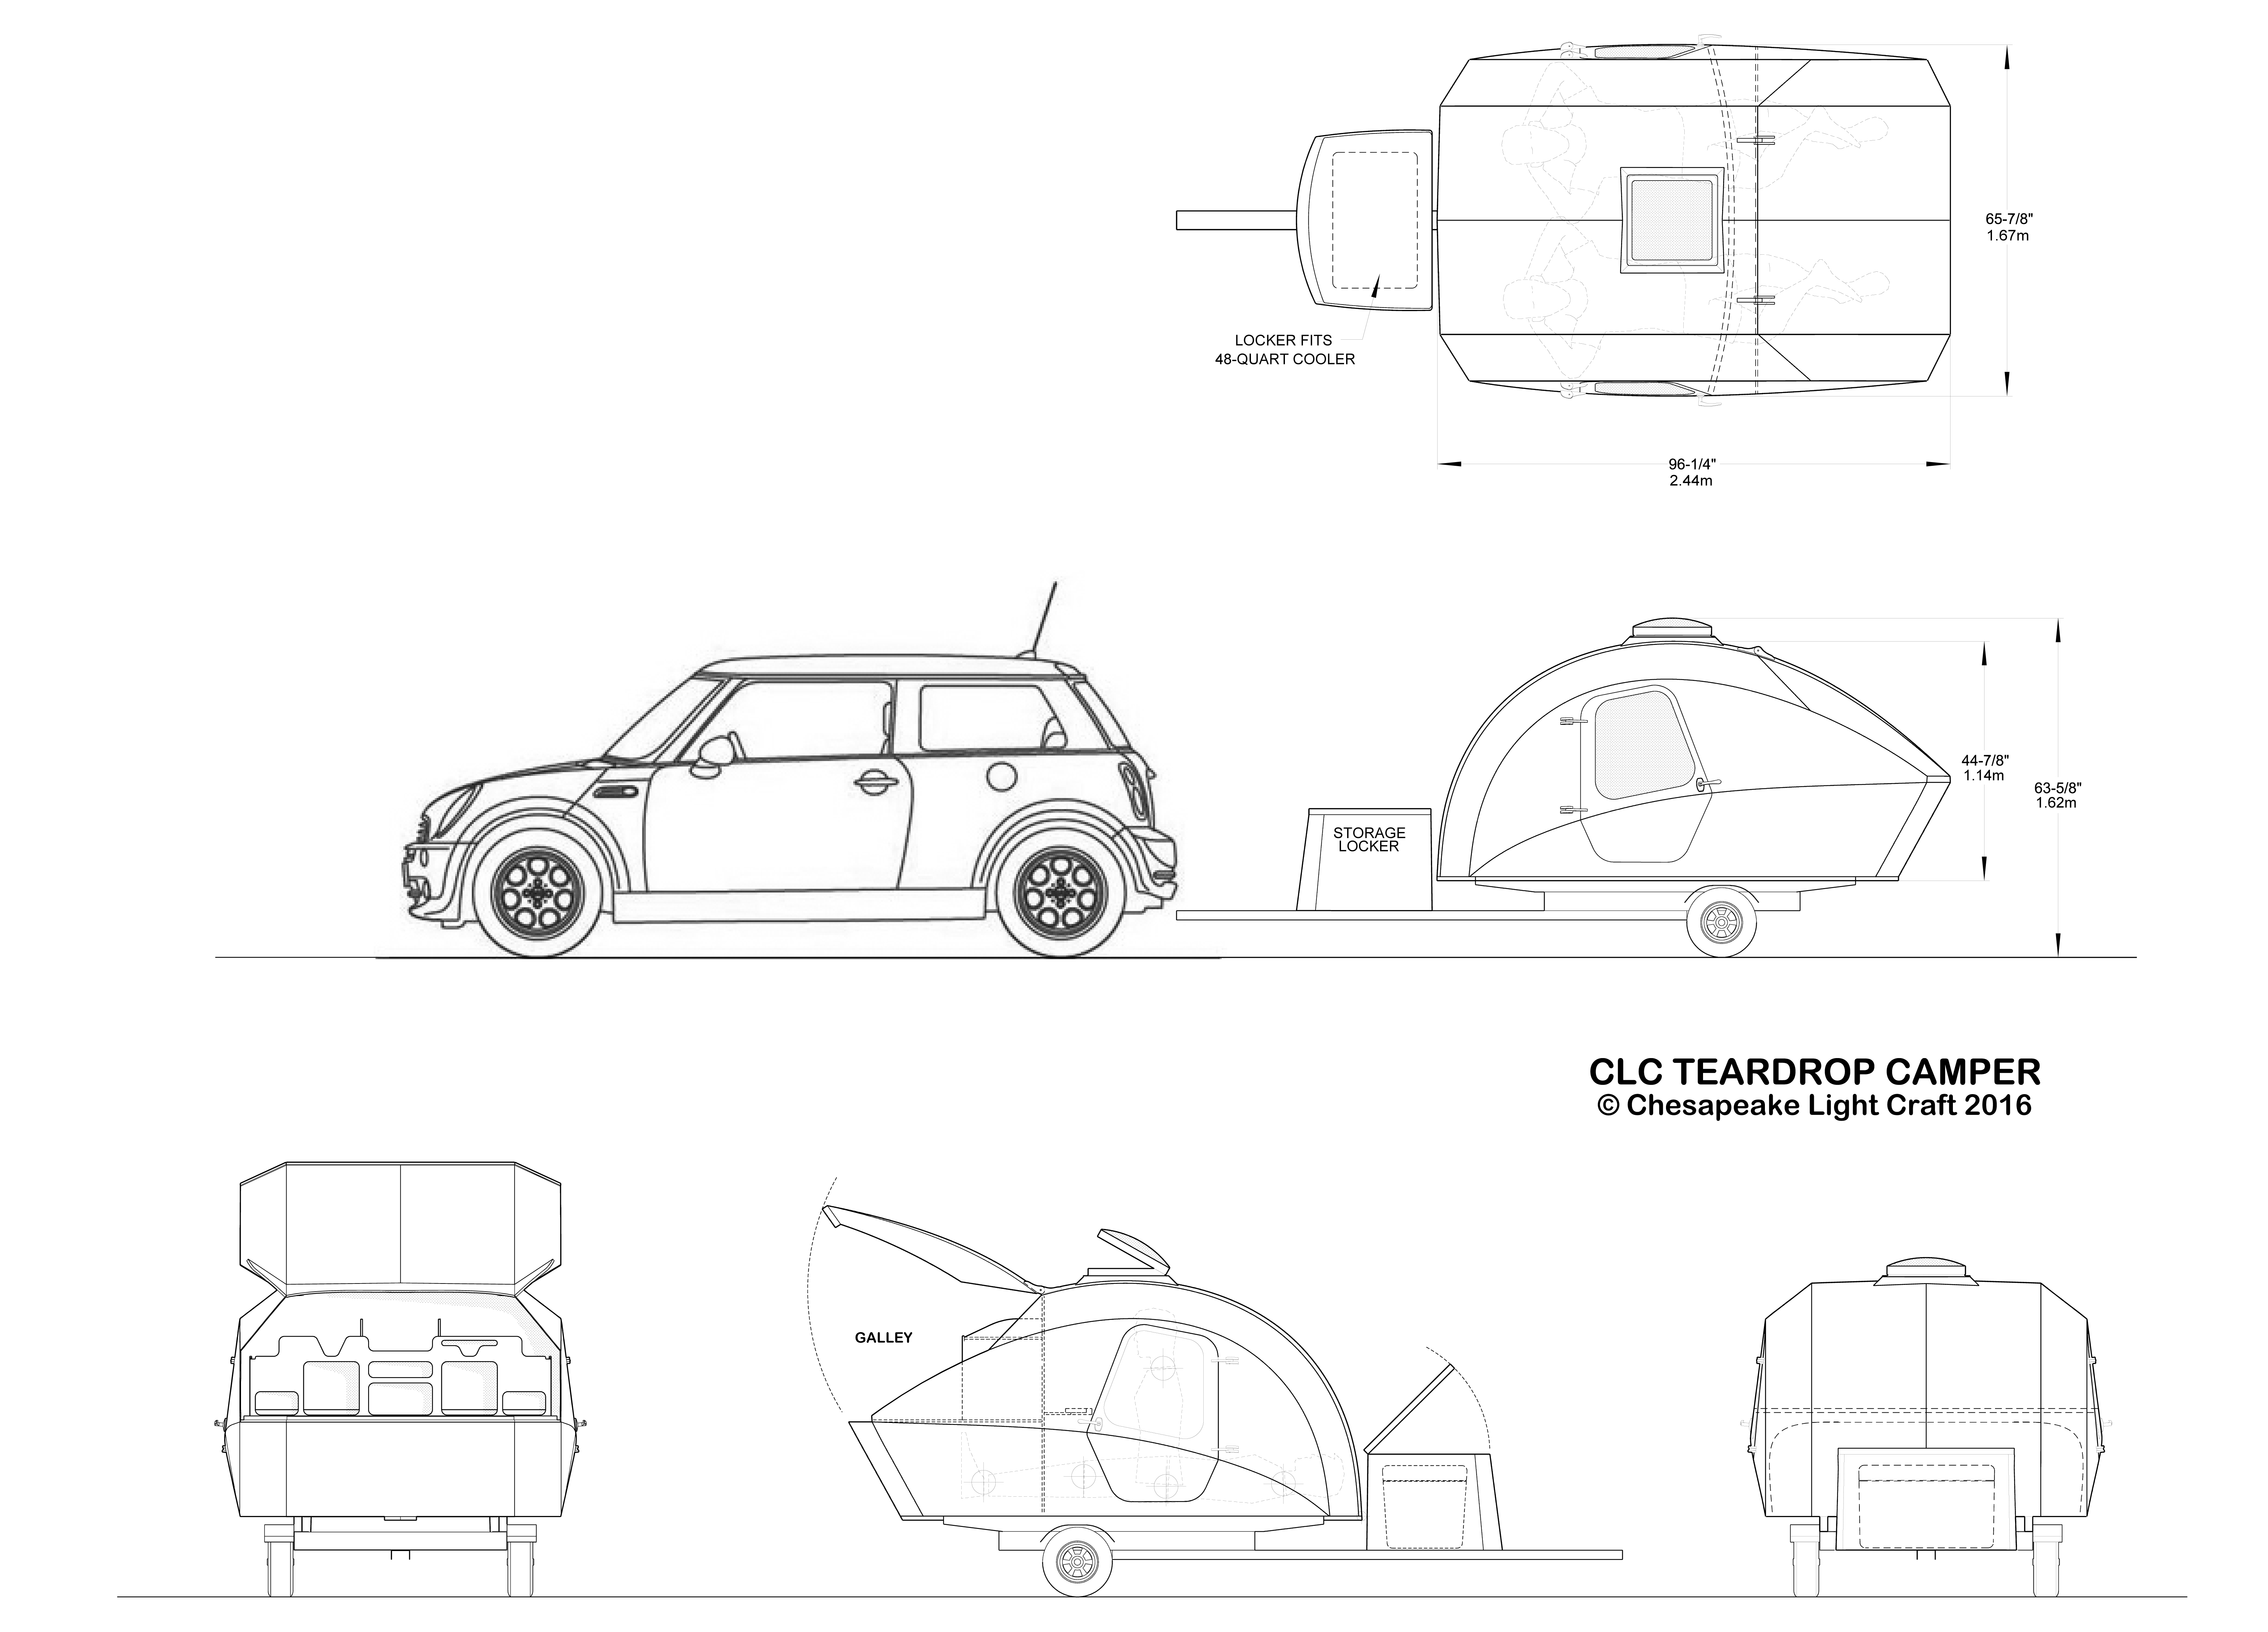
Link for the original image is https://www.clcboats.com/images/photos/boats/clc_teardrop_trailer/Teardrop%20Camper%20Official%20Lines.jpg
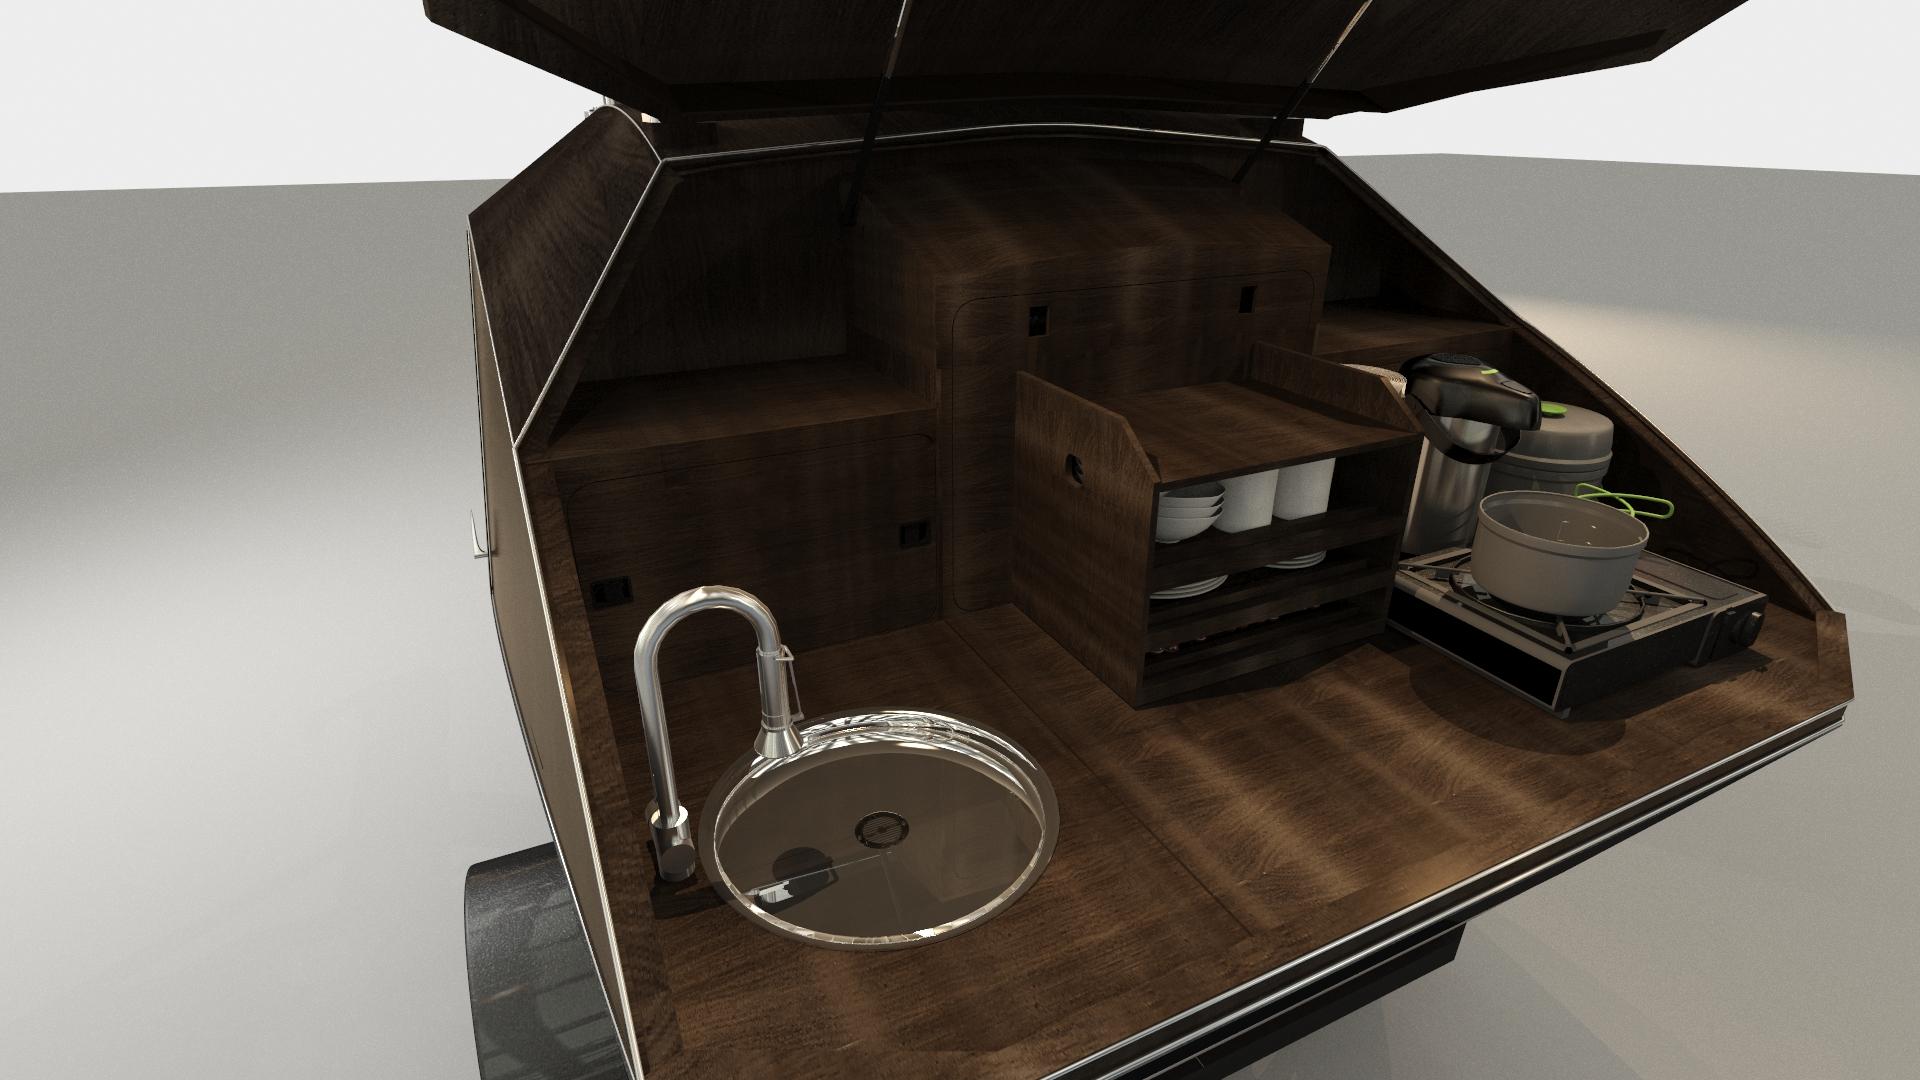
This is my plan for the galley area. Where the Galley Module would go I’ve replaced with built in cabinets on Left and Right sides that are accessed from inside the cab through the bulkhead. These cabinet sections measure roughly 19″width 12″ deep to bulkhead and 11.5″ height from galley flat.
The center section between the two cabinets will house the electrical system 23.5″ width 12″ deep and as tall as I can while still clearing the hatch stiffener and curved to match the hatch (~19″ height @ Bulkhead ~17″ height @ galley rear).
In front of the cabinet section I will have a removable dishware caddy, a shallow sink on the left and propane cooktop on the right.
 Participant
Daws, Your camper looks great! for future reference to add multiple images to the same post you have to do it one at a time and hit return/enter after each image adding the next one on a new line. Otherwise it overwrites the previous image with the new one.
May I ask what you used to coat the galley flat and cabin shelf with?
ParticipantComccoy, thanks for the ideas. Its funny you mention insulating the garage. After 2 days of working in this heat I went out and picked up 1″ foil backed rigid foam to insulate the garage door which helped a little. I’ve also installed a portable AC which vents out to the soffit. You can see the AC unit on the right in the first photo of my previous post. I will need to install an inline duct fan on the extended exhaust pipe to help pull the hot air away from the AC unit. It currently only runs for a few minutes before it shuts off from over heating.
Until i can get it cooler in my garage I’ve been resorting to keeping the resin cool before use. I’m also only do small batches at a time (8 pumps or less) and bright an early in the morning. I hope to be working on the large glassing steps in the dead of winter where heat wont be an issue.
ParticipantThanks for the great idea faithie999. I may give that a try and start storing the resin in the house. I started mixing it while holding the container right in front of my portable AC to help cool it down too. I may even try putting my mixing container inside another larger container with ice water to prolong pot life. Either way in a few more weeks I shouldn’t have much more of an issue with heat.
ParticipantI’d recommend a space heater and thermometer for your garage. The epoxy that came with my kit was MAS LV w/ Slow Hardener.
look here for the manufactures FAQ https://masepoxies.com/faq/
Pay close attention to the MAS epoxy cure schedule on the FAQ, they do not recommend using the product in temperatures below 41°F and for every 18°F the temperature falls below 77°F, the pot life will double for the mixture.
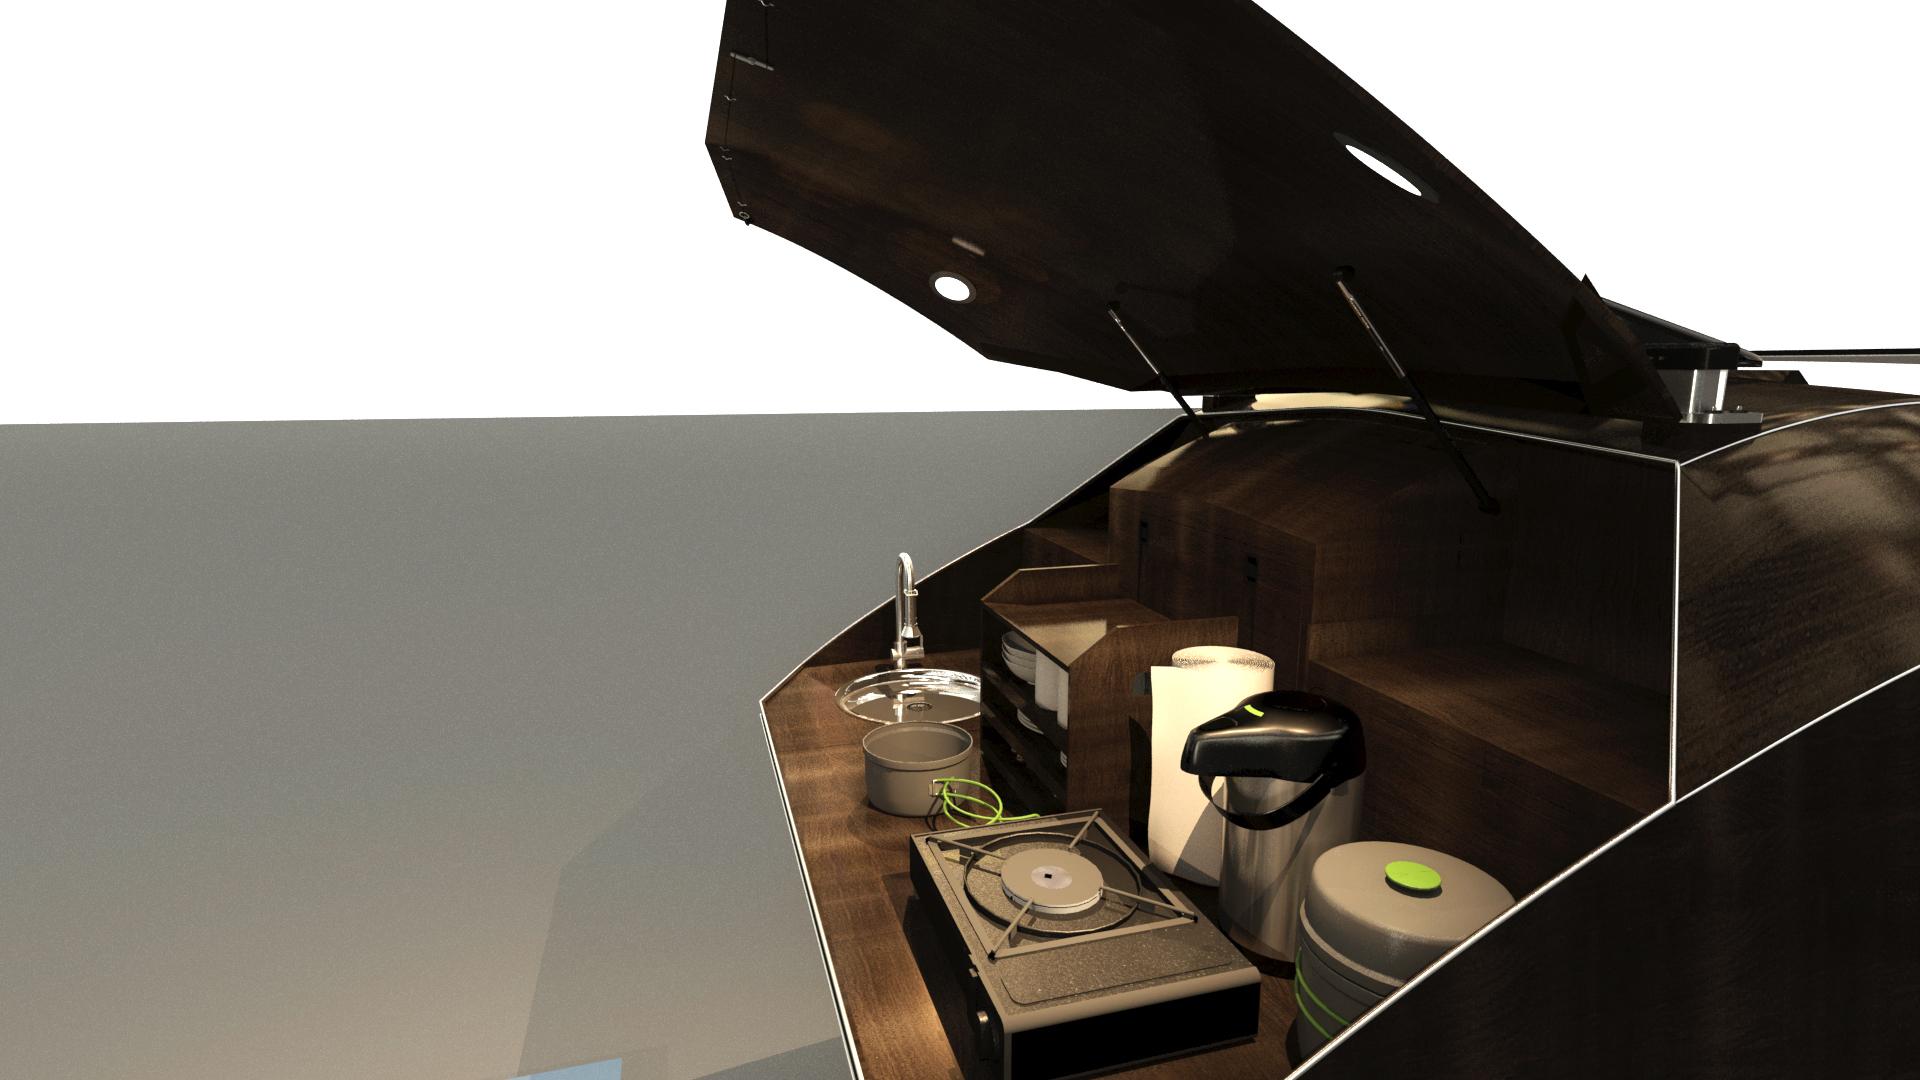
ParticipantI’ve done some 3D mock-ups (see image below) and plan to install two 12v 3″ LED pucks with 120 degree beam angle on the galley hatch on the left and right beveled surfaces midway, near the tapered ends of the hatch stiffener. This position seems to be the best for directing light into the galley space when the hatch is open.
You could power up your puck light and or light strip and hold it in place to find your ideal location. Keep in mind to avoid interfering with the galley seal & gutter as well as the galley module if you have one.
 Participant
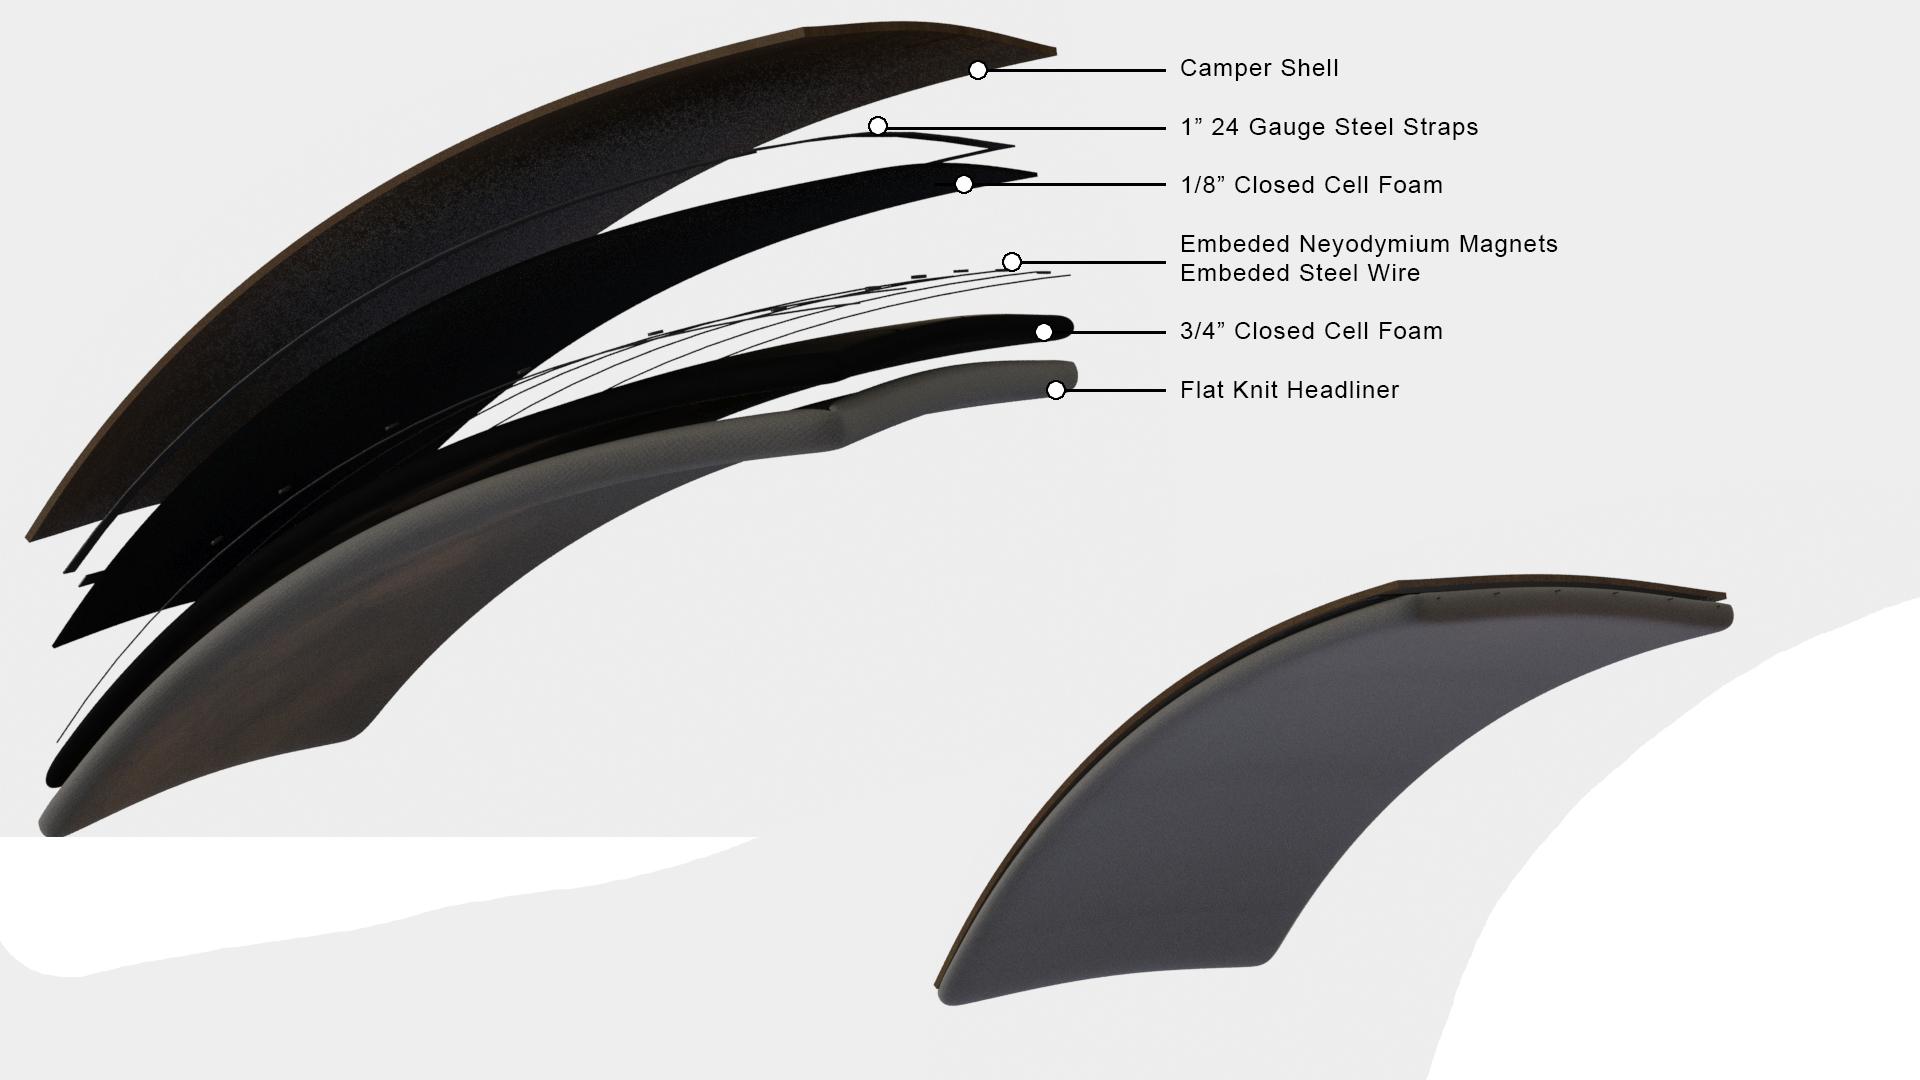
I’m not at this stage in construction yet, but here is my plan i’m considering for a removable headliner using magnets.
I will be cutting the panels from 3/4″ Closed Cell Neoprene foam. Inside the 3/4″ foam will be embedded steel wire to conform the shape of the headliner pieces to to the curve of the camper shell. Neodymium disc magnets will be embedded and glued in the foam around the border edges (size of magnets and their spacing will be calculated based on the final weight of each panel.)
The 3/4″ foam will be wrapped in a Flat Knit Automotive Headliner. An additional layer of 1/8″ foam backing cut 1/2″ under the outer dimensions of the 3/4″ foam panel will be glued to the thicker panel. This extra foam ensures no air gap caused by the wrapped headliner.
Finally on the inside of the camper shell I will permanently attach 1″ wide 24 gauge galvanized steel straps along all of the panel seams for the magnets to stick to.
 Participant
My first thought would be to use two quick release hinges like these.
Mount one side of the hinge to the vertical wall of the galley insert and the other 90deg to the galley floor. Rubber/felt pads under the module would be a good idea to avoid scuffing the galley floor moving it in and out.
ParticipantUnfortunately for a radiant barrier foil to work it requires an air gap on the inside. If you put the liner directly over the top of the foil it would become a conductor of heat and not help at all. The bubble wrap part of the barrier you used on the garage acts as an additional air gap for the outer most layer of foil making it more effective.
If you want additional insulation you could line the backs of the CLC TD liner pieces with closed-cell elastomeric foam. 3/4″ of elastomeric foam has an R-value of about 3. The foam will also help absorb sound.
-
AuthorPosts