Welcome to TeardropForum.com › Forums › Teardrop Builders’ Forum › Stained CLC Camper Build Progress
Tagged: @artisticadam
- This topic has 21 replies, 9 voices, and was last updated 3 years, 8 months ago by
ArtisticAdam.
-
AuthorPosts
-
October 12, 2017 at 1:15 pm #1376
ArtisticAdam
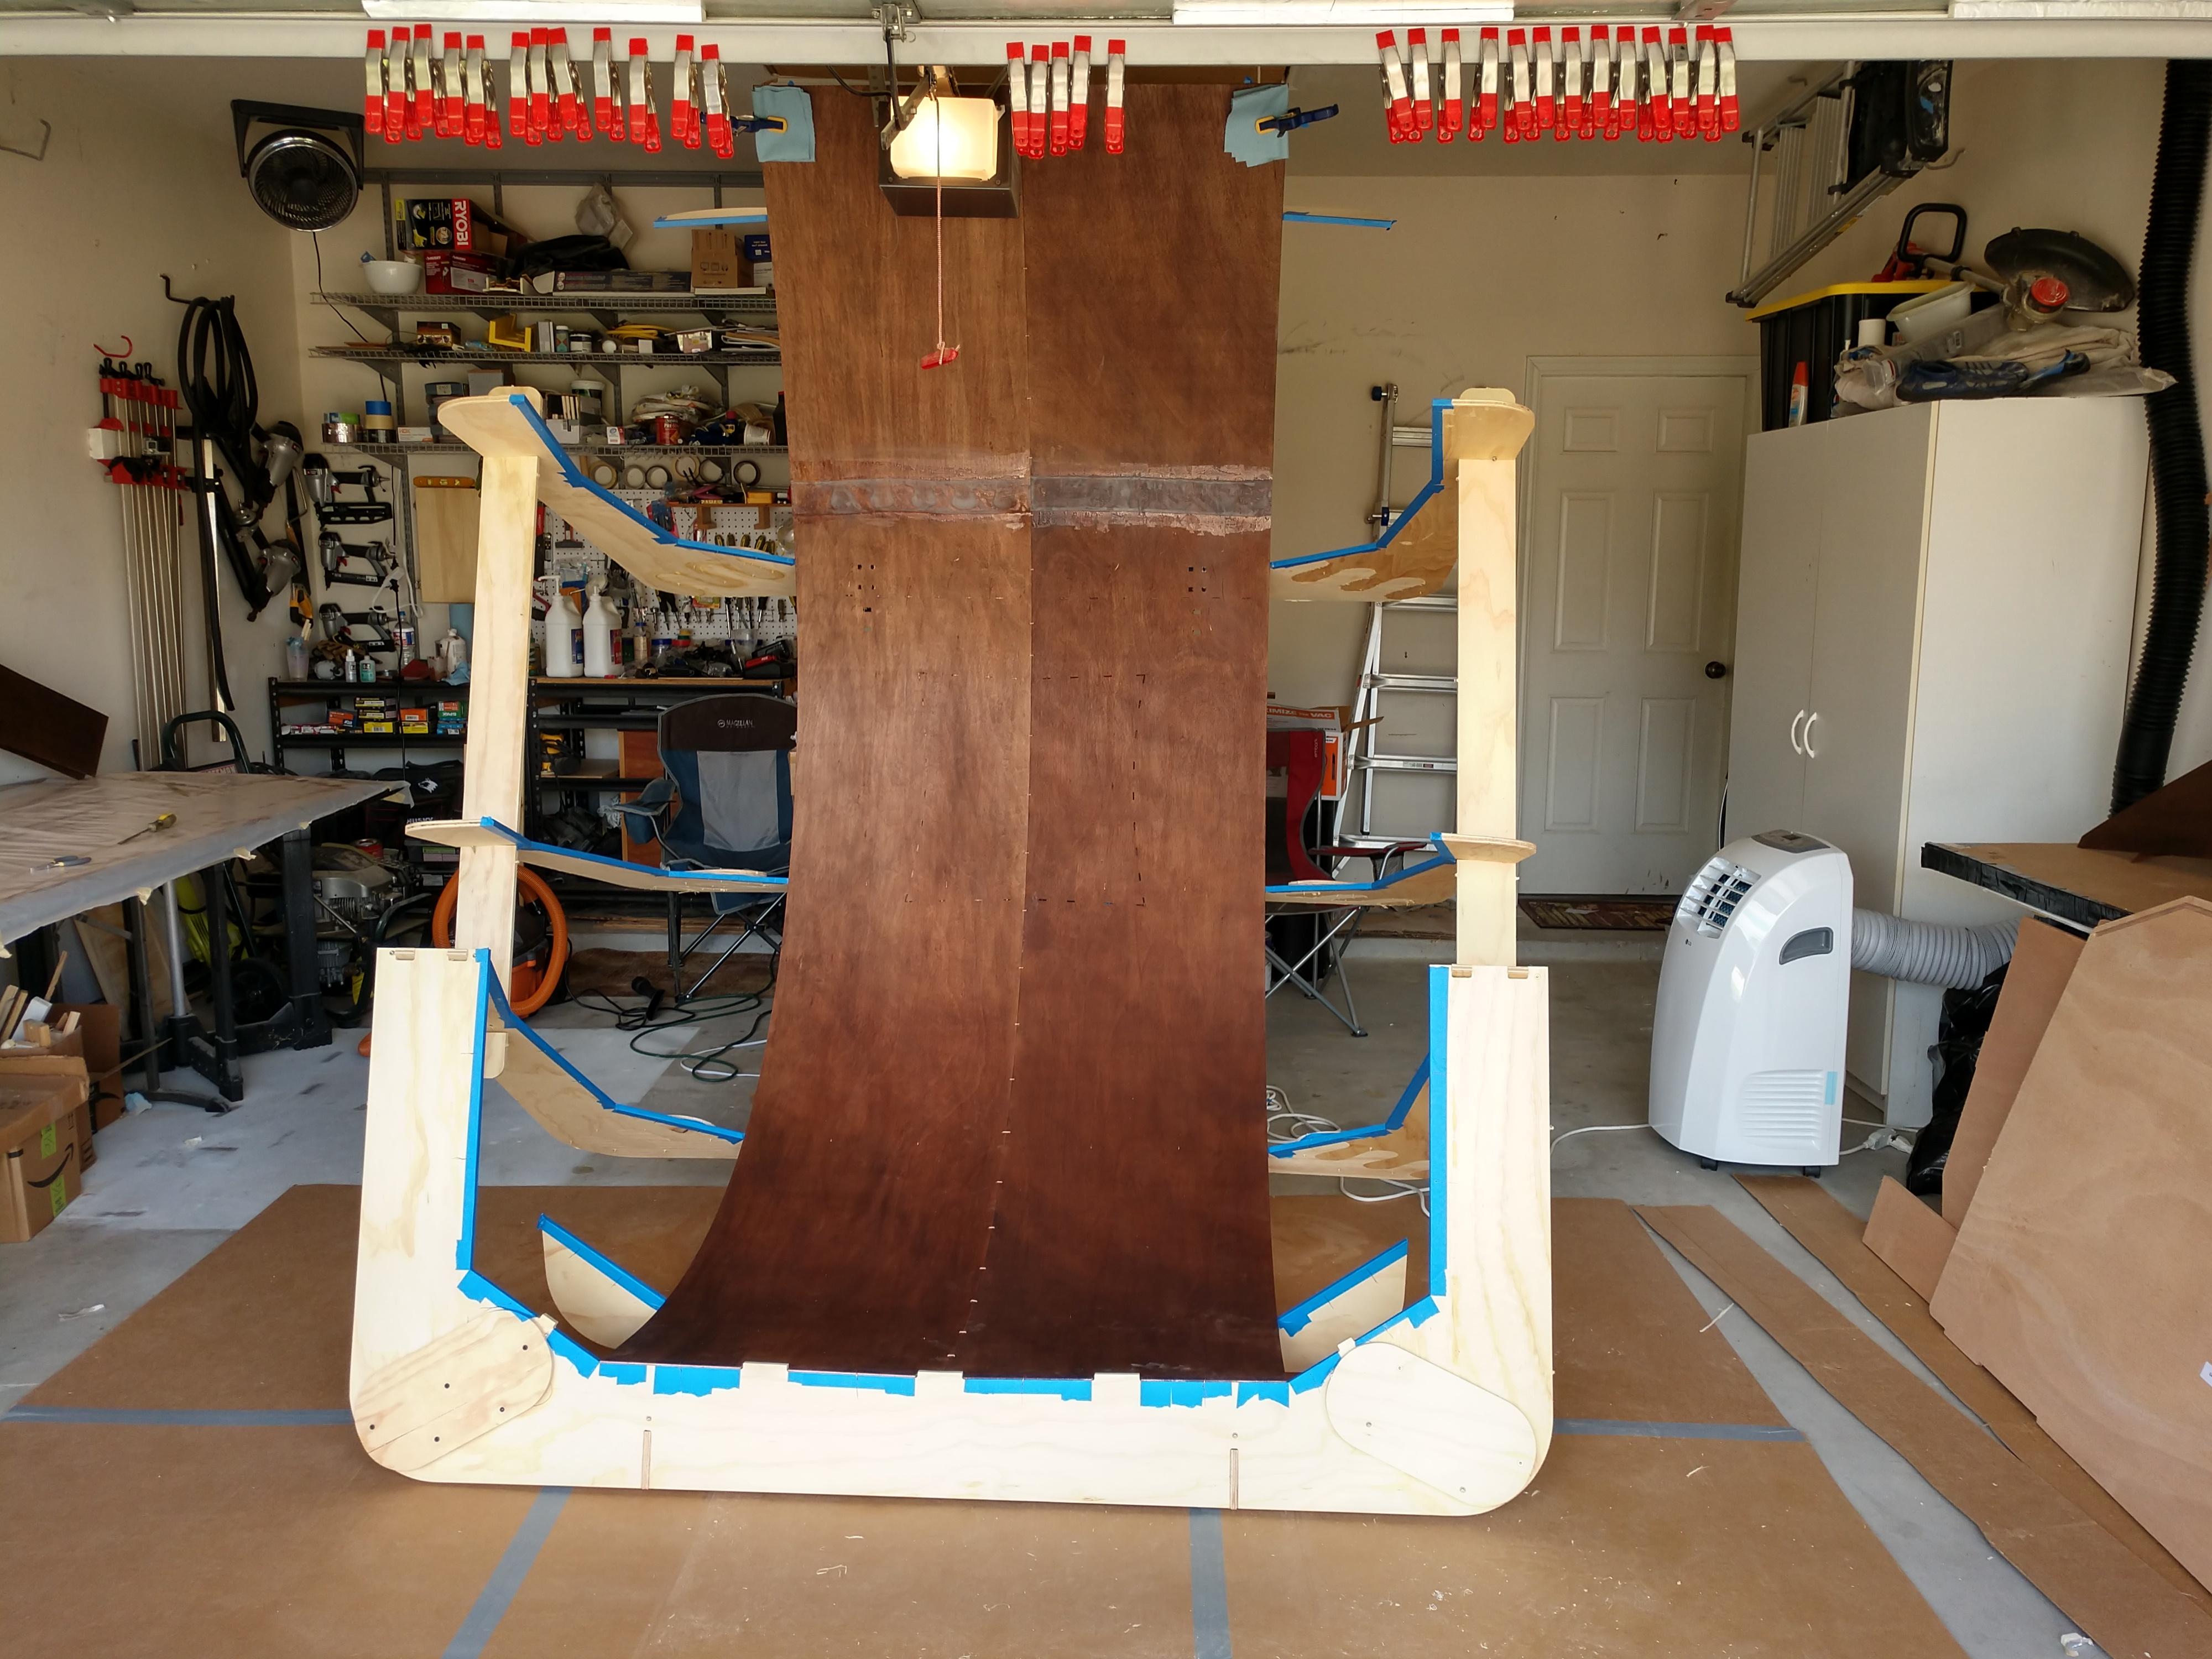
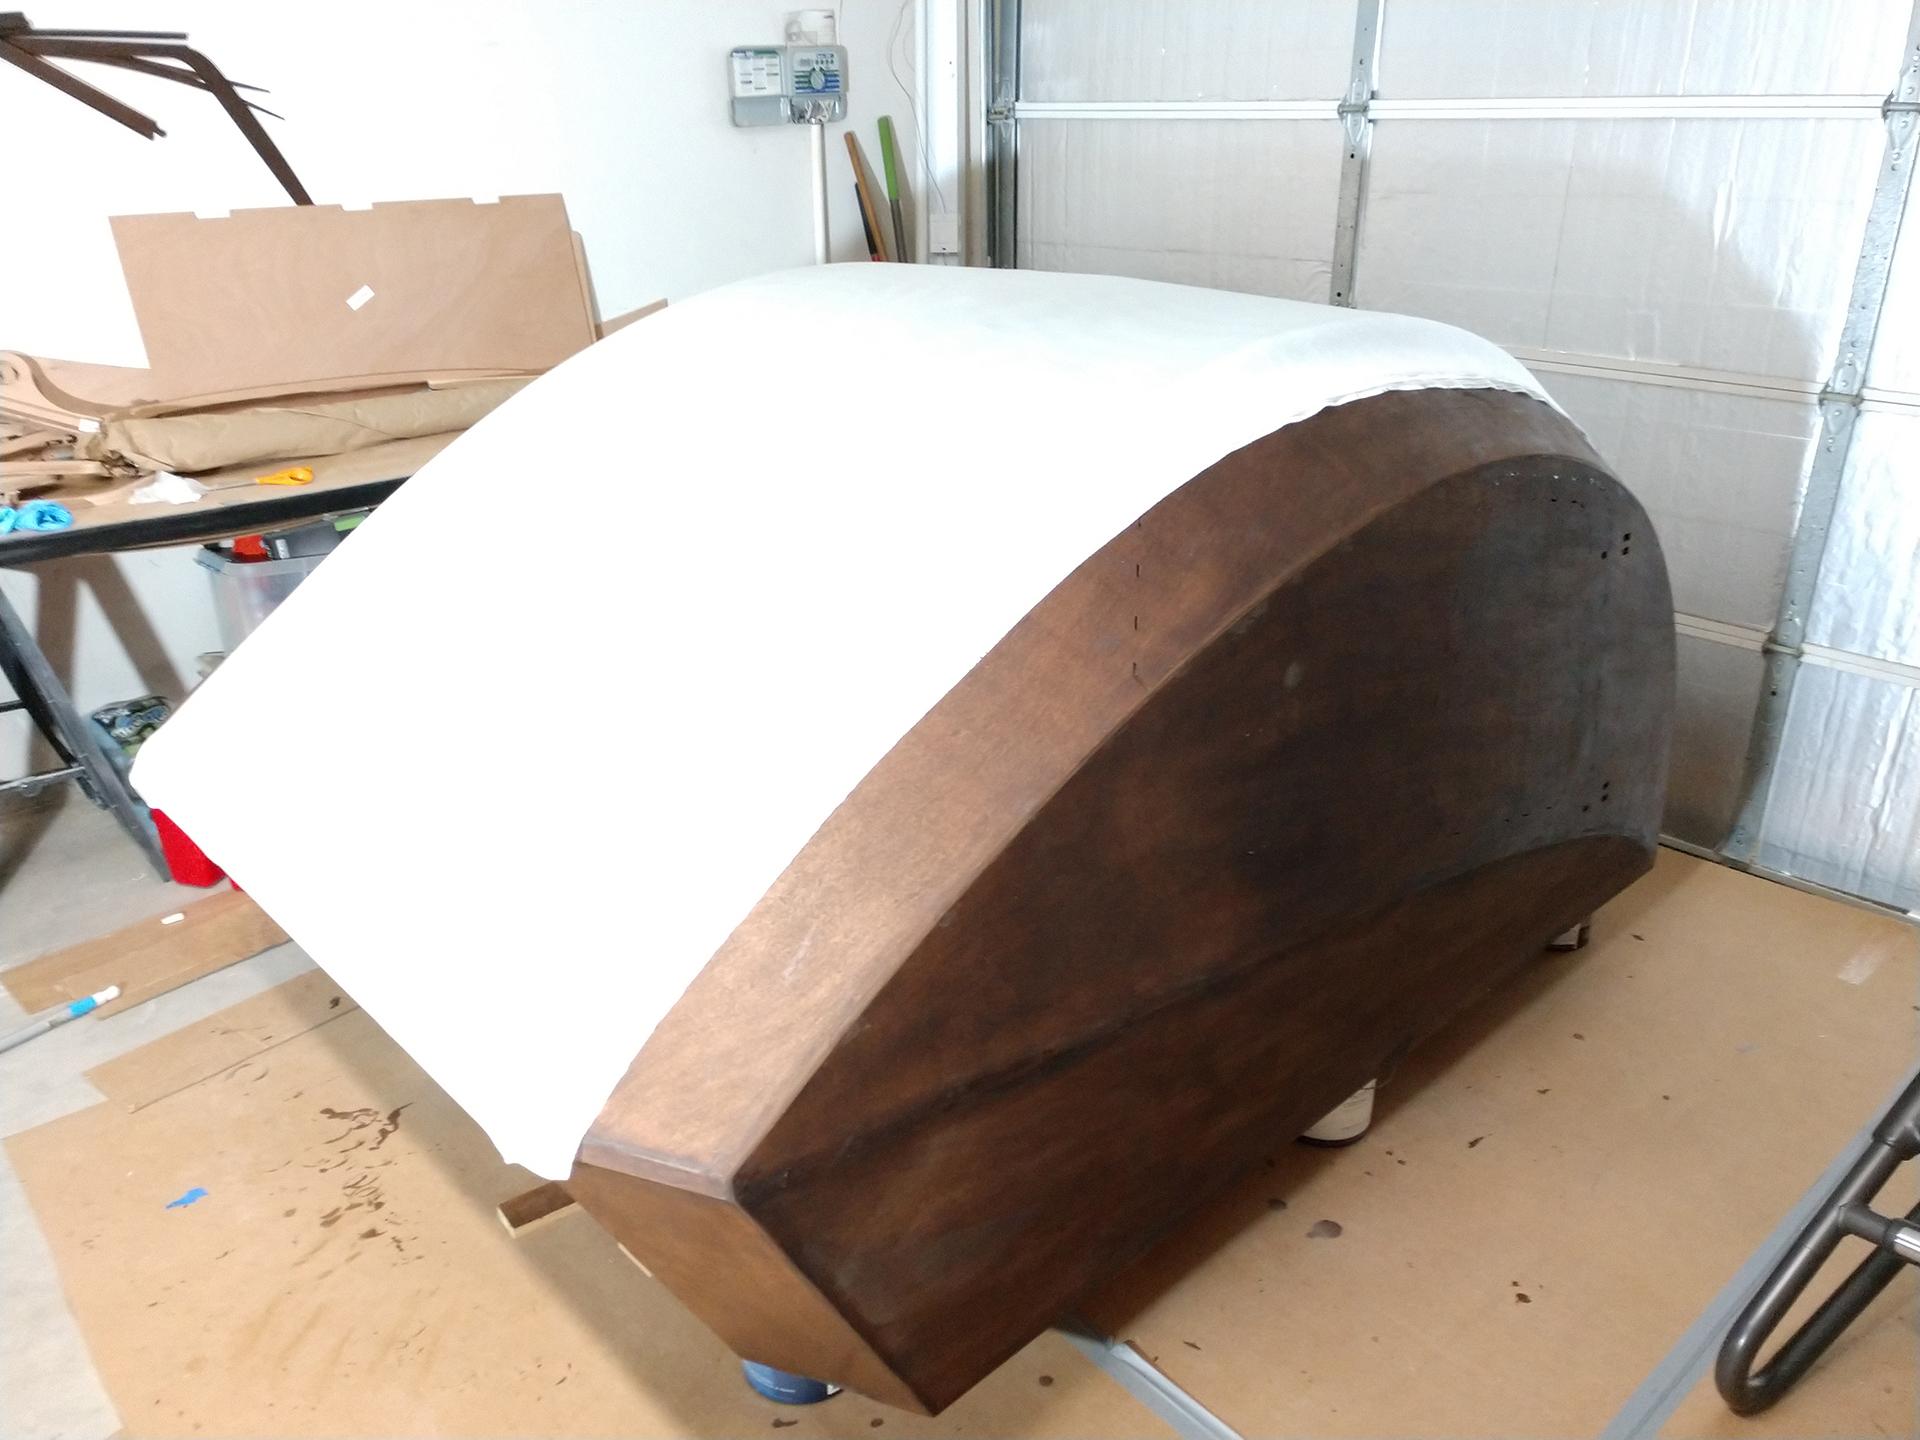
ParticipantI’ve finally made progress with my camper! It’s been slow going with the heat and humidity in Houston, TX. My first long strip of fiberglass got messy because the epoxy batch kicked in about 15 min in 85deg weather. Until it cools off a lot more I will stick to <4 ounce batches.
All pieces needed to be conditioned and stained prior to any epoxy work. I used the Hickory color Behlin Solar Lux dye and Minwax pre-stain conditioner. I’m also taking video of the process and will keep you all posted on the progress.
 October 12, 2017 at 7:53 pm #1382
faithie999
Participantif you keep the resin and hardener in your house, and dispense and mix it in the house, you might get a few more minutes out of it than if you start with the two parts at 85F.
October 13, 2017 at 12:34 pm #1383ParticipantThanks for the great idea faithie999. I may give that a try and start storing the resin in the house. I started mixing it while holding the container right in front of my portable AC to help cool it down too. I may even try putting my mixing container inside another larger container with ice water to prolong pot life. Either way in a few more weeks I shouldn’t have much more of an issue with heat.
October 15, 2017 at 7:01 pm #1389comccoy
ParticipantThat is what we did. Our townhouse has a 1st floor bathroom right inside from the garage we built in and the sink was relegated the last 4 months as our epoxy storage and pumping station. We also store the marine varnish/CA glue/etc in there and only took it to the garage as needed.
A few other heat related ideas as we built for weeks with it in the high 90s here:
- If your garage door is not insulated get some bubble wrap based radiant barrier rolls. We get full sun on a metal garage door for the hottest part of the Maryland day and this dropped our temperature by 10 degrees! I considered adding some foam boards with radiant barrier as well and only didn’t to save time as the extra weight likely would mean I needed the tension adjusted professionally. The weight of the double thick bubble wrap sandwiched between 2 radiant layers did not effect the garage door.
- Radiant barrier is good all year round so I plan to maintain it going forward regardless of the project.
- If you can get some air conditioning in your garage over night you can often to the epoxy etc early the next morning before the sun is in full effect. We cooled by leaving the door open in to the house and blowing air in with fans. From my memories of living in El Paso years ago, that might not be viable with Texas heat!
- Epoxy especially does not seem to need a super slow cure time so we would let the temperature come up after epoxy applications and often it was not tacky after 4-6 hours and in 12 we could even sand it.
- Make sure every place you can do the fiberglass/epoxy in multiple steps that you do it! We did the top/left side/right side in 3 steps over 3 days. This was great with maybe 3 bubbles! It fooled us in to thinking we had this. We did the bottom in one step, as the hymnal never mentioned splitting it up and we were naive. With the heat rushing the epoxy that was a HUGE mistake. In hind site we should have spread that bottom glassing over 2 days and it would have been MUCH better. Bubbles all over the butt block. Hours of grinding them out and filling them. Luckily this was the bottom and we painted it.
- The trickiest part we had was with marine varnish. It is supposed to be applied between 60-80 and even at 78 we has issues with being able to tip it. If we build another one (yes we had that much fun) we have talked about a supplemental AC just for the garage at that stage. We might end up having to get creative and put a unit on our balcony disguised as a planter with a disguised in/outlet running down due to our HOA!
Timing is critical. With the varnish we rushed on 3 coats with only scotch bright clean up between them to make our trip this weekend. No one noticed, but we did. As the temp drops over the next month or so, we have enough varnish and we plan to wet sand and do 2 more to get it more beautiful. Maybe 3…
October 16, 2017 at 11:12 am #1401ParticipantComccoy, thanks for the ideas. Its funny you mention insulating the garage. After 2 days of working in this heat I went out and picked up 1″ foil backed rigid foam to insulate the garage door which helped a little. I’ve also installed a portable AC which vents out to the soffit. You can see the AC unit on the right in the first photo of my previous post. I will need to install an inline duct fan on the extended exhaust pipe to help pull the hot air away from the AC unit. It currently only runs for a few minutes before it shuts off from over heating.
Until i can get it cooler in my garage I’ve been resorting to keeping the resin cool before use. I’m also only do small batches at a time (8 pumps or less) and bright an early in the morning. I hope to be working on the large glassing steps in the dead of winter where heat wont be an issue.
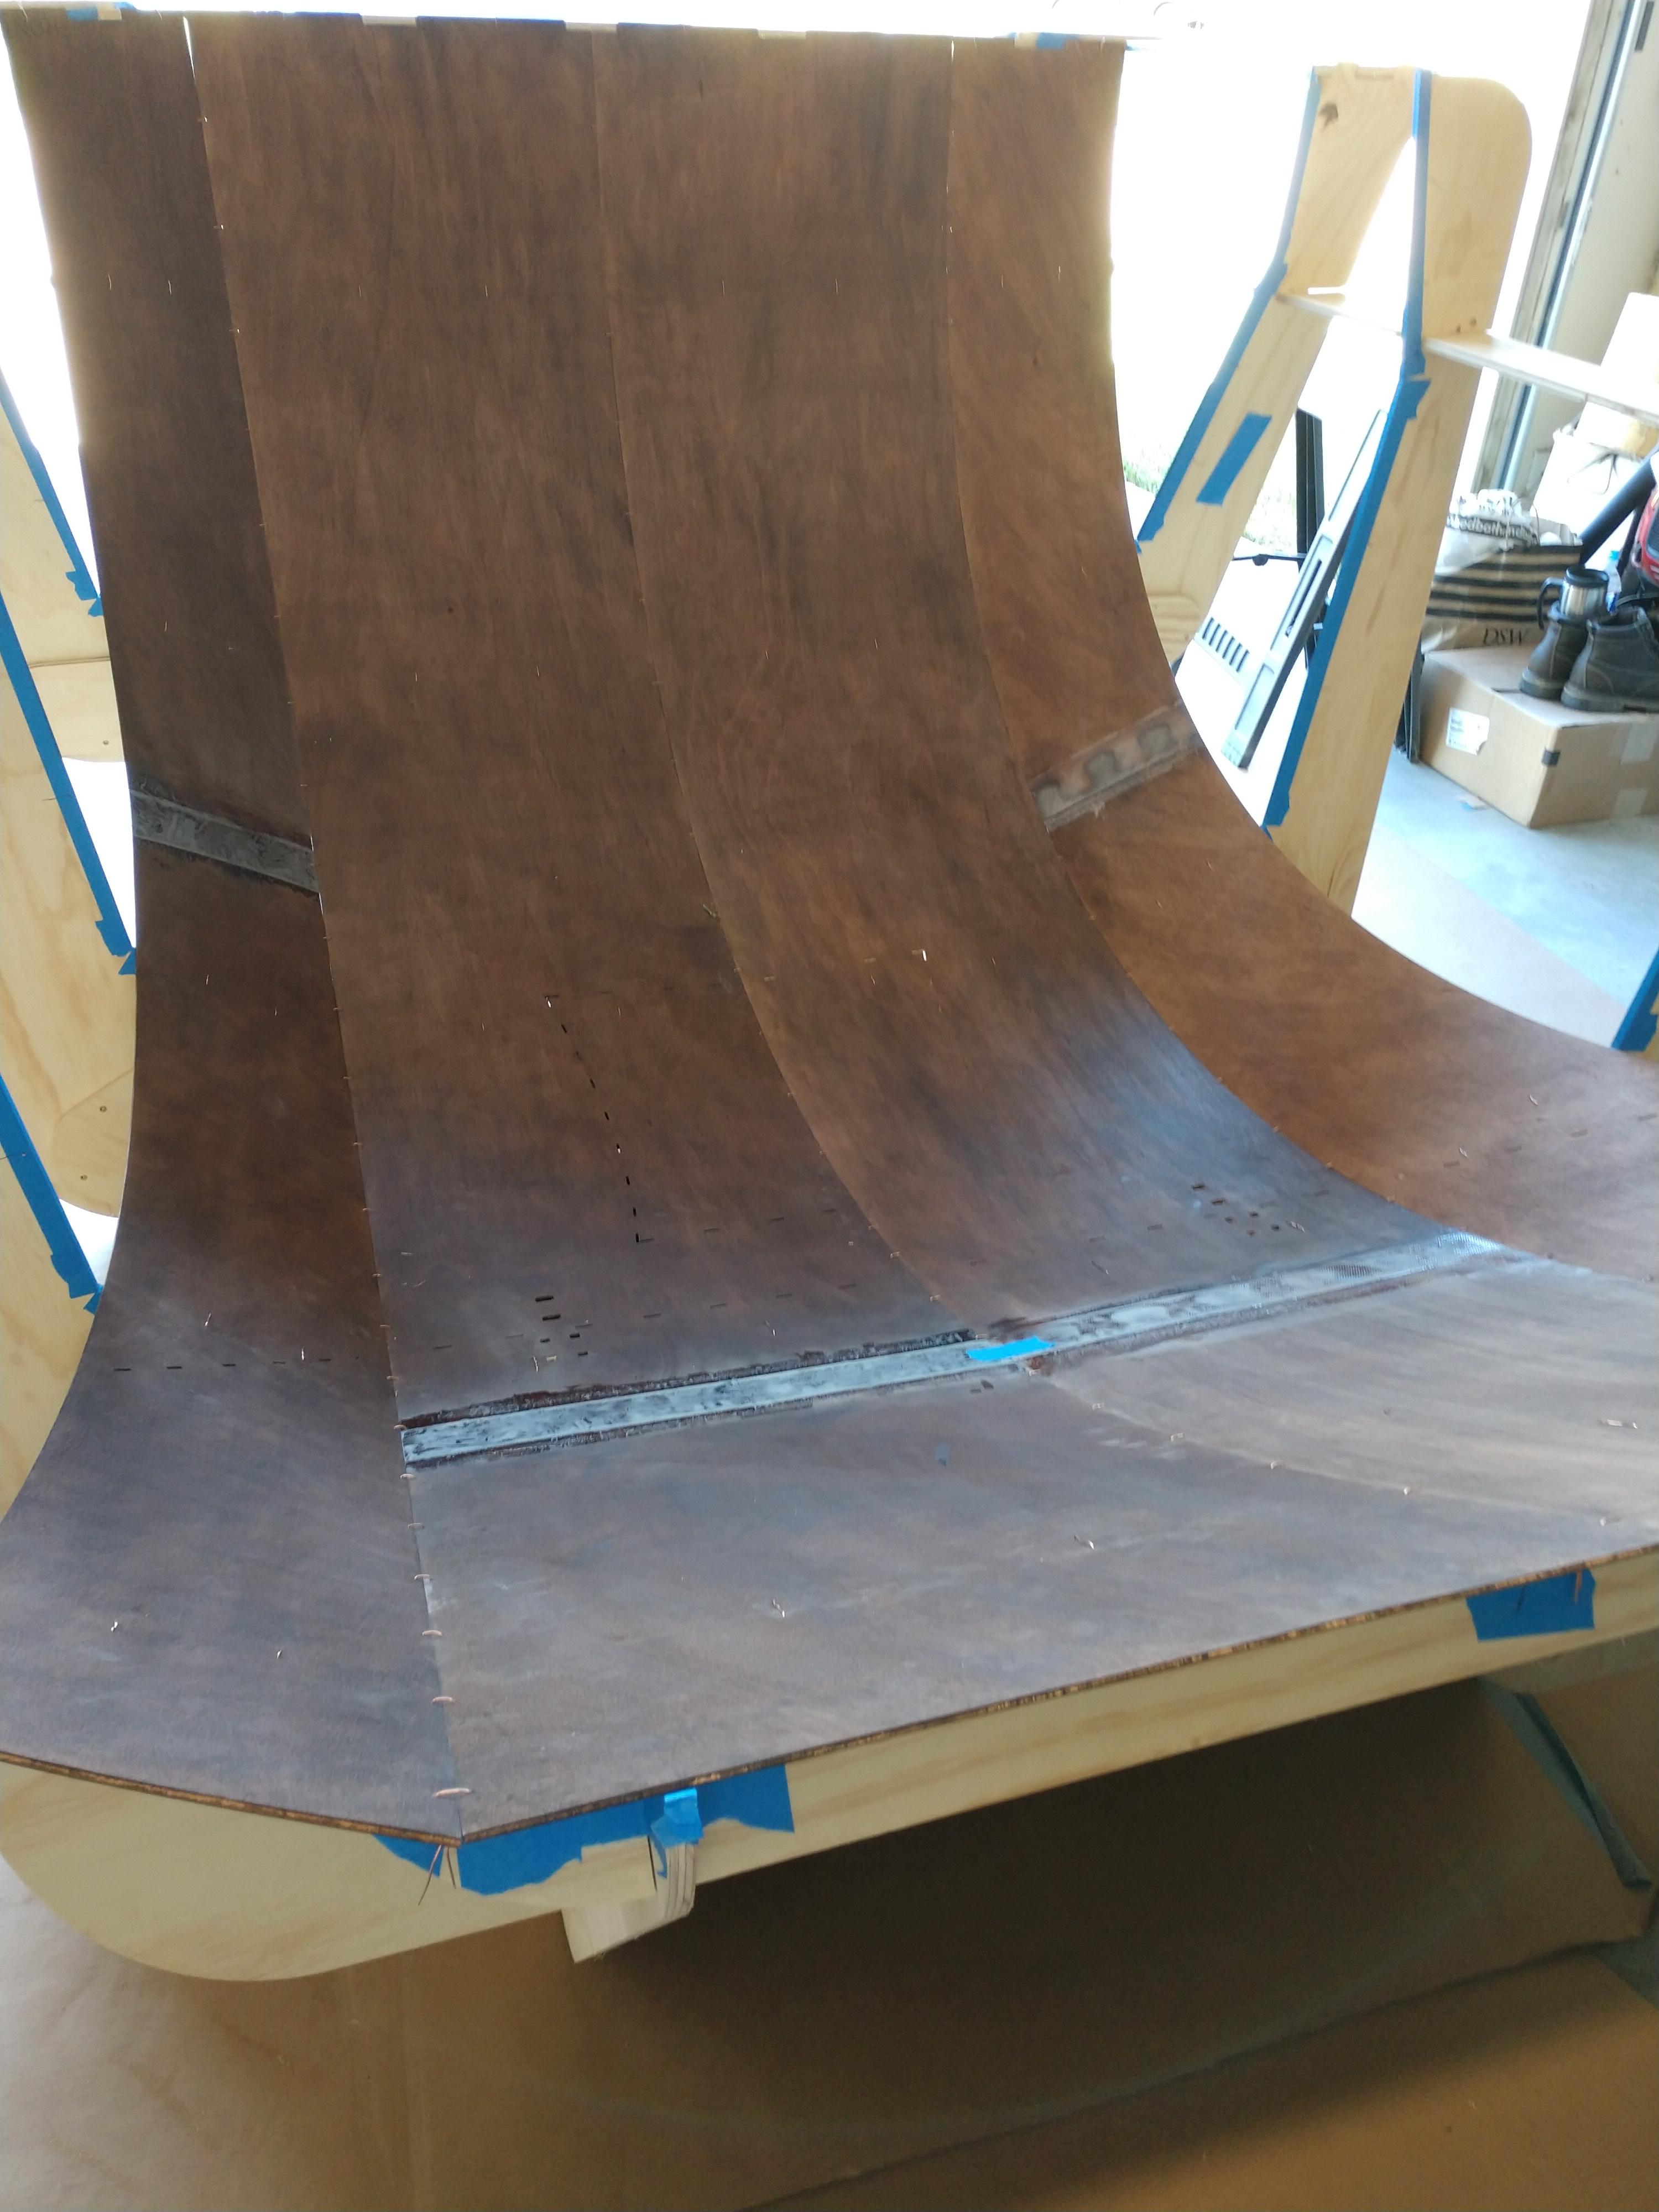
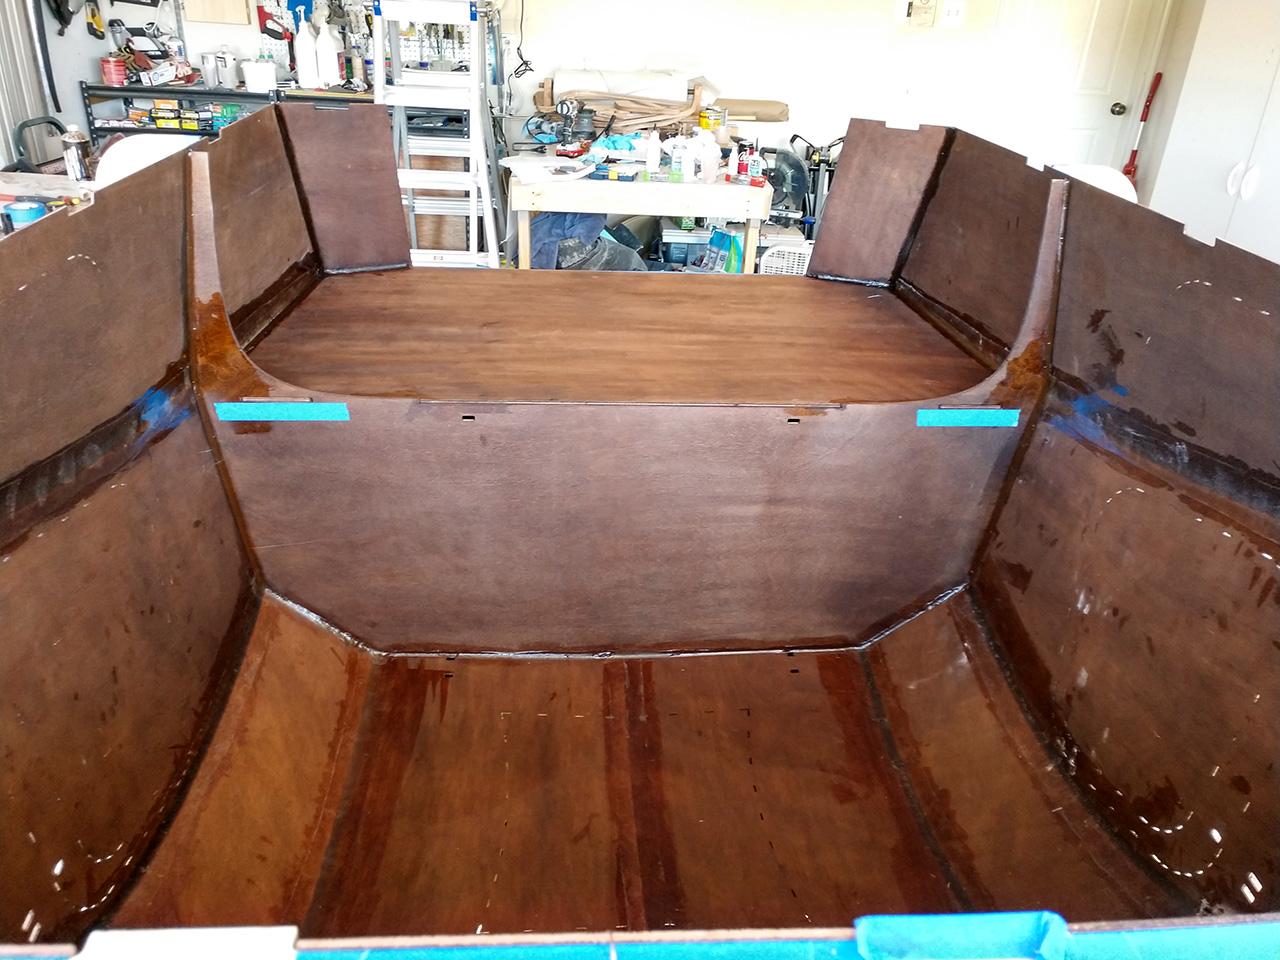
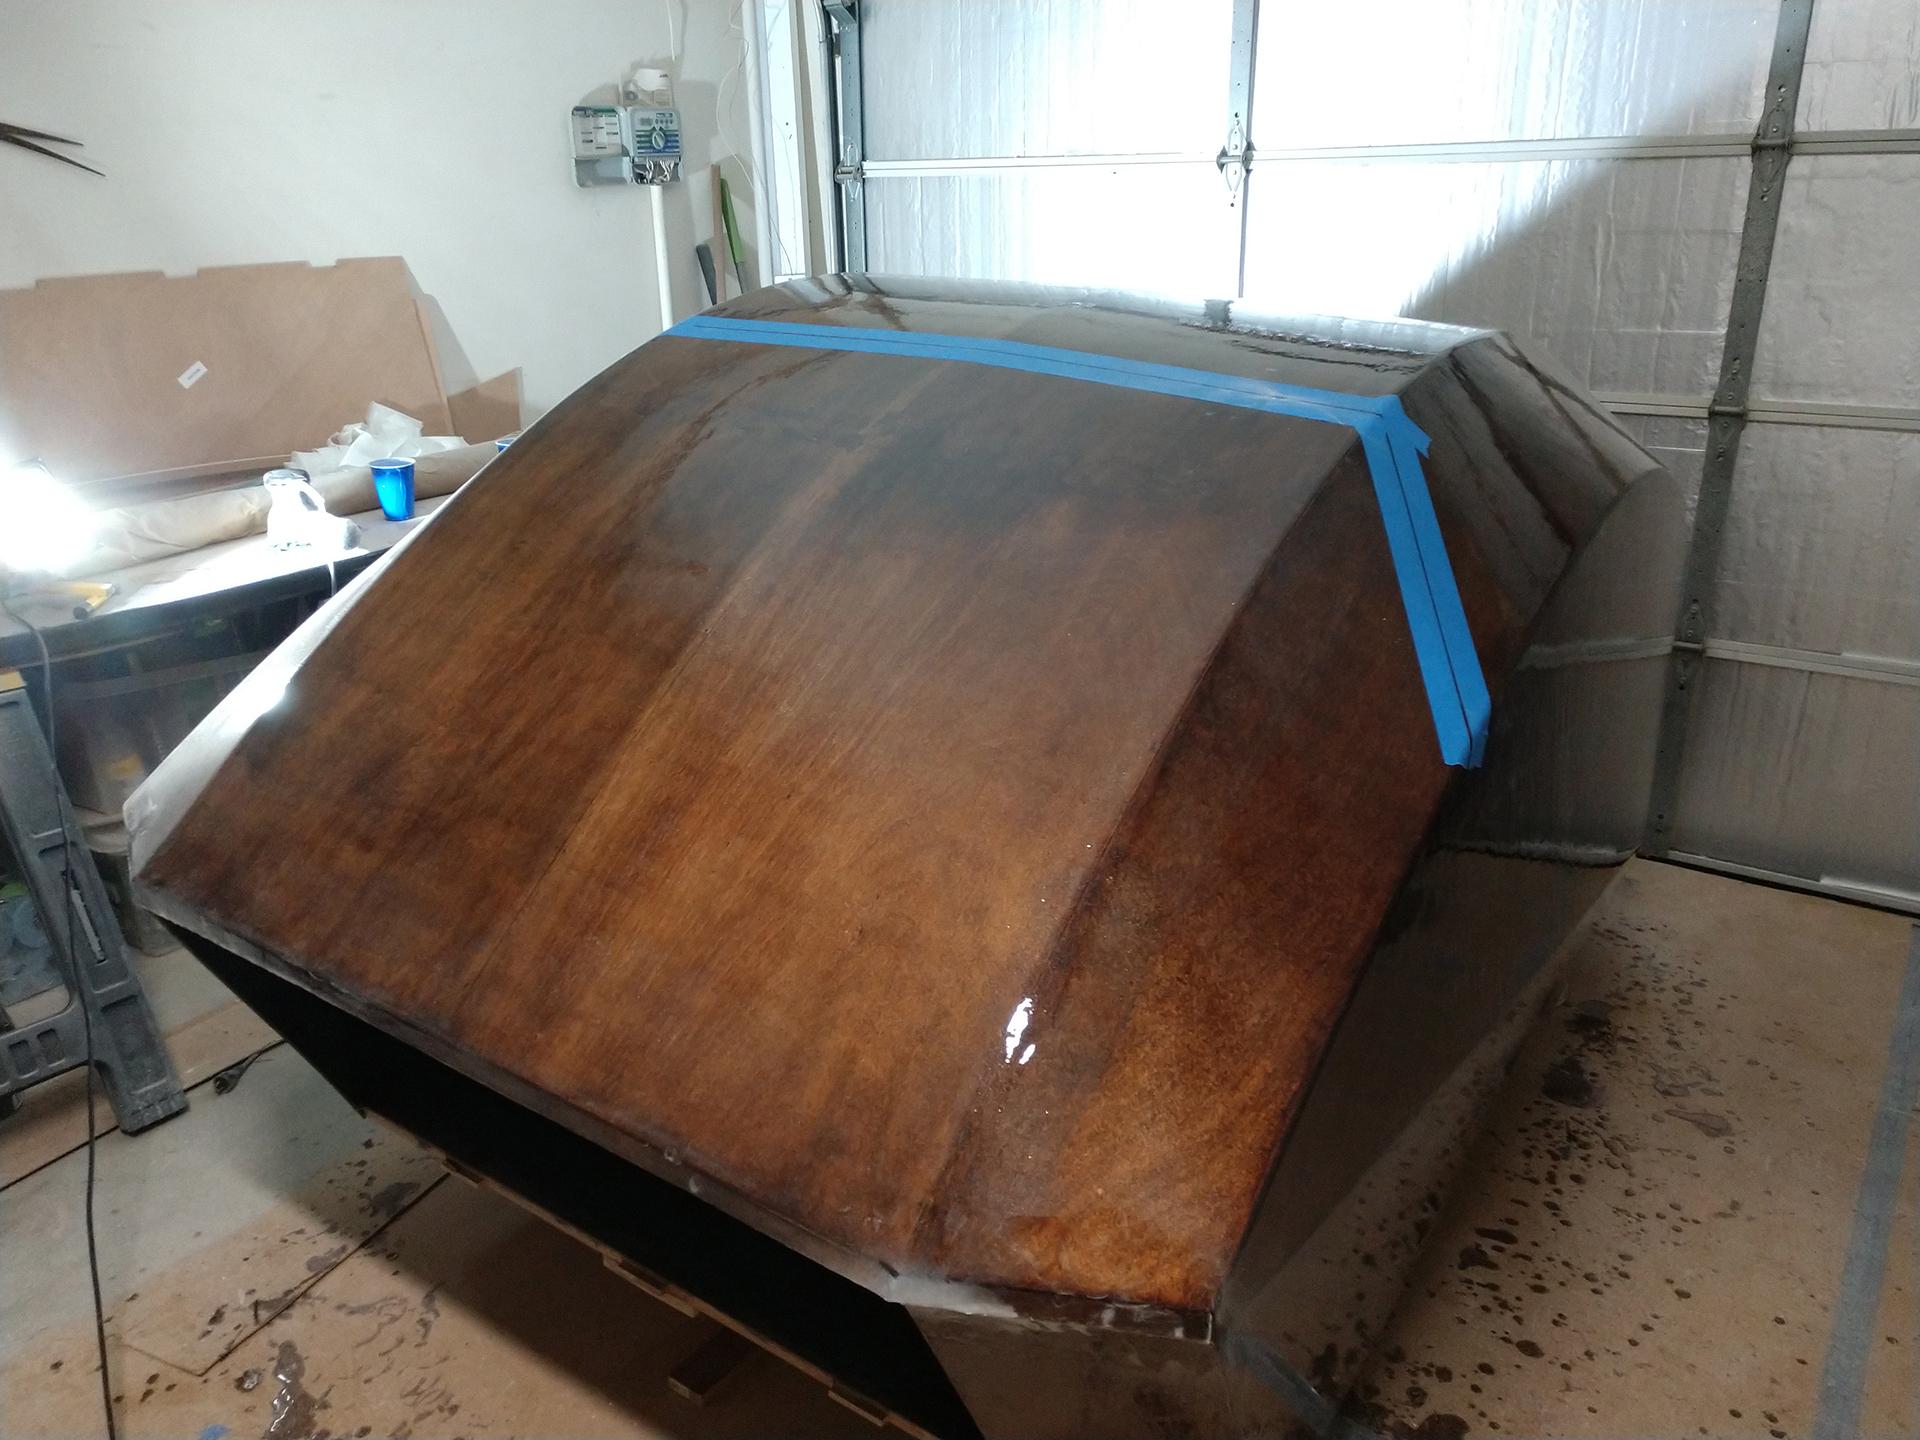
November 22, 2017 at 12:04 pm #1449ParticipantProgress update (Time Spent To Date ~50 hrs): It has finally cooled enough that I could make substantial progress. I’ve also been very successful with coloring the thickened epoxy for the fillets using the alcohol dye, and am very happy with the results. I’ve learned some lessons along the way that I should share, most of which revolve around minimizing additional sanding because I’ve dyed my parts.
1) Do not use blue tape to label your parts if they are dyed, it will lift little fibers of wood when peeled off and will require touch-up. Obviously there are areas in the build that require masking so touch-up is inevitable.
2) Thoroughly sand parts before pre-stain and dye, pay close attention to areas that had stickers from CLC’s labeling process. The stickers they use leave a heavy residue.
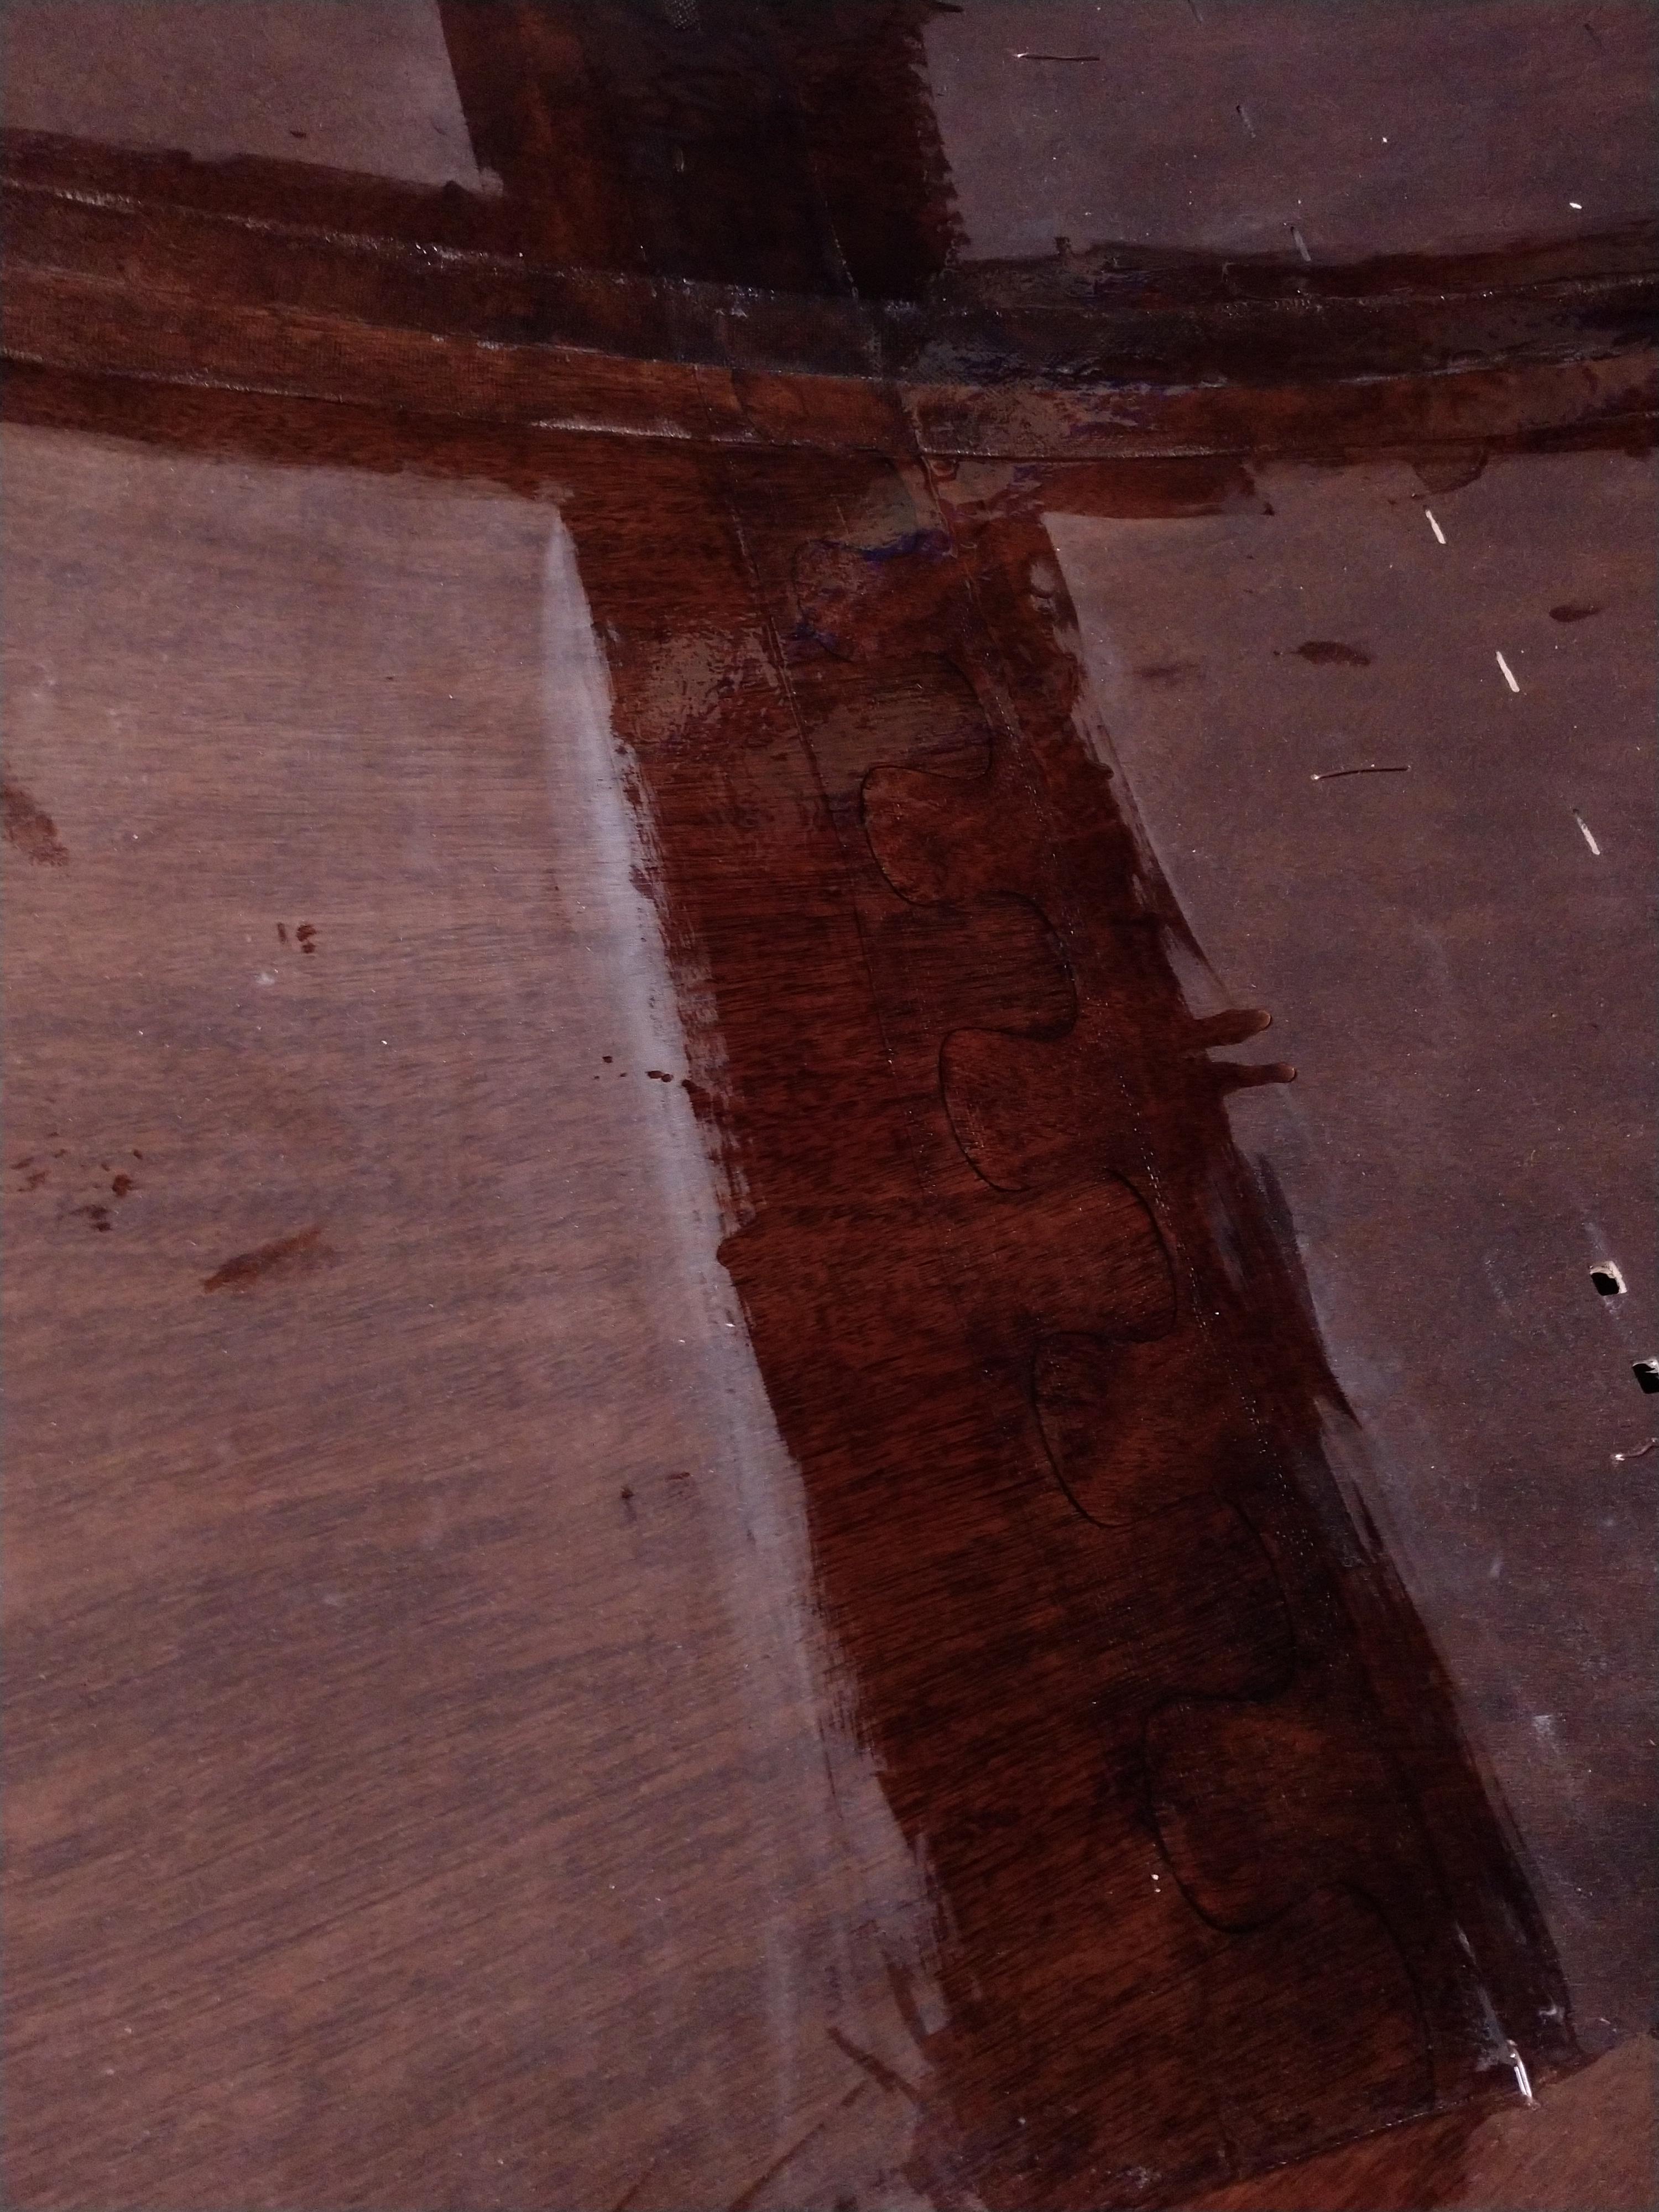
3) To minimize epoxy seeping through stitch holes and small gaps during panel glue-up use CA glue. The CA glue followed by the kicker will seal any gap or hole nicely. Failure to do this will result in bubbled up drips on the outside of the camper shell that will require sanding before the big glass job. I will need to buy another bottle of both CA and Kicker before the camper is finished.
4) The fiberglass ribbon supplied with the kit has one side that is thicker because of the weave. I trim this edge off carefully right before gluing it down which makes for a smoother application with less sanding in the future.
5) Be careful of vertical clearance when you flip the camper onto the transom side to do the bulkhead and galley hatch stiffener. I had room to do this in my garage but the garage door was opened during this process and hit the camper. Thankfully no damage done, but if it wasn’t propped up securely or aligned differently this could have been catastrophic.
Galley Flat: Now the galley flat was a little snug. I ended up sanding the side edge just a little bit and removed two frame stitches from either side of the shell to get it to slide down perfectly. I caution anyone during this step to be very careful with the snug fit and sliding it into place. I had some blow out of the veneer where I forced it a bit too much. Luckily the epoxy fillet covered this up.
You will also notice I’ve omitted the galley stiffeners. I’ve done this because I plan to double up the galley flat on the top side. Stiffeners will be added between the doubled up layers in more strategic positions to support my custom galley module and sink, as well as creating a cable chase for electrical and plumbing. (Added bonus of a nice flat galley bottom with extra foot room)
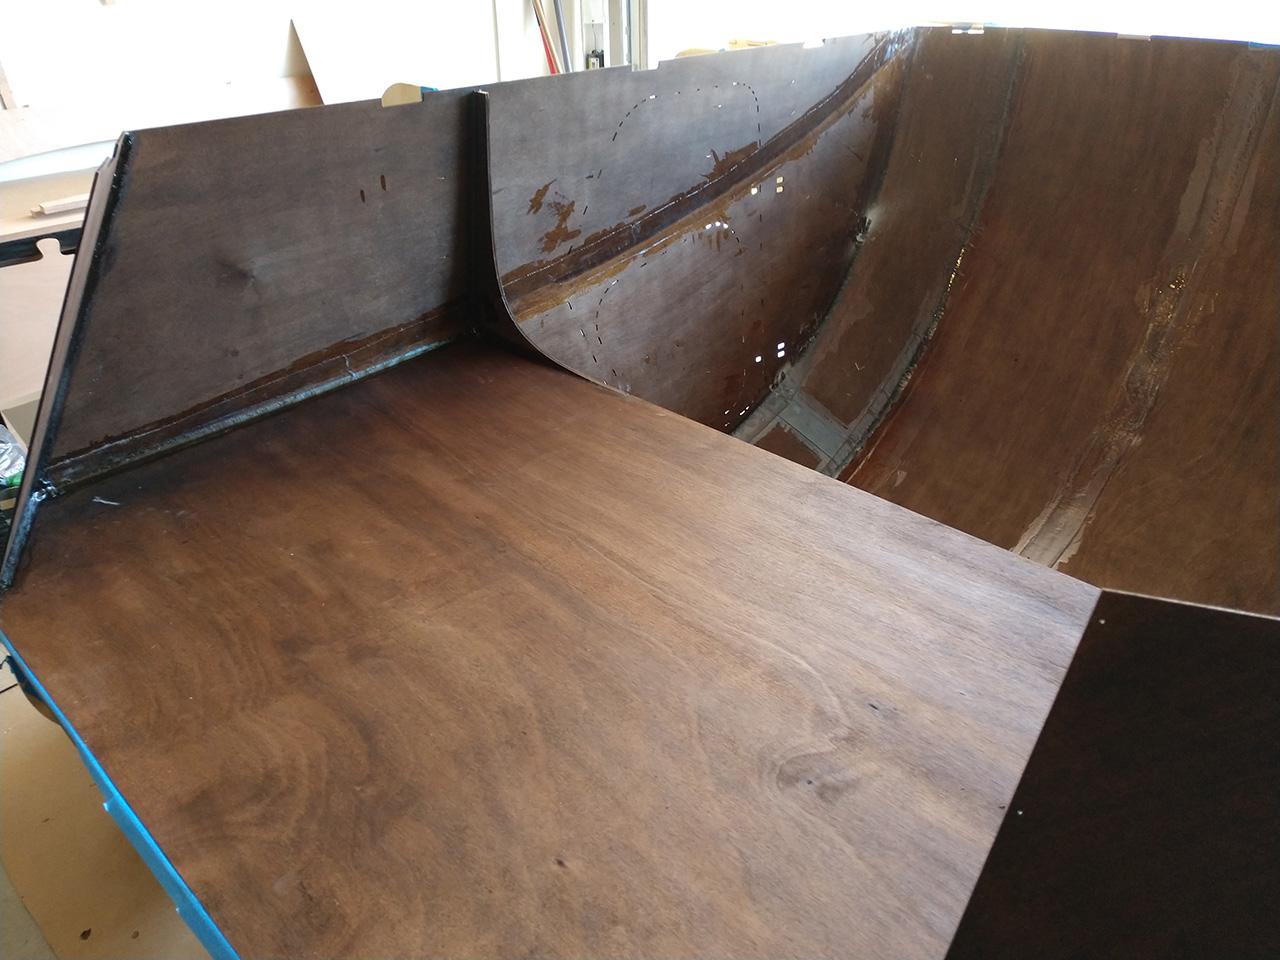
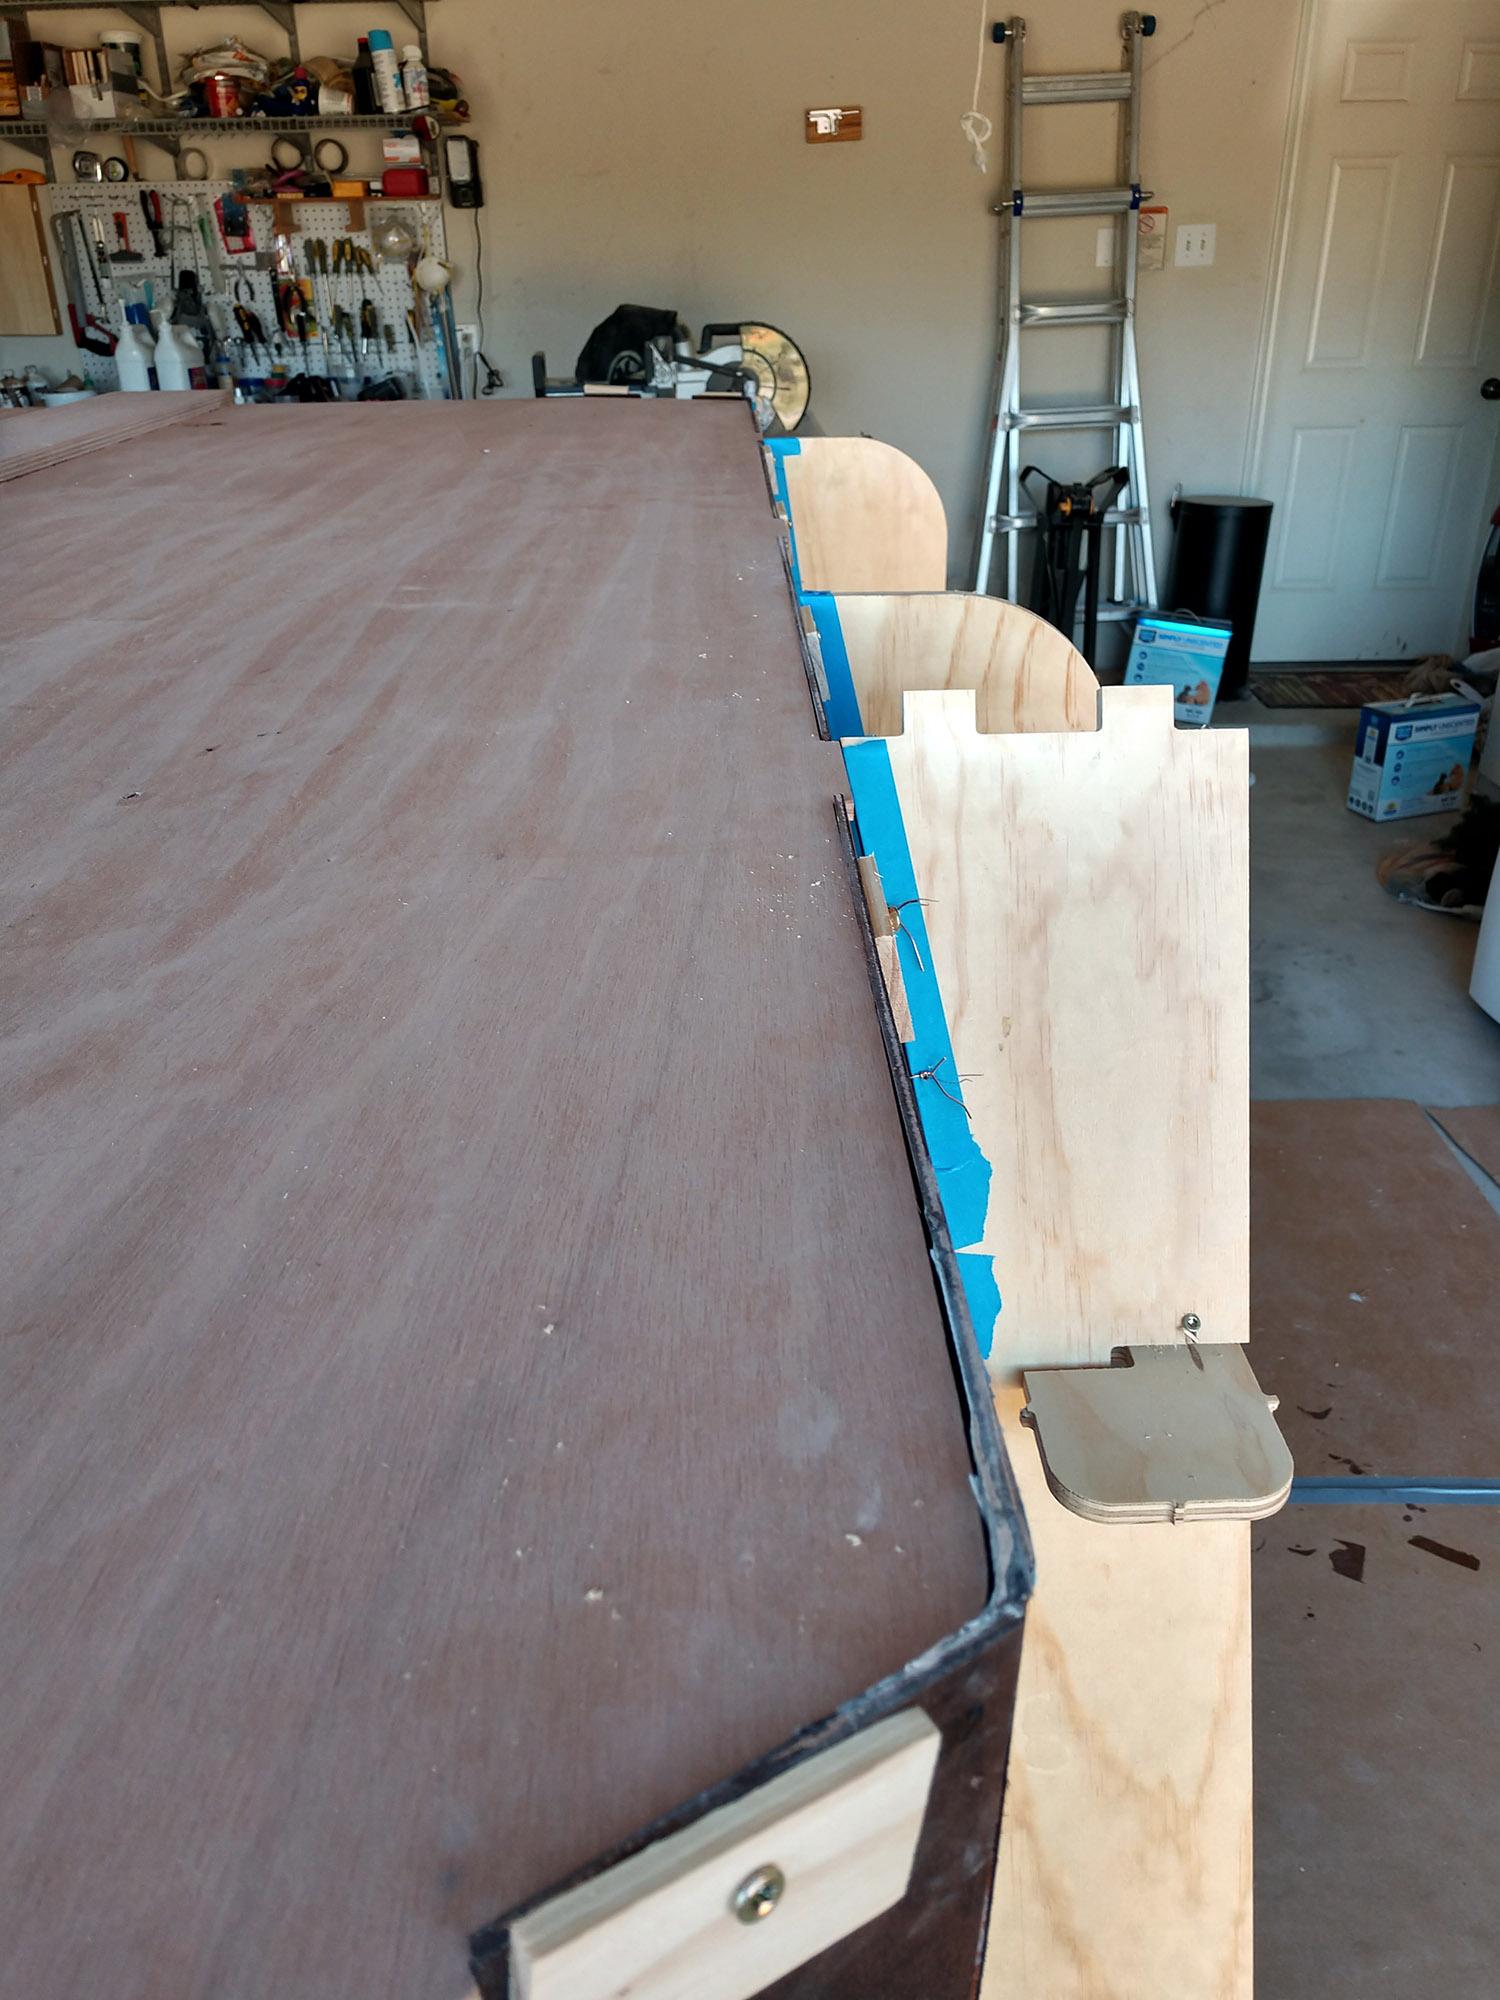
Transom Panels: The transom left and right panels are a bit tricky to stitch and glue. These panels have no frame support and the angles and geometry are very important for the hatch to line up and transom panel to fit later. For this process I stitched the panels as instructed but also stitched the middle transom panel in temporarily until the fillets cured. This helped me align the panels and ensure the space between them fits the middle transom panel perfectly later on.
 January 8, 2018 at 1:10 pm #1560Participant
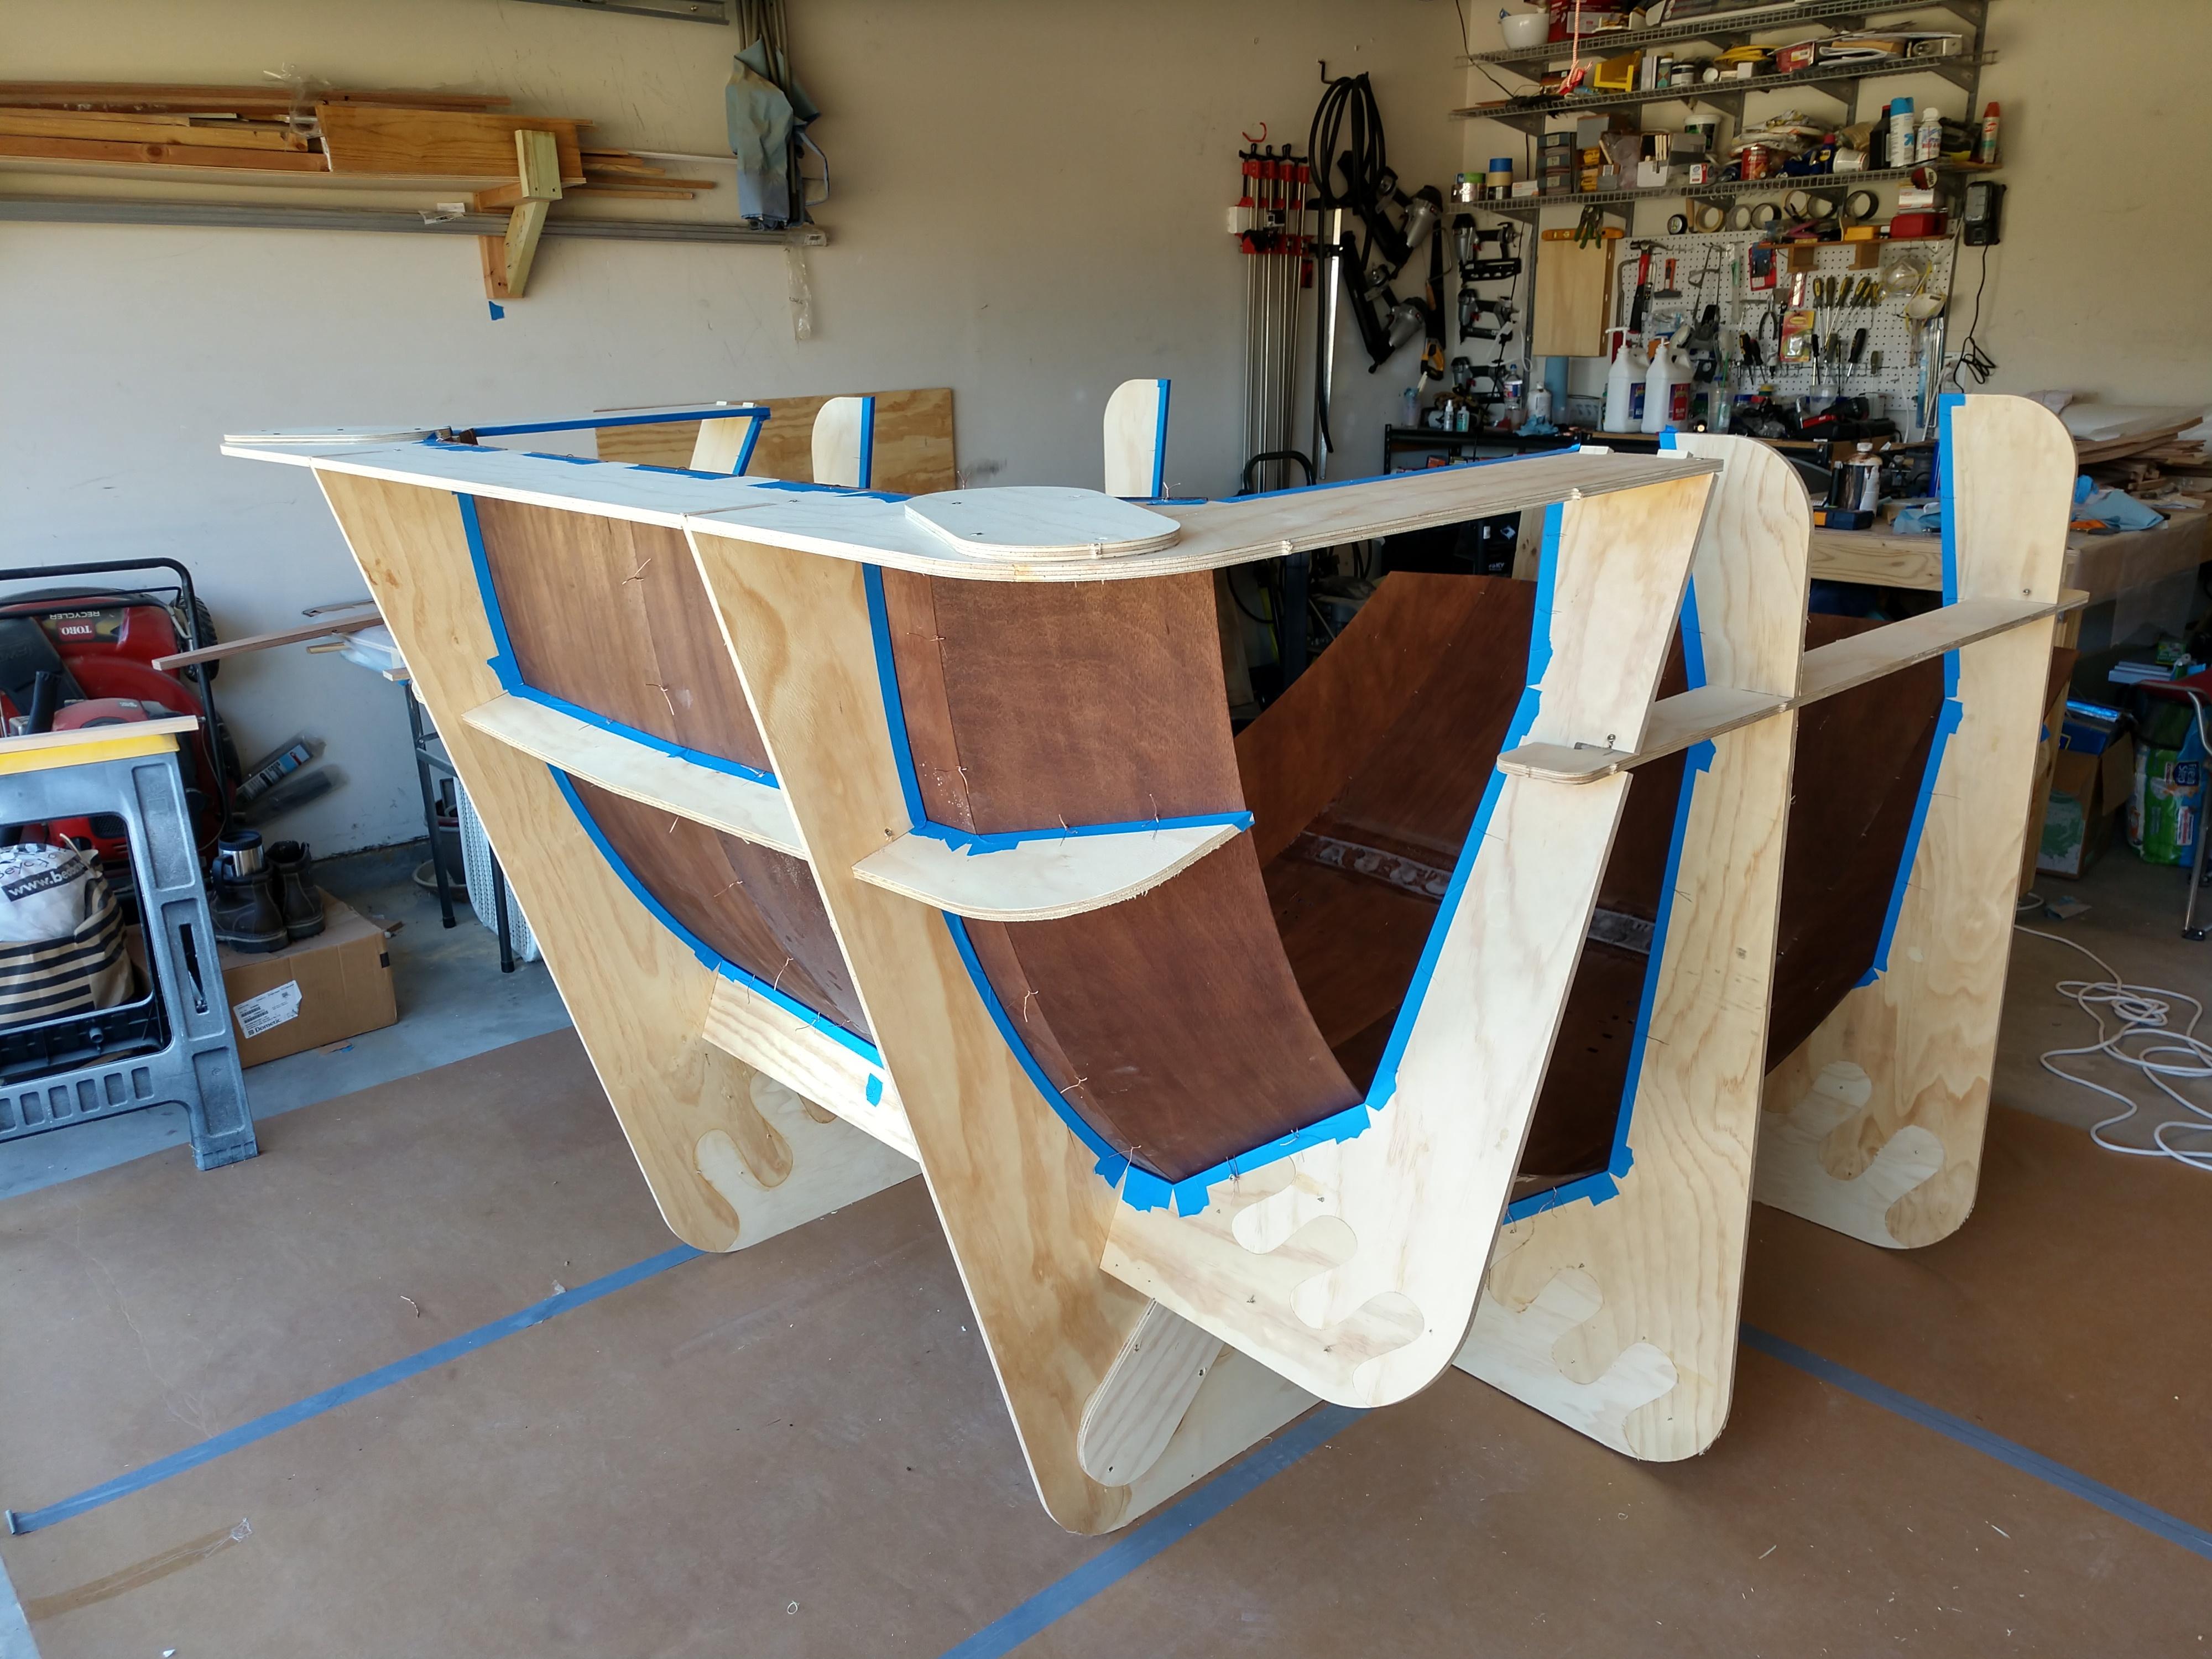
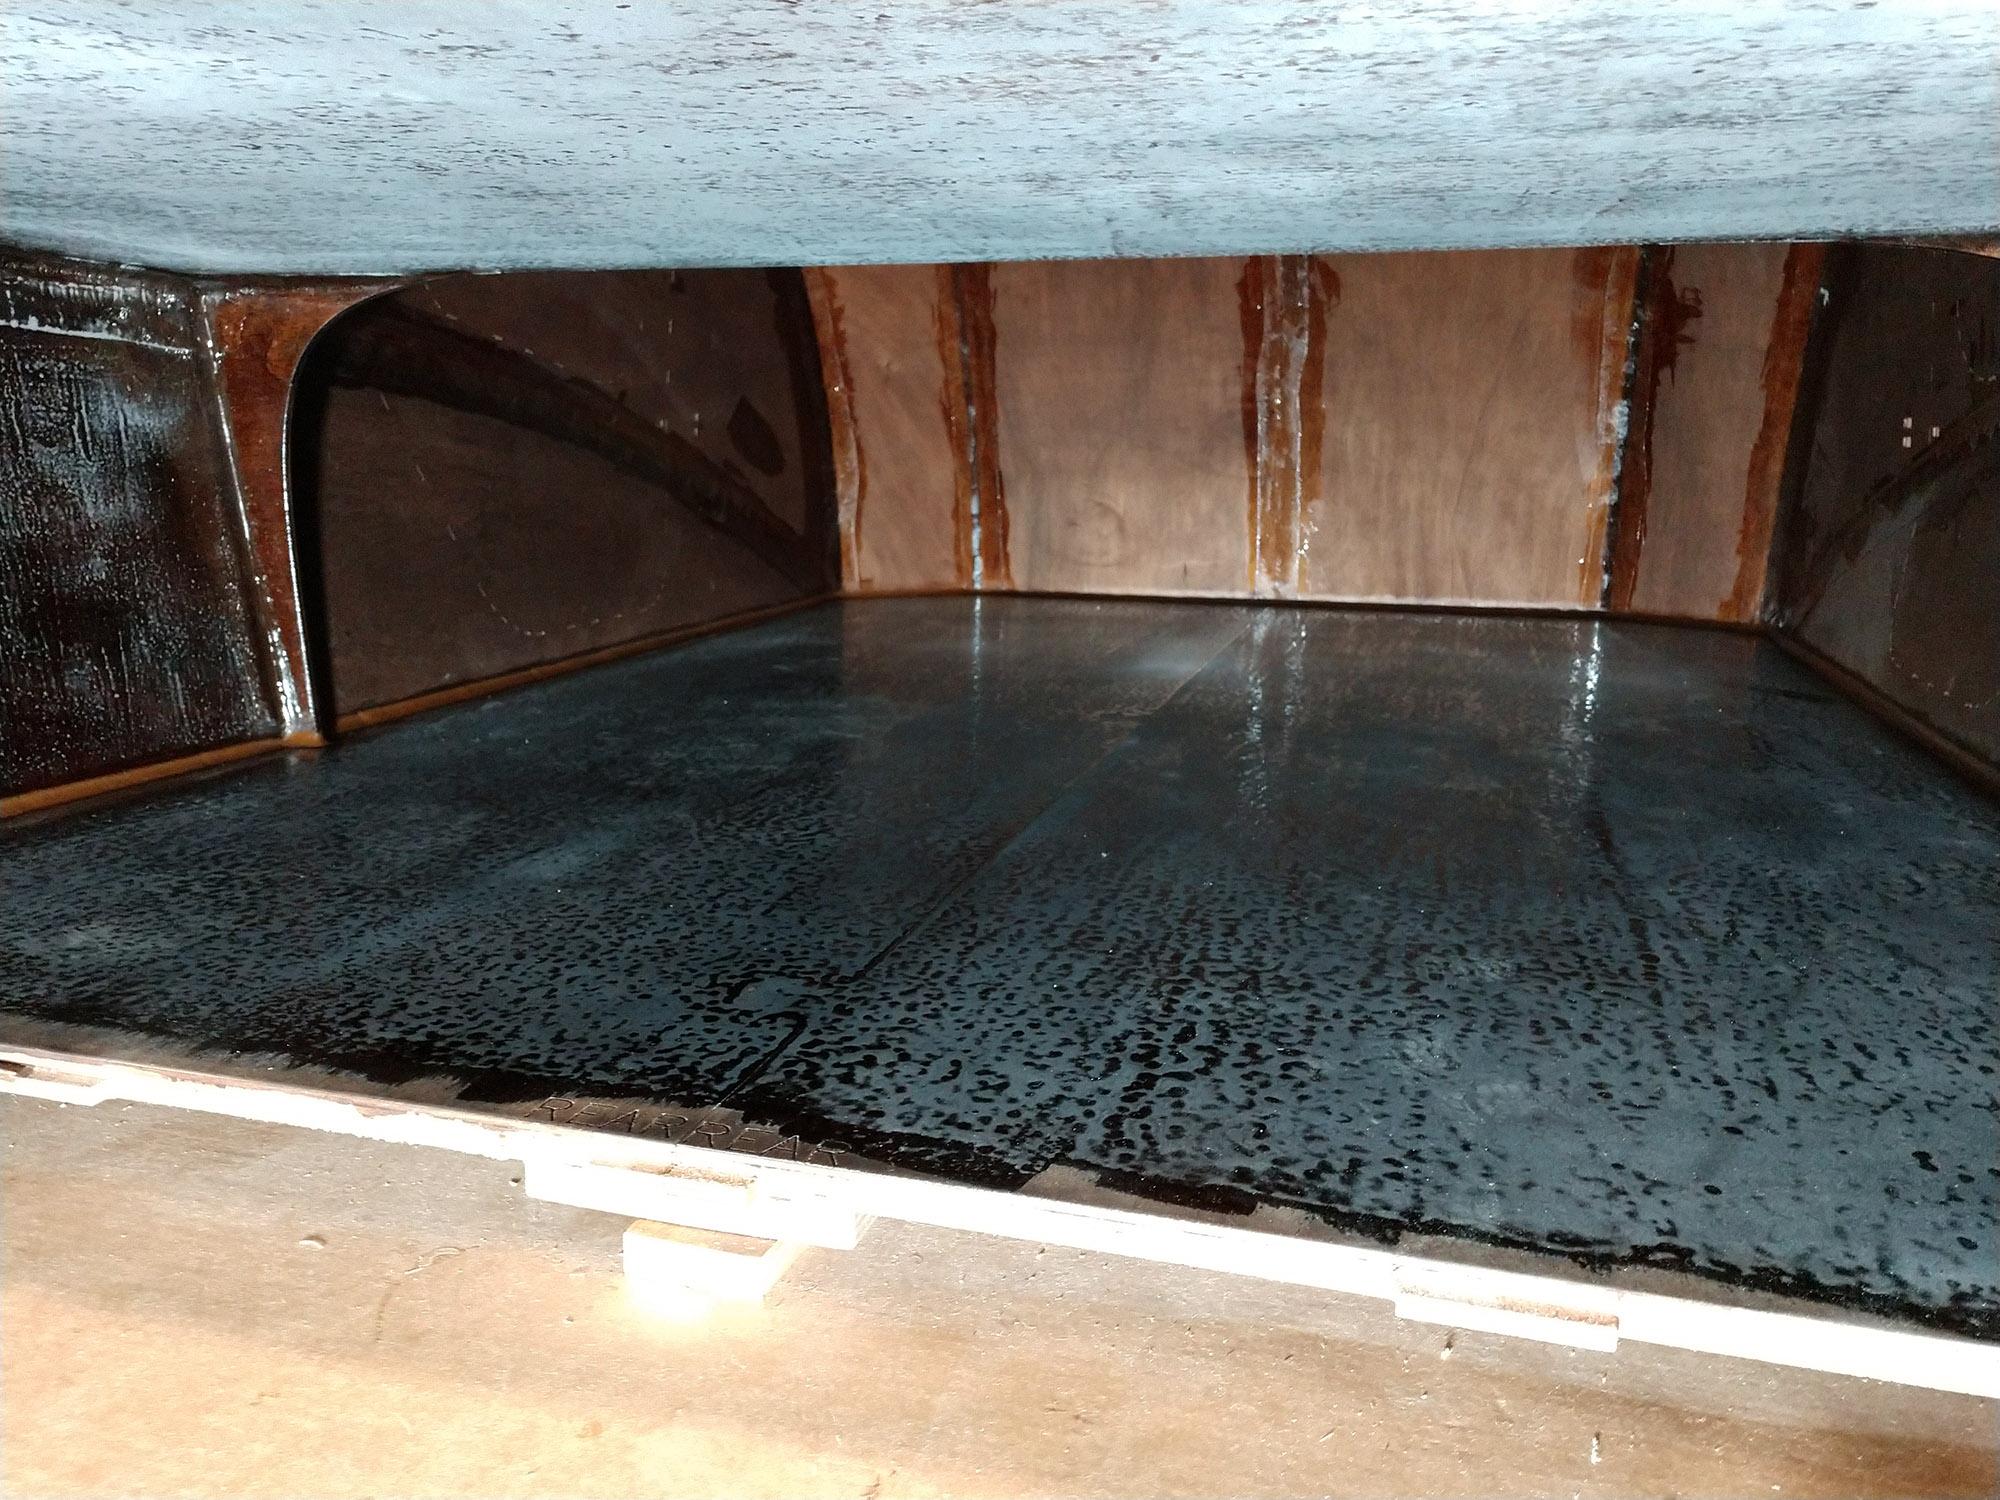
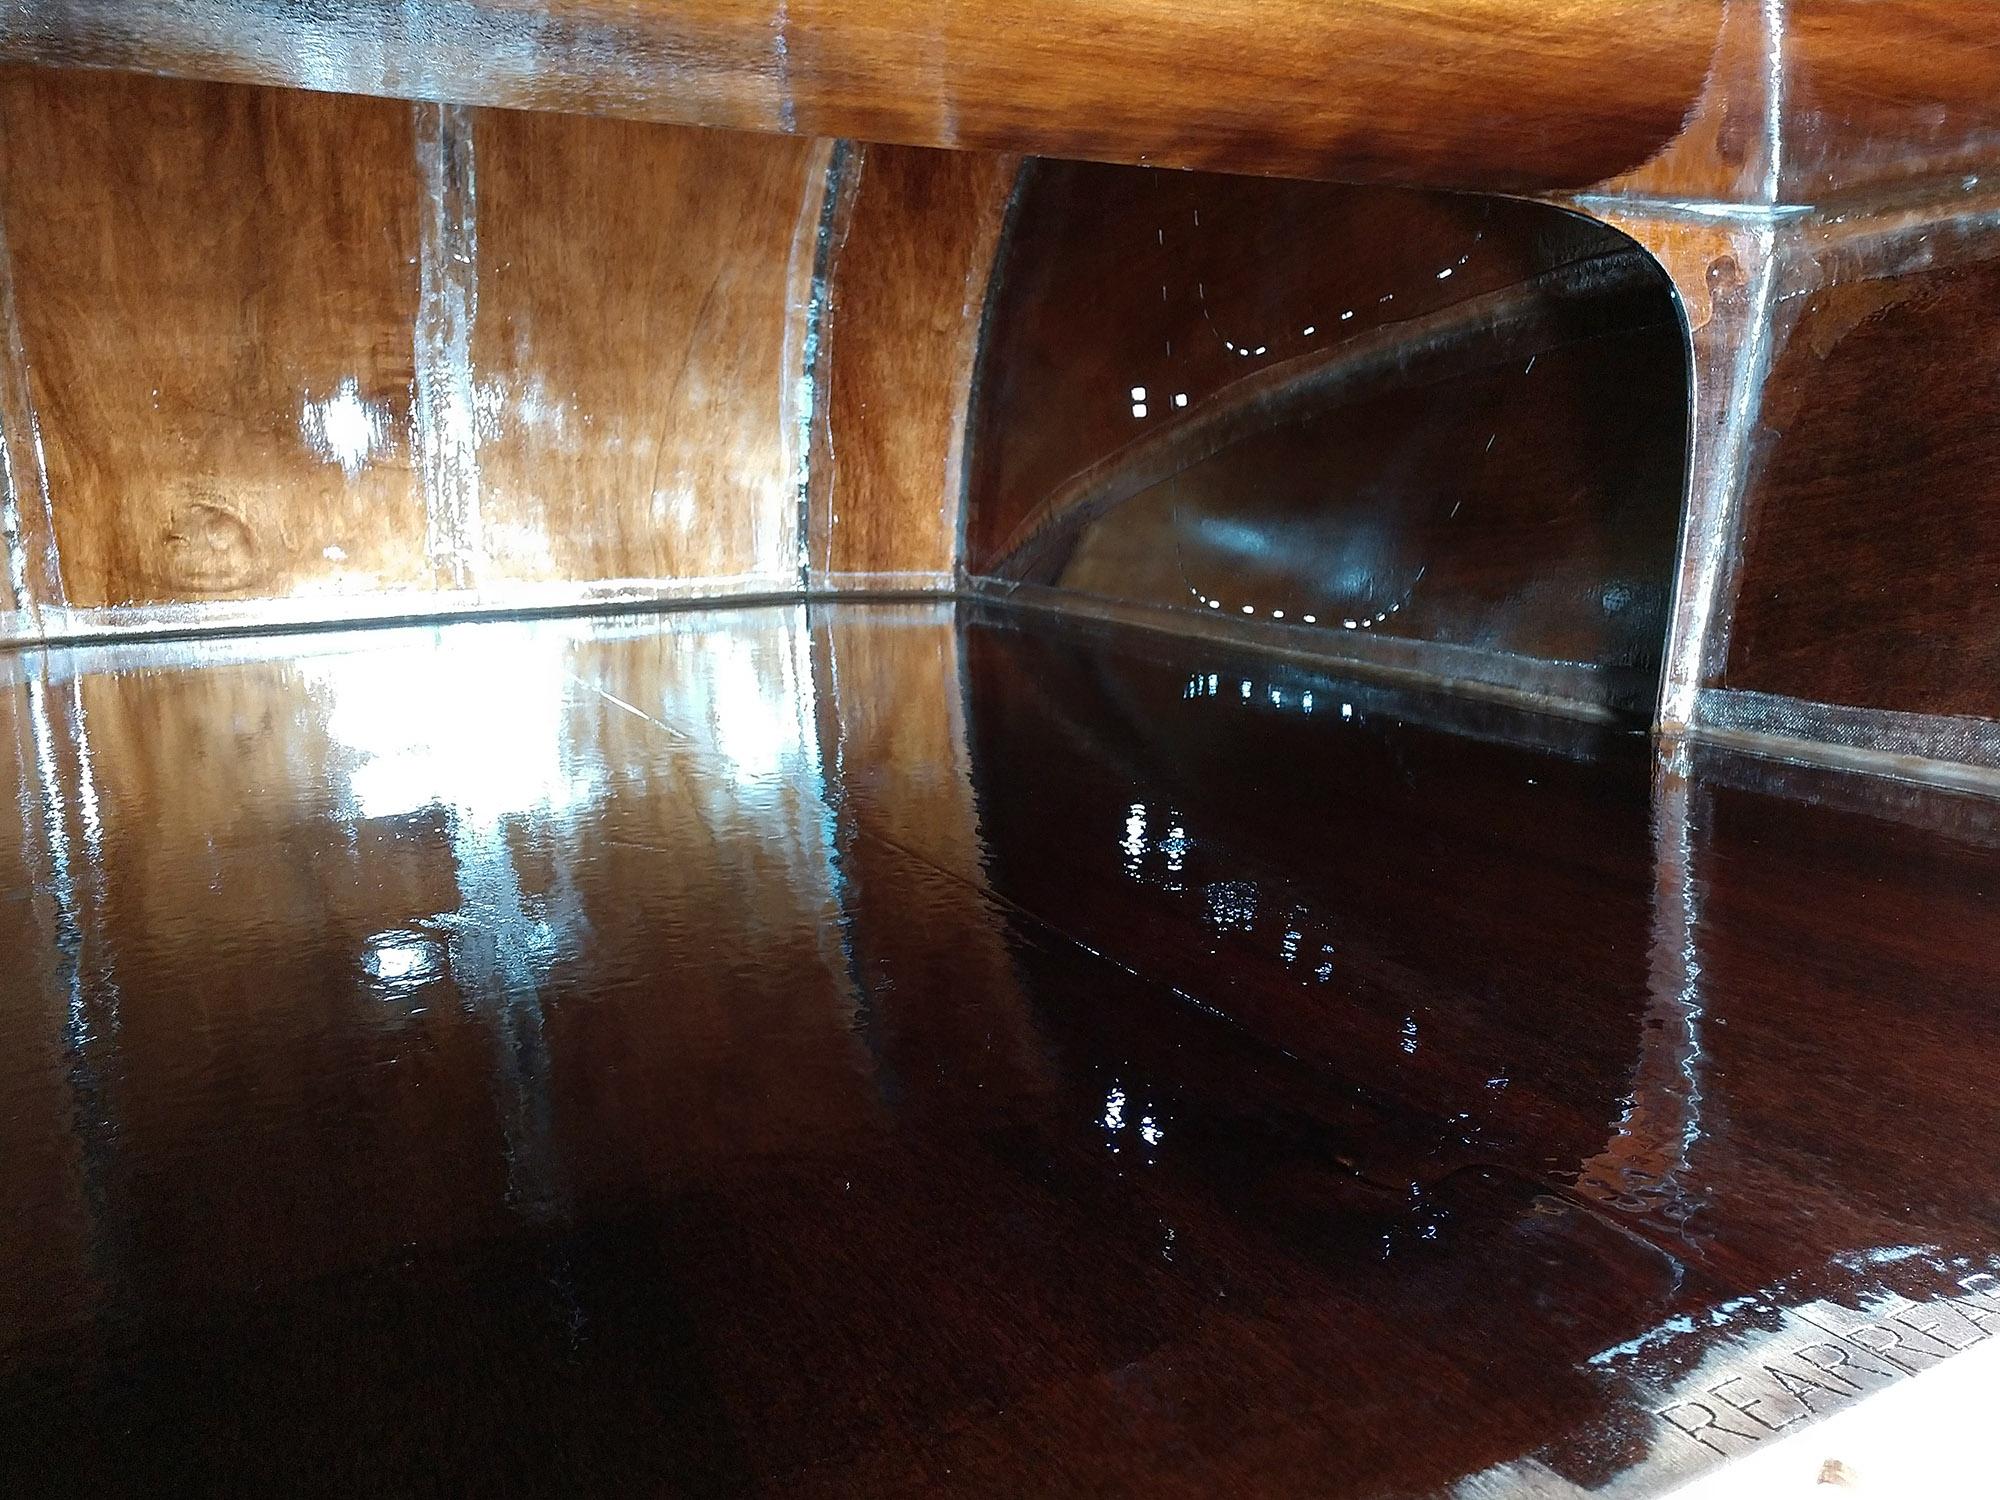
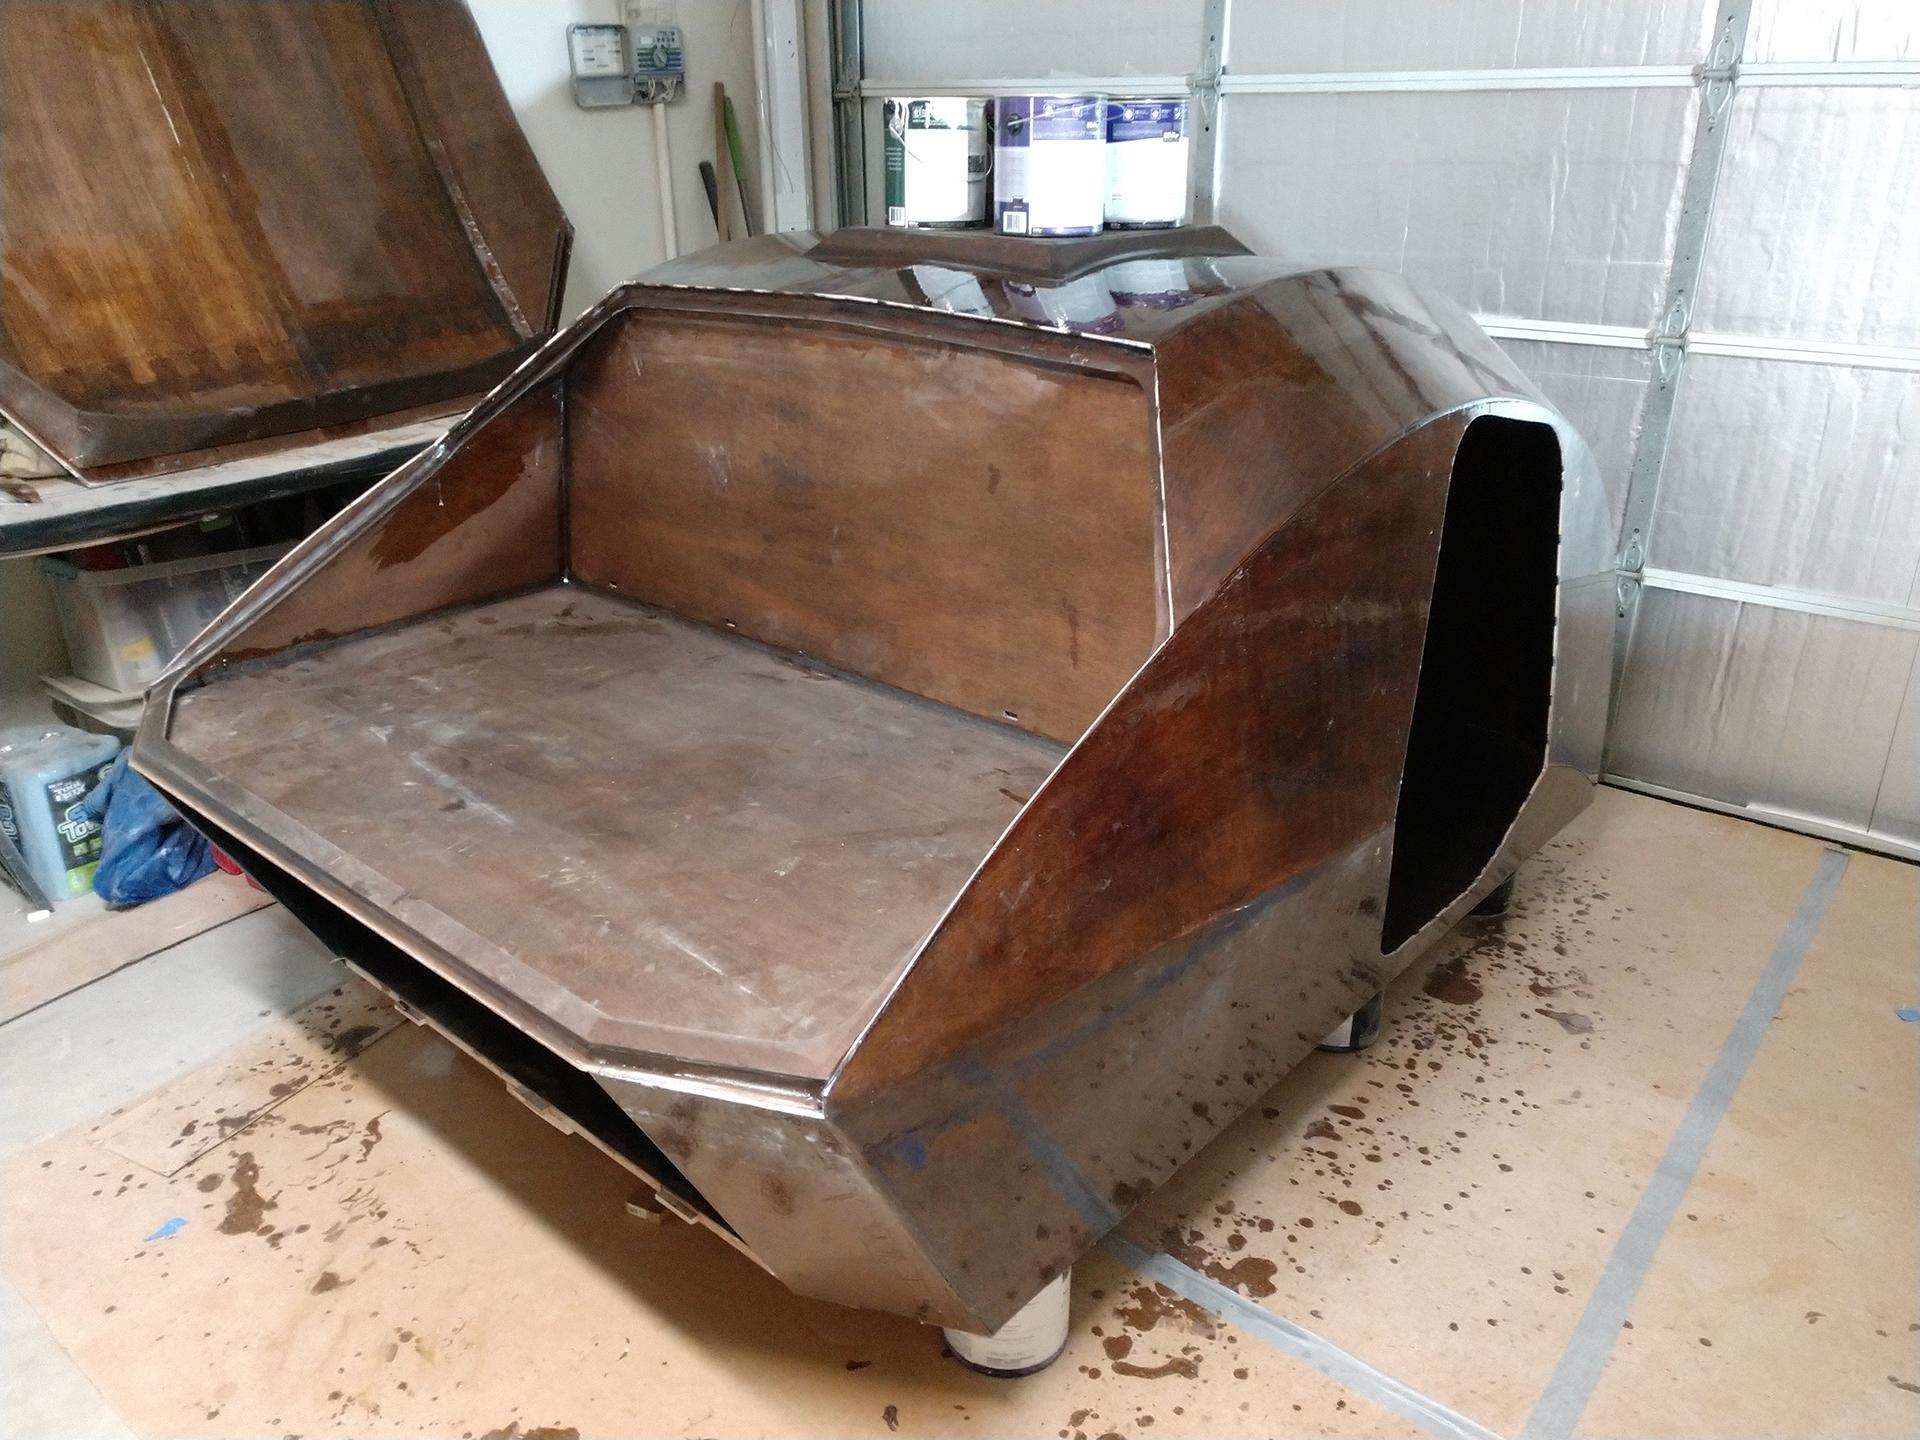
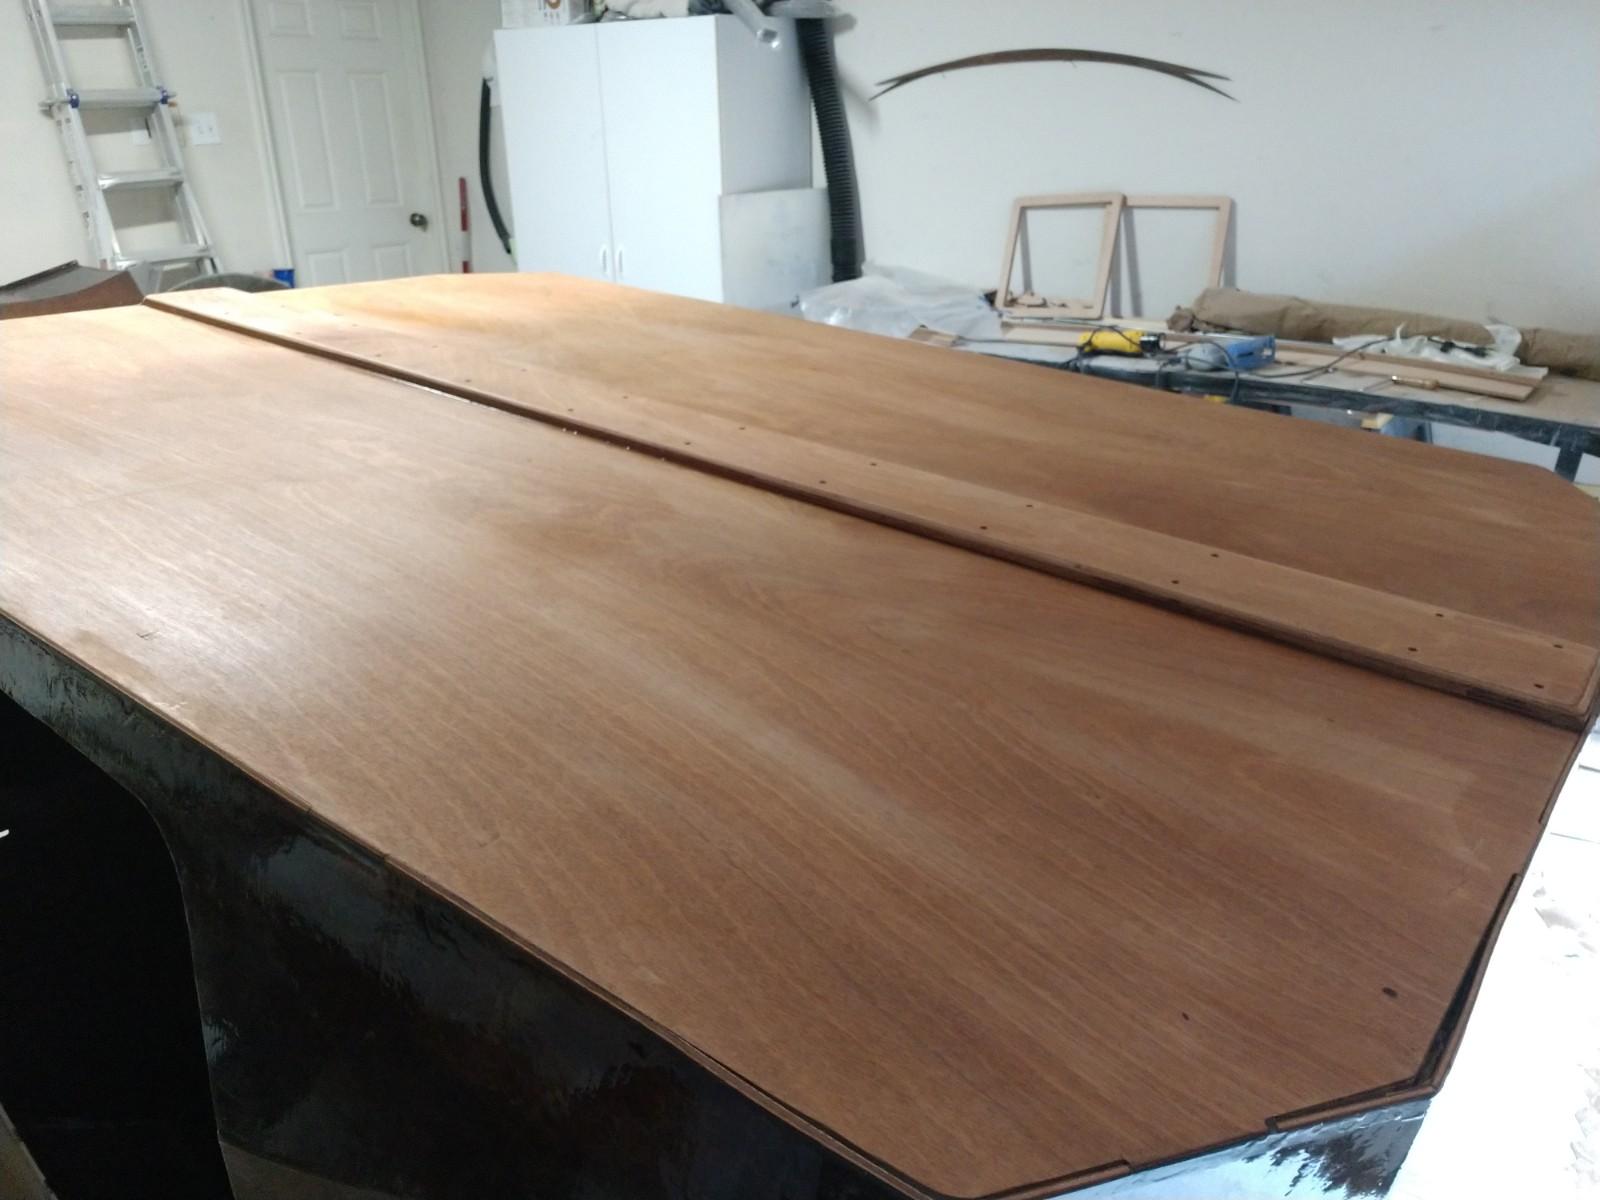
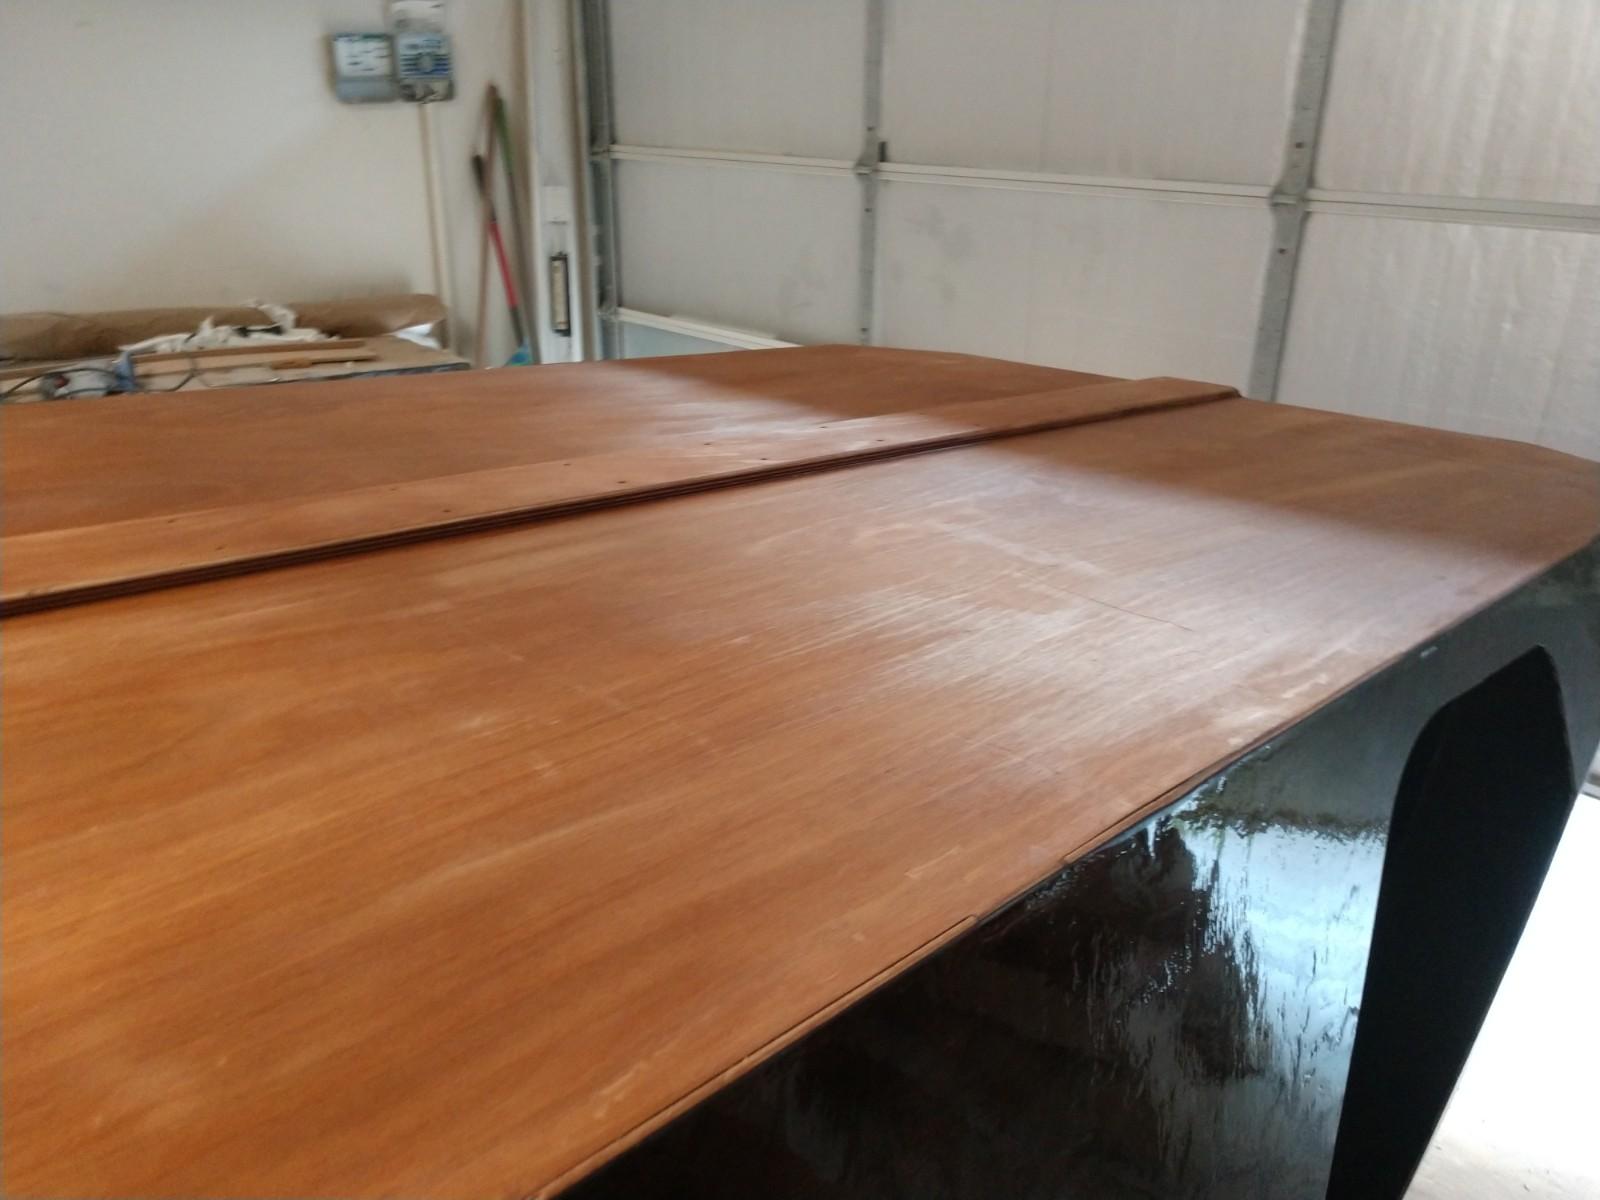
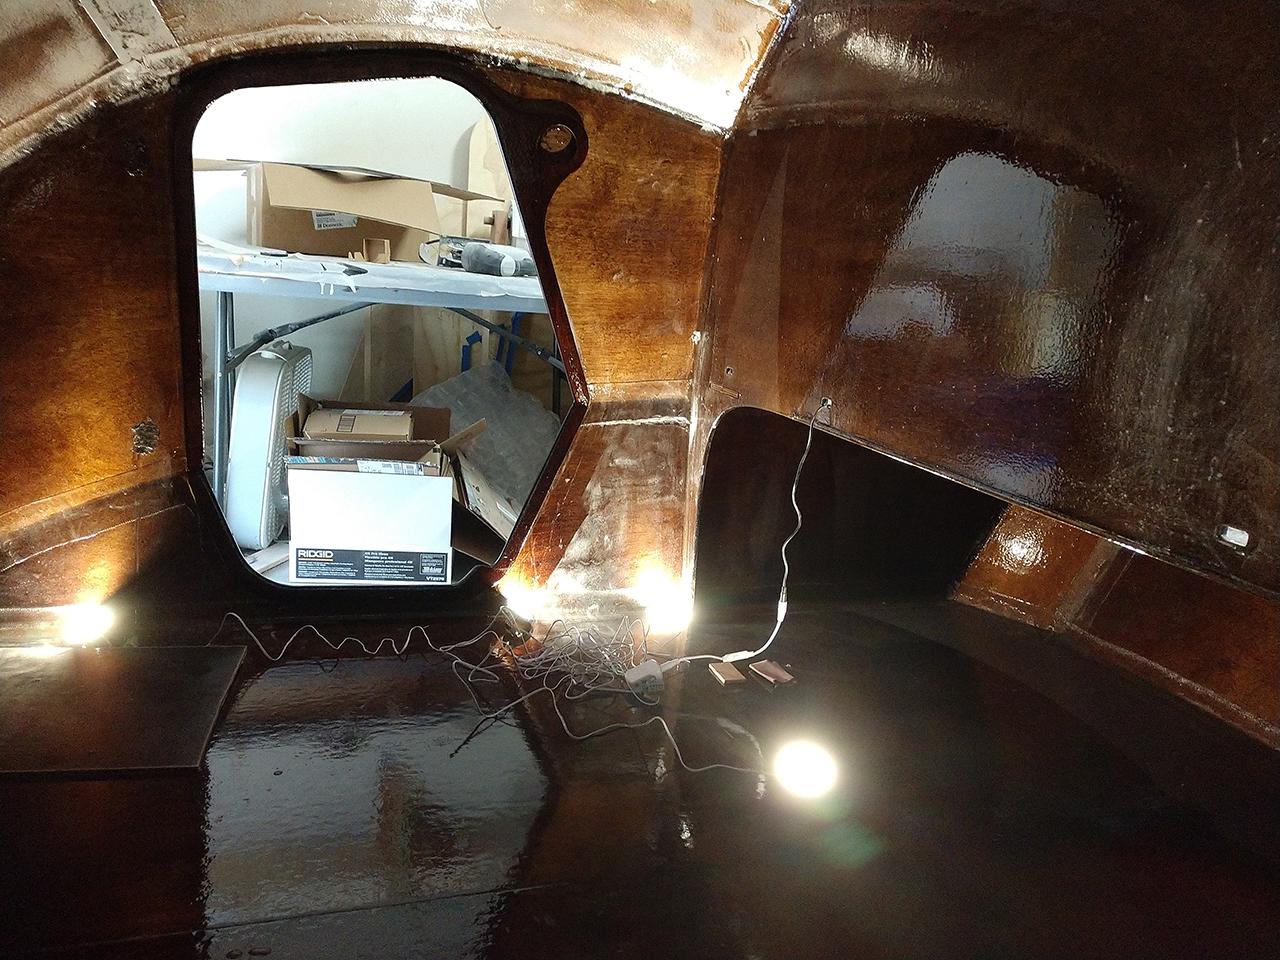
Progress update (Time Spent To Date ~79 hrs): The bottom received 2 coats of epoxy with sanding after each coat. Once that was accomplished I was able to attach the bottom to the camper shell and removed it from the mold. At this point I really had a sense for the final shape and size of the camper. It was exciting to be able to crawl inside and “test it out”. I’ve also finished the first coat of epoxy on the entire interior. The floor and bottom of the galley flat now have 3 coats of epoxy.
Next step prep the outside for the big glass job. Wish me luck.
Floor First Coat of Epoxy:
Floor Fit & Secure:
Floor Fit & Secure:
Inside Floor Fillets:
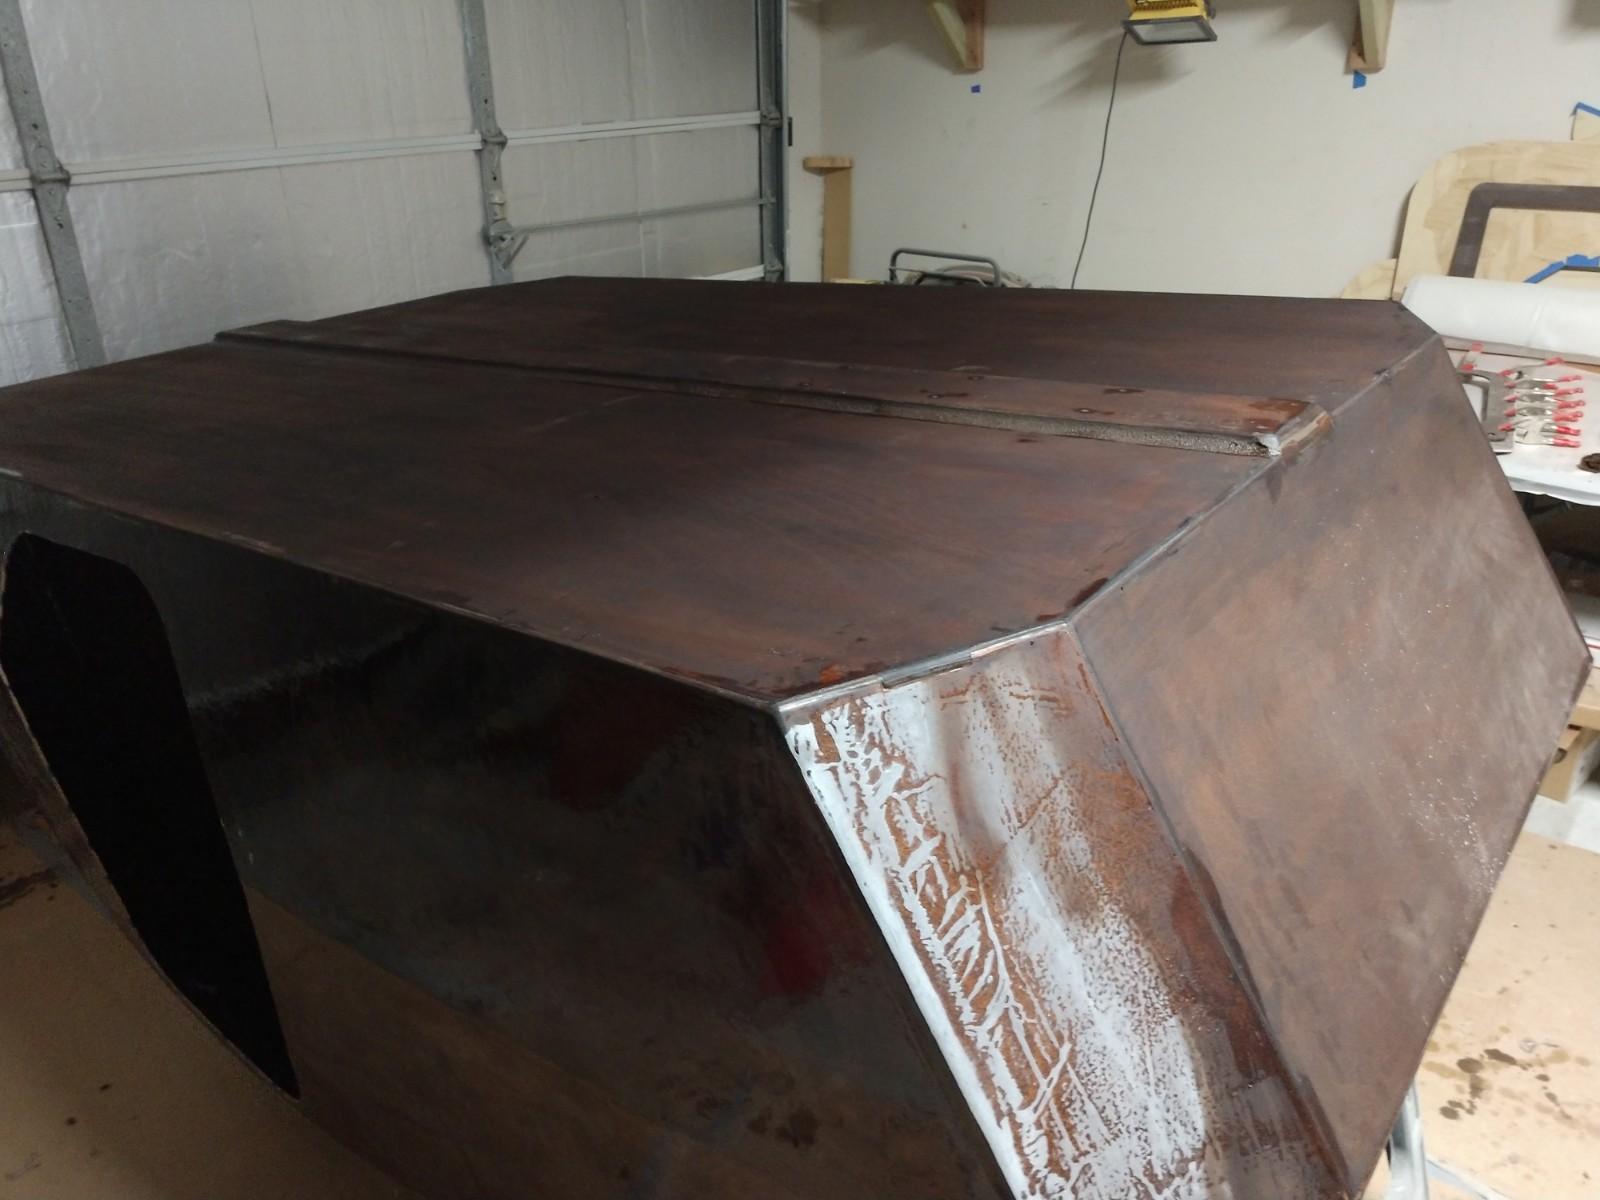
Shell Removed From Frame Mold:
Inside First Full Coat of Epoxy:
 March 12, 2018 at 10:56 am #1702Participant
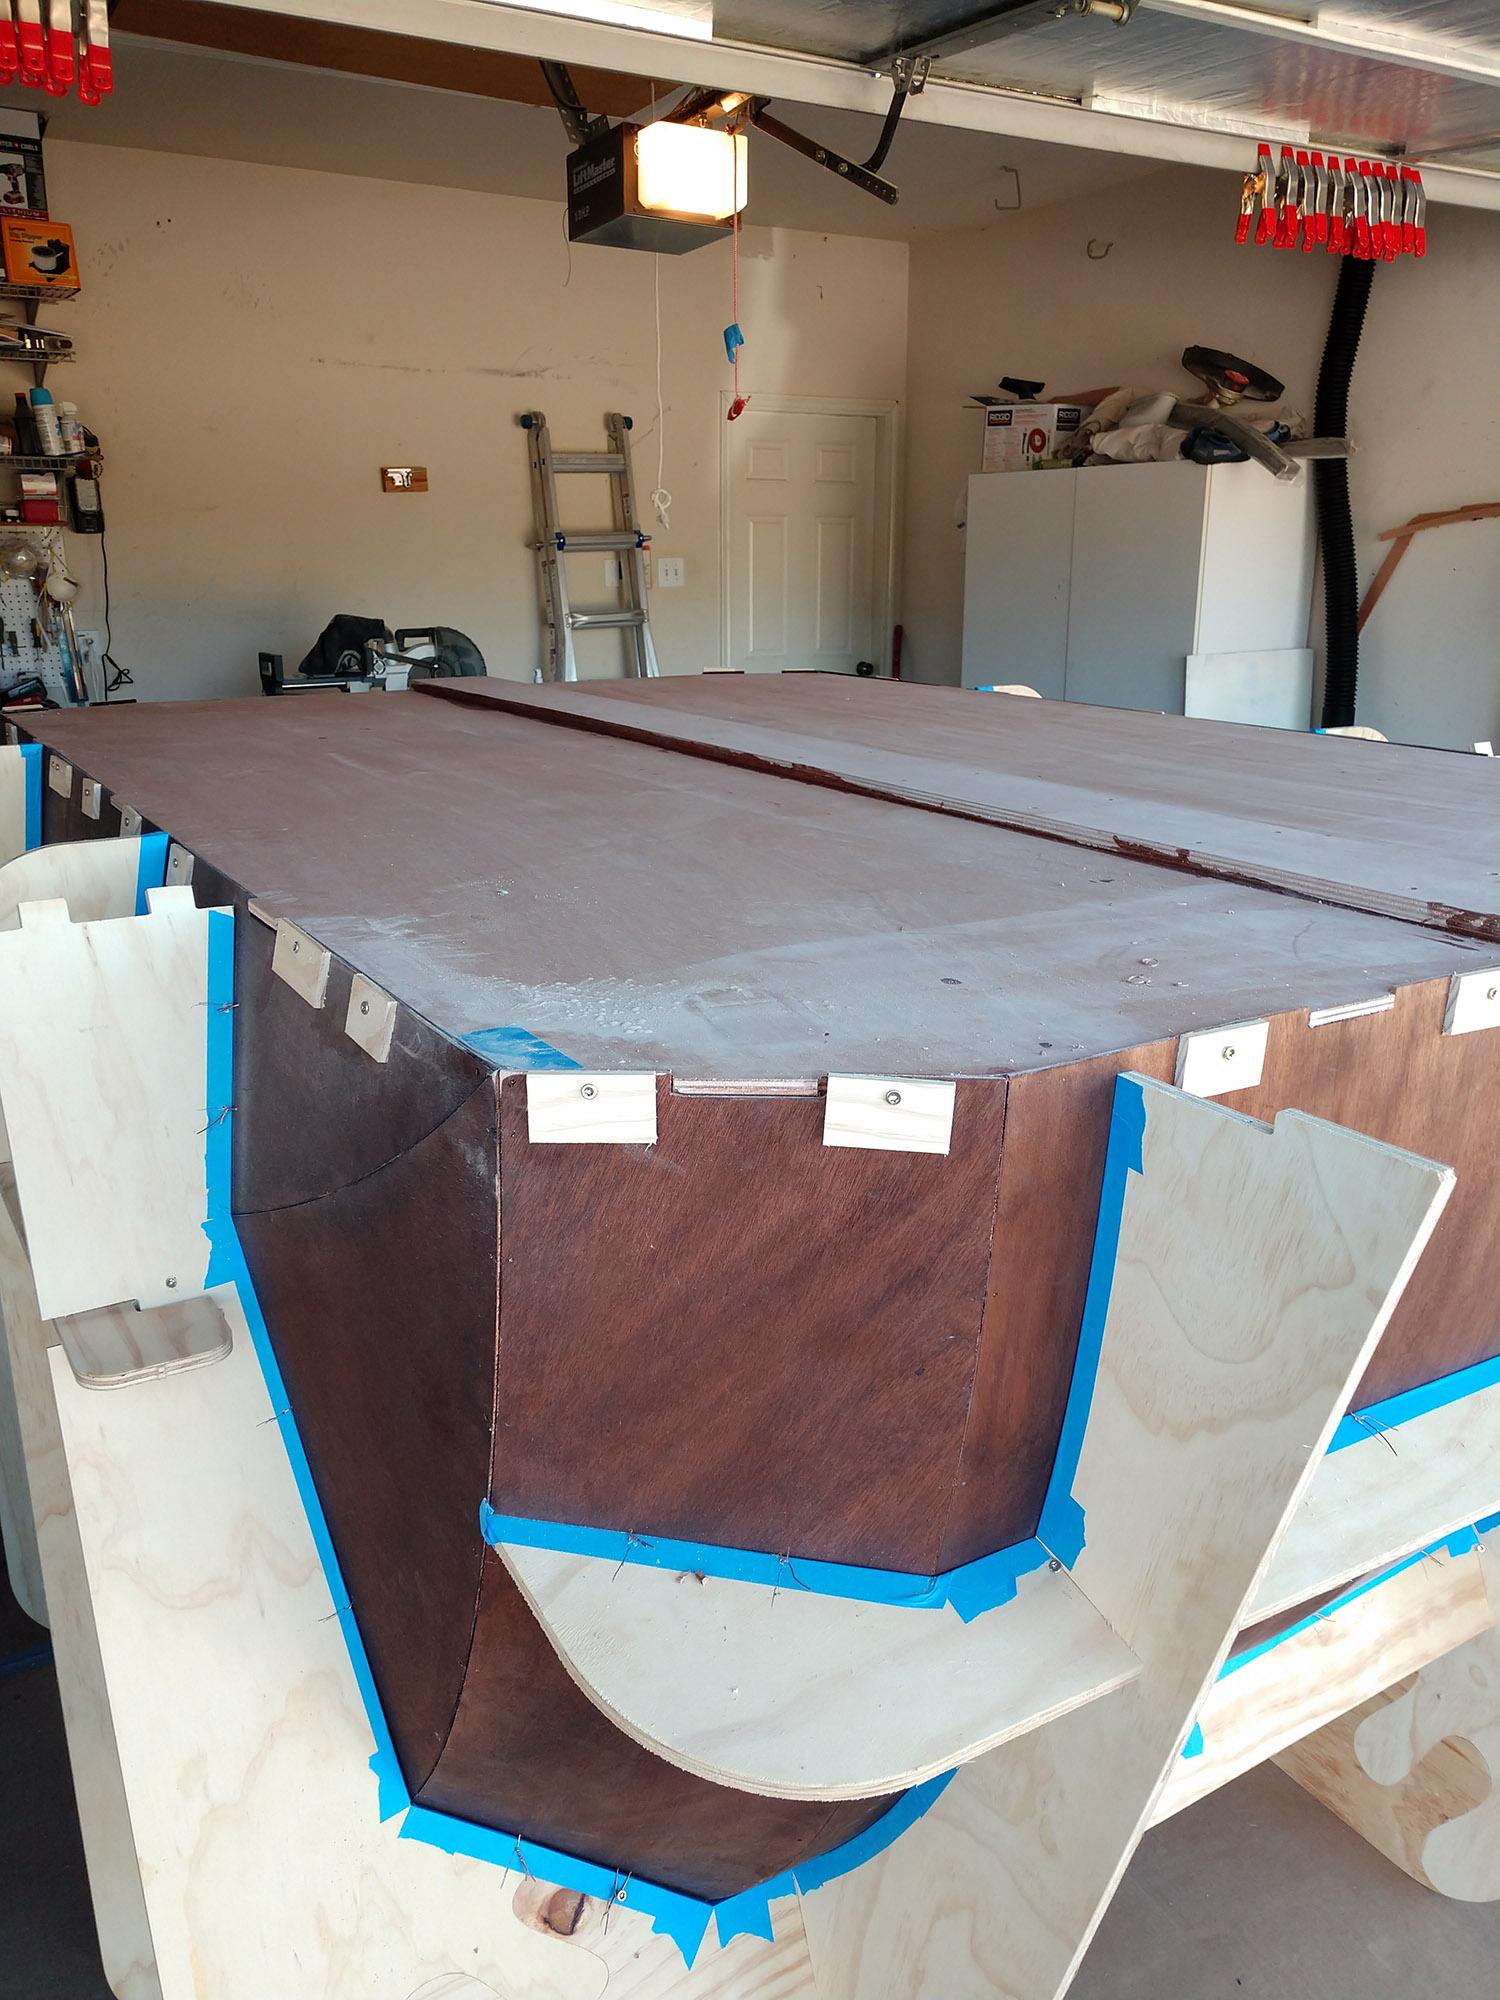
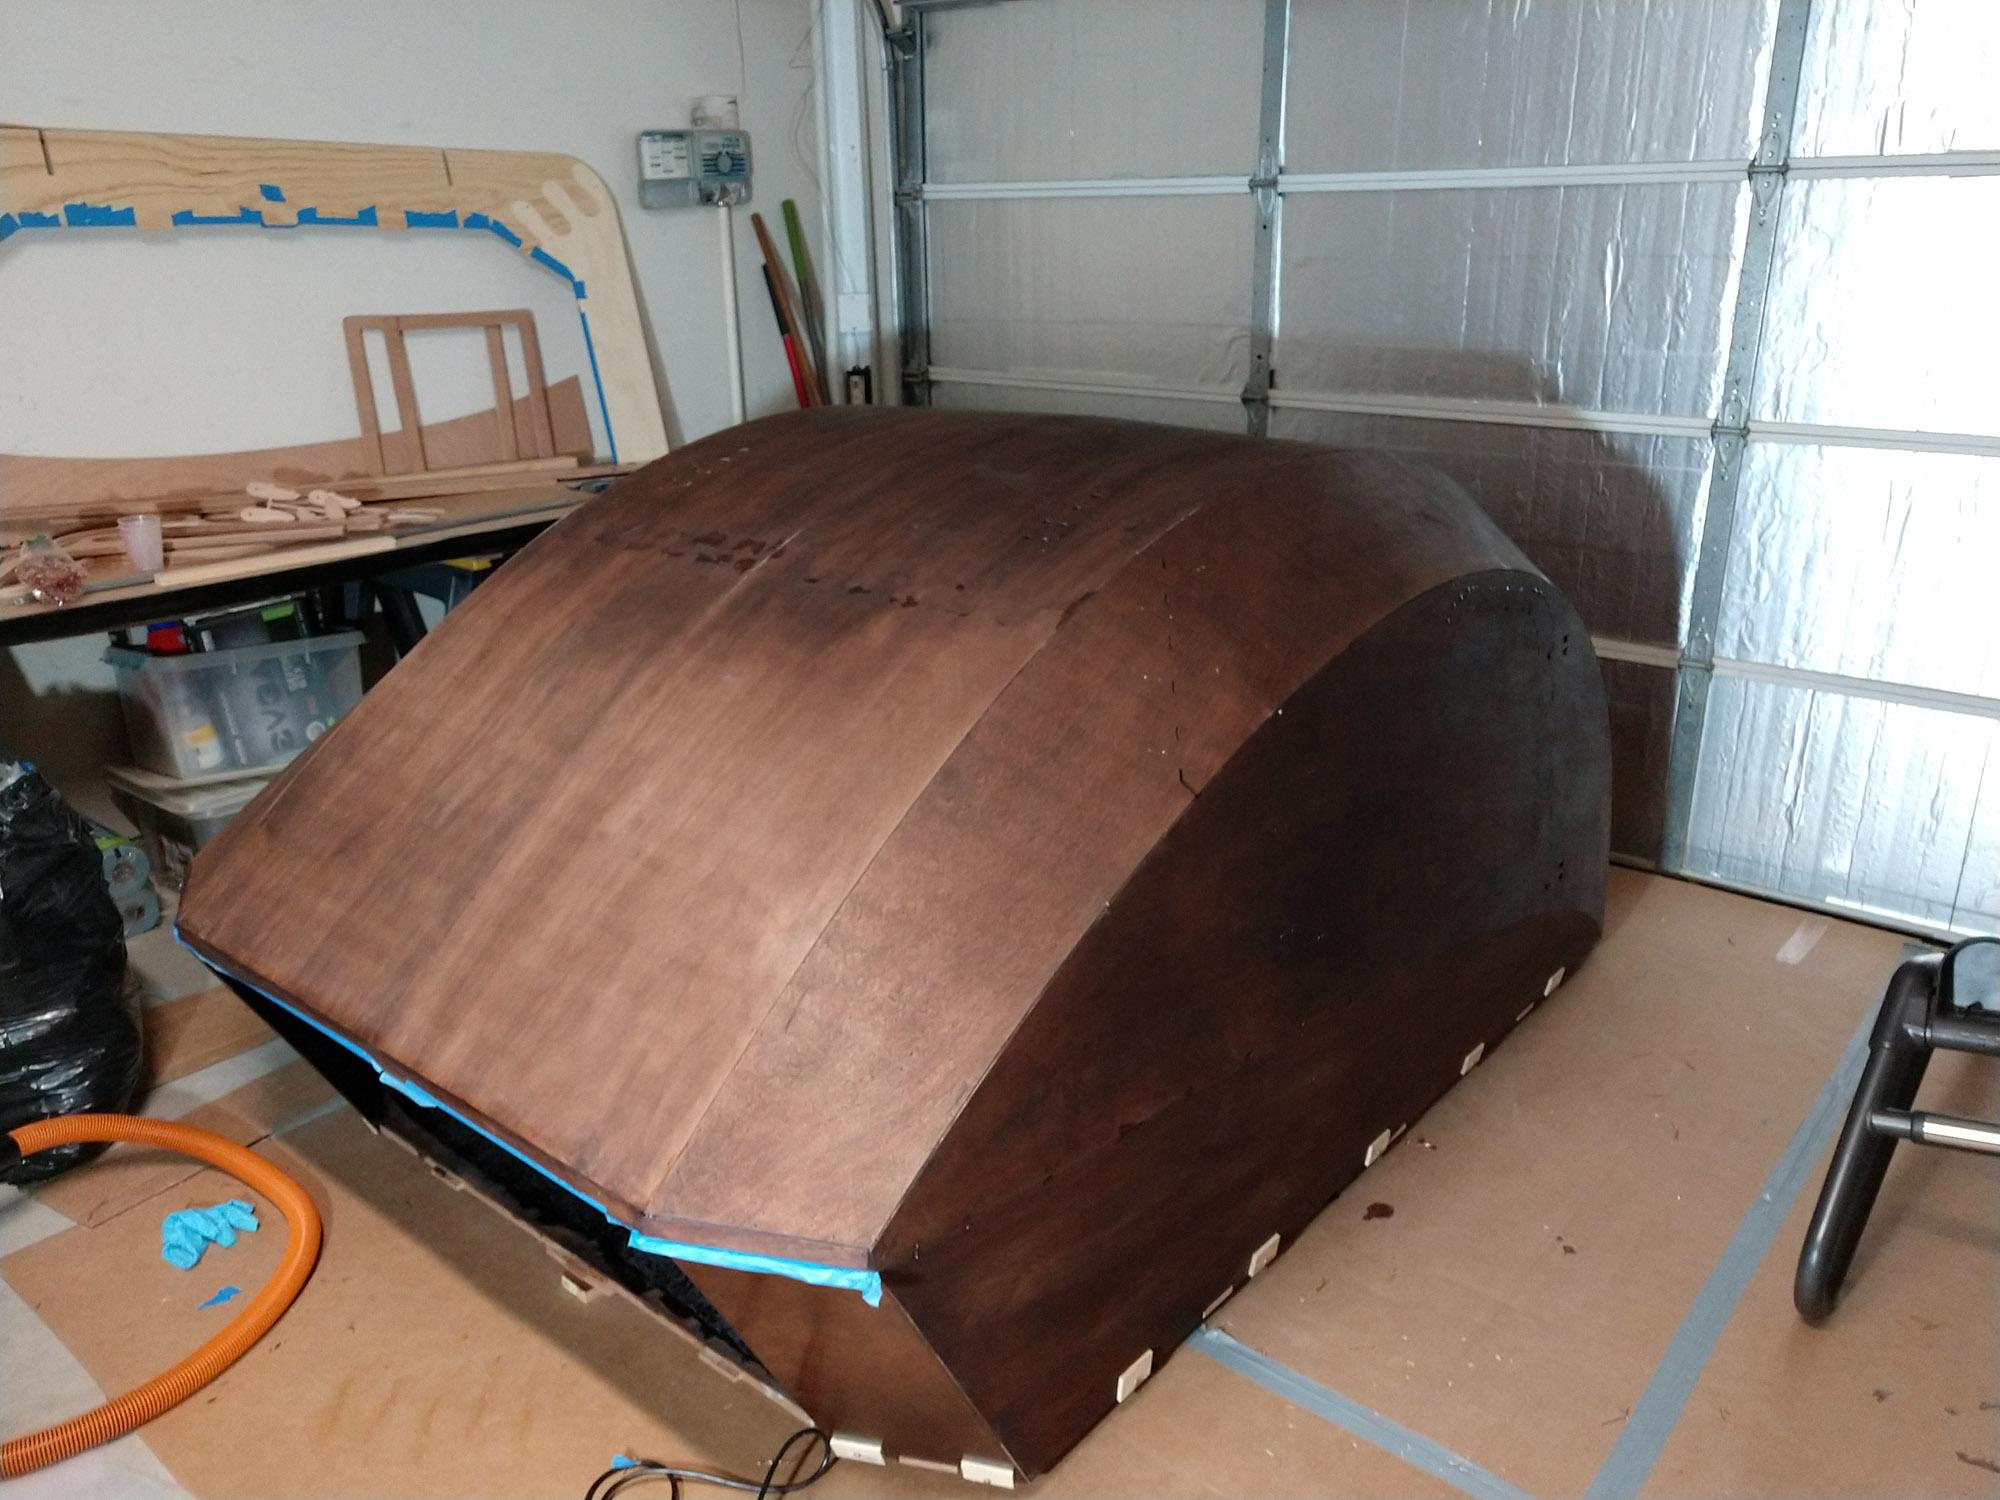
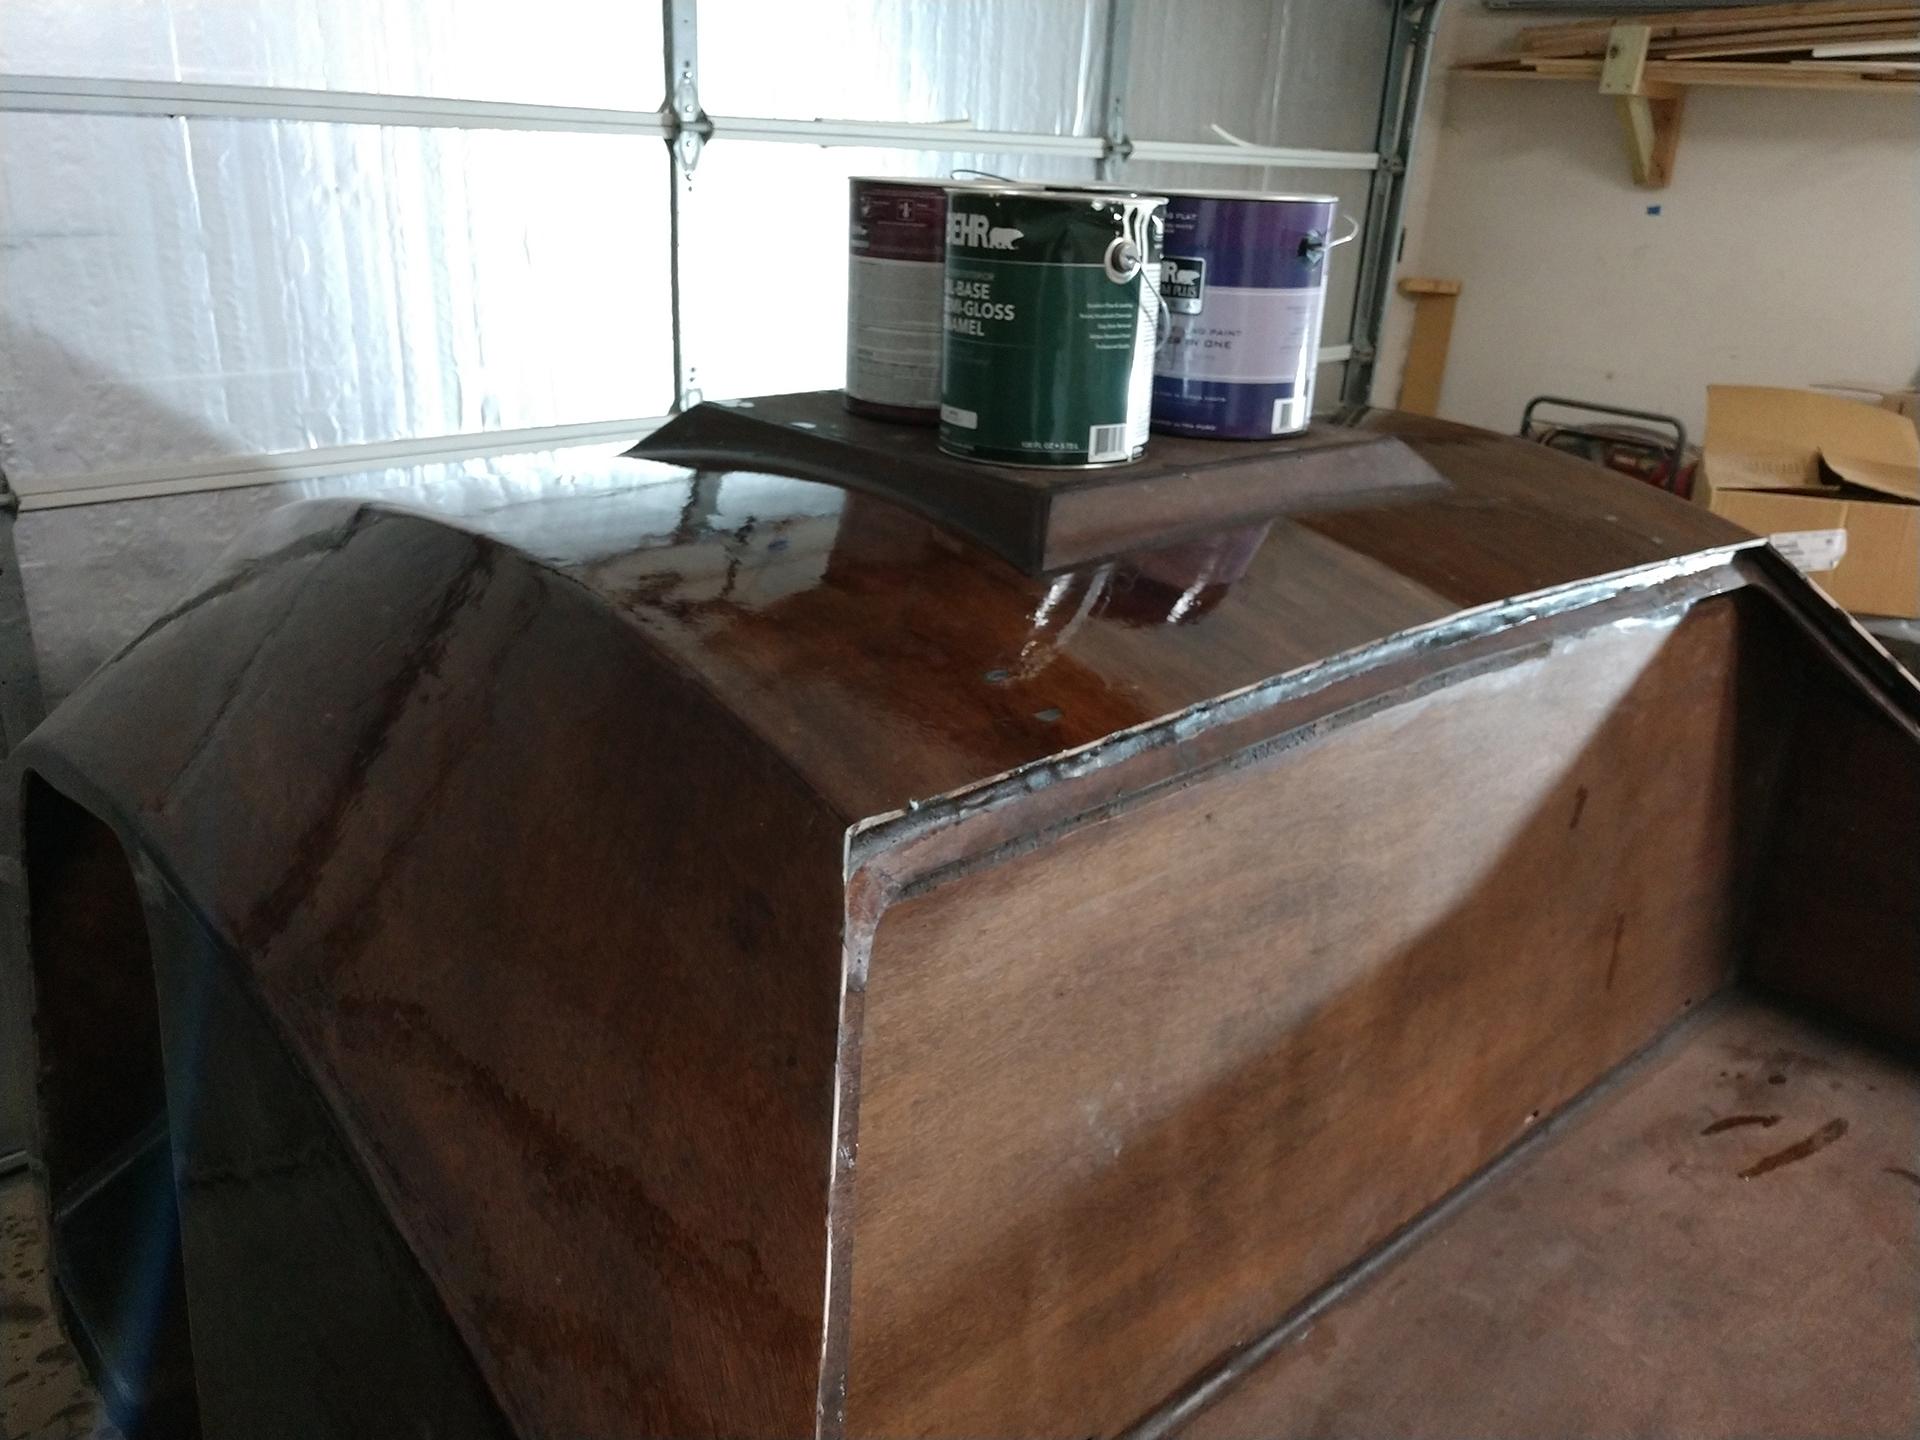
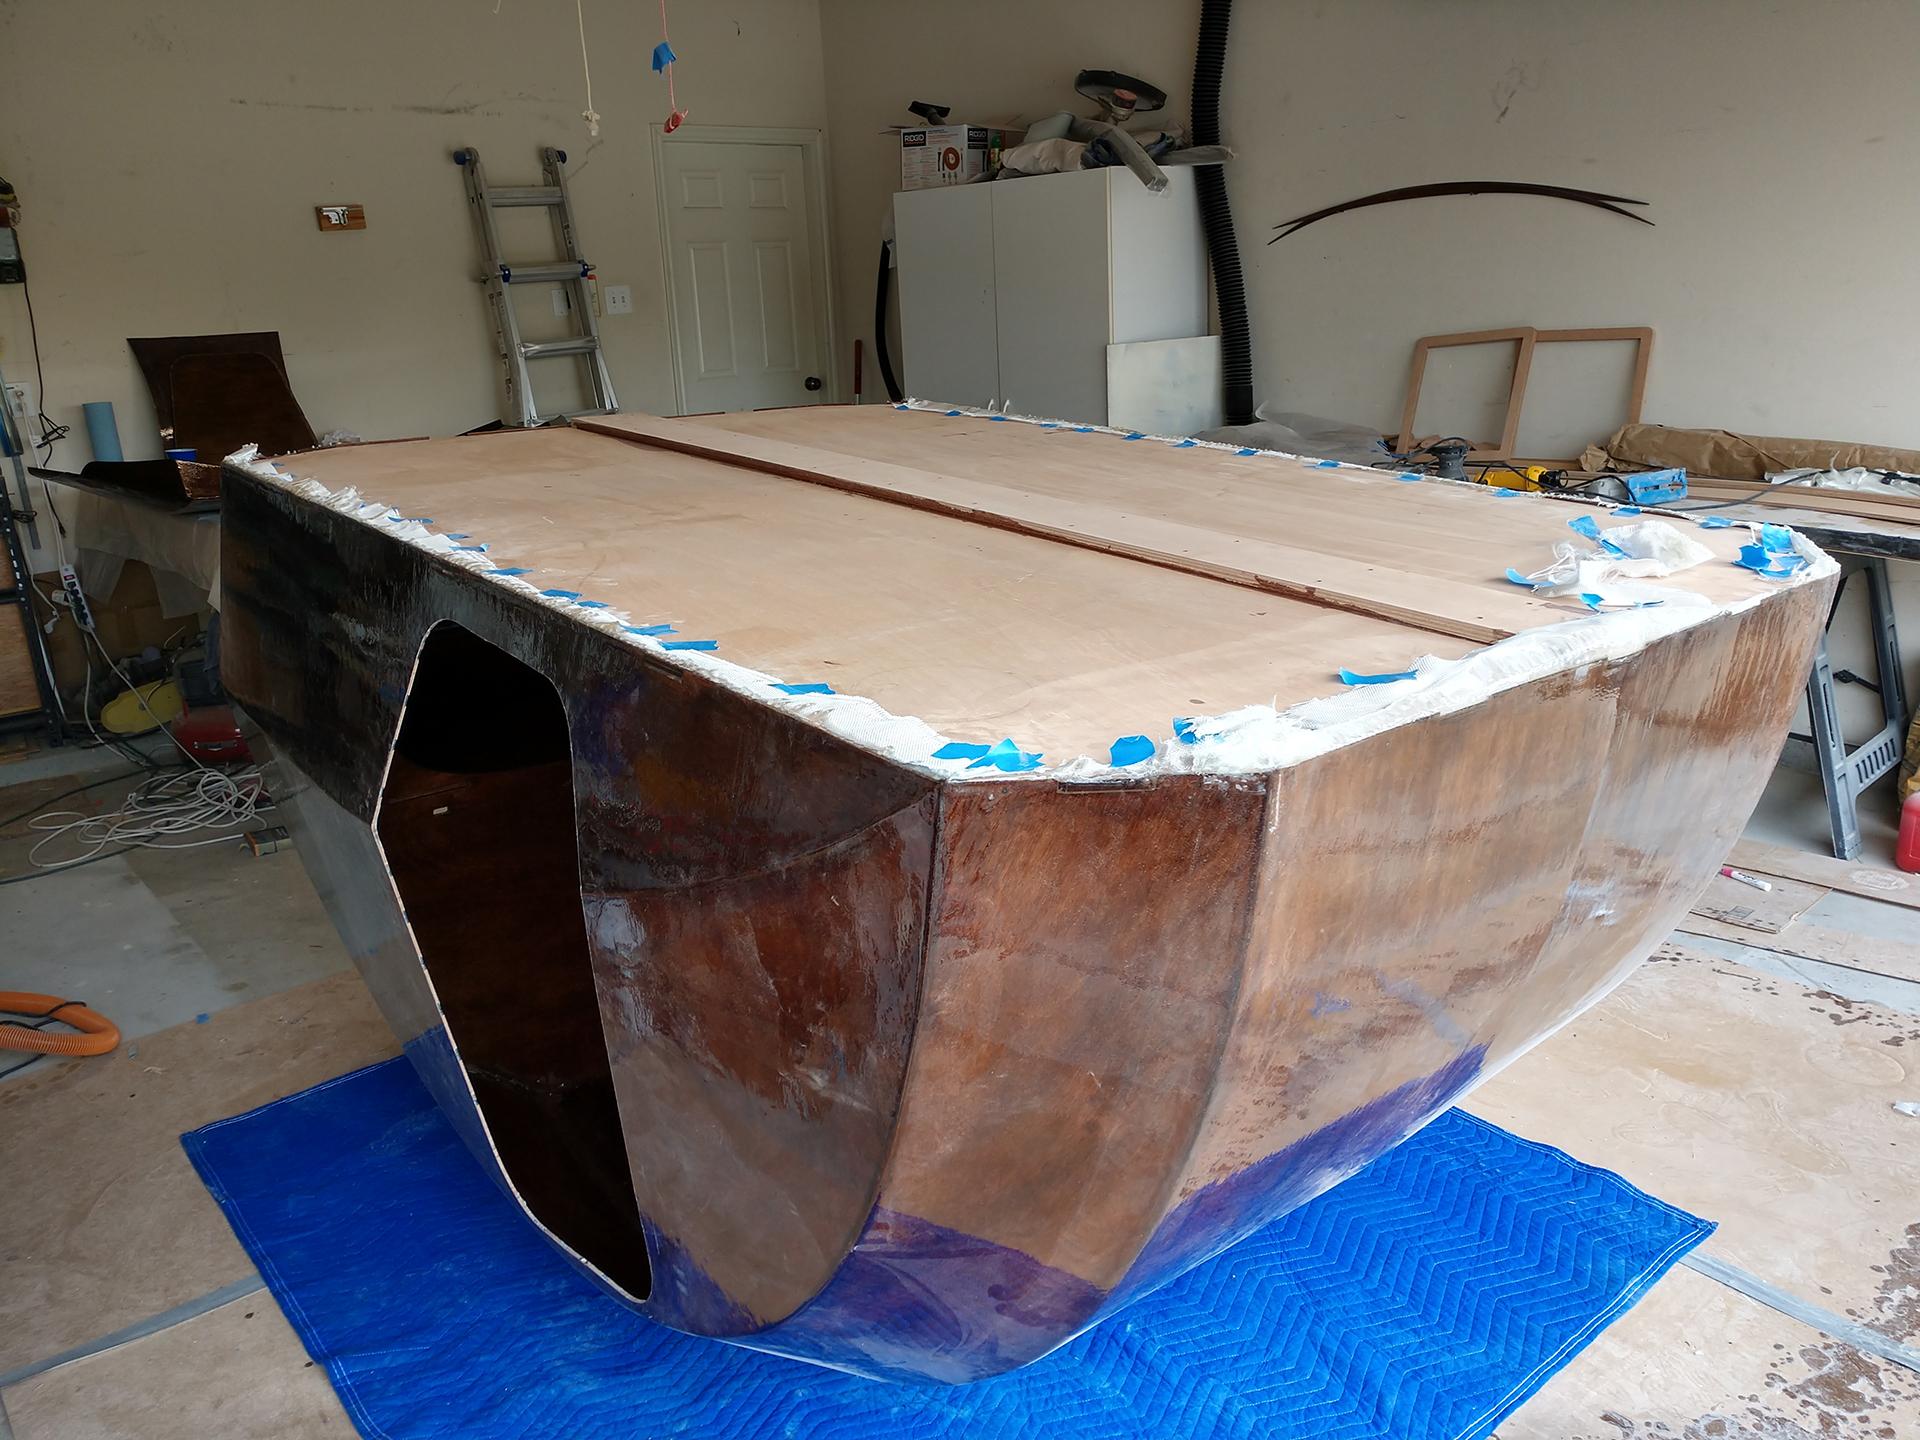
Progress update (Time Spent To Date ~120 hrs): I’ve made some major progress since last I updated. The large fiberglass job I opted to do in two steps. There was one trick I learned during this process with the fiberglass… Don’t force the ripples in the cloth out by stretching or tugging, rather a light patting motion on the bubble/ripple will work it into shape. The fibers of the cloth are very forgiving if you take it slow and pat it down.
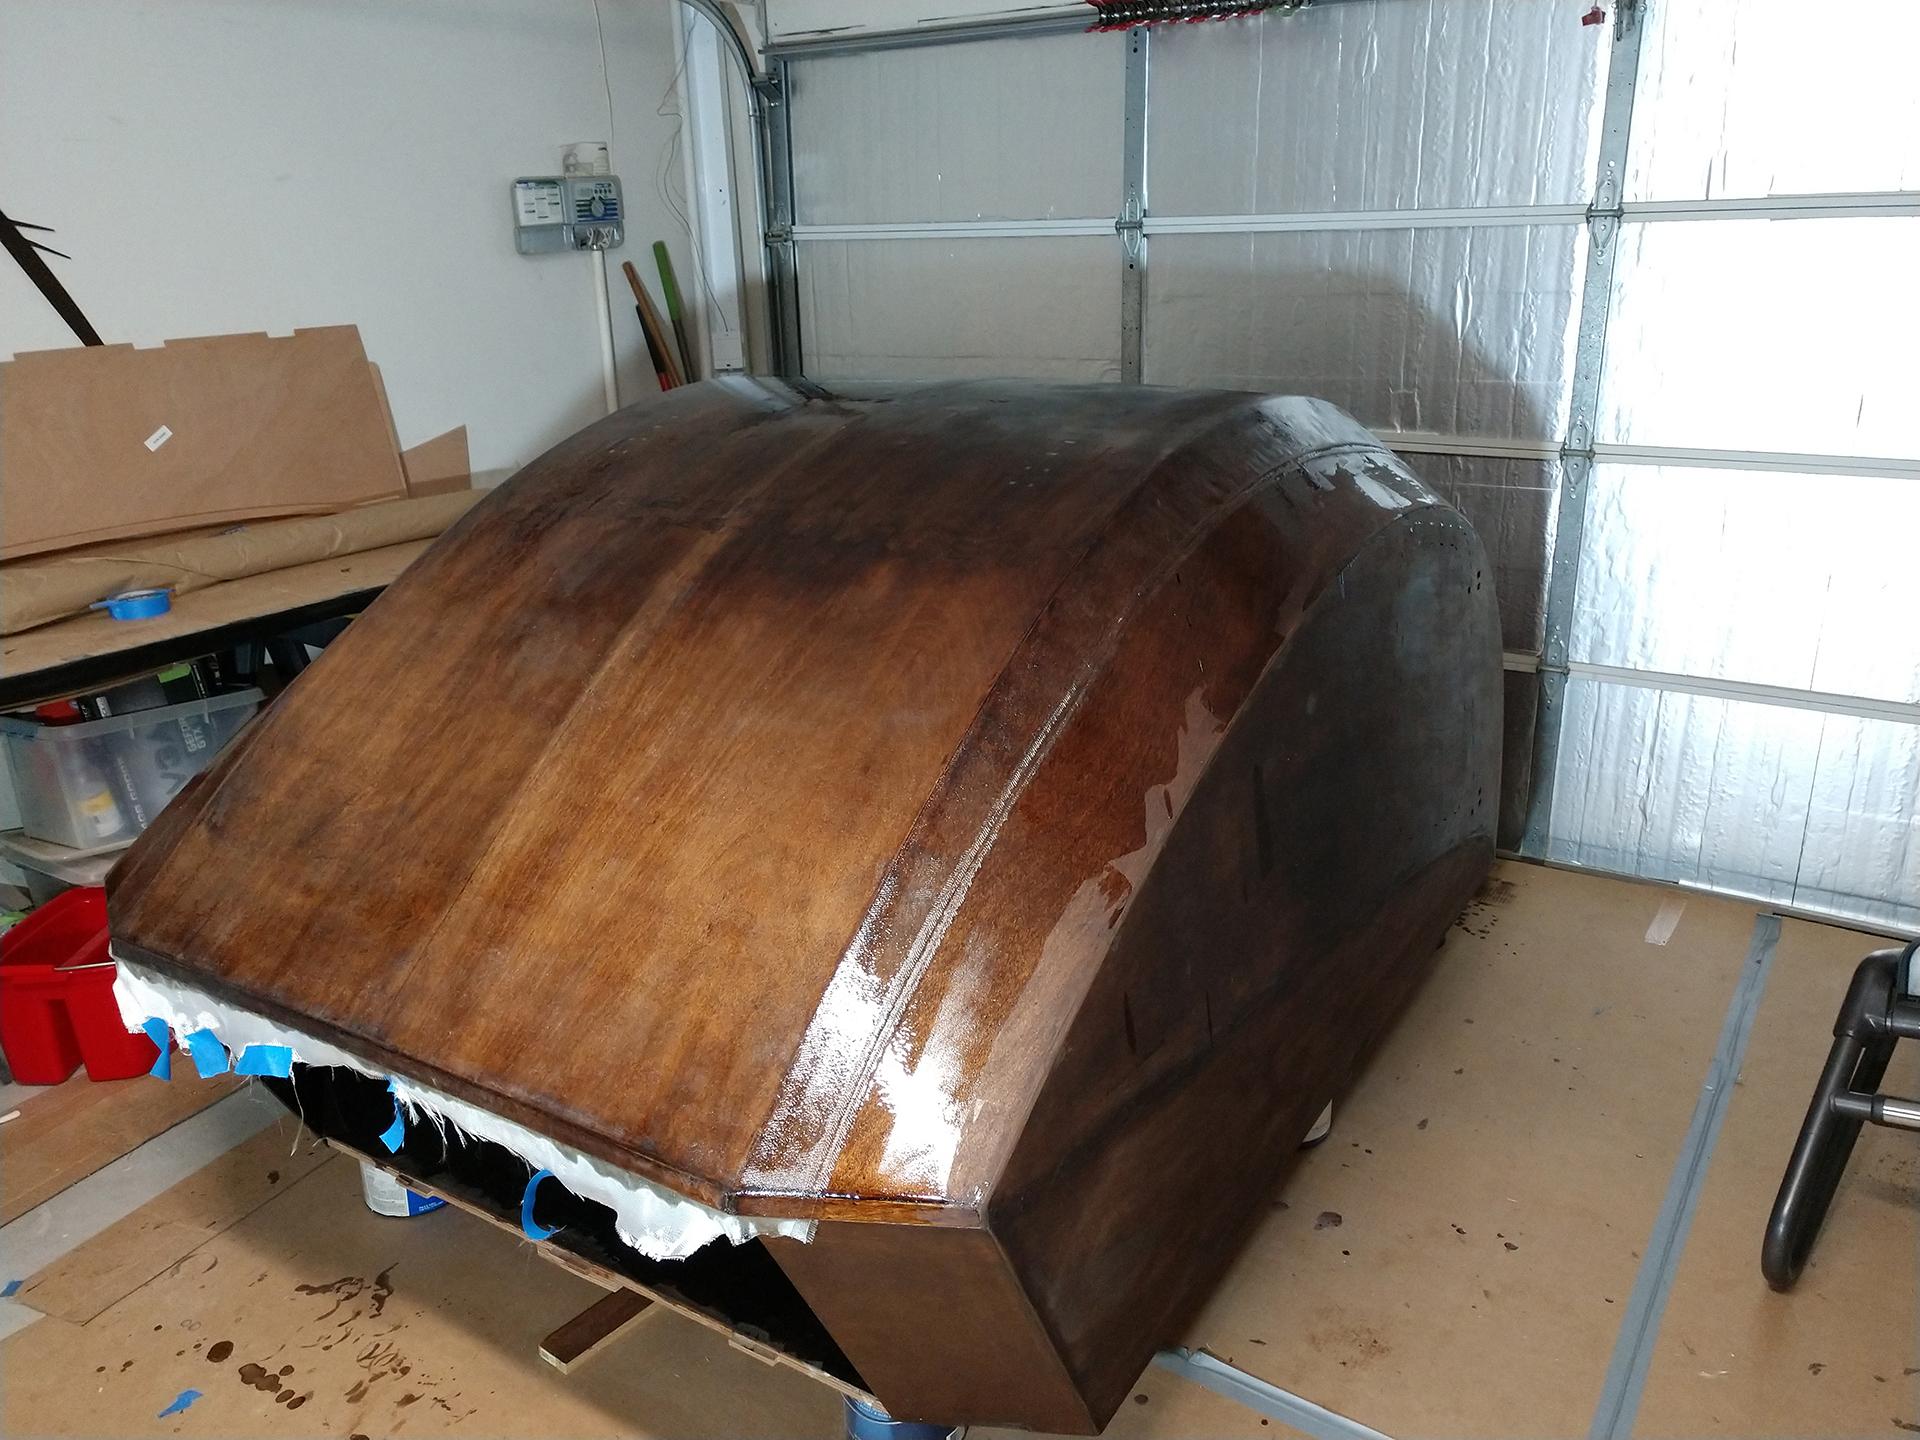
Sanding the top layer before the sides are glassed. There were some blemishes, mainly on the 3&4 panels at the galley hatch area. After the first coat of epoxy this area looked Foggy. I believe I overworked the resin in this area and pulled up some of the dye into it. Not much I could do to fix it at that point so I pressed on.
sides glasses and 2 coats of epoxy later

Look at that $5 mess of epoxy on the floor. Gravity was not my friend at this stage.
Prepping to cut the hatch out I was very nervous at this stage. Because of the darker stain on the camper it was difficult to see any guide marks. Instead I used blue tape and straddled either side of the mark with it. Using the tape like I was masking for pin stripes on a car paint job I could check my lines and tweak them here and there.
I used a skill saw and a Dremel cut off disk to start my cuts. For the doors and roof hatch I used blue tape again. This time half way through the cut to hold the door in place while I finished the other half of the cut.
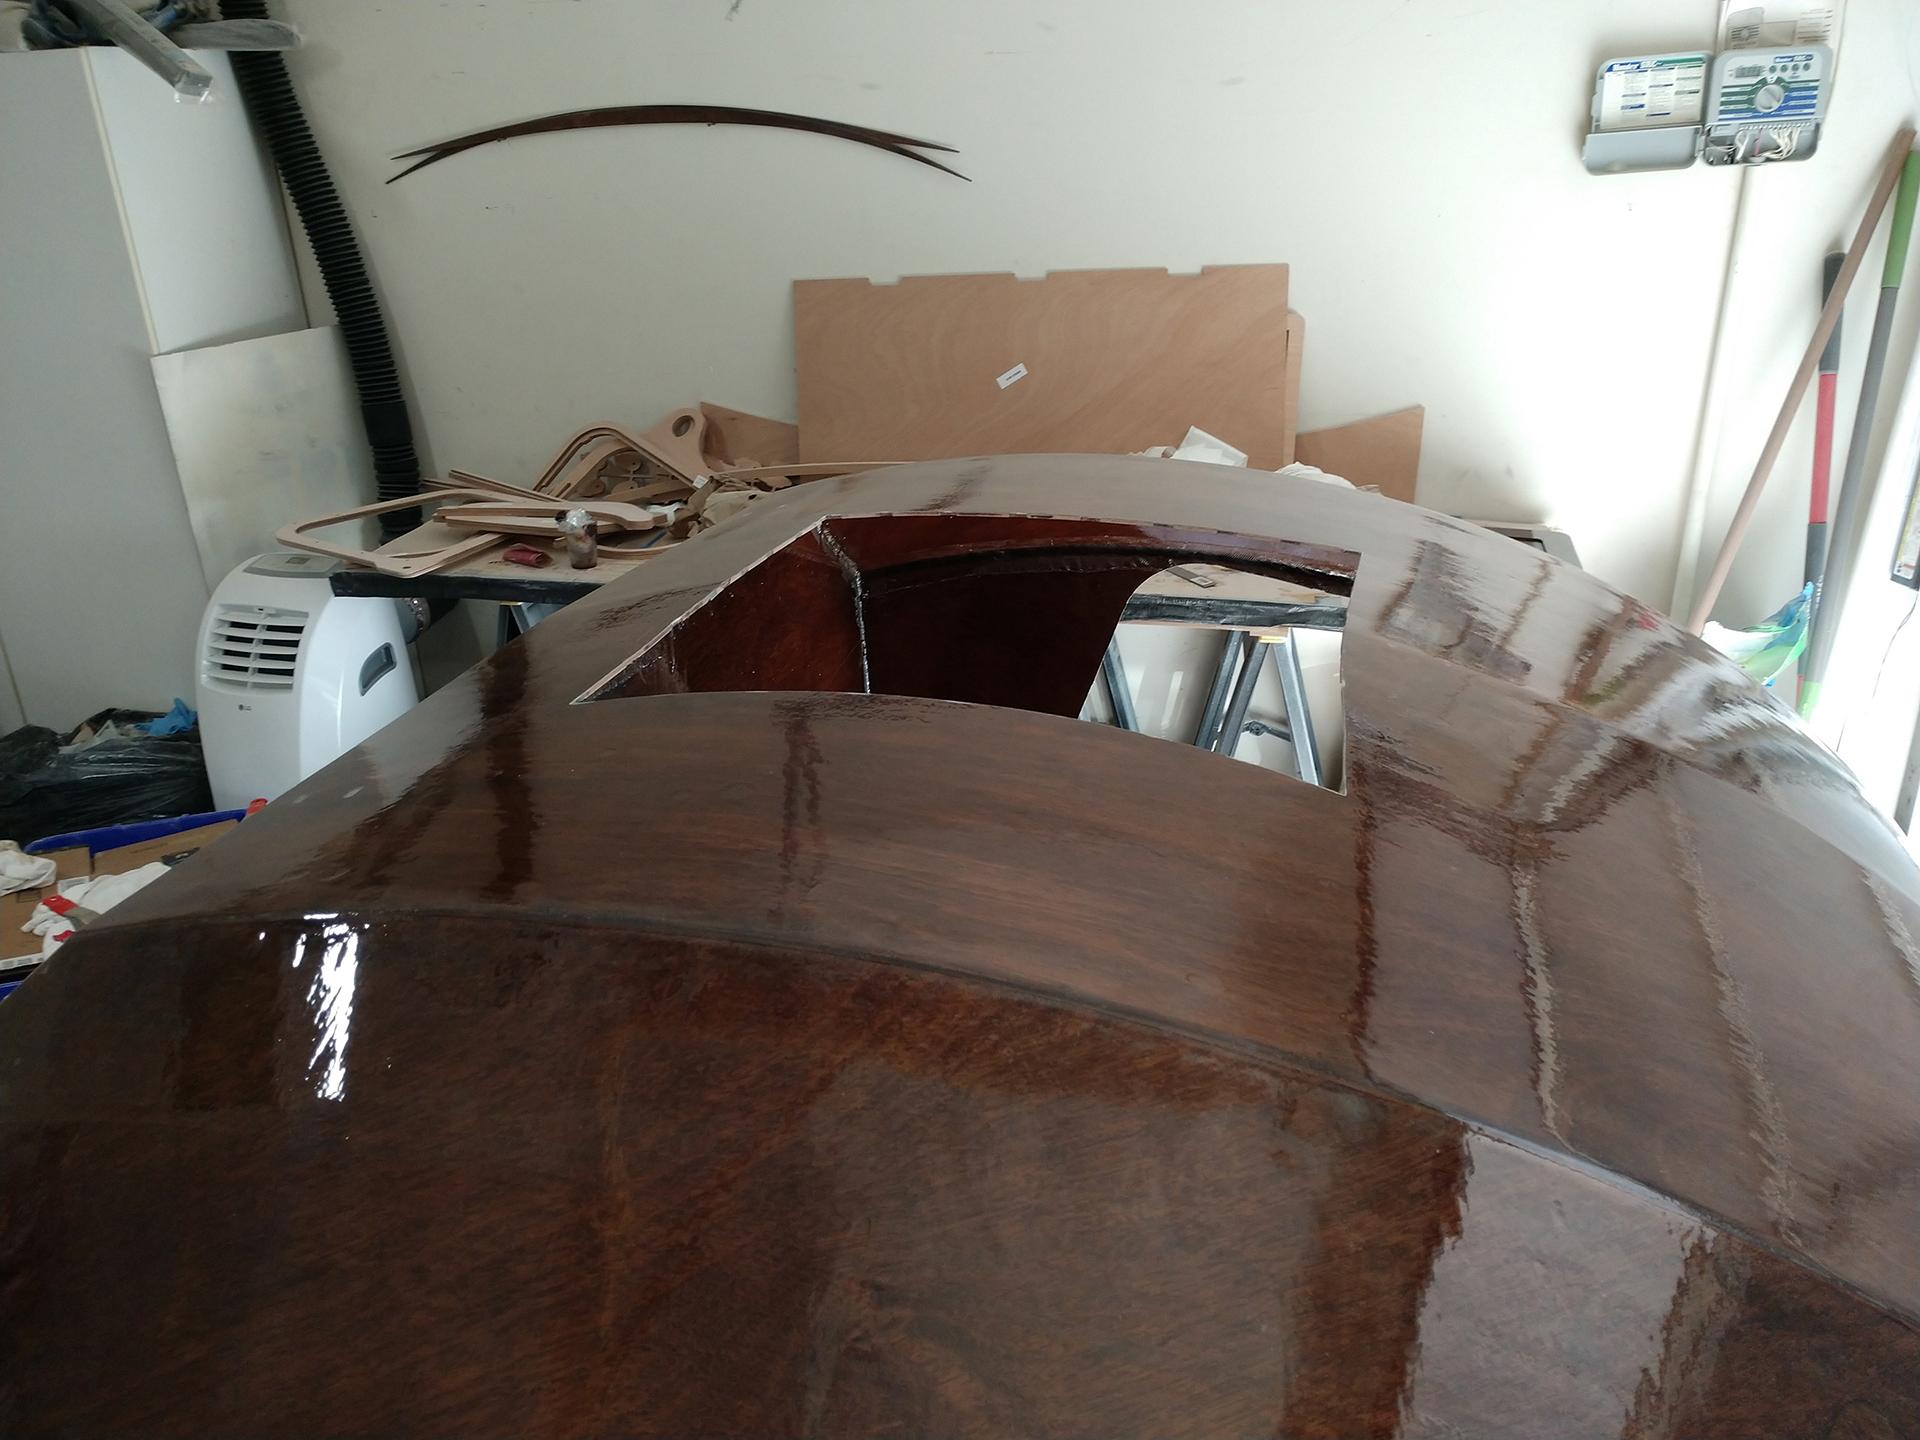
I didn’t realize how close the top of the galley hatch cut was to the bulkhead and I ended up gouging the crap out of it. Good thing I plan to have a back splash material installed there. I touched it up anyways with some left over thickened epoxy.
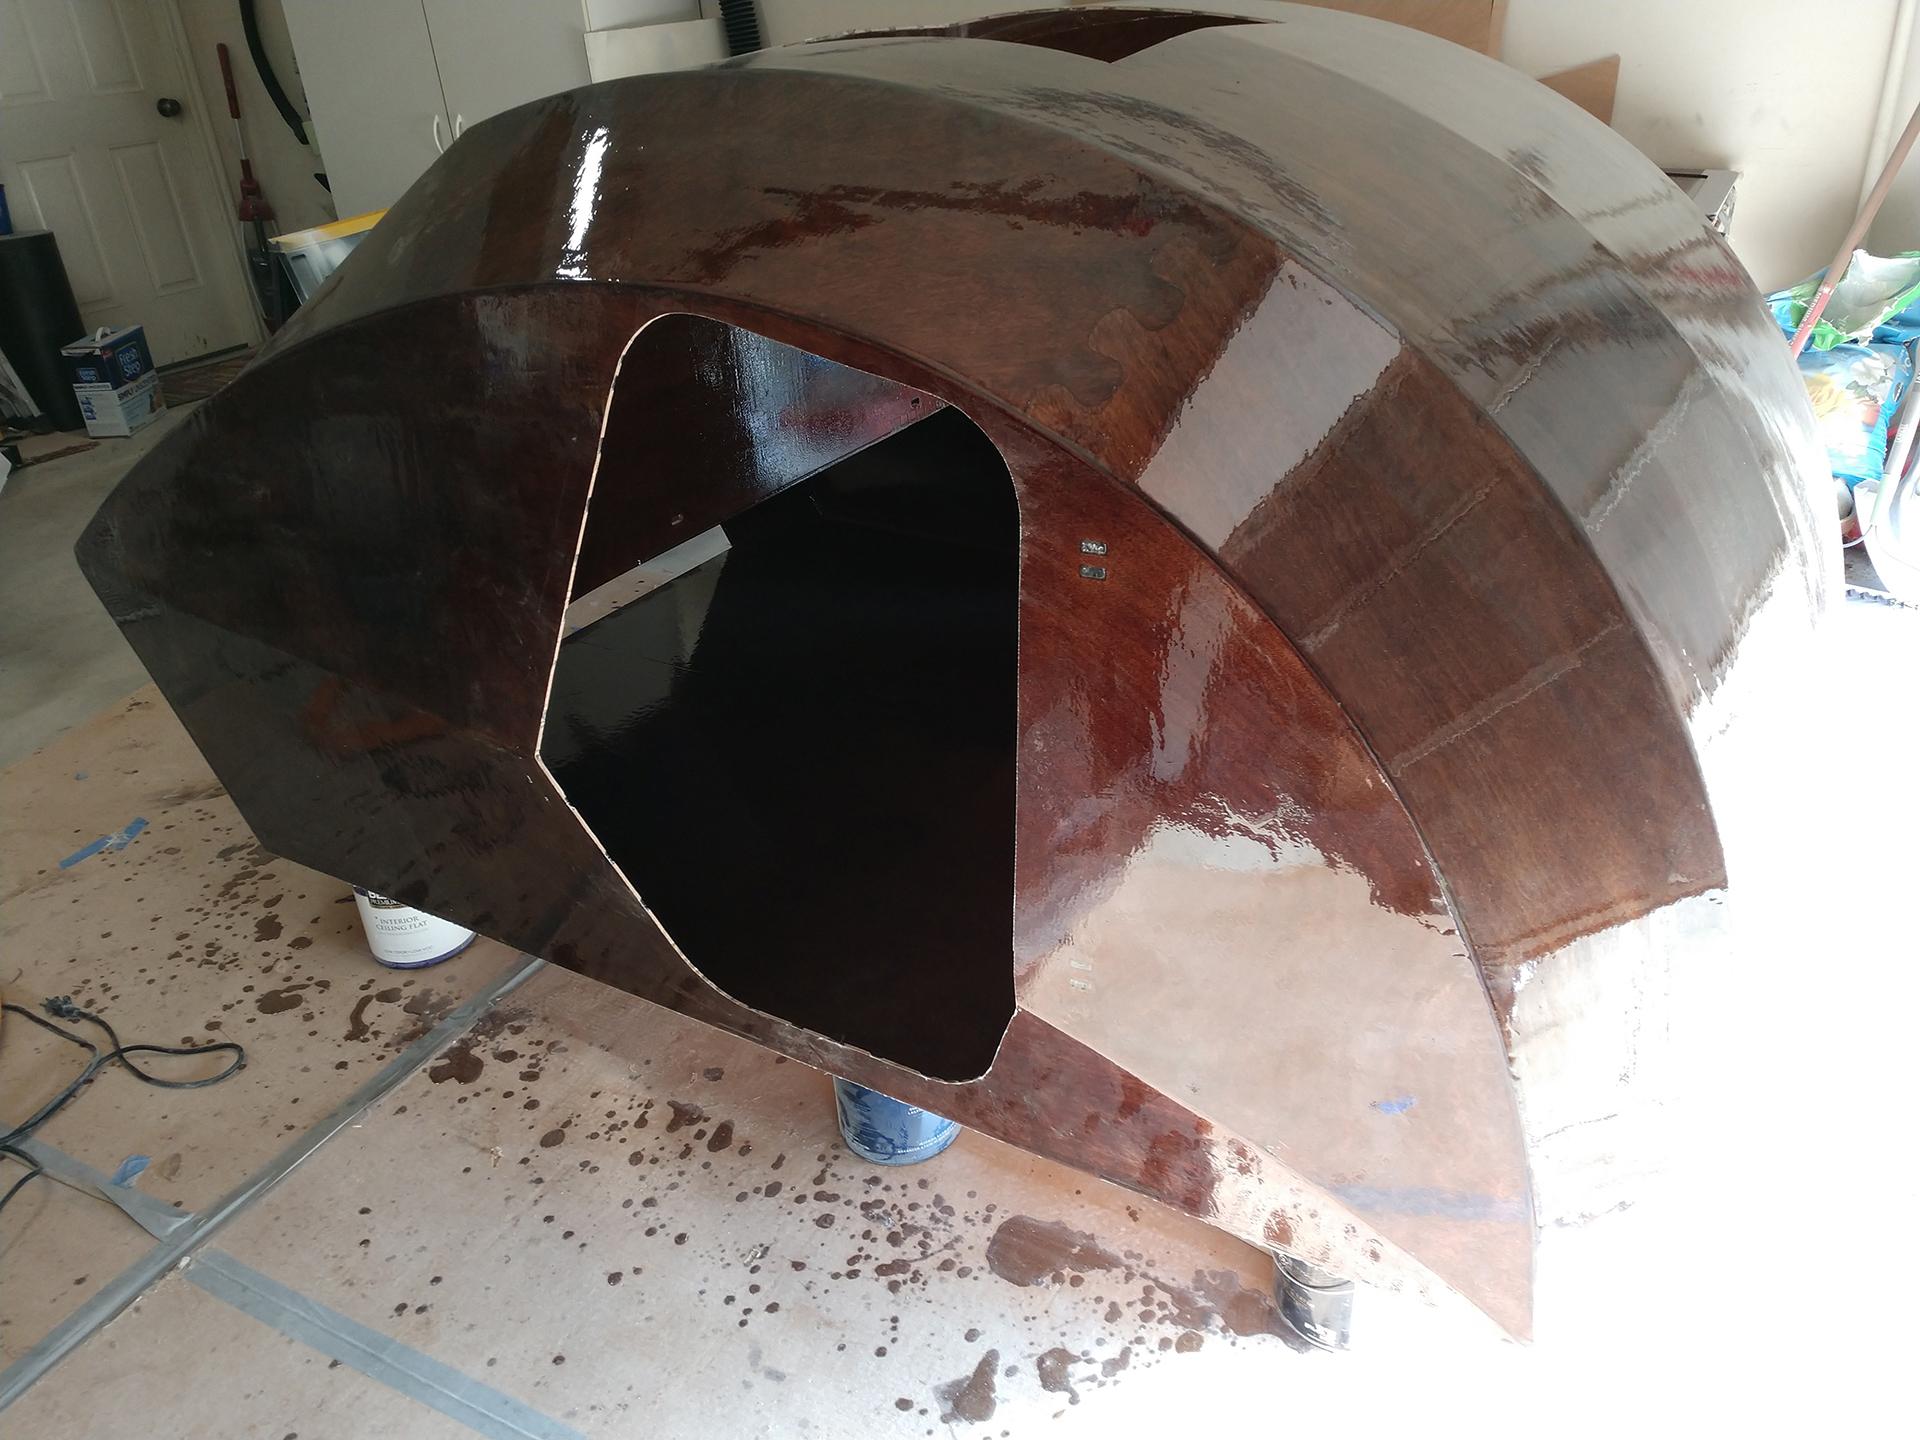
The gutter and roof hatch installs were straightforward. However I had an issue with the WIDTH of the lower gutter section as apposed to the length like the manual pointed out. I ended up cutting the puzzle joint in half and removing 1/4″~3/8″
I will be working on the doors next. I want to get the door stiffeners installed as soon as possible to maintain the door’s shape. With any luck I wont need the fabric door straps.
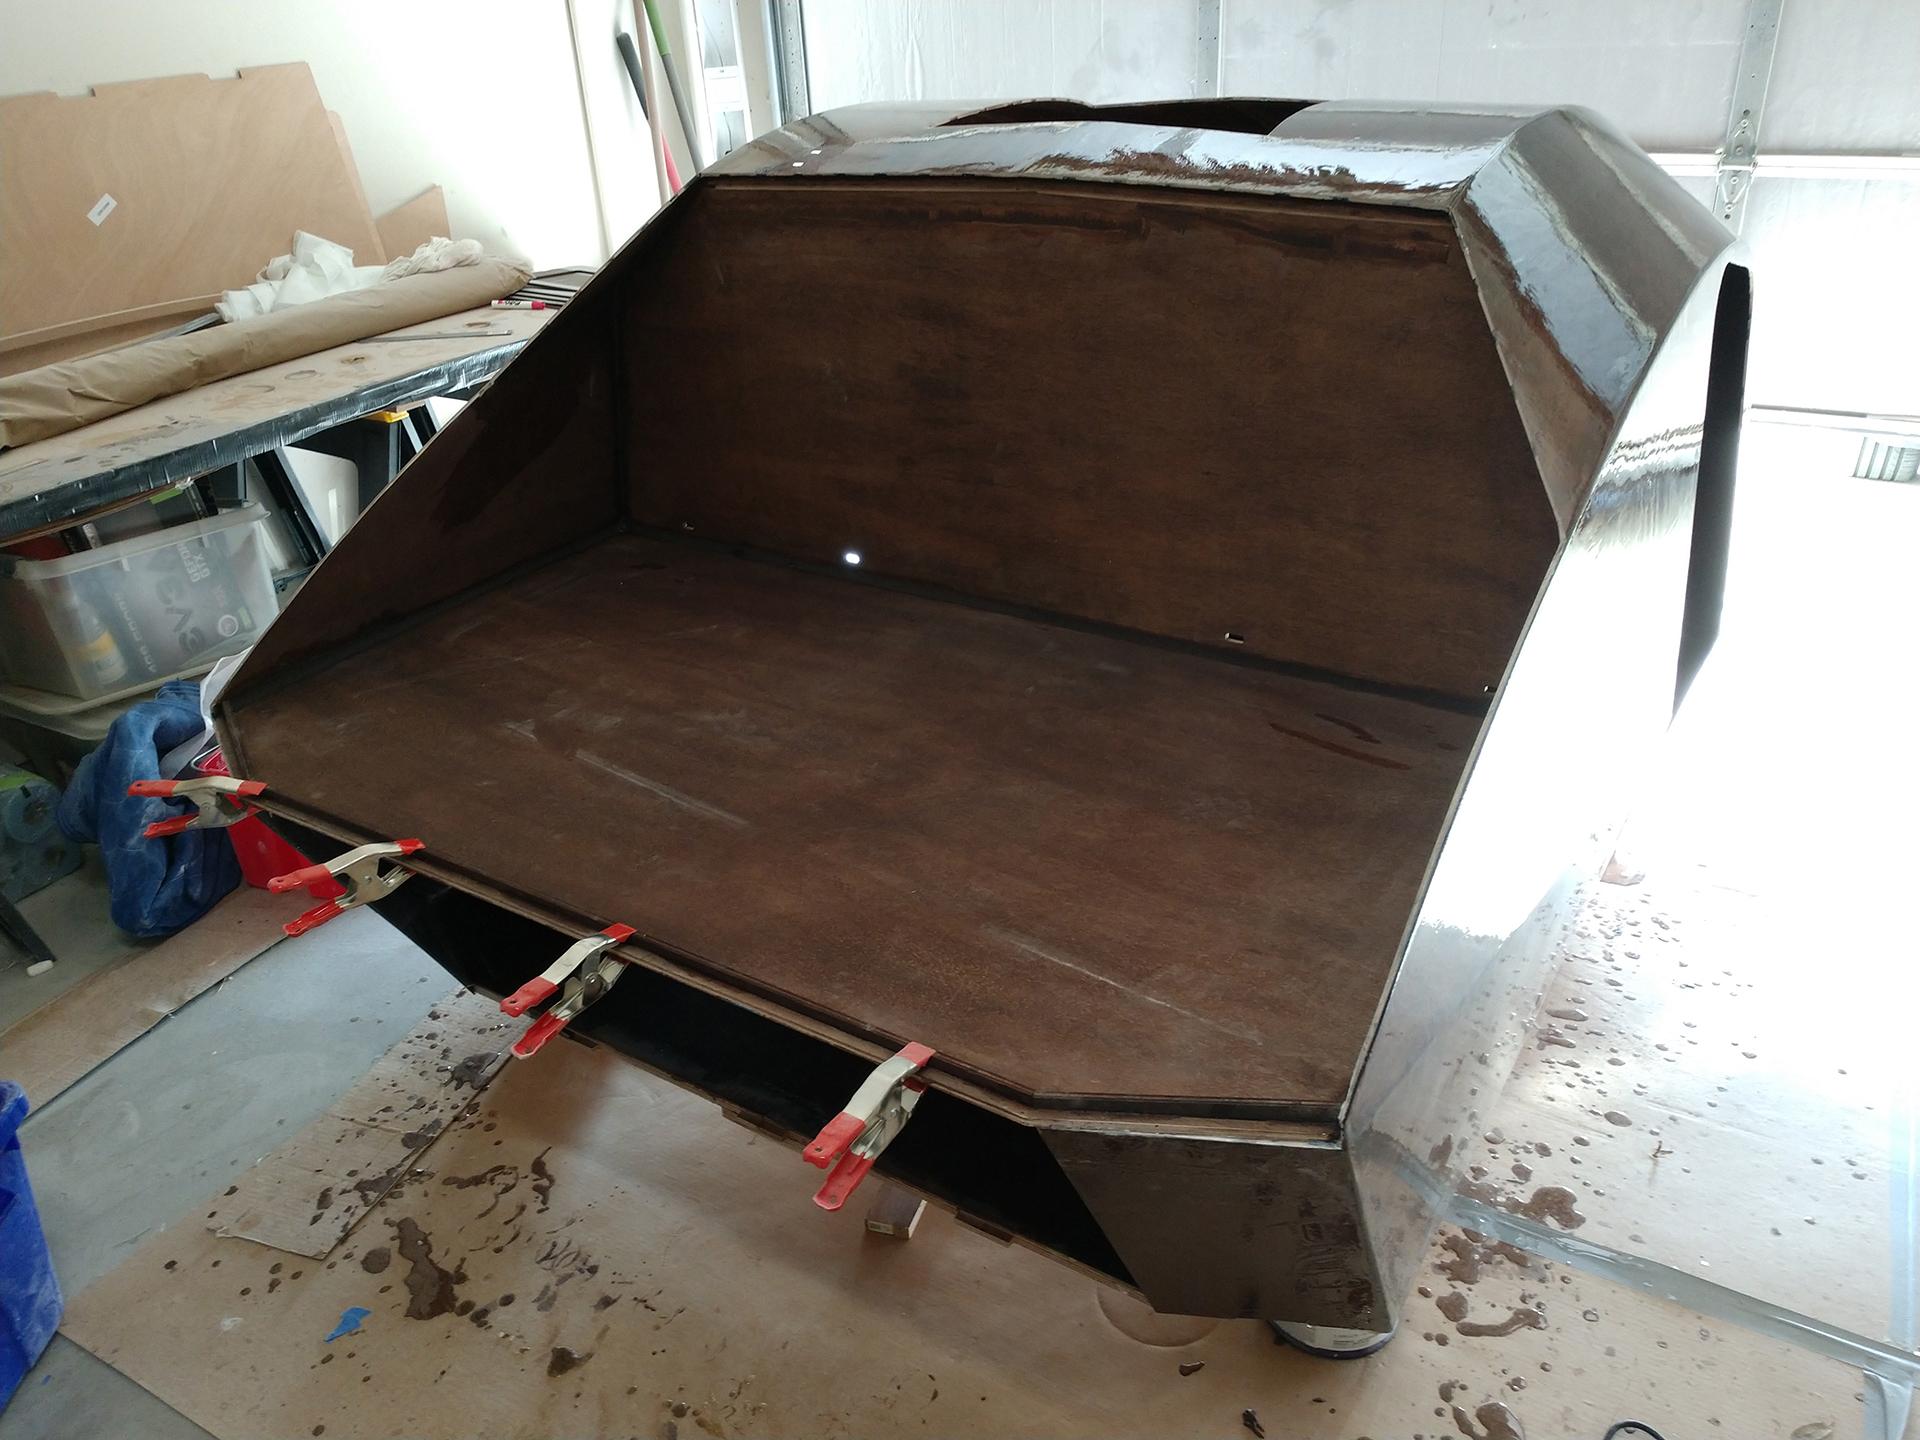
March 20, 2018 at 11:53 am #1724ParticipantProgress Update (Time Spent To Date ~140 hrs): Last week was productive, I was frantic about getting the last large epoxy job done before the temperatures here in Houston picked up.
Galley Hatch received its first complete coat of epoxy. You can see the window and roof hatch scraps propped up in the back. I need to figure out something fun to do with them. Any ideas?
The door stiffeners were shaped (a lot of tapering was required much more than the manual seemed to show).
Gluing the stiffeners in was easy, I opted not to use the stitching method and instead I measured and marked their position. A little weight on the top (full paint can) and pressure from the back side with a clamp propped up kept the door in the correct shape/angle.
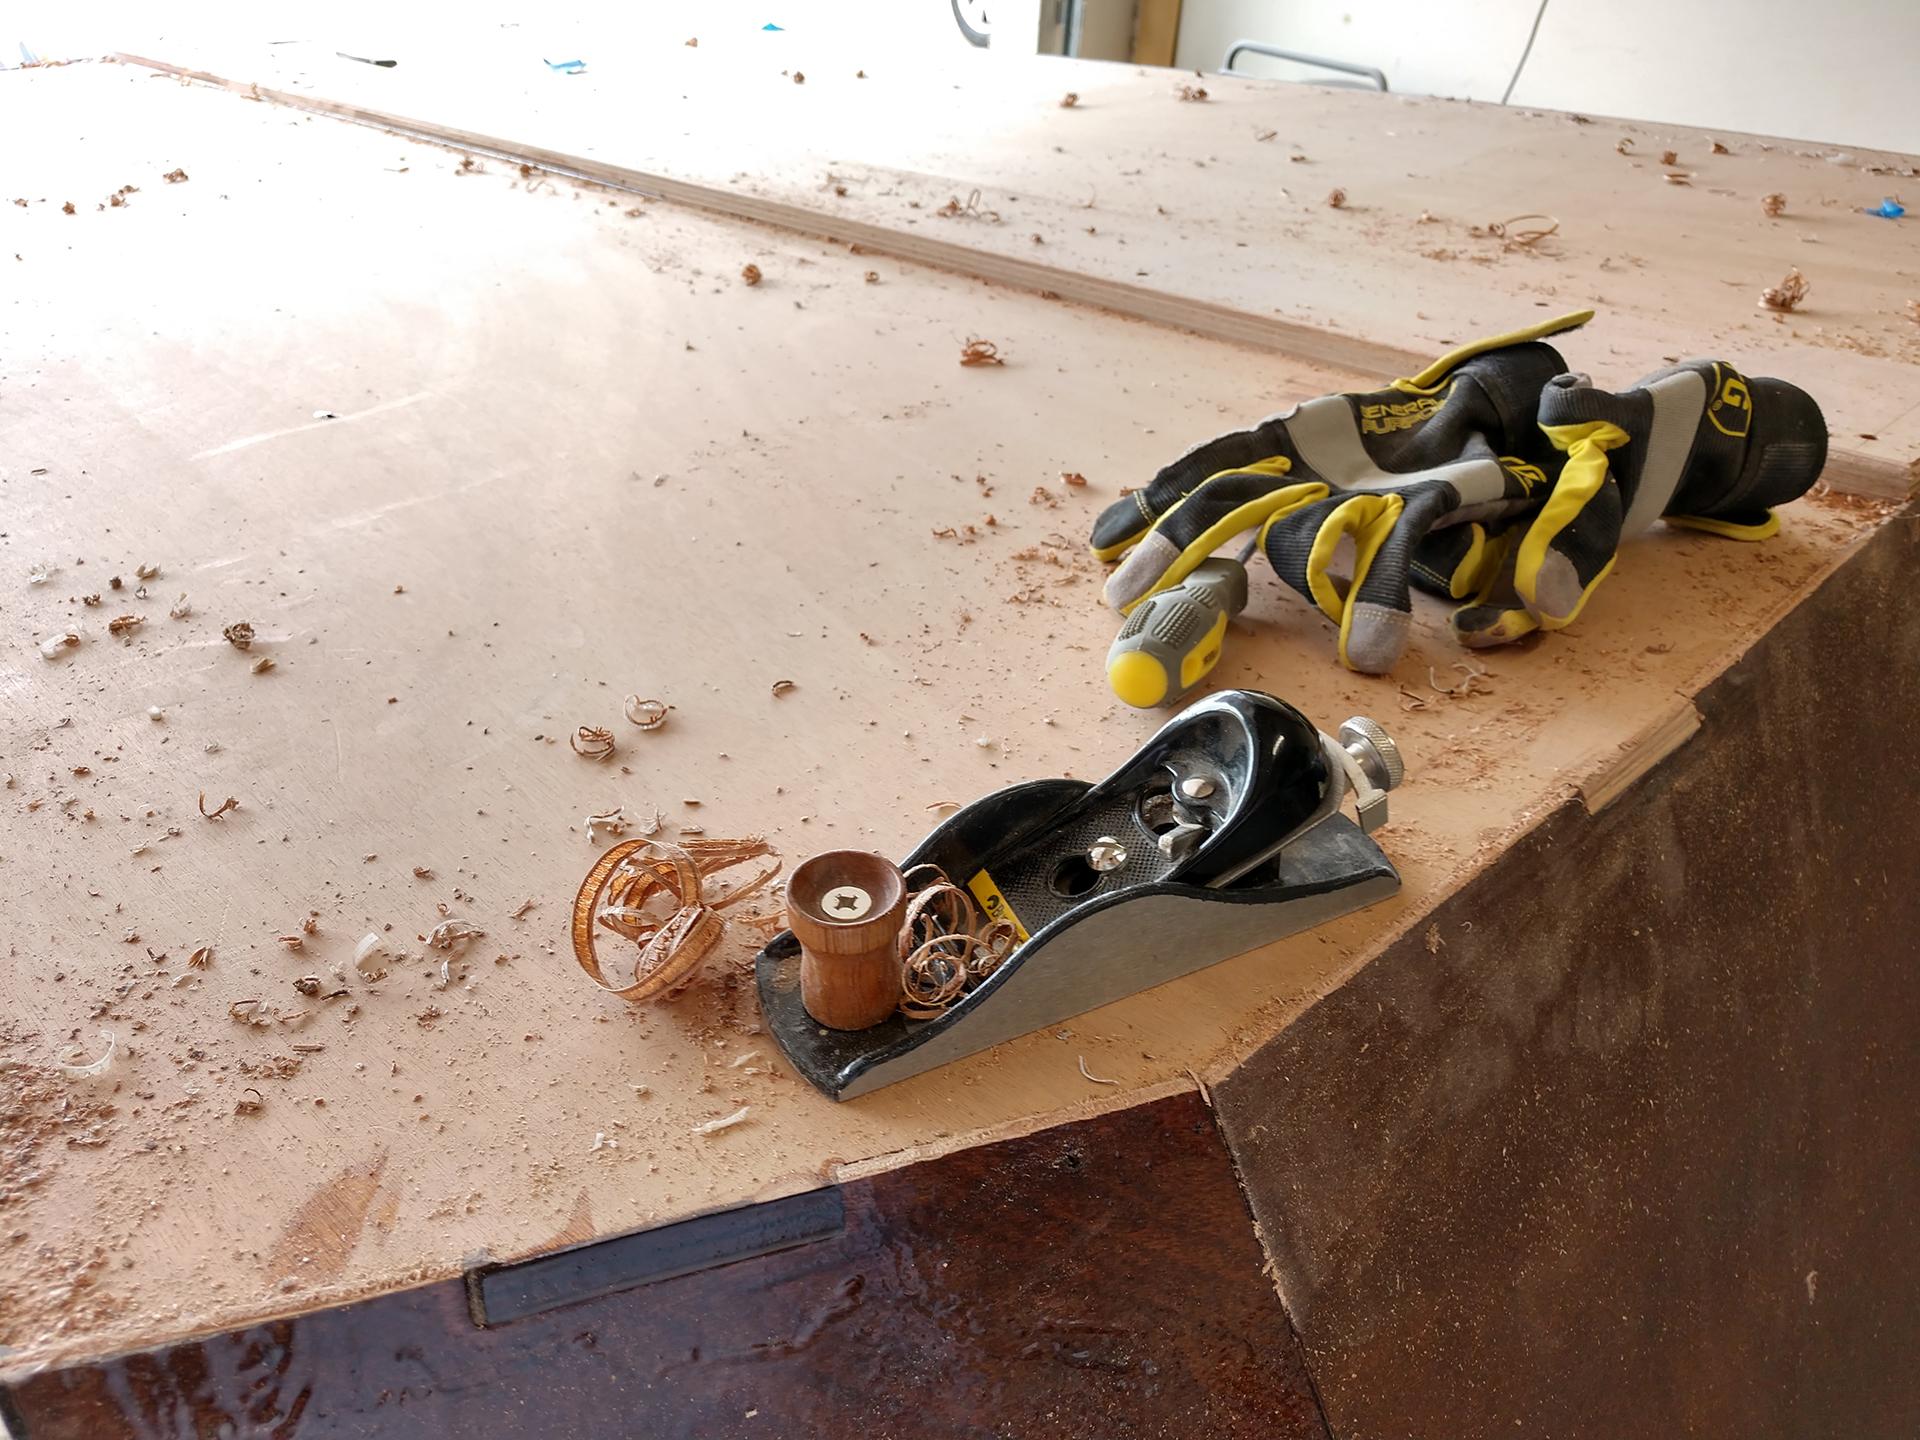
The turtle was flipped on its back. I used a Coping saw to cut away the overhanging fiberglass which was so much easier than trying to do it with a box knife.
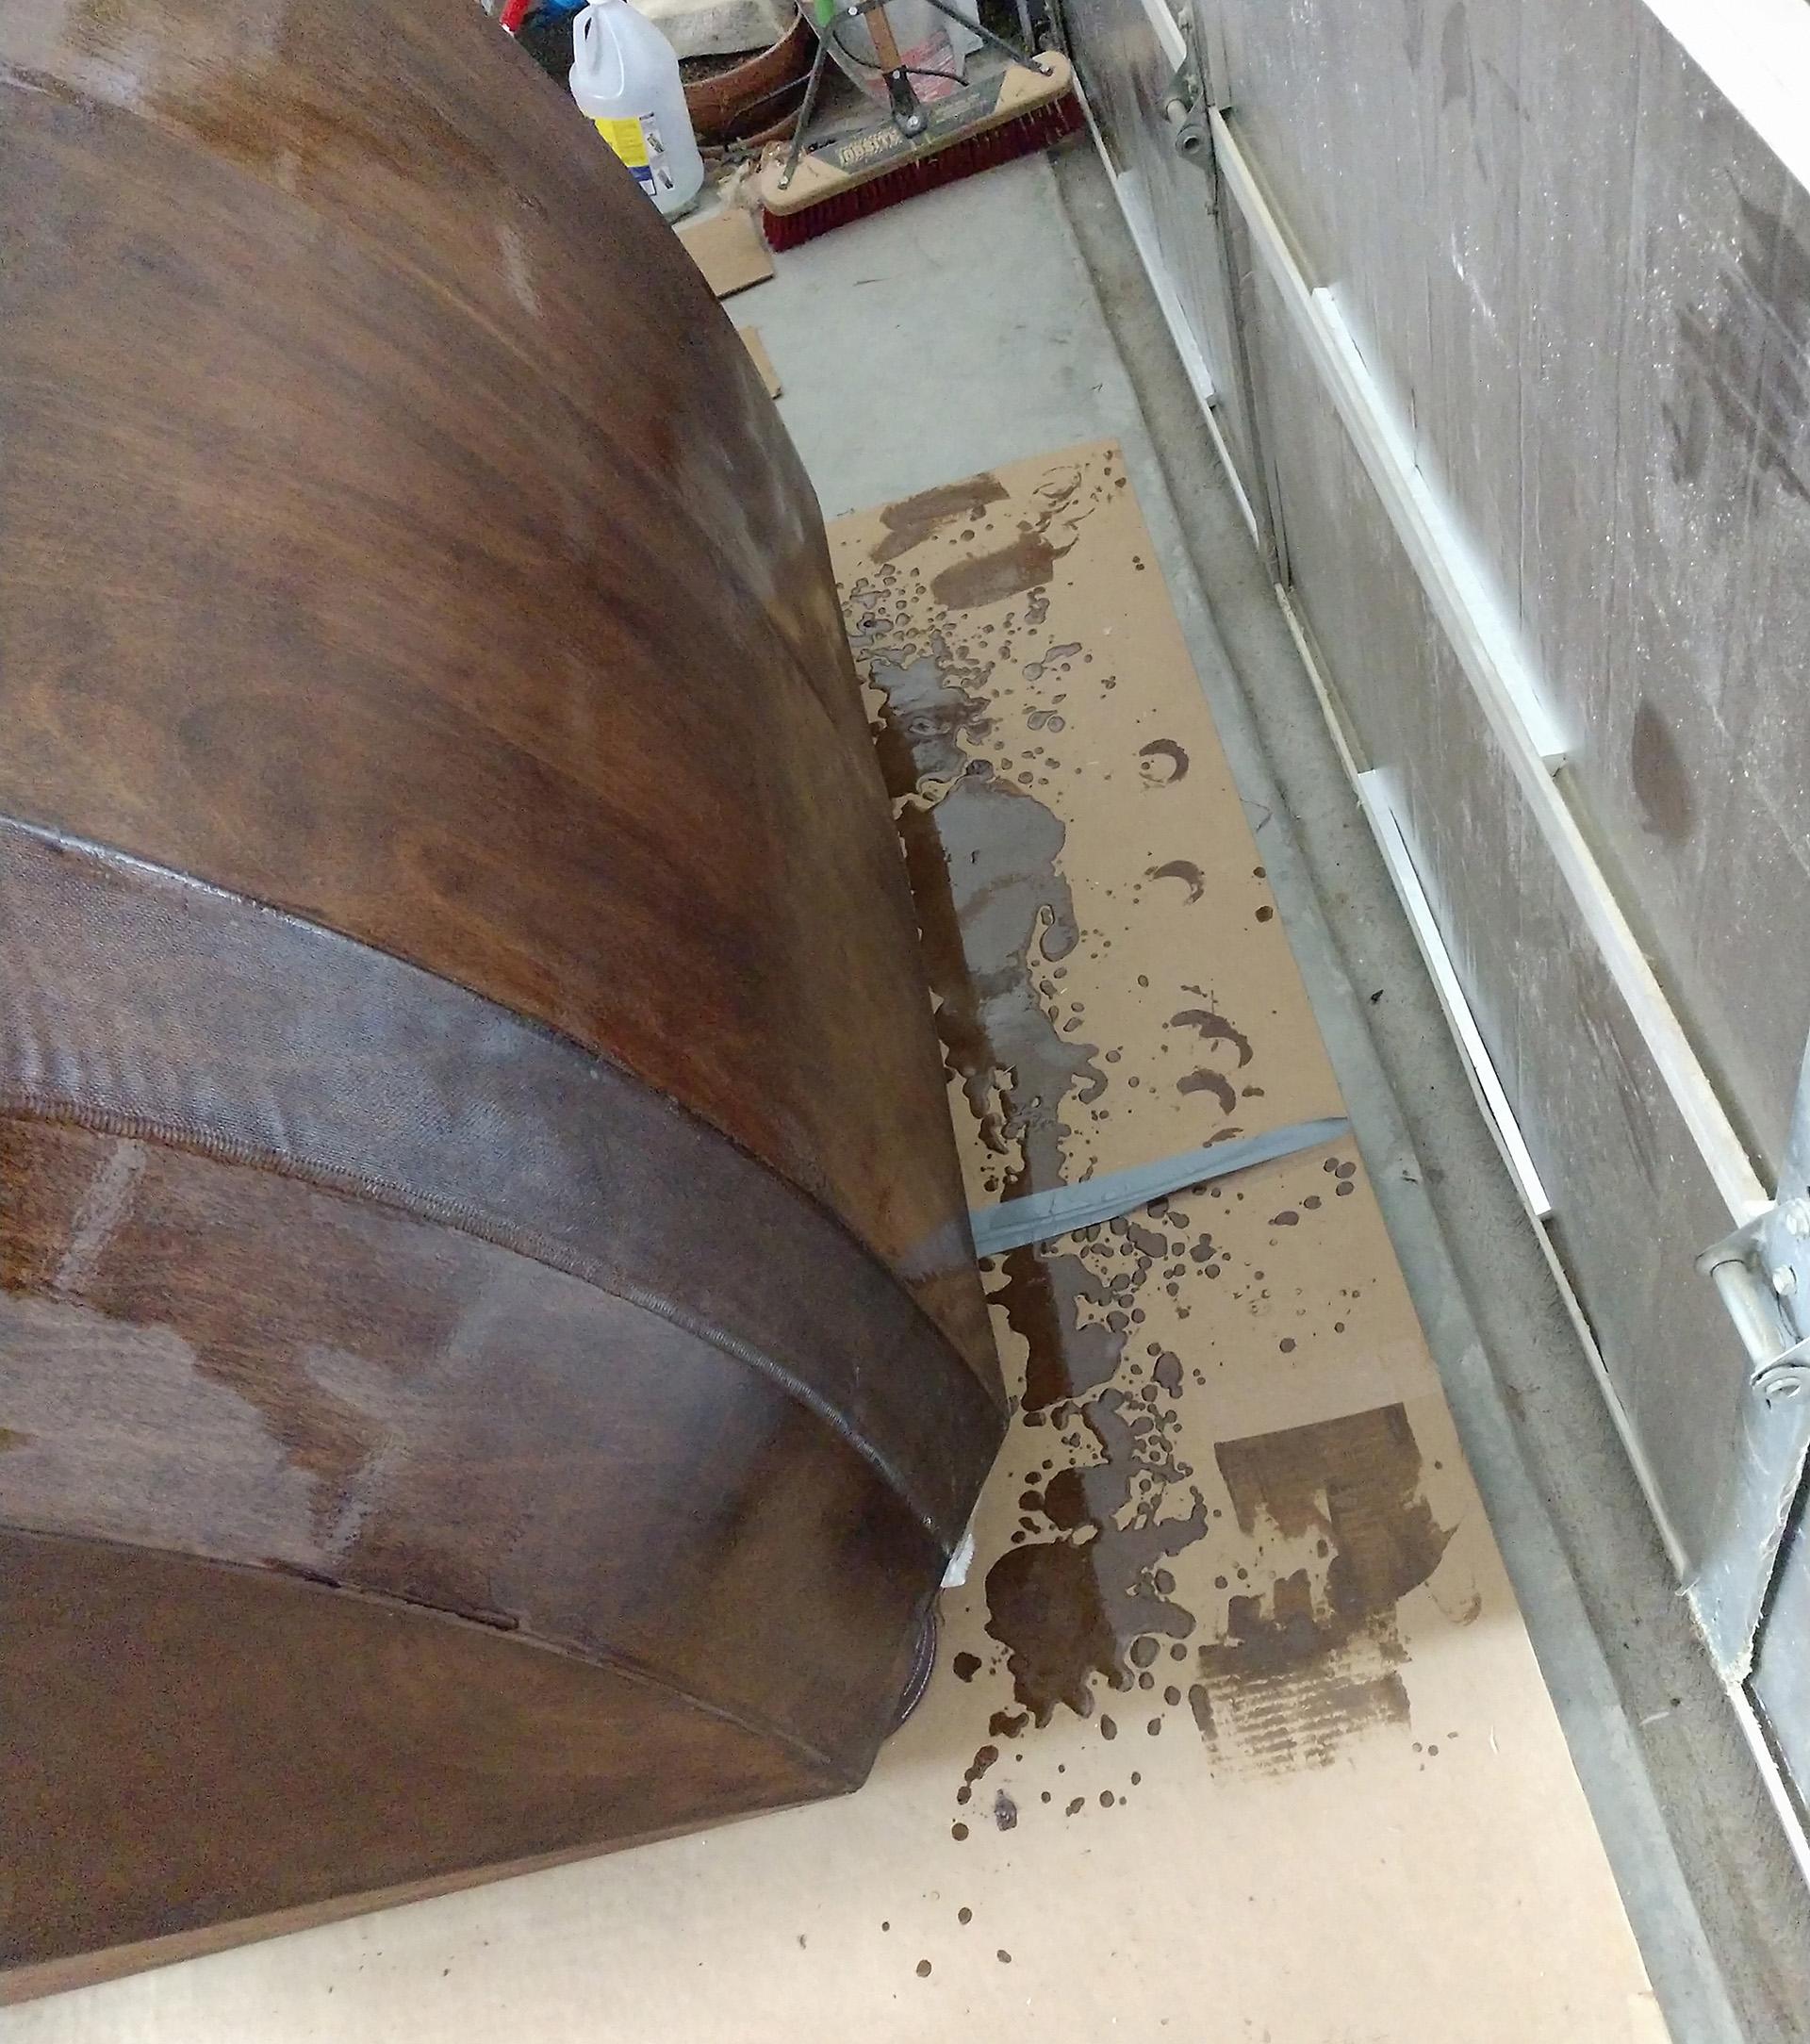
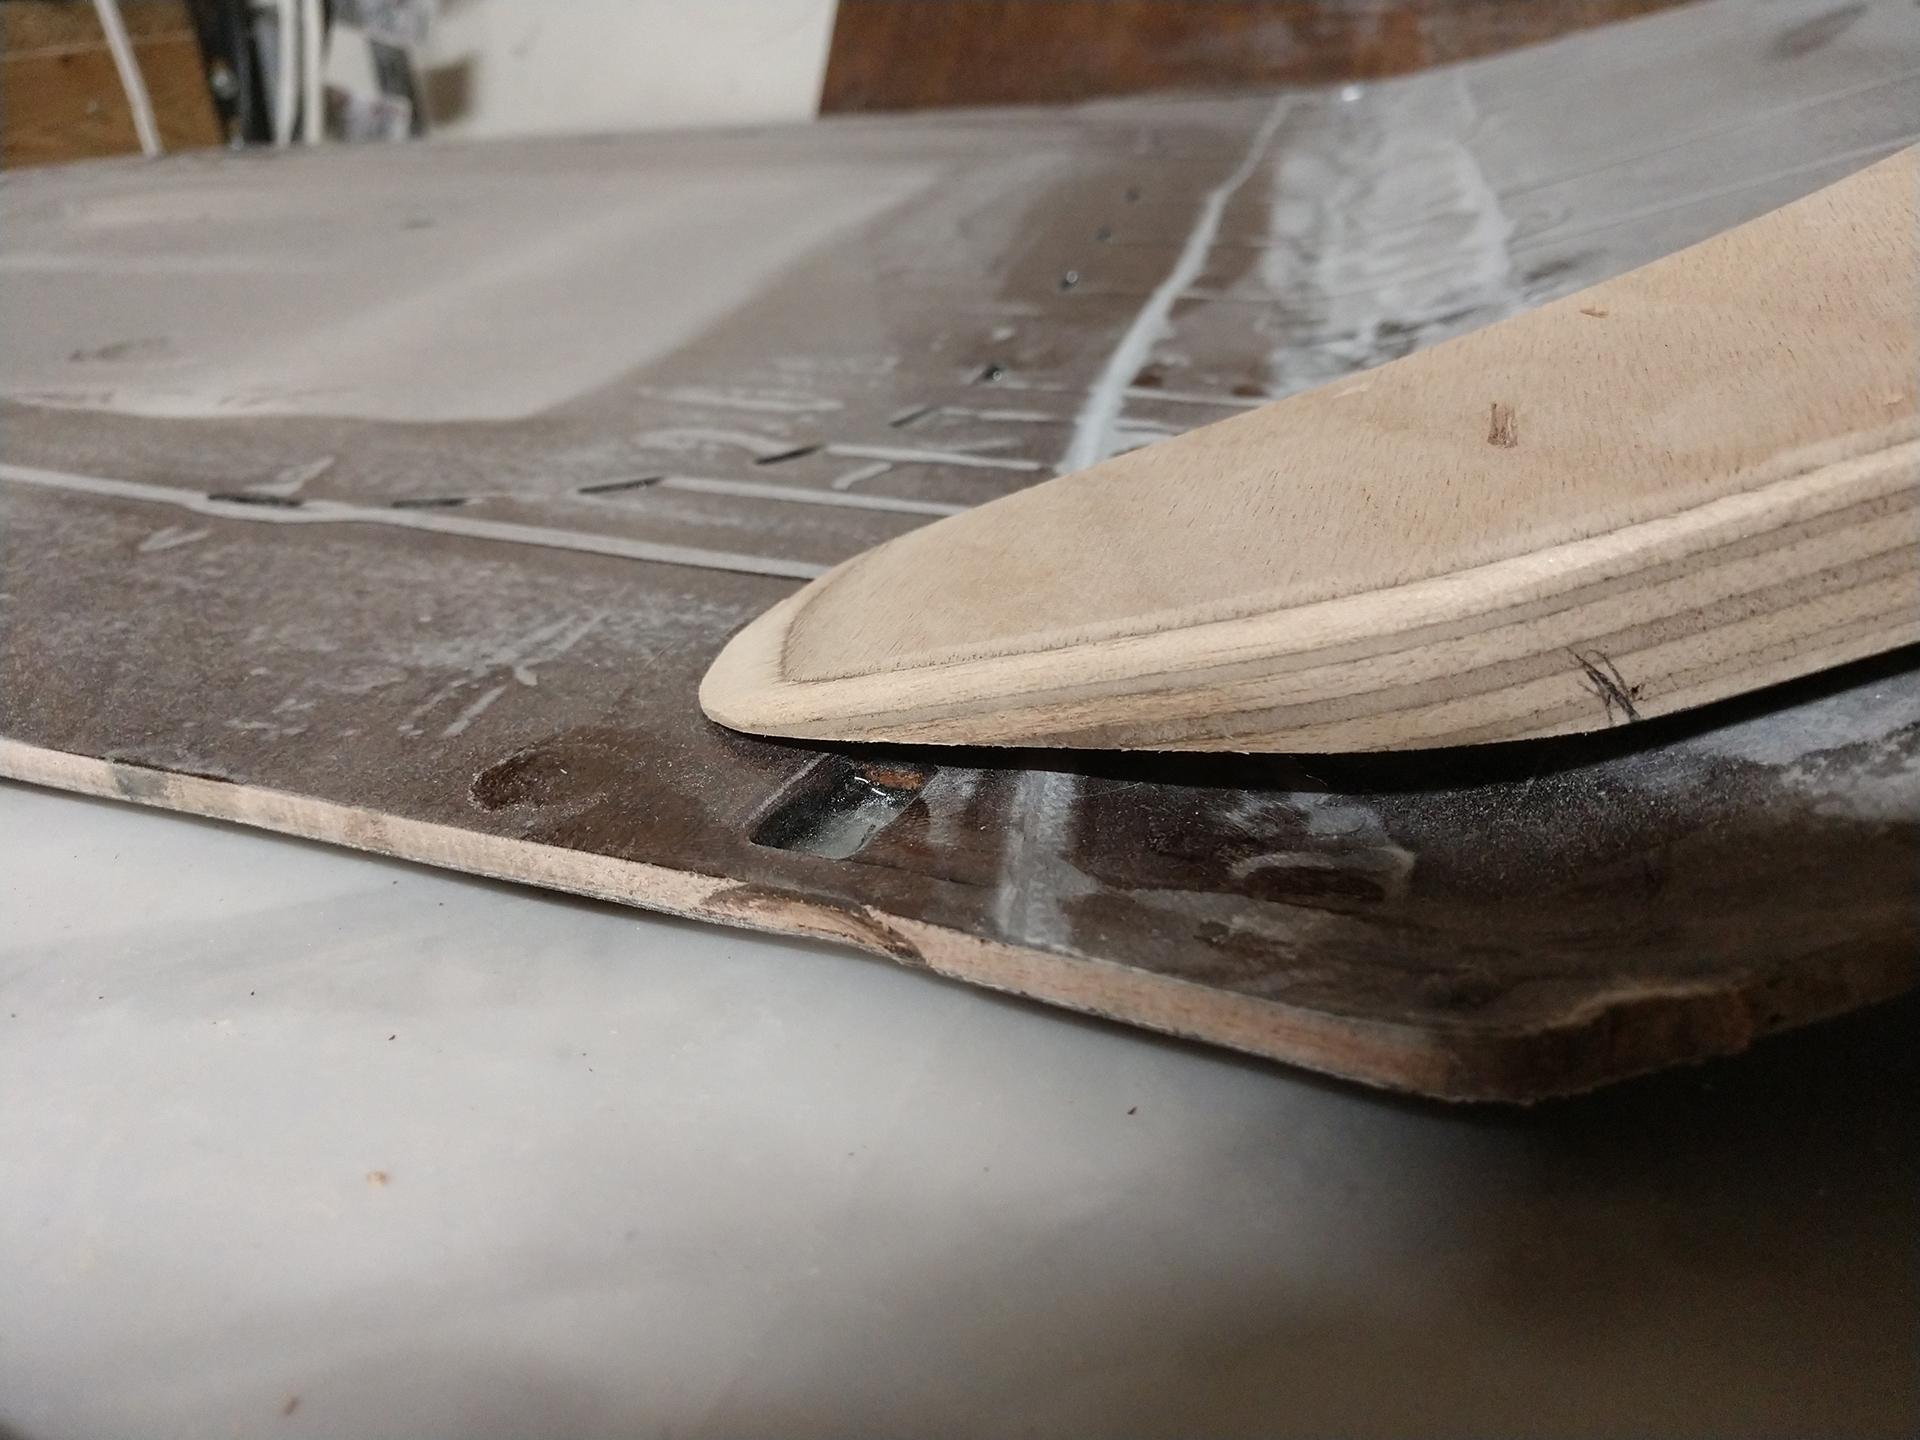
The block plane made quick work of leveling out the shell to the bottom surface. I wish I had routered the round over on the butt-block before gluing it to the floor. The block plane and random orbital sander was used instead.
The window sills were glued to the doors after the stiffeners received their first coat of epoxy. I used all of my clamps for this…I may need more for the door sill install.
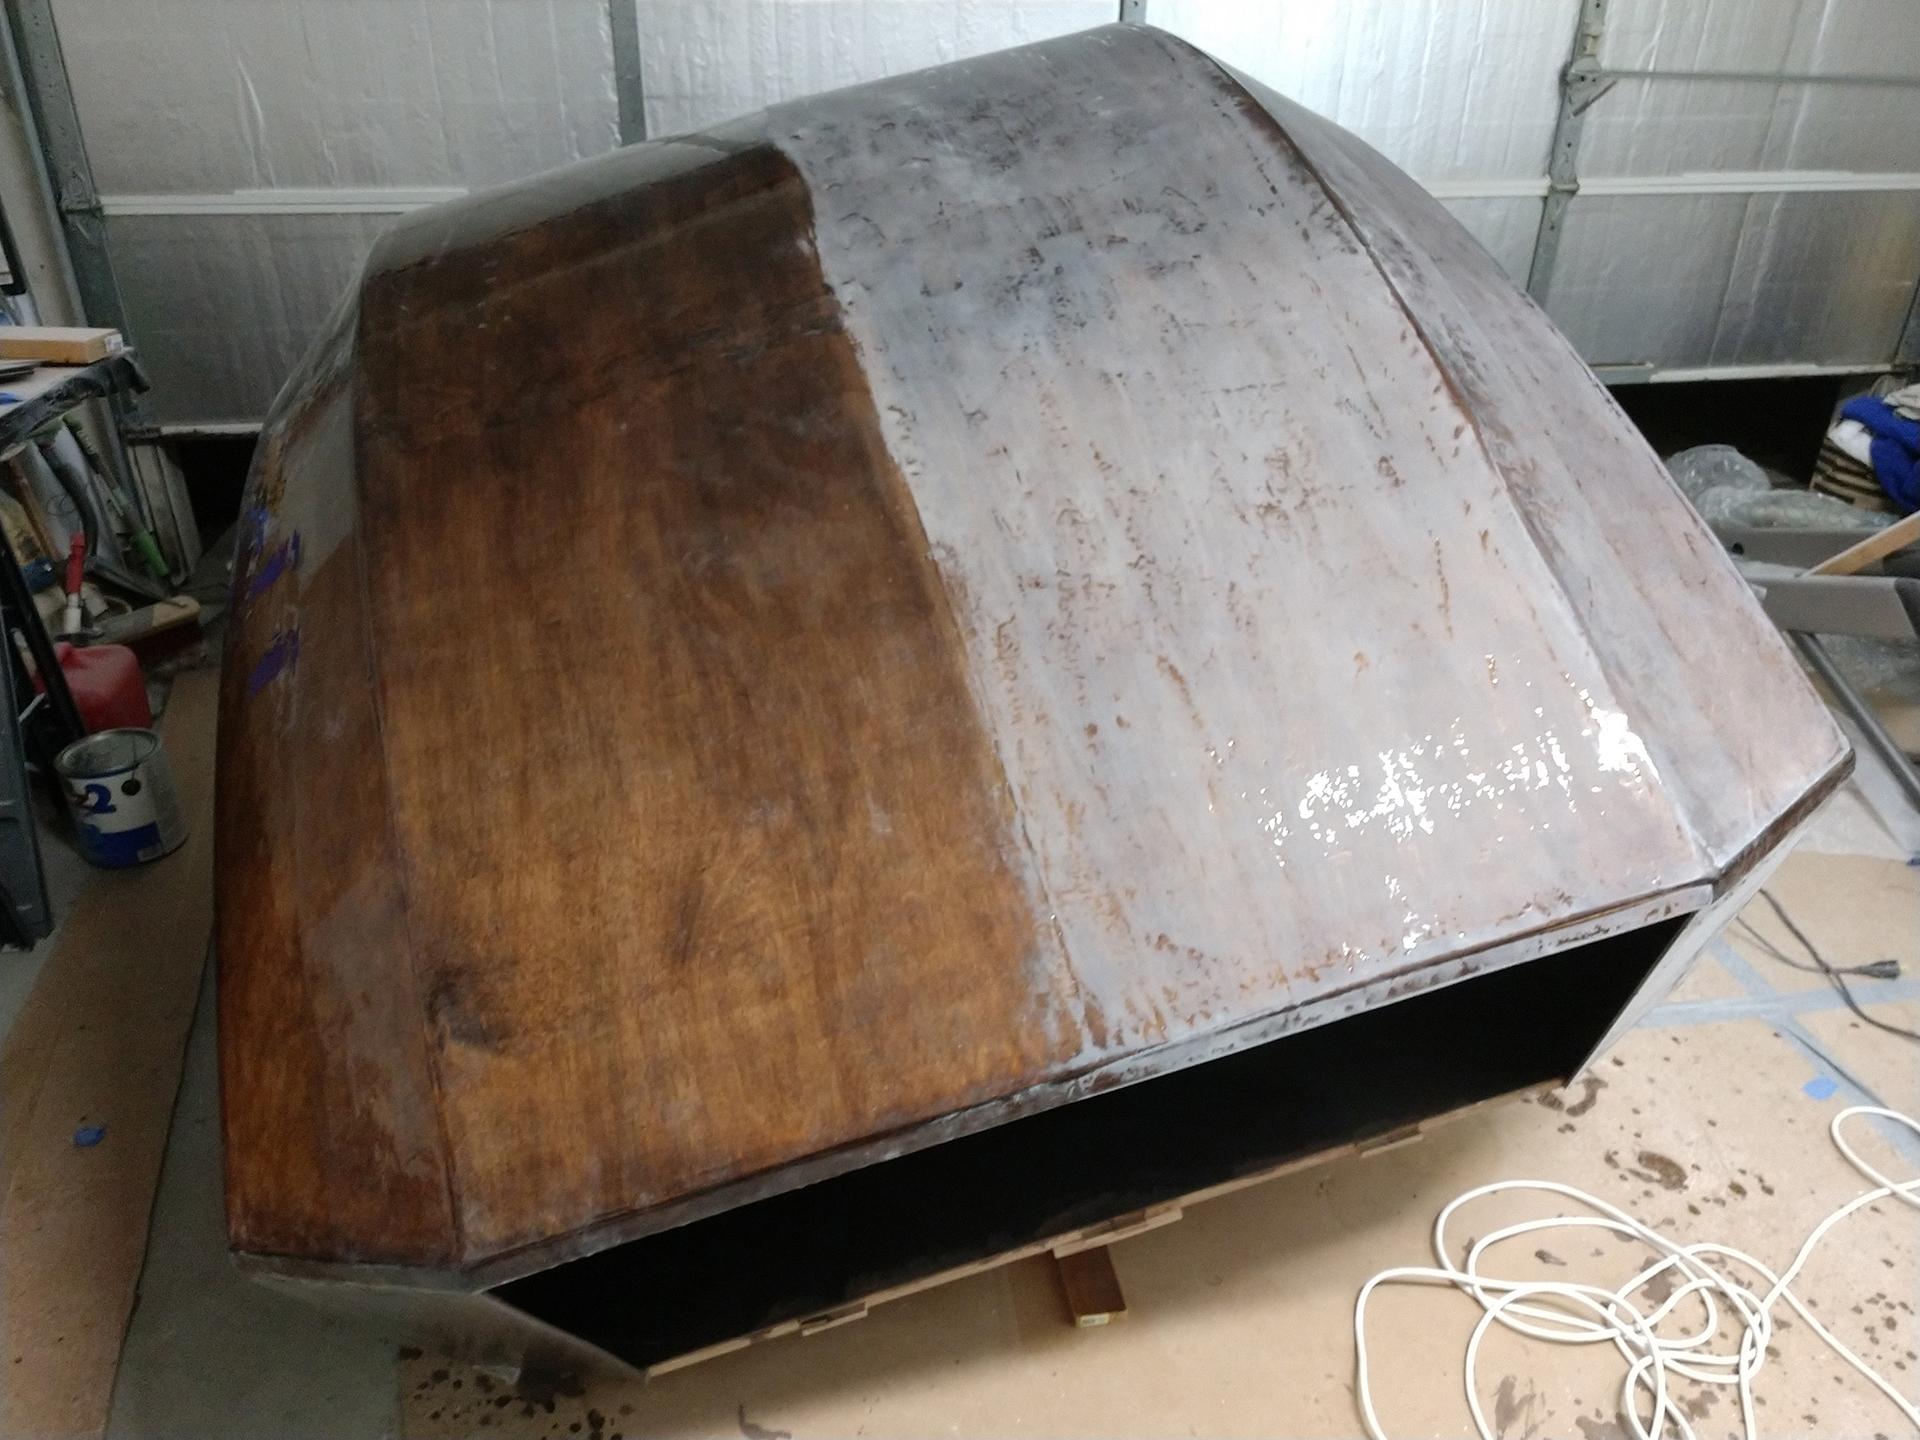
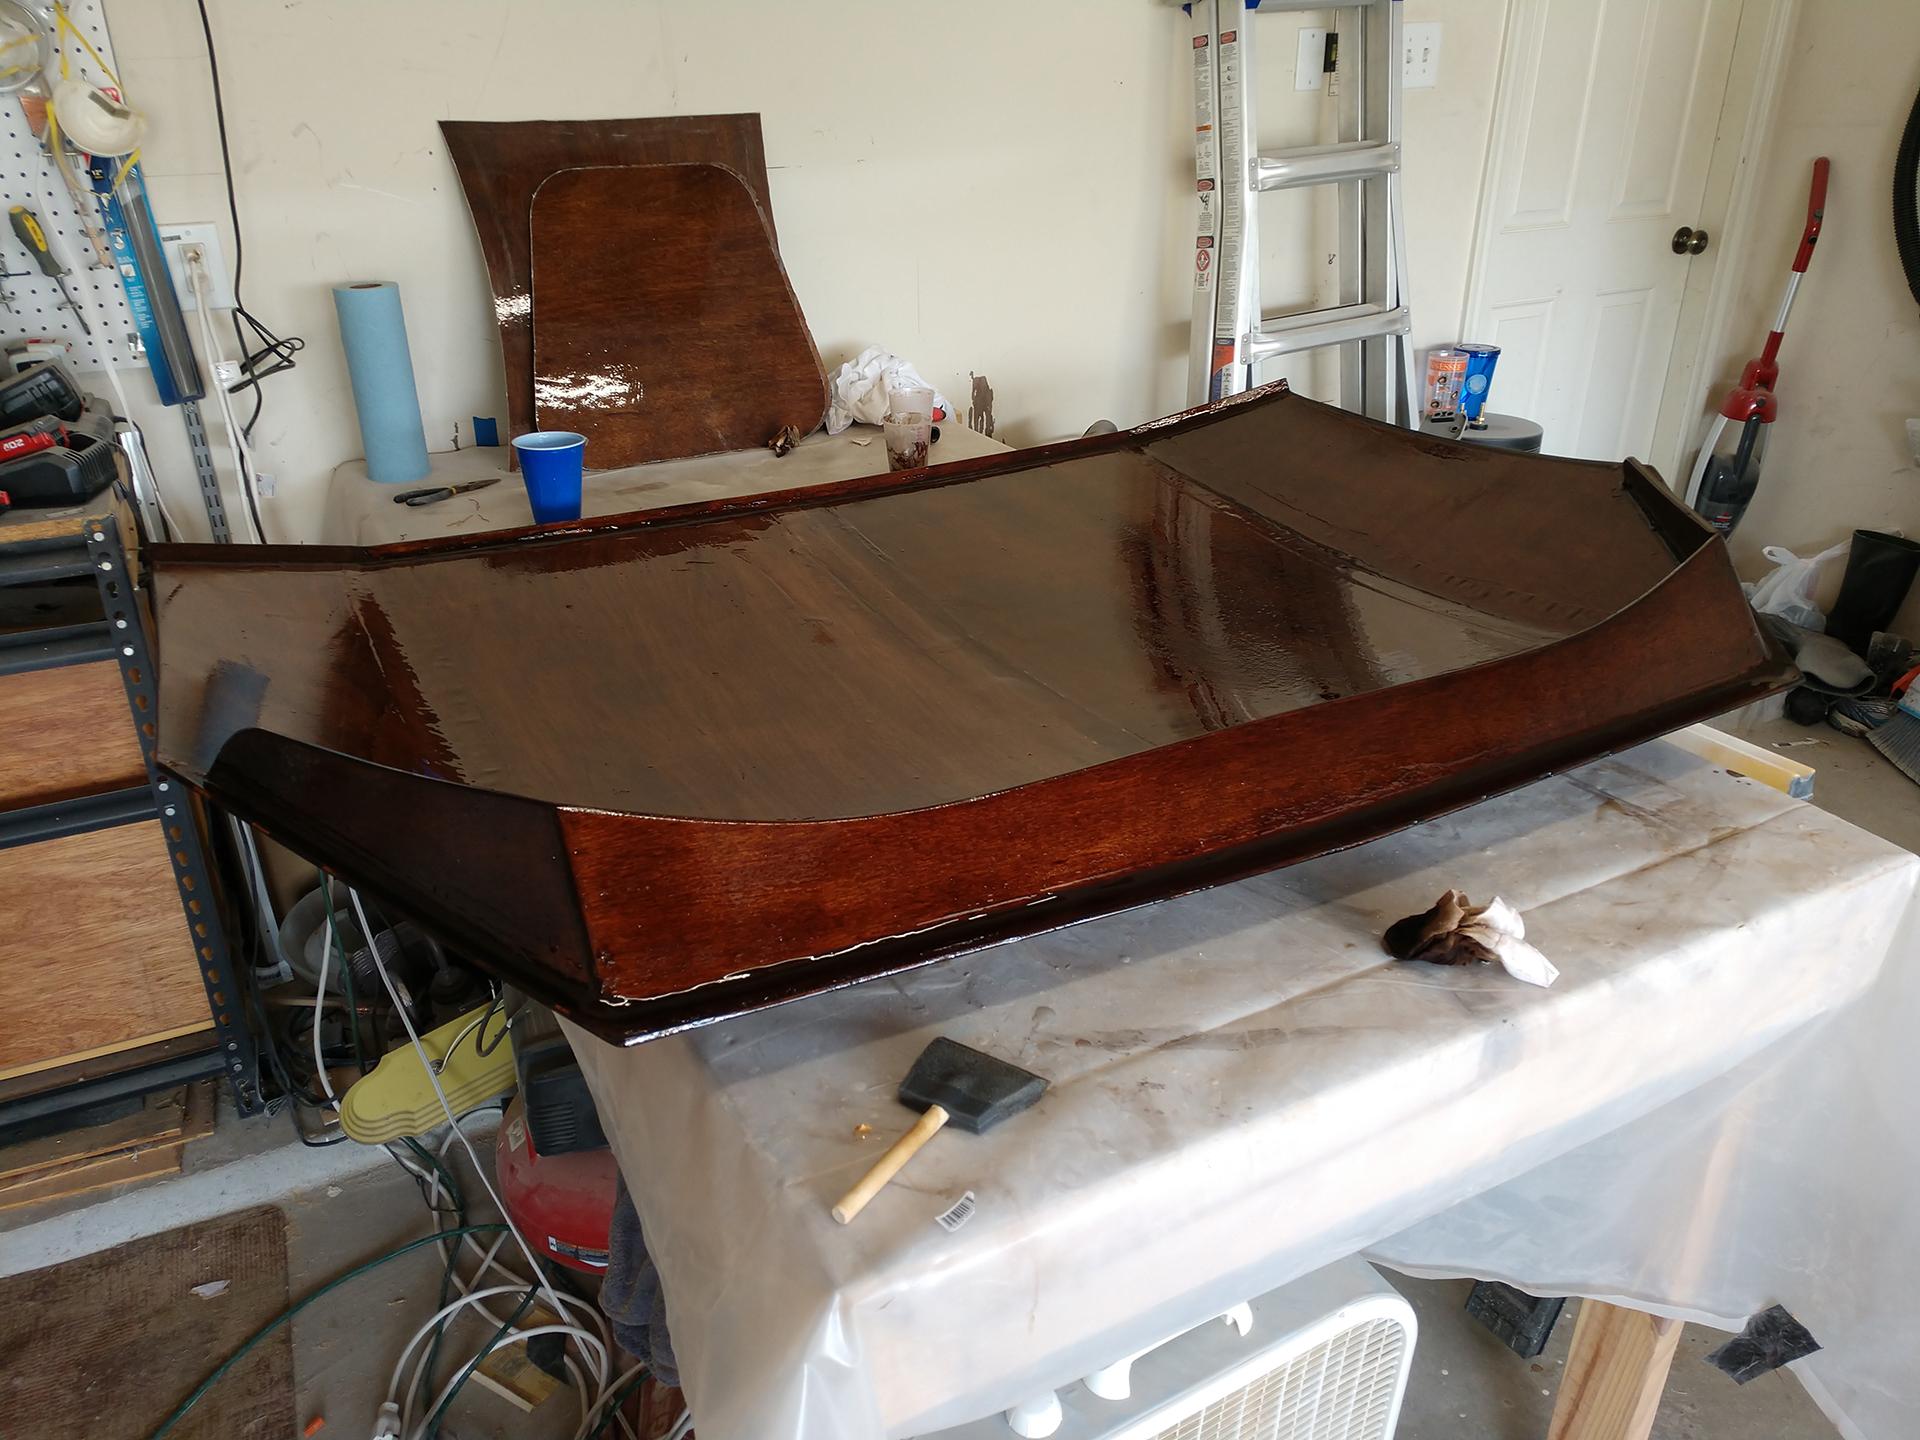
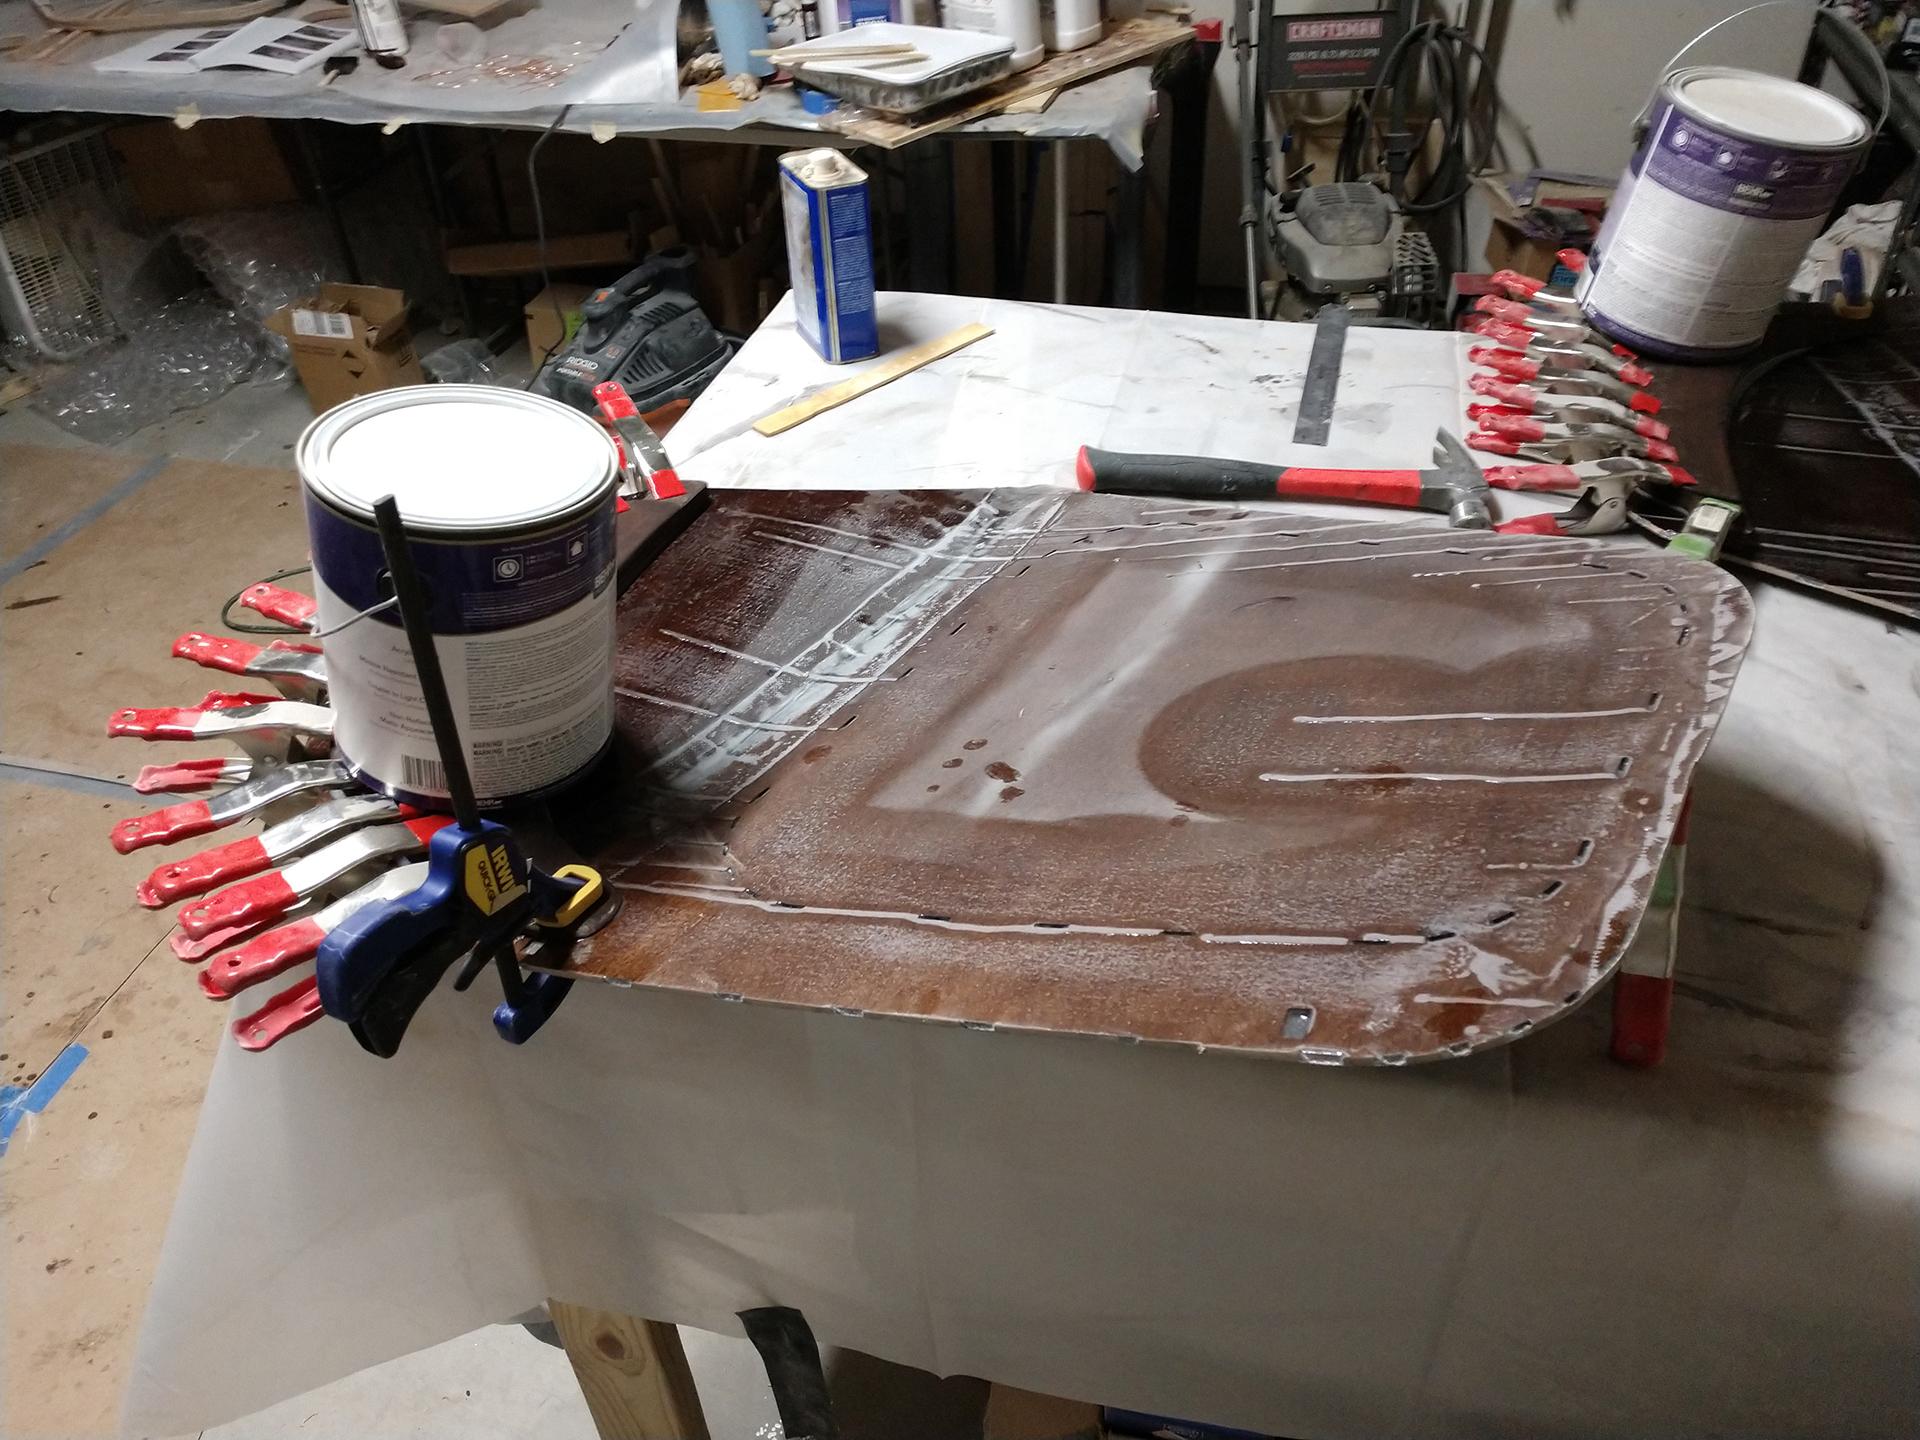
With the final shaping of the bottom complete I opted to pre-stain and dye it just in case I decide not to paint the bottom when i’m done.
After it was dyed I filled some gaps with thickened epoxy and applied the butt-block fillet.
 April 7, 2018 at 3:56 pm #1758
Dan
ParticipantRegarding the window and roof hatch scraps: folding camp chairs. 🤔
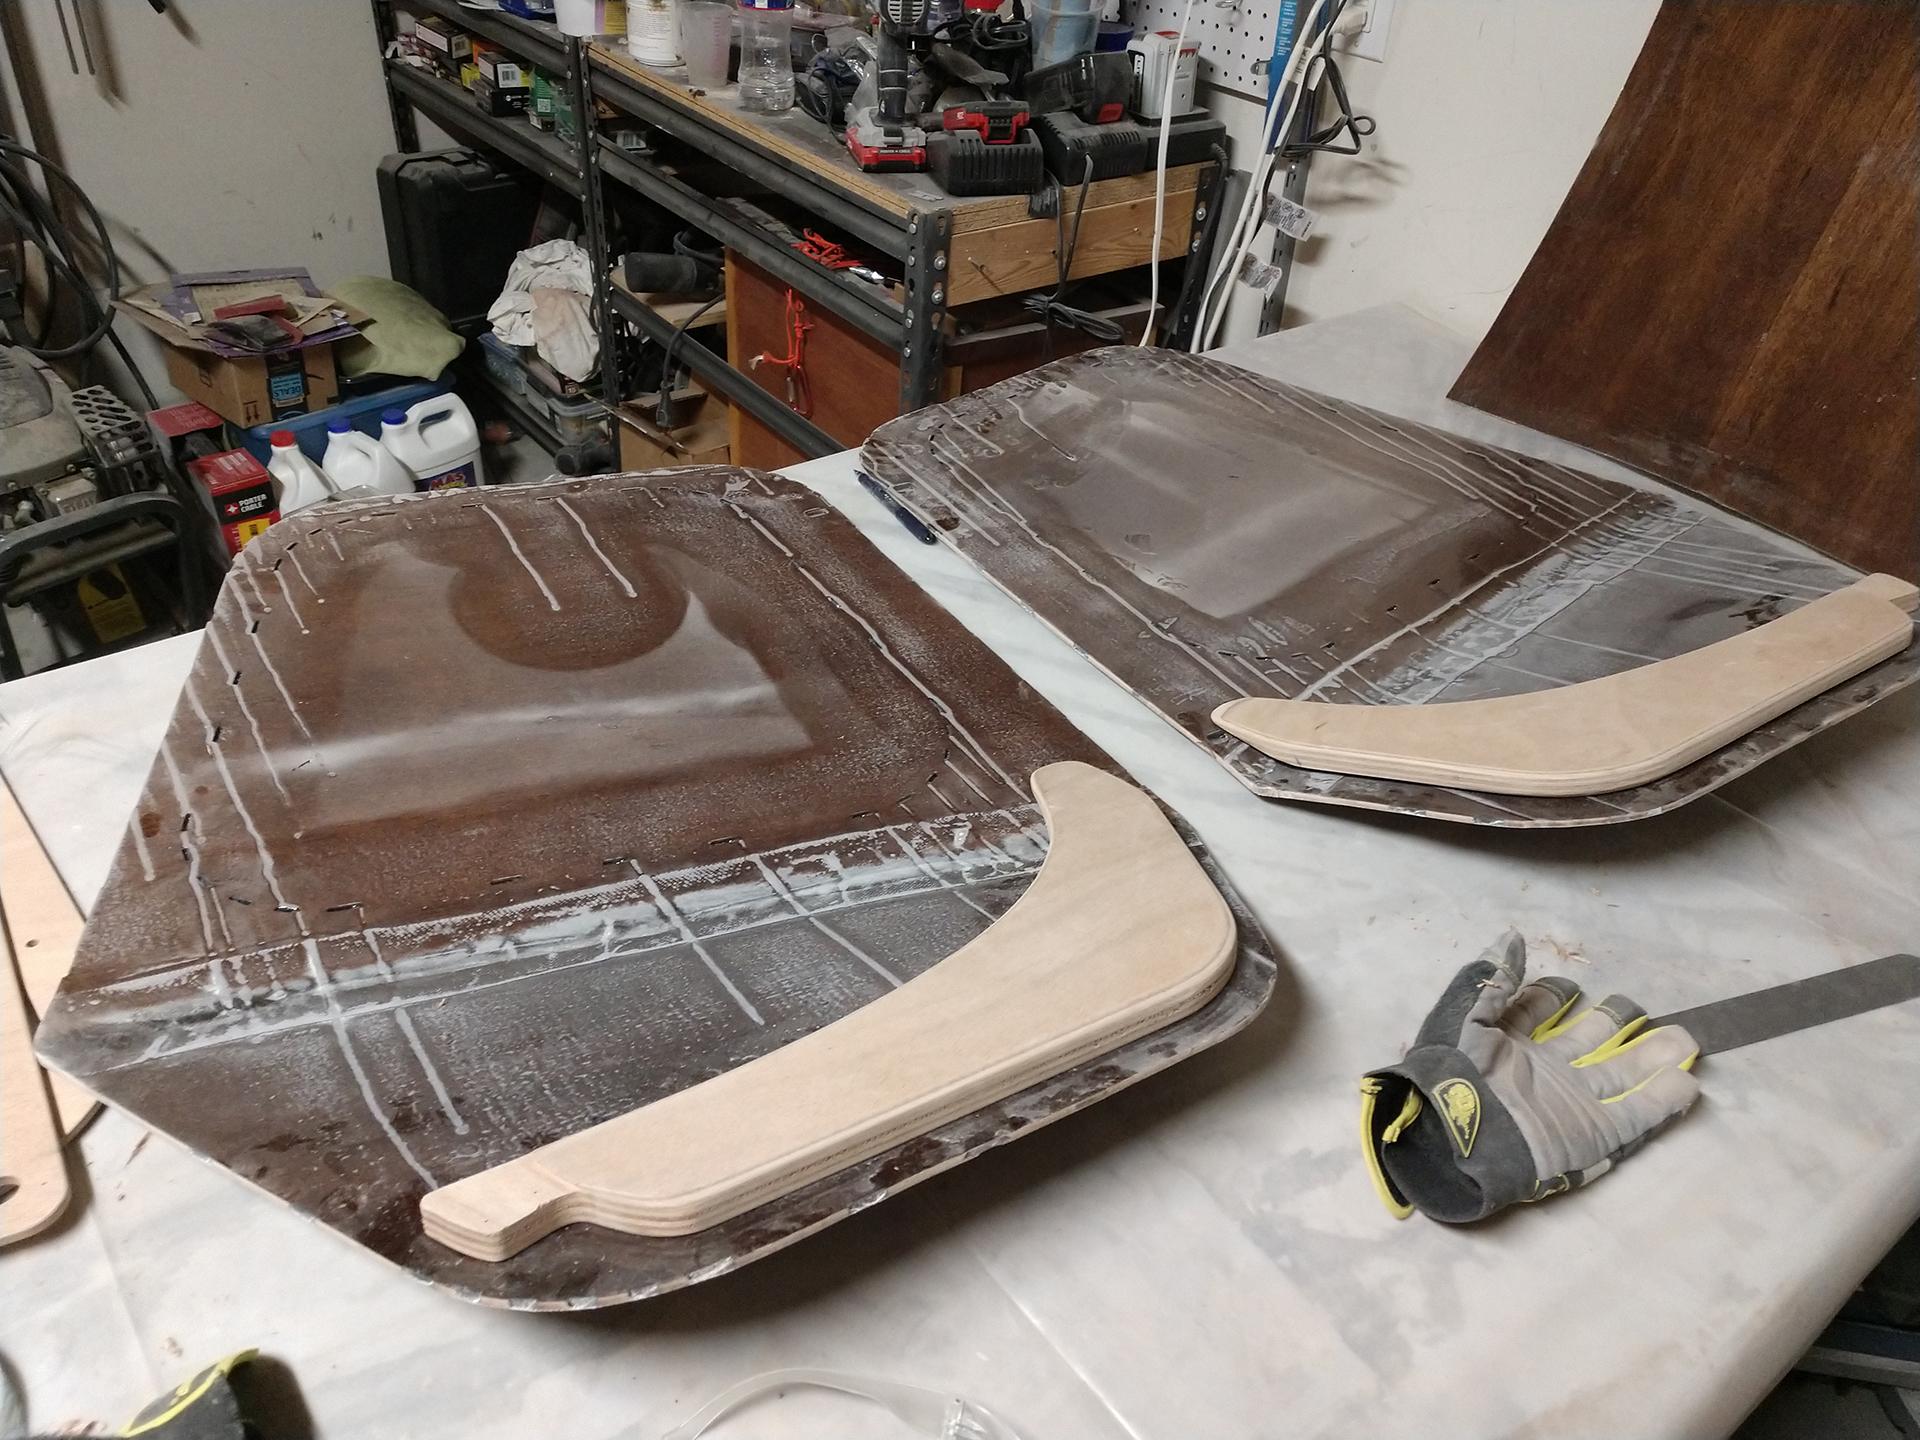
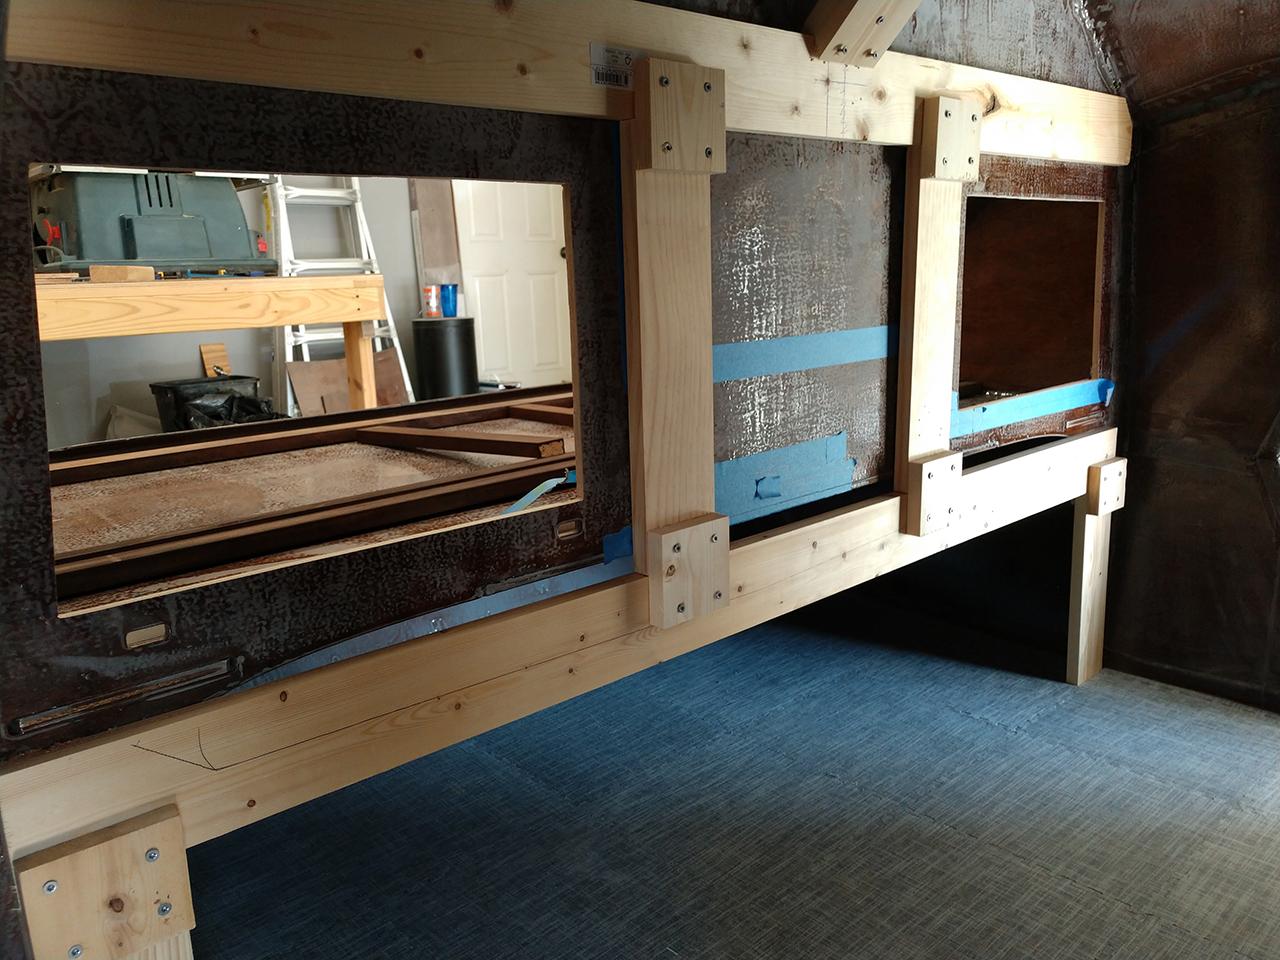
May 7, 2018 at 12:45 pm #1821ParticipantProgress Update (Time Spent To Date ~180 hrs): I took a weekend to overhaul my workspace so progress was slow. Doors temporarily mounted using the metal hinges from Southco https://www.southco.com/en-us/n6 Galley underside framework started and bulkhead cutouts almost complete. I’ve also installed some foam tiles to make working inside the camper a little more comfortable. At this stage in the build I am almost completely off book. Next step is the construction of the left, right and center cabinet units behind the bulkhead before a final sanding & staining on the cut out edges and a final coat of epoxy on the interior.

 July 16, 2018 at 2:12 pm #1982Participant
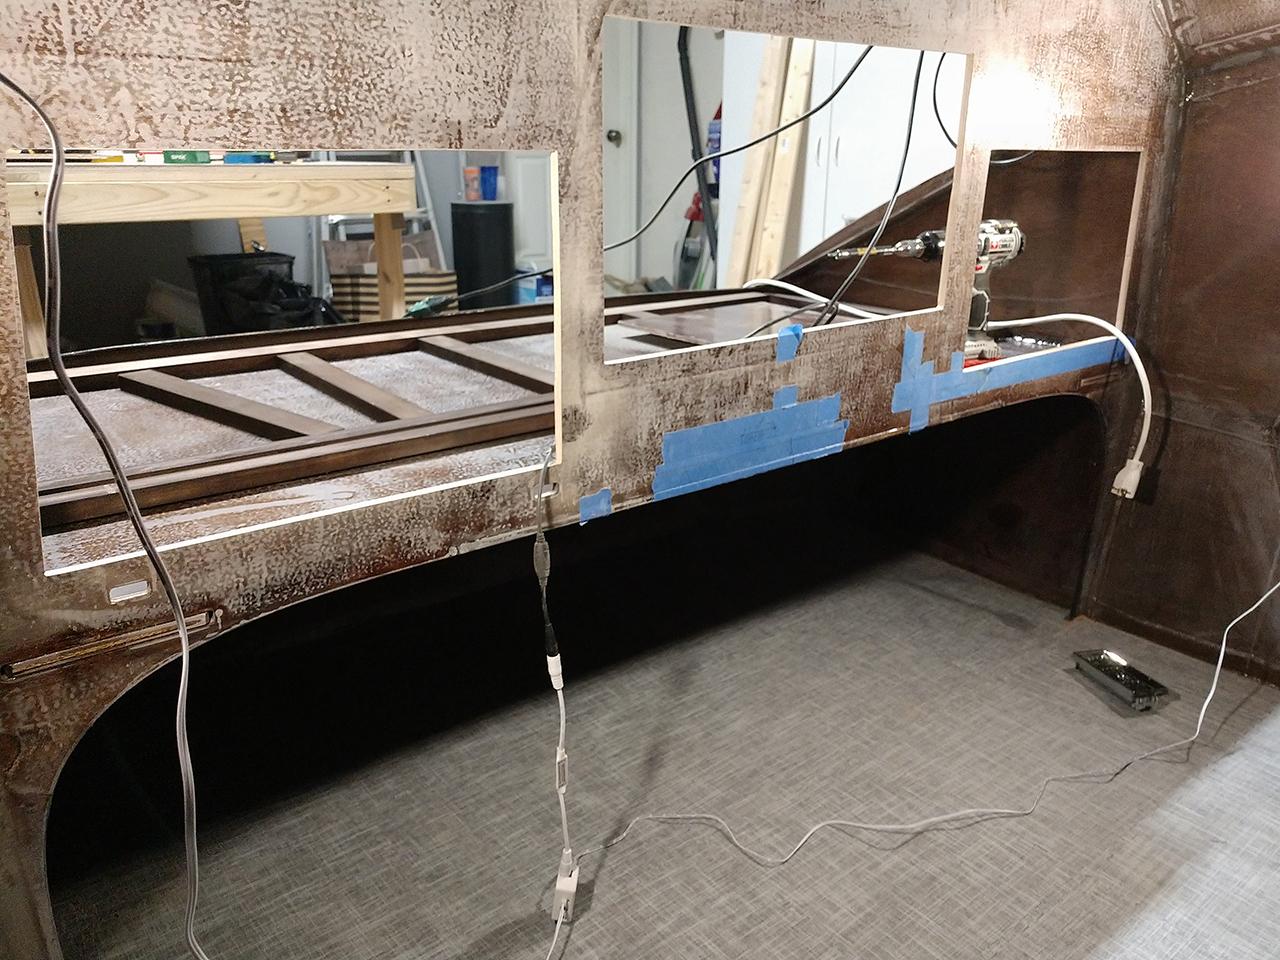
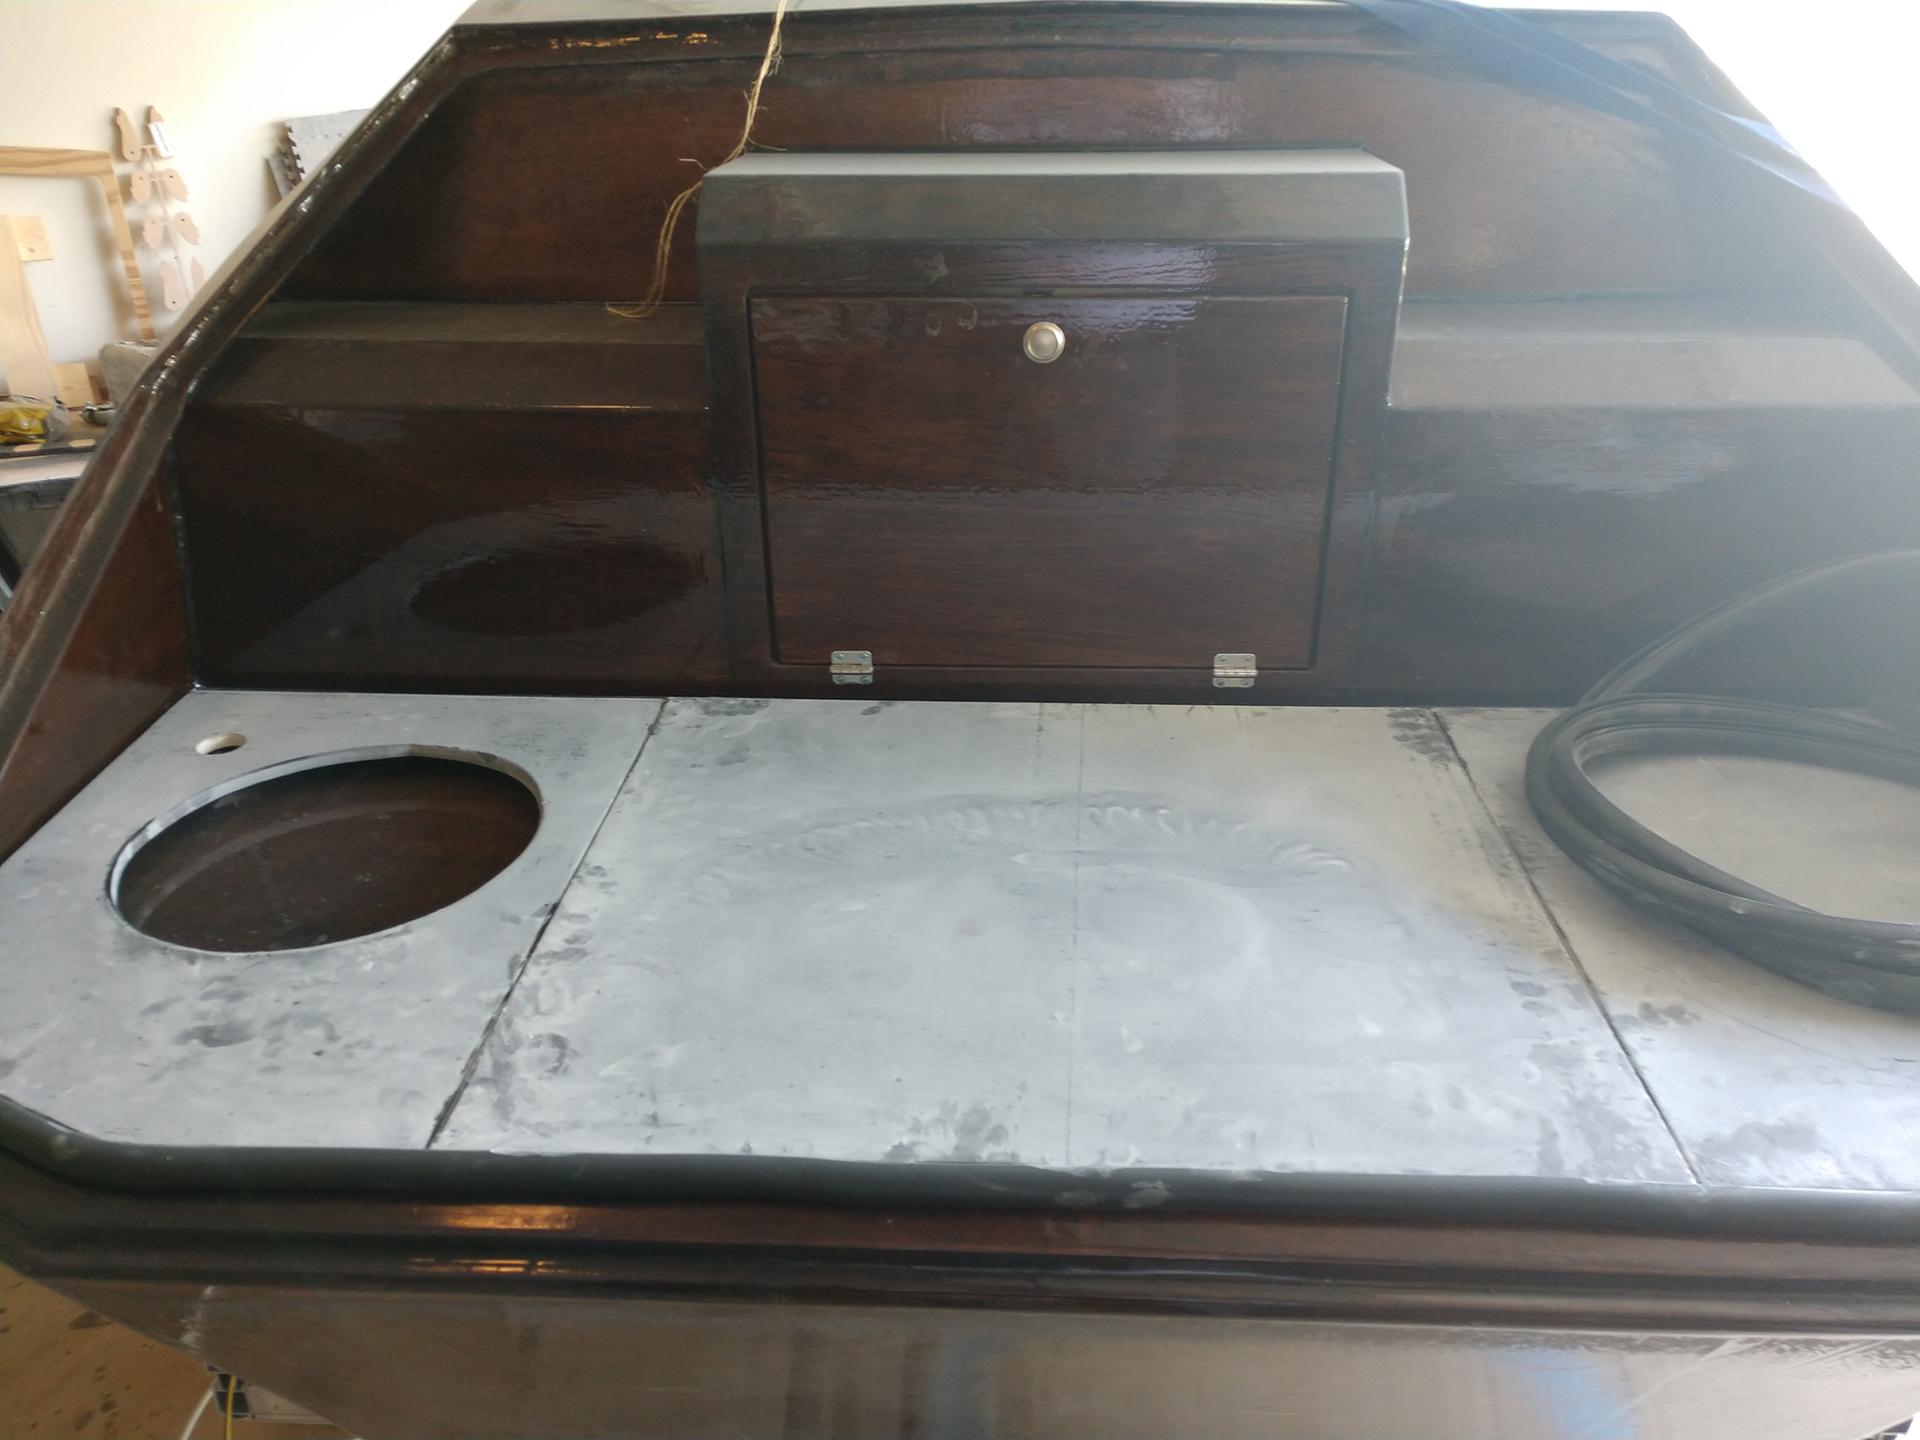
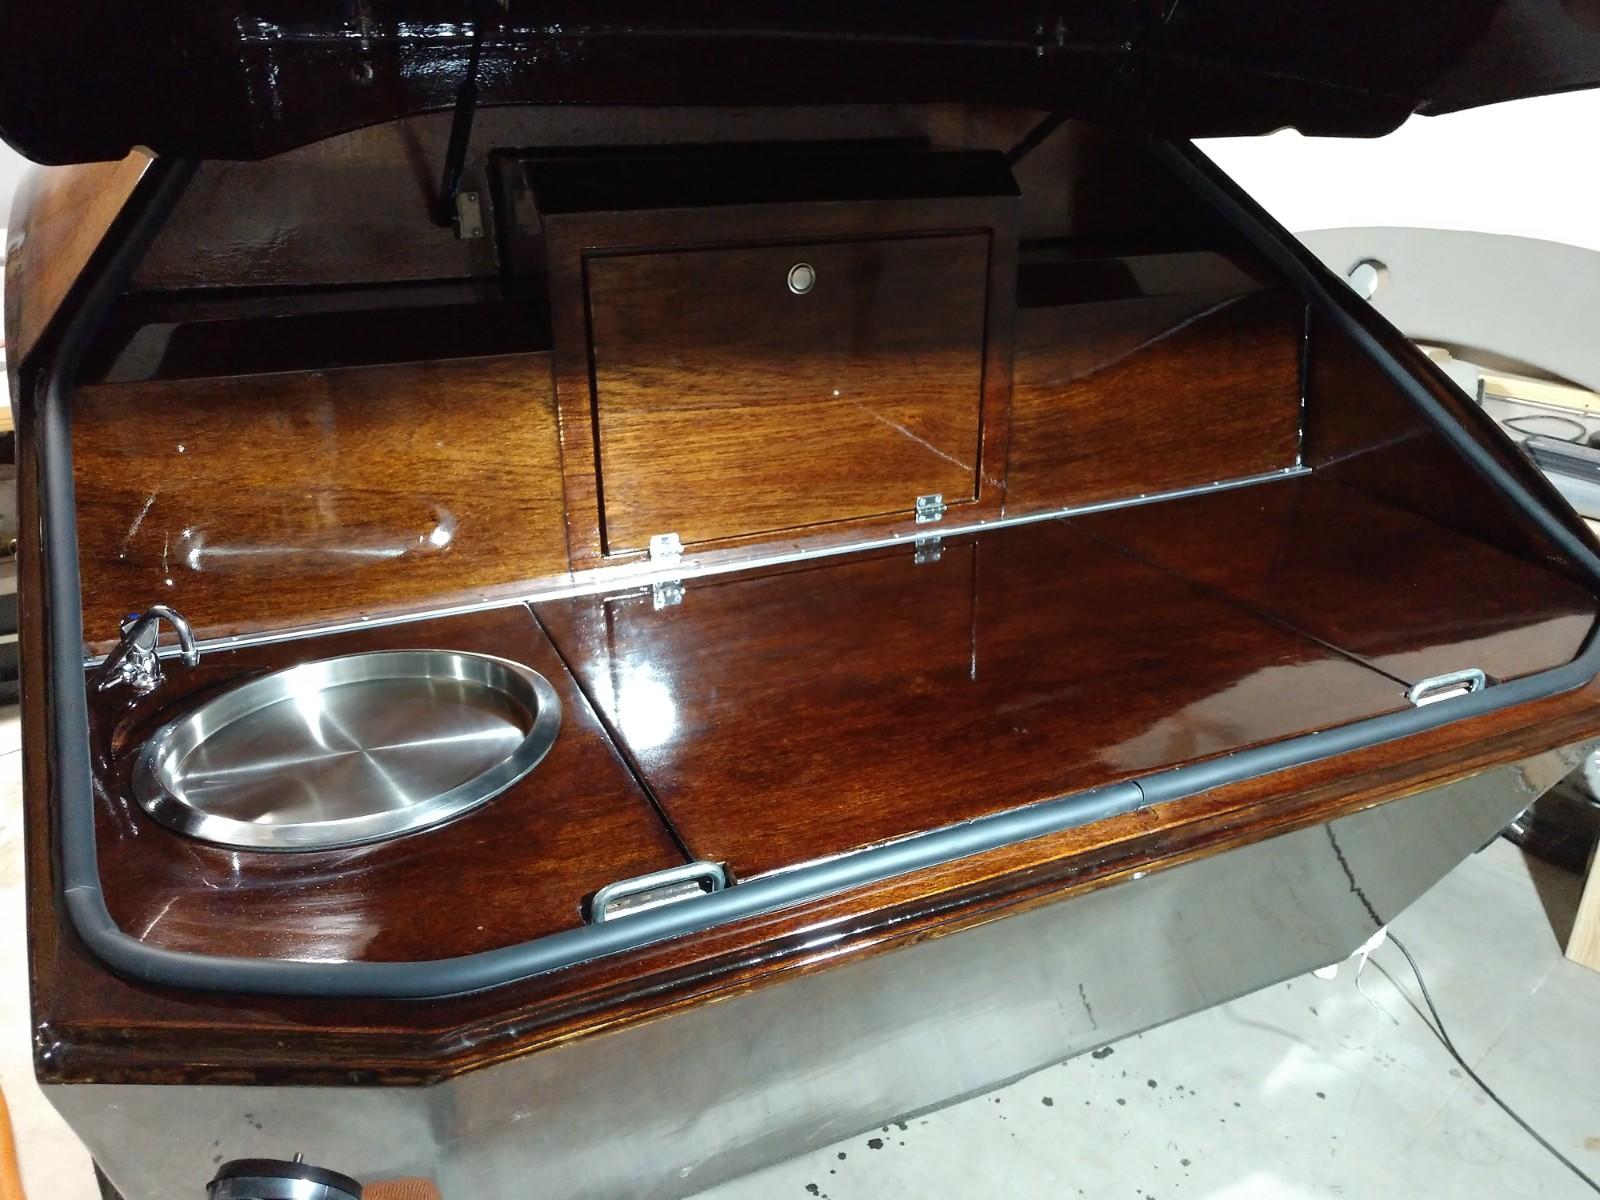
Progress Update (Time Spent To Date ~300 hrs) Galley & Cabinets are finished, minus a few holes to drill for the door latches. This was a huge victory and I couldn’t be happier with the results! Left/Right boxes are interior cabinets while the center is for all the electrical components. The 3 galley counter pieces are removable and sandwiched between these and the original galley top will be the plumbing, wiring and insulation.
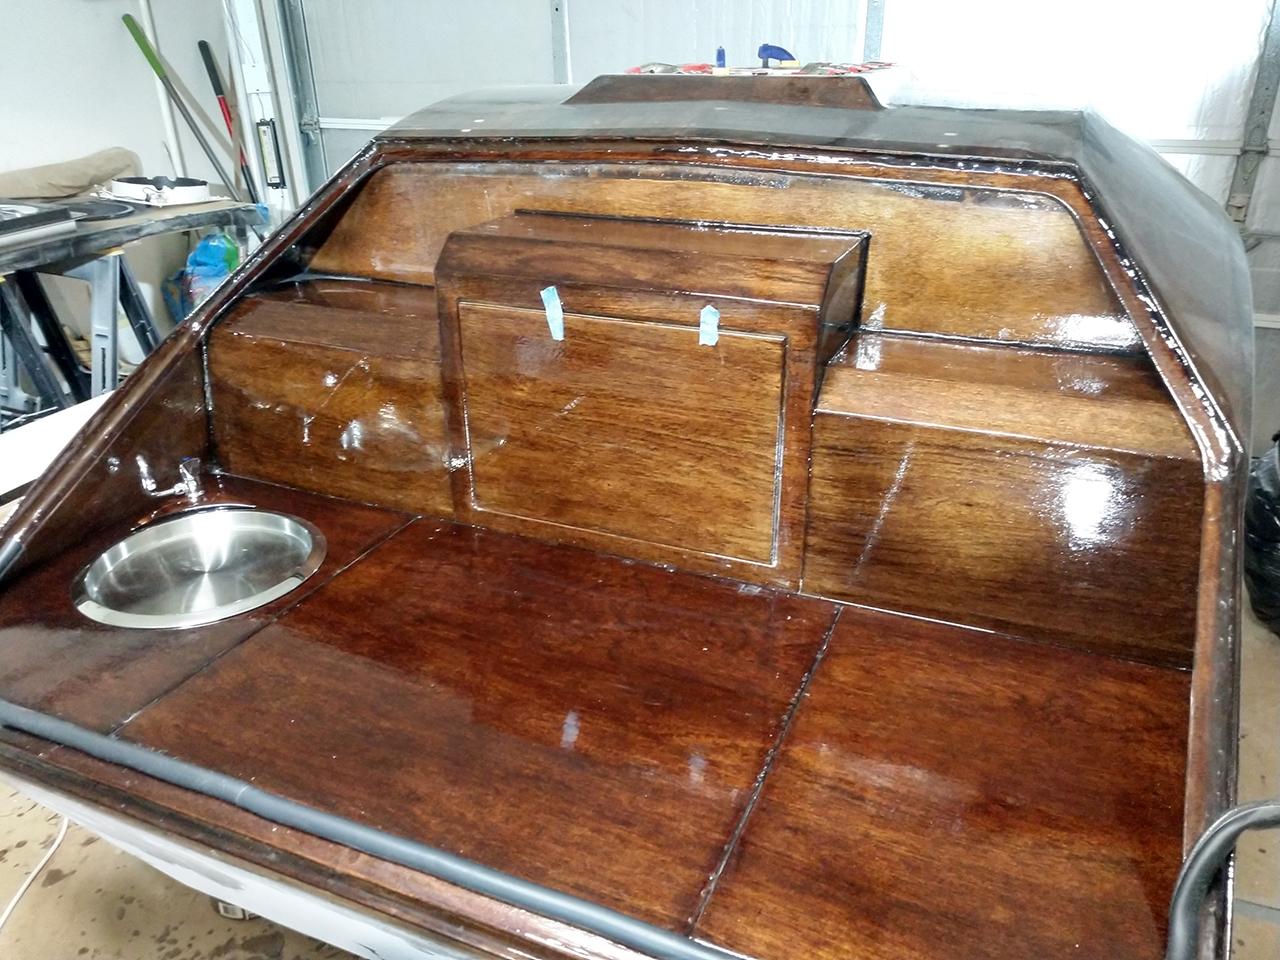
Started work on the armrest/nightstands seen on the bottom left corner in my concept image:

The armrests will have speakers, a slot for a cellphone with USB charging, and controls for fans and lights.
Next step is to shave/shape the foam which will then be wrapped with the same headliner fabric and capped with the stained wood piece seen above.
I think I may have used too much foam.
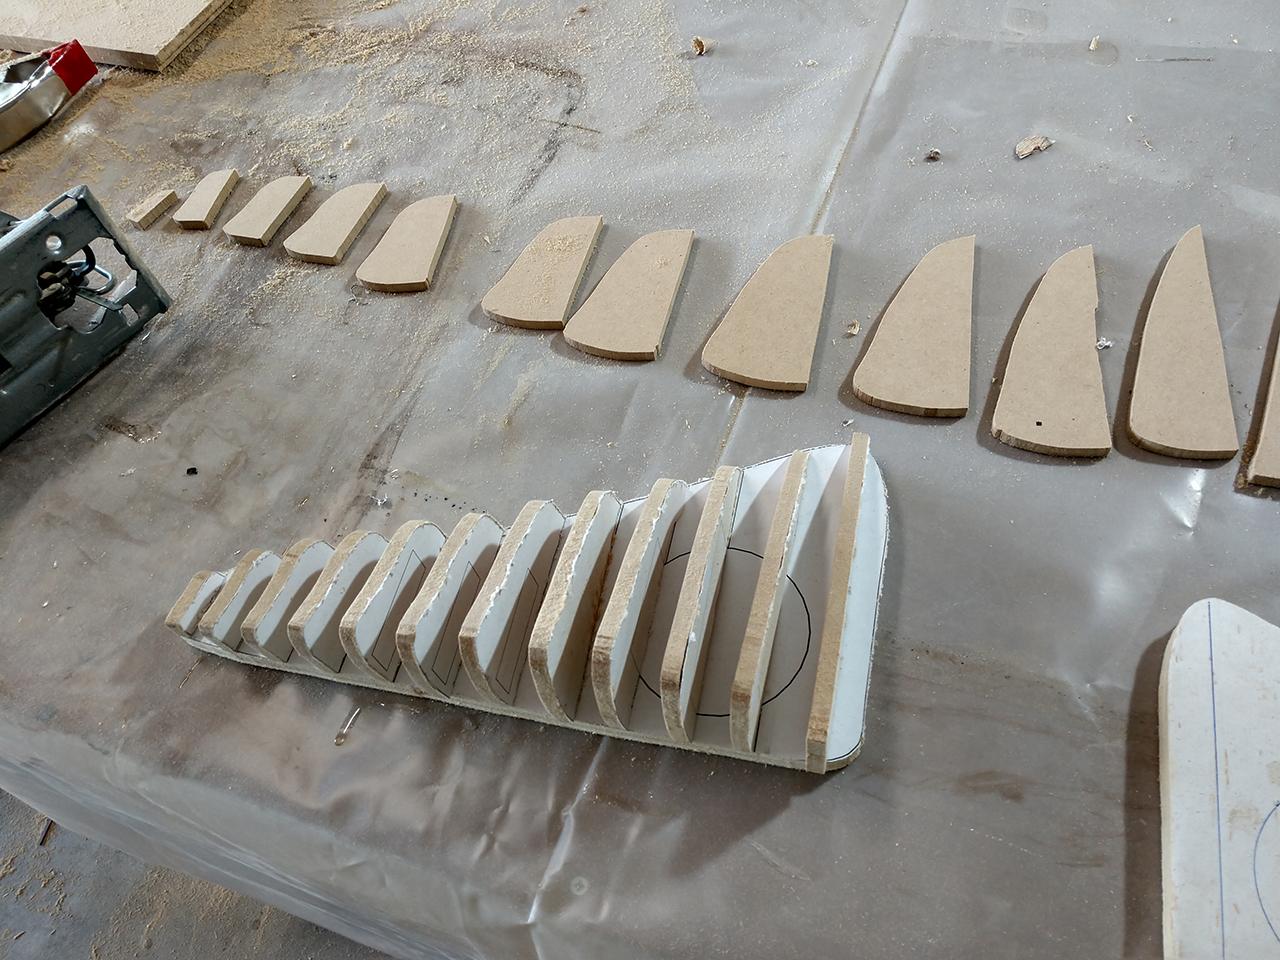
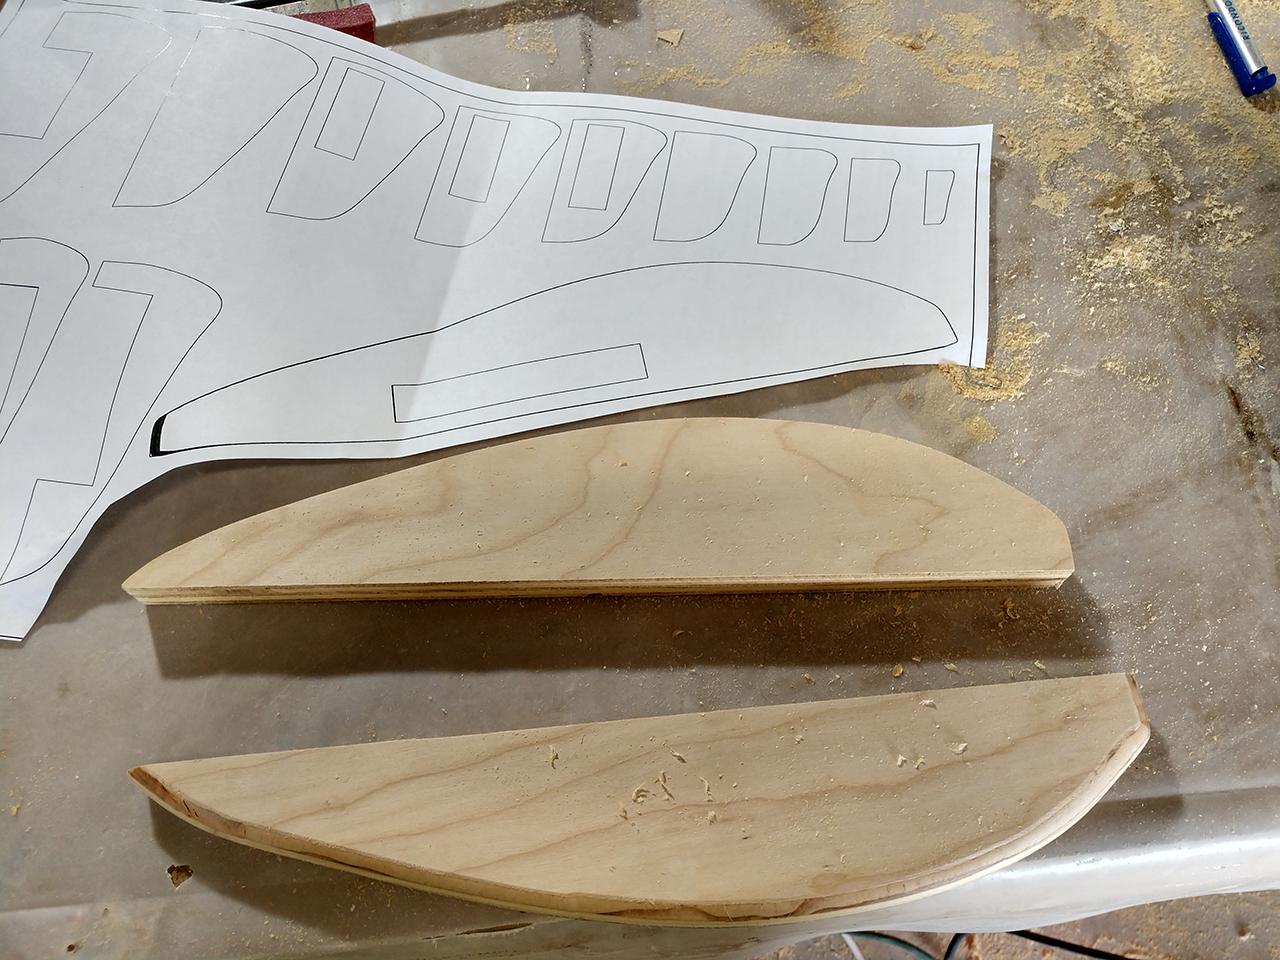
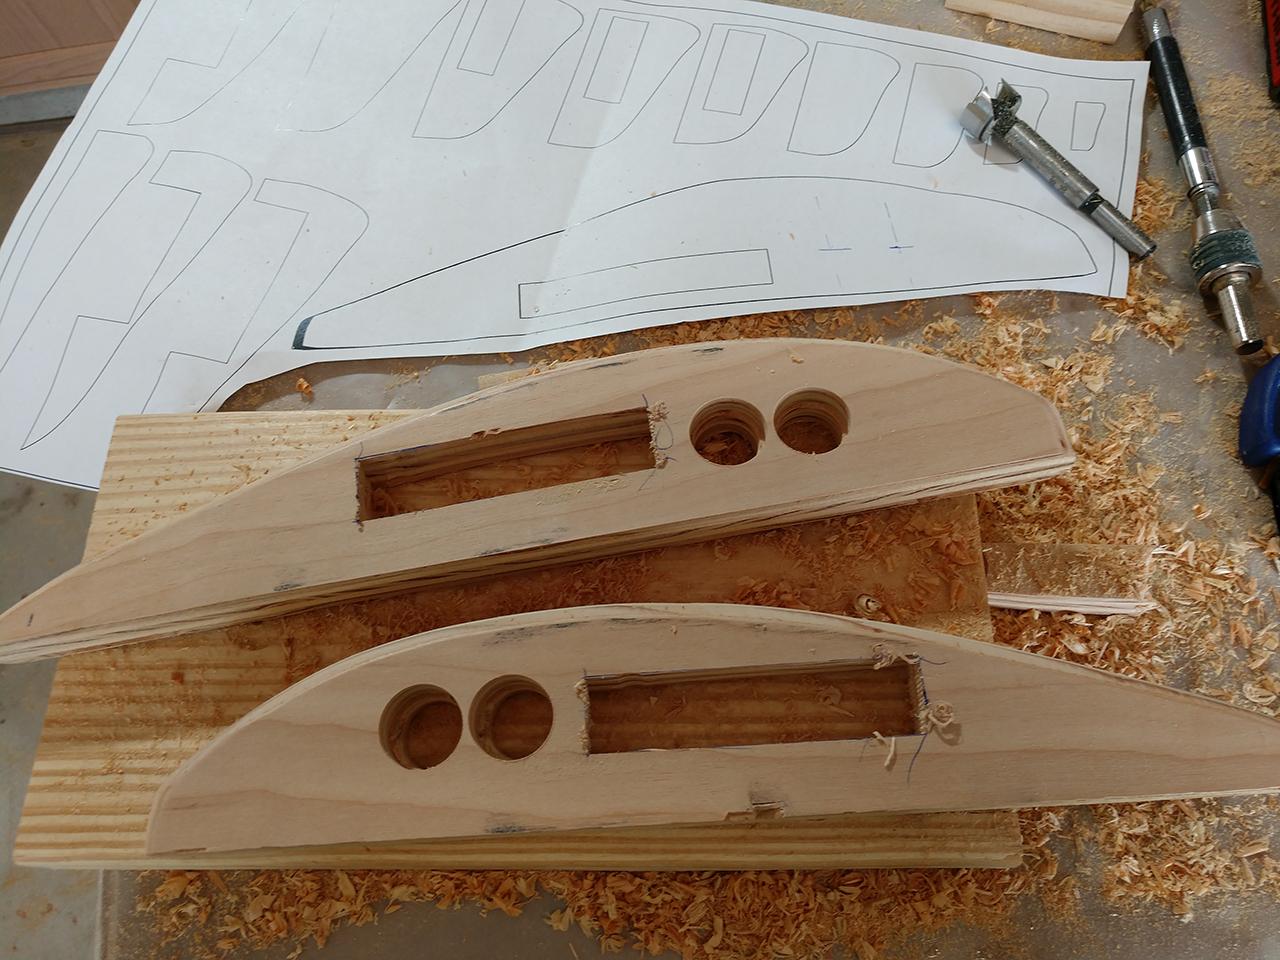
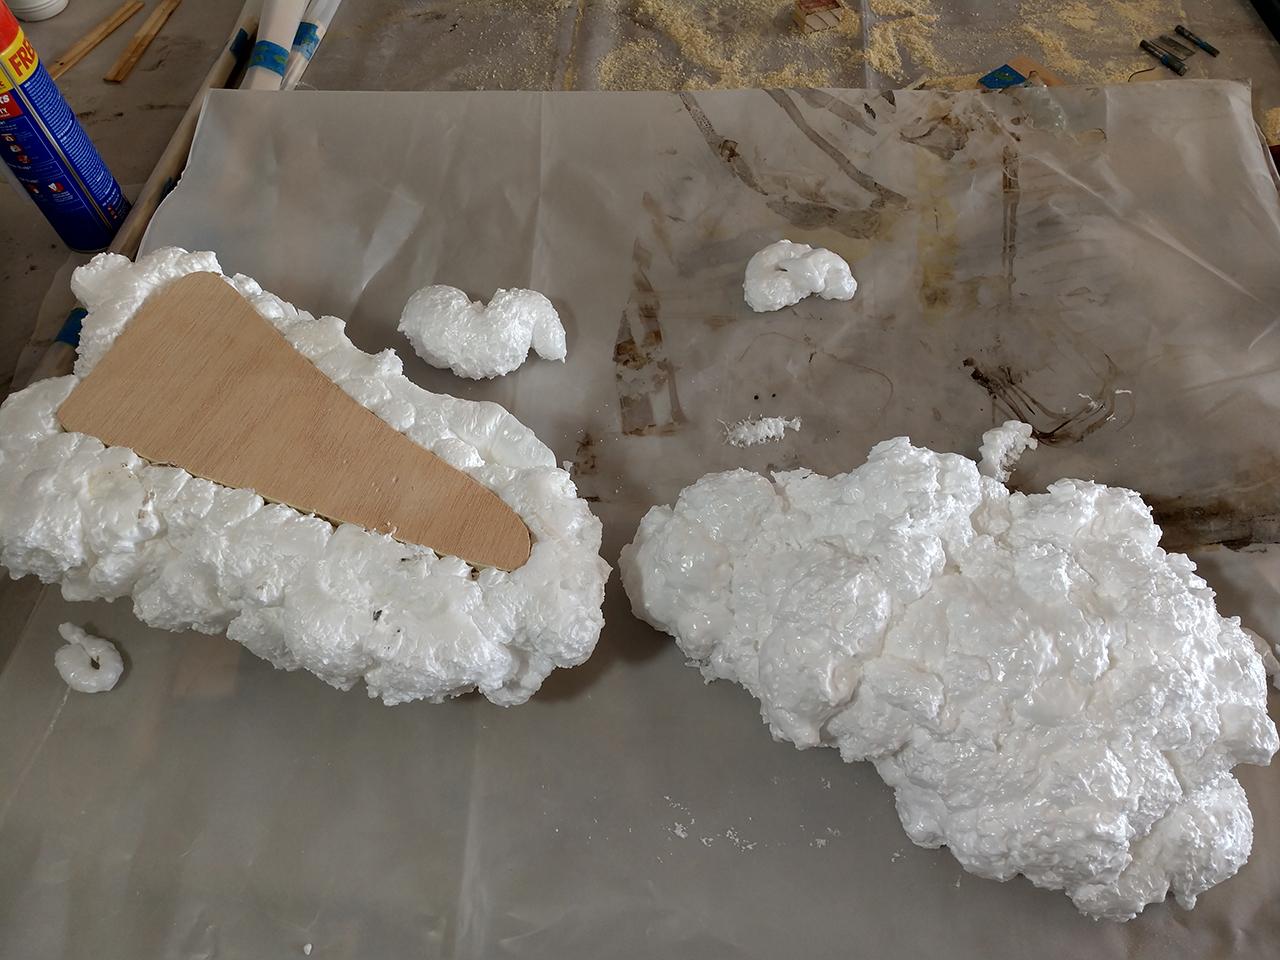
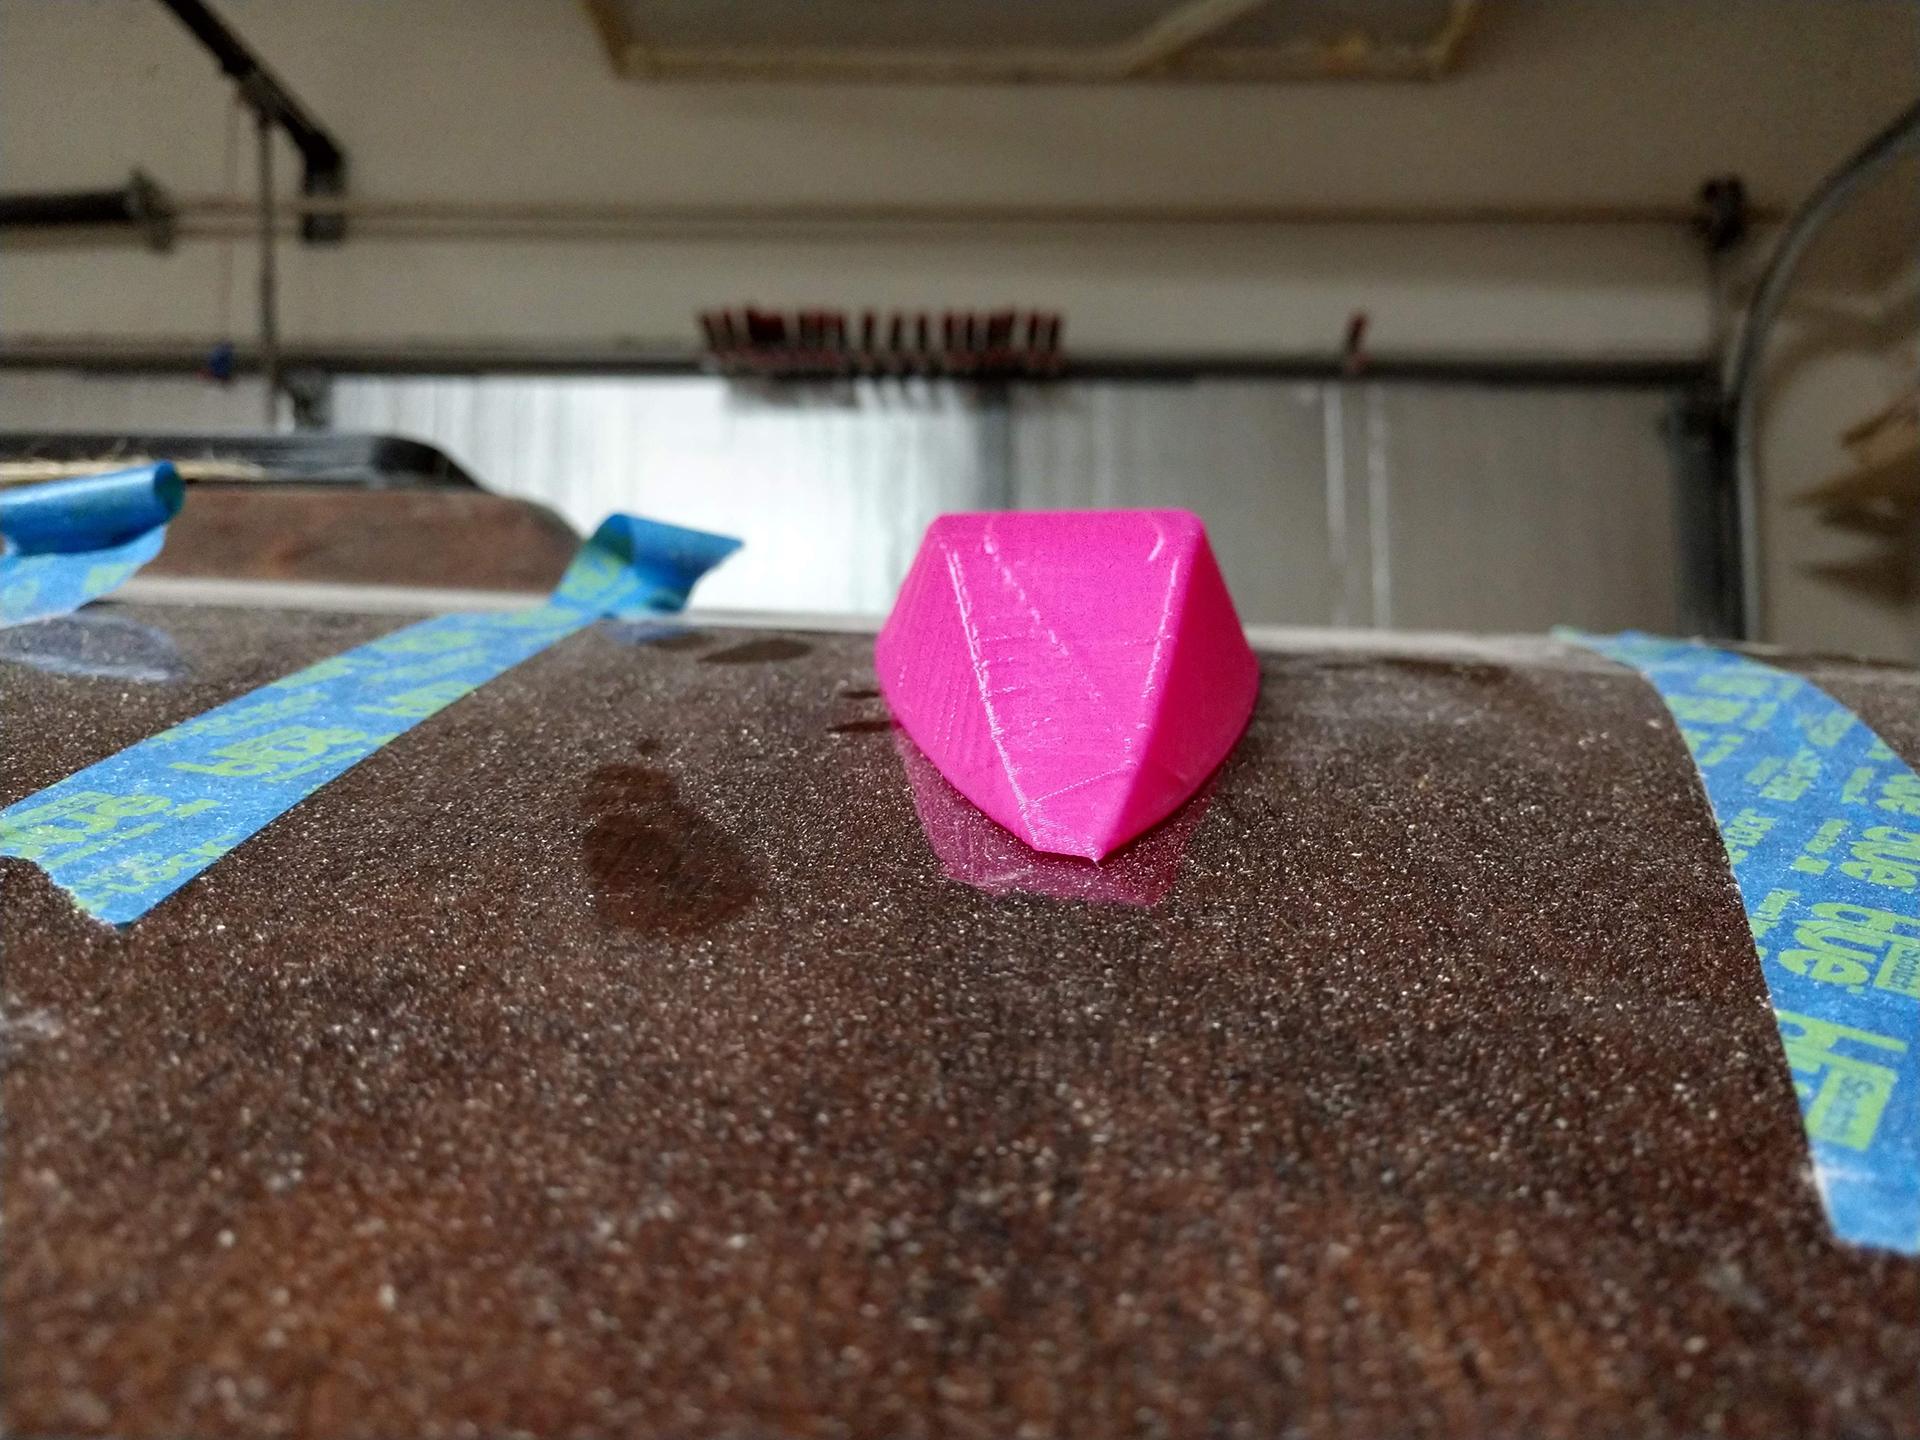
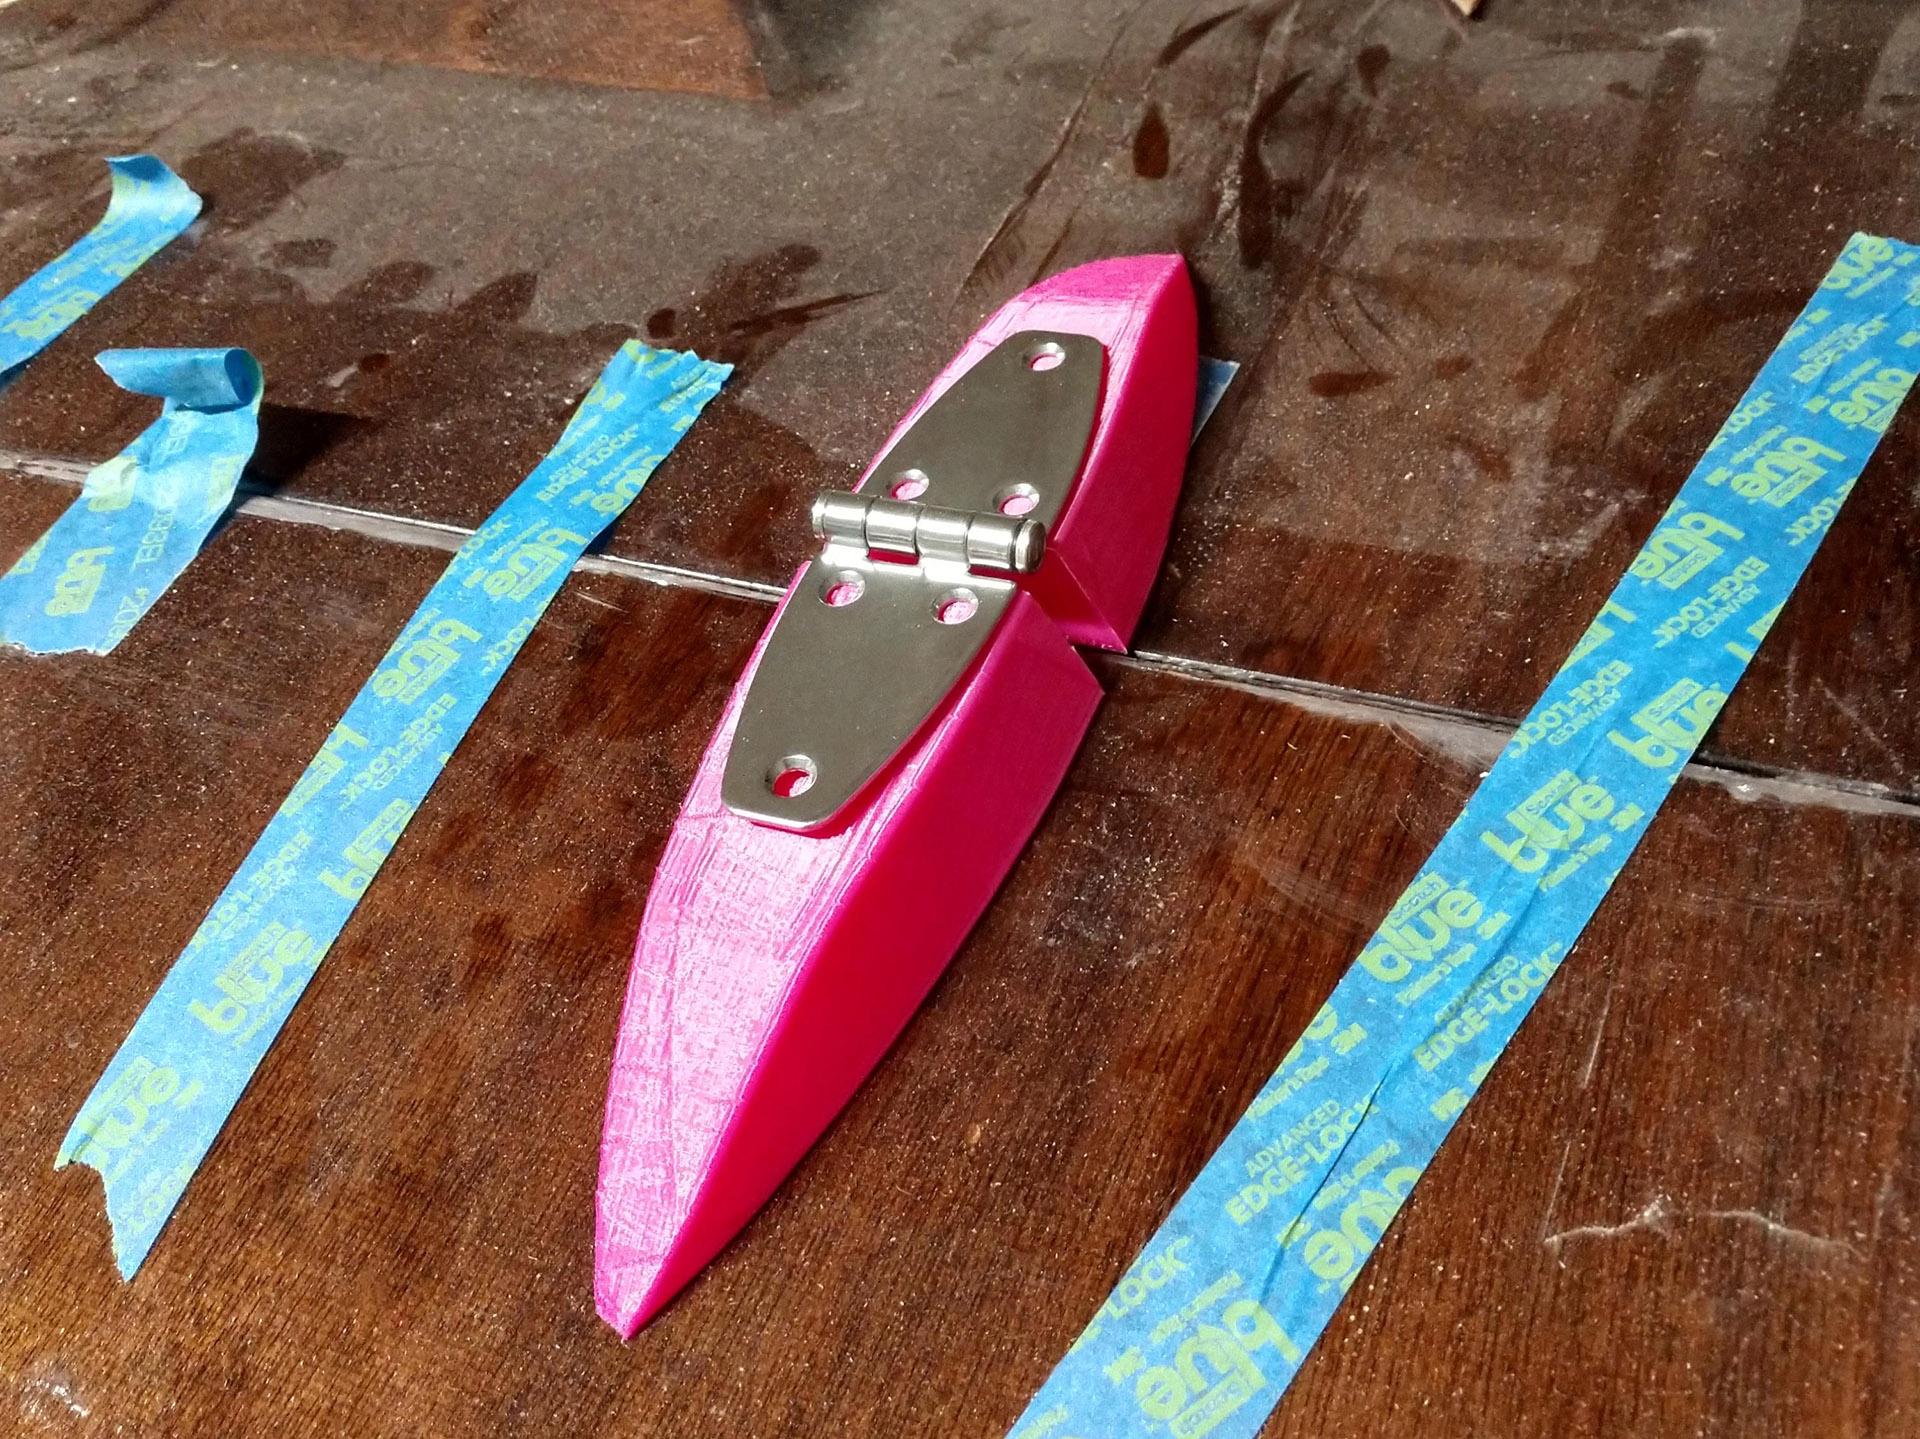
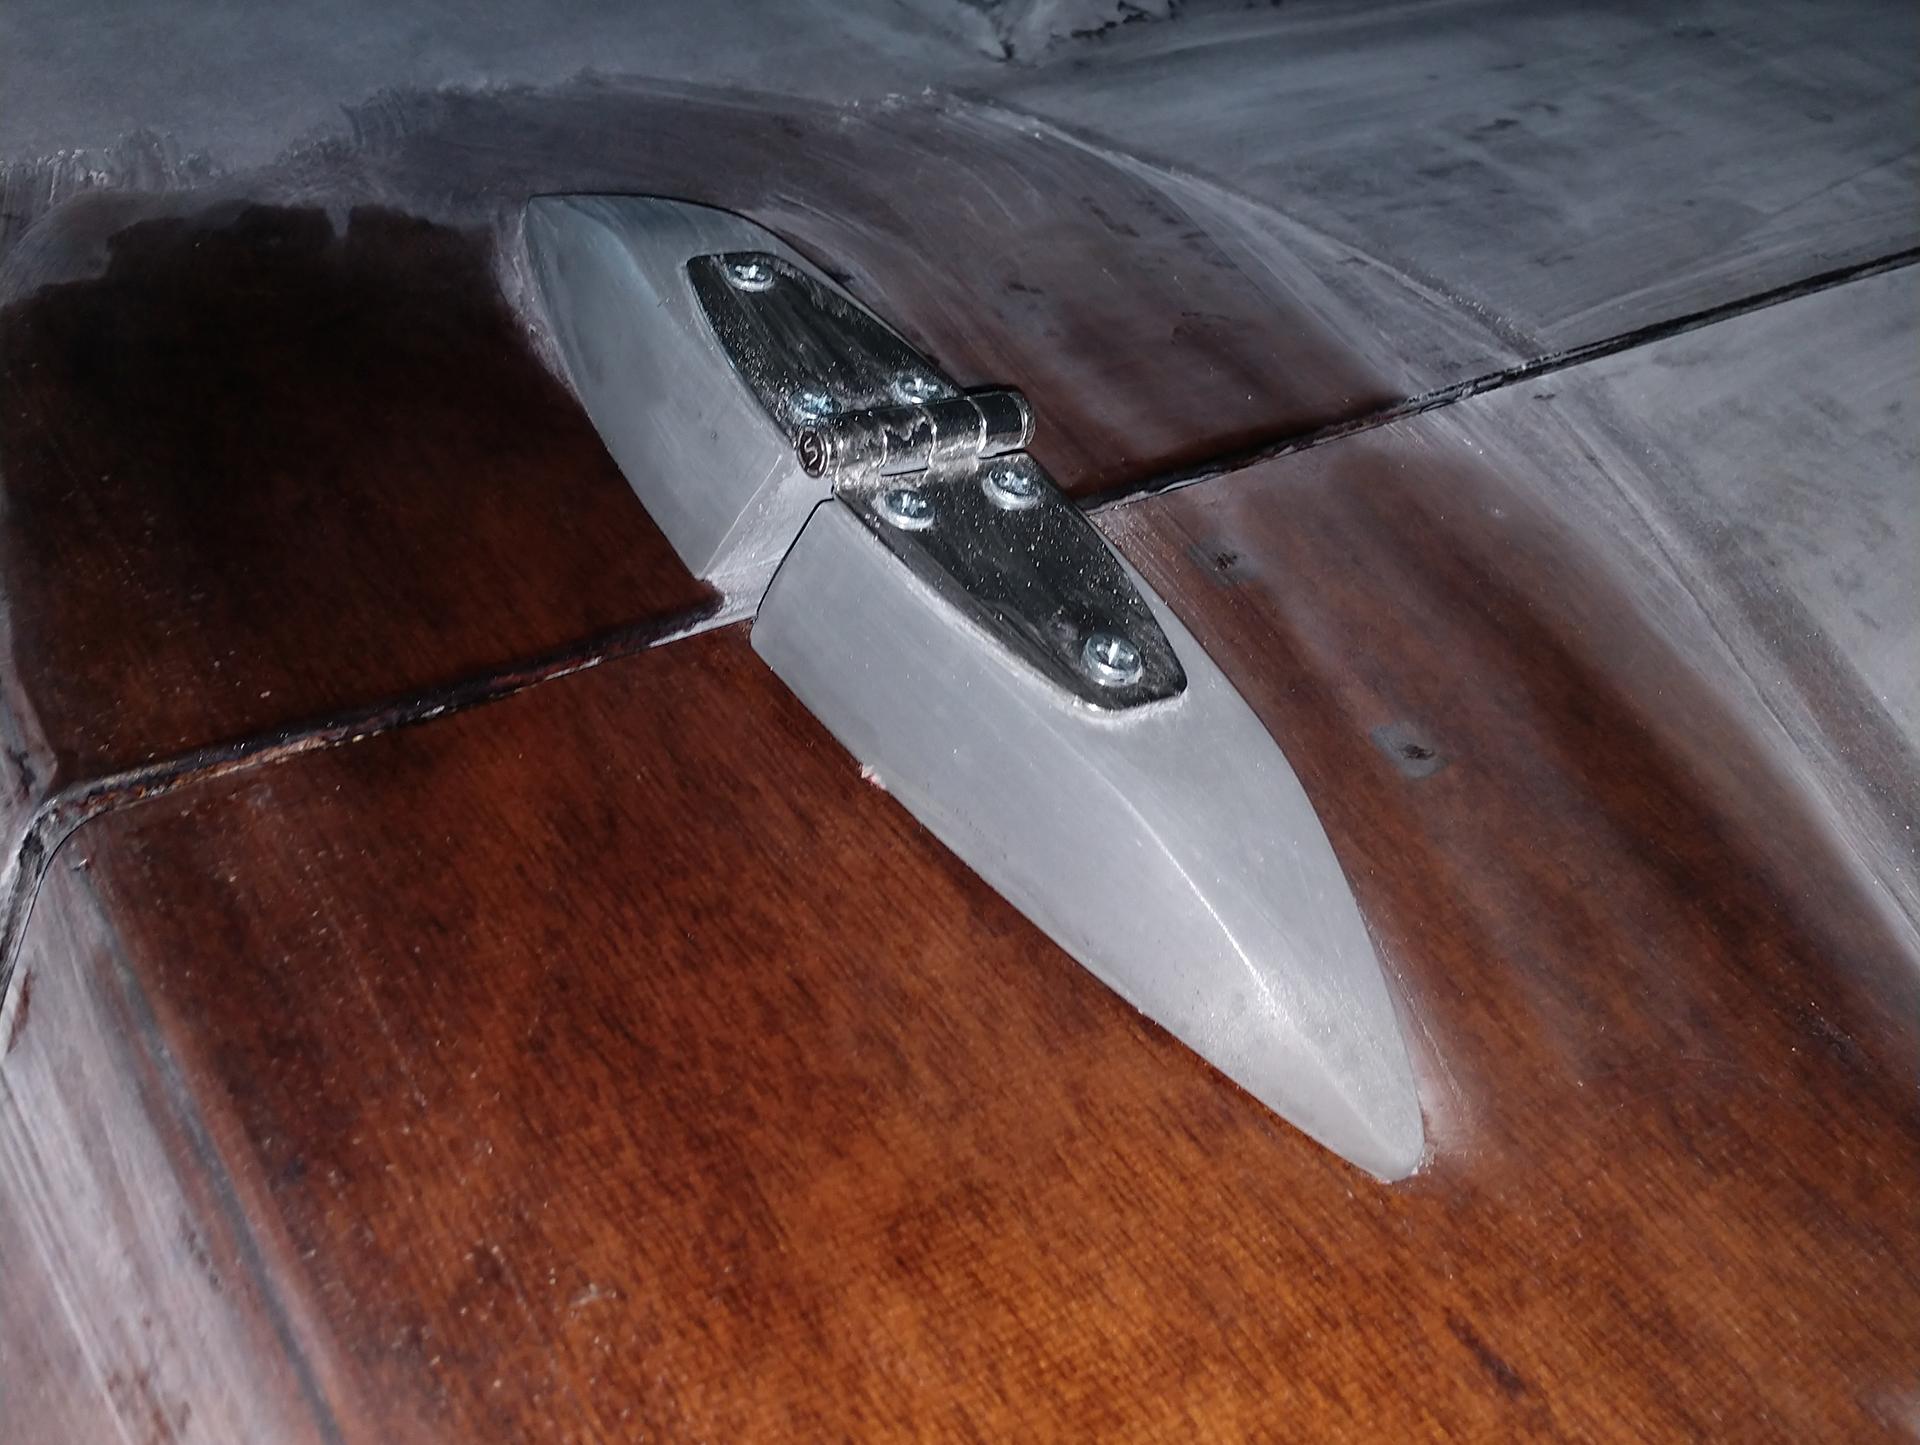
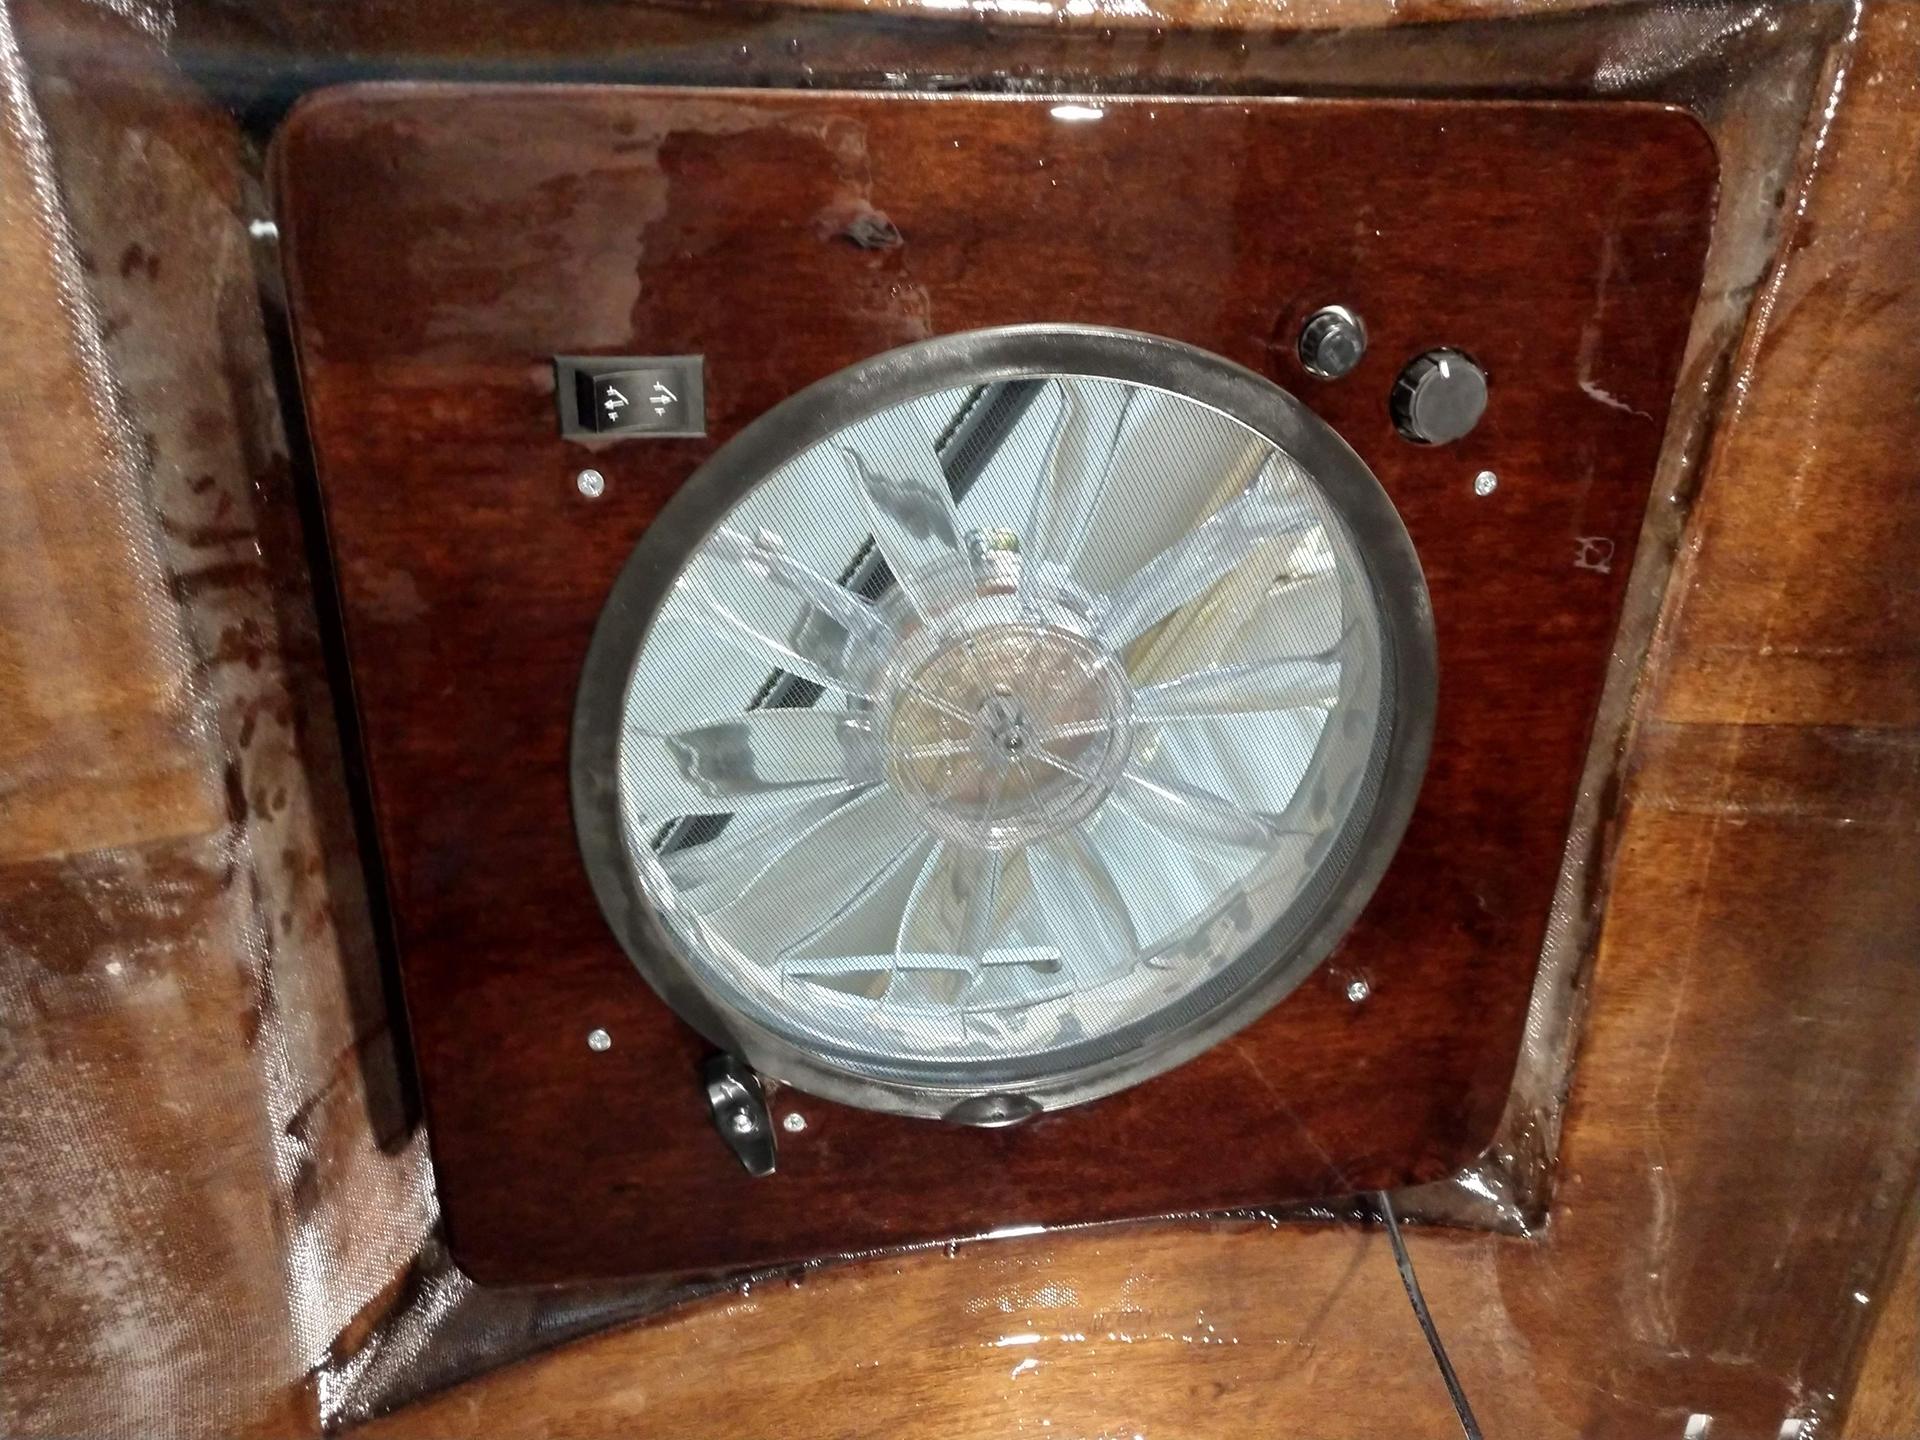
September 10, 2018 at 12:54 pm #2115ParticipantJust a quick update on some of the off the book modifications. I’ve had great success with my galley hatch hinge blocks. The pink ones were 3D printed and used to create a silicone mold. The final hatch hinge blocks were then cast using Task-18 resin with bolts embedded in the blocks for mounting to the shell. Later I will replace the resin hinge blocks with solid metal one but these will work for now. I’ve finished sanding and getting it prepped for varnishing and hope to have the Camper finished in the next 6 weeks. More photos soon to follow including the custom headliner foam. Wish me luck .
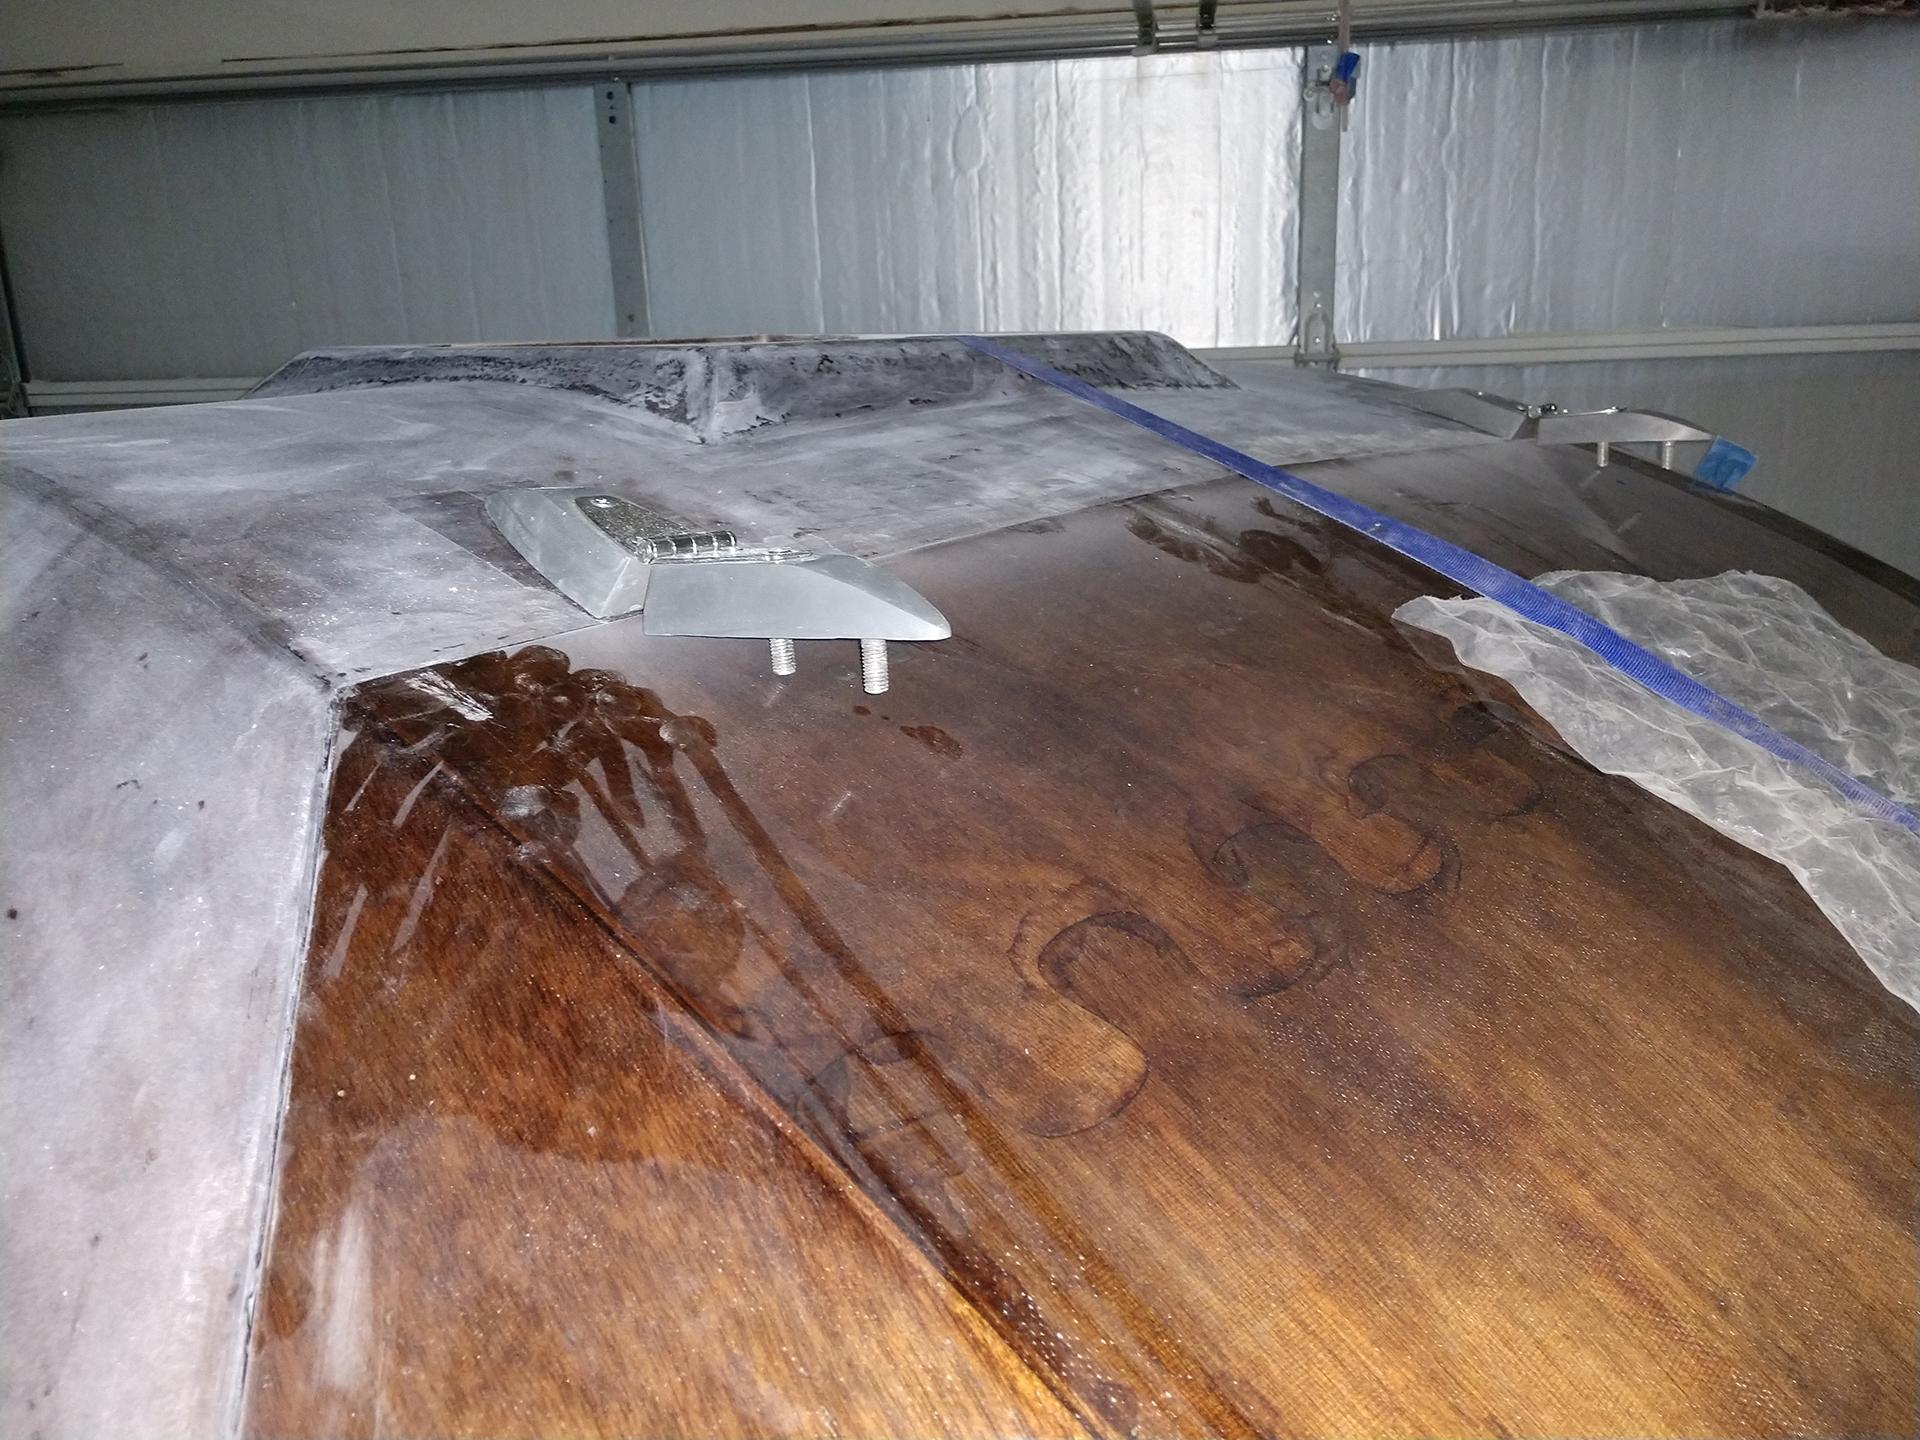
I’ve also finished the custom roof vent cover to replace the one provided by CLC. The original wood cover showed too much of the boring white plastic.
Started the final sanding with the galley counter top inserts, with any luck the reset of the camper will be this uniform after sanding.
 October 24, 2018 at 2:10 pm #2233Participant
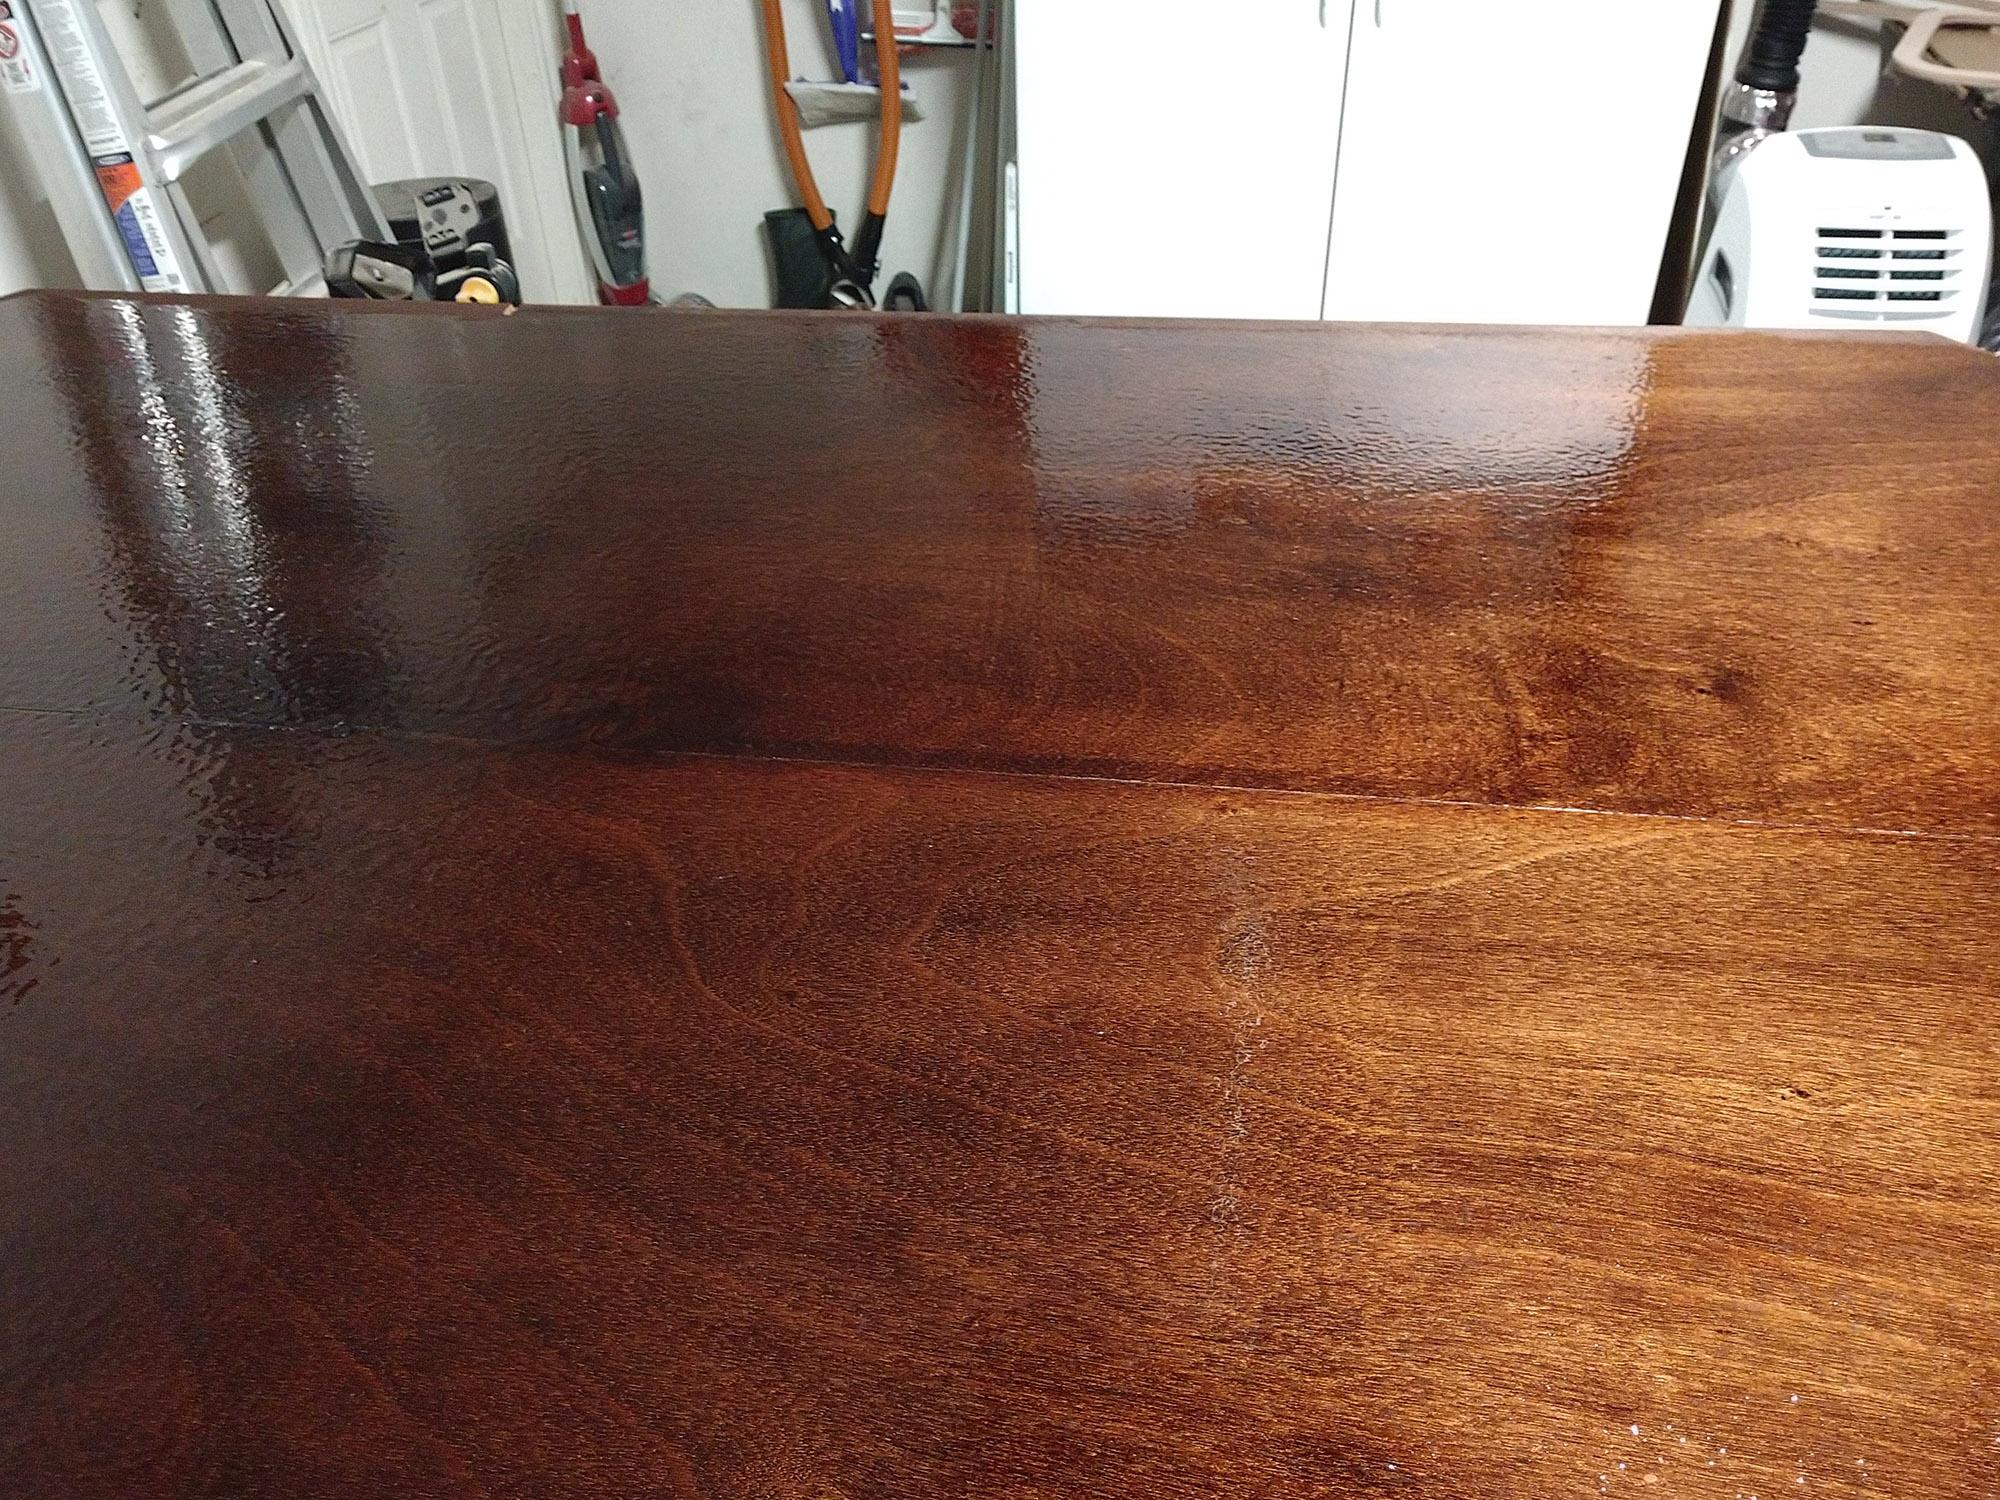
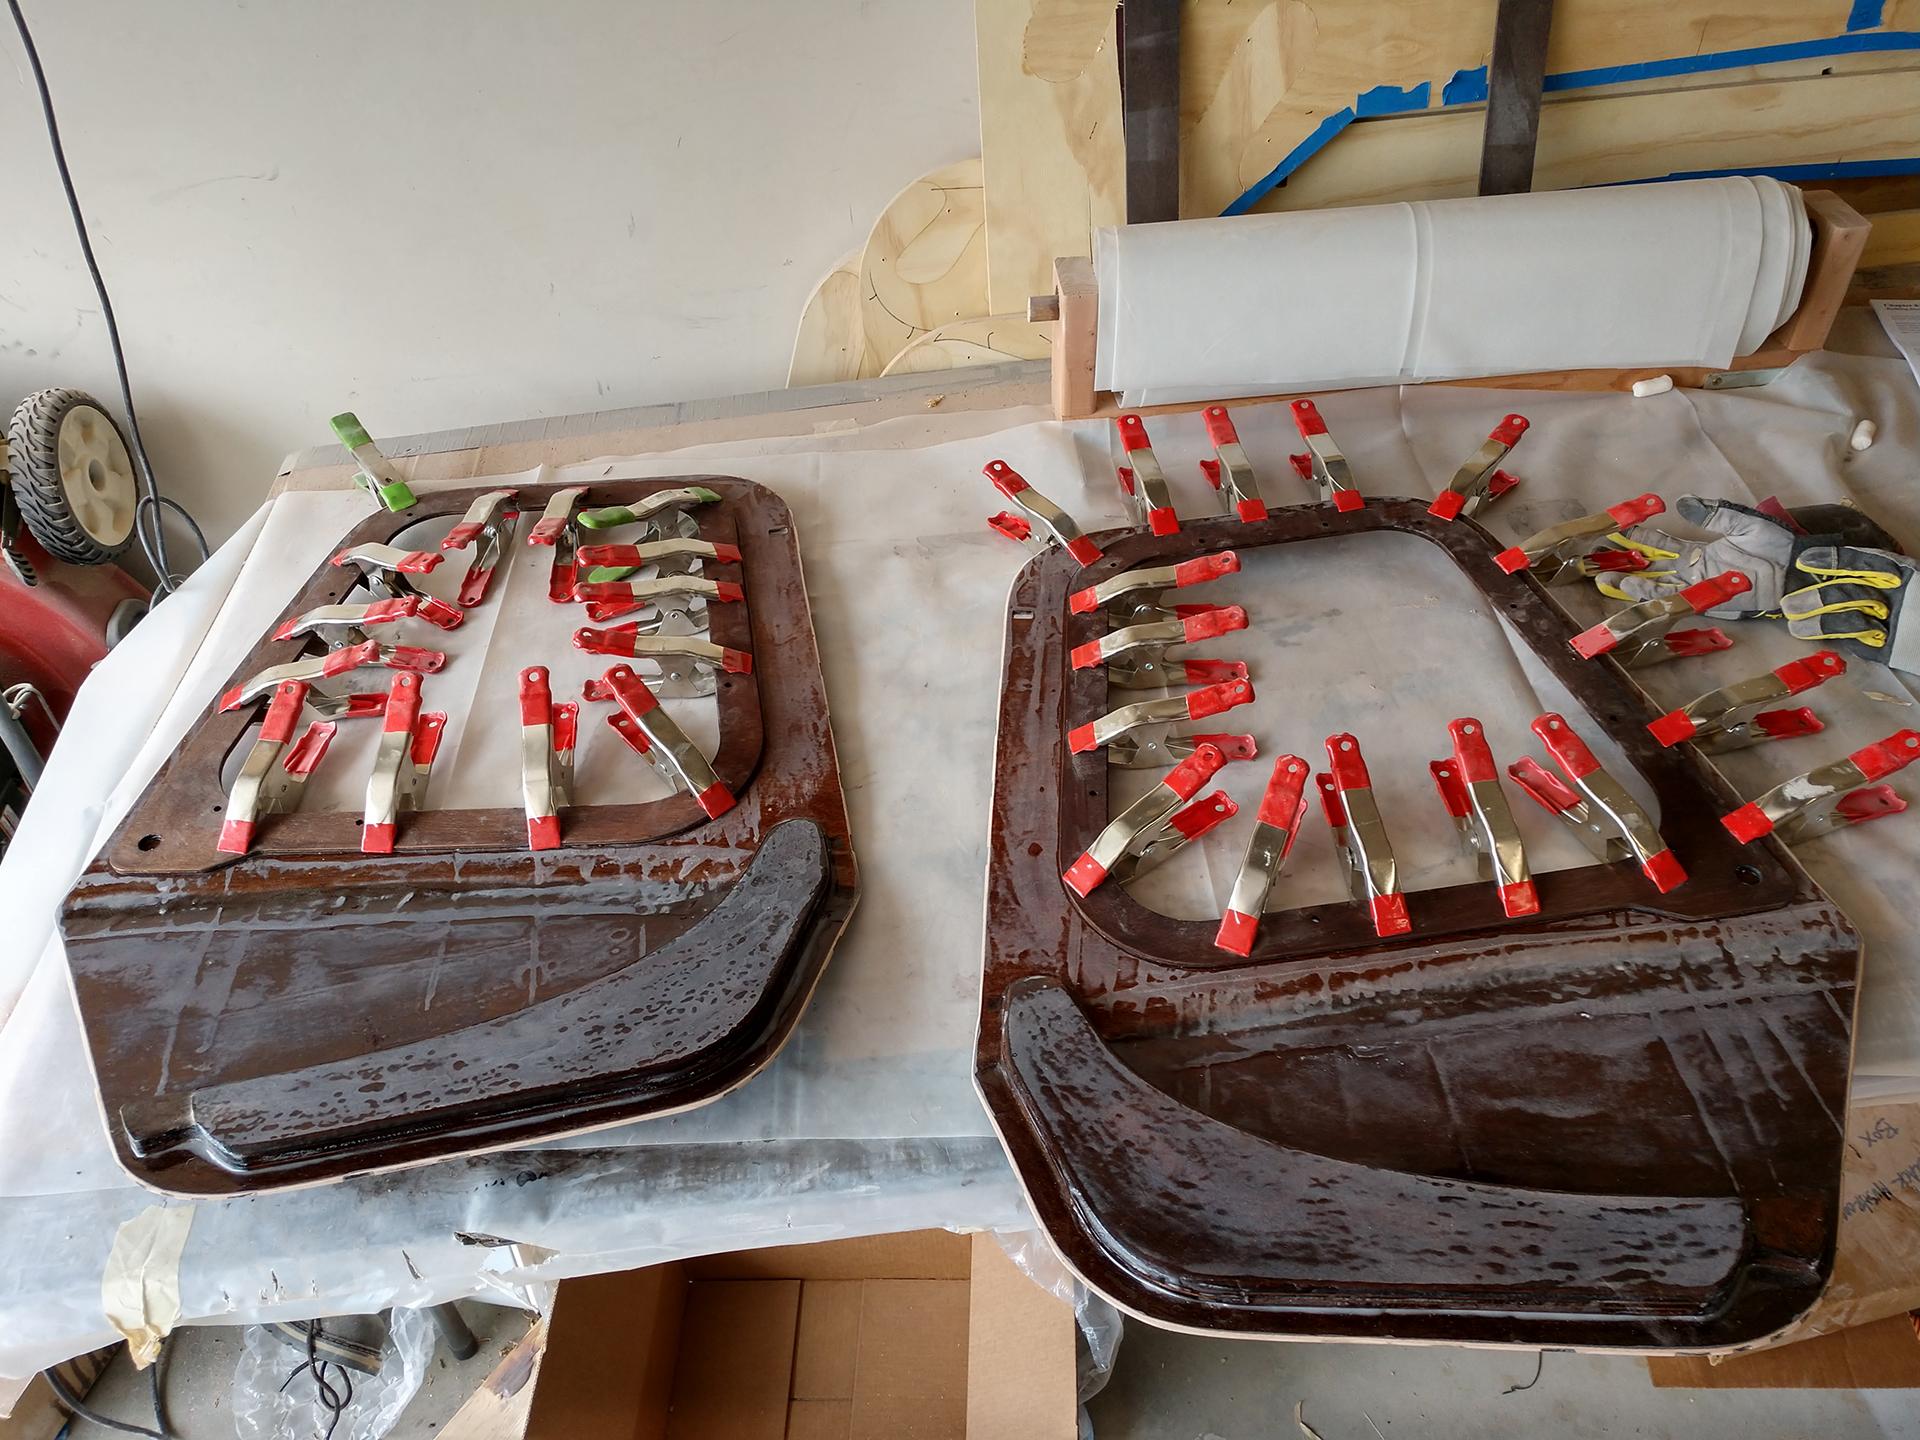
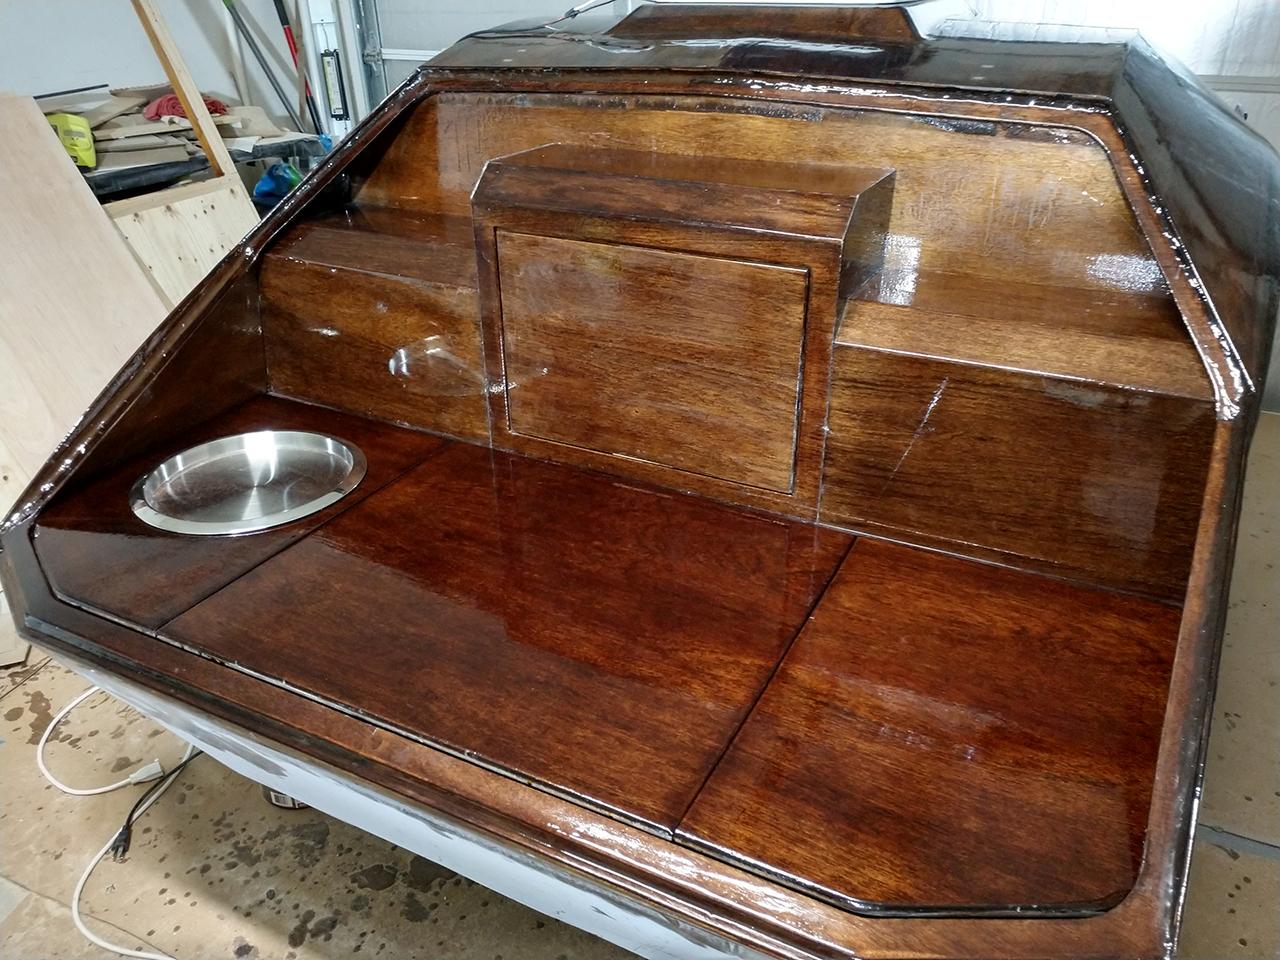
Progress Update: Varnishing is complete and I’ve been installing hardware. It’s difficult to take pictures of the camper at this stage because it’s soooo glossy. Aside from the gas springs not providing enough lift the hardware install has been simple and straight forward.
Hinges look great. In hind sight I should have tried to fill the precut hinge holes with wood instead of epoxy.
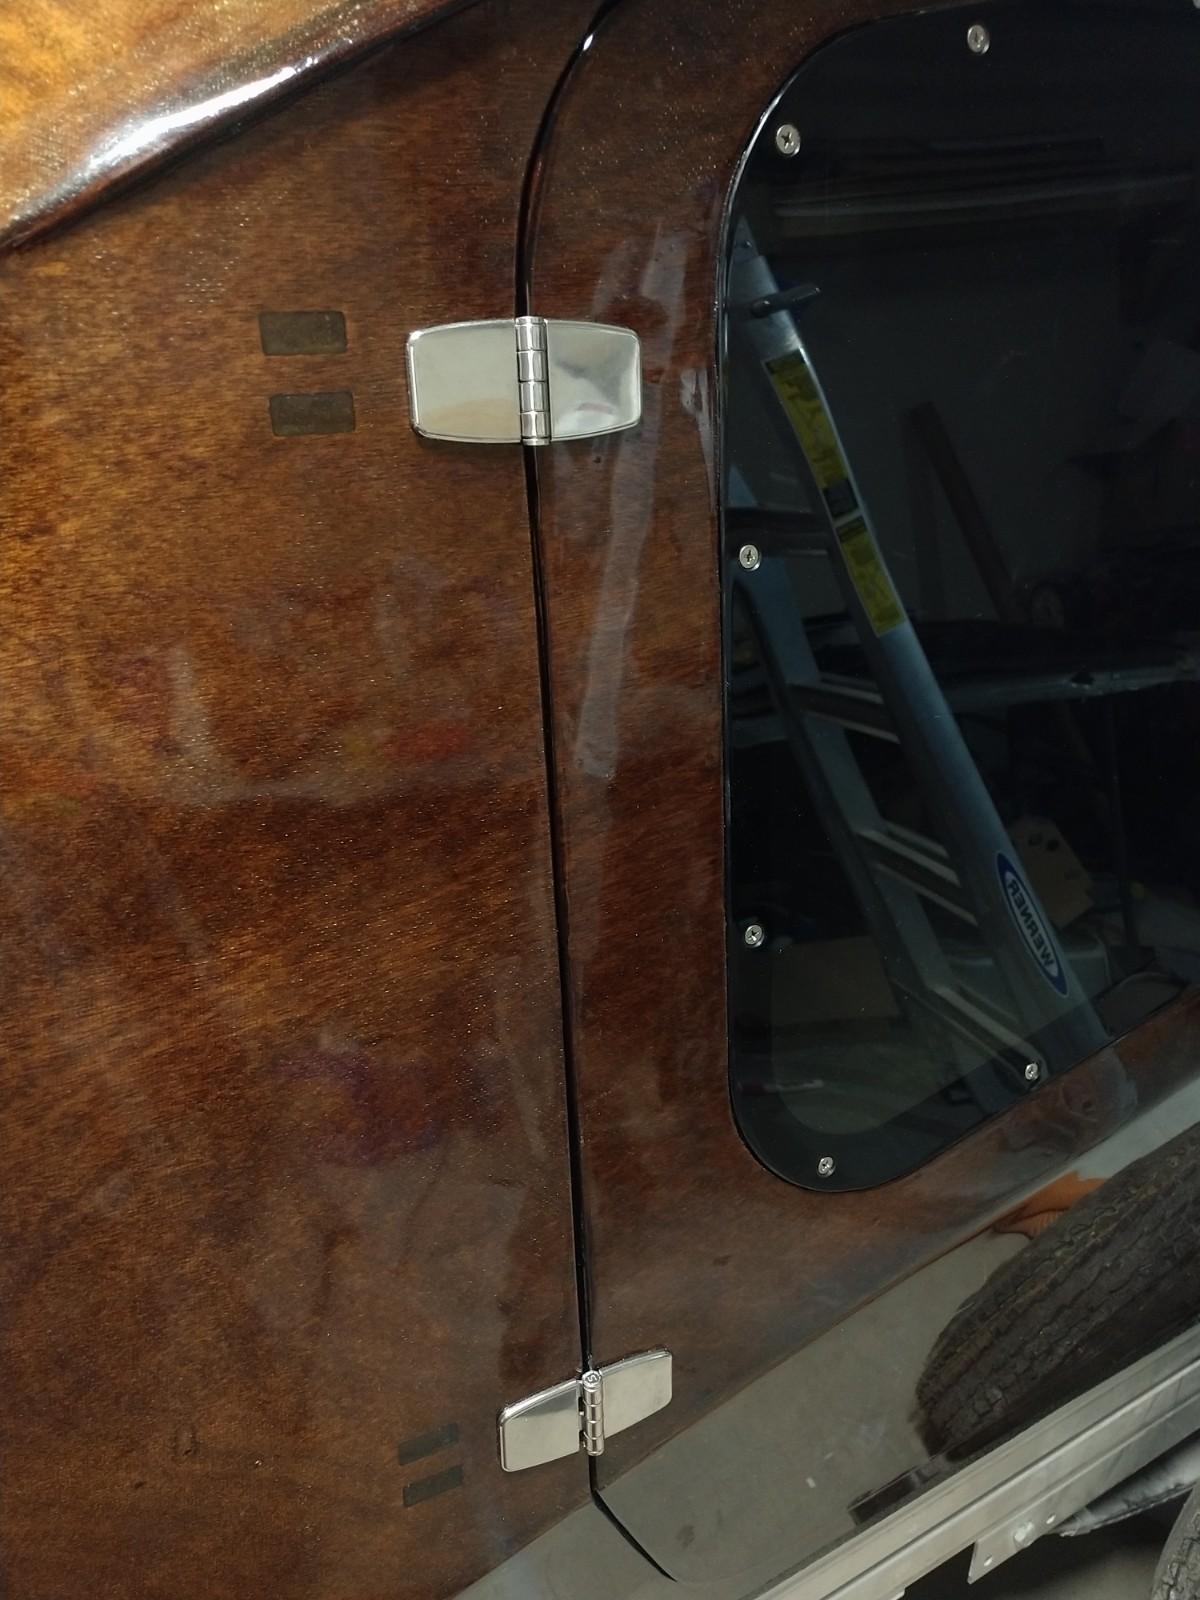
CLC didn’t mention it in the manual but I highly recommend flame polishing the edges of the window plexi glass.
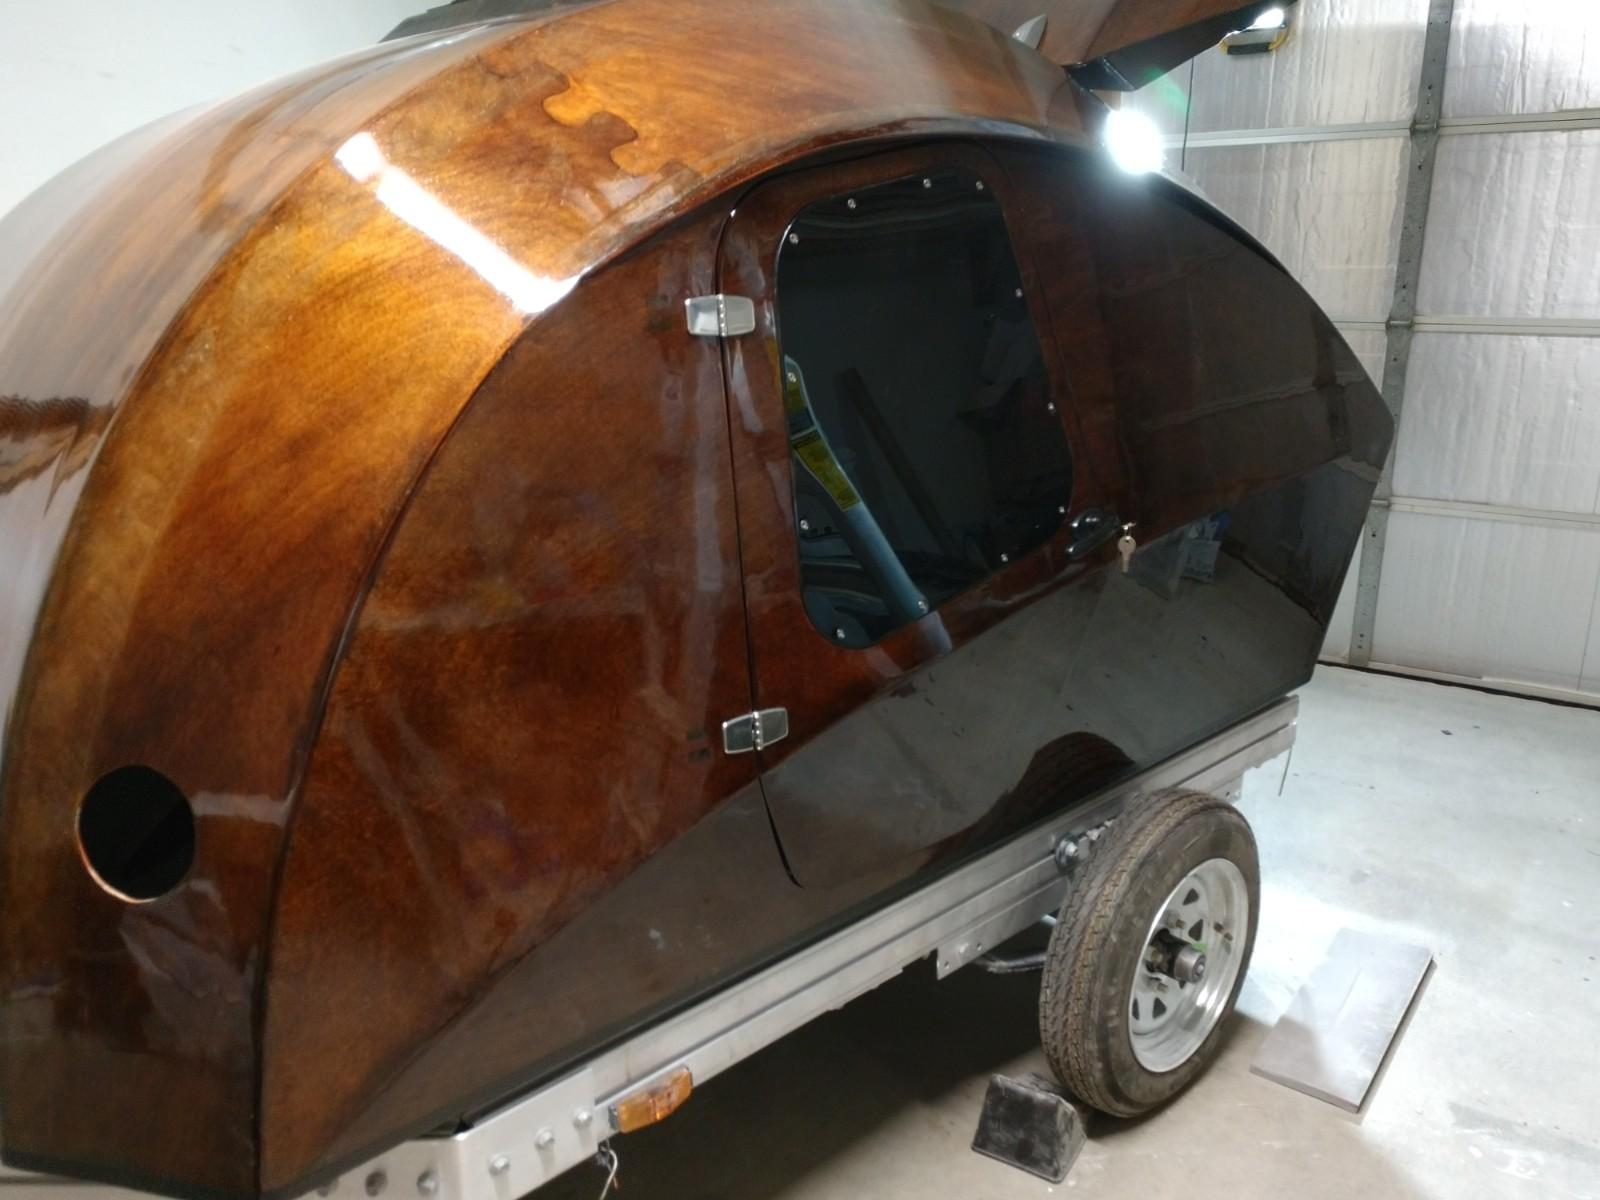
I opted for 2 Cam locks.

The 2 cam locks engage the u-bolts that are bolted through the original galley top. A simple adjustment on the height of the U-bolts will affect how tightly the hatch is held down when locked.
 October 24, 2018 at 4:04 pm #2234
abrightwell
ParticipantI’m digging the progress… and I’m especially digging your hinge solution. It’s looking good. I finally got to use mine for the first time a few weeks ago. It was so much fun and well worth the time put in.
-
AuthorPosts
- You must be logged in to reply to this topic.