Forum Replies Created
-
AuthorPosts
-
madebymike60
ParticipantThis could be about any of your recent posts so first of all, nice craftsmanship and/or design work on several ideas. I’m sure you look at it now and appreciate the time and effort you put into doing things as well as you did. My camper is complete (and I like it a lot) but if it was still in progress, I would strongly consider using some of your ideas – like the galley map for instance, it’s a very cool addition. Second, maybe you’ve noticed also that this forum is not nearly as active as it was even a year or so ago. The search function no longer seems to work and new posts are often weeks apart…not counting your recent ones, of course. Anyway, if you’re on Facebook, I’m sure there are current builders who would love to see things you’ve done. I even directed someone there to your way of holding up the galley hatch when they were looking for a different idea. Just something to consider.
ParticipantYou may have already made a decision so this may help with other things that come up. This forum used to be much more active and was very helpful to me when building my camper (about two years ago). I even posted many ideas during my build. Lately however, there have been far fewer posts or questions and very few followers it seems. The search function no longer seems to work so to find a topic you would have to scroll through post titles for something that might be relevant. If you happen to be on Facebook, the CLC group there is more active and could help with your build going forward.
As for your particular question, I went with stainless clevis pins and cotter pins for the doors and hatch using the ‘drill and fill’ technique. My doors open with no ‘play’ in them so I would absolutely recommend doing something similar.
ParticipantHere is the link to that post about the drawers if you are interested.
ParticipantMy two cents…even though it would be easier to put holes in the plywood before the shell is together, I would recommend waiting. For one thing, depending on the number and size of the hole(s), you almost certainly would weaken the plywood. While that wouldn’t matter in some places, it wouldn’t be a good idea for plywood pieces that get bent. As for the galley bulkhead (which I know doesn’t get bent) if you’re not sure of exactly what electrical items you want and where you want them, it seems smart to wait until later. Use the time to look at ideas and when you’re camper is nearly done, make your decisions after getting in it and looking at the useable space and where things would work best.
I get the idea of doing things when they would be easier. I added runners under the galley floor (to add drawers to later) before installing the camper bottom because it would have been much harder to do later. That worked out well. I just don’t know if what you’re thinking about will. I wish you patience and good luck with your build.
ParticipantI tried 3M 77, 3M 90 and Gorilla brand and felt like 90 stuck the best. The other two seemed about equal. What will make as much or more of a difference in your results might be the technique and what fabric you cover the insulation with. For example, when both parts were sprayed, they stuck better than when only one part was. Also, the car headliner material stuck much better than a heavier outdoor fabric I tried first. Good luck. This was one of the more difficult things to get ‘right’ but will be worth it if every time you’re inside your camper you’ll see nicer results.
ParticipantFor my first attempt with insulation, I tried sticky back velcro on CLC’s panels with limited success. It generally stuck to the inside of the camper better than the the backs of the panels and (upper) pieces would come loose or even fall completely. I also tried magnets, which worked well IF I could get them to stay in place but that didn’t always work. Part of the problem was the fabric I chose to cover the CLC foam with. It was a bit stiff, hard to stick to the panels and wrinkled or bubbled a lot.
I ended up redoing the entire job, reusing some of the CLC pieces and also buying some 1/2 inch foam with adhesive on one side for others. I also used auto headliner to cover the pieces which worked much better. A benefit of using it is that velcro sticks to the headliner fabric. So if you wrap the headliner around the foam (and attach it well), you can use velcro around the edges of the pieces to stick them to the camper.
The new pieces are held in place mostly with velcro, a few strategically placed magnets and friction between pieces. Here is how it turned out, much better than before.
 Participant
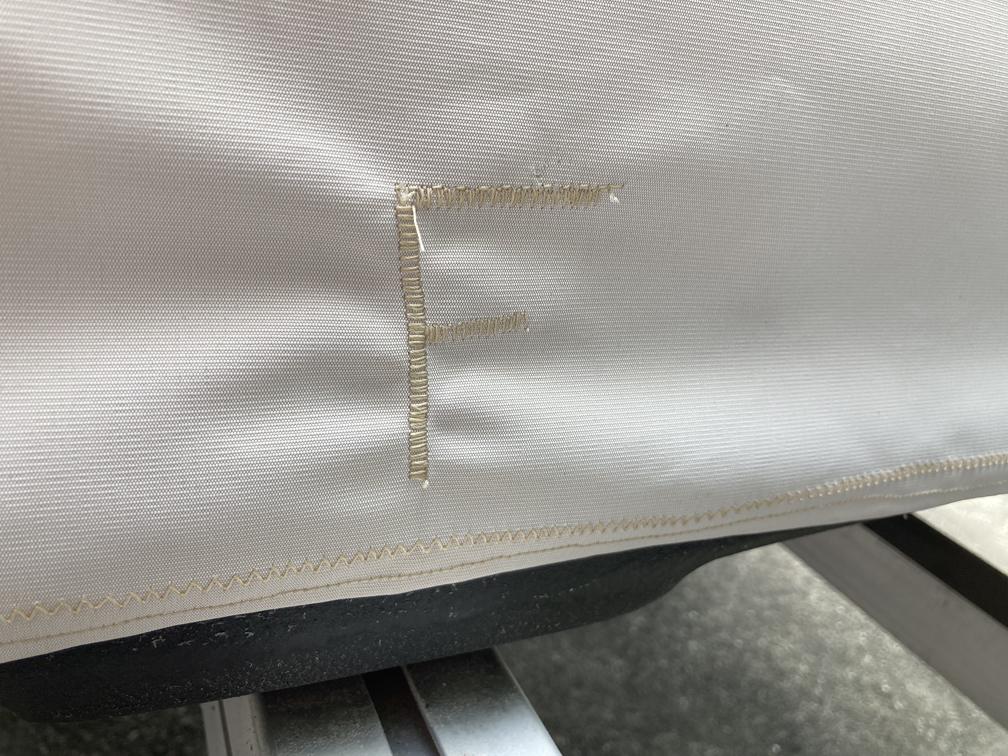
One last detail is below. The cover is pretty symmetrical side to side but not as much front to back so an ‘F’ sewn on the front keeps it from being put on backwards.
 Participant
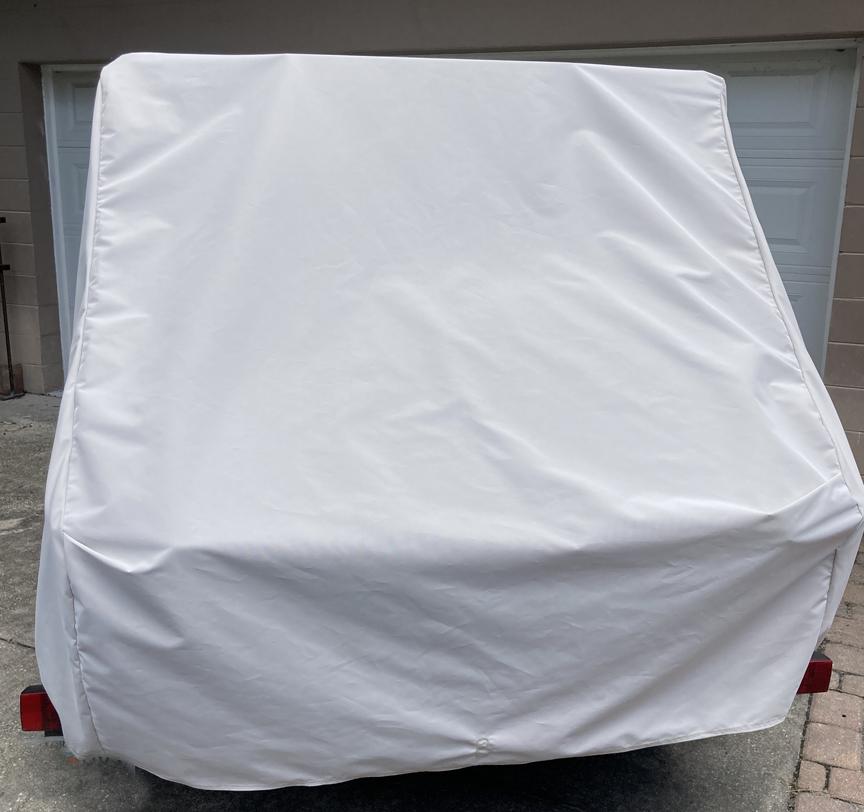
Here’s another view of the cover after stitching the bottom all the way around to keep it from fraying.
 Participant
$1200 for a custom cover from CLC is a lot so I bought some Weathermax 80 fabric recently from Joann (online) when it happened to be $9.99 a yard – normally about $33. I assume it is the same fabric that CLC uses or close enough. I am not a seamstress by any means but by using my daughter’s sewing machine it took about 5-6 hours total to get this far. My camper has roof racks and a solar panel – maybe one day I’ll add an opening for the panel to be exposed but for now it is fine. I also may add an opening for access to one of the doors but again, for now it’s good. Total investment was about $120 (11 yards of fabric and outdoor thread) plus some time but this will do the job of protecting my camper while outside in the Florida sun.
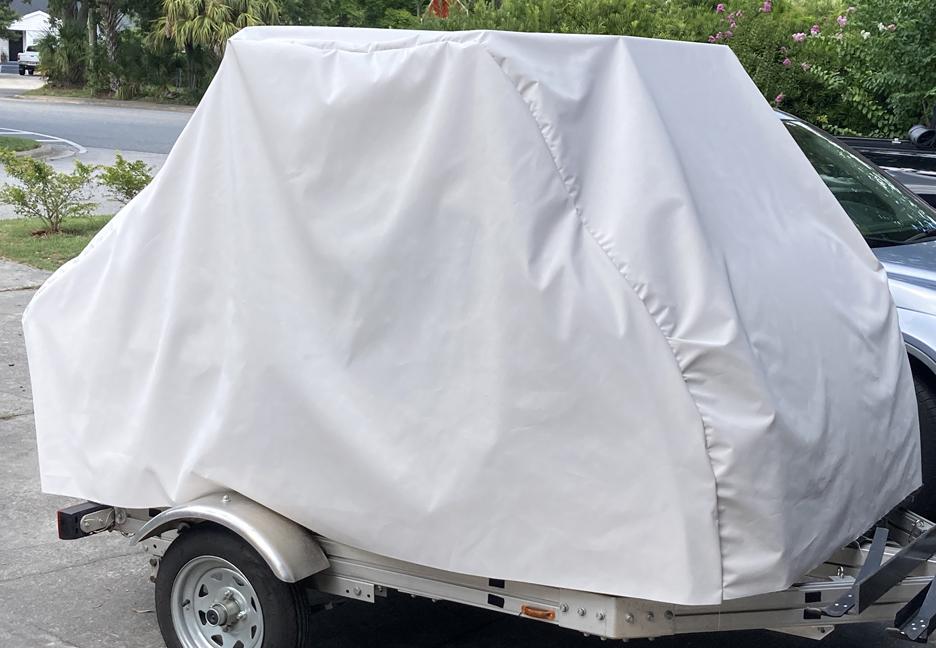
The process was fairly easy with the hardest part(s) being moving, holding or clamping the fabric in place. I started at the front and unrolled fabric to cover the entire camper and cut it off at the back. The 60″ width pretty much went from one side to the other. Then I unrolled a piece big enough to cover a side and clamped it (to the roof racks) so the bottom edge was about right. Then I cut the extra off that side piece to match the top piece making sure to leave a couple of inches of overlap. I sewed that side to the top, put the whole thing back on the camper and repeated the process for the other side piece.
ParticipantMy two cents…My struts are installed according to the directions. I don’t have an alternative but could tell the supplied rods (30 pounds I think) were not going to hold the galley hatch up well. It would close several inches and it hadn’t even been completed yet. I added a stiffener and glassed part of the inside of the hatch so it had some extra weight but was simply too heavy. I bought and used 40 pound rods instead and they’ve been fine. Also, I disconnect the rods at the top pretty much all the time the hatch is closed. Doing that minimizes both side gaps so that water has very little room to get in (while sitting outside or driving). It only takes a few seconds to reattach the rods at the tops after opening the hatch so I think the trade-off is worth it.
ParticipantLike John says, it’s hard to answer because of all the variables. These include not only the trailer model, but also the tire size and whether the axle is over- or underslung. With that said, mine is about 81.5 inches to the highest point of the galley hatch when open. I have the Trailex trailer with 12″ wheels and an underslung axle which lowers the overall height of trailer and camper. I don’t have the integrated cargo carrier.
ParticipantSo far, nothing I’ve tried has kept some of the insulation panels in place against the cabin. They happen to be the four larger ones covering the ‘ceiling’. I haven’t tried contact cement (seems too permanent) but combinations of sticky velcro, magnets and hot glue and/or 3M mounting tape haven’t worked.
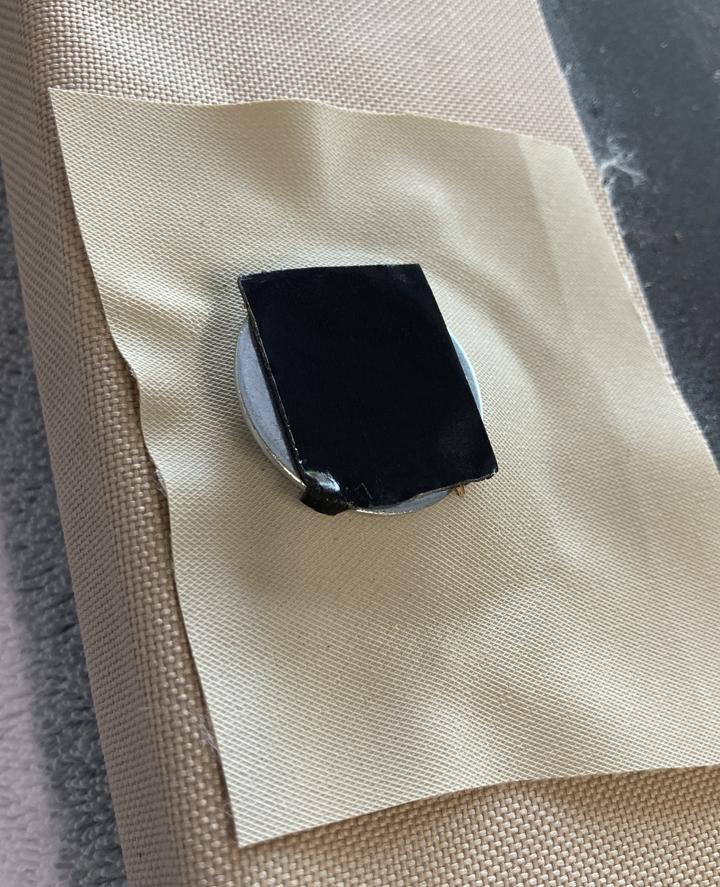
I decided to piggyback off of kimf’s idea and ‘trap’ the magnets under some material and that seems to solve my issue.
Here is everything in place before putting the panel back in. My fabric was already attached, so I put a strong round magnet under the extra fabric piece which is hot glued around the magnet. I used large washers in place of the hanger strap – Everbilt zinc fender washers; 1.25″ across with a quarter inch hole – but any that are at least an inch across should work. I believe the adhesive is 3M ‘Extreme’ mounting tape, which works very well on the cabin walls. Four to six of these around the edges of the pieces that were falling is now keeping them in place.
 Participant
I believe the tabs are to attach a large cover that would let you run the fan while it’s raining. I left mine even though I have a solar panel that serves the same purpose.
ParticipantI’m sorry it didn’t work as well for you. I don’t know if you saw or tried it but in the first post I mentioned expanding the part of the gasket that slips over the wood. I used a plastic automotive pry tool to open it up just a little since it was so tight to begin with (as you also noticed). I tried for a ‘snug’ fit but not one that I felt like I would have to hit with a mallet to get on. Doing that not only made it easier to install but would have allowed a little more space for the butyl material. Glad you figured out a solution to the problem though.
ParticipantHere’s the base. There’s a part under what you see that goes to the floor and fills the space between mattress and insulation. I added another layer of plywood where it sits on the mattress to fill the gap which I thought would be filled with mattress topper but that didn’t seem to work as well. Now the base sits partly on the floor and partly on the mattress and is a solid support for the storage cubby. Building this in two parts makes it easier to put in or take out of the camper. The base is not going anywhere and I think the storage cubby will stay in place but I may figure out a way to attach the two while traveling just to keep the cubby from ‘wandering’ – a simple eye-hook or something similar would do it.

-
AuthorPosts