Forum Replies Created
-
AuthorPosts
-
stretchMike
ParticipantRsander, I agree with Artistic Adam on this one.
The problem is that you will need to eventually sand the outer surface smooth in order to get the fibreglass cloth to lie flat. Given that the puzzle joint is not flat you will have to sand through the top veneers on the high points. That will be highly visible with a clear finish – and the puzzle joints already draw the eye to that area. With a painted finish it won’t be a problem – but the clear wood finish is much prettier to most.
Nevertheless, I think this can be solved. This is what I would do:
1. I presume you have applied the fibreglass tape to the inside of the panels as directed. Sand that off with a pad sander and 80grit down to the wood.
2. Take a razor knife with a brand new blade and from the outside surface cut along the puzzle joint. You don’t have to go all the way through, but score it to at least 1/2 depth. You may have to use multiple new blades. Take care, this is your finished surface.
3. Take a wooden block (hardwood 2×4 or similar best) and place it on the outside surface over the puzzle joint that you have just scored. Give the block a sharp rap with a hammer. The puzzle joint should be sufficiently weakened to come apart.
4. Clean up the edges of the separated puzzle joint with sandpaper on a round block taking care not to round the edges.
5. Repeat joining process at 35-39 of the bible, but add this to avoid problem again:
- I would do one joint at a time;
- I would place it on kitchen wax paper or parchment paper on a flat surface, then epoxy and tape the joint as directed, then place more paper on the top of my joint and add a block and a heavy weight on top to get it absolutely flat.
Remember, there is no shame in taking a backward step to get it right, and if not addressed when they first appear problems tend to expand as the process continues.
ParticipantGreat, see you there. Anyone else?
ParticipantWelcome to the adventure. Fully agree with comments above. Some others:
- there is a wealth of information in the builder’s forum on this site. It is well worth some time (hours) browsing.
- enlist others to help with larger epoxy jobs. If involving a significant other for epoxy mixing (very useful) suggest buying her an all in one painter’s overall because epoxy WILL get on clothing guaranteed: “Look honey I got you a new outfit!”
- “cleanliness is next to godliness” is very appropriate for this project. Reducing clutter and mess keeps dust down and reduces chance of tripping with pot of epoxy and getting epoxy on tools
- buy 3 or 4 extra boxes of disposable gloves and change them frequently. Reduces chances of epoxy getting where it shouldn’t
- Buy several packs of cheap scissors for cutting cloth. They will get gummed up with epoxy and need to be treated as disposable after a while
- Be scrupulous about keeping cloth free of dust or epoxy until it is used. Even a single drip of epoxy on your roll of cloth will prevent it from lying flat.
- generally with epoxy “less is more” as long as cloth is wetted out you are better off going with more coats rather than thicker coats
- if not experienced with epoxy I suggest doing one seam at a time in stage one.
- avoid having to sand extra epoxy wherever possible, particularly drips:
- better to use less epoxy to avoid runs and clean up
- its easier to mask than to wipe
- its easier to wipe than to sand
- A very bright portable LED lamp will help you find those drips and to wipe them up before they set.
- Anything left in a position where it could possibly fall on your project will do so!
- Any modification will have ramifications over a number of steps. Think it through carefully
- For cutting out hatch and doors I used a Dremel Ultrasaw. A very useful tool with multiple other uses on wood, plastic or metal.
That’s it for now – except this: most mistakes are fixable (and we all make them).
ParticipantMatt, for more details best to contact me directly:
barnards then the @ sign, then telus.net
Mike
ParticipantI also found that 4 coats (thin) necessary to get good coverage. You will want to eliminate most signs of the glass weave before sanding.
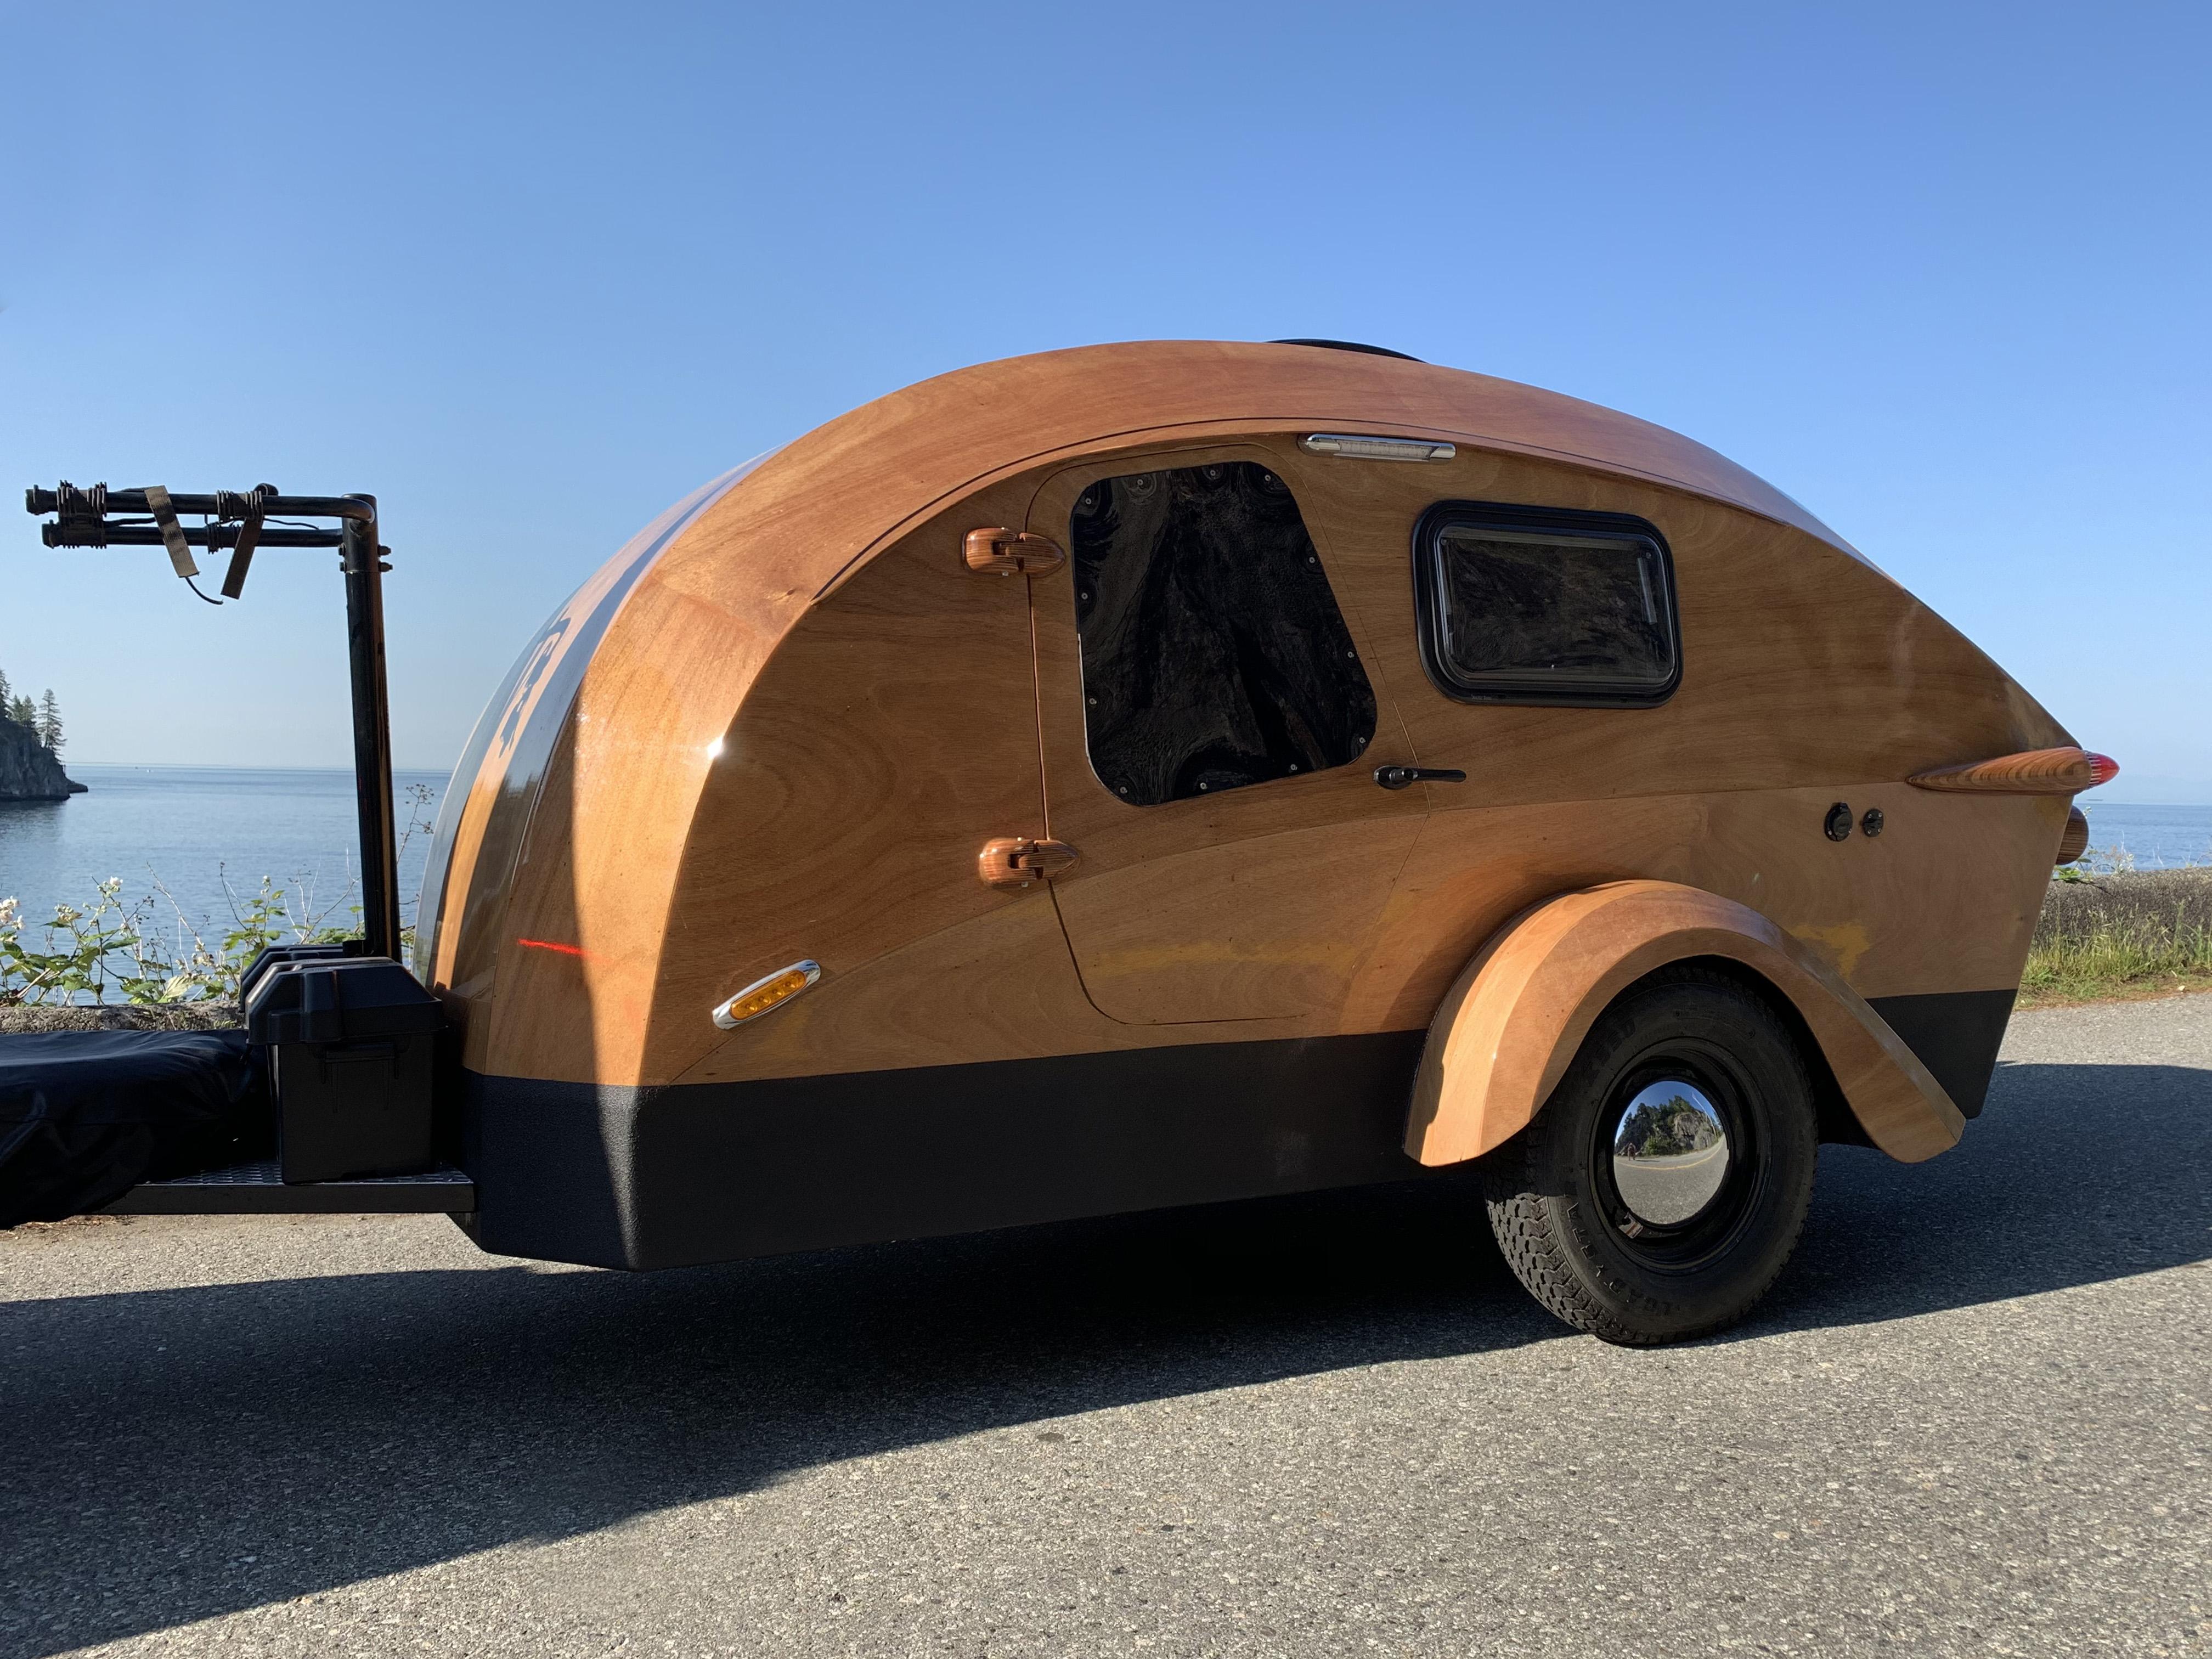
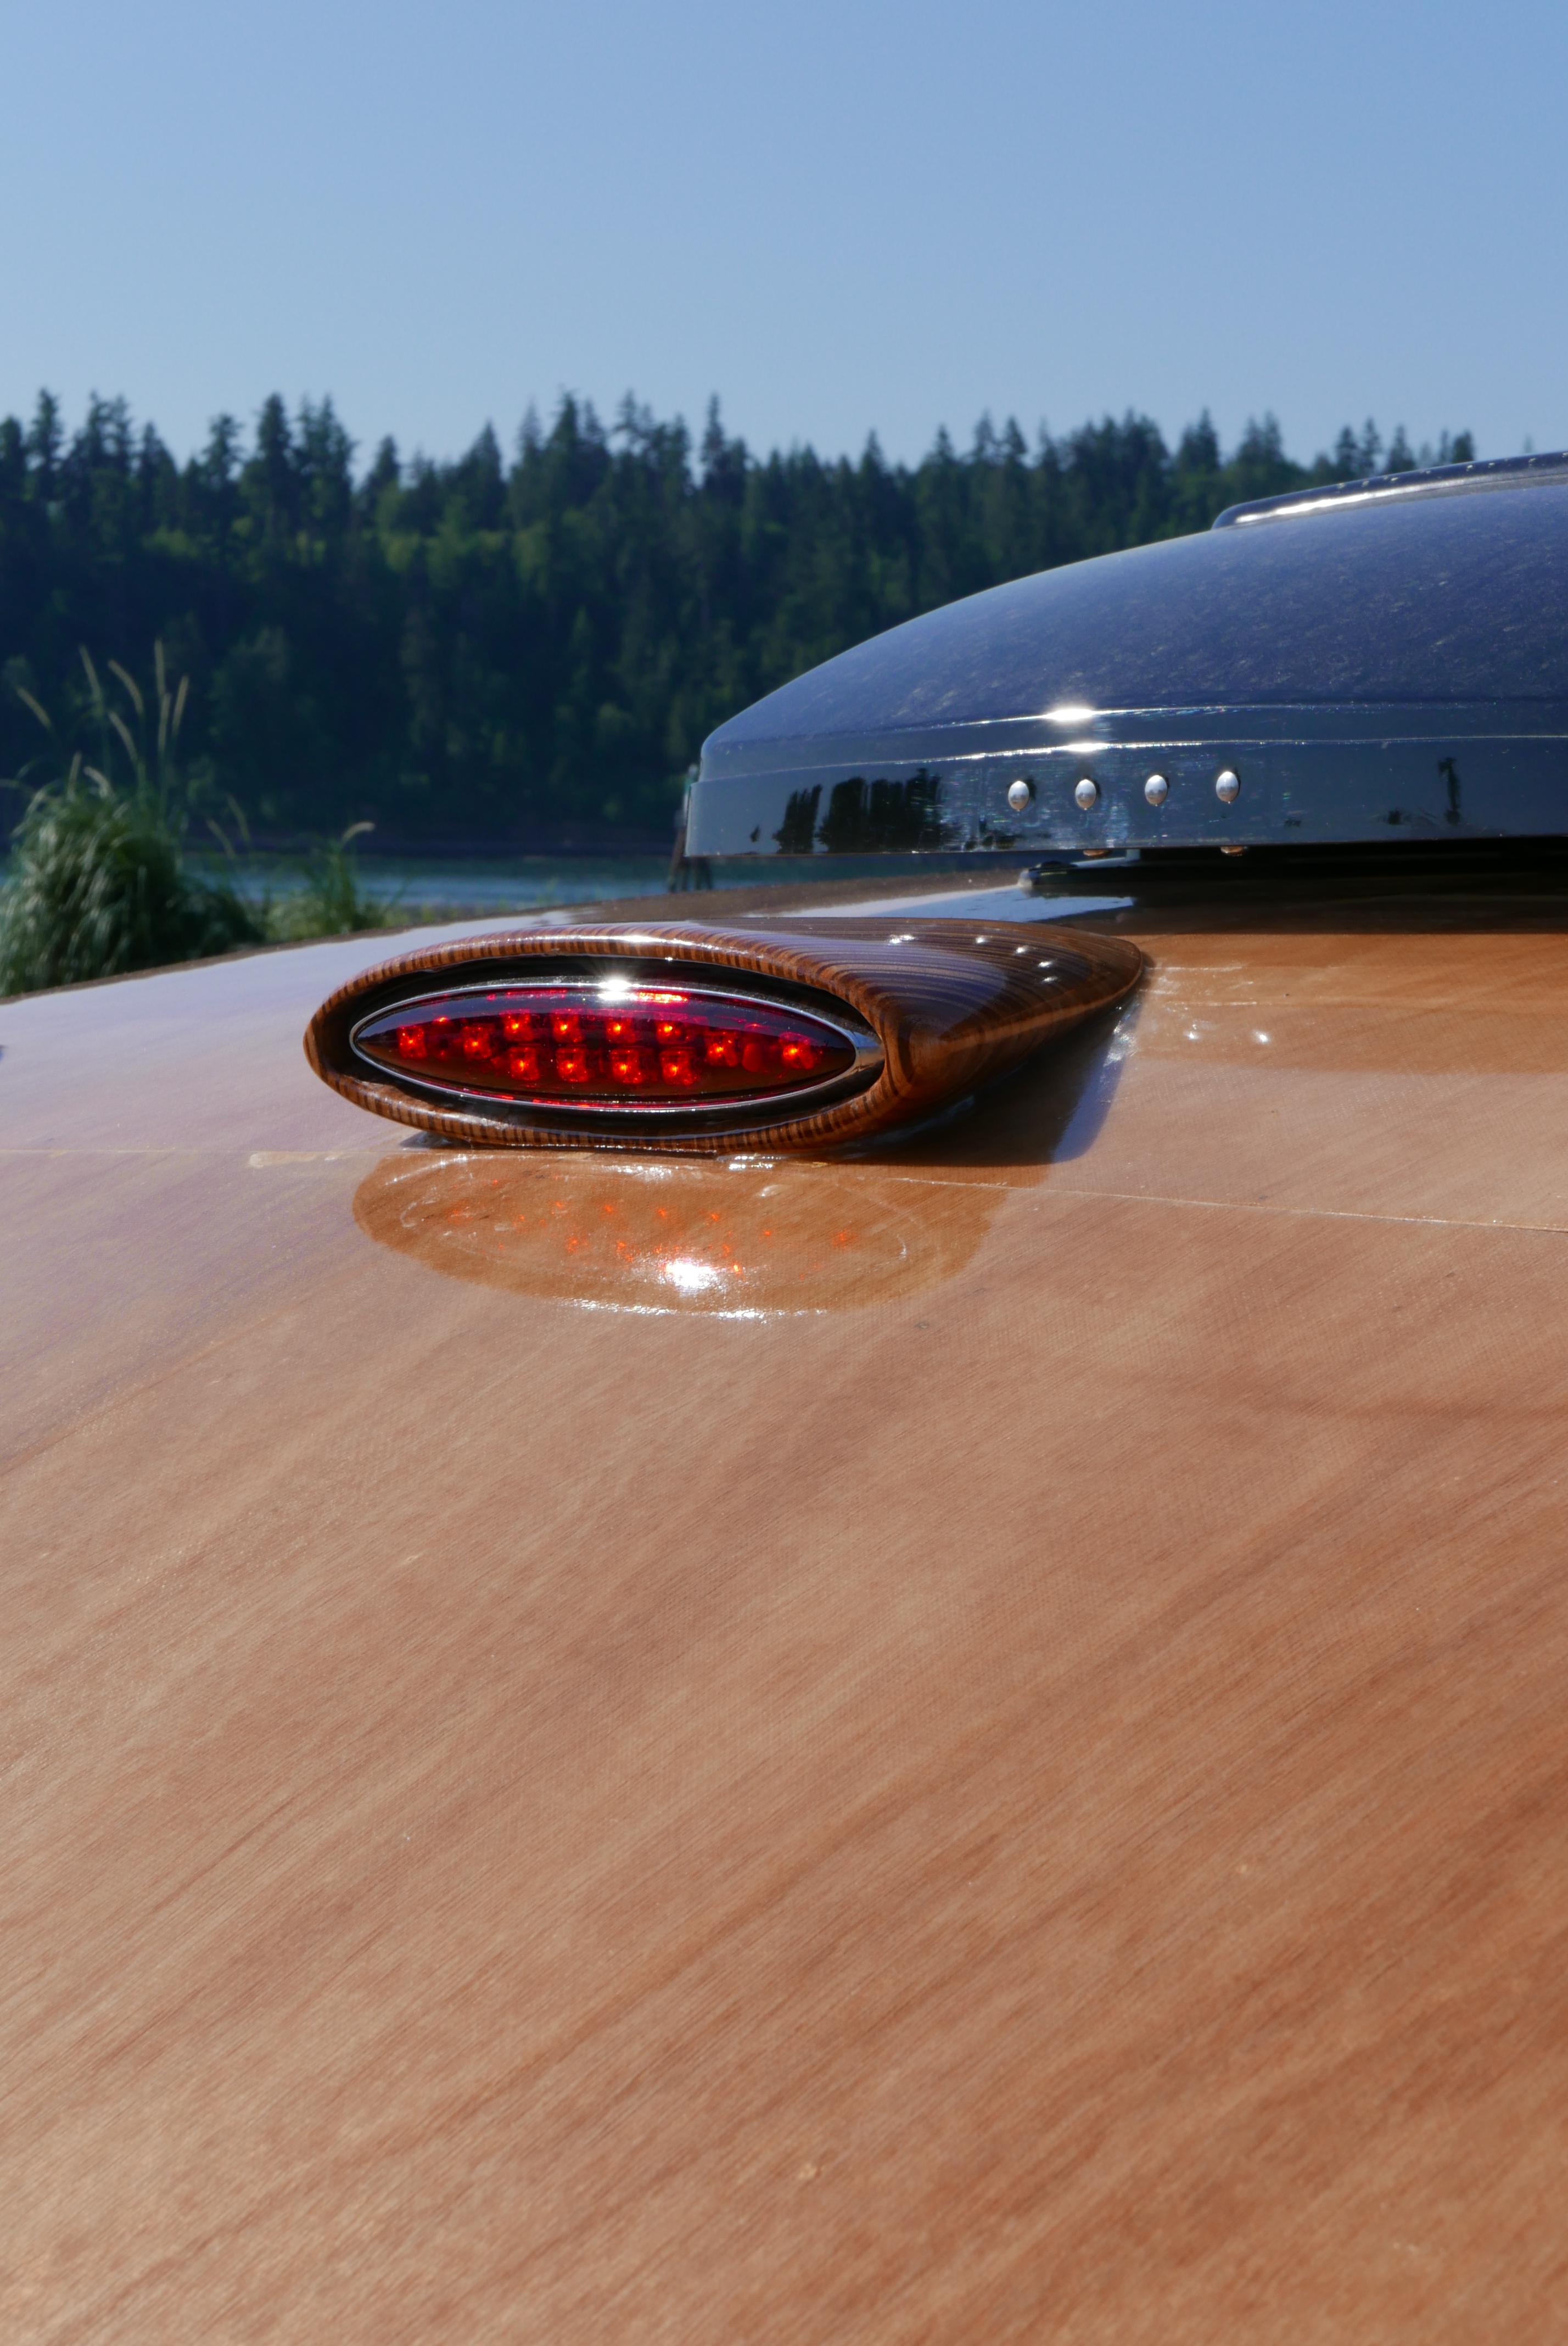
ParticipantJust noticed these replies. Yes lights are multi-function. JimBuilt: light fairings were laminated from leftover 3/4 inch Okuome ply from underfloor storage. I shaped them by hand with planes, rasps etc using templates I had drawn up. Then 3 1/4 hole saw to cut out recess to accept light base. After attaching to sides drilled for wiring.
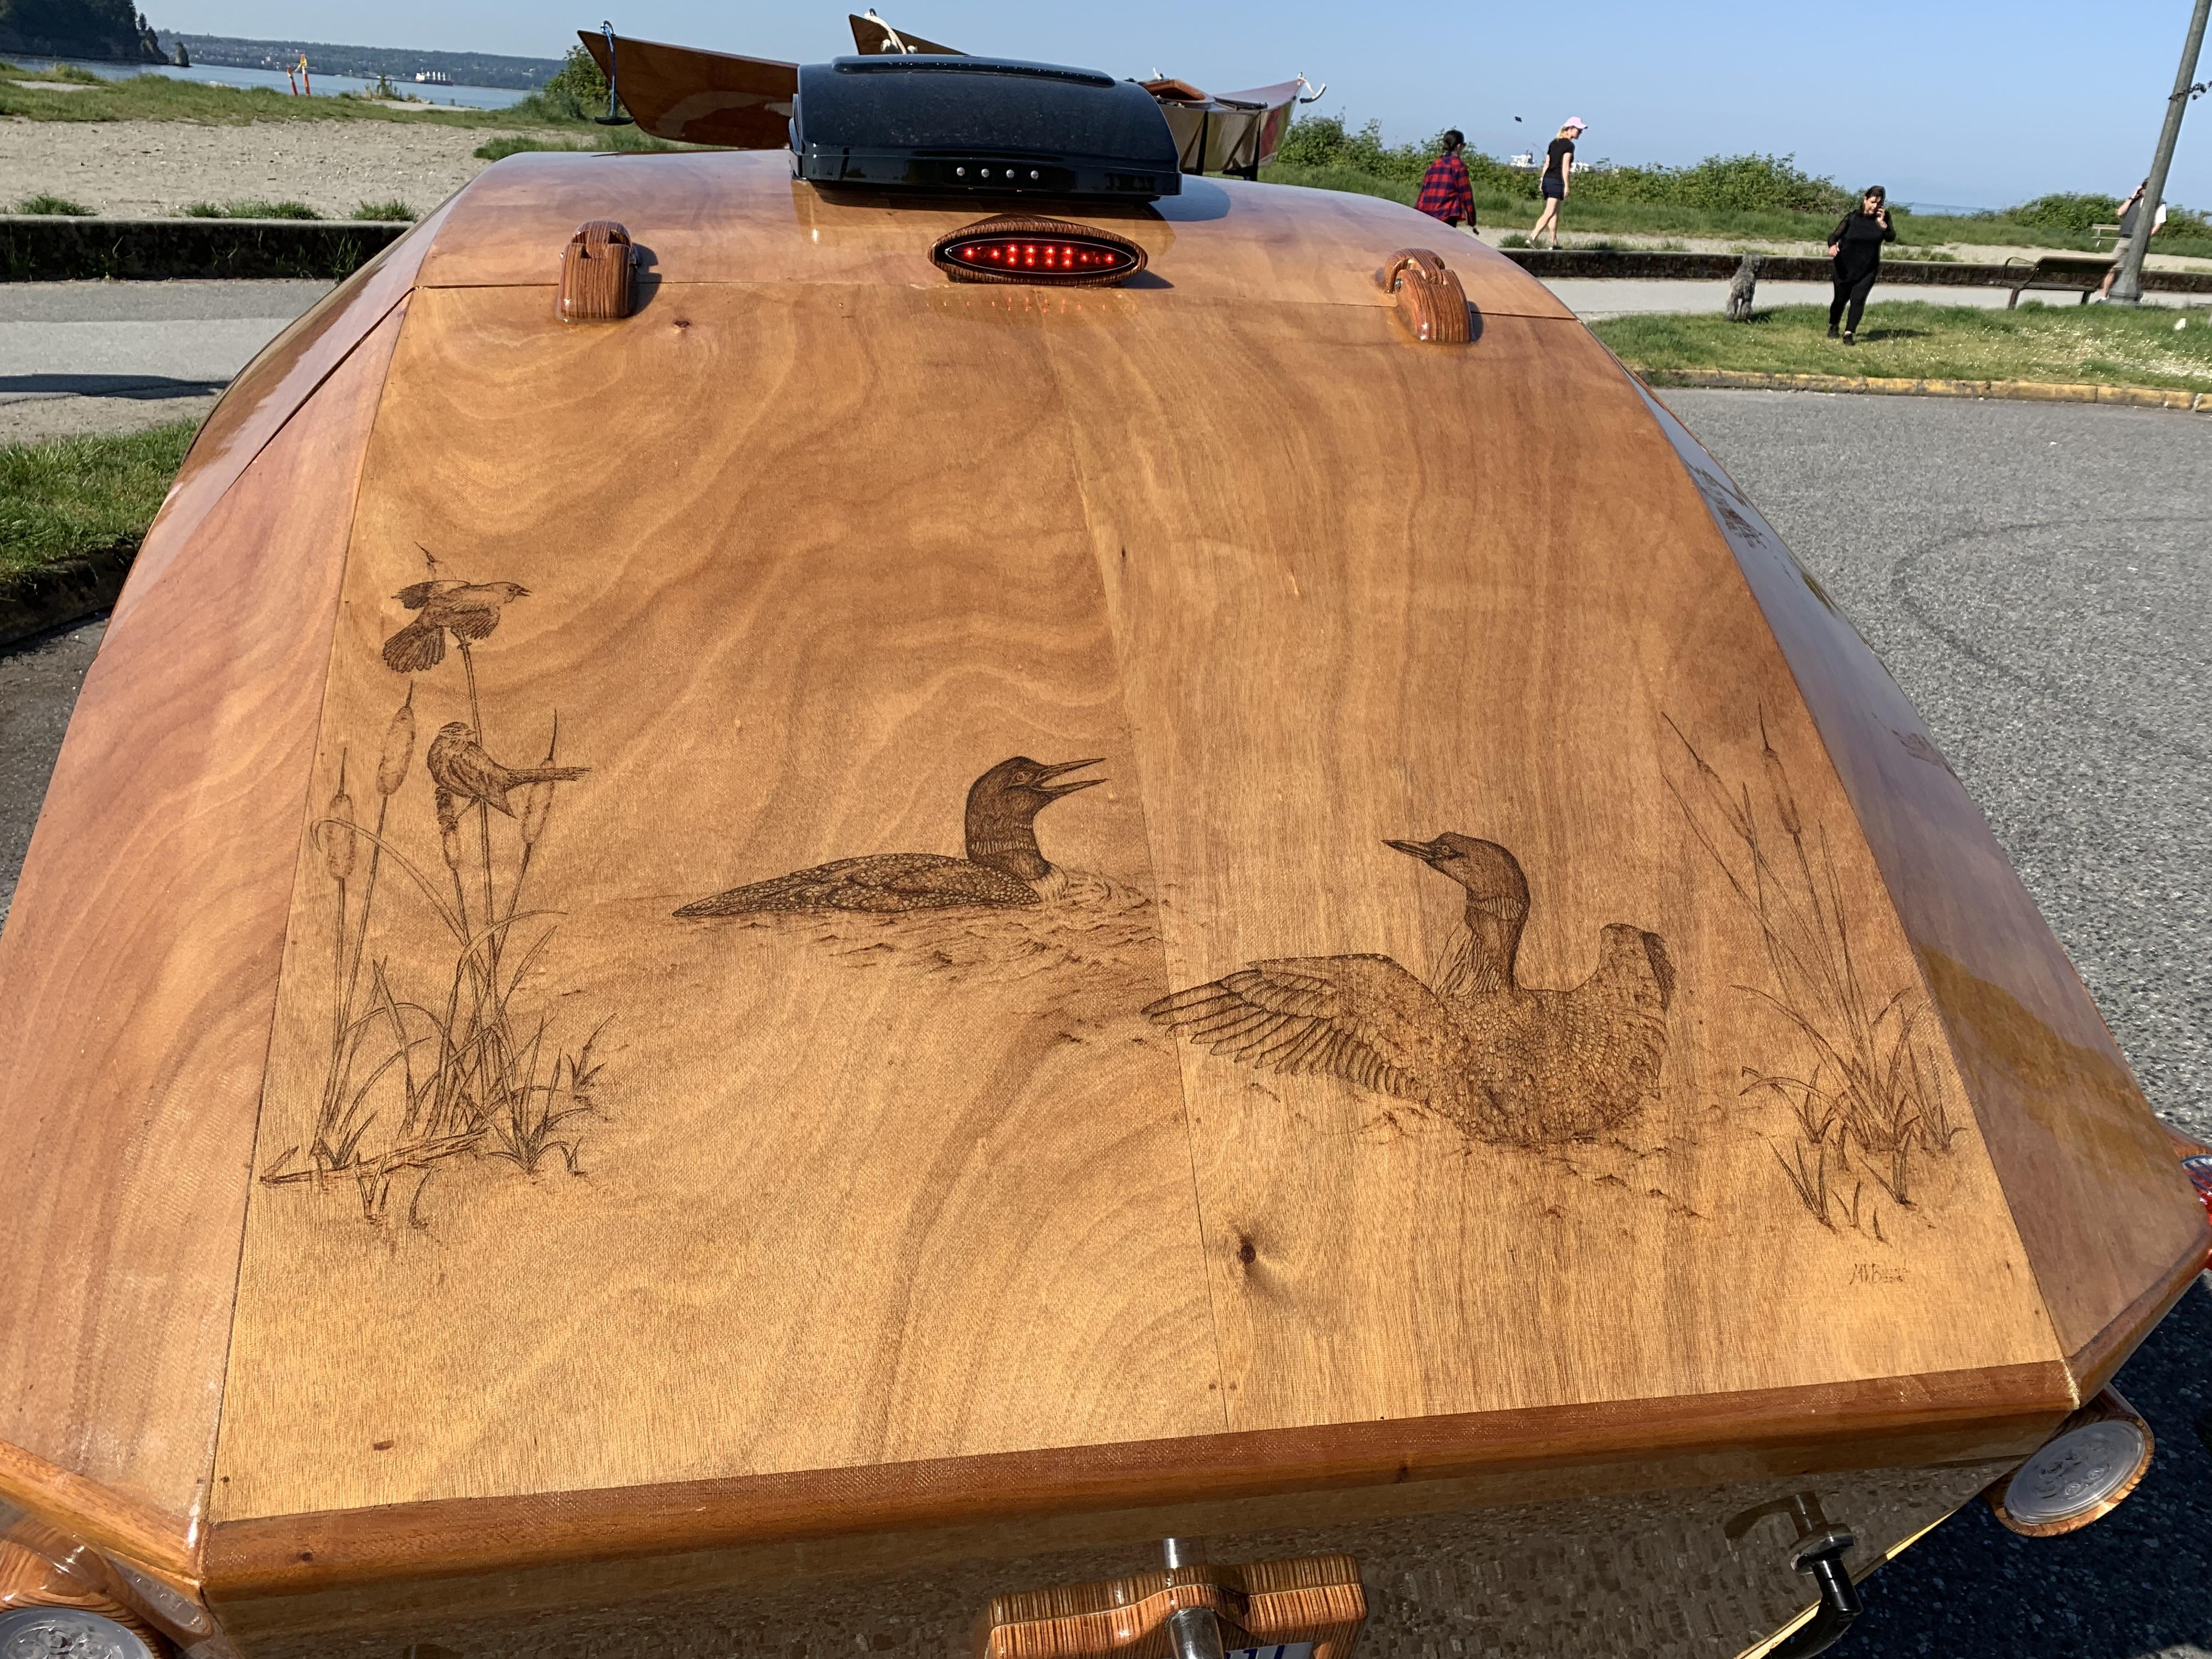
ParticipantYes, wood burned loons and red-winged blackbirds. More details under my forum topic Teardrop Stretch
Tail lights are LED replicas of lights from ’59 Cadillac.
June 27, 2019 at 12:53 pm in reply to: Filleting – Sourcing the right filler for a Bright Finish #2535ParticipantI ran out of commercial wood flour part way through and couldn’t get more. What to do? Coincidentally my belt sander dust bag was full. Worked perfectly and price was right.
ParticipantMatt, thanks for the kind words.
I am away from home until July, so a bit limited in my reply. But I can say that the diagonal rails do not tie into cross member. The ends are welded to angle sections (at the base of the triangle) that are drilled and then bolted through the front of my storage box (3/4 inch ply) which is drilled oversize and filled with hardened epoxy and re-drilled. Inside the box are matching 1/4 inch steel plates to accept bolts and sandwich the ply.
The tongue piece has 4×6 inch plates welded ate the far end, top and bottom. They slip over and under cross member and bolt through it and continue through floor and matching steel plated underneath.
When I get back I can post some sketches and photos.
Lastly a disclaimer- I am no engineer and this may or may not work long term and / or be safe. Buying a manufactured trailer is the safer way to go.
Participant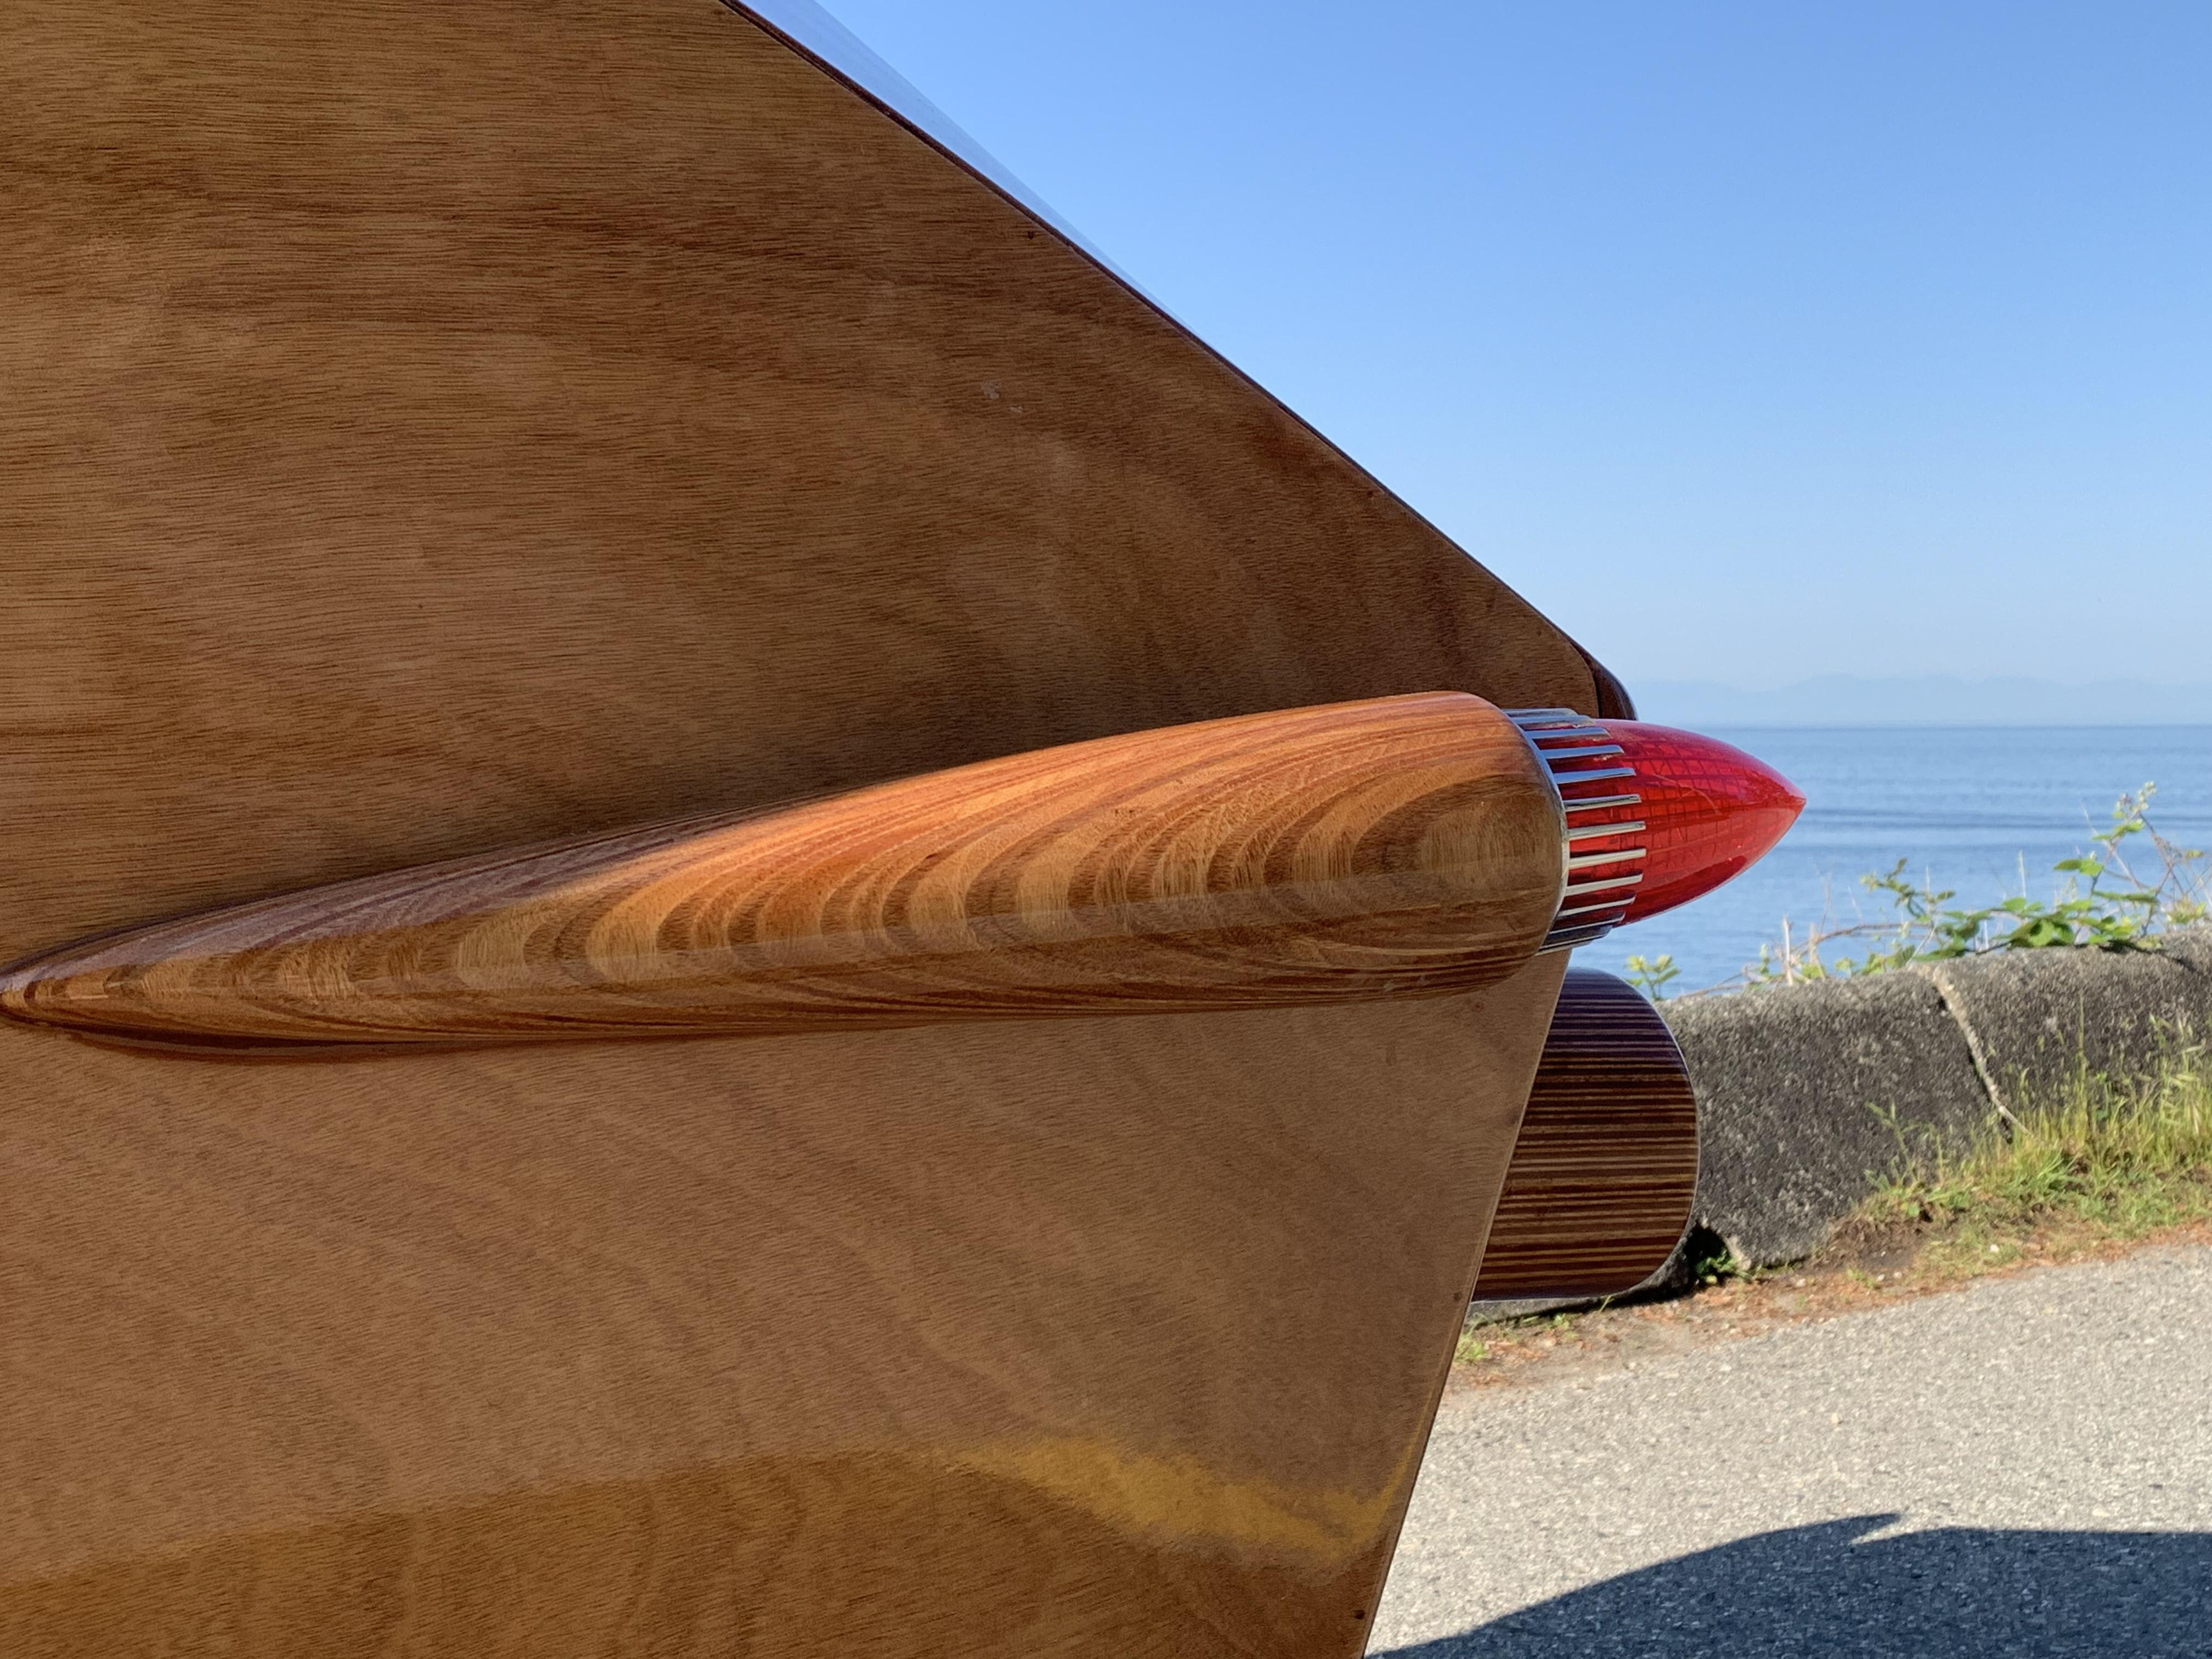

 Participant
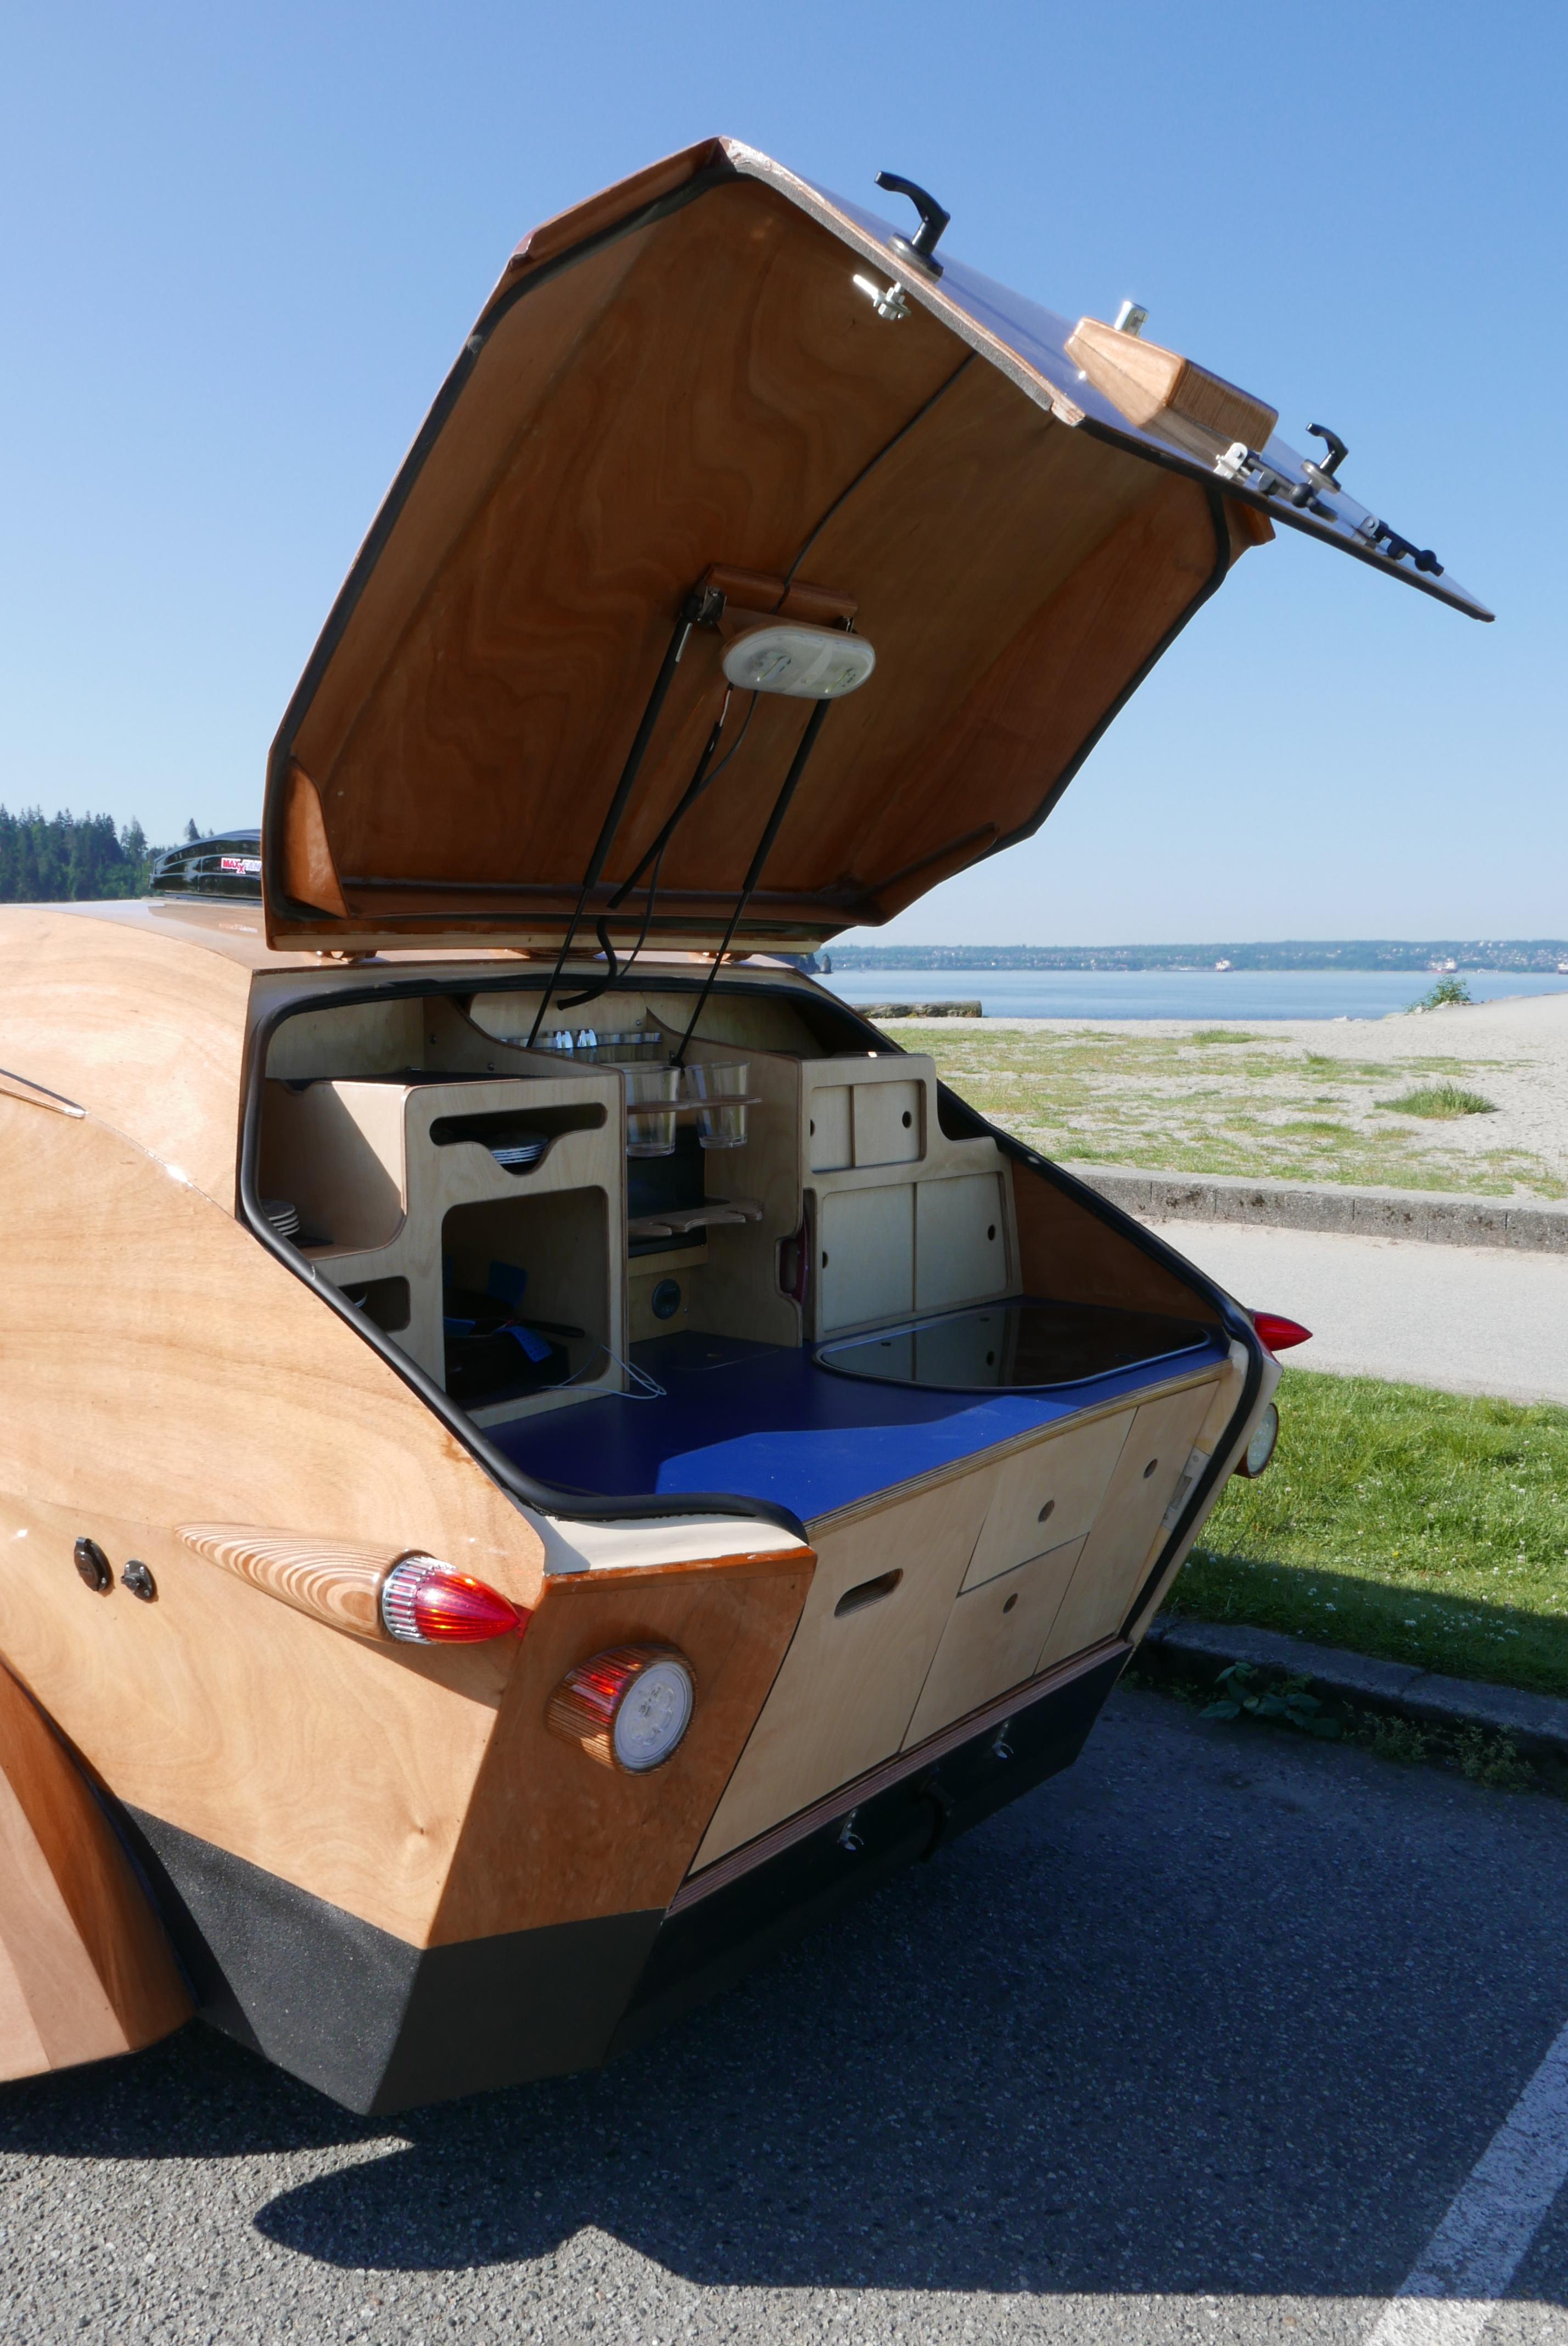
My plans built and modified (2 ft stretch) teardrop now completed in Vancouver.
 Participant


 Participant
My plans built and modified (2 ft stretch) teardrop now completed in Vancouver.


 Participant
Yes, they are included.
ParticipantOn to the fenders: did not seem right to slap on some aluminum or galvanized ones, so went a different route –
First drawing them up – again flexible stick and French Curve drafting

Then a male mold to shape the panels

Patterns made of “wigglewood” – much easier to bend.

Then the female mold:

Okoume panels bent in, glassed and epoxied just like camper shell:

I added inner fenders at front and back for strength, filled ends with two part foam, glassed and sprayed with bedliner paint. Then fixed to camper shell


-
AuthorPosts