Welcome to TeardropForum.com › Forums › Teardrop Builders’ Forum › Teardrop Stretch
- This topic has 43 replies, 16 voices, and was last updated 1 month ago by
fischautotechgarten.
-
AuthorPosts
-
January 31, 2018 at 10:13 am #1627
stretchMike
ParticipantGreetings to all and thanks to previous posters for their many useful comments.
I am building from plans with a twist: I am adding a 2ft stretch between molds 4 & 5. I figure they do it with planes and around here (British Columbia) ferries – so why not a teardrop?
The main reason is that I want under counter storage in the galley sufficient to hold a pull out 12v fridge, together with drawers and water containers for sink. Inside the cabin the stretch will give me room for cabinets and a little more room to move. The dimensions of the stretched shell will be 5×10 which is a common size for traditional or commercial teardrops.
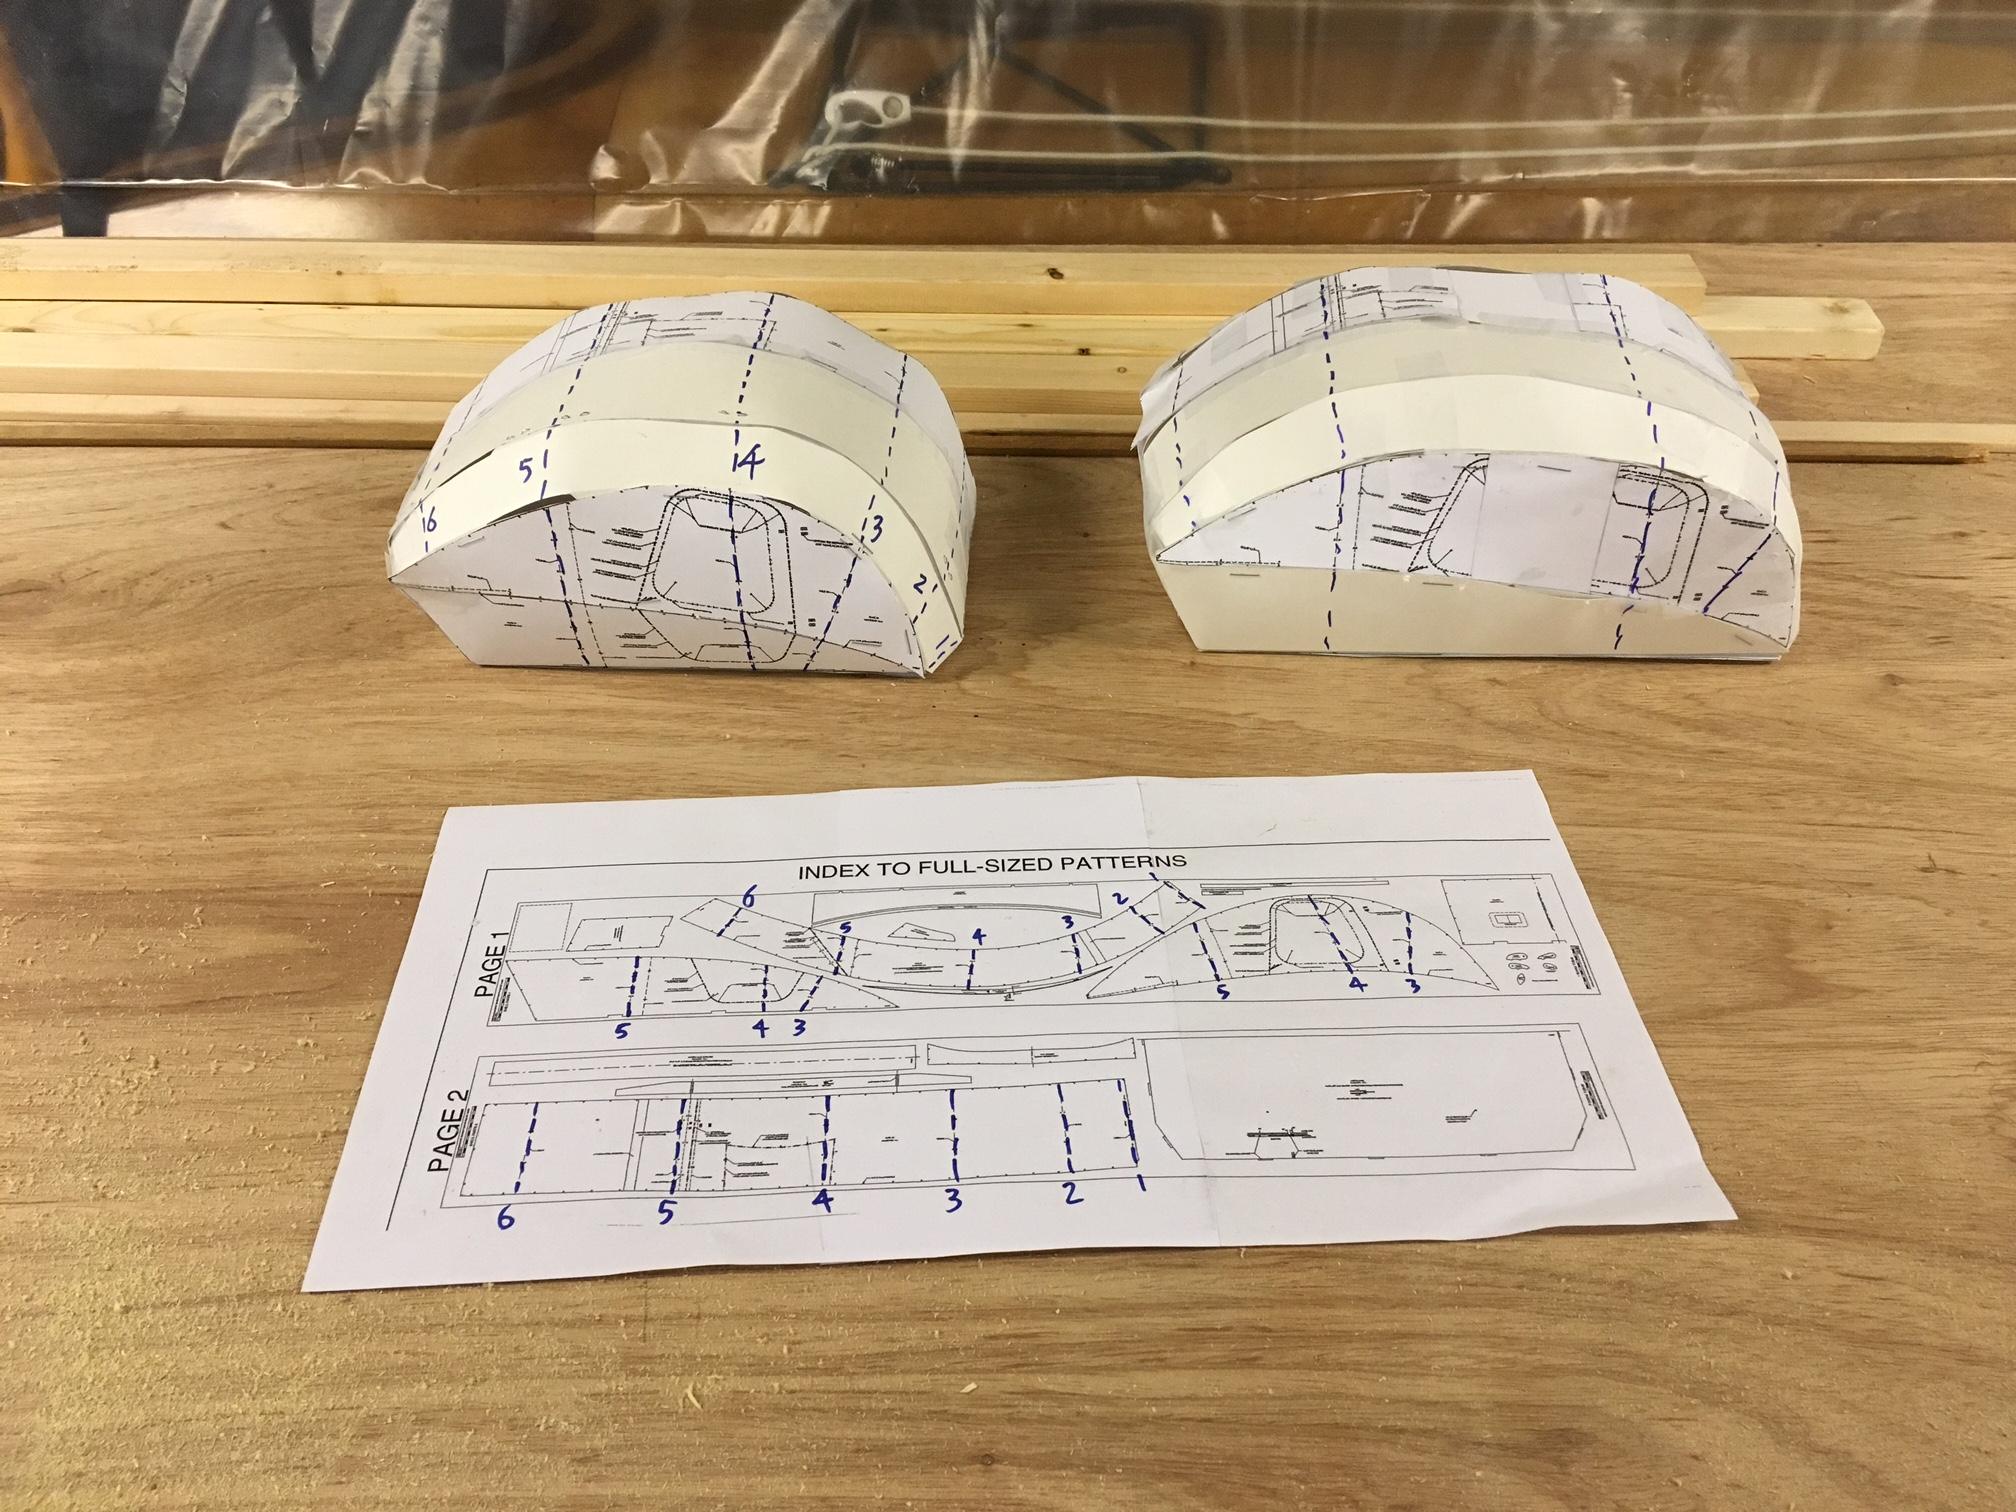
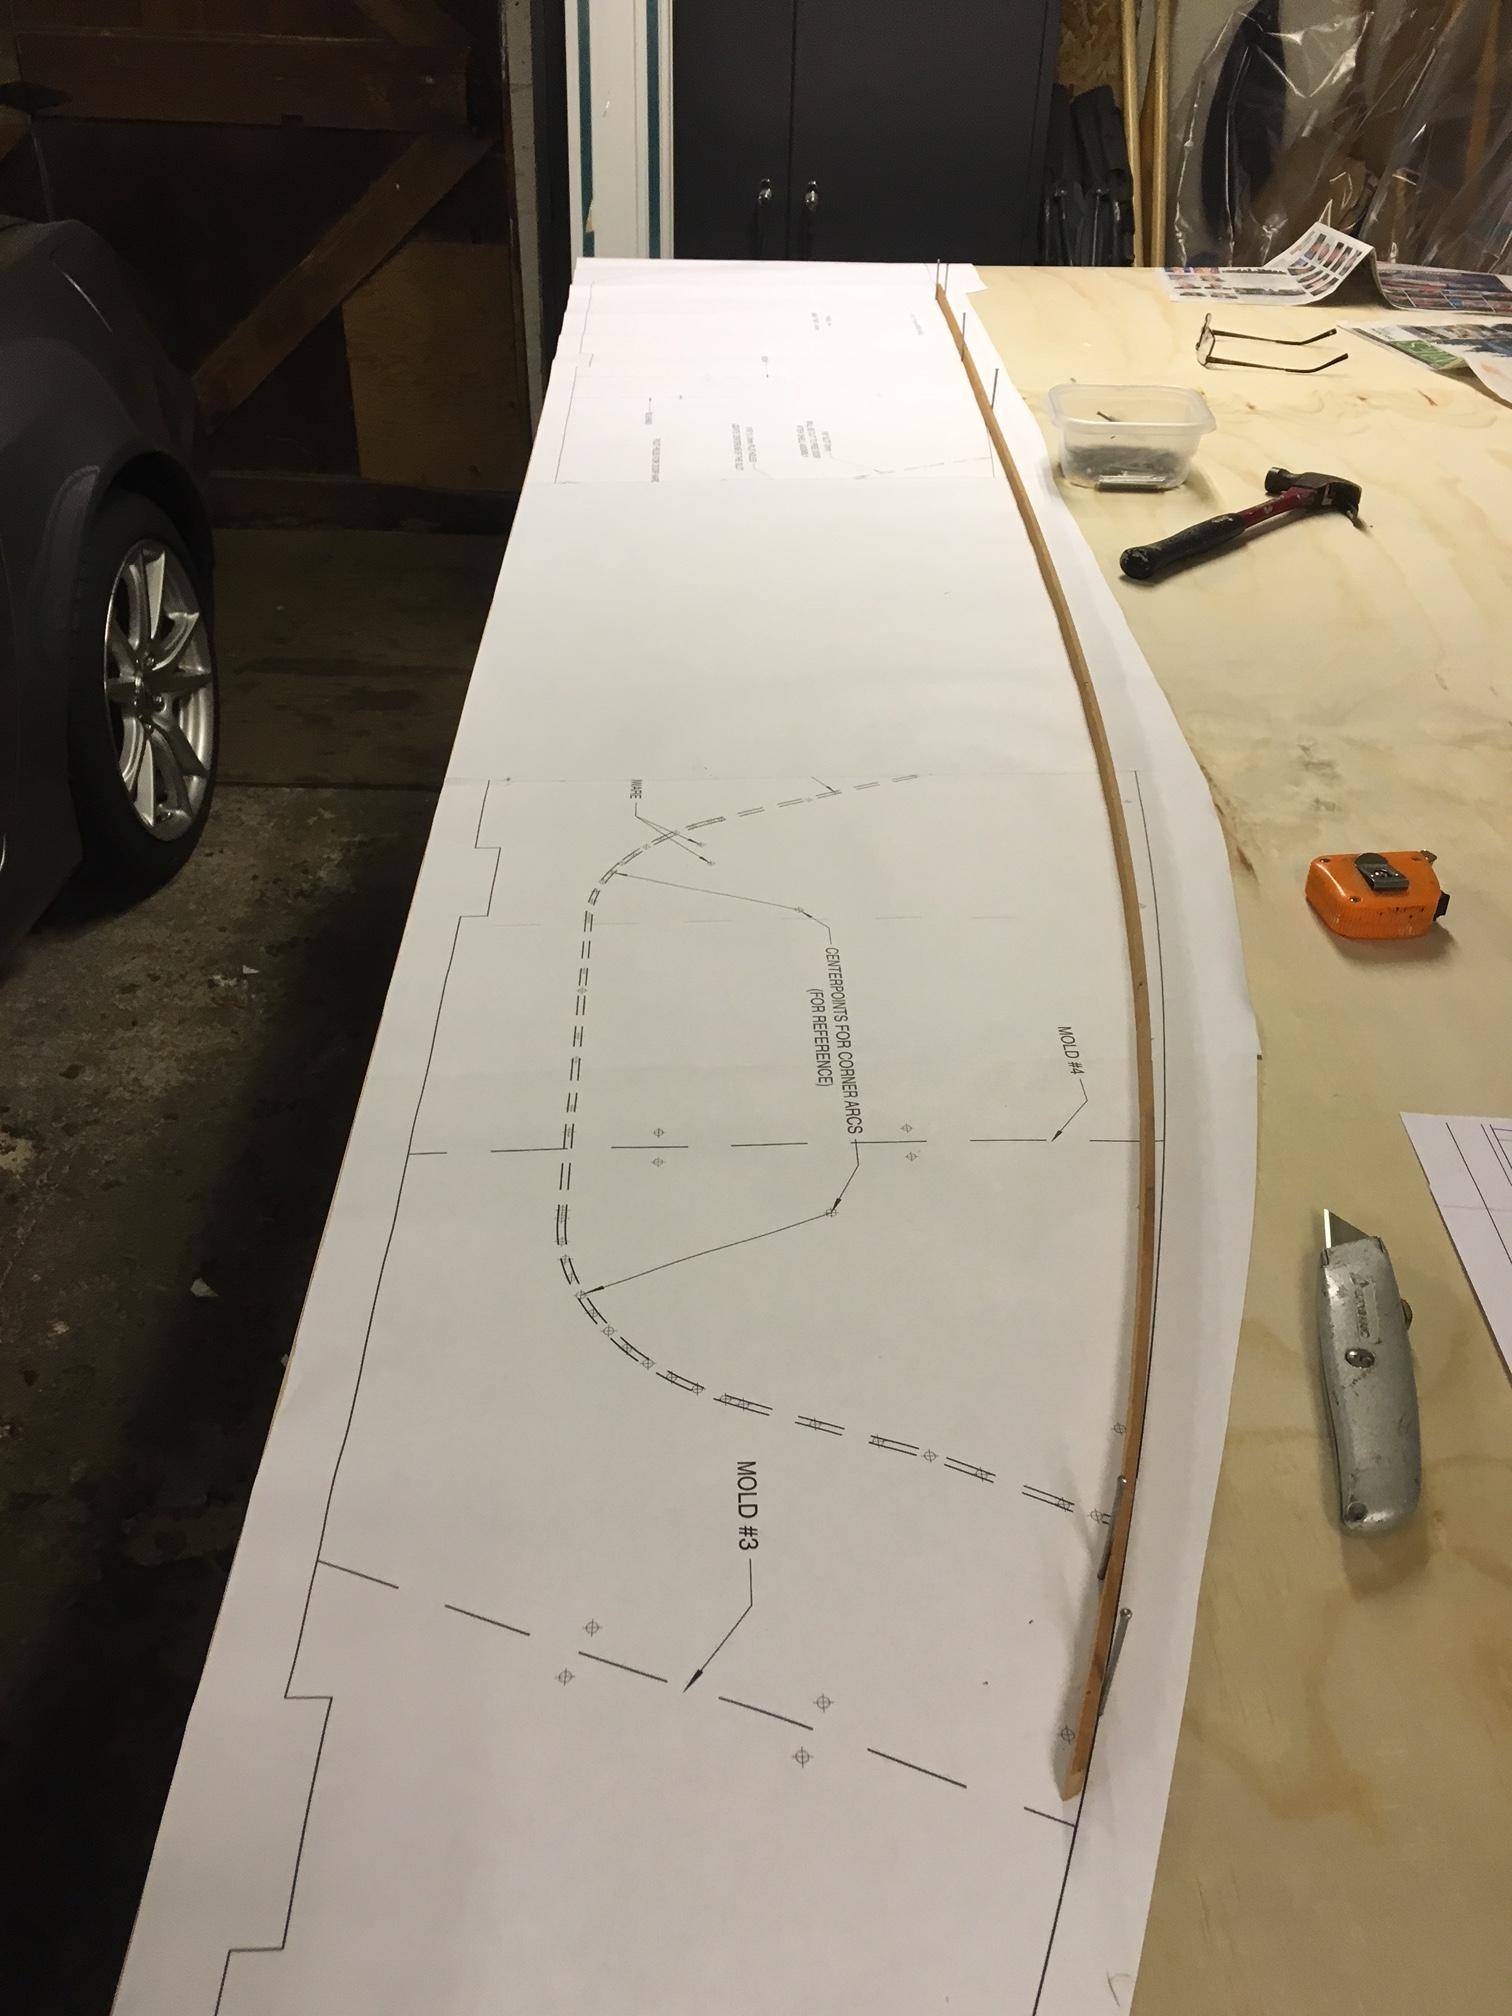
First job was to mock it up to assess new proportions and to check where cut and stretch would go. Then laying out full size plans for panels, pasting in a 2ft sheet of paper and adjusting curves to incorporate stretch. No CAD here, so resorted to “flexible stick” drafting.
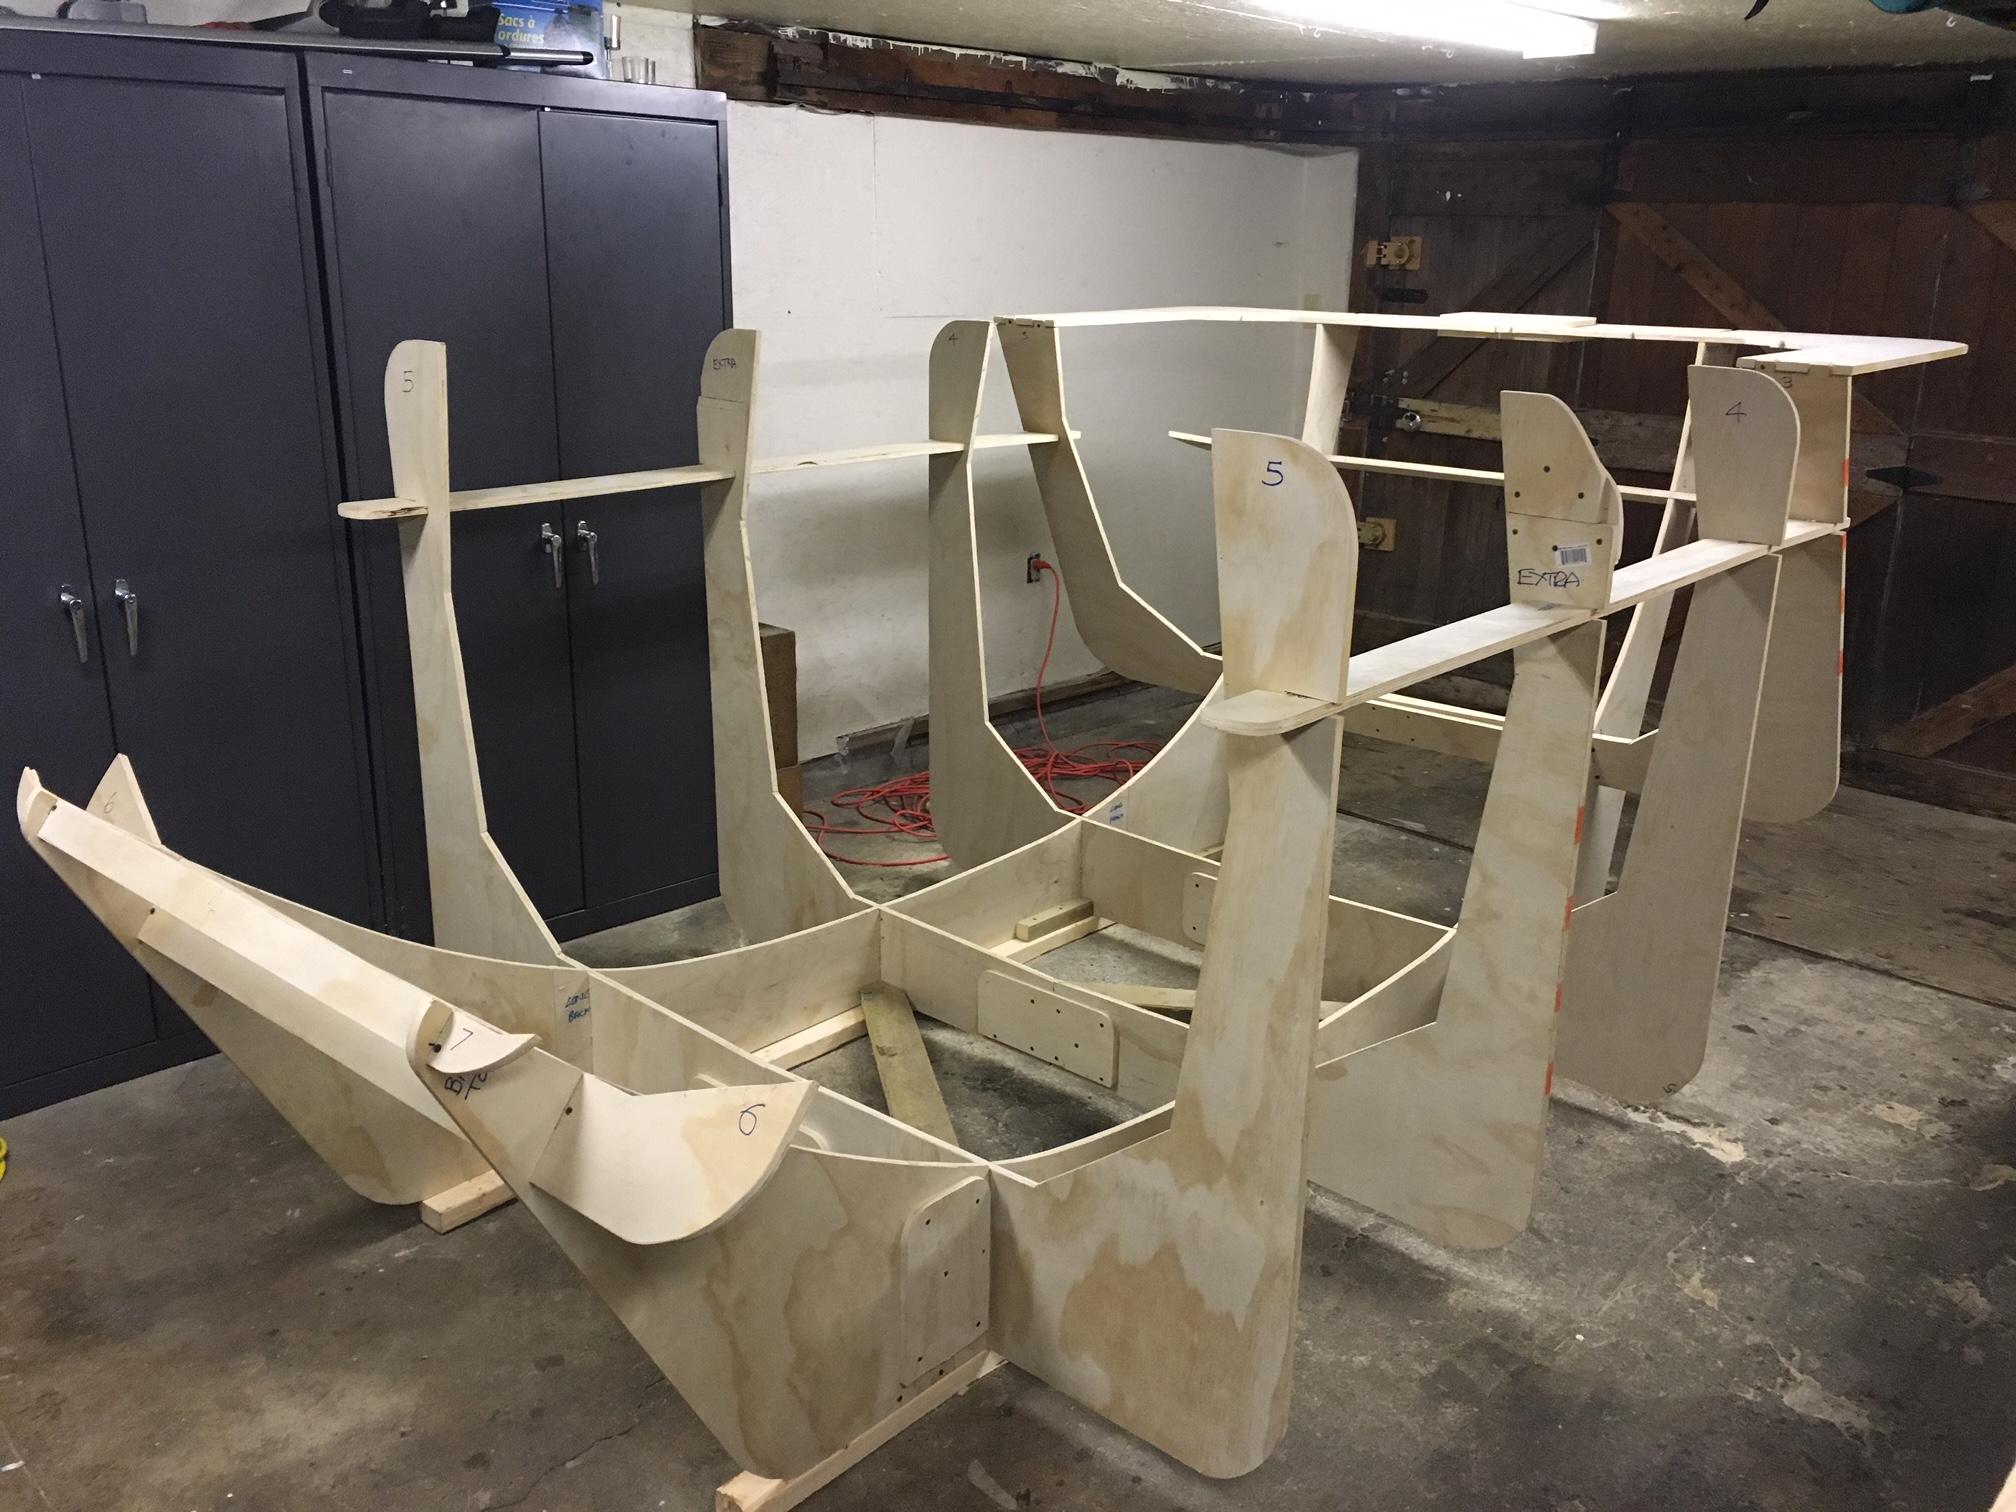
Next, I added an additional mold between 4 & 5 to support the stretched section. I also beefed up the mold a bit on account of the increased size.
Now on to shell construction.
 January 31, 2018 at 2:18 pm #1629
Helibuff
ParticipantWow That is cool ! Great idea
January 31, 2018 at 5:17 pm #1630rovineye
ParticipantWhen we do it on a ship after construction it is called jumboization.
January 31, 2018 at 6:16 pm #1631jschalsk
ParticipantI am impressed with your design.
March 5, 2018 at 12:23 pm #1691ParticipantAfter some fiddling with the block plane stretched shell now completed.
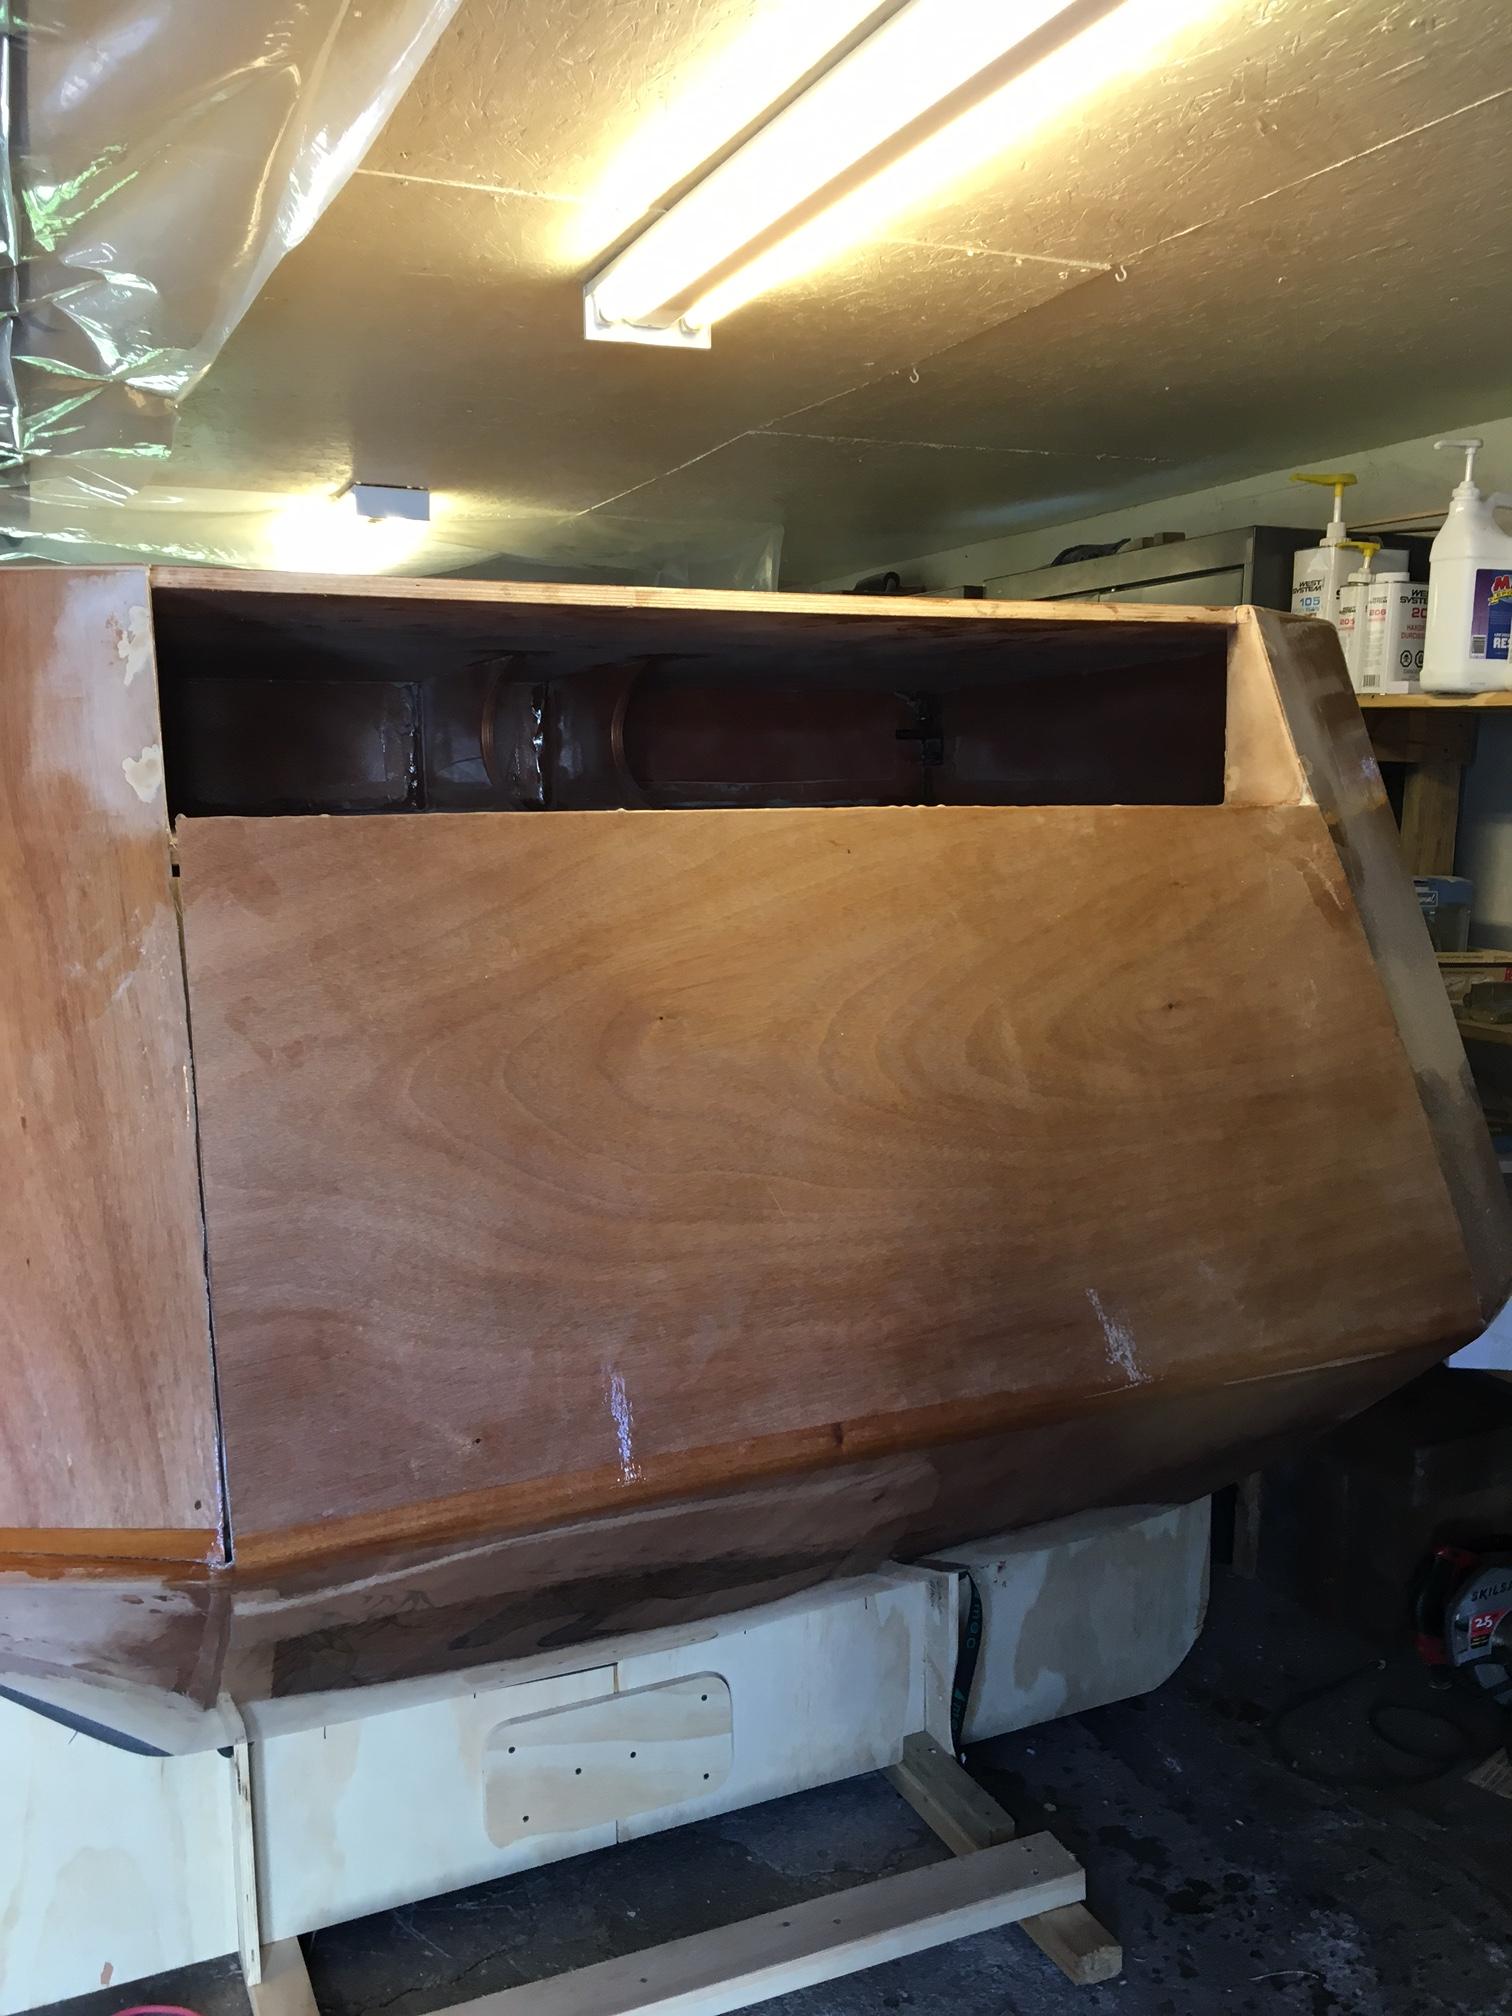
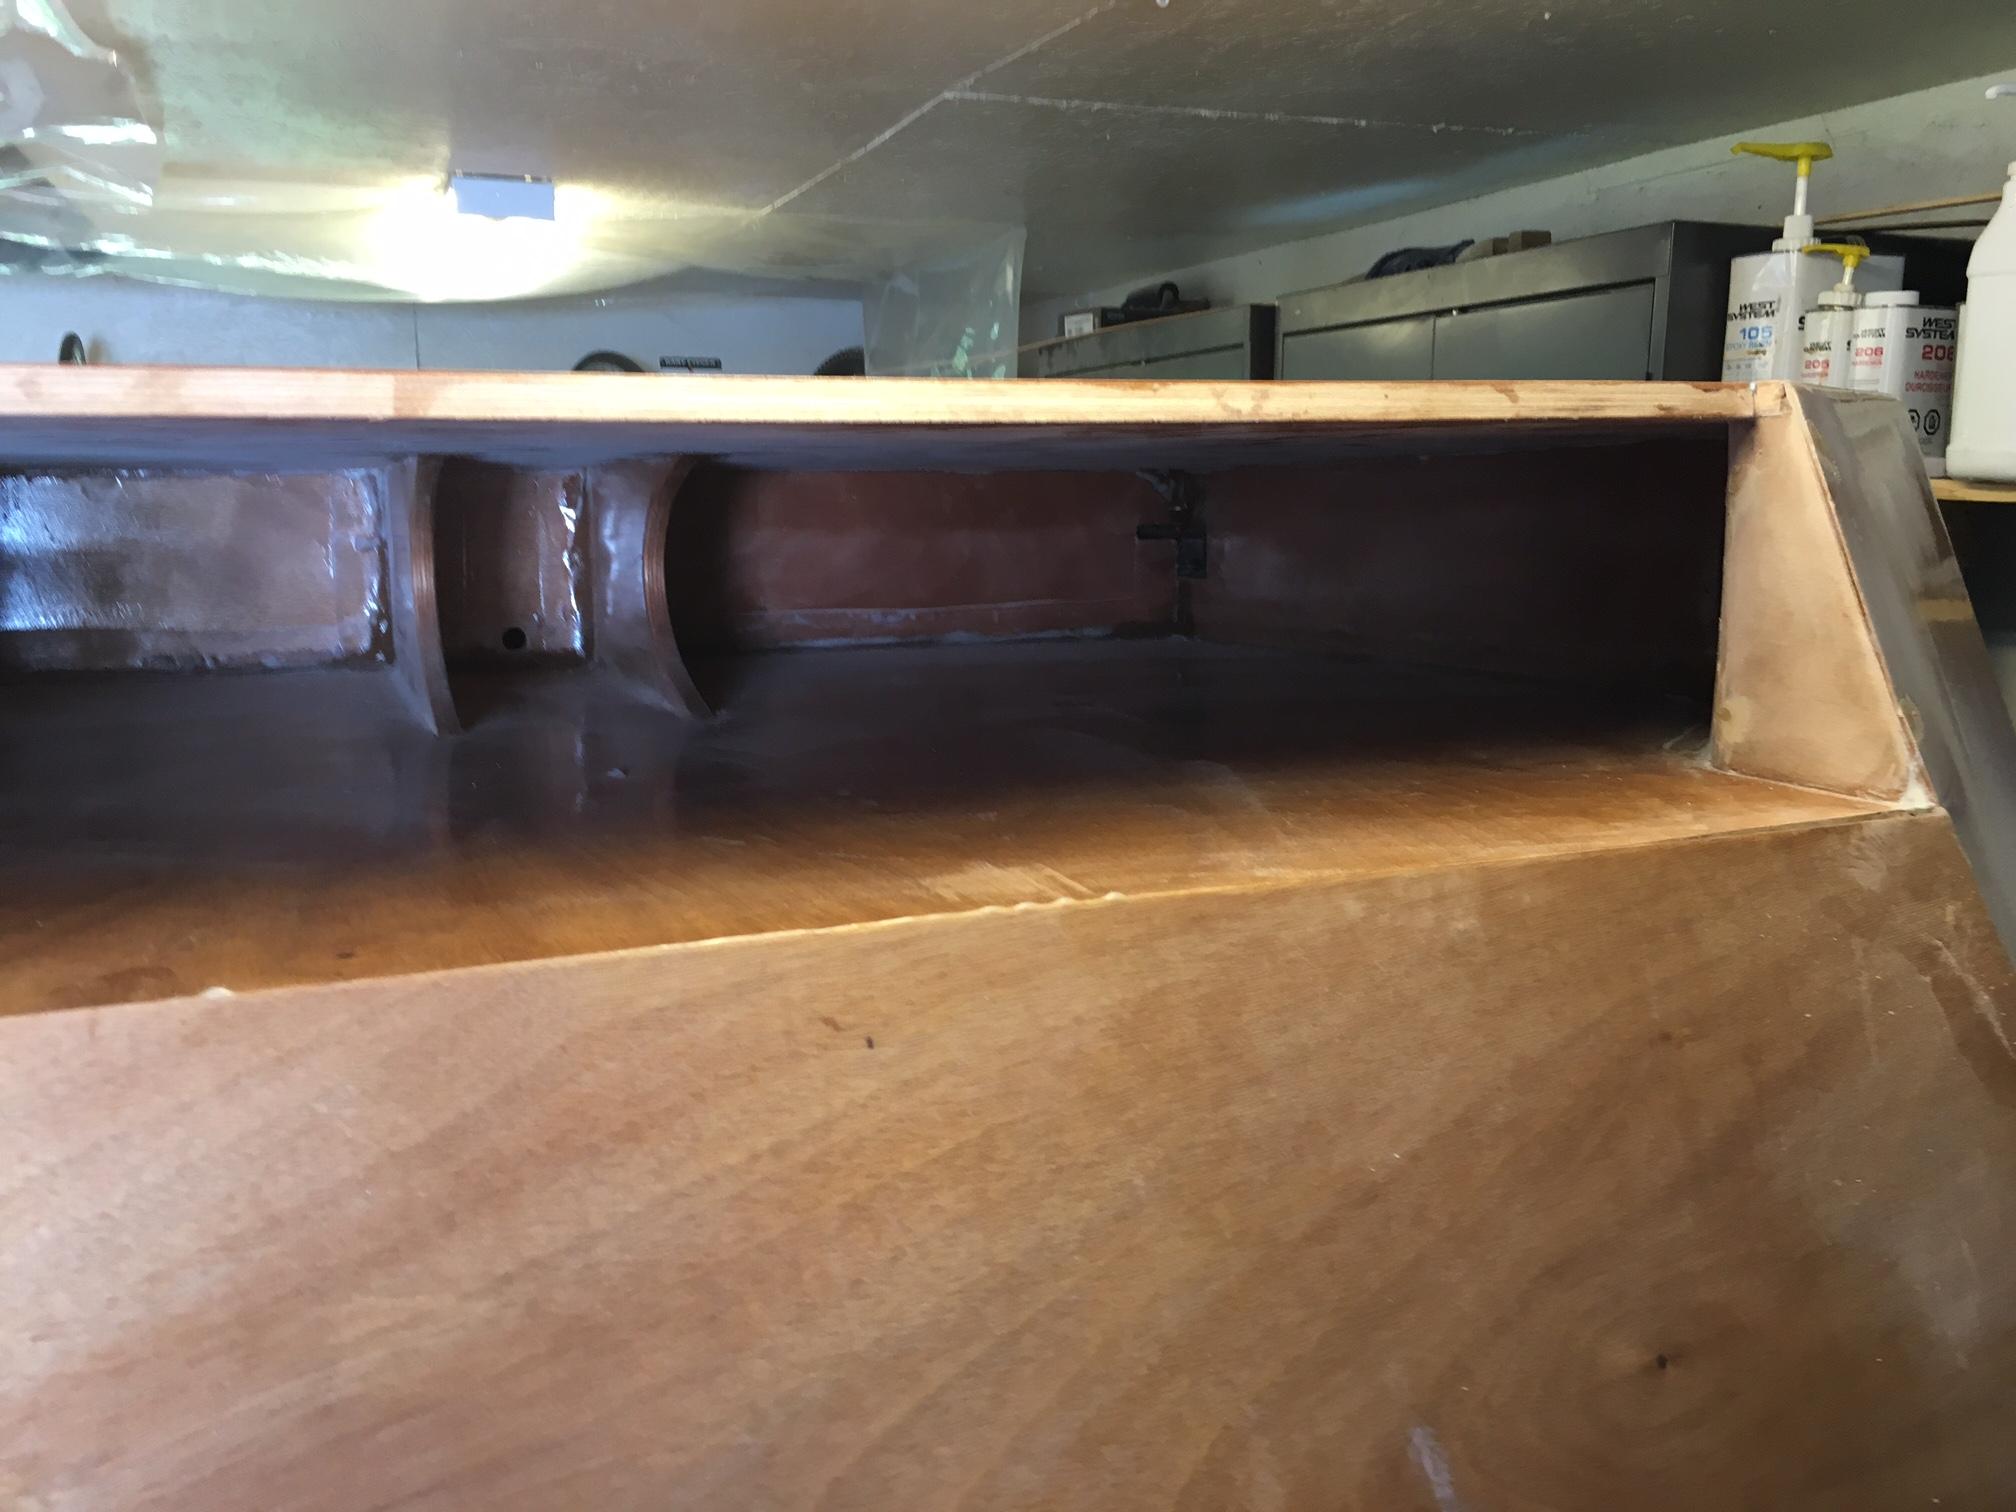
 My modified plans include under counter storage, so transom becomes part of hatch. When I glass the shell my cloth will be carried over from hatch to transom in 1 continuous piece so I needed a more rounded profile on the transition piece. I chose to use a nice piece of solid Honduras Mahogany, fileted to accept leading edges of hatch and transom. Joint is then reinforced with tape and epoxy.
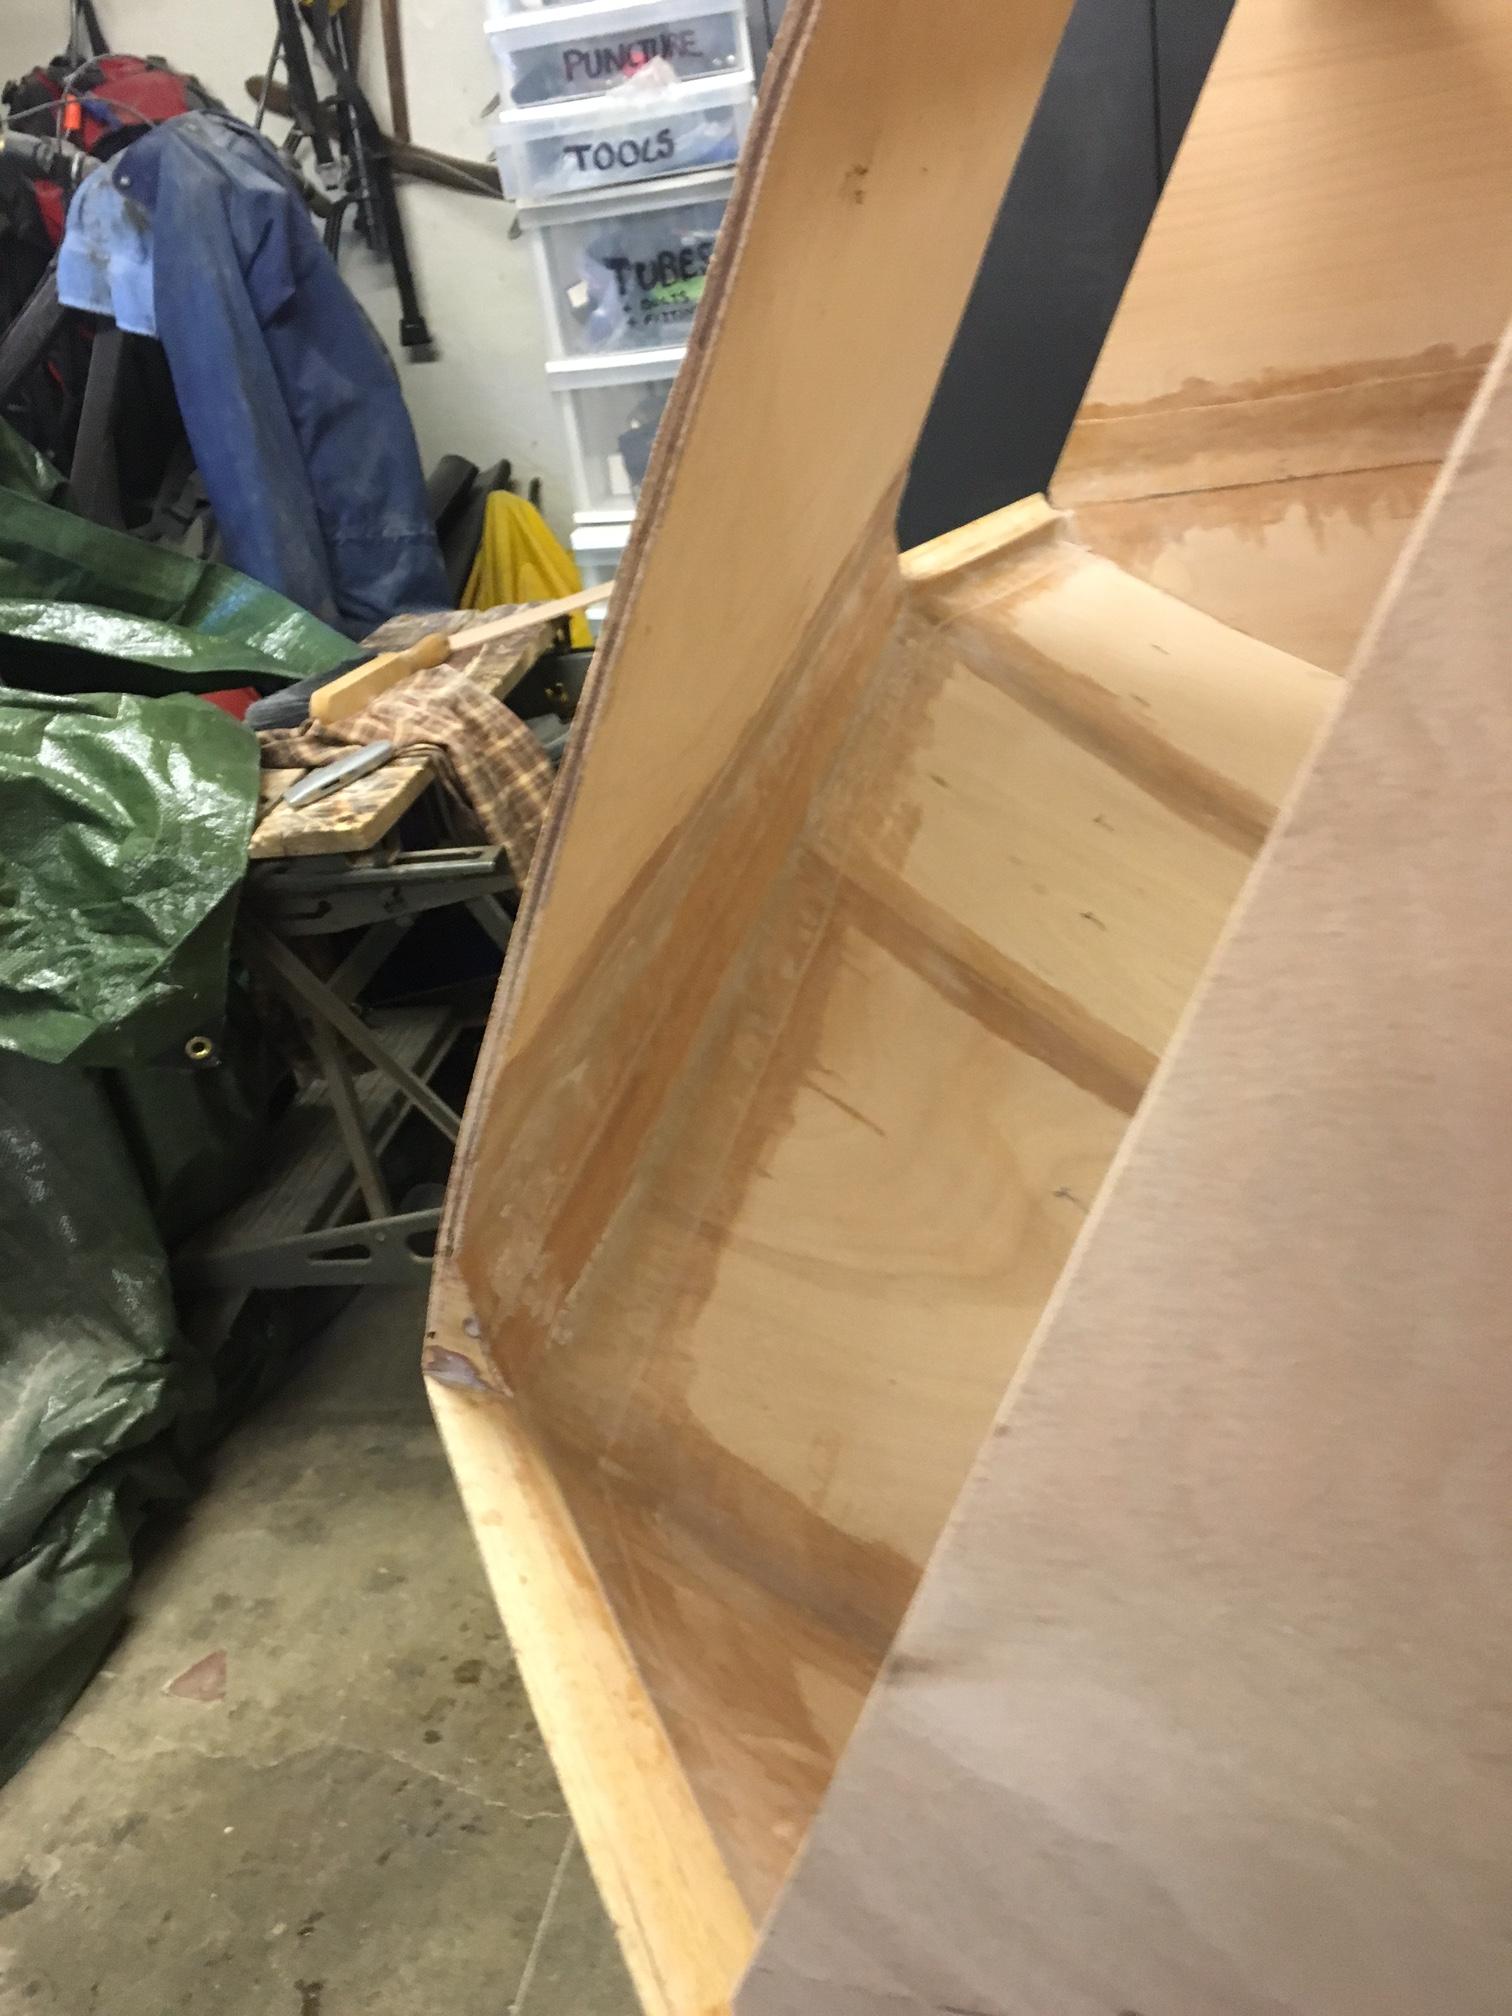
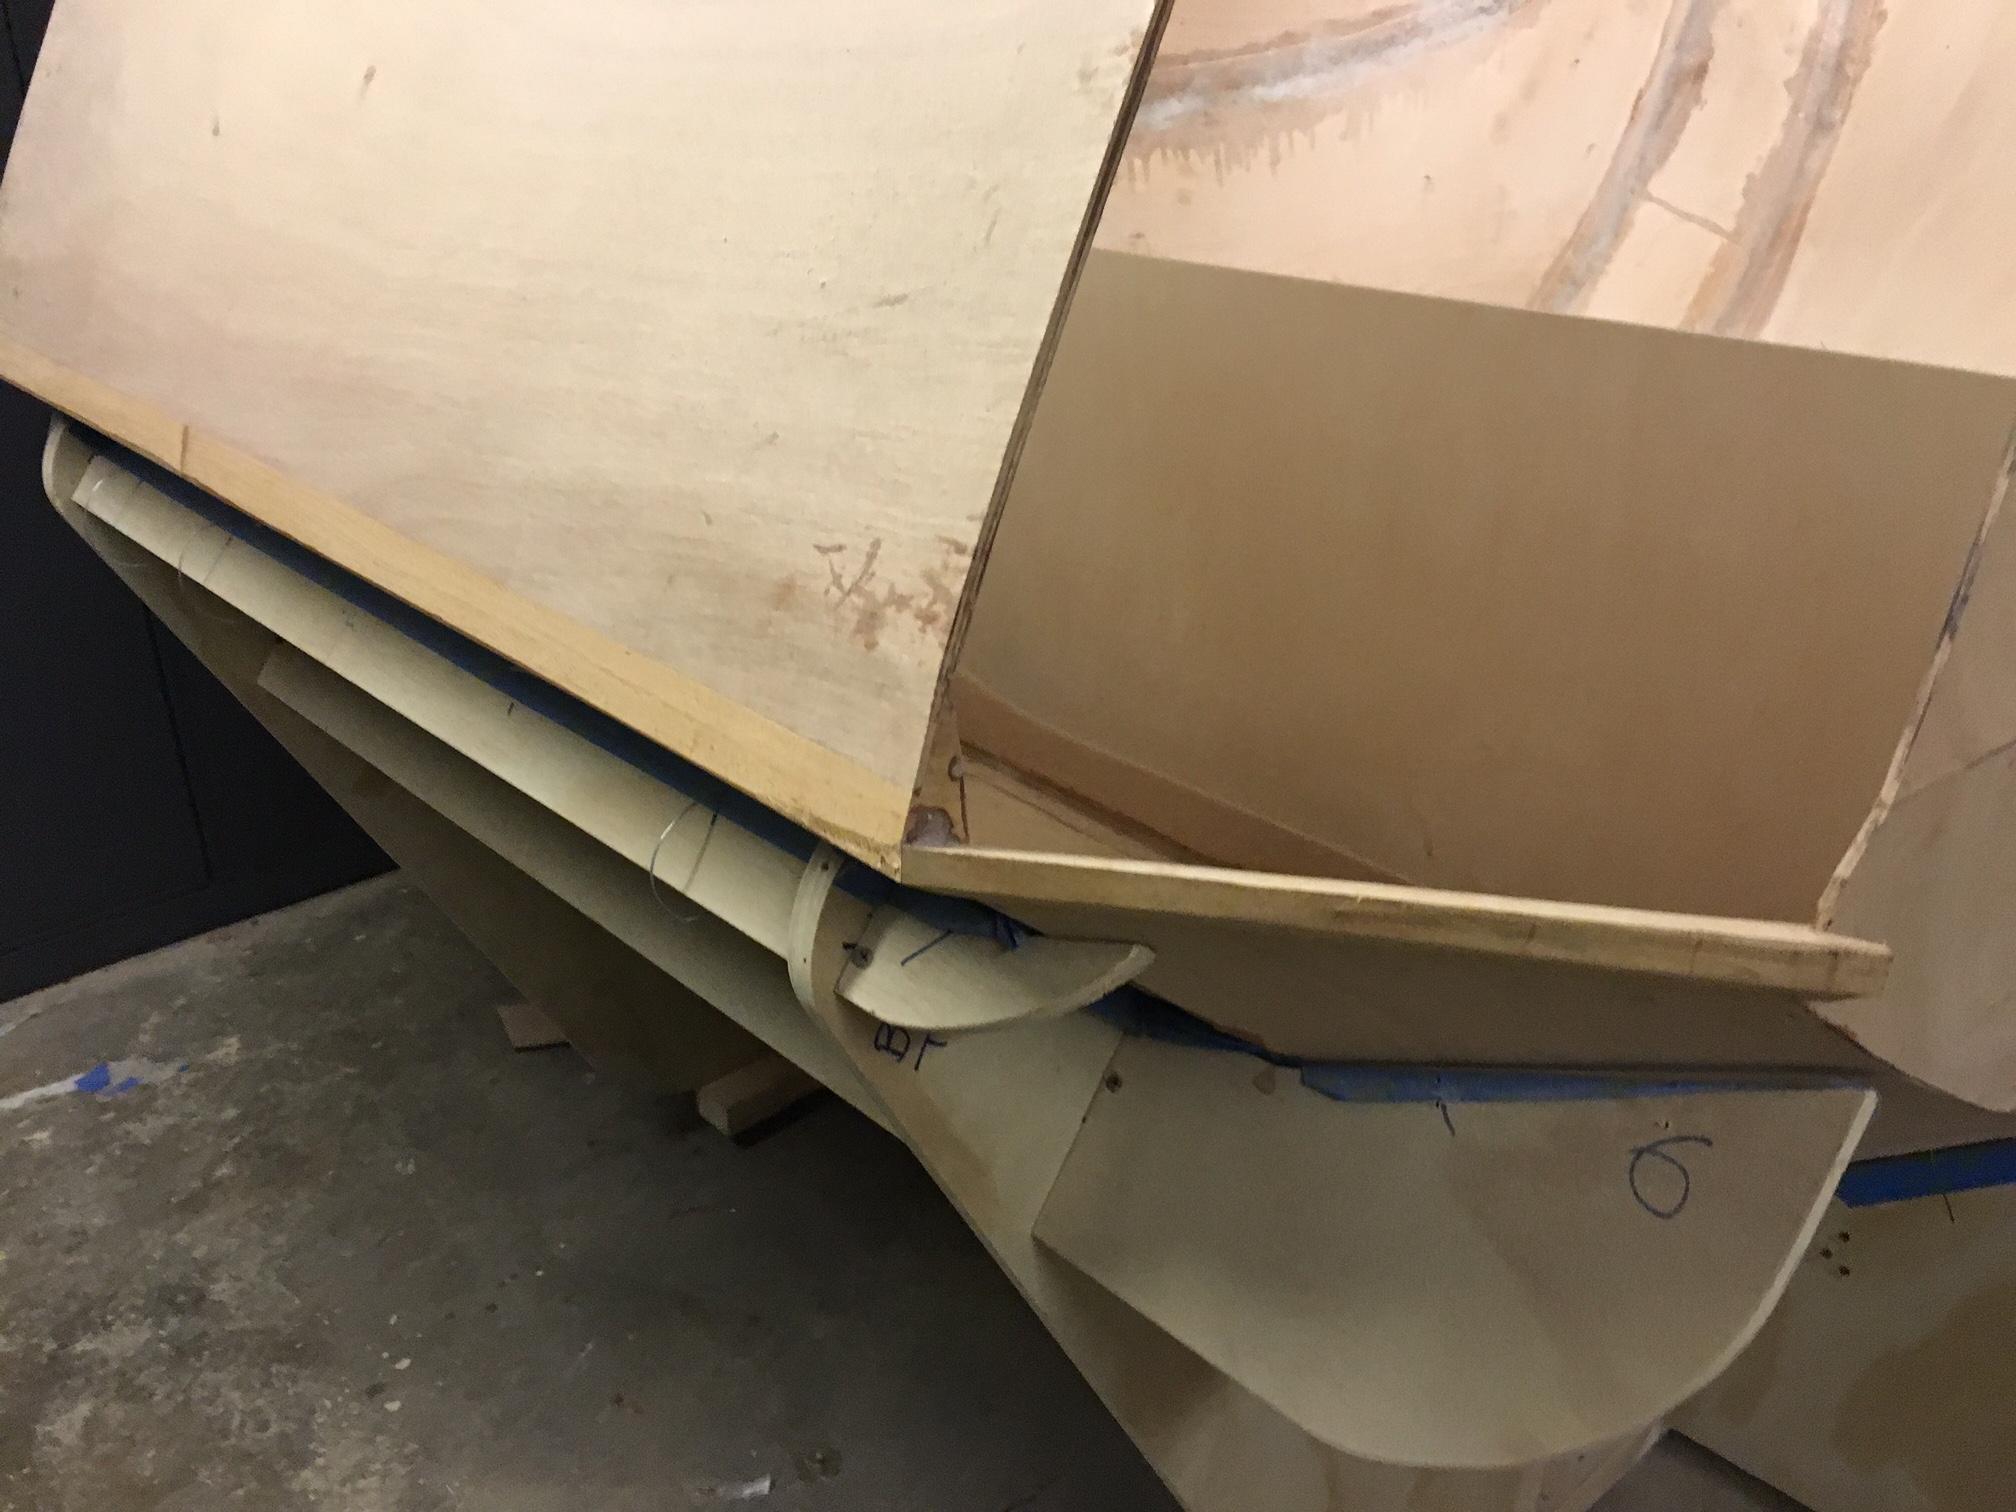
Transition pieces still to be shaped and sanded.
Hatch opening above quarter panels requires cutting mahogany transition piece in 1/2, angled down for drainage.
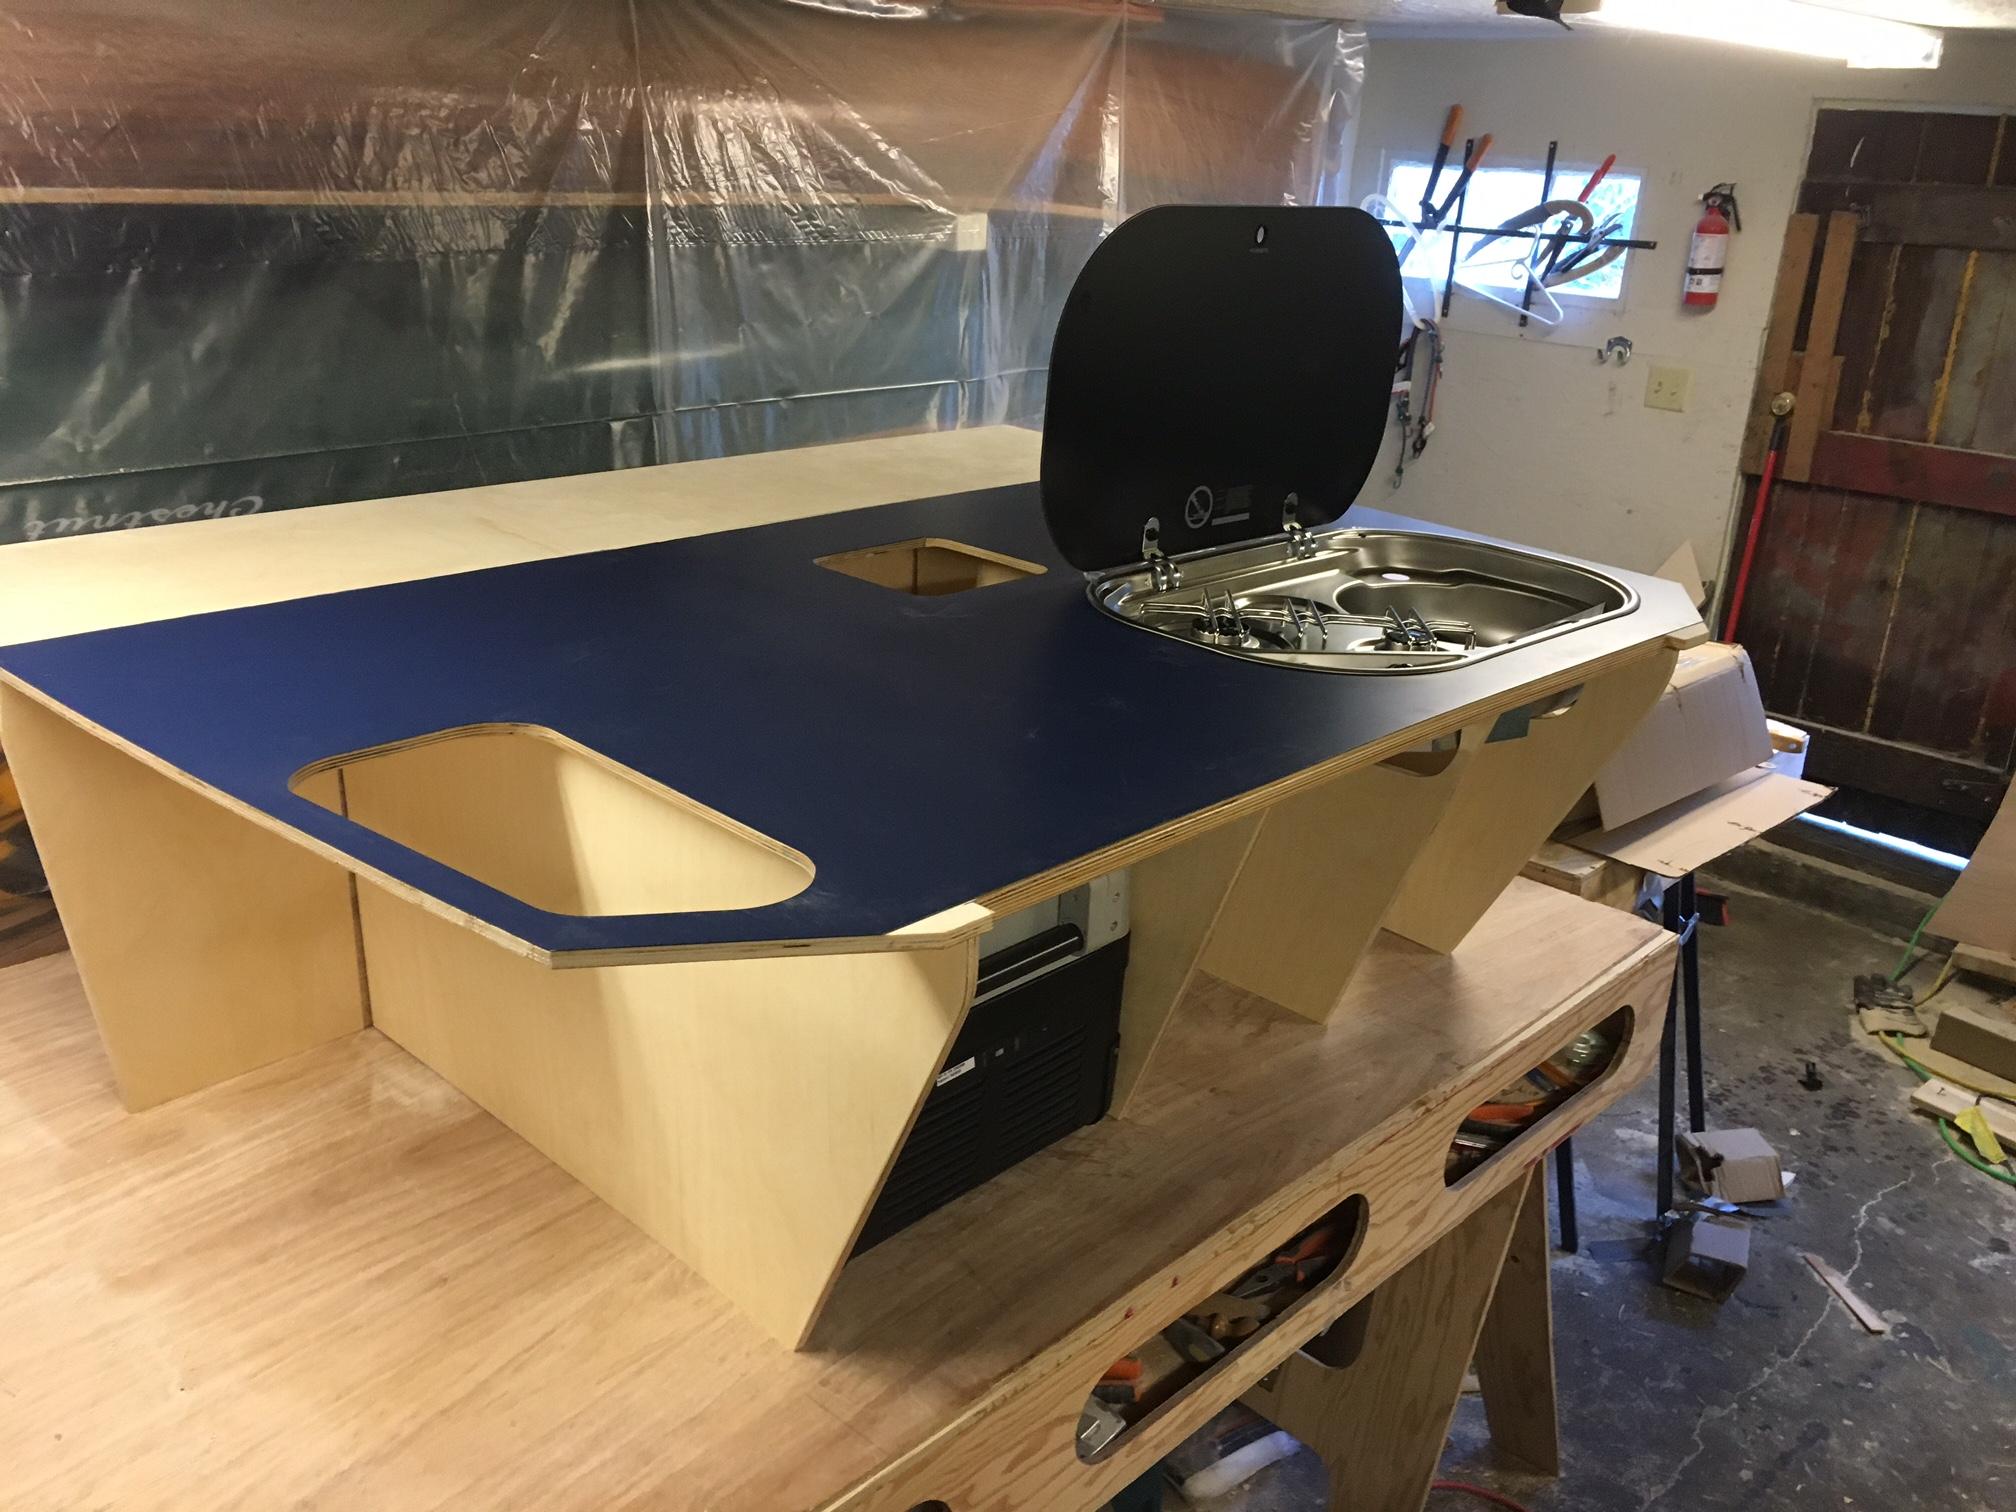
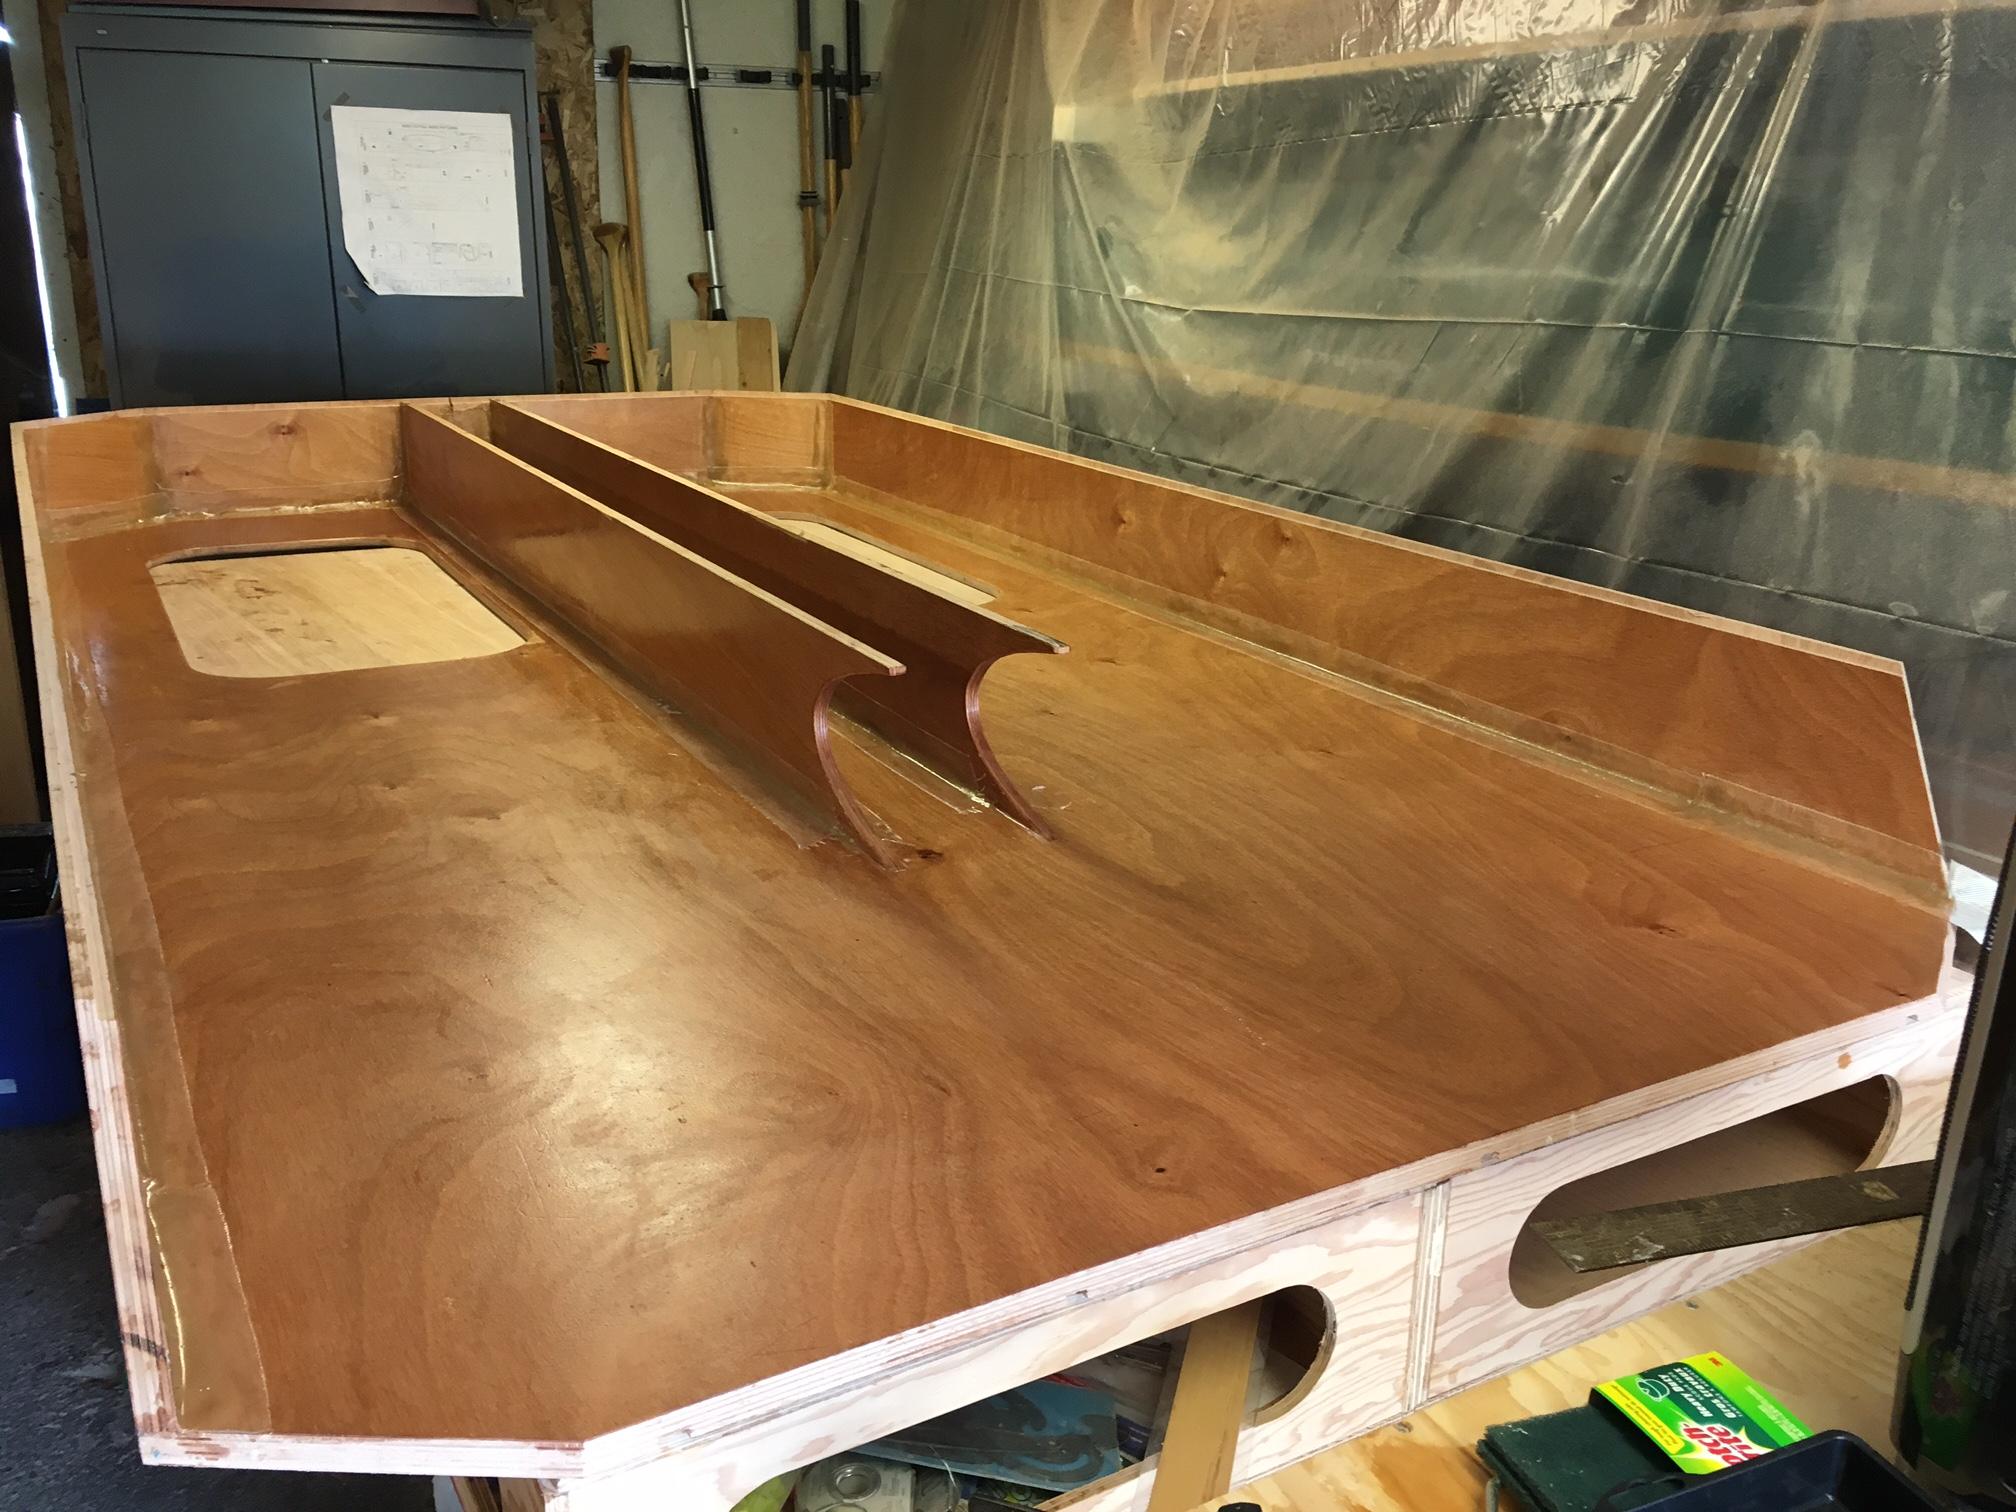
Next to galley and counter design: decided on Baltic Birch cabinets for contrast and laminate top for durability. Here are counter and dividers dry fitted (dadoes) and set up with Dometic 12V fridge and sink/burner combo.
 Now on to installation of counter, lower bulkhead and dividers into shell, then on to floor.March 7, 2018 at 10:36 am #1697
faithie999
Participantfantastic!!
if you bought the kit from CLC, there may not be enough fiberglass cloth for your stretched TD. maybe you can order some from somewhere that will let you return it if you don’t need it but might be nice to have on hand so you don’t have to stop glassing to wait for more to arrive.
March 7, 2018 at 4:05 pm #1699ParticipantThanks Faithee, but I am a plans builder: too many mods to start with a kit.
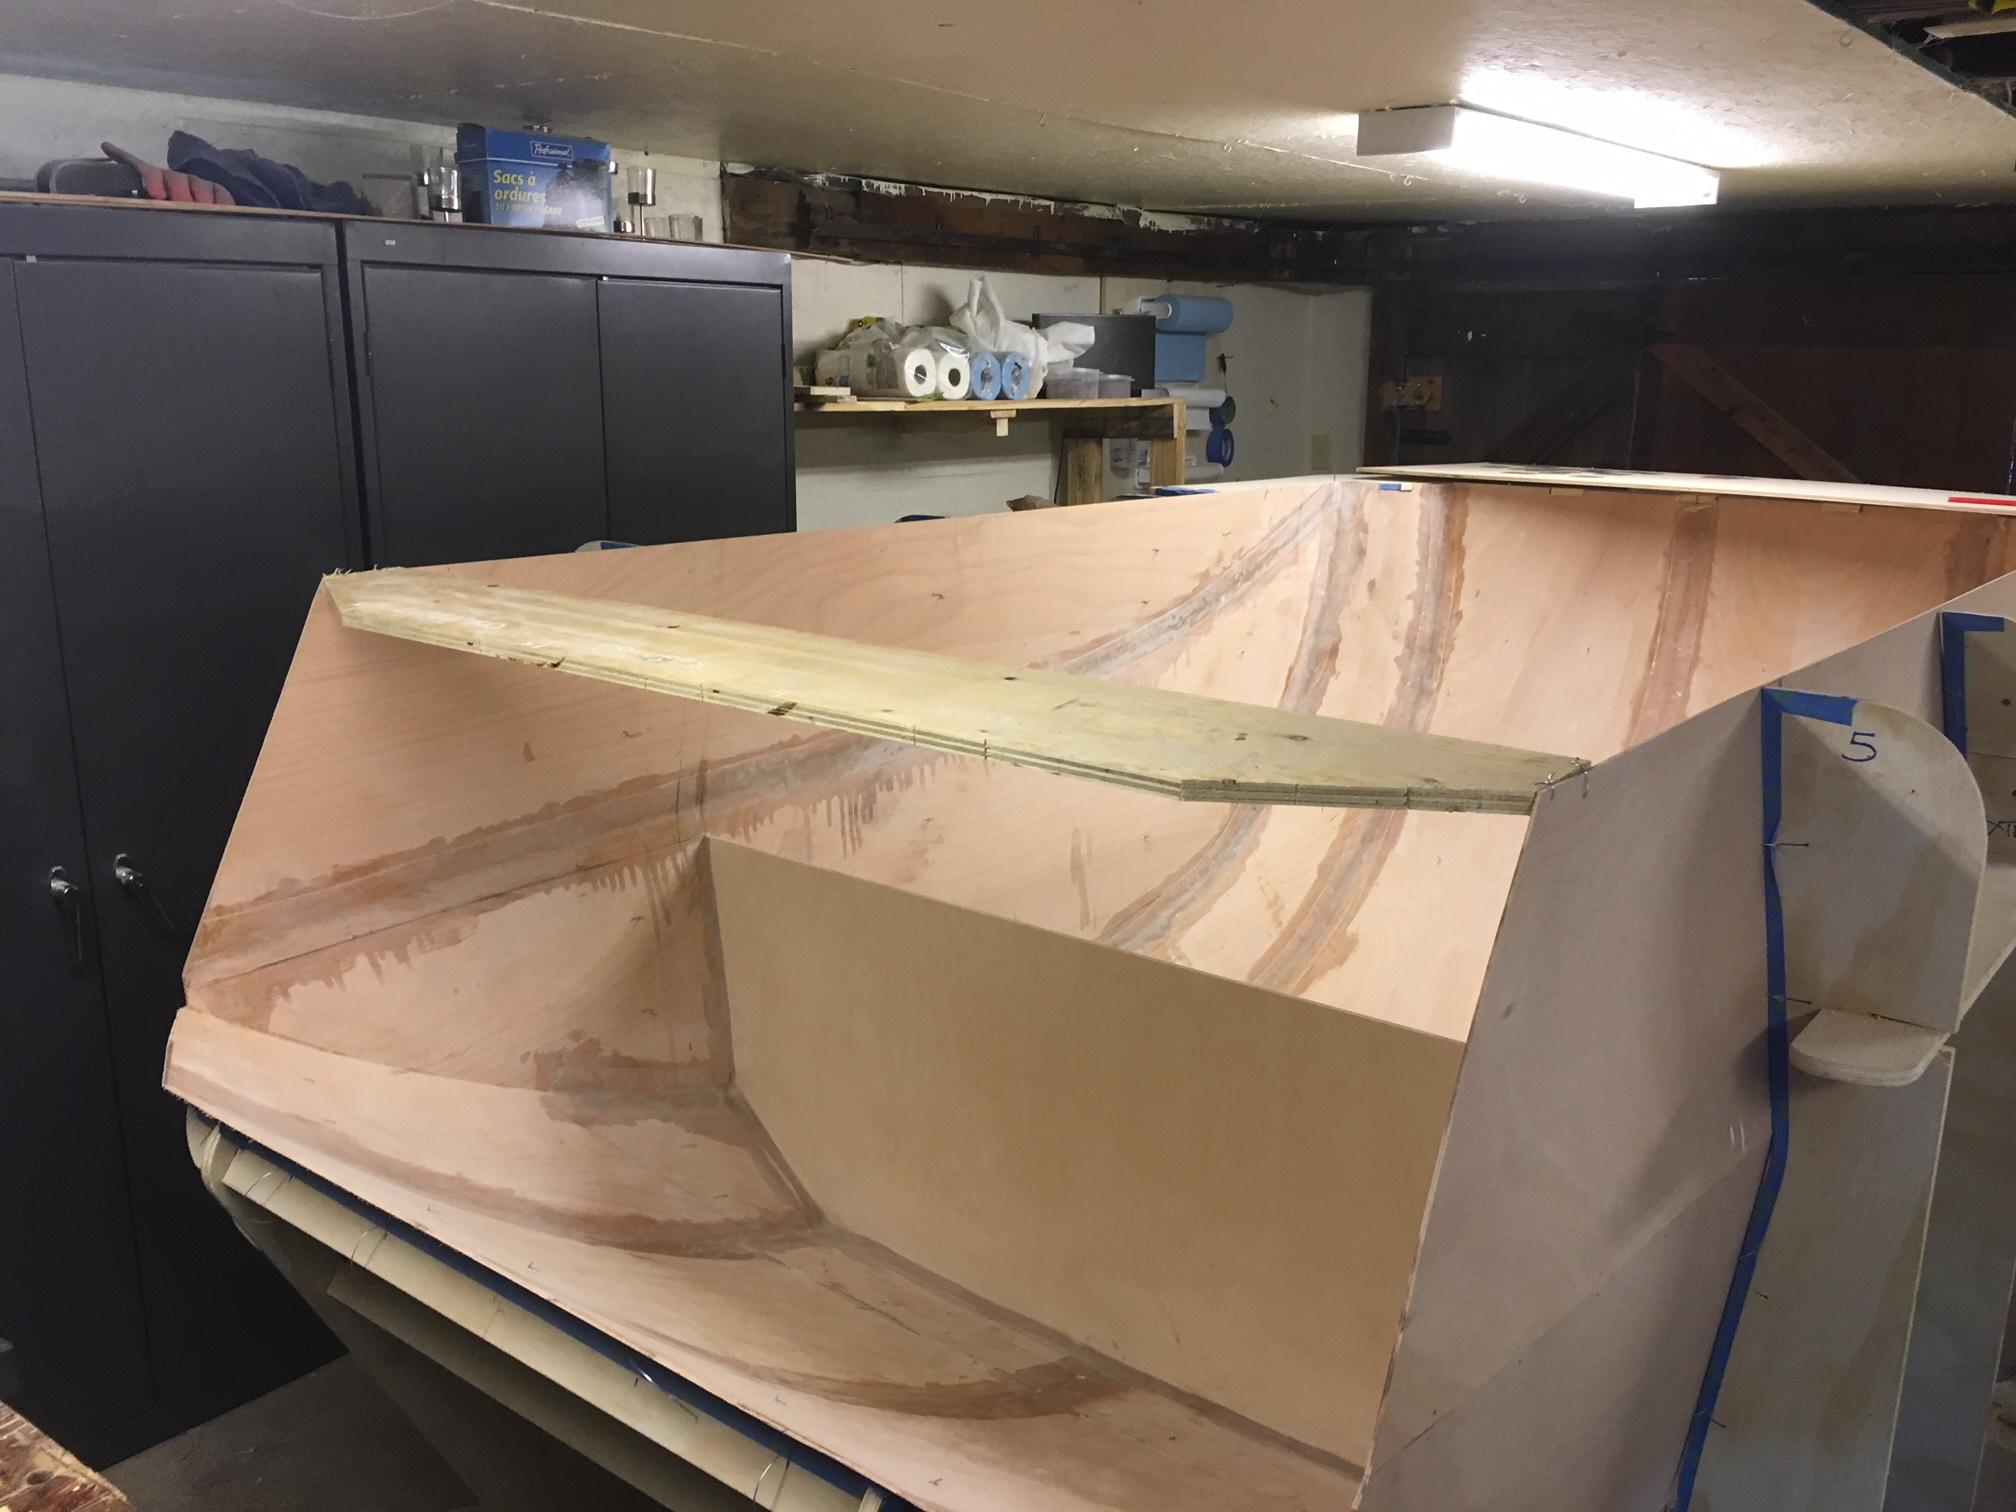
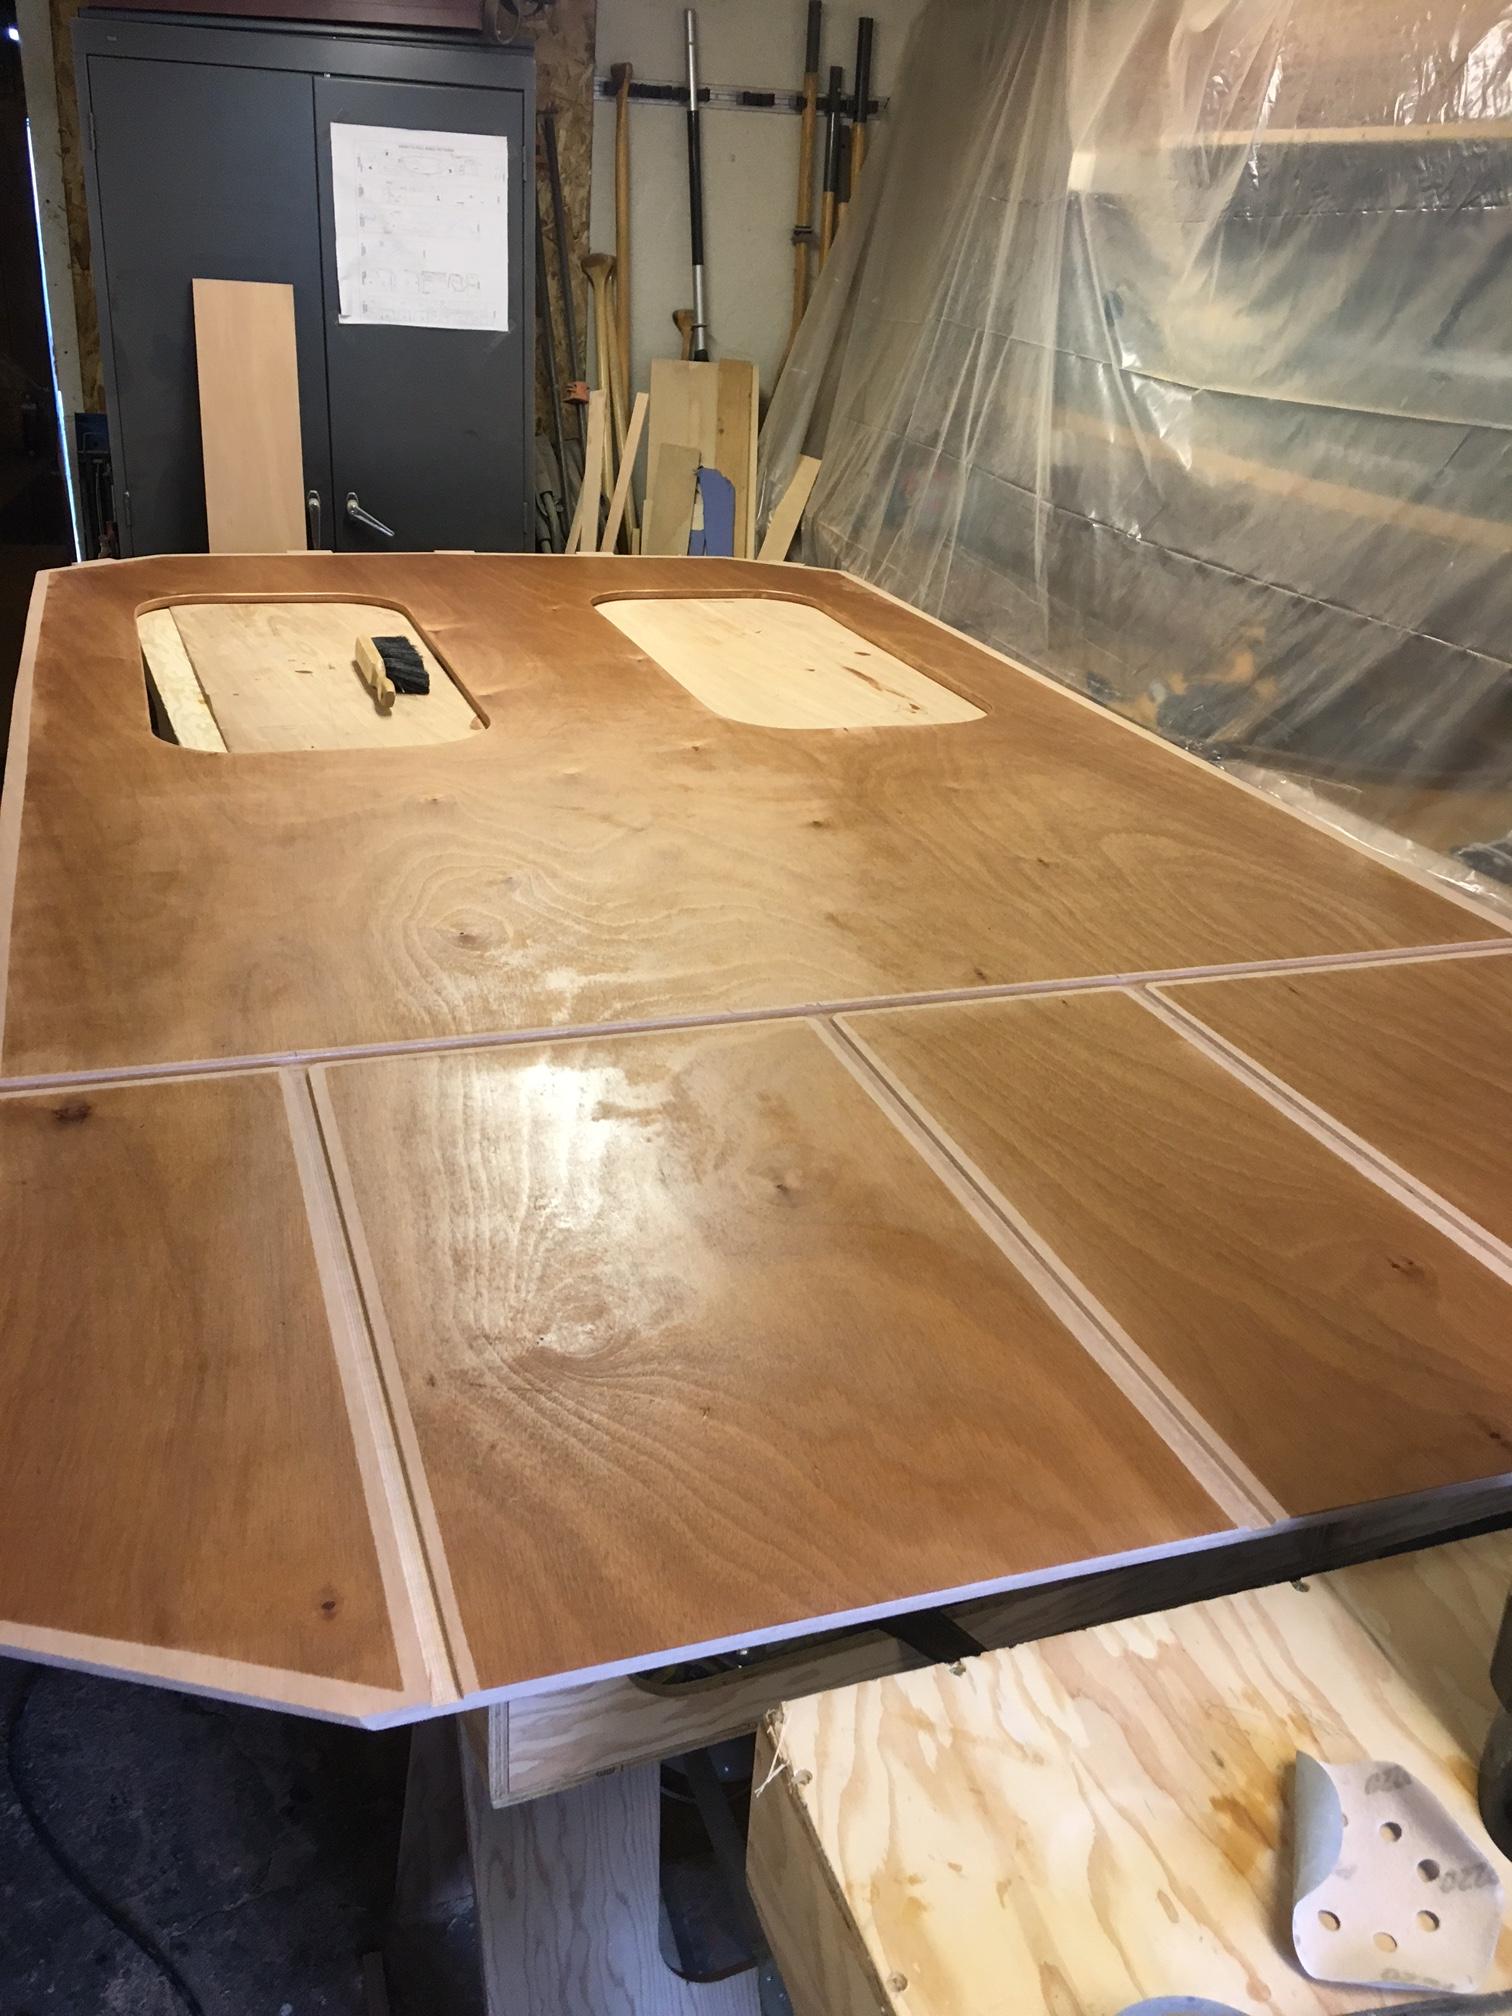
April 22, 2018 at 12:07 pm #1777ParticipantMy next mod with my teardrop has been to add underfloor storage. The forward portion is accessed from under the bed via two hatches. The back section is accessed from outside and is intended to store camp chairs, portable solar panels etc. Depth is 8″ and storage box is built from same 3/4″ ply as floor. Luckily I was able to find 5 x 10′ panels from World Panel Products in Florida. Ideal for my stretched 5 x 10′ teardrop and avoids scarfs, but blocks etc.
Here is floor with hatches cut, also dadoes for galley cabinet dividers. I have applied one coat of epoxy leaving bare wood for fillets.
Next the underside with walls and central spline attached.
Now flipped and floor attached – and the big reveal.
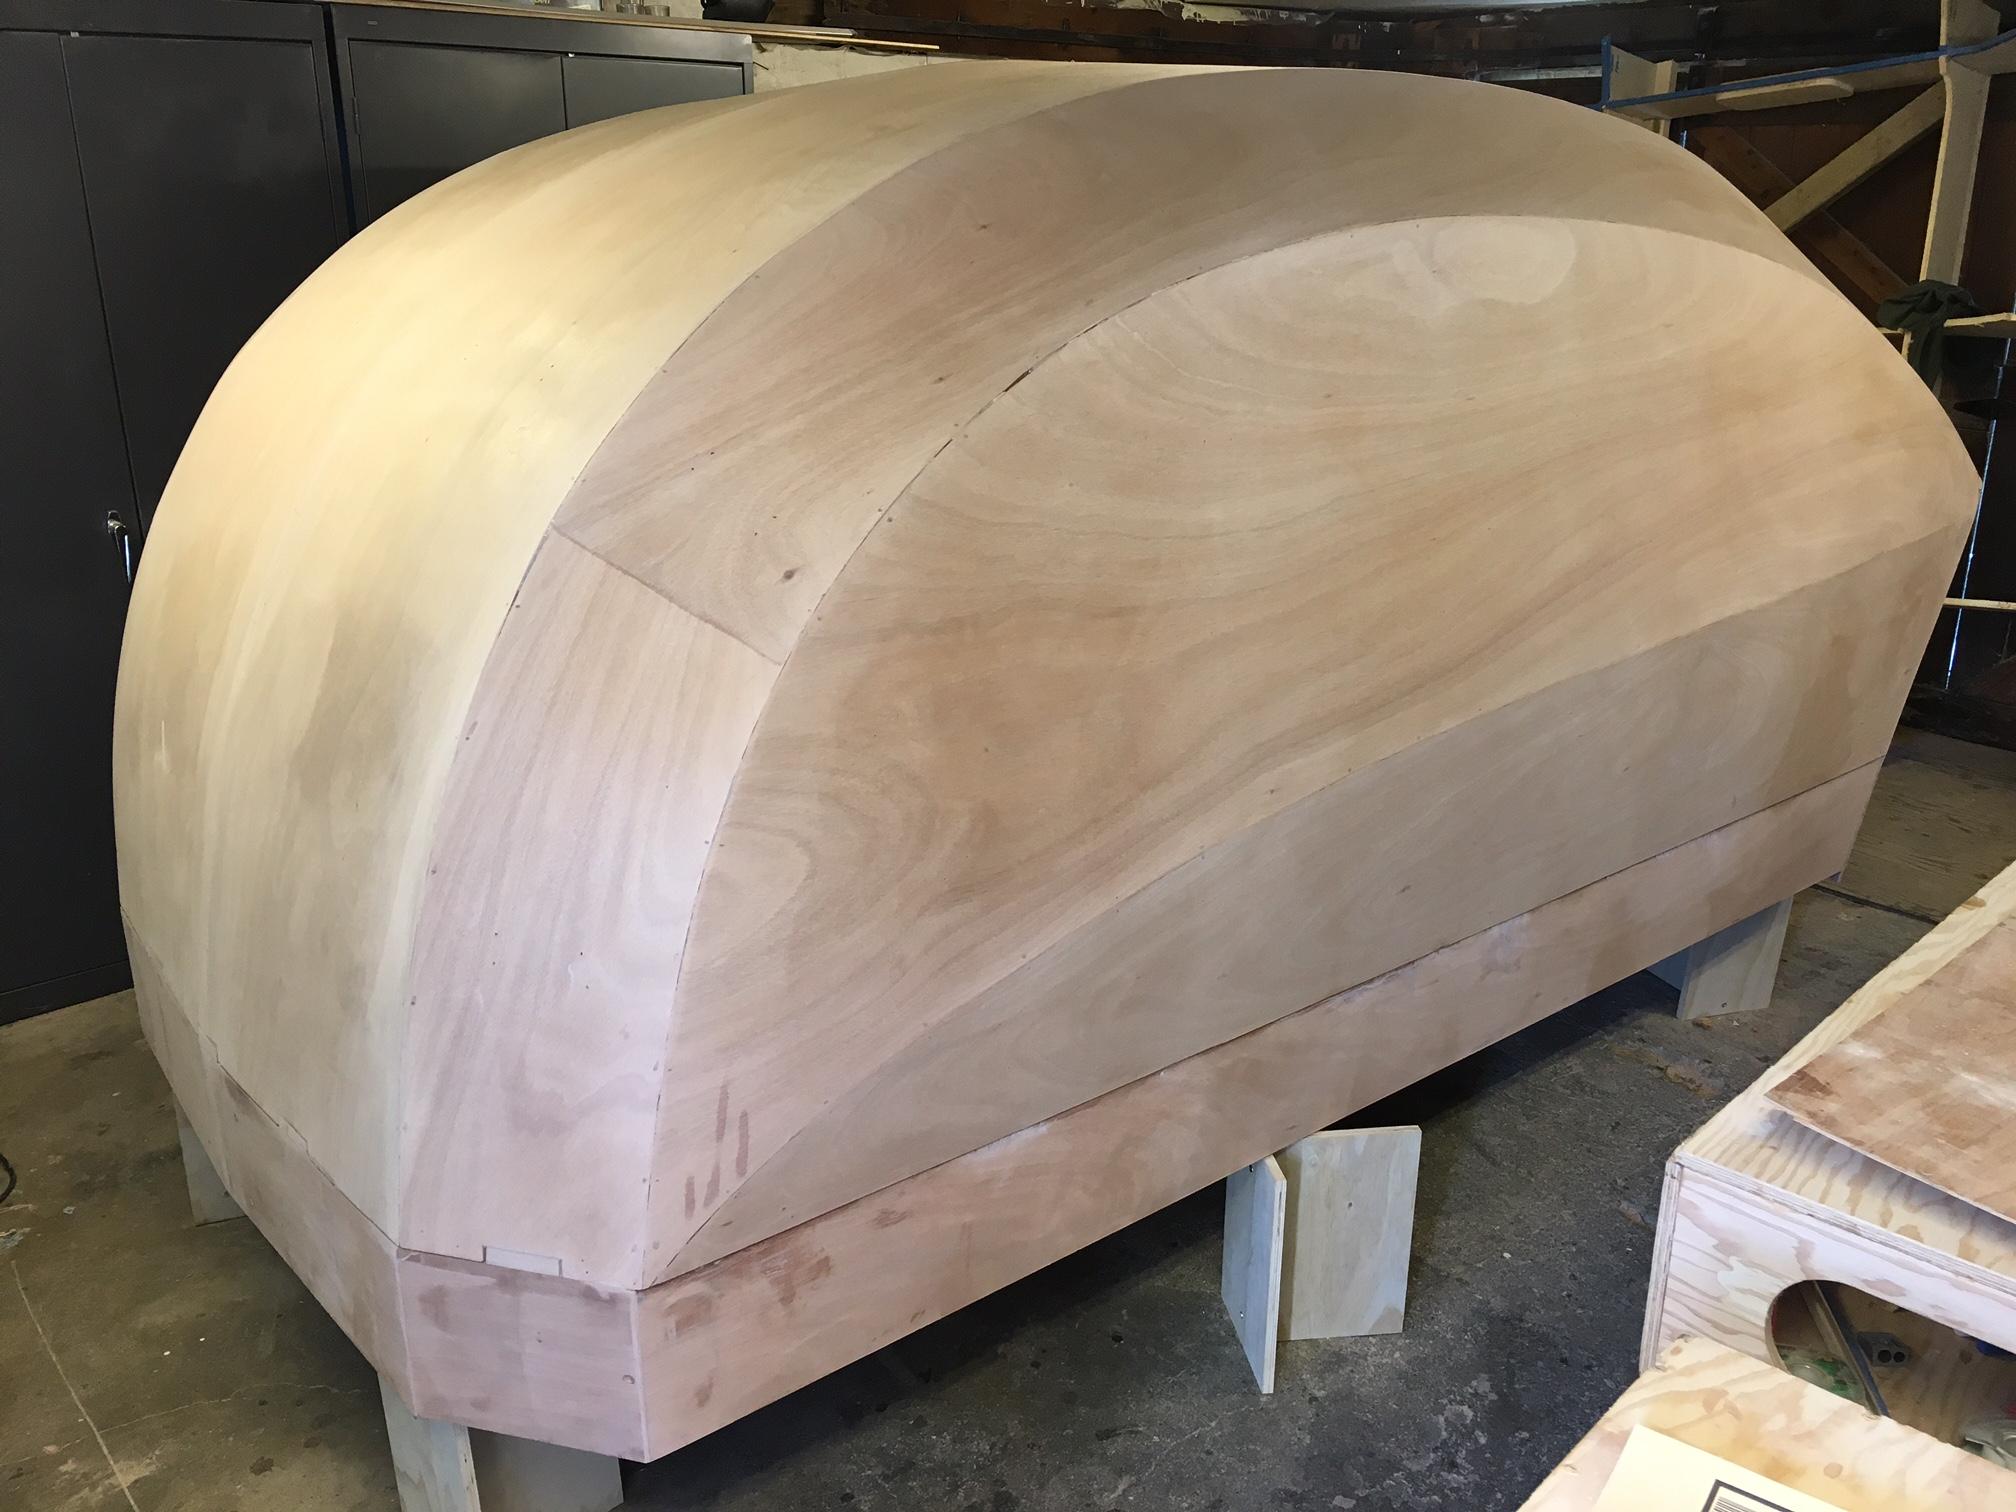
Because my version has a full ceiling to floor bulkhead I had to access the inside through one of the floor hatches.
Now on to a lot of sanding.
September 3, 2018 at 3:24 pm #2092matukas
ParticipantAny update on the progress, we would love to see photos of the interior and how the hatch opens. This is a great modification. It would be nice if CLC would consider offering a 10 foot version in a kit. I may just have to build from plan to try this.
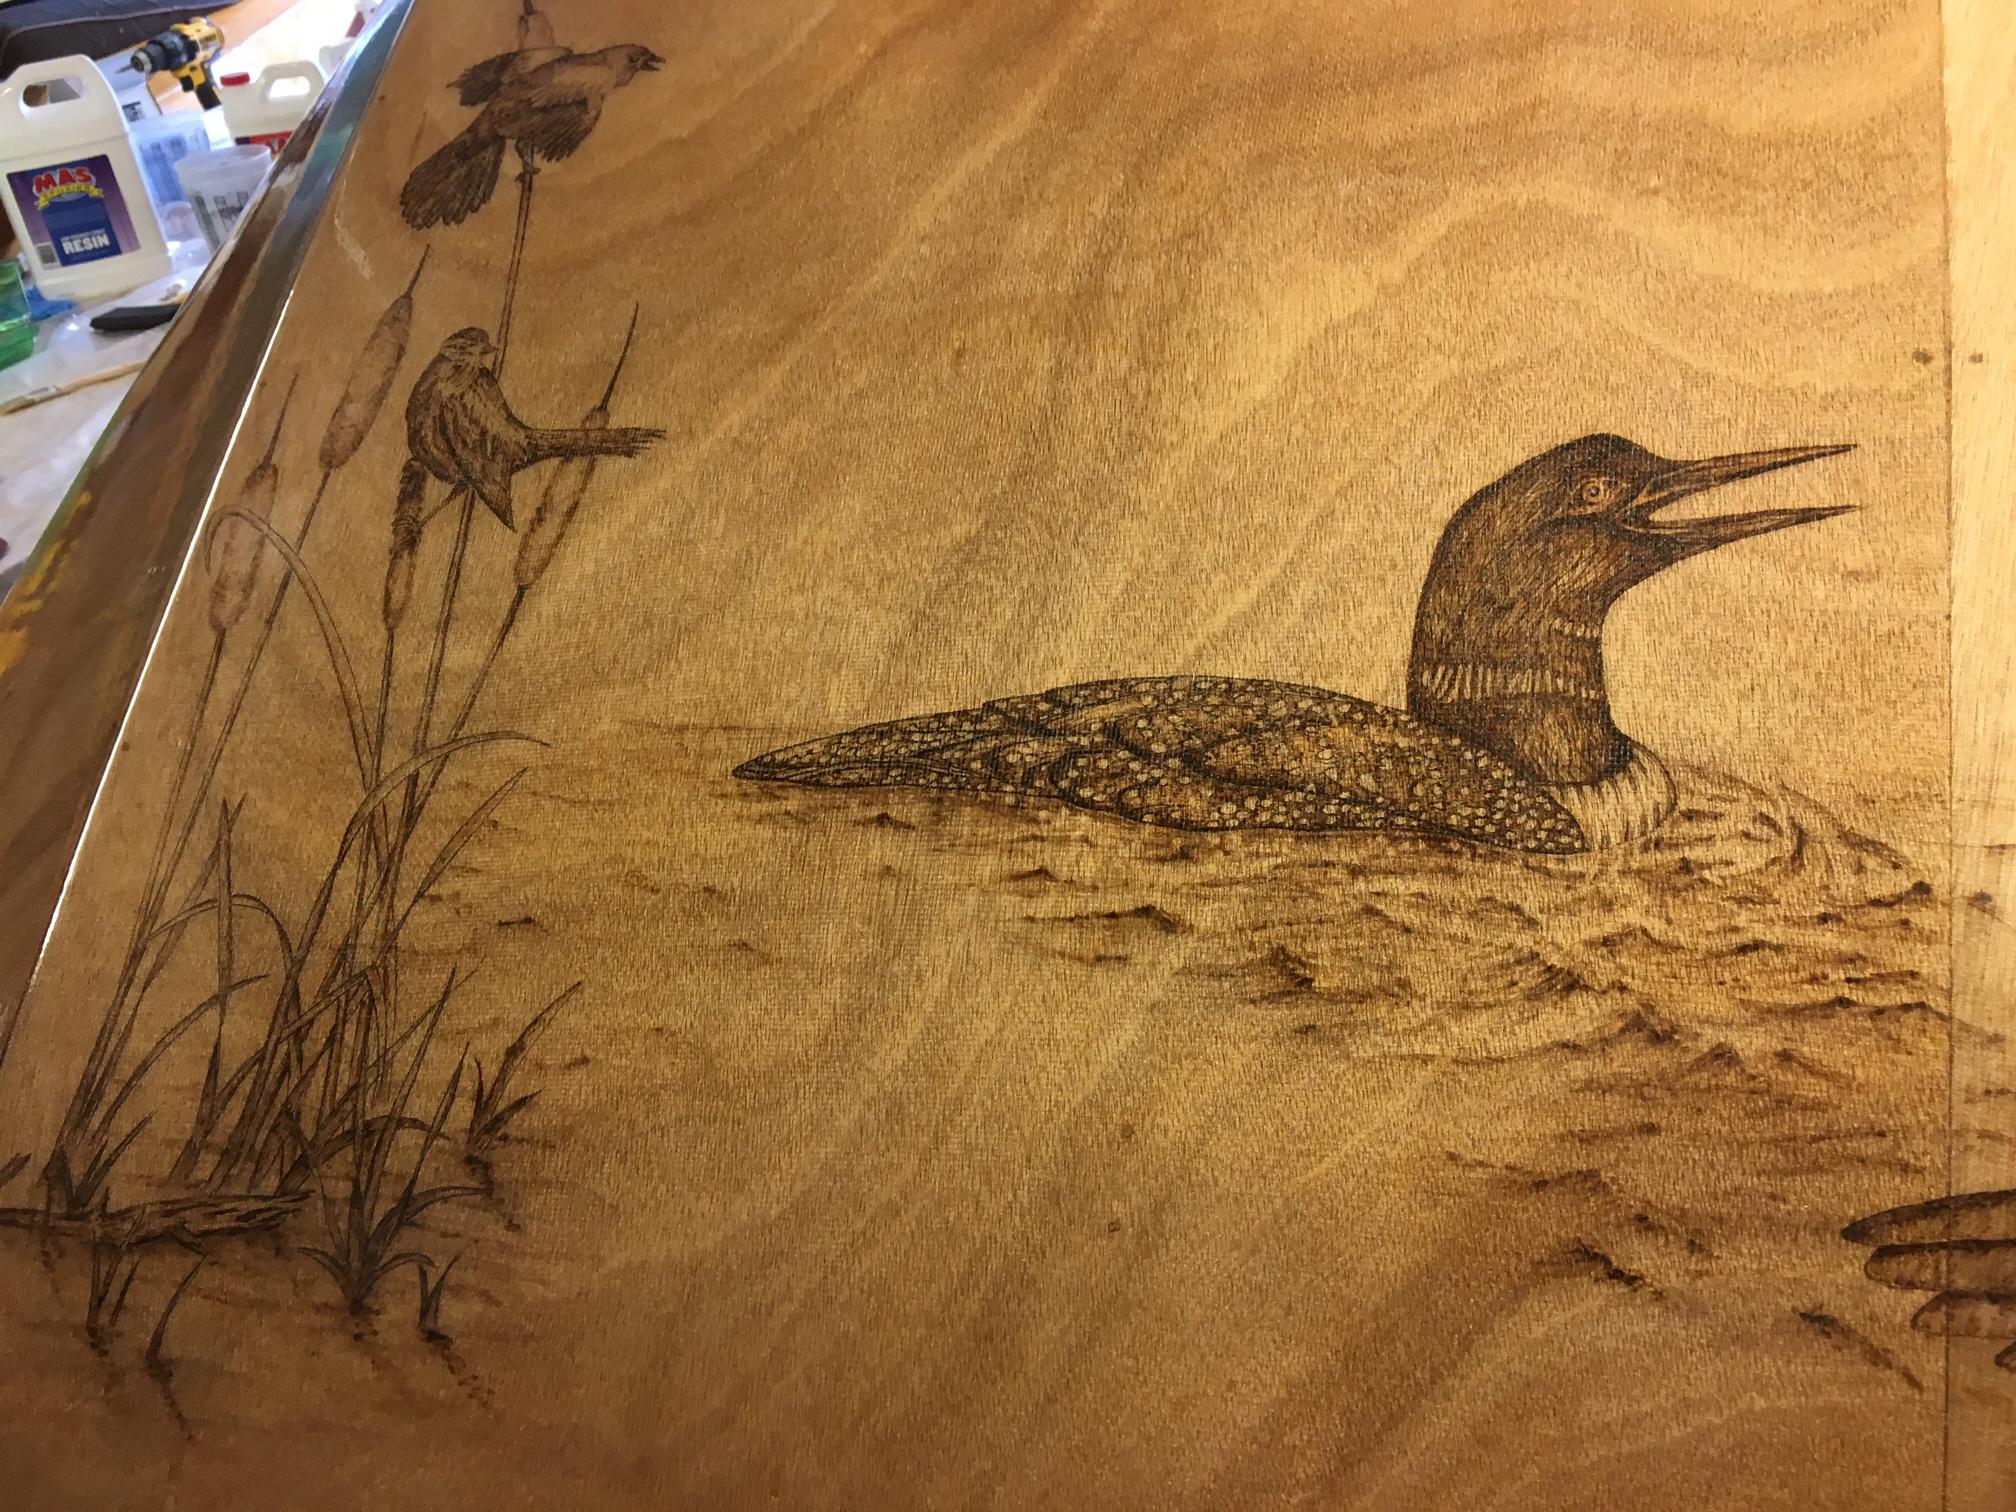
September 4, 2018 at 6:34 pm #2098ParticipantUpdating my build record from my “Decoration Post”: After releasing the shell from the mold and finish sanding my mind turned to a little decoration on the hatch.
It takes a brave or foolhardy man to take a hot iron to the freshly sanded handiwork. Think I am more of the latter, but after having previously messed around on a kayak project with wood burning with a soldering iron I went all in this time:
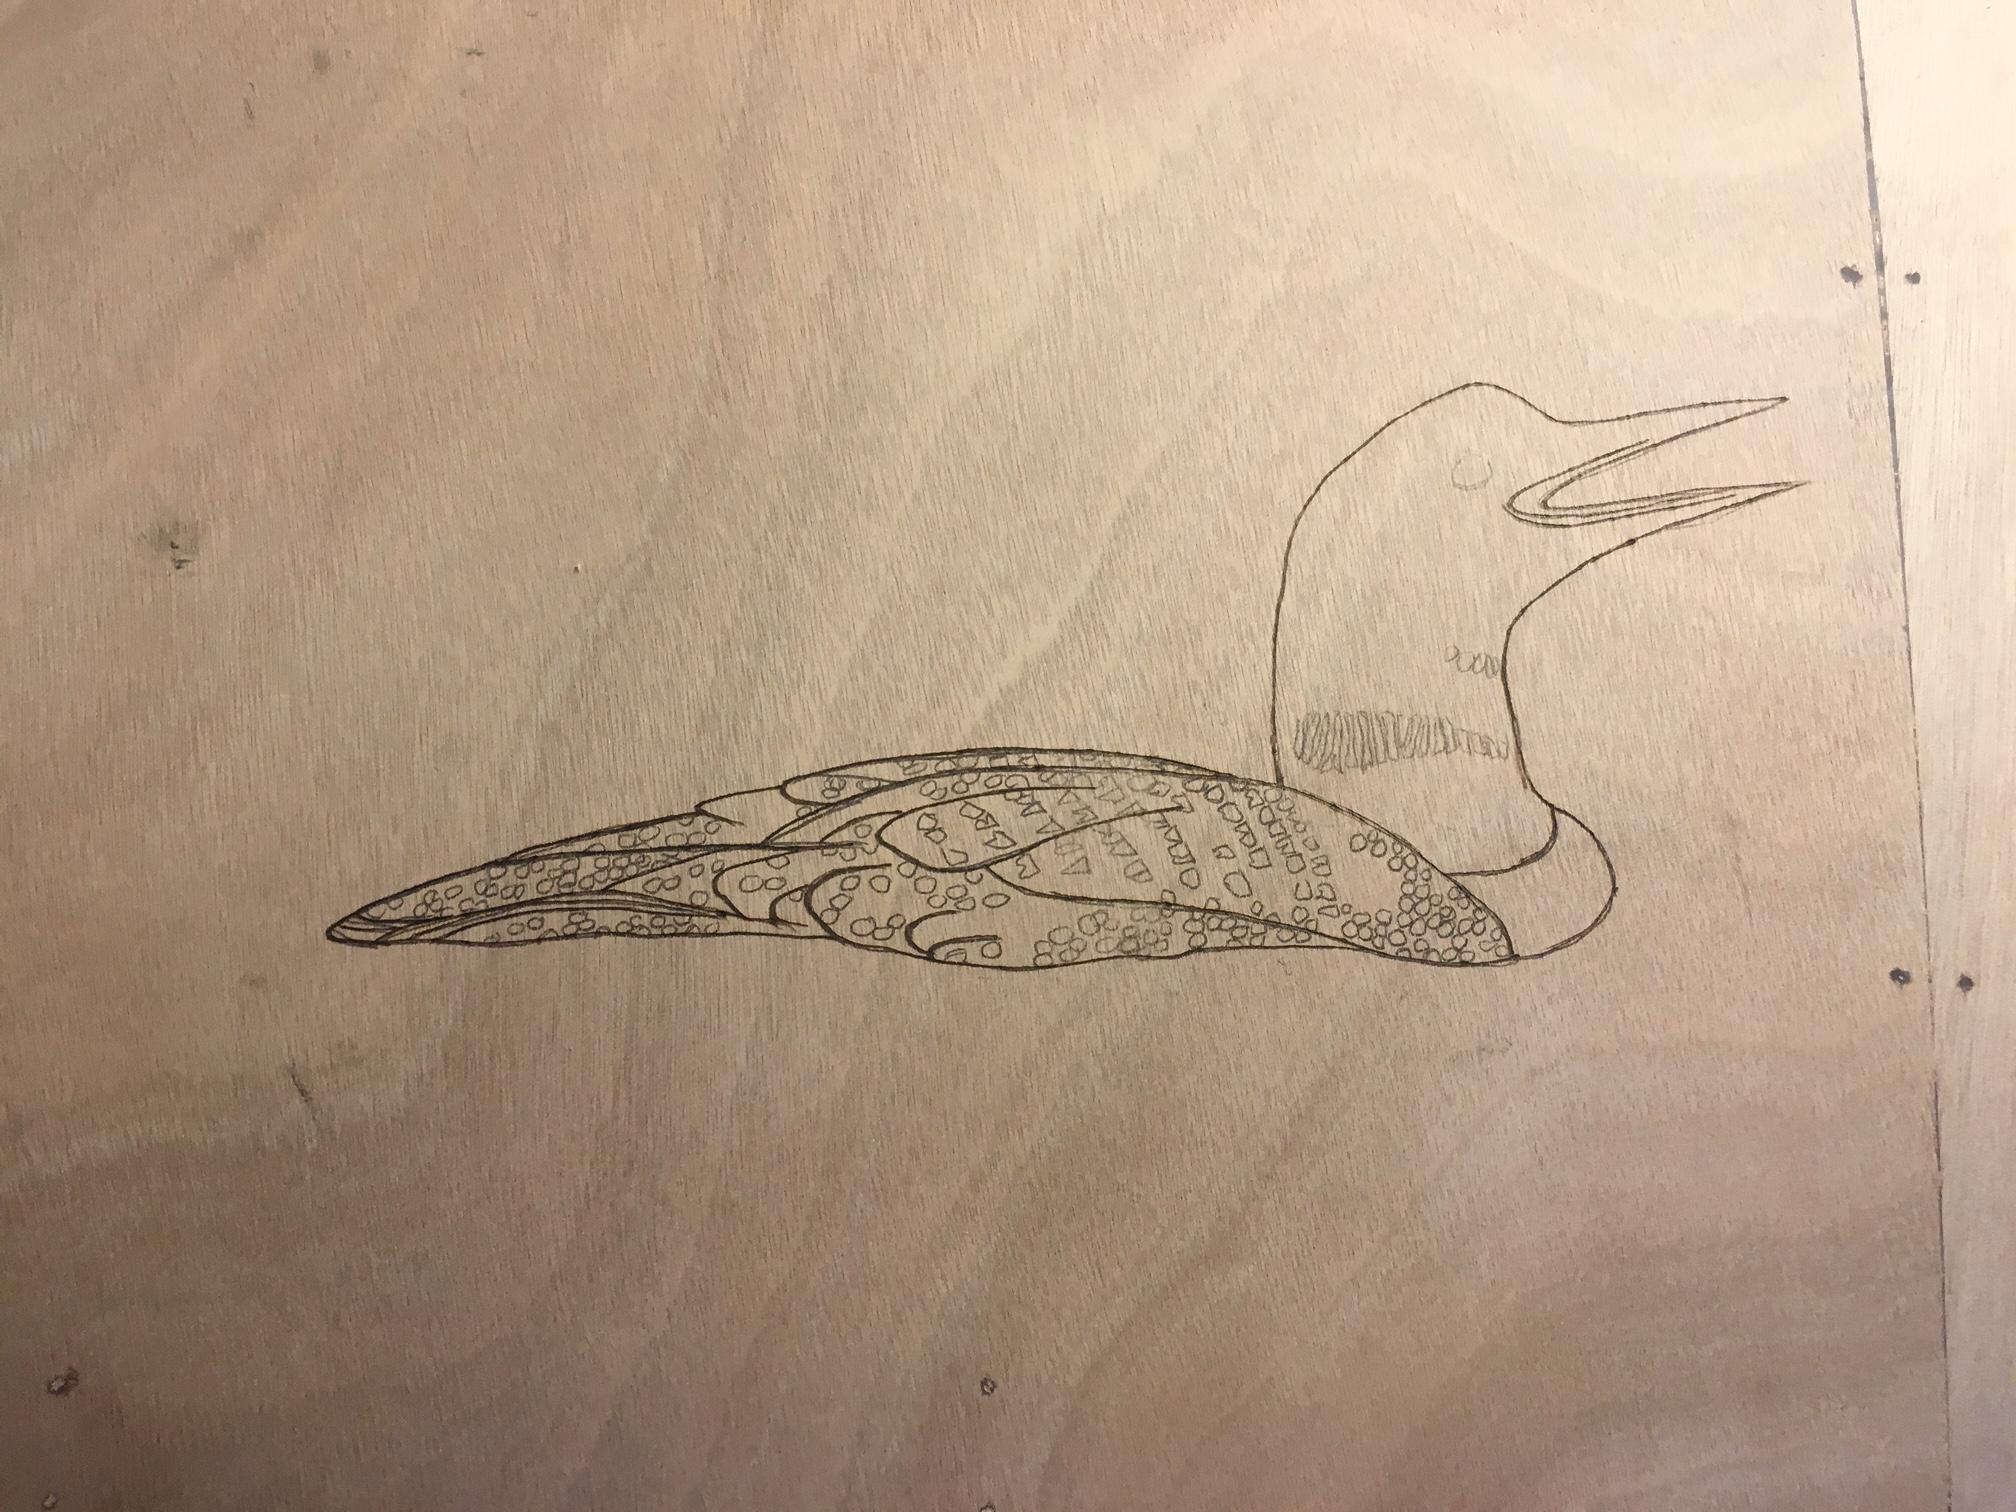
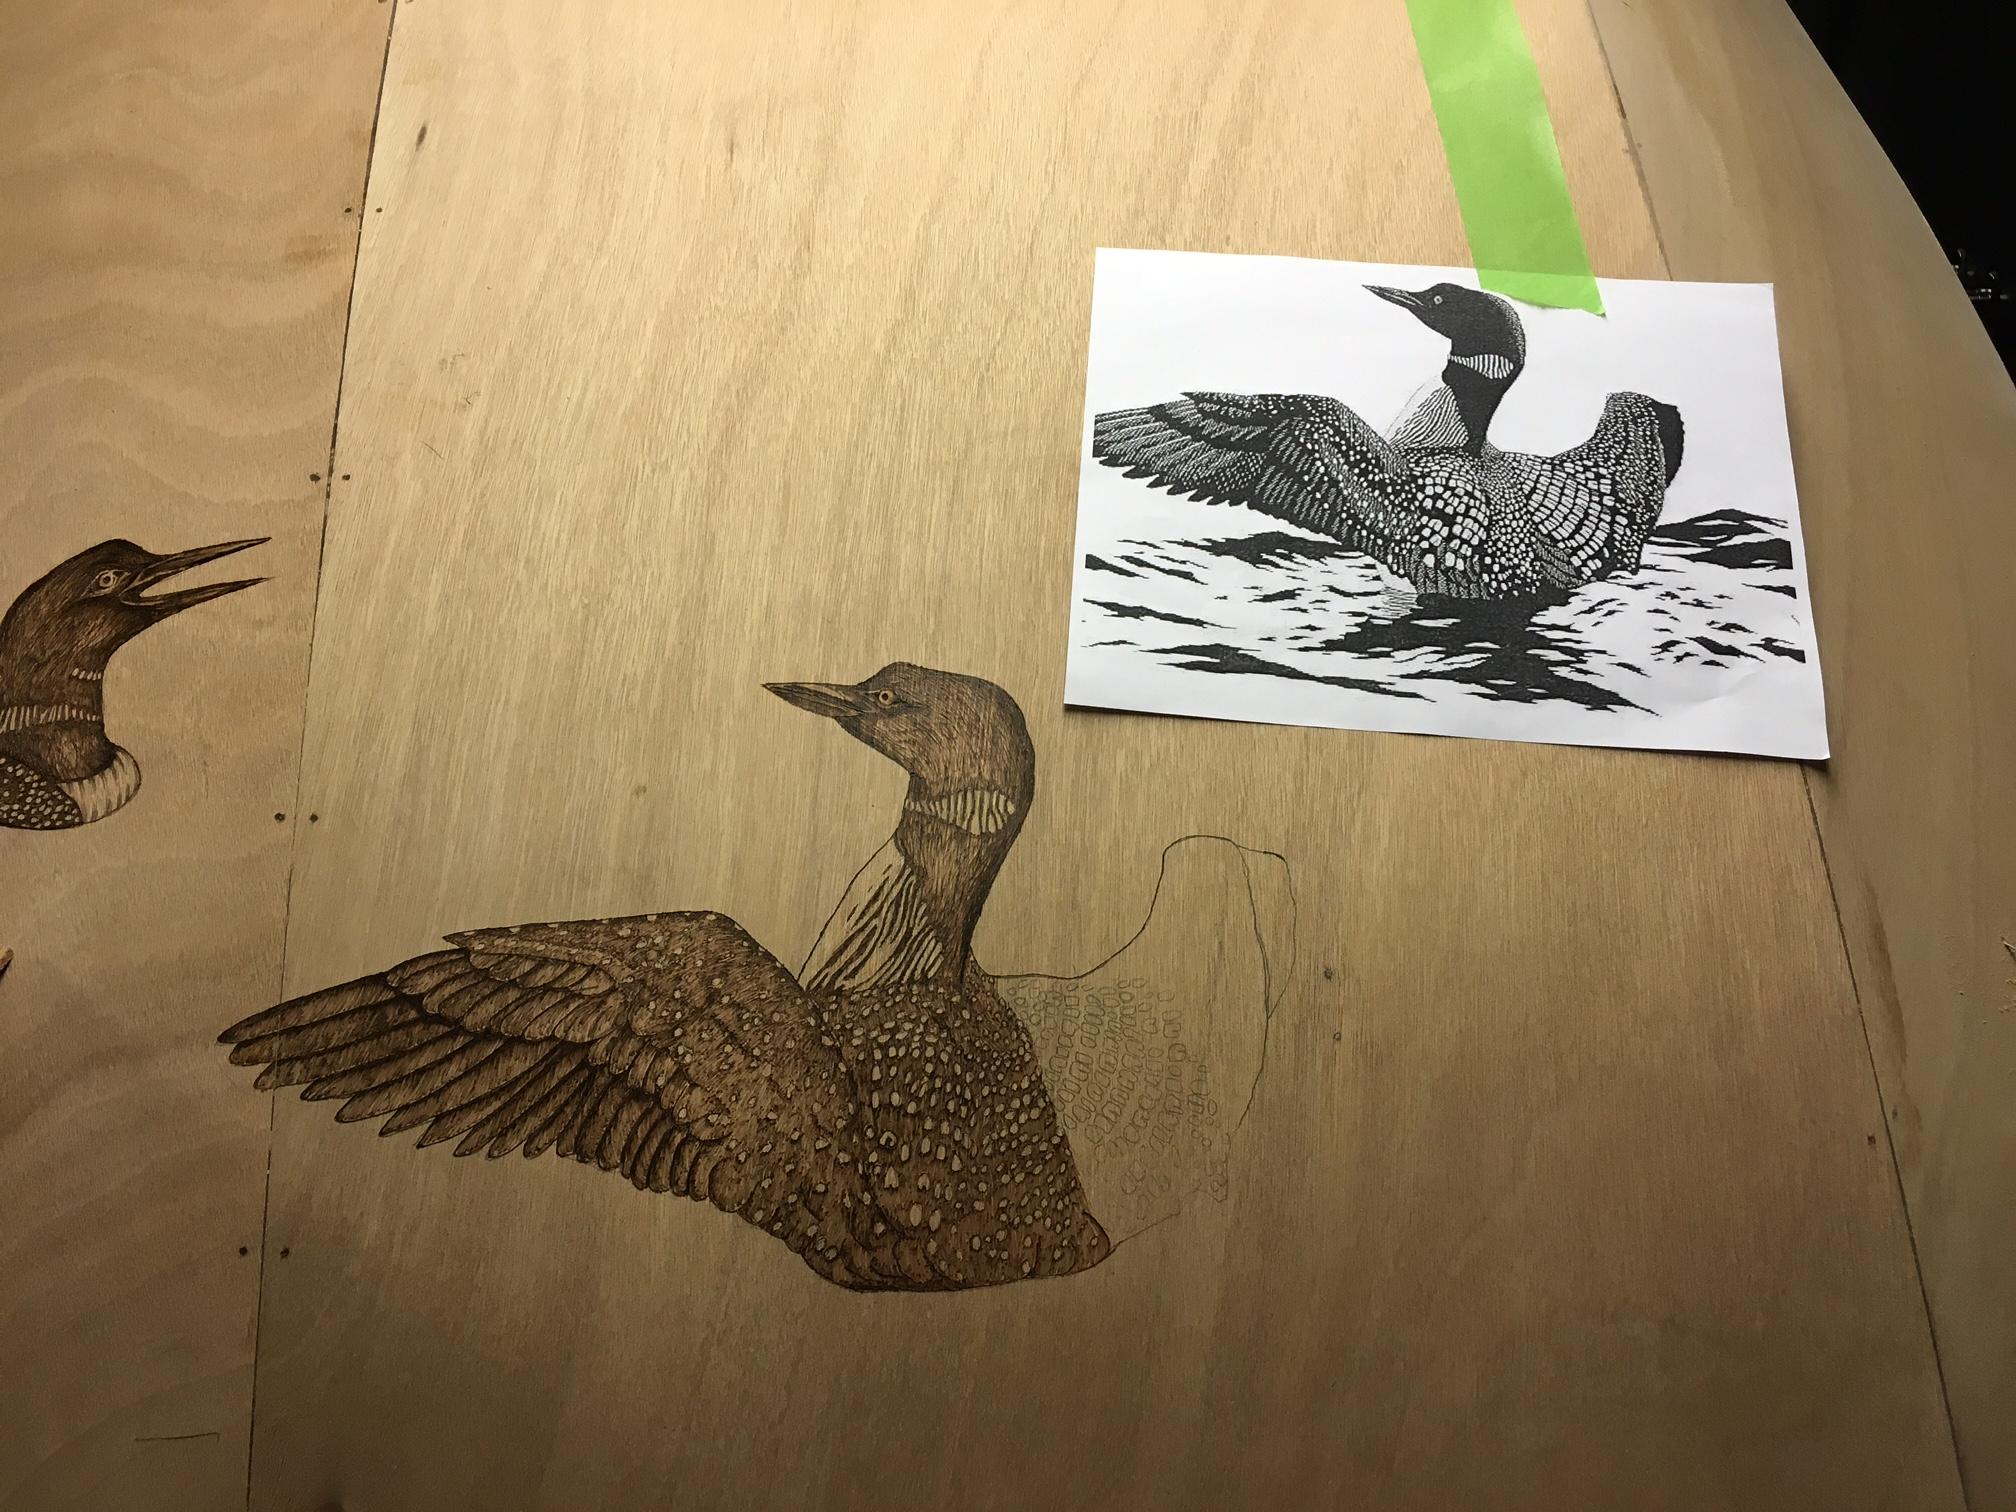

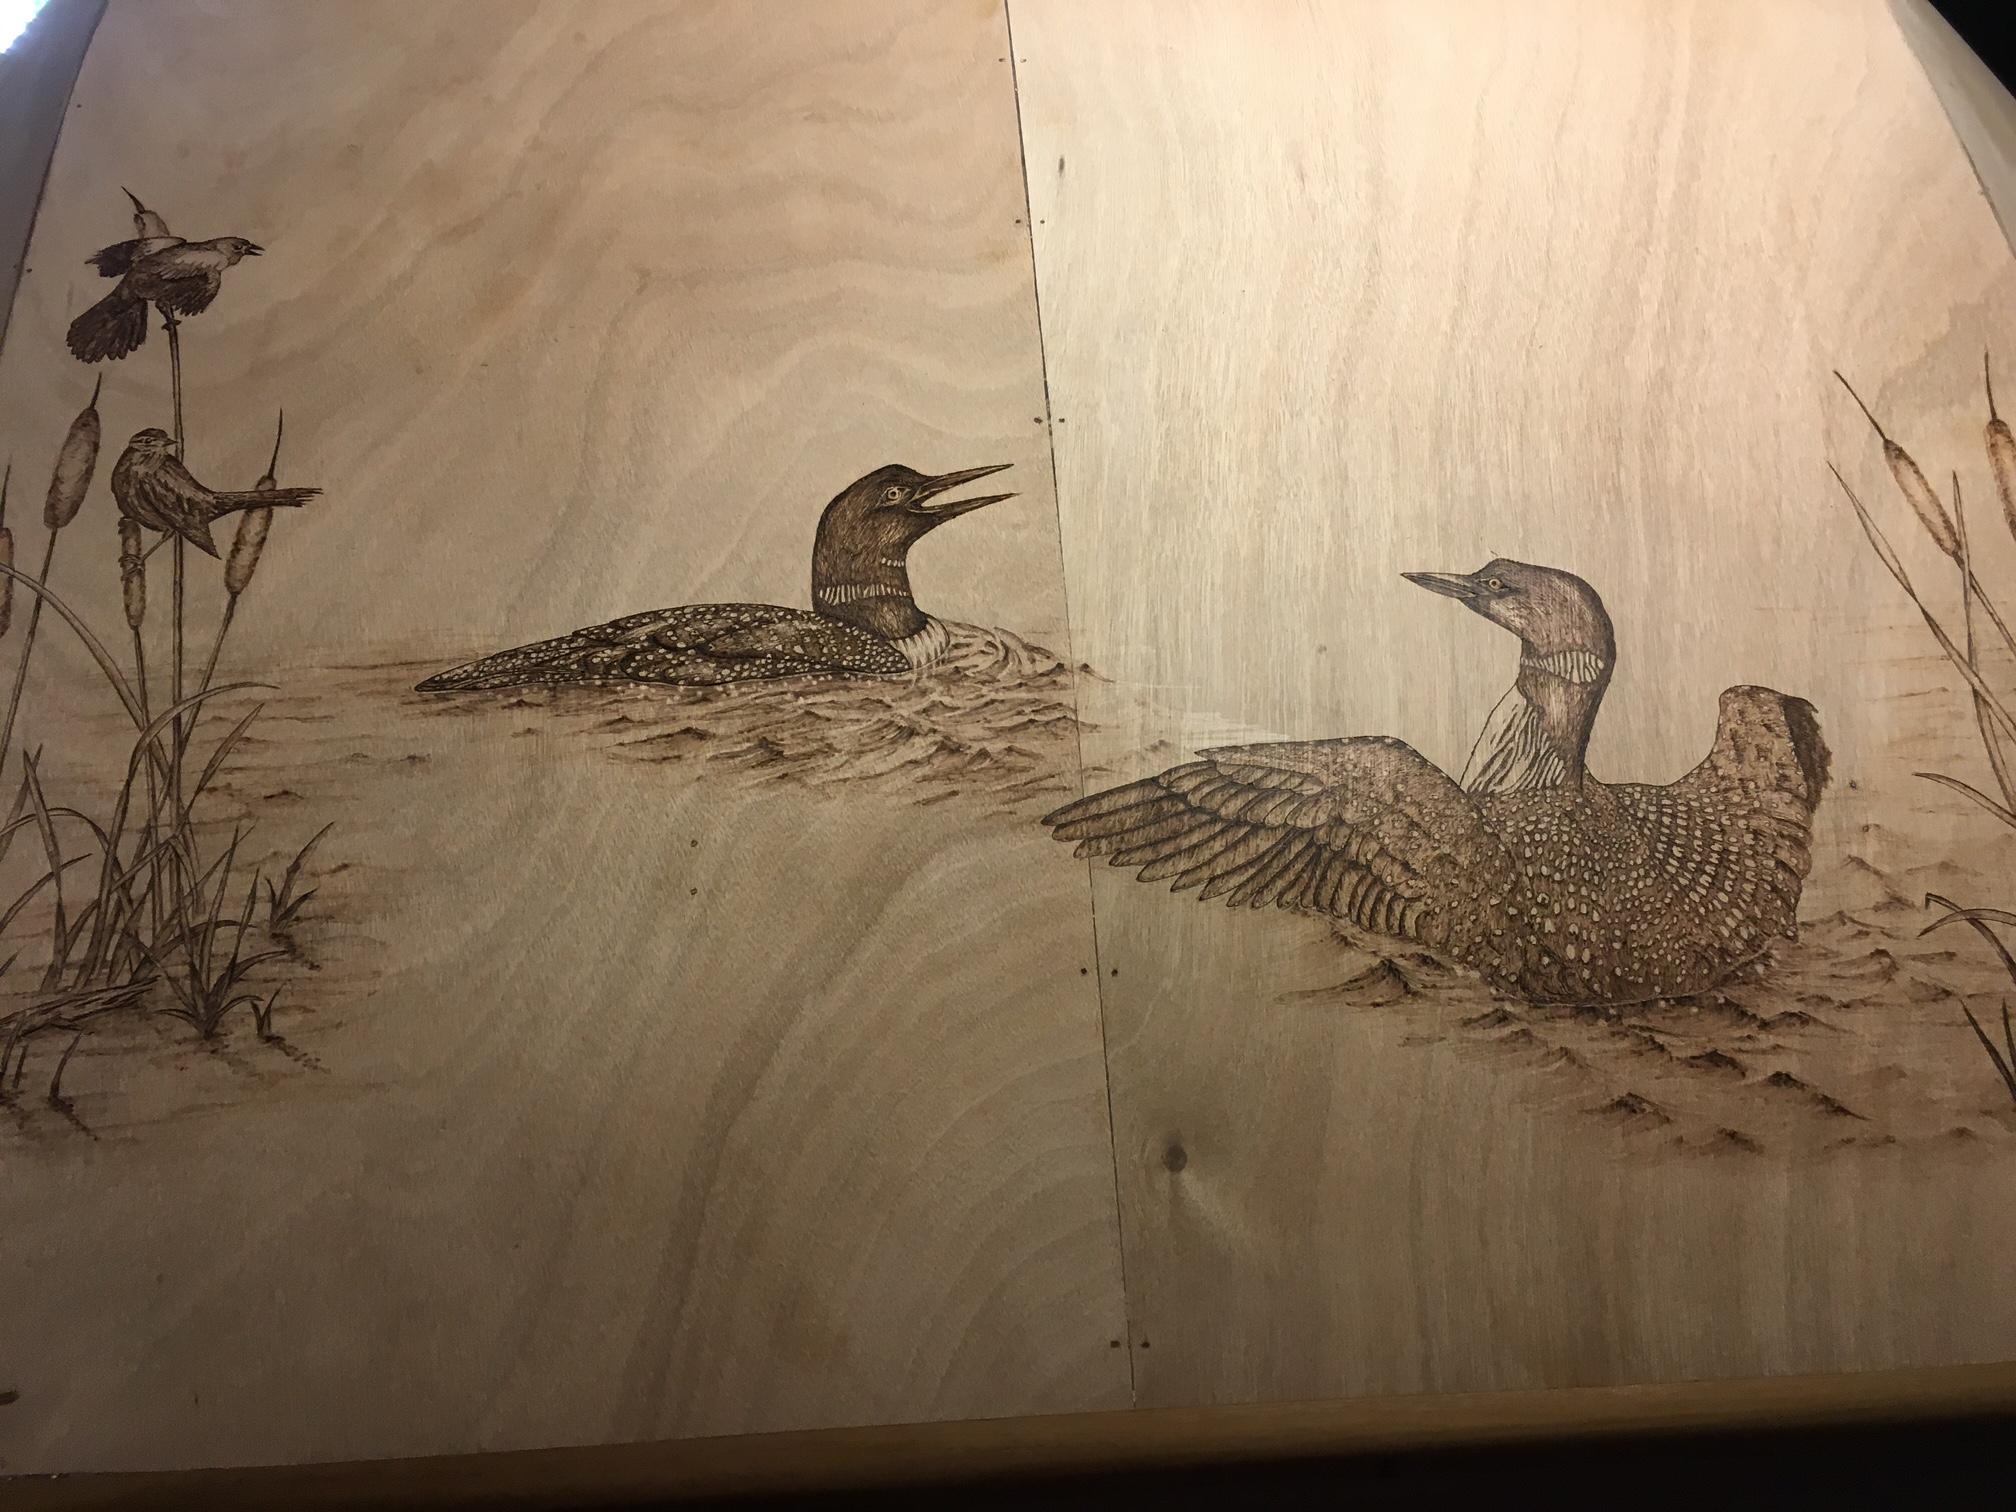
Reb winged blackbirds and common loons: frequently seen at some of my favourite campsites.
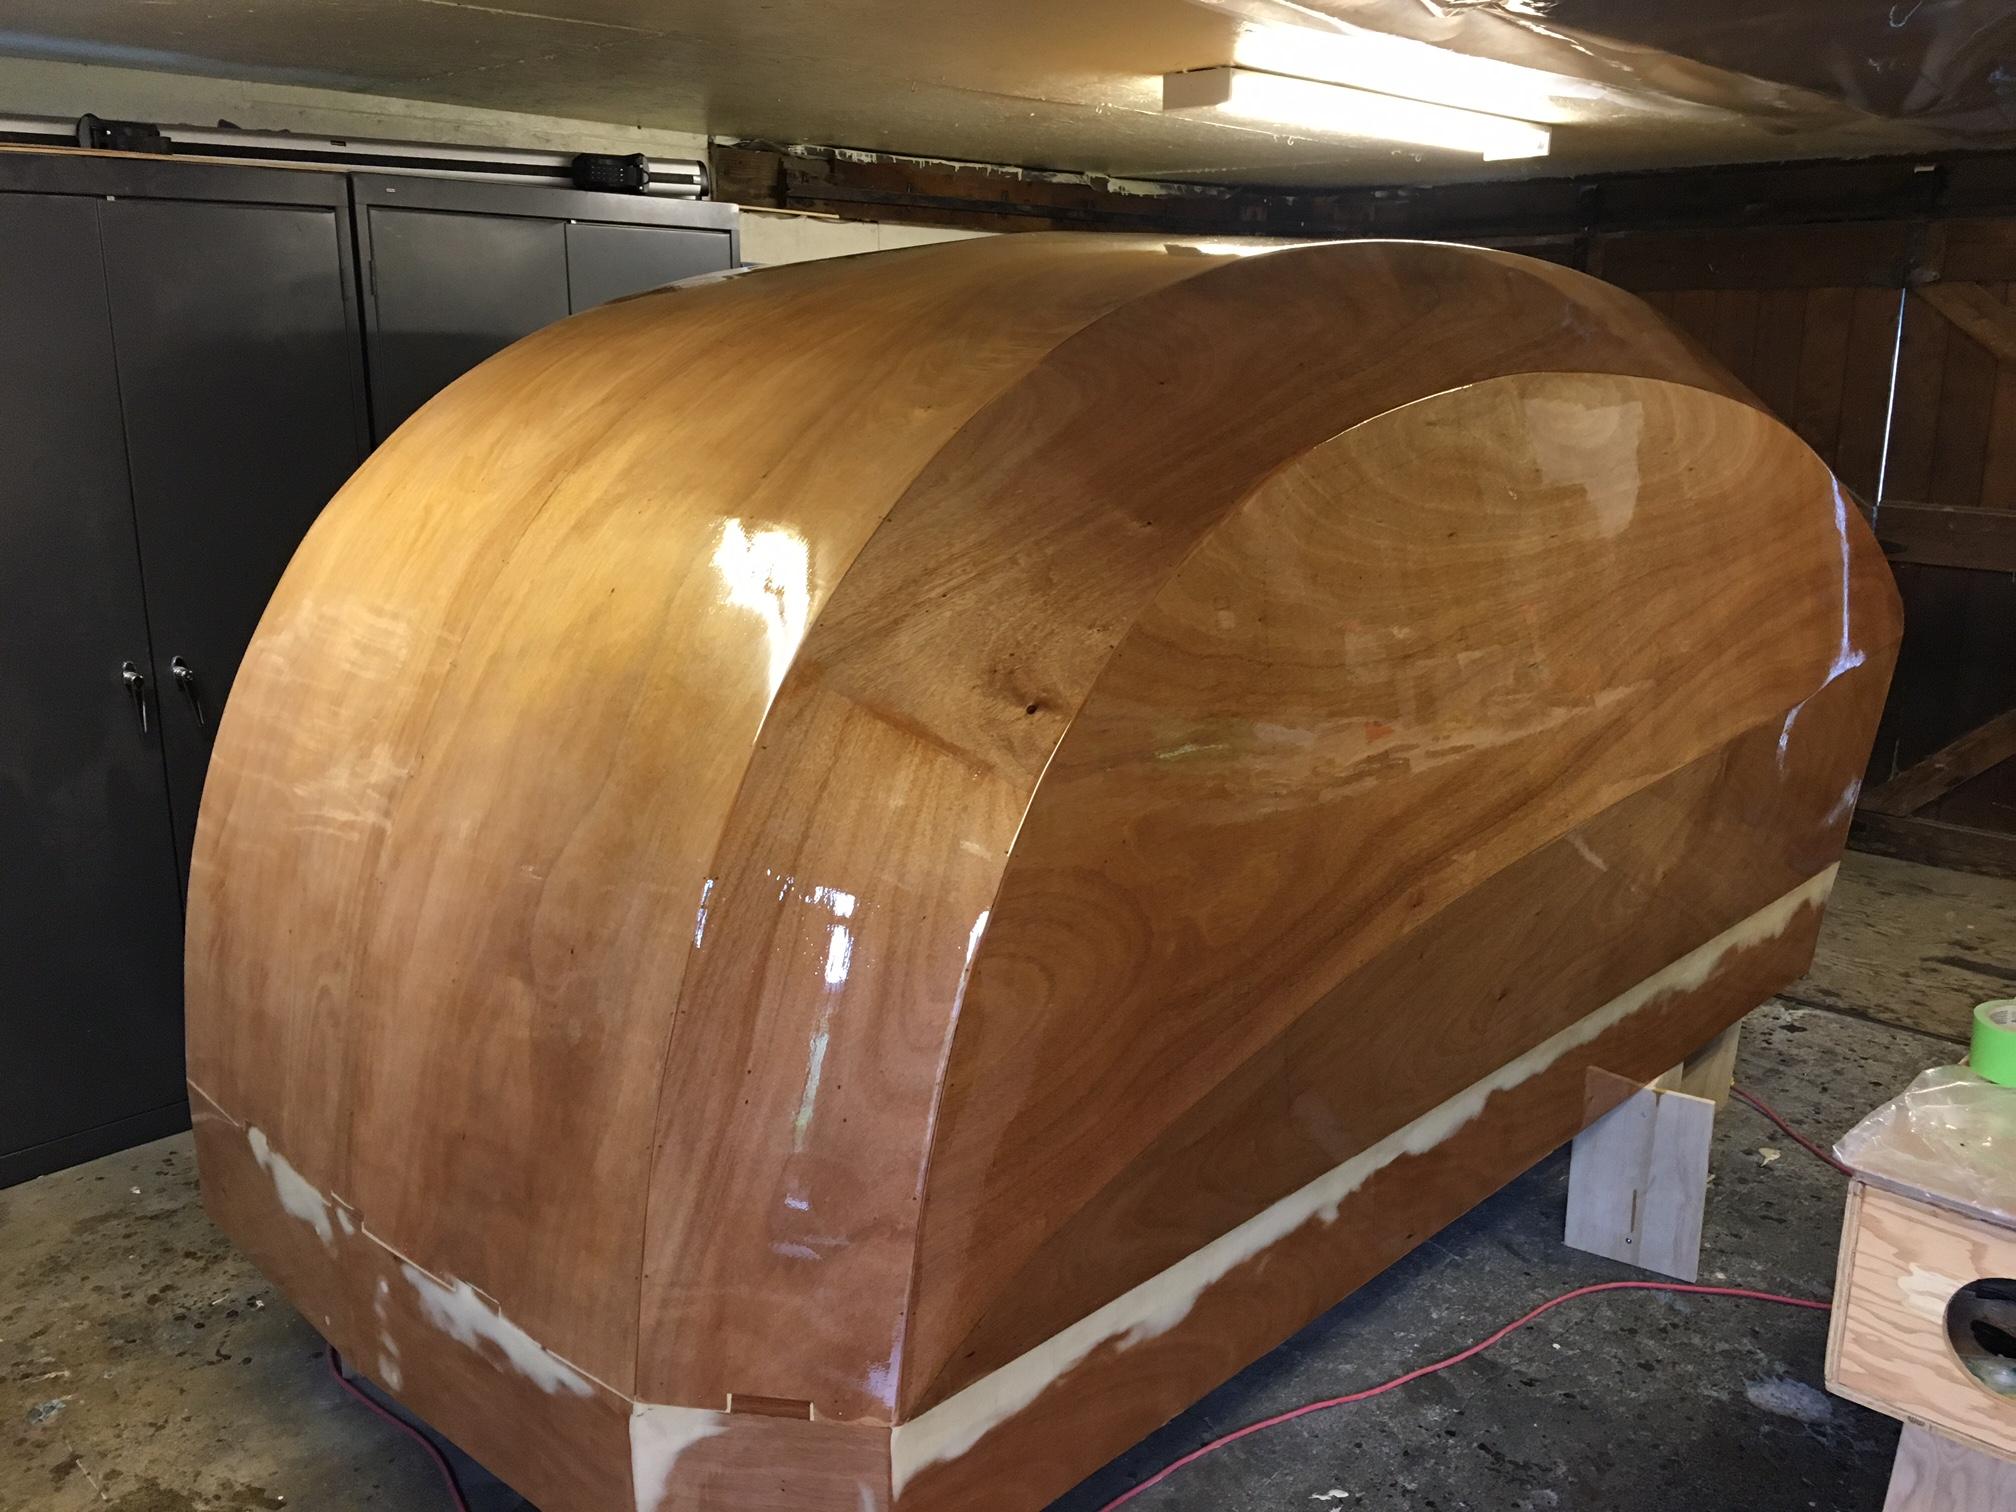
September 4, 2018 at 6:35 pm #2099Participant… and after 4 coats of epoxy:
 September 4, 2018 at 6:49 pm #2100Participant
Now back to construction:
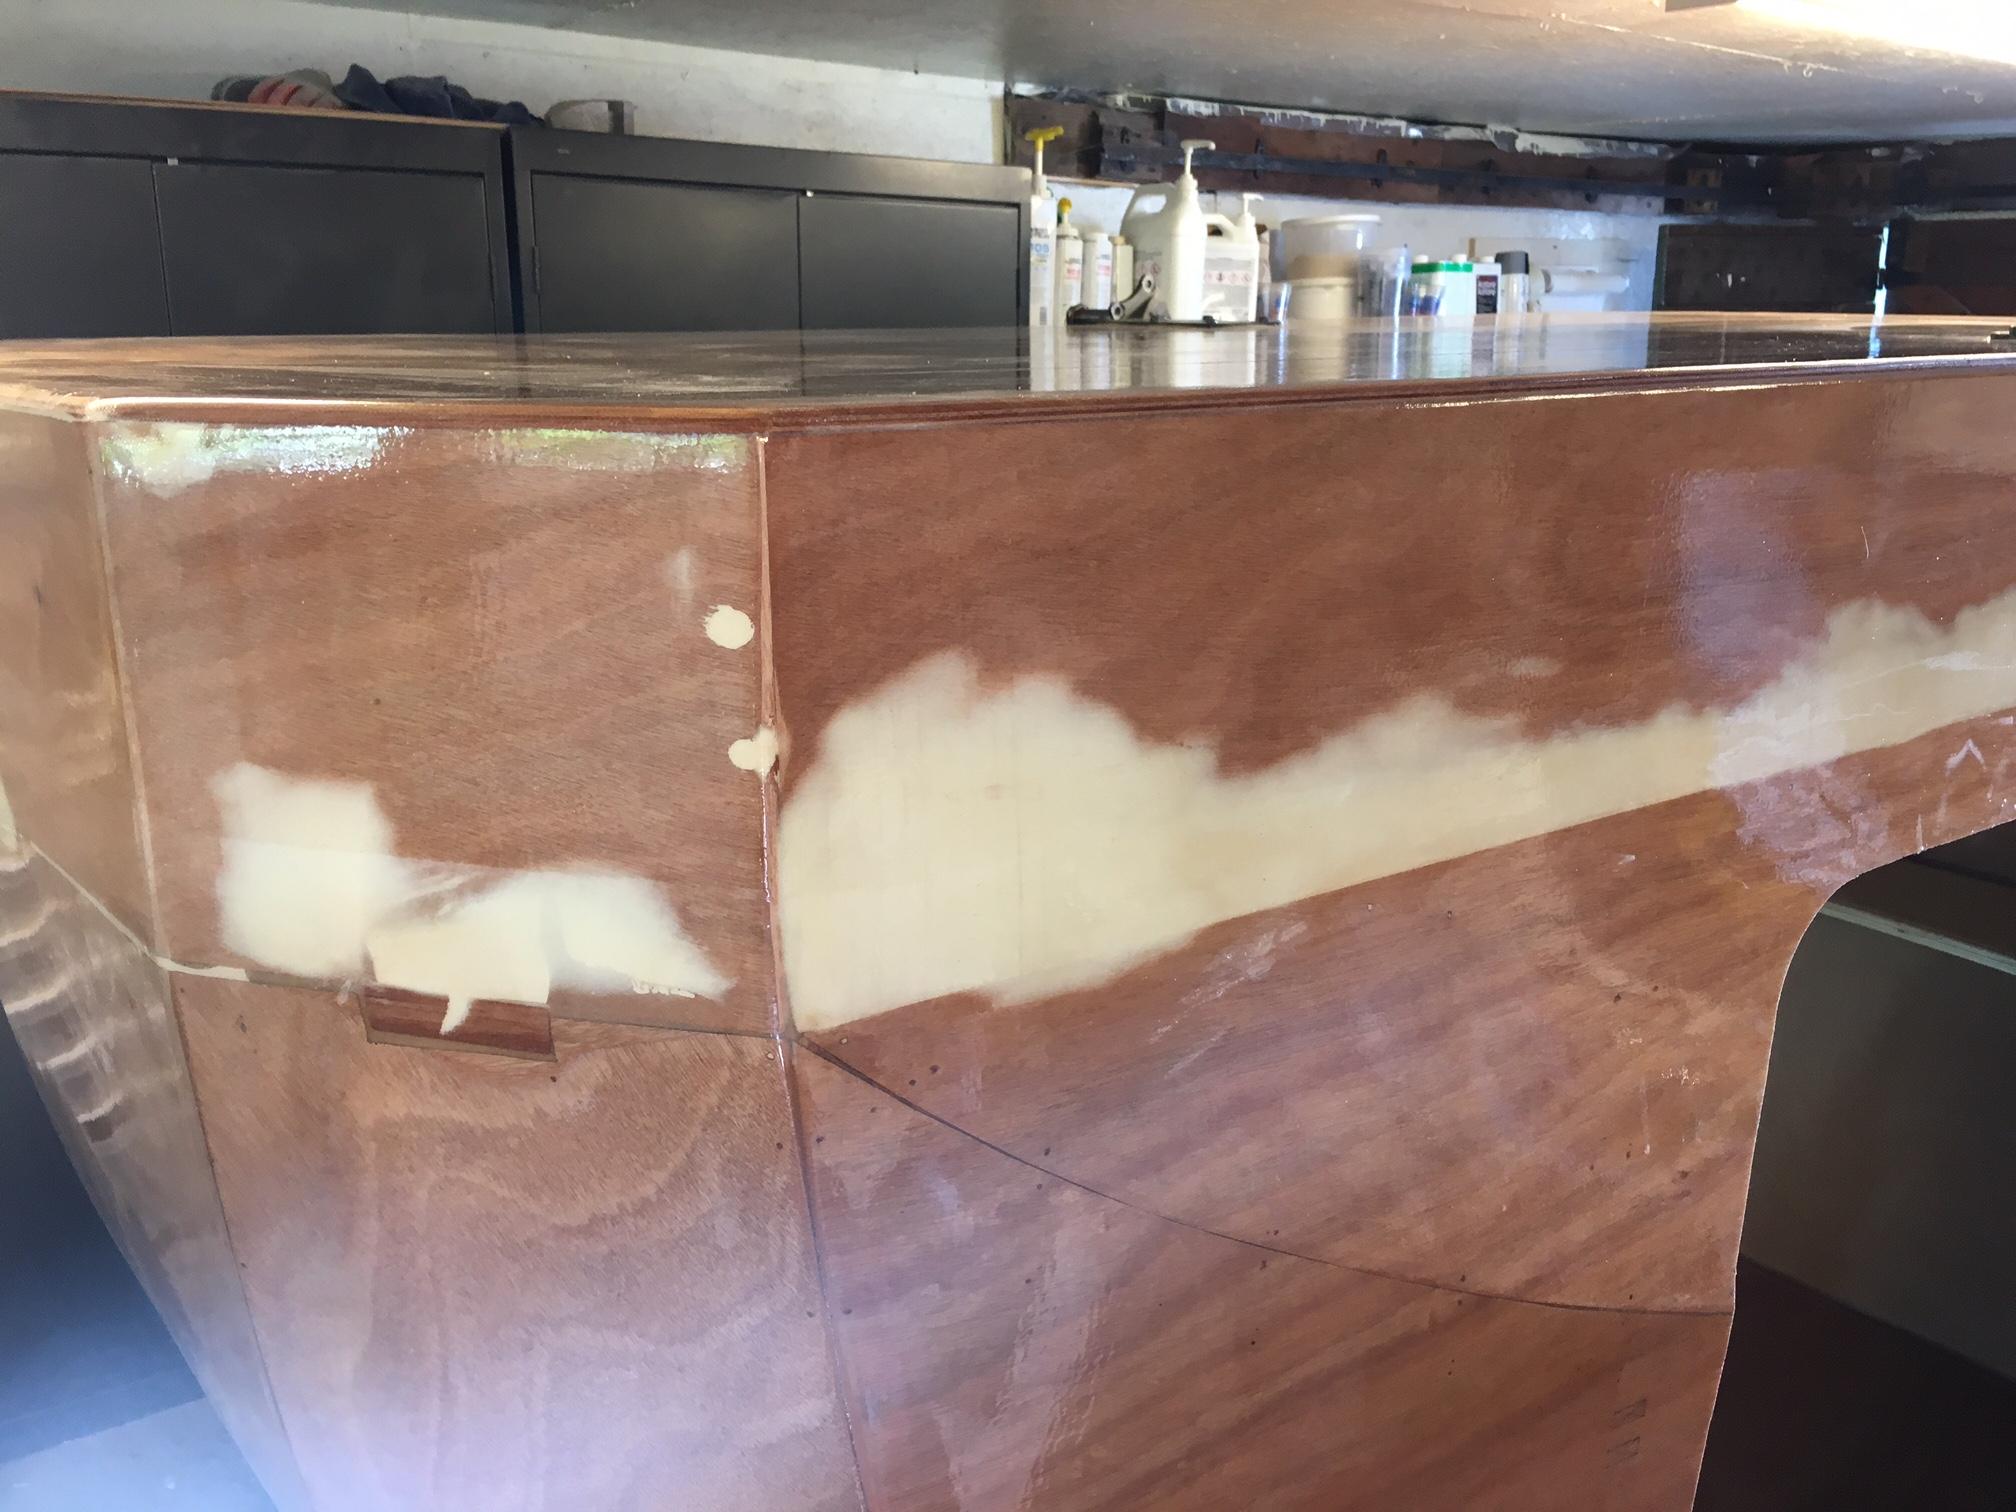
Prior to glassing the shell I faired in the vertical underfloor storage sides to the sloping shell panels with West microlight filler. I was not worried about cream colour because bottom paint will be carried up sides @ 9 inches.
When glassing the shell I obtained 60inch wide cloth so that the side panels would be wide enough to also cover my side skirts in a continuous piece.
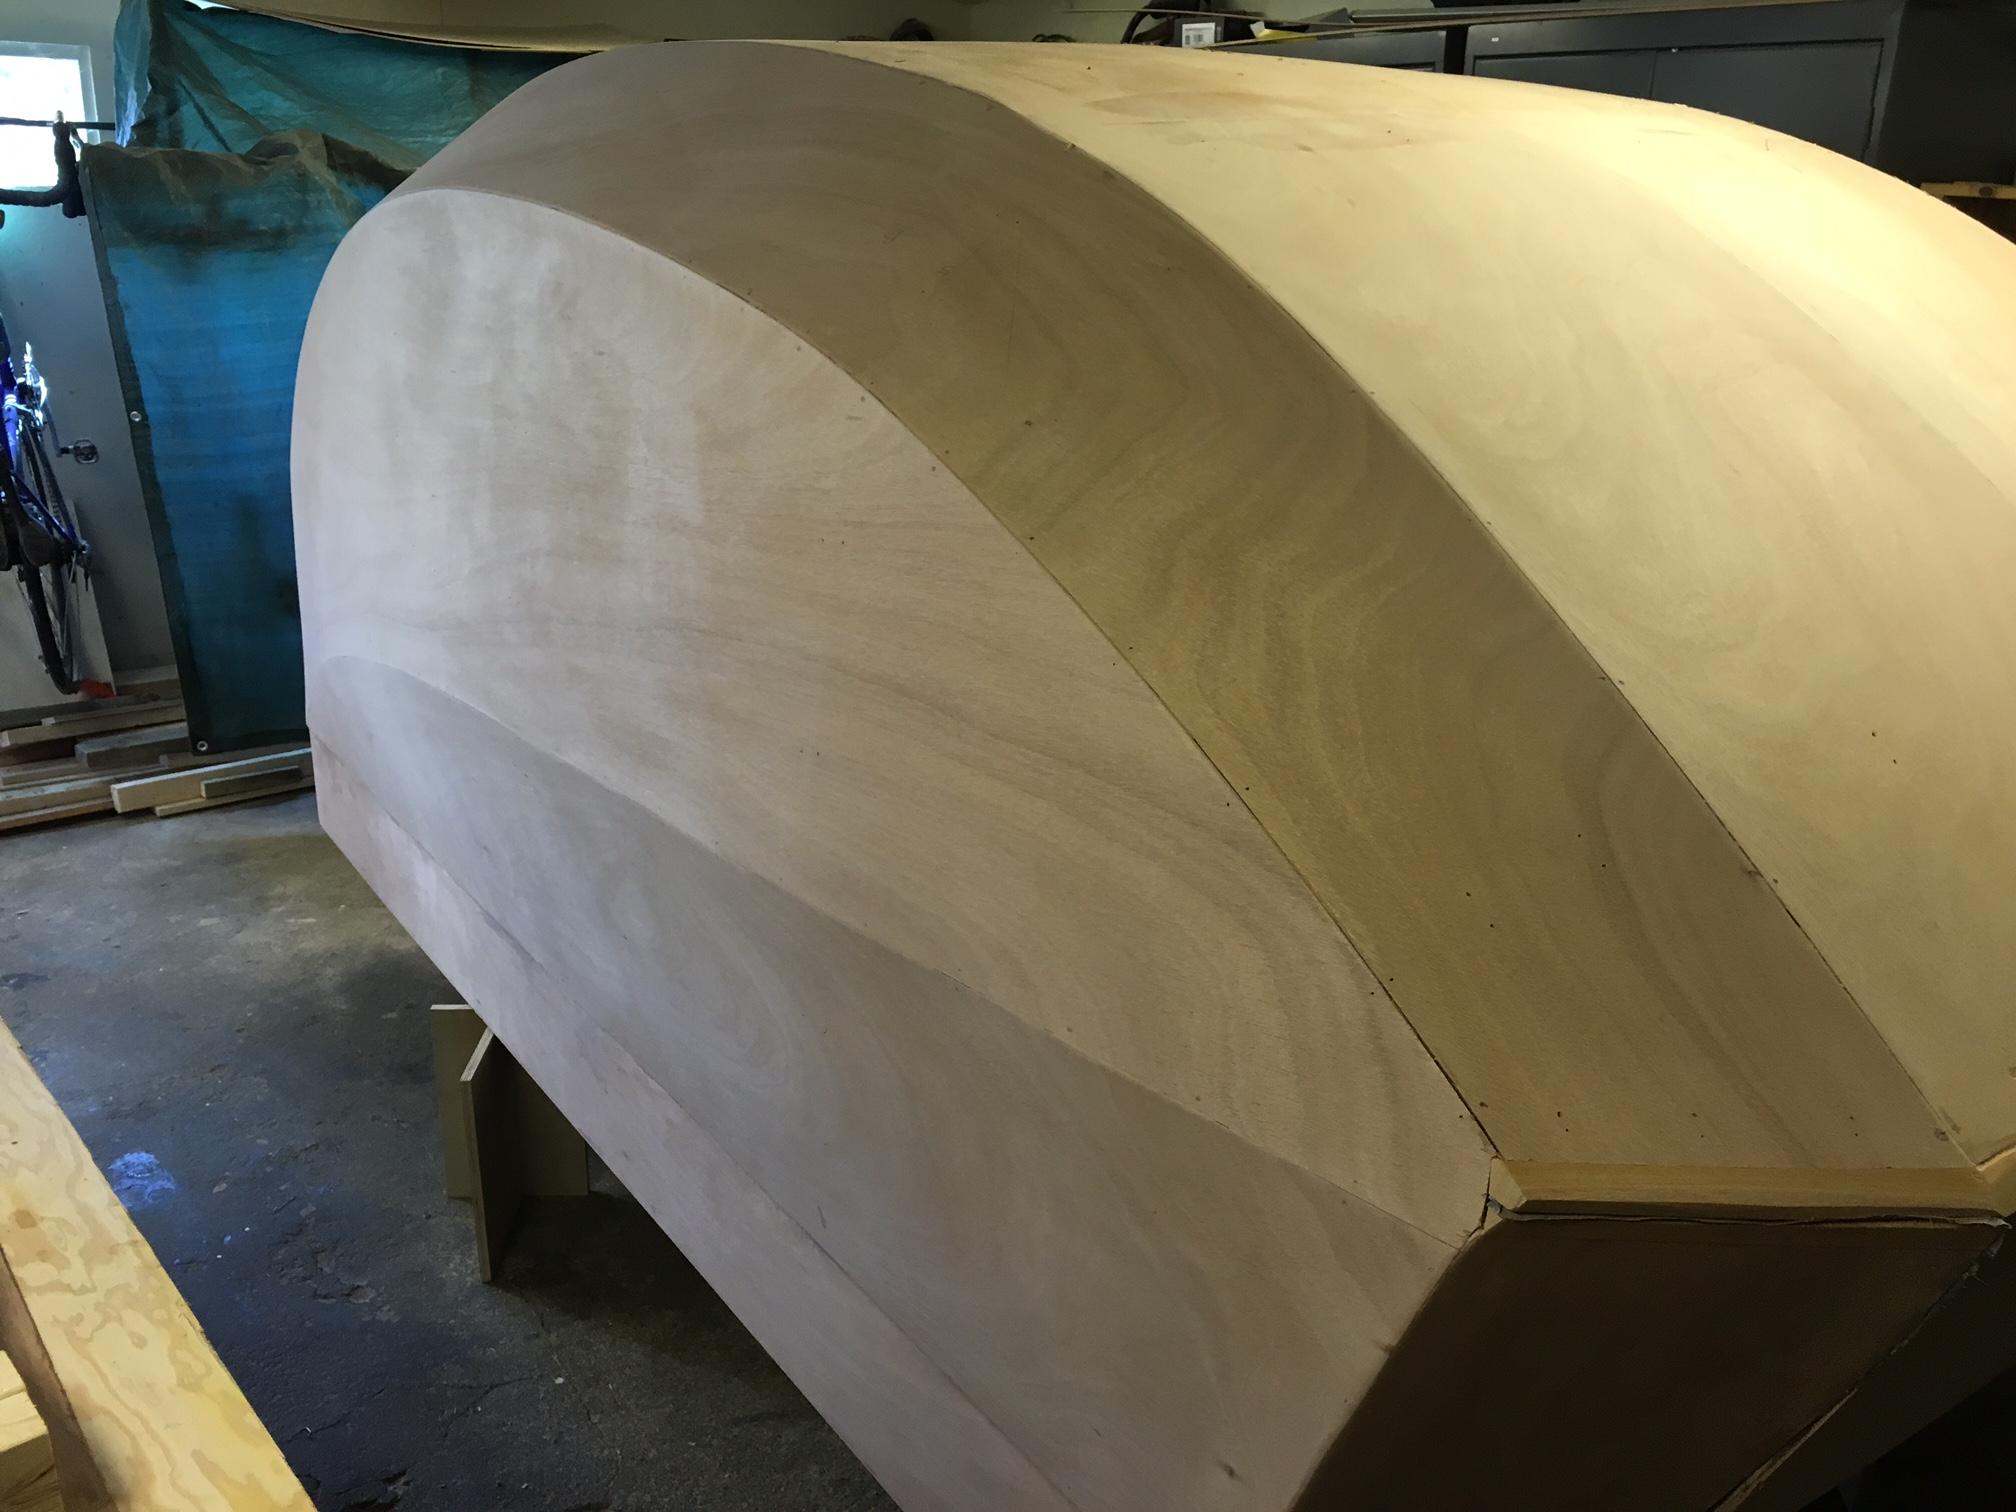
Then the big flip. I had saved the top portion of the mold to use as a cradle. Cushioned the epoxy finish by applying foam pipe insulation over the plywood edges of the mold.
Then glued on my bottom floor. From West I got an empty caulking type tube which I filled with thickened epoxy. Worked brilliantly for applying an even bead of glue down my dadoes and rabbet joints. So I now have two 3/4 inch floors with underfloor storage between.
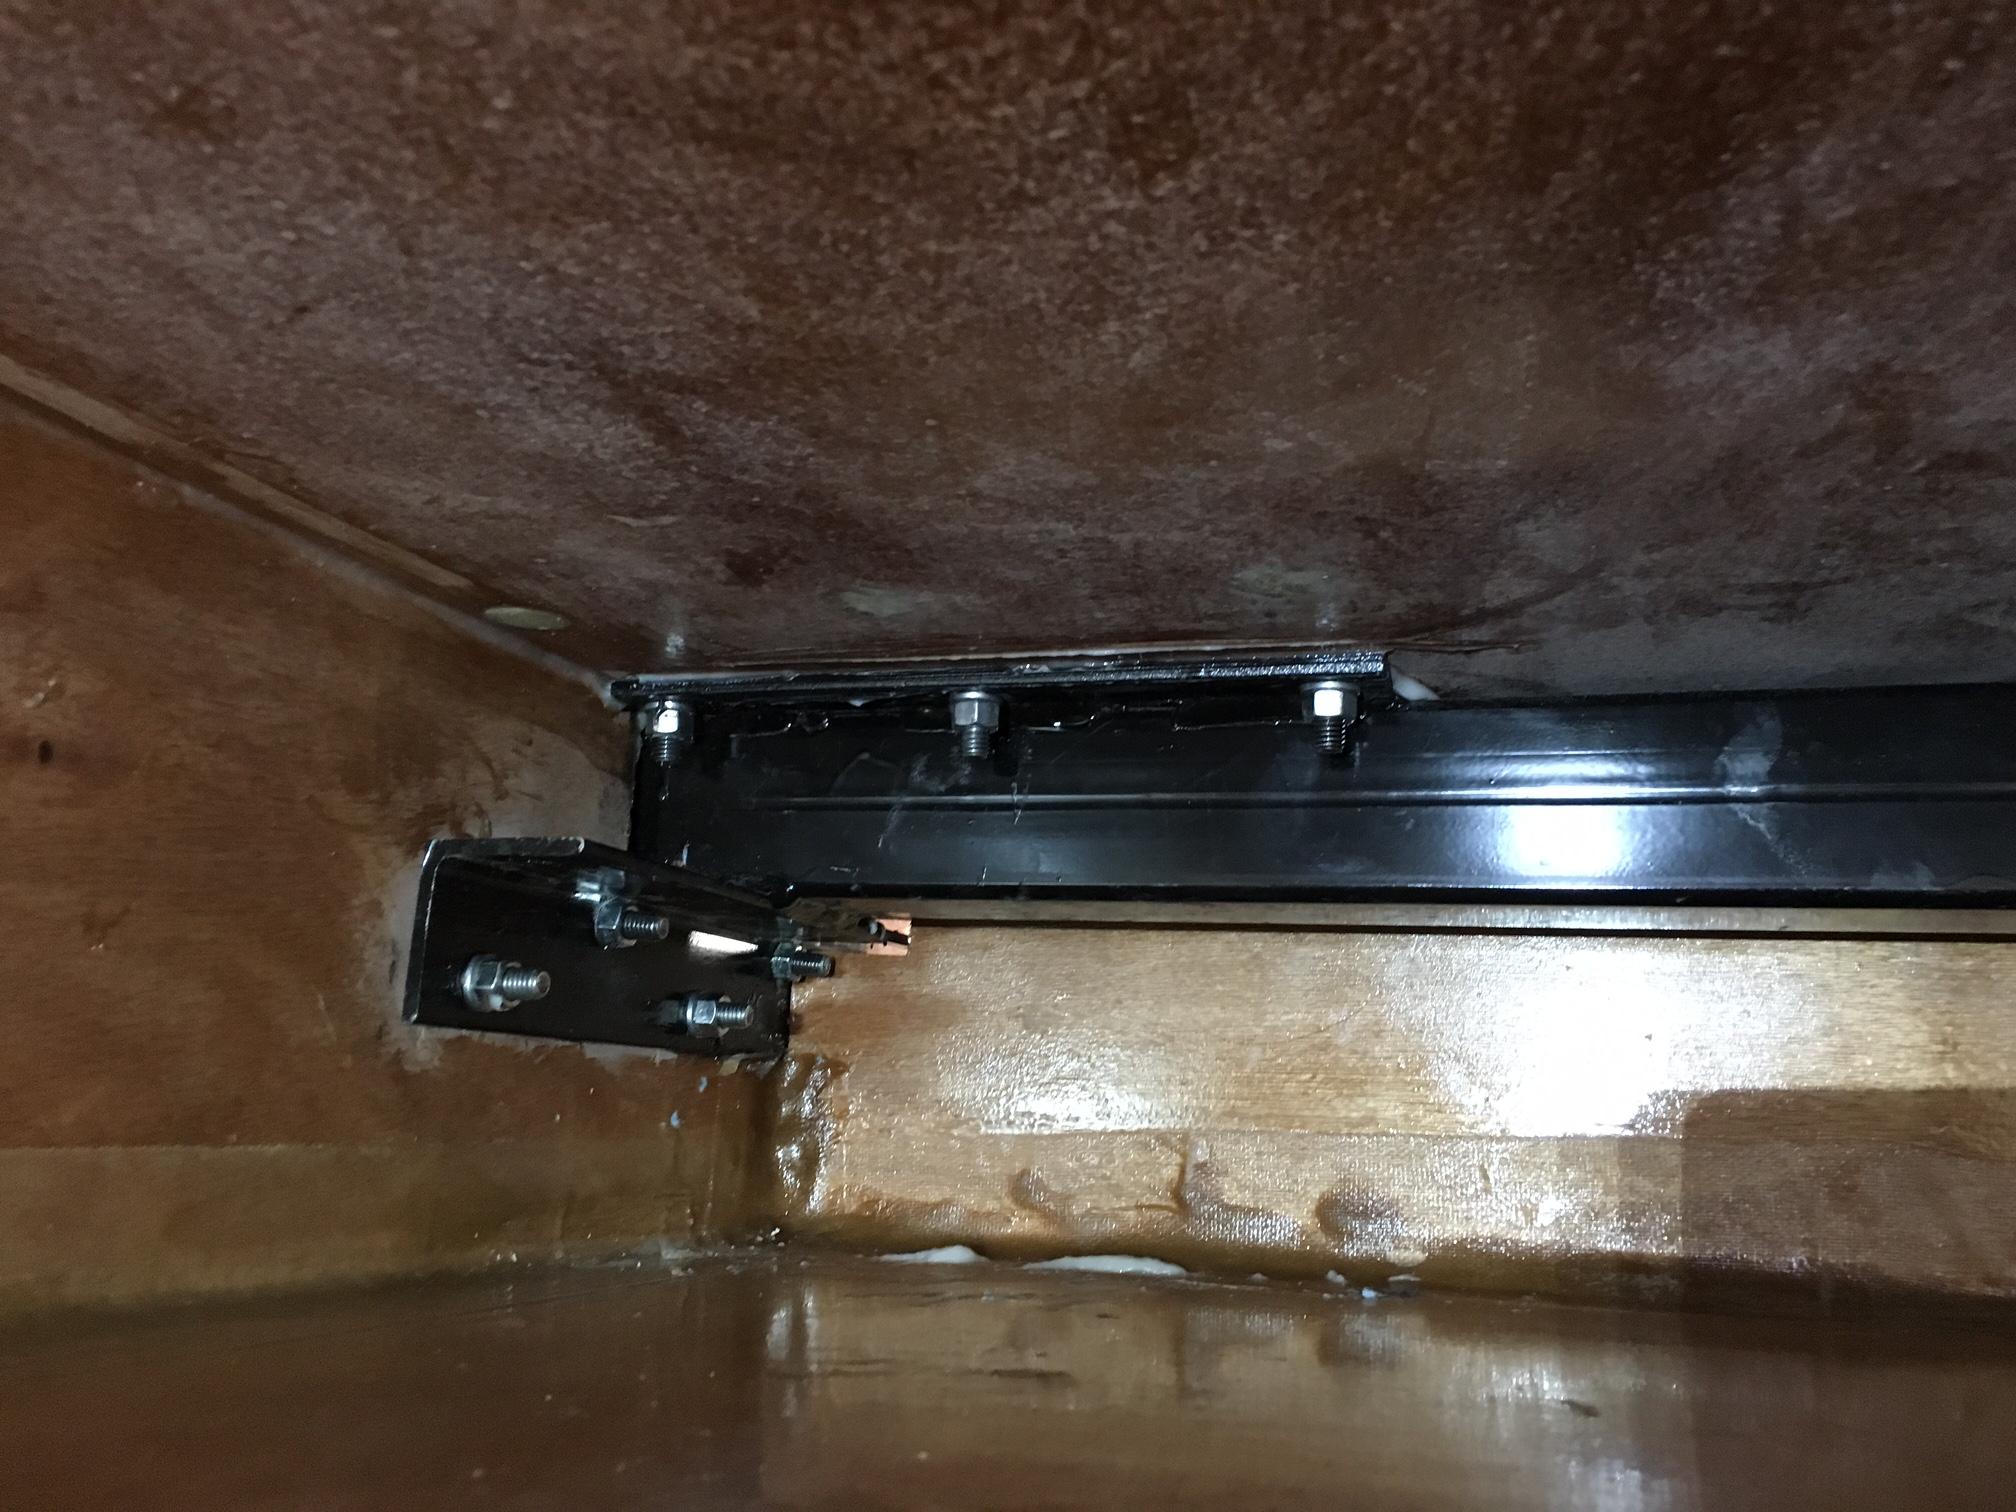
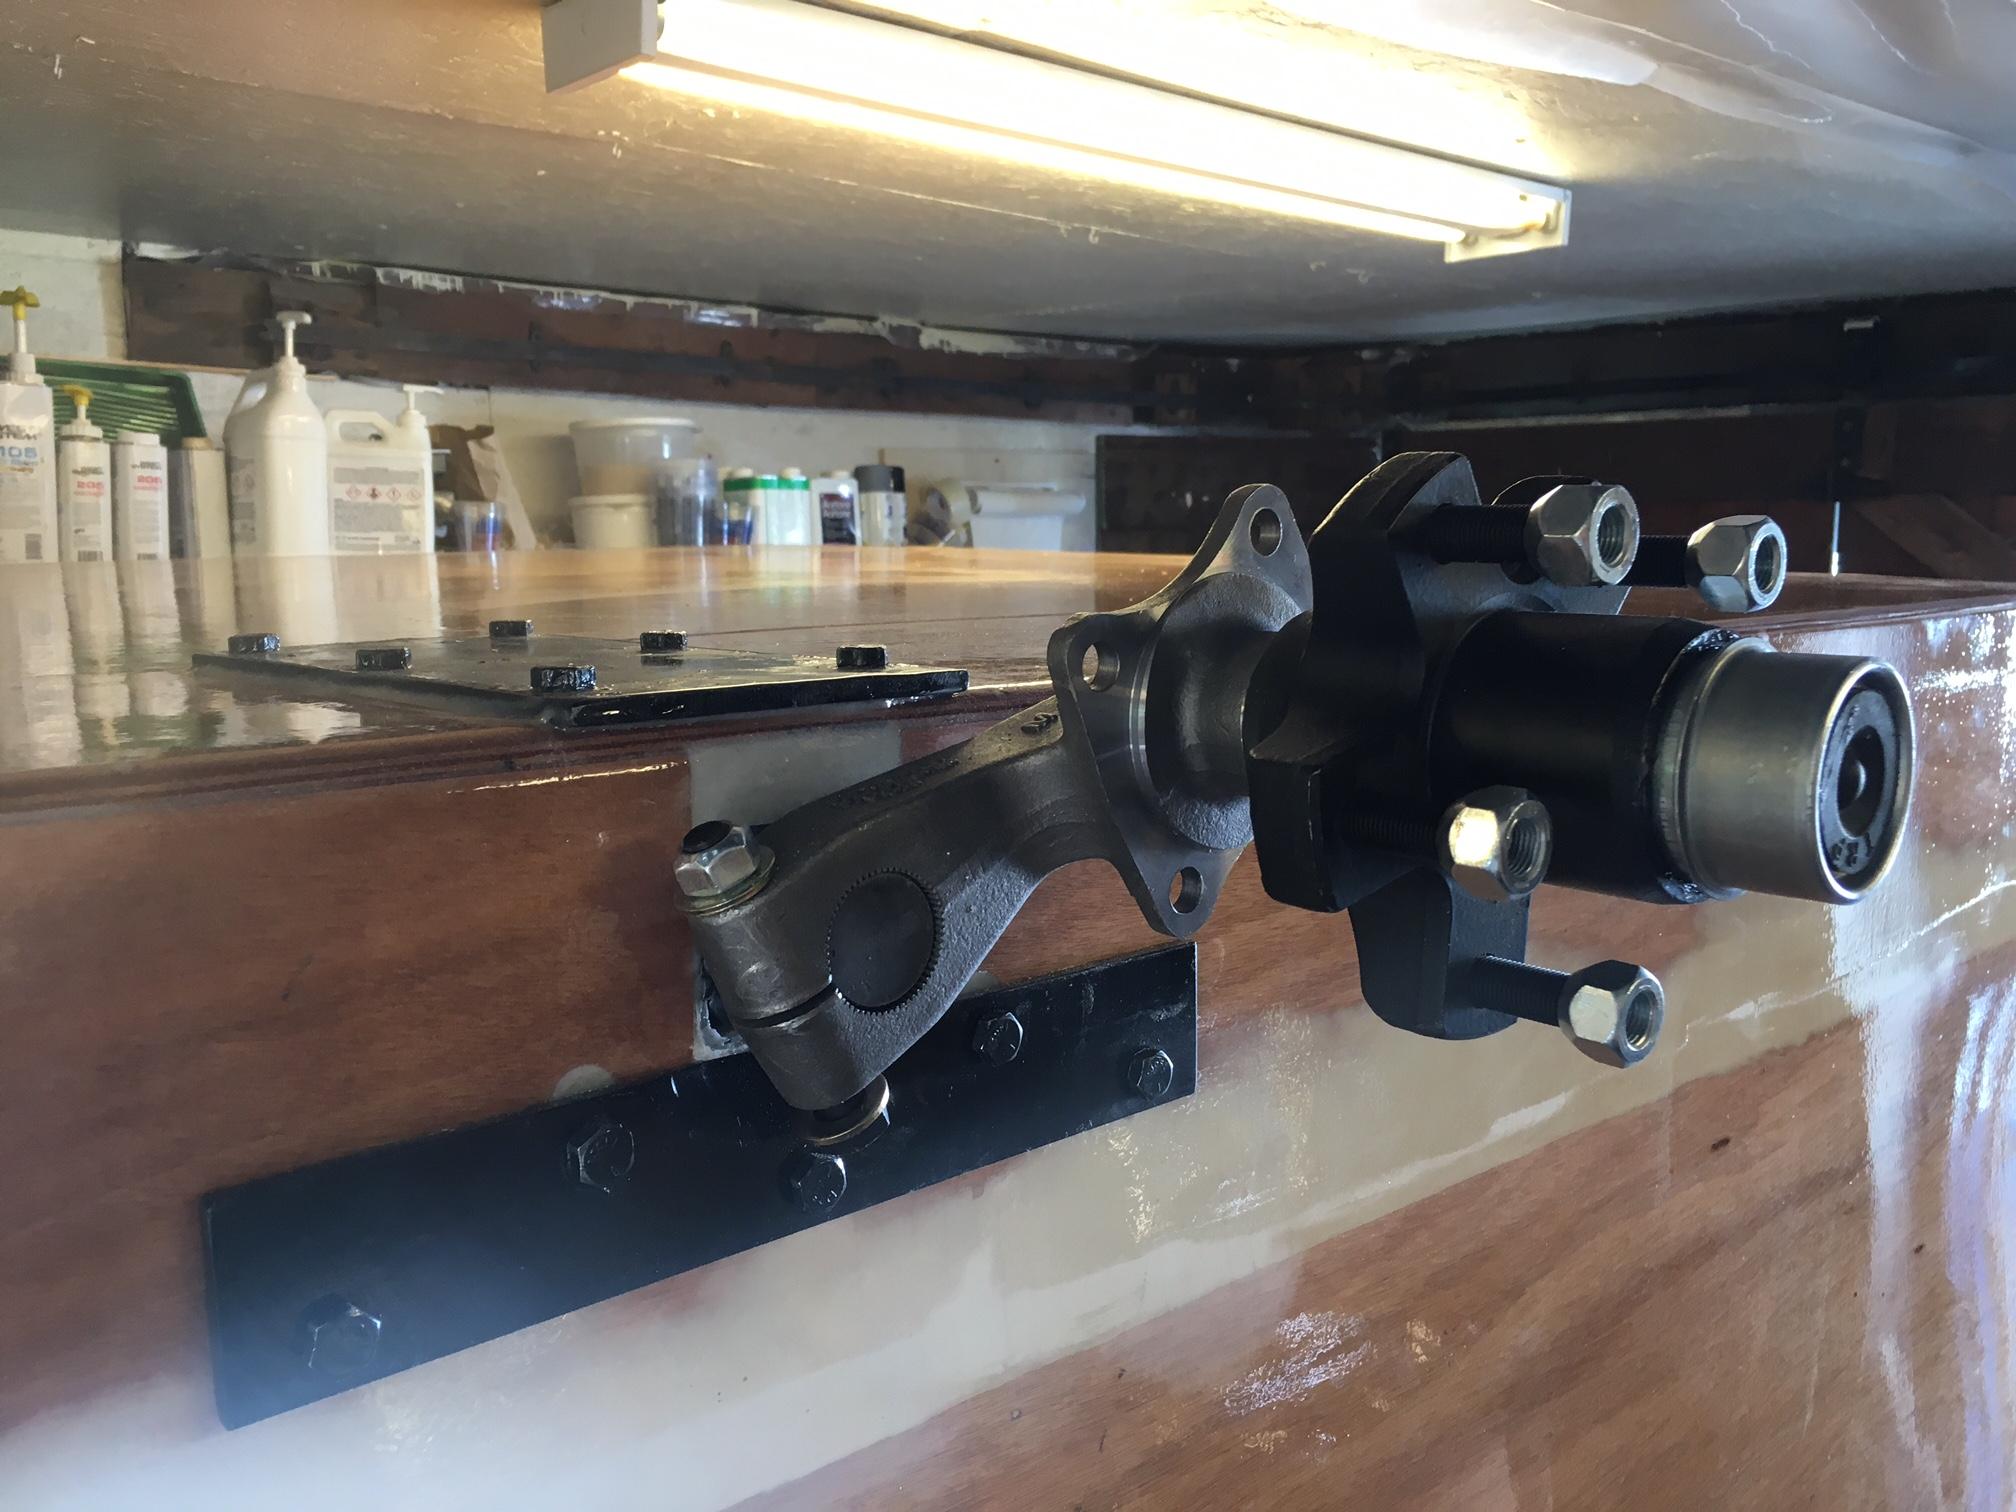
September 4, 2018 at 7:07 pm #2101ParticipantA digression: I am not using a traditional trailer. Objective was minimum overall height with underfloor storage (8inches) and reasonable ground clearance.
I decided to use a flexiride torsion axle with semi-frameless construction. This features:
- a 2 1/2 inch square steel axle tube across the trailer, containing flexiride torsion cartridges and custom welded brackets to allow bolting through floor and side skirts;
- This axle is contained within my storage space – so not exposed;
- Debating 13″ or 14″ wheels;
- 3/8 bolts are bolted through 1 inch epoxy plugs hardened with West high density filler and then through matching steel plates;
- tow bar of same 2 1/2 square material is inserted into storage cavity longitudinally and has flanges that sandwich axle, with bolts through both and also through floor and matching plate underside
This is what it looks like so far:
My underfloor storage is separated into two sections by a bulkhead just aft of the axle. Th efront section is accessed through hatches under the bed:
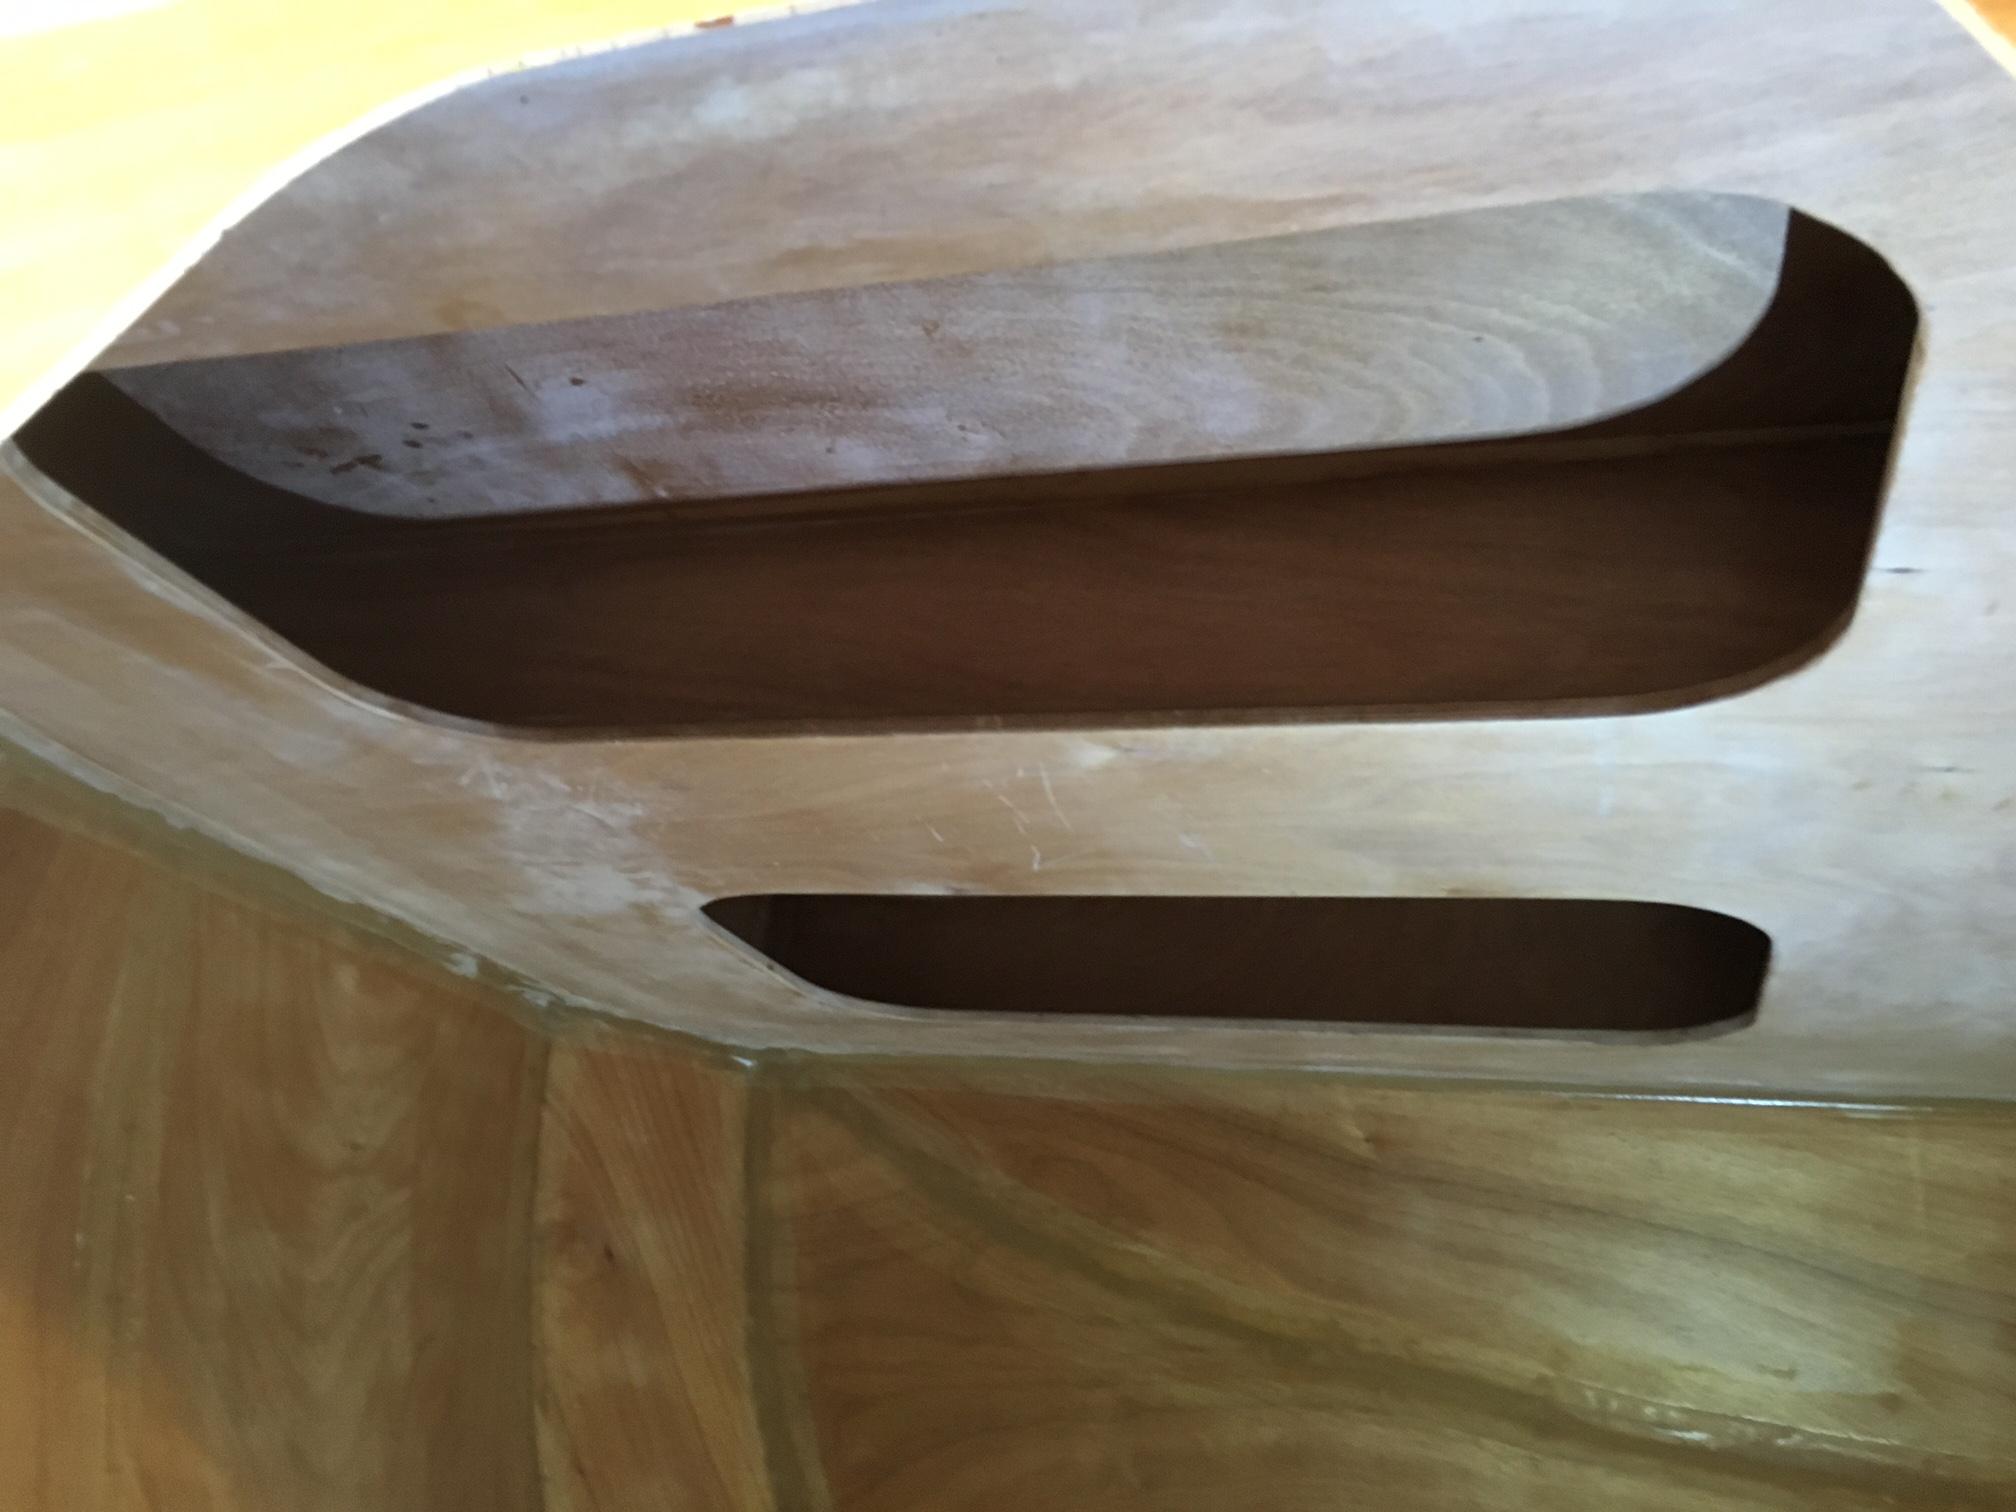
The rear section, intended for camp chairs etc is accessed through a secondary drop down door under my hatch:
Next job: finish bottom – planning on a truck bed liner type material; either take it out for Line -X or DIY U Pol Raptor.
September 6, 2018 at 12:47 am #2109friz
ParticipantEliminating the trailer frame is a great idea. The only purpose the frame on mine serves is to hold my lights and hide my battery and spare tire. My spring channels and tongue could have easily been bolted straight to the shell.
September 7, 2018 at 8:44 am #2110DakotaDirk
ParticipantLove all the ingenuity!
I also went without a conventional trailer. I doubled up the floor thickness, and bolted the tongue and axle to the floor. Not done yet, but happy with the lower height.
-
AuthorPosts
- You must be logged in to reply to this topic.