Forum Replies Created
-
AuthorPosts
-
SOMDTD
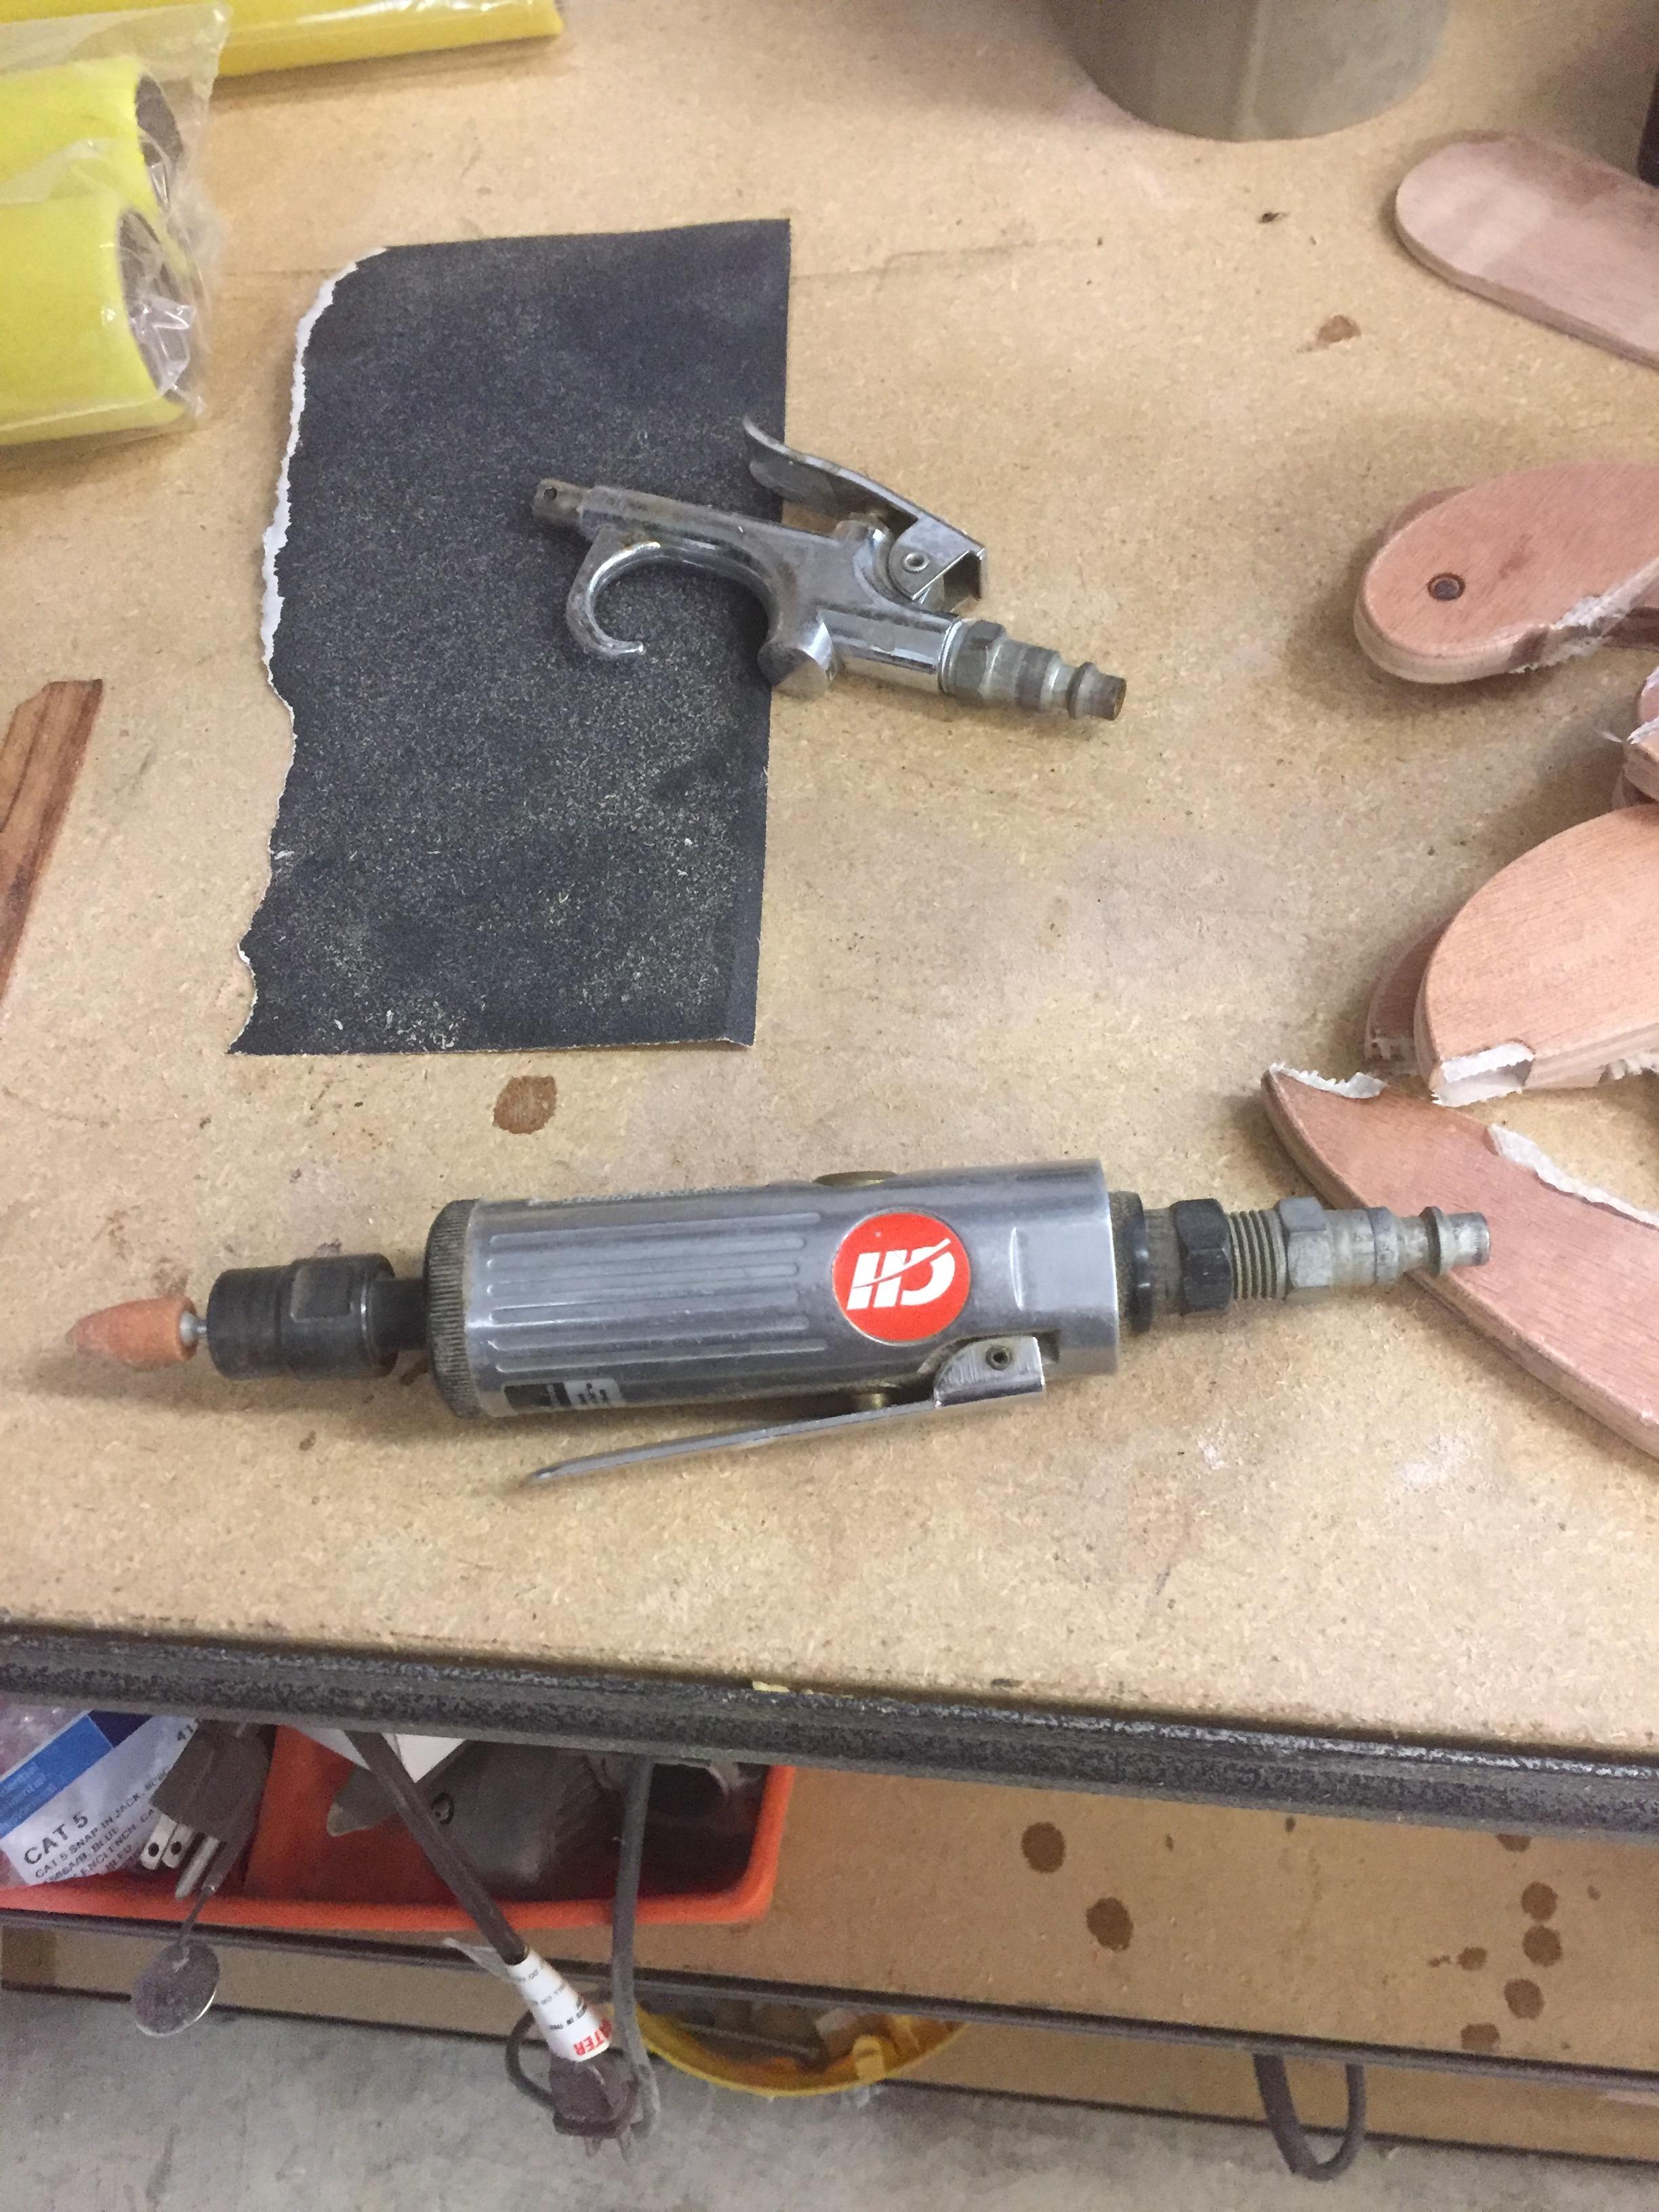
ParticipantHere is some pix. The first one is a air powered die grinder fitted with Dremel tool bits. Makes quick work of cleaning out the door hinge holes, among other things!
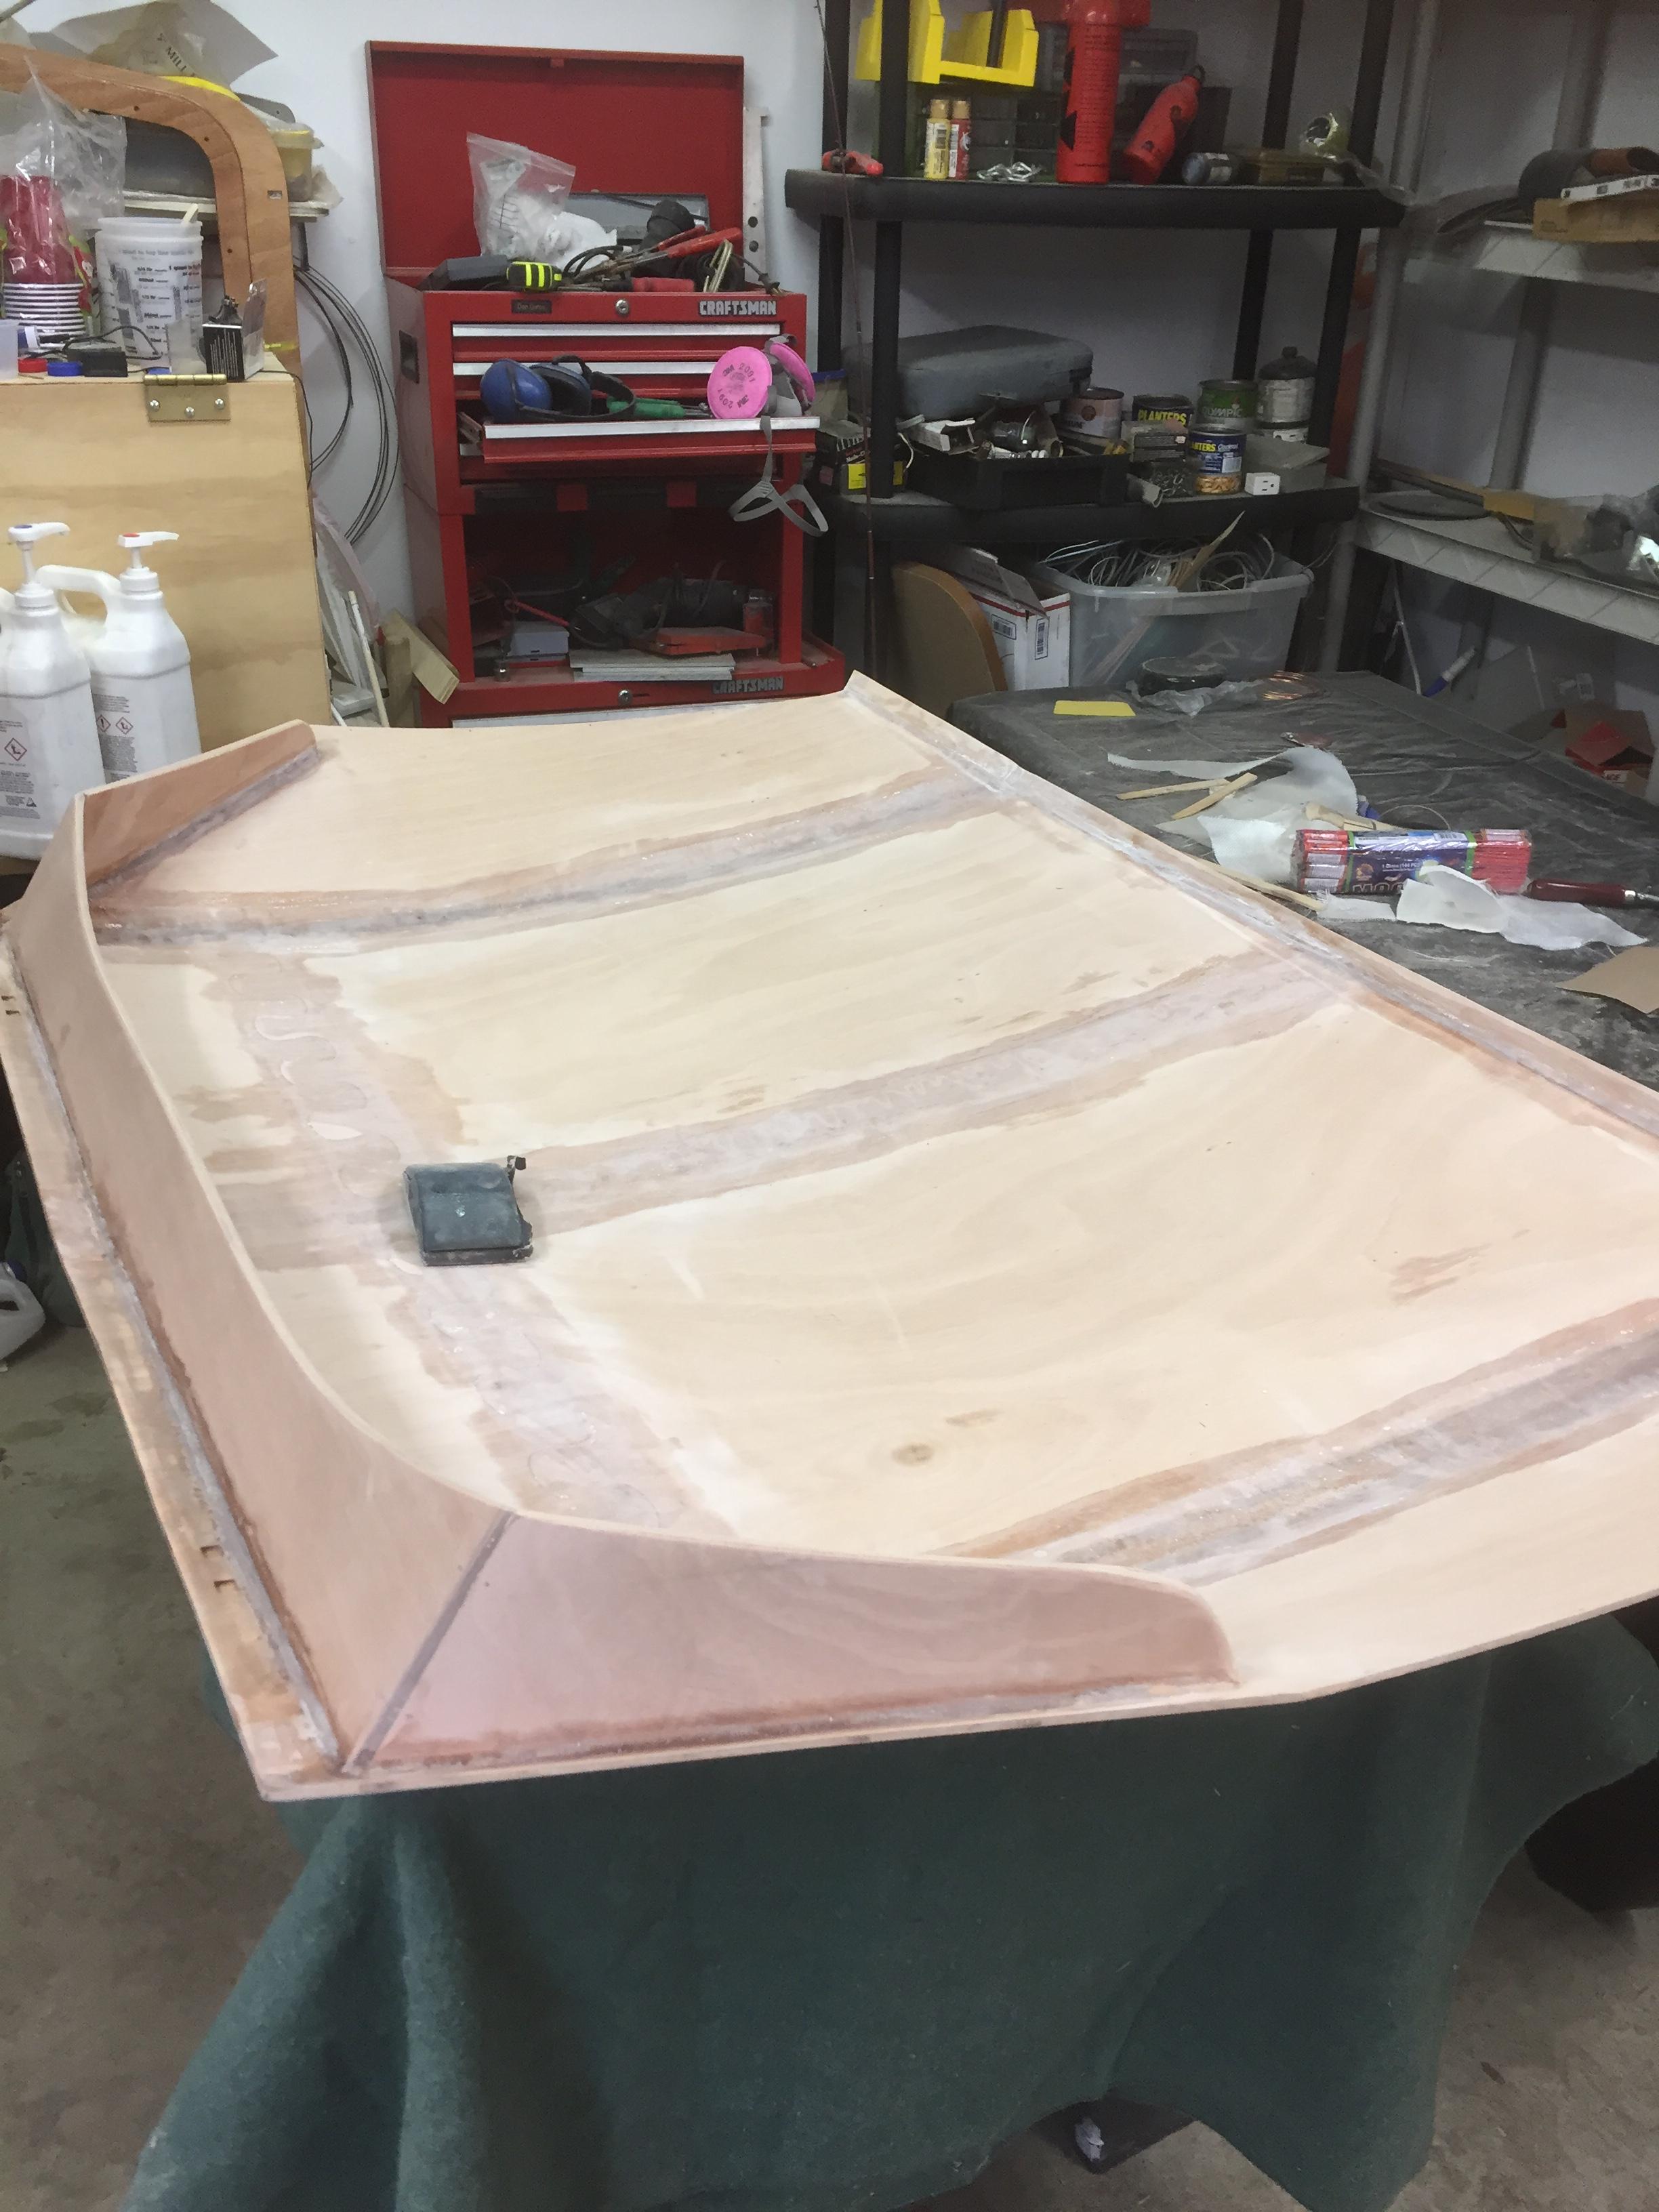
Door sill “bow”, pre-sanding
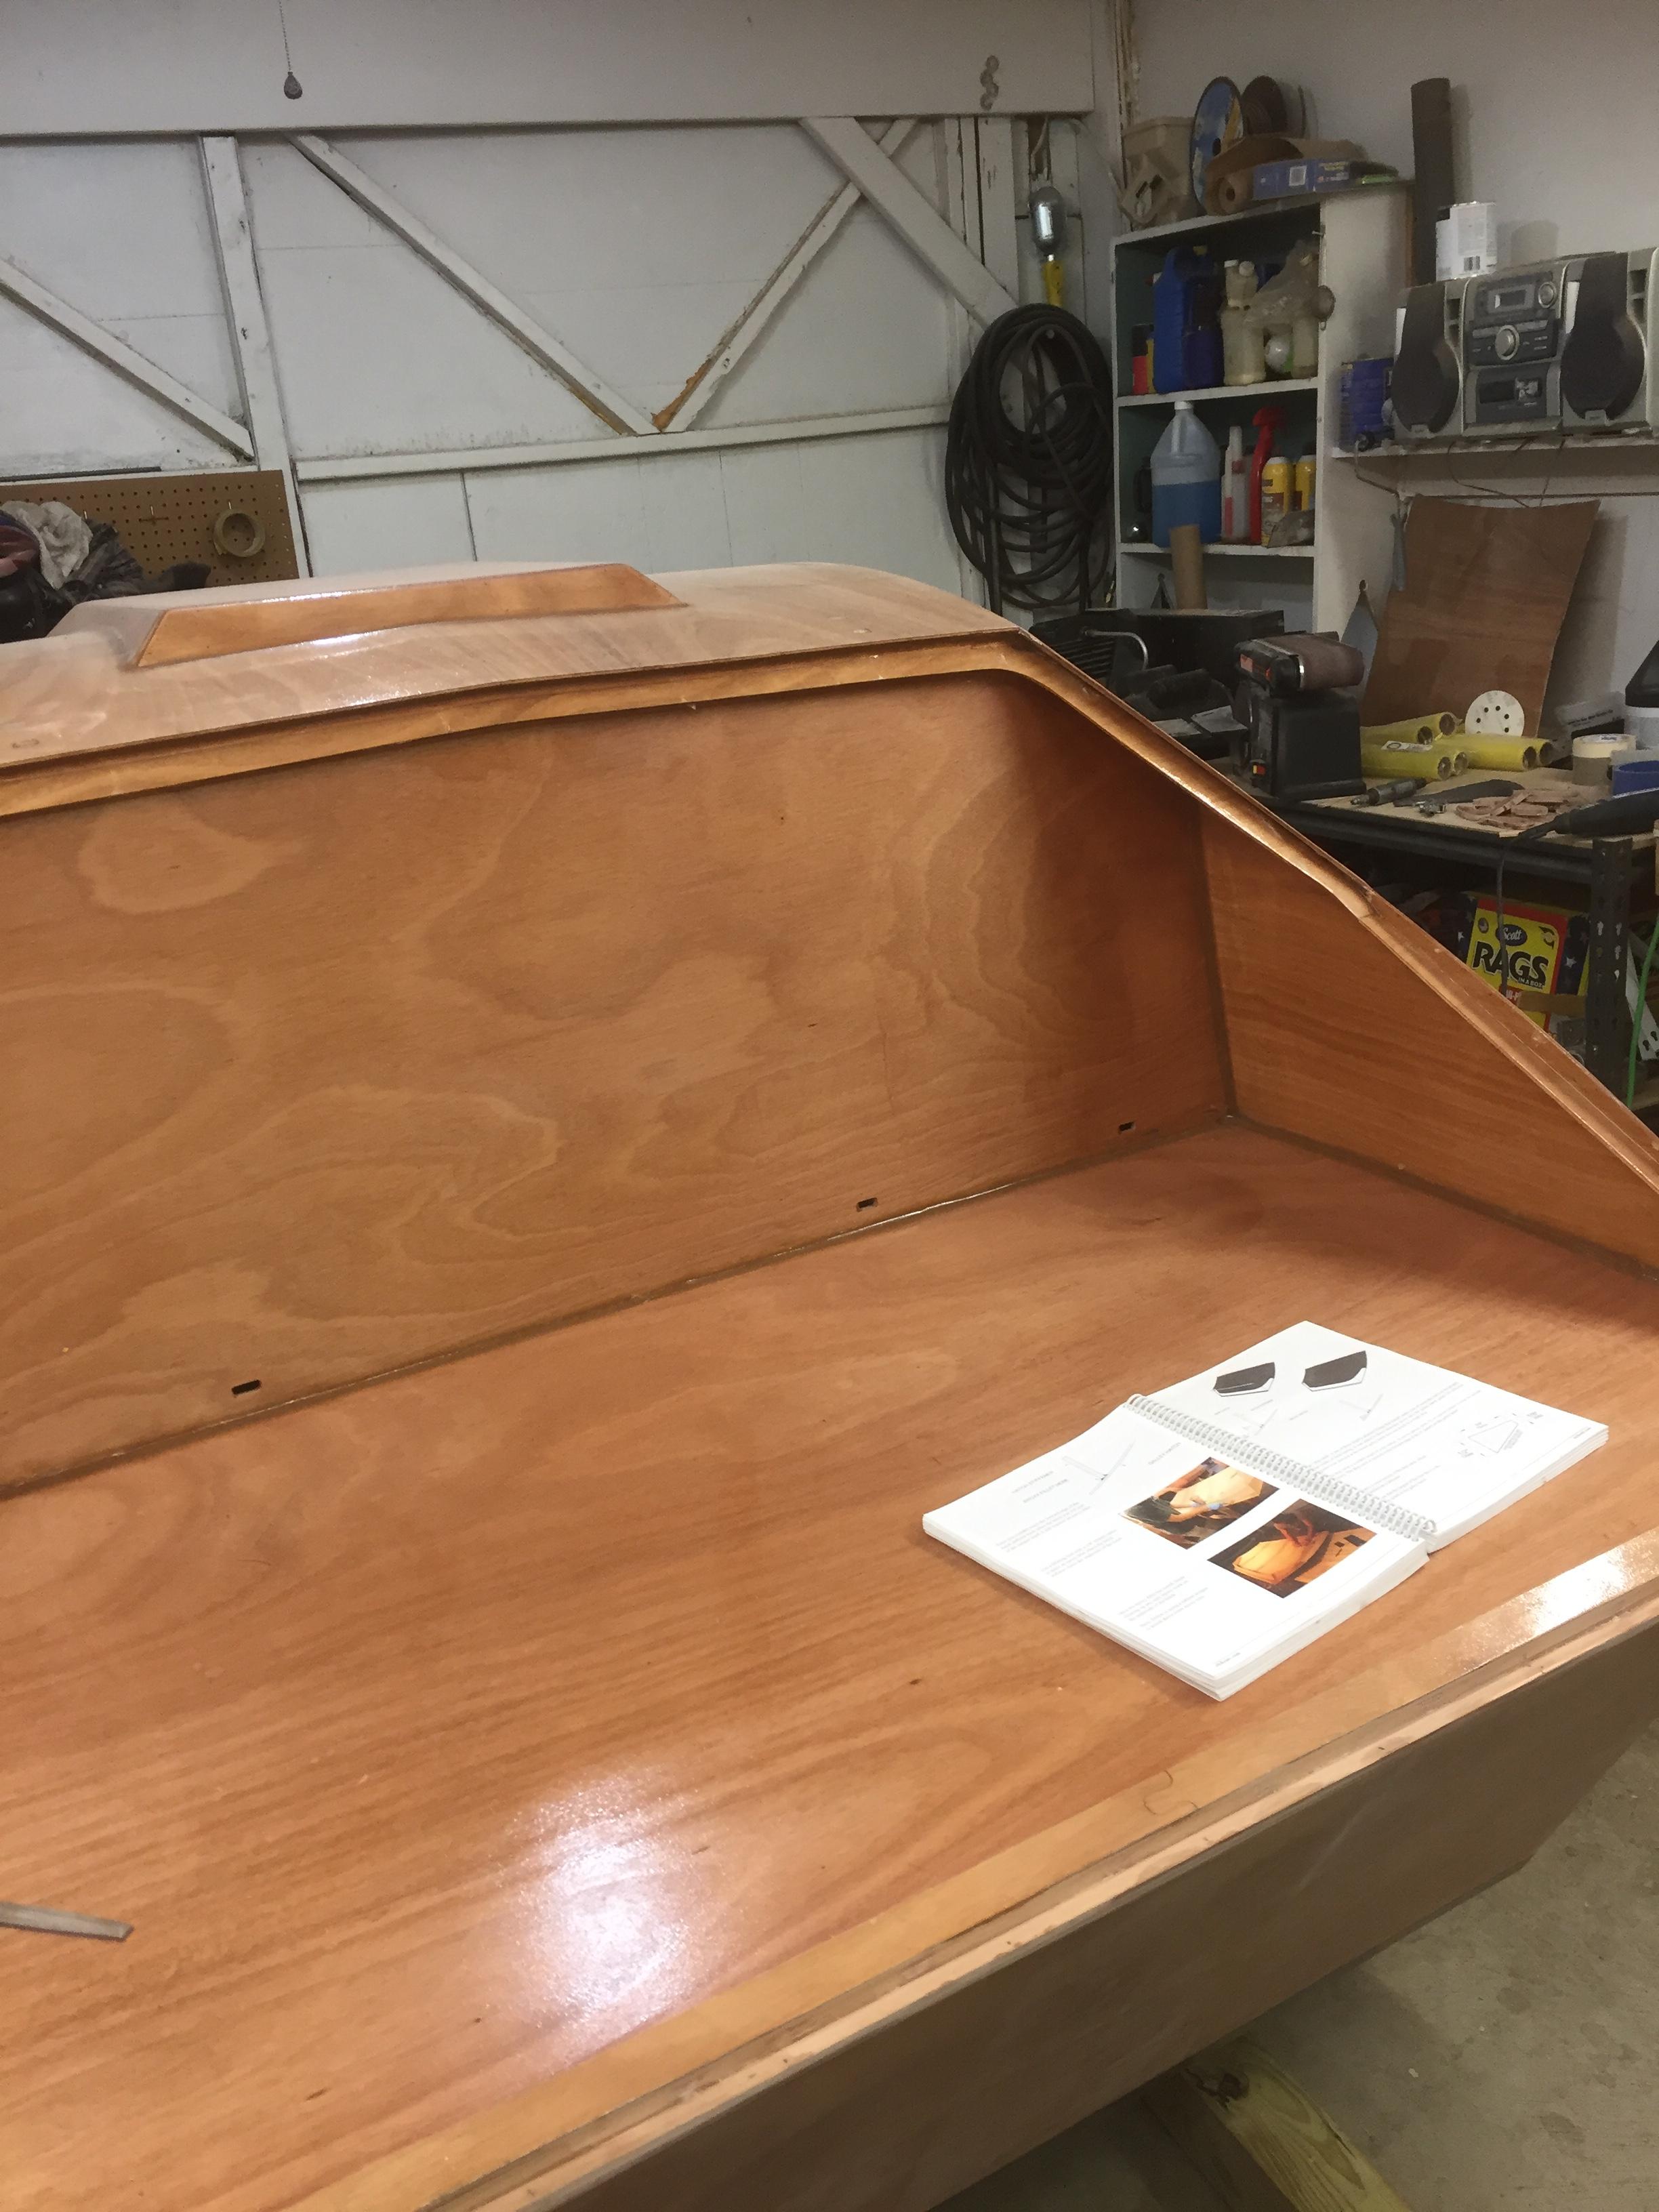
Right side door sill. Pretty happy with it, the door fits well. Note the Tyvek disposable painter’s dropcloth taped inside over the floorboard. It has caught LOTS of epoxy drips and will make final cleanup of the floorboard much easier.
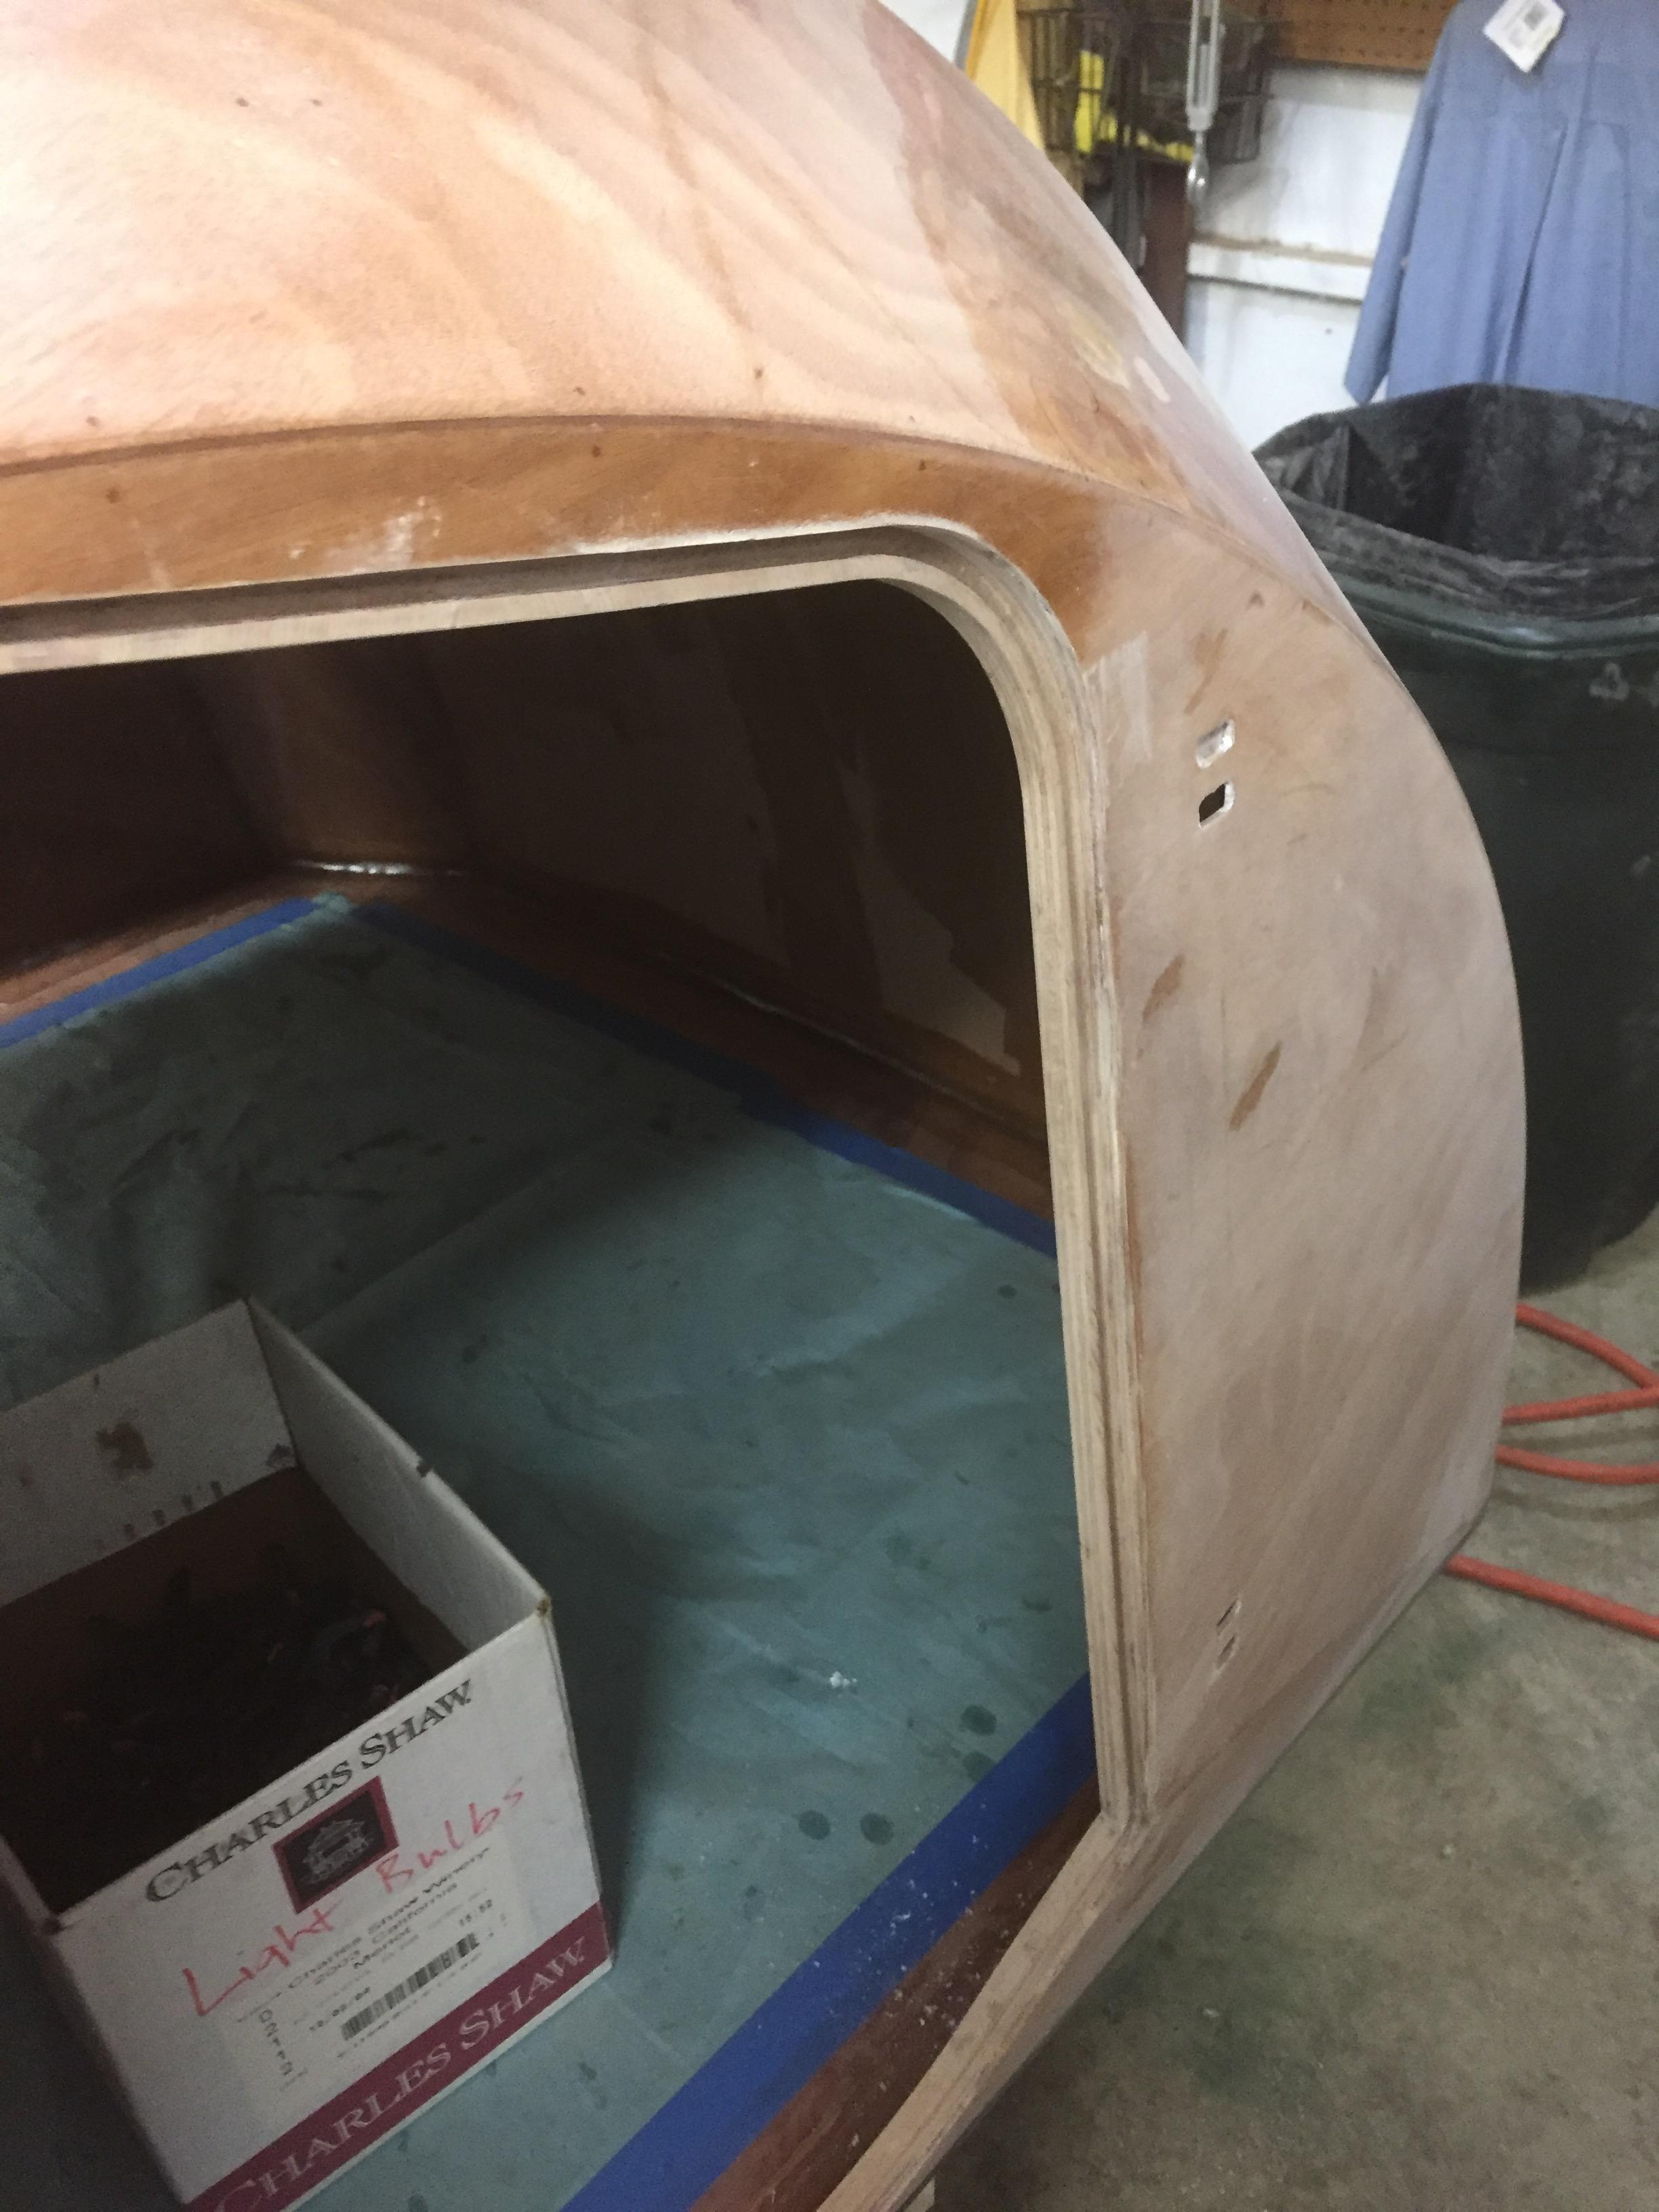
Regarding the floorboard, if I had to do it over I would find, or cut on a table saw, a pair of 1 1/2″ x 1/2″ triangular strips of wood, or look at Lowe’s in the molding department, and glue this strip on the sides of the butt block to form the transition instead of the “1/2″ round over and fillet” that the hymnal specifies. Getting the cloth to conform was a PITA and I was not entirely successful, there were some pretty good air bubbles despite my best efforts. It’s a non-visible area anyway and forming that transition with a triangular wood strip would make that much easier to glass. I chose to not grind out the air bubbles and just press with it, applying a good coat of black gloss enamel to assure a good watertight seal. The wood was pre-coated with epoxy anyway
-
This reply was modified 7 years, 2 months ago by
SOMDTD. Reason: Spelling and added text
ParticipantCLC’s vendor changed the fan flange but kept the part number the same. They contacted the vendor and are getting the older, lower profile fans in for new orders next week. If you haven’t installed the fan I would contact CLC and ask them about exchanging it, if it is an issue for you.
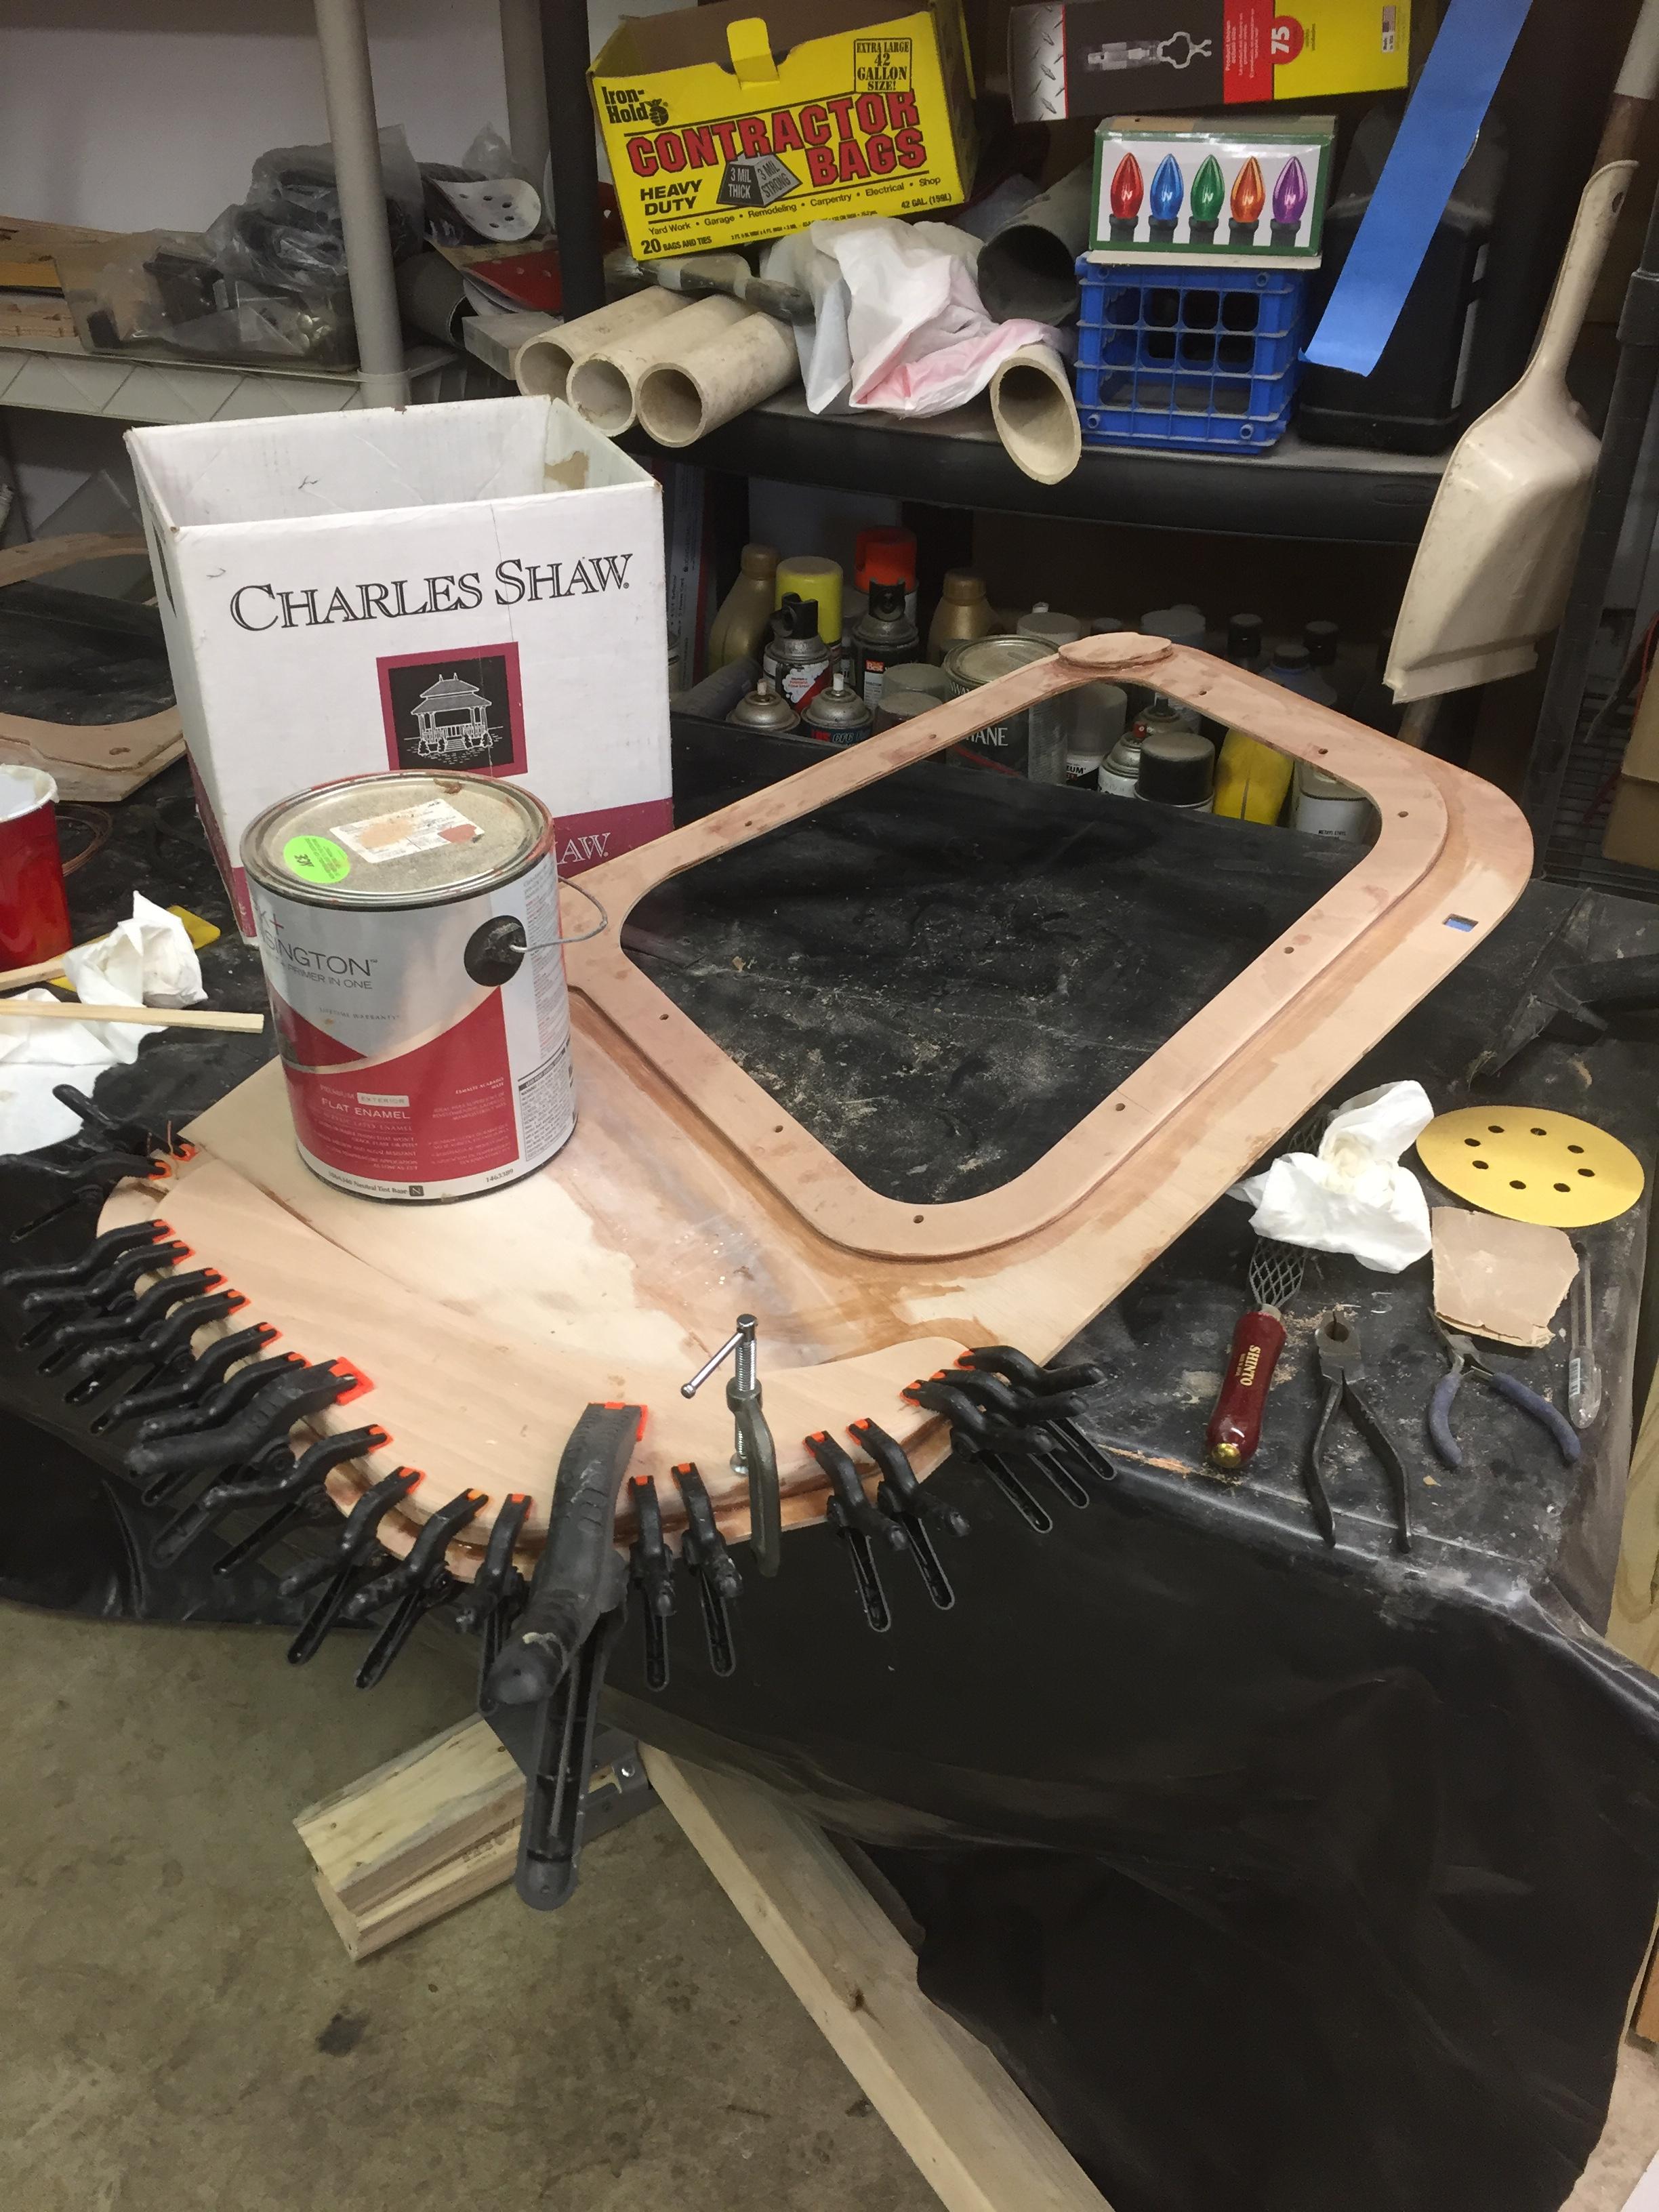
ParticipantWorking on multiple things at once. Did the door sills over the last couple of days. There is a lot of “finish” work in those, sanding, routing the inner side, fitting to a fair thee well. Also working the inside of the galley hatch. Lots of sanding and fairing int he fiberglass tape from “day one” of the project. I elected to round over the galley hatch stiffener edge, that would have been much easier if done before installation. Did the back side fillets.
Pics tomorrow.
ParticipantHi,
I just glued in my door sills… a painstaking process to be sure. What I discovered is that the door sills are flat but the shell of the camper is NOT! I intentionally did NOT clamp the forward door sill to the shell while glueing and filled in the gap with epoxy/cellofill glue. My theory is that the doors have the same curve to them since they are cut from the same panels. I also tapered the ends of the door sill where the upper “bow” and the lower “bow” meet, due to the roughly 3/32″ of filler and glass tape where the panels meet. I tapered the top of the upper sill for the same reason. I could have ground the glass away but did’ want to do that much sanding as well as the strength it would take away from the door area.the rear door sill shell is a LOT flatter so a clamped like crazy there. I will say, once fully worked in, the door sills fit nearly perfectly! I rounded the interior side with a 3/8 round over router bit.
One thing I have learned along the way is epoxy that goes on is epoxy that needs sanded off later! Tip: Take epoxy cleanup seriously, SO much easier to thougoughly clean wet fillet goo than sand it off later! 🙂
ParticipantYou are obsessing. Stop it. Keep calm and build on. It’s a beauty mark, and a “there I was” story.
ParticipantI spoke with John Harris with regard to the clear coat and UV protection. He says that it provides the nessessary UV protection just fine. Among the reasons to do clear coat is that the resultant finish is considerably harder than varnish and more resistant to abrasion (rock dings, and trade show wear in CLC’s case). Another is that it being an outsourced step, it’s a one day in the shop and done thing, not an insignificant thing. Downside is that it’s expensive. Retail at a typical auto body shop is probably pushing $1000. Me, I have a “hook up” (to use an old Navy term) and it’s going to be about a hundred bucks and a case of beer.
One still has to sand to a fair thee well! Clear coat will not substitute for inadequate surface preparation. I will go down to 320 with the DA sander and wet sand with 400 on the outside. I will be having it shot before I install the door latches, windows, and mushroom vents; and I will have the galley hatch off. We’ll clear coat inside and out!
ParticipantI am going to have a auto body shop spray clearcoat on mine, inside and out. I have a buddy that owns a shop and he will do it for material cost, as long as I show up 99% ready to shoot.
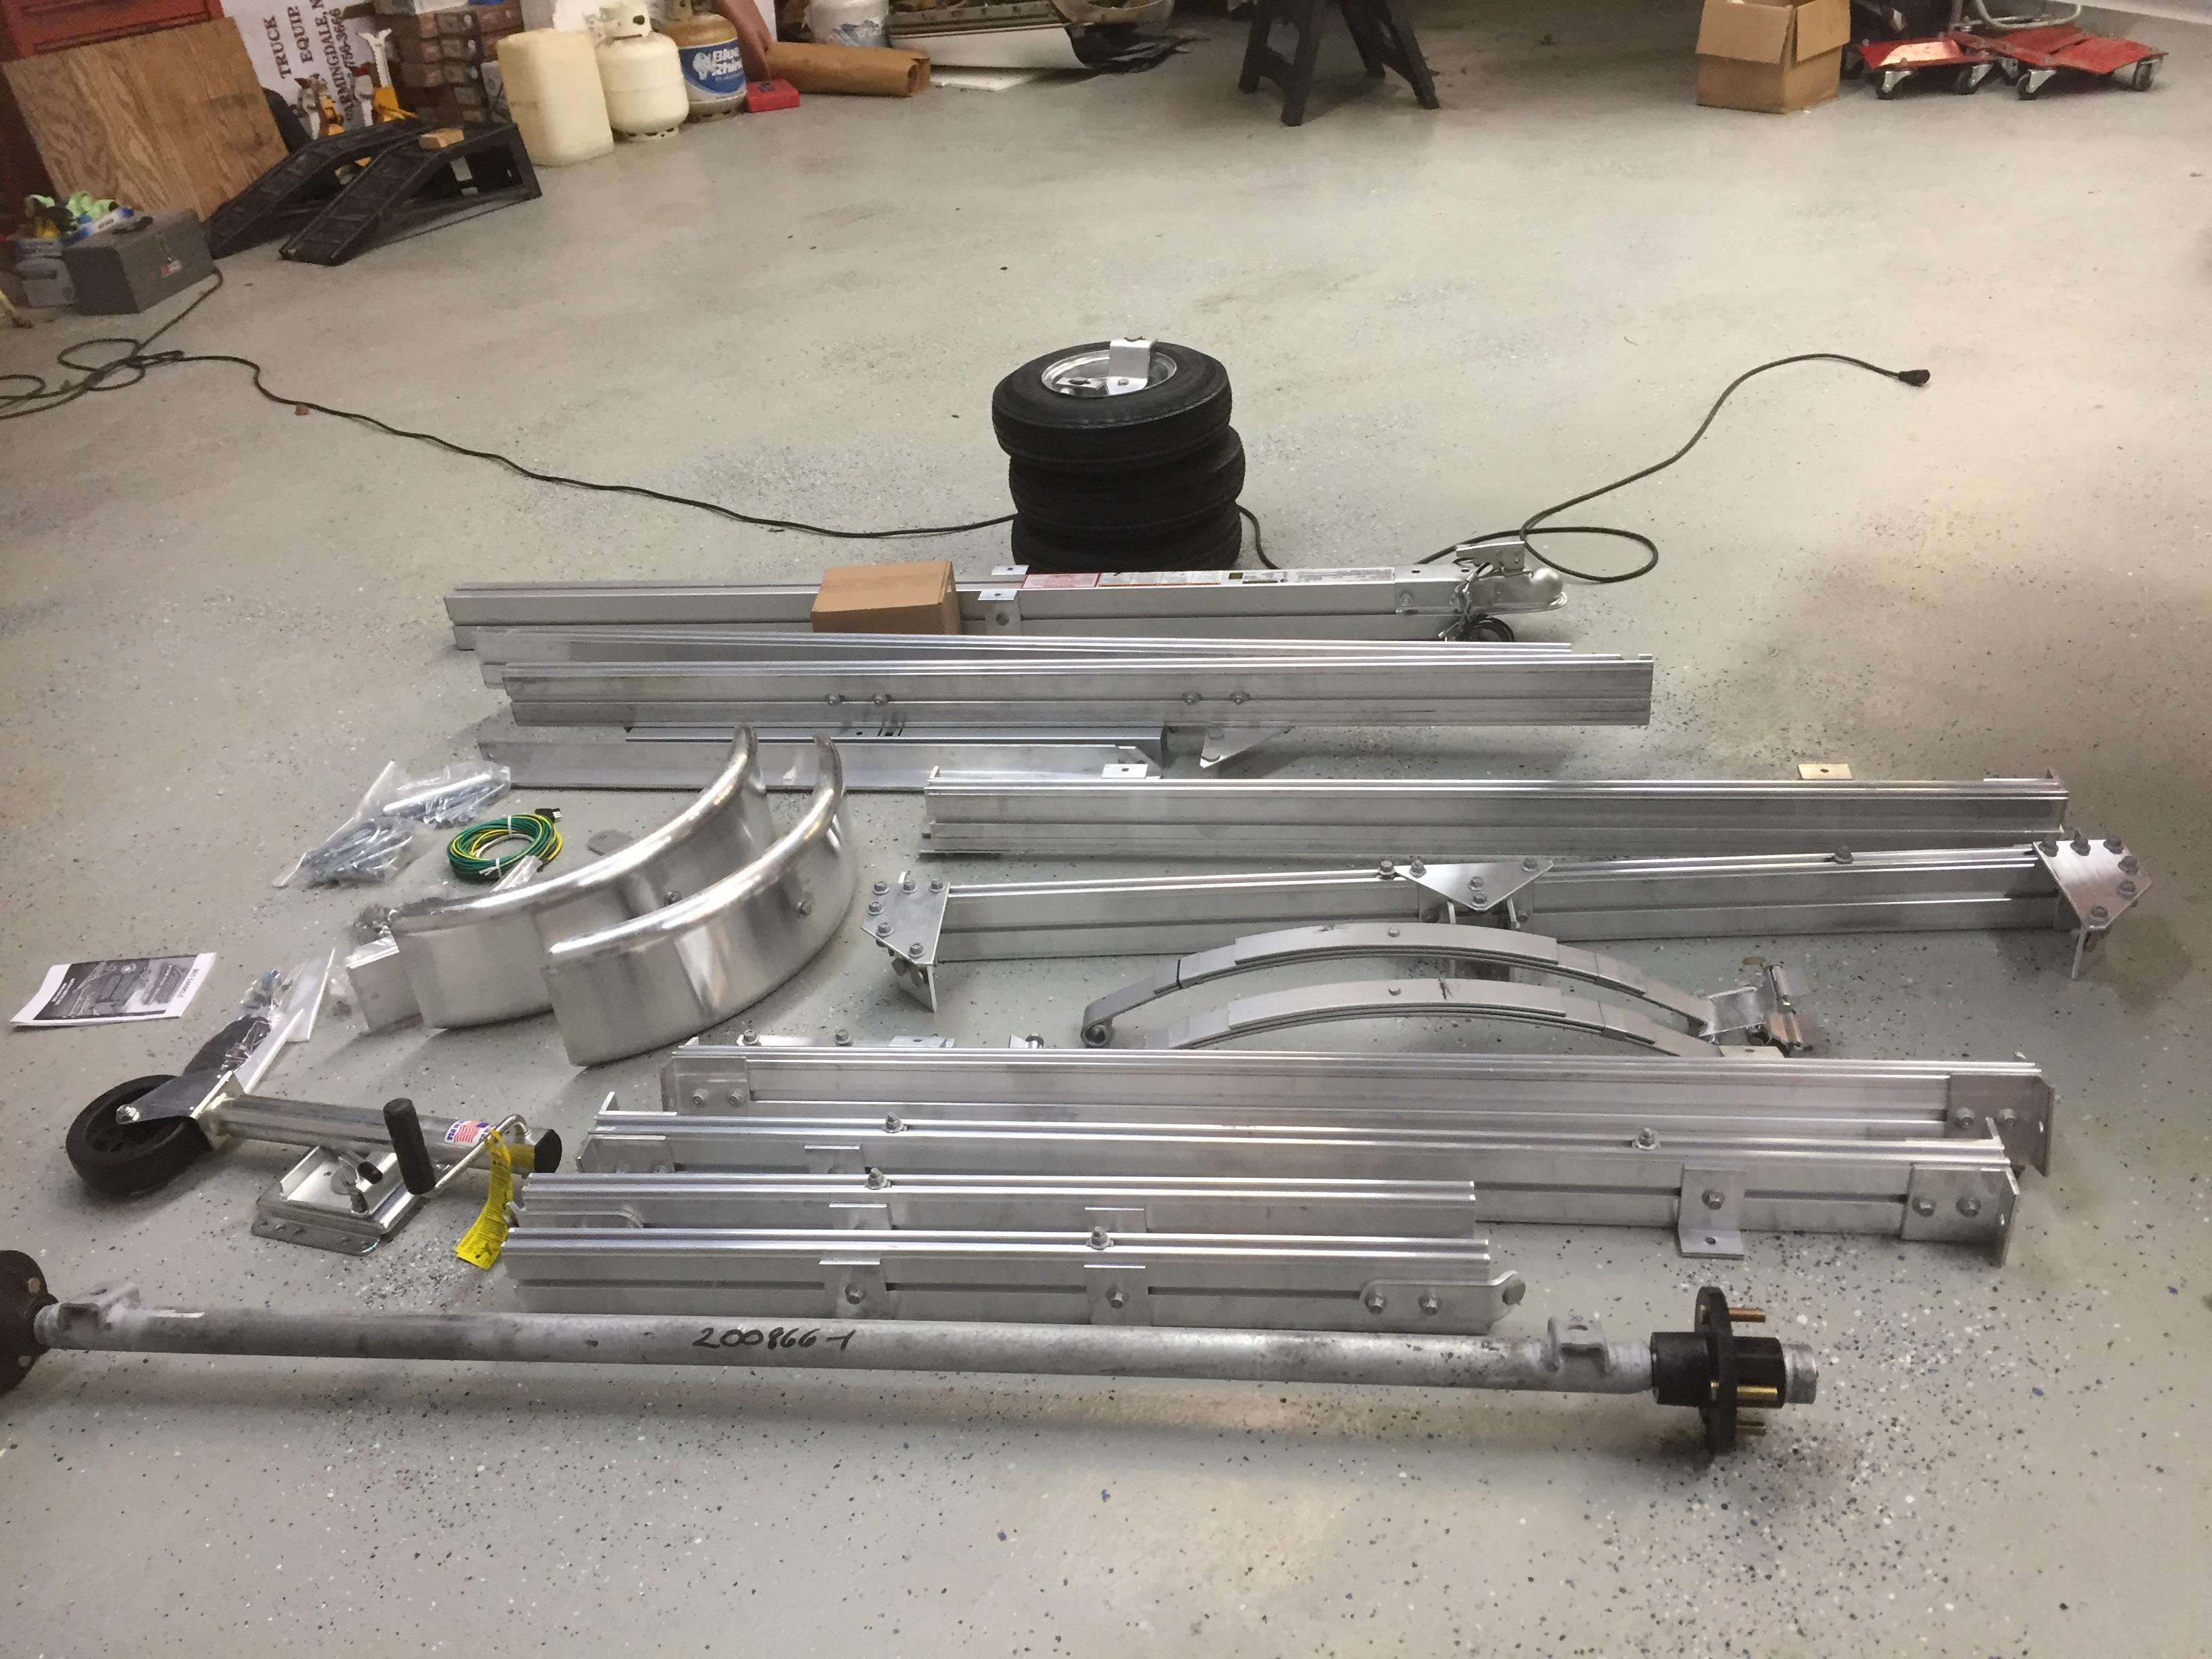
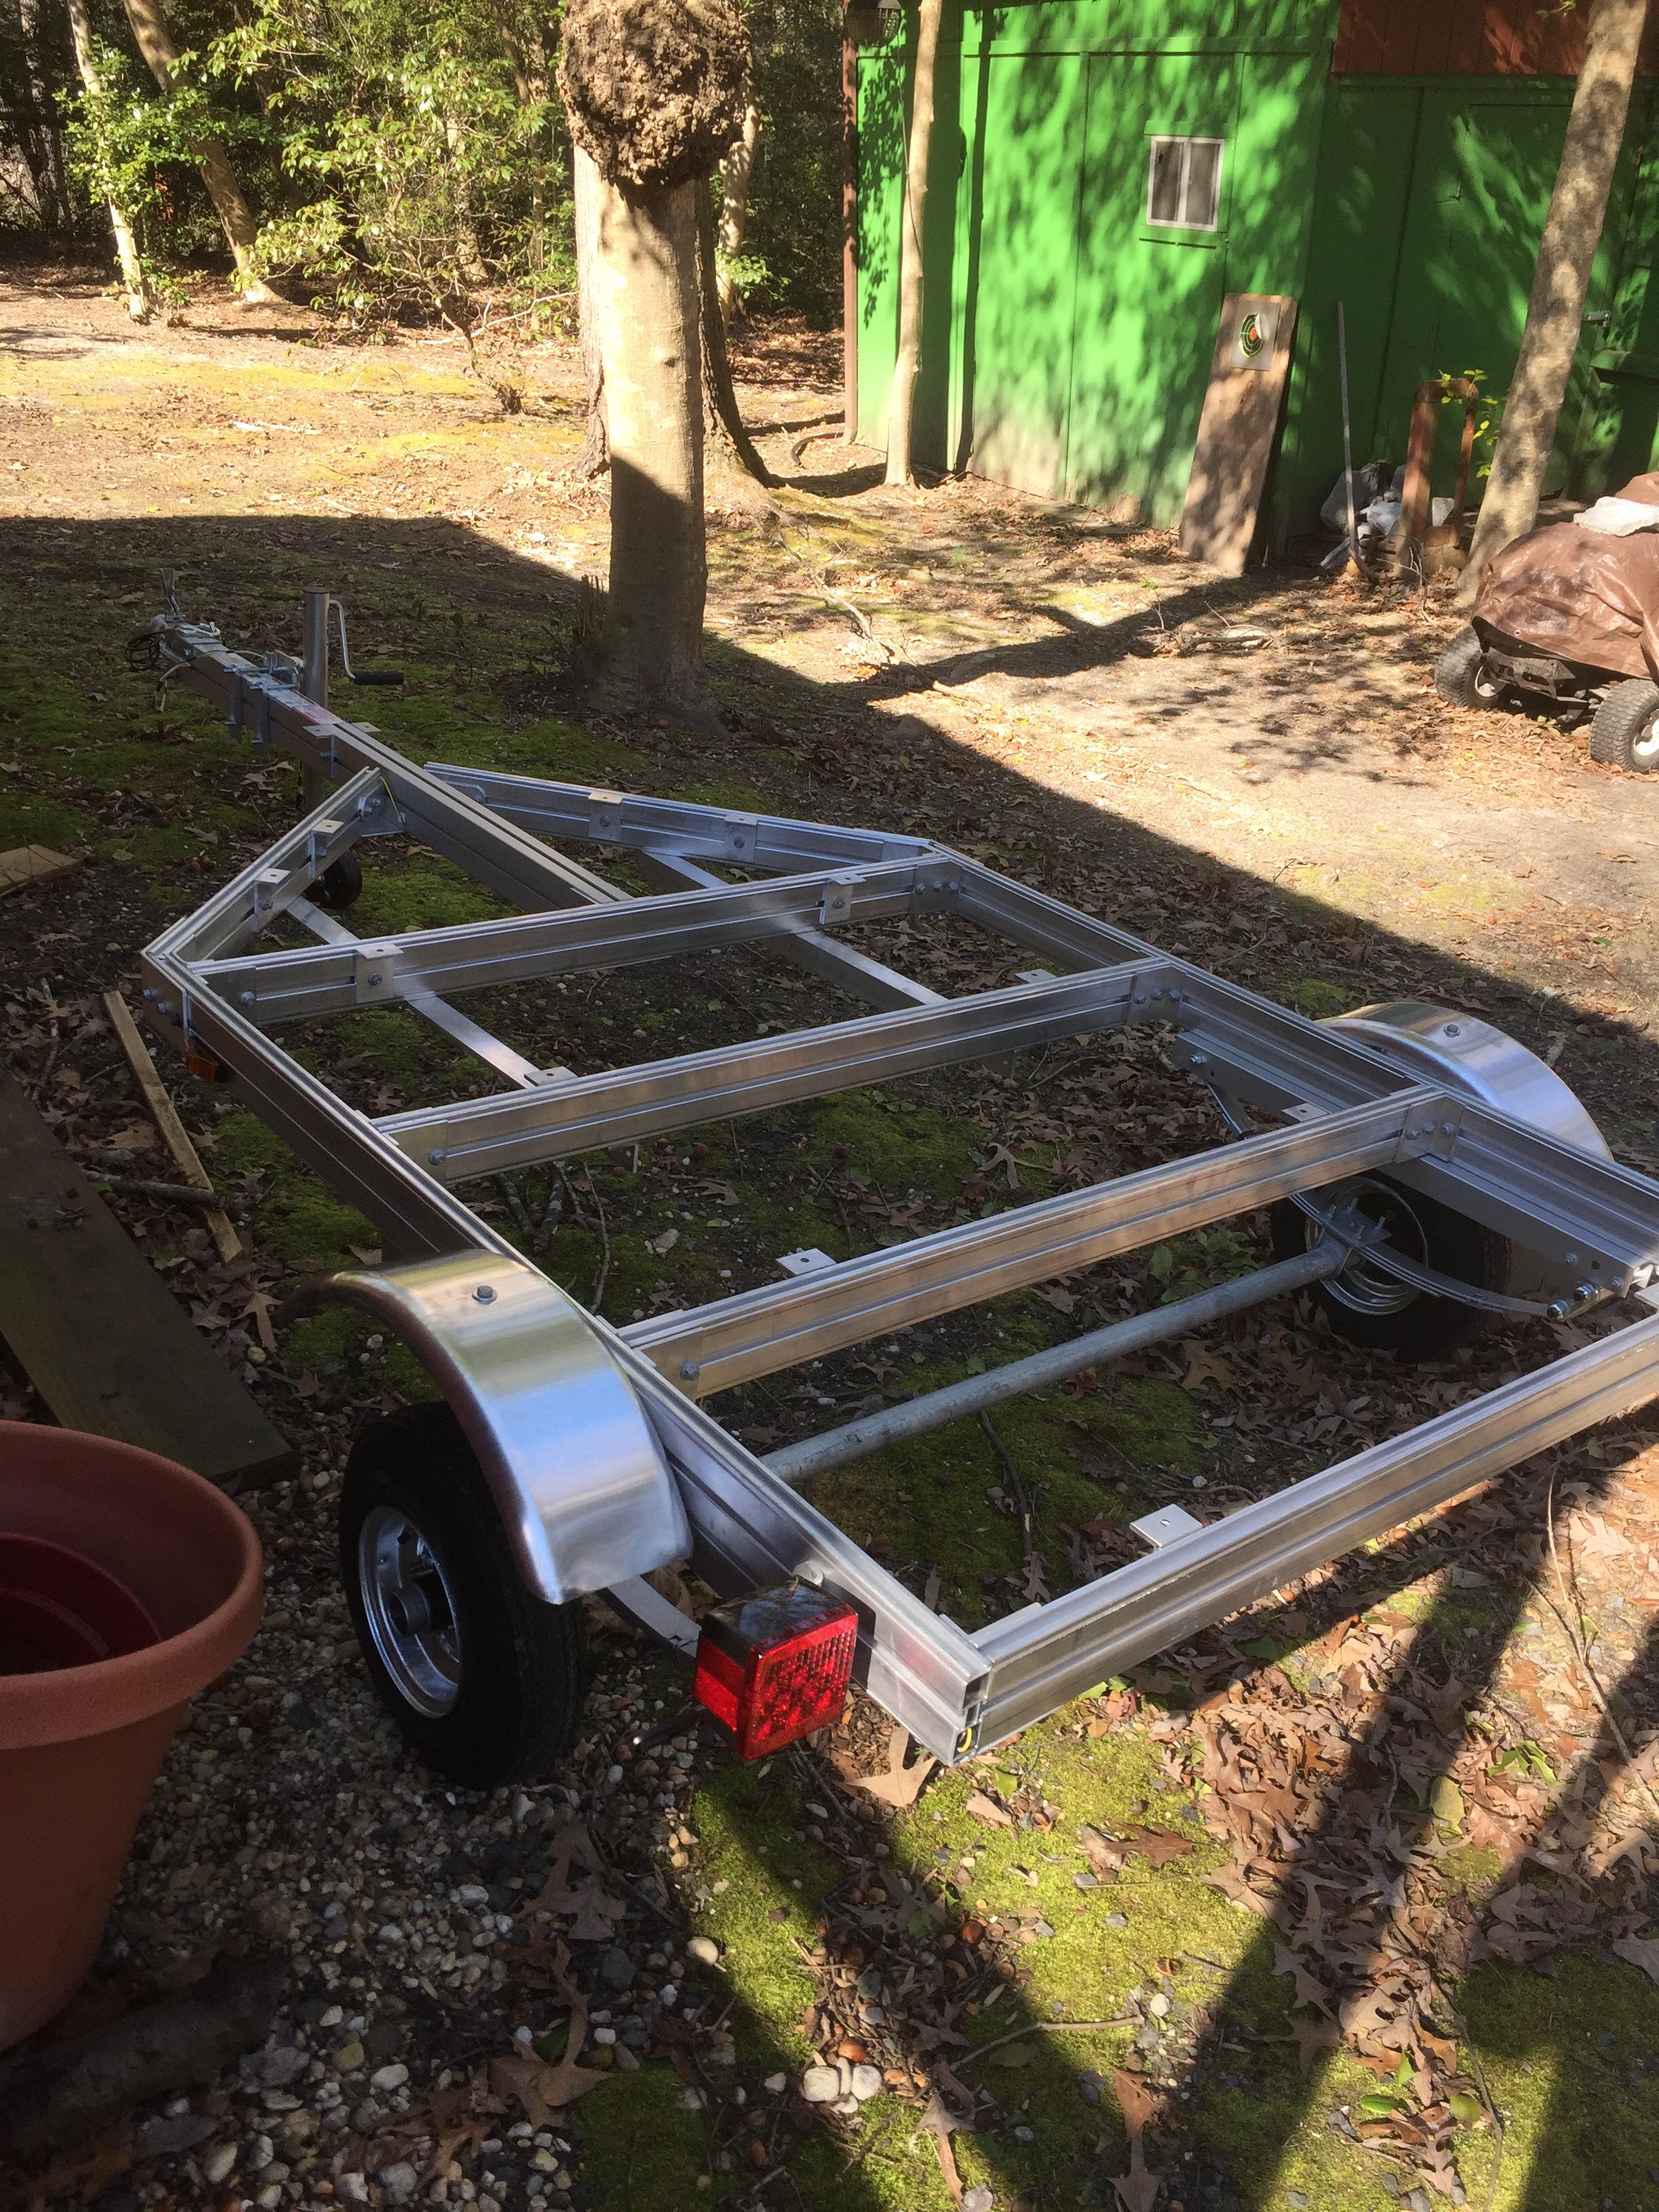
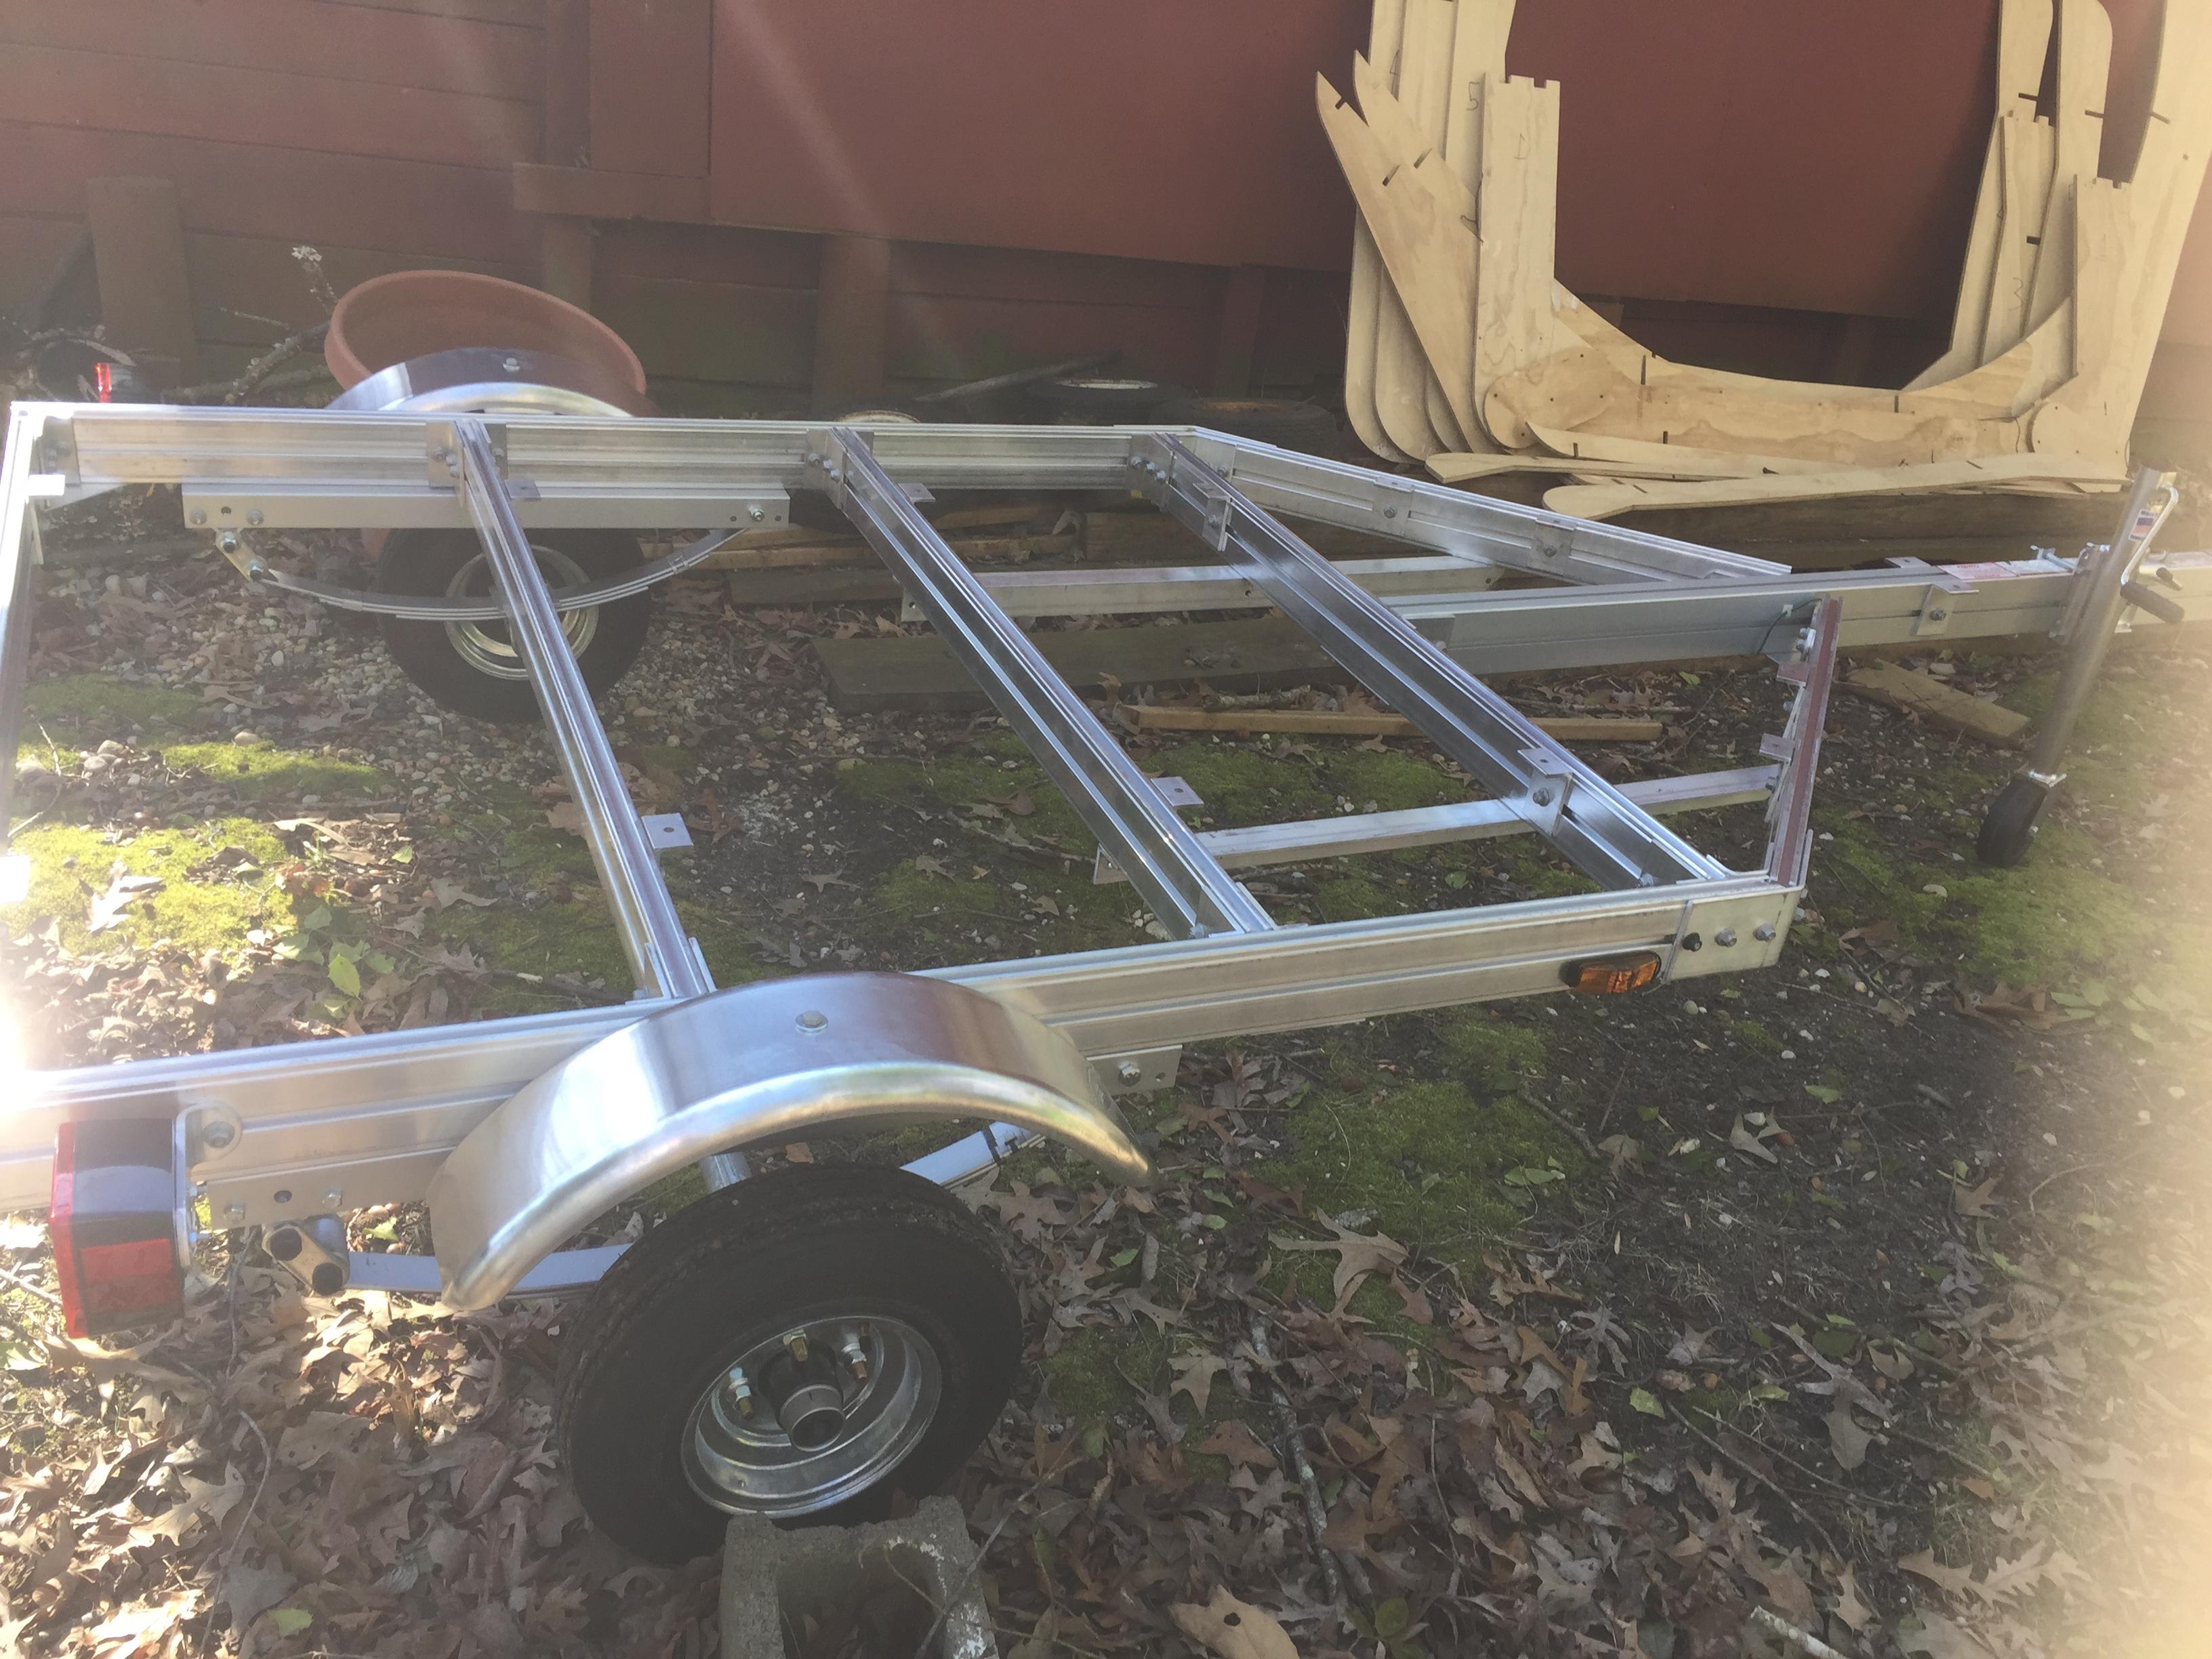
ParticipantHere’s some pix of the Trailex trailer kit….
And gluing the stiffener onto the first door….
 Participant
Perfection is unlikely on a project like this. My project has a good number of minor defects and at least one major defect. This isn’t for score, it’s to produce a pleasing result that has practical application. That looks totally repairable, however replacing the panel is the best option. I bet CLC will cut you a new panel, but even if they don’t just lay it flat, apply a fiberglass patch over it and press forward. The crack will be visible but the fiberglass patch will essentially dissapear. In the end it can be covered with a sticker, a flag, or other decorative item.
Don’t lose heart, and believe me, this will NOT be that last imperfection. Even with the warts on my trailer, it’s still pretty darn nice looking, especially to others. *I* see the defects, but essentially nobody else does!
ParticipantI assembled the Trailex trailer today. Went together easy once I got left/right and right side up / upside down figured out. Finally. Four assemble / dissemble / do-overs later. Tip: REALLY pay attention to the photos! Doing it right once would have saved me 2 hours.
Also been working on building the doors. Window sills in, one door stiffener shaped & sanded. One more to go.
Also epoxy coats on the transom, should paint the bottom in the next day or so, after finishing sanding the transom.
Just little time consuming tasks.
-
This reply was modified 7 years, 2 months ago by
ParticipantNice job! If you are ever passing through Southern Maryland…..
ParticipantI went with the 8″ wheels on the trailex trailer for just this reason, galley flat height, as well as the “door sill height”. The CLC demo unit has the 12″ wheels and I found that the galley flat height was just a tad too high. Also, sitting in the door, my feet were a couple of inches off the ground. It’s a preference thing though, others may like the higher ride height. The trailer tows just fine with either wheel size, so that issue is a wash.
ParticipantI am going to get the headliner. I think it adds an important touch to the overall utility of the camper.I don’t think I could fabricate something that looks that good for any significantly less money.
ParticipantDid you use the CLC galley kit? If so, CLC’s paper towel holder is simply two plywood rings and a metal tube, probably cut from a curtain rod.
ParticipantOn electrical, I am going the opposite. My goal is to have a panel that rivals the cockpit of an F-16. I will build in a laptop connected to a panel mounted monitor // TV along with a marine stereo head unit. Speakers in the cabin and the galley. I will use a powered digital TV antenna and use the tuner in the TV for over-the-air broadcast TV reception — which is surprisingly widely available! Also putting a dedicated 4G WIFI hotspot. 115V inverter, as well as pass-through 115V (for use when “shore power” is available). I have located a 250 watt electric heater which ought to be enough for the small cabin volume. Considering this is as well : http://www.climaterightair.com/applications/rv-trailer-air-conditioning-and-heating/climateright-5000-btu-a-c-heater.html
It’s $500 but for the primary purpose I plan to use the TD for it might make sense.
I’ll use it for camping and such of course, but my “couple times a week” use will be a portable break / nap “pod” for work. My work involves real time operations control that runs 24/7, and I’m “on console” on a 2-on, 2-off schedule. When working a night shift, having a napping spot from 0100 to 0300 sounds mighty nice. I have to remain on call and close by, of course.
-
This reply was modified 7 years, 2 months ago by
-
AuthorPosts