Forum Replies Created
-
AuthorPosts
-
SOMDTD
ParticipantDon Gates, Calvert, Maryland. Started 1/1/17, completed 3/31/17. (Except for headliner and audio system installation)


-
This reply was modified 7 years, 1 month ago by
SOMDTD.
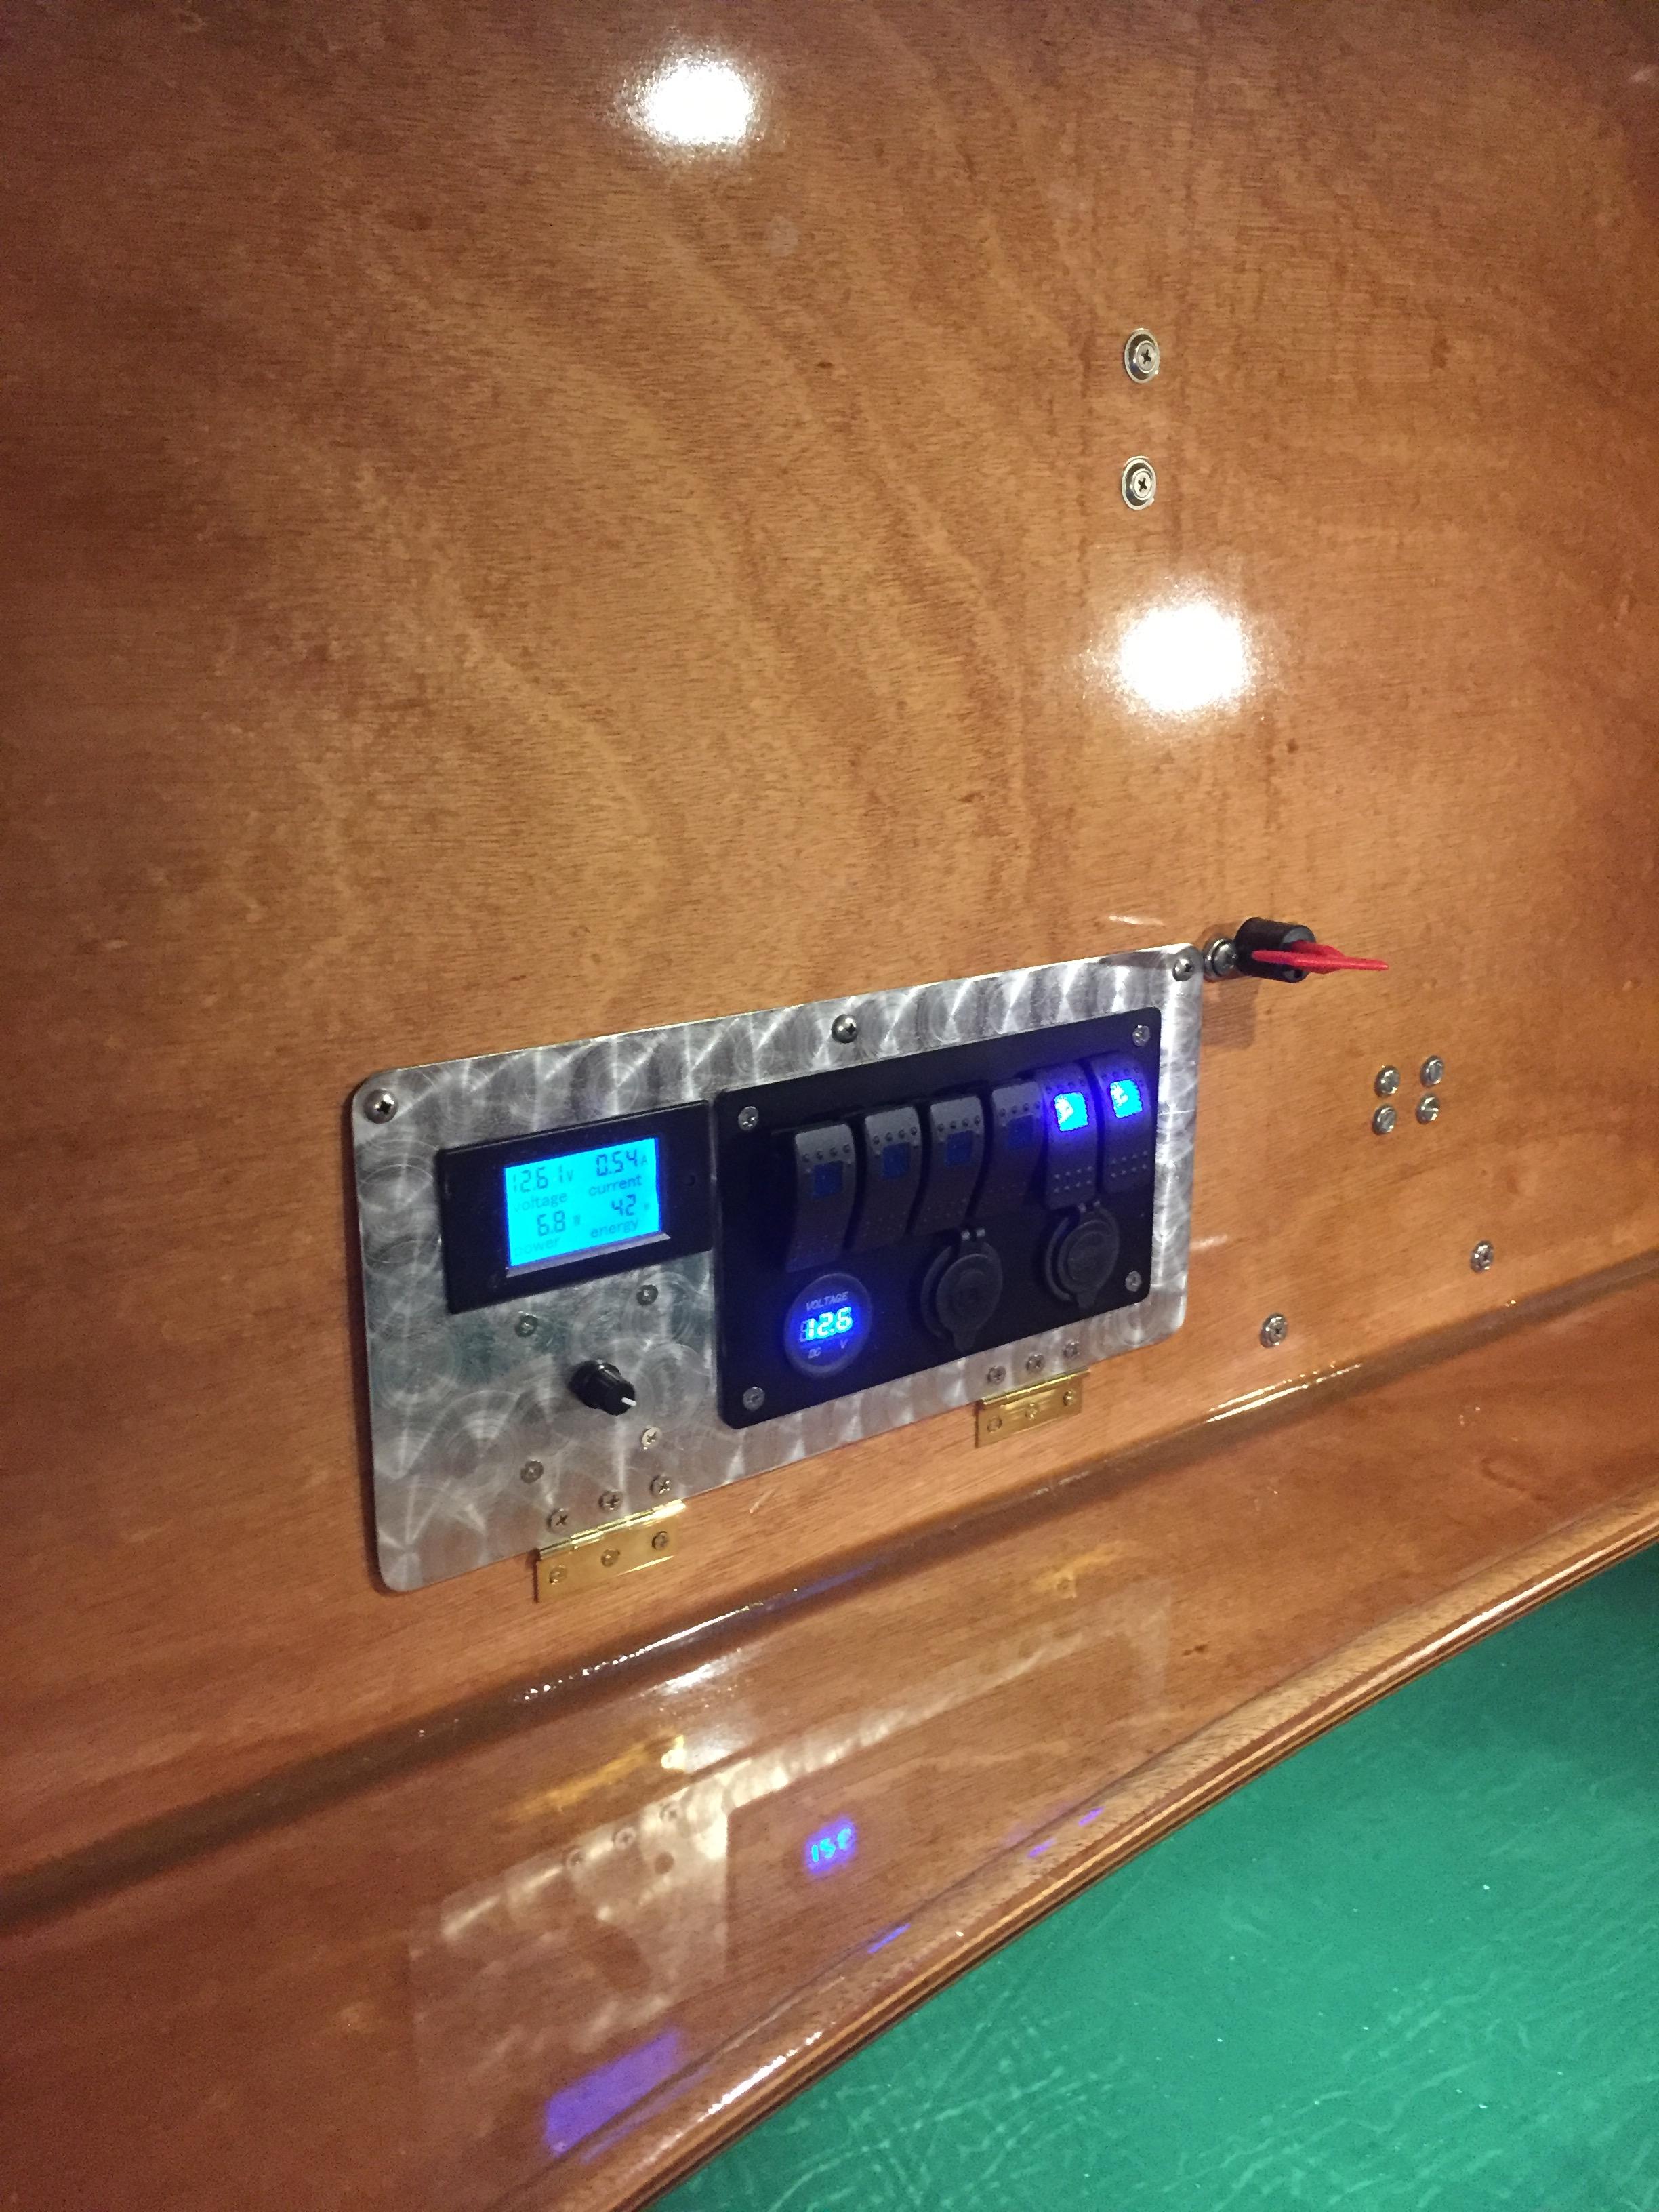
ParticipantAce hardware had the lights, a. Bit pricey at $40 for 3 of them. Damn things wire was marked wrong, wire with the “-” was the positive lead. Backwards. As for fitting, I cut two 2″ diameter wood discs from 3/4 plywood and sanded them to fit in the holes, then flush mounted the pucks. Drilled a 1/8″ or so hole in the door sill “ear” for the wire. Aluminum tape holds the wire in place.
Wire splicing technique: strip 1/2″ of wire on each, twist ends, slide on heat shrink, form into “J”, hook two “J”‘s together. Solder splice. I mostly used a 140 watt soldering GUN, worked well although a iron would work two. The gun is nice since it gives you lots of heat fast. Let splice cool, slide heat shrink over it and hit it with a BIC lighter.
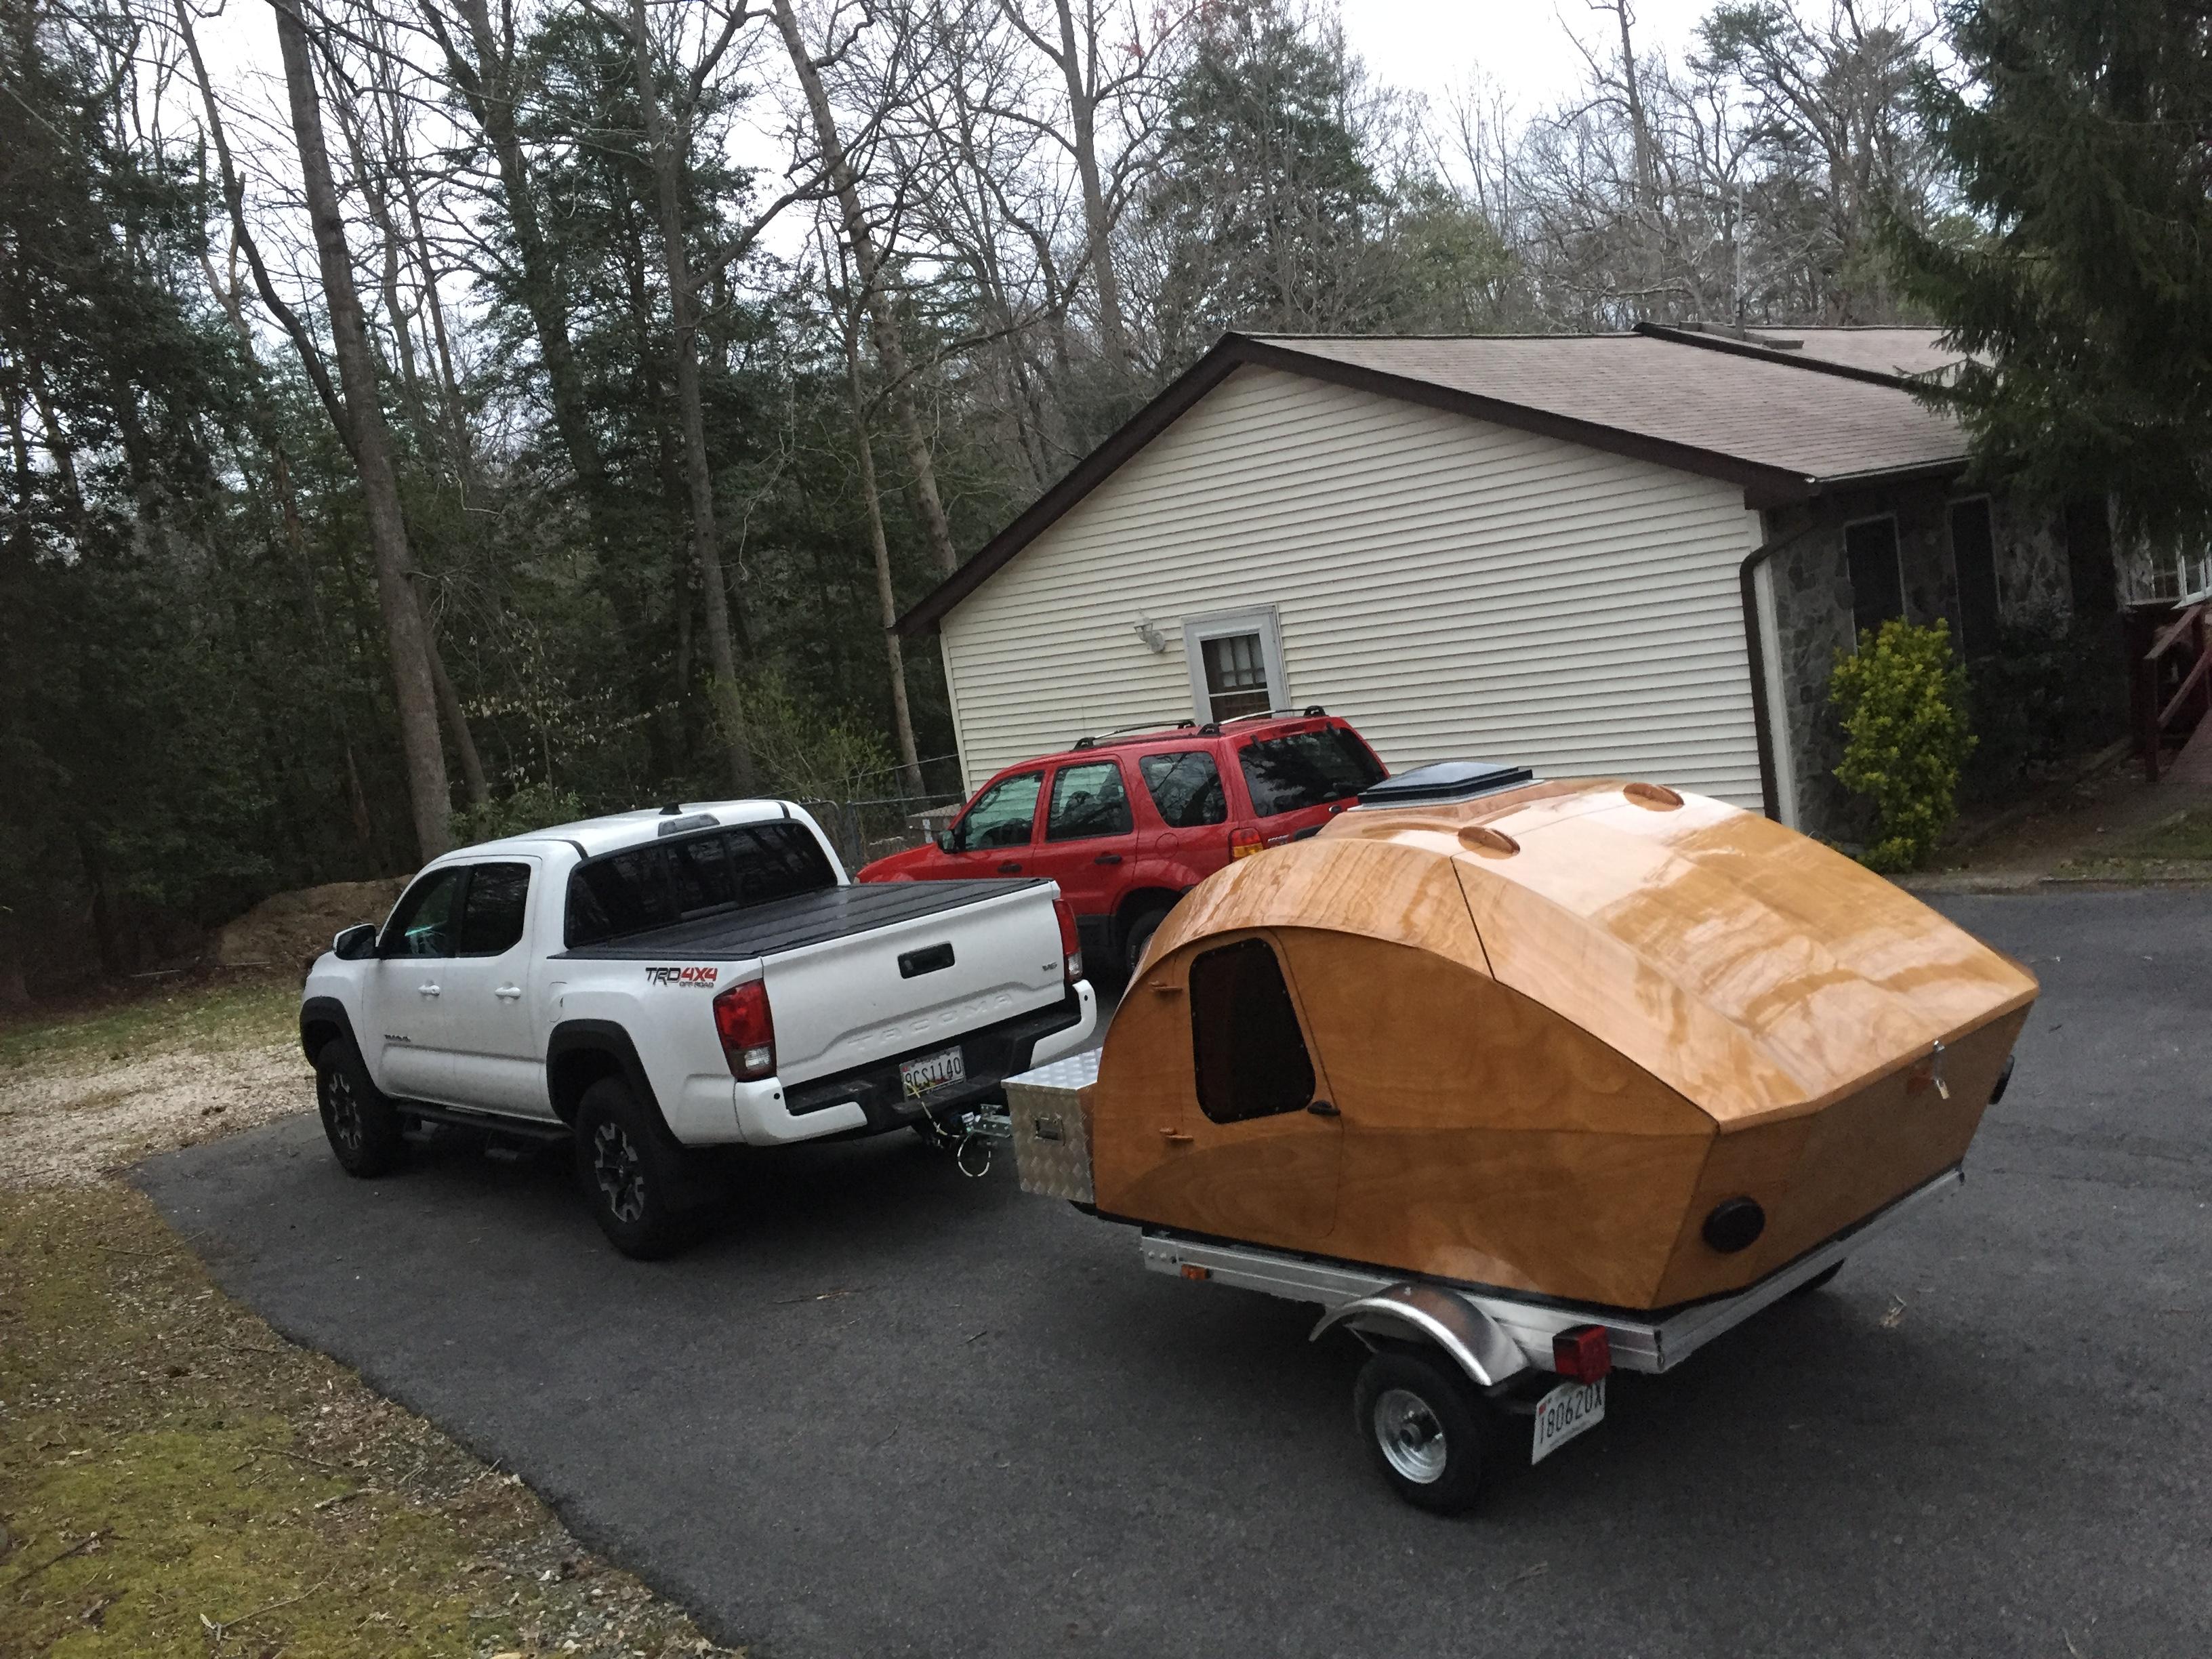
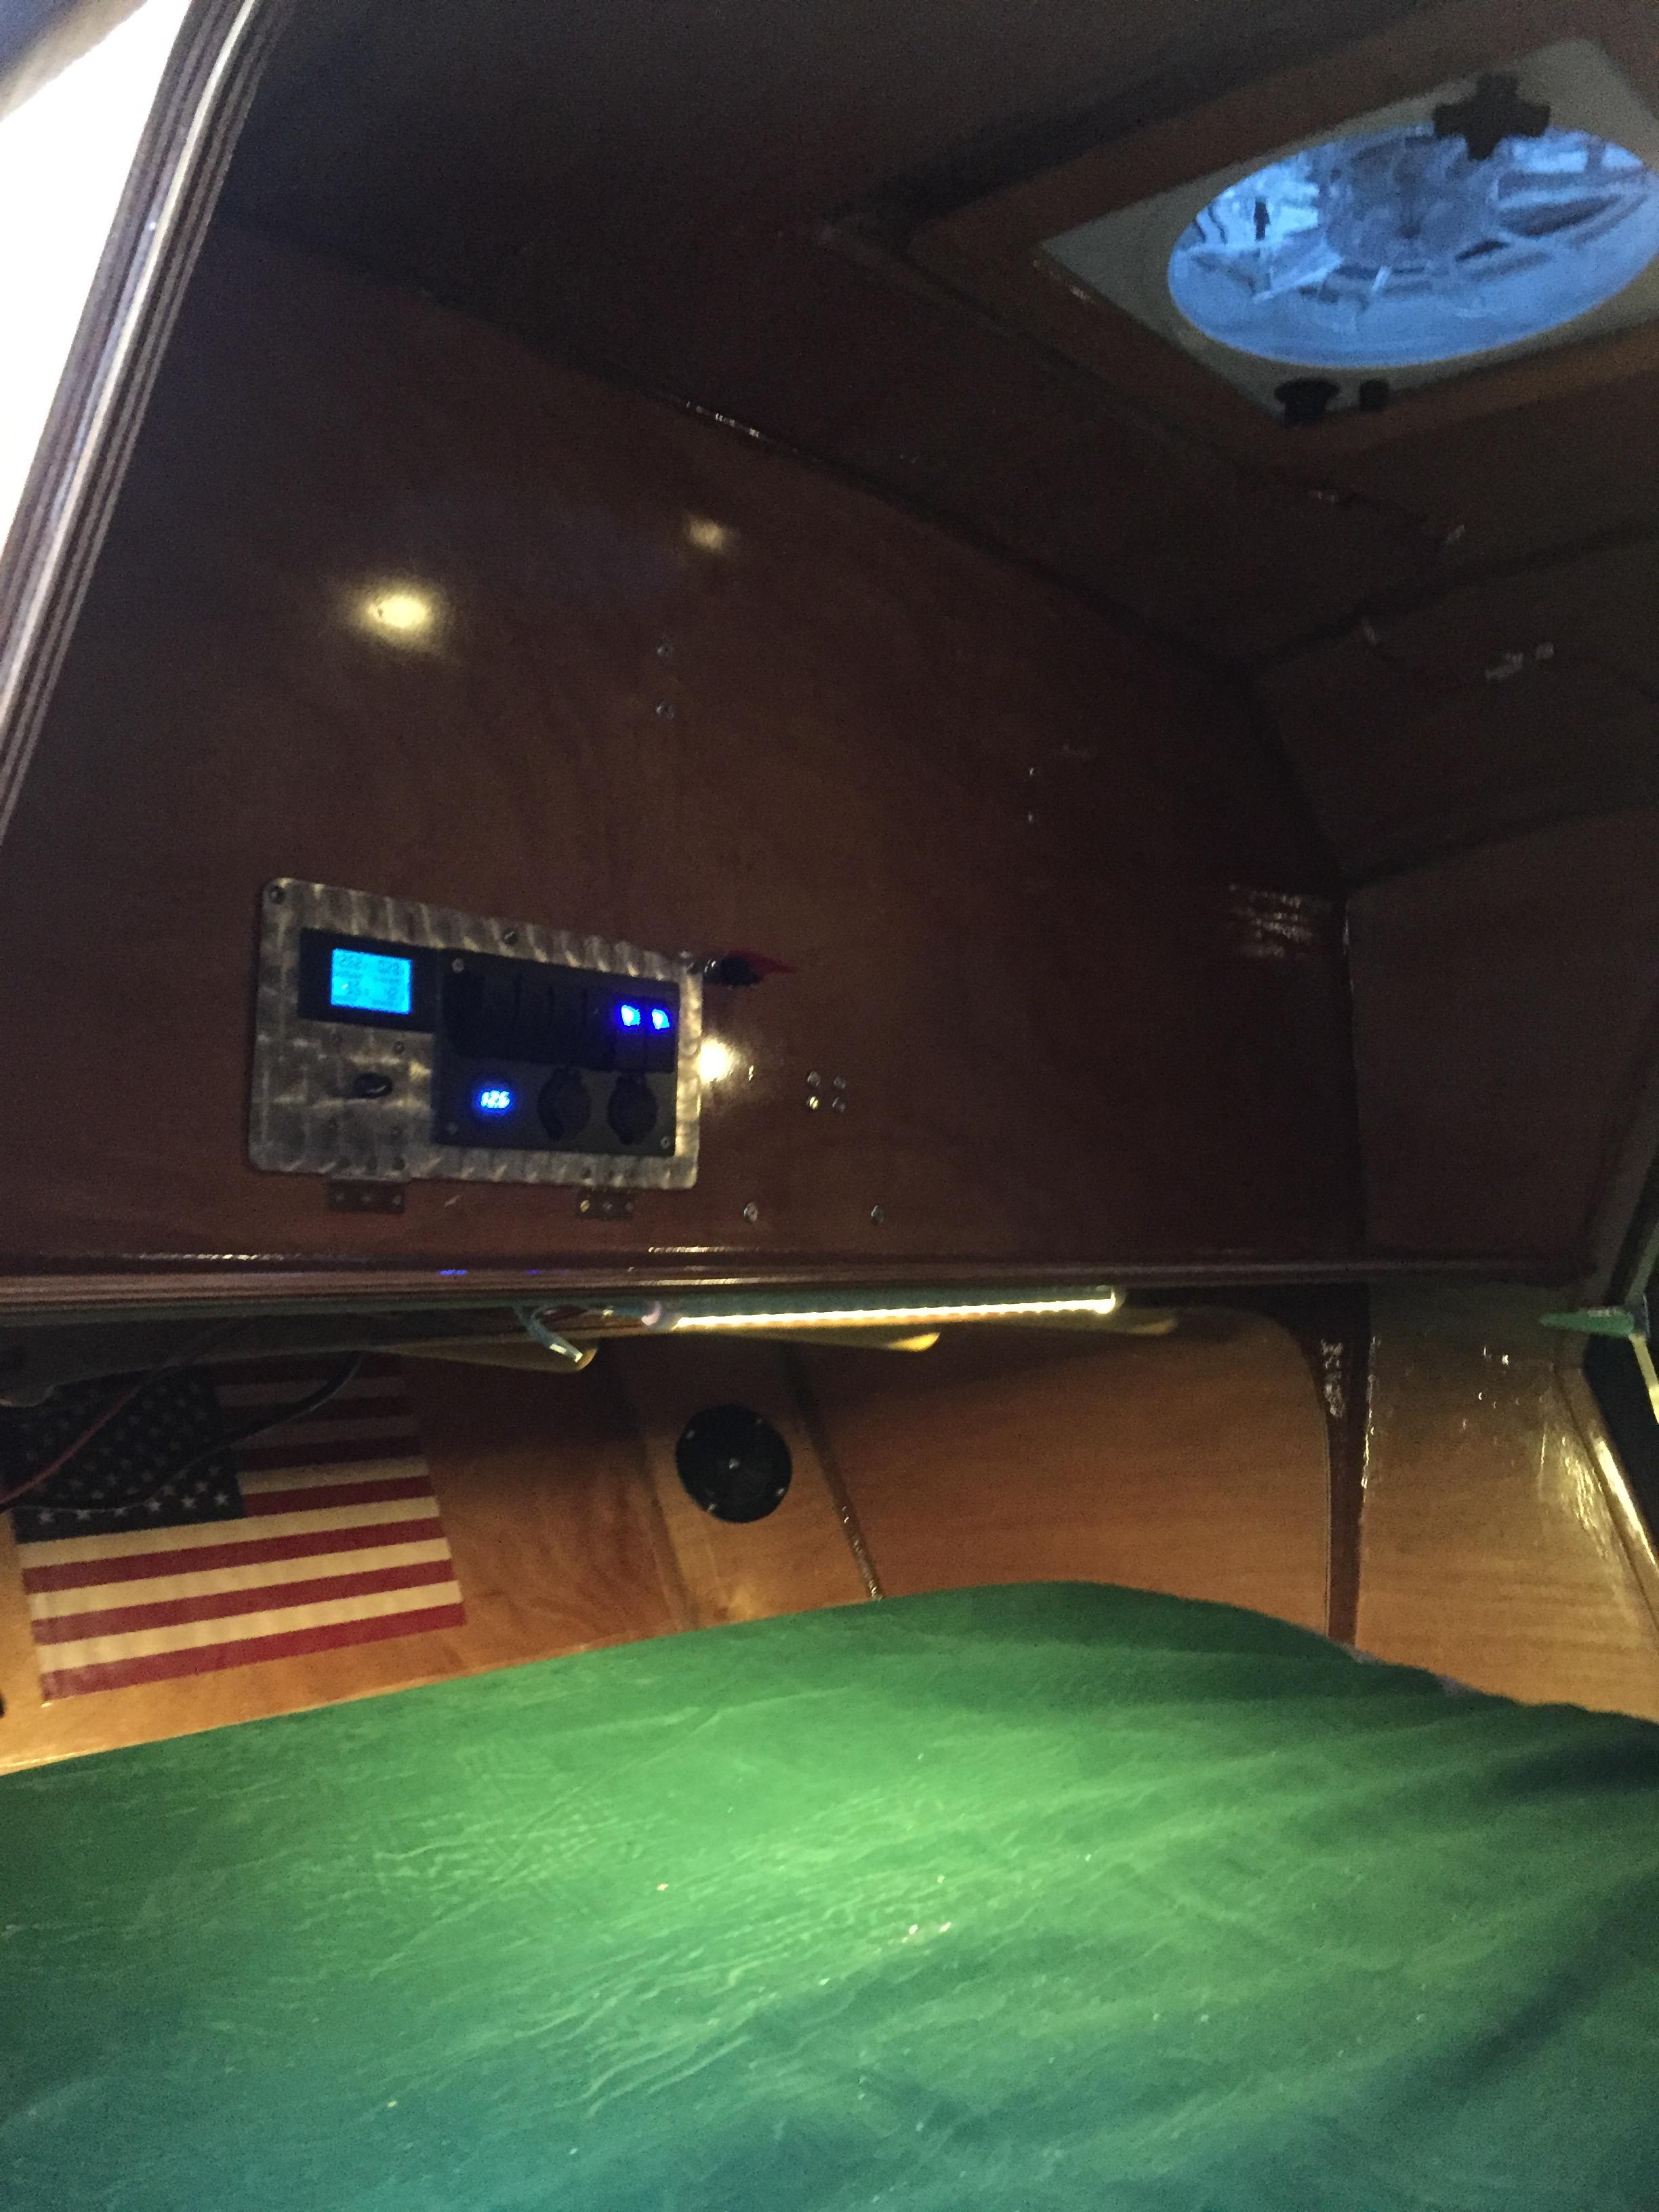
ParticipantAlmost DONE. Took the camper our for a test tow yesterday. Electrical is done, door assembled and installed, galley hatch installed. Putting that hasp block on was a minor PITA.
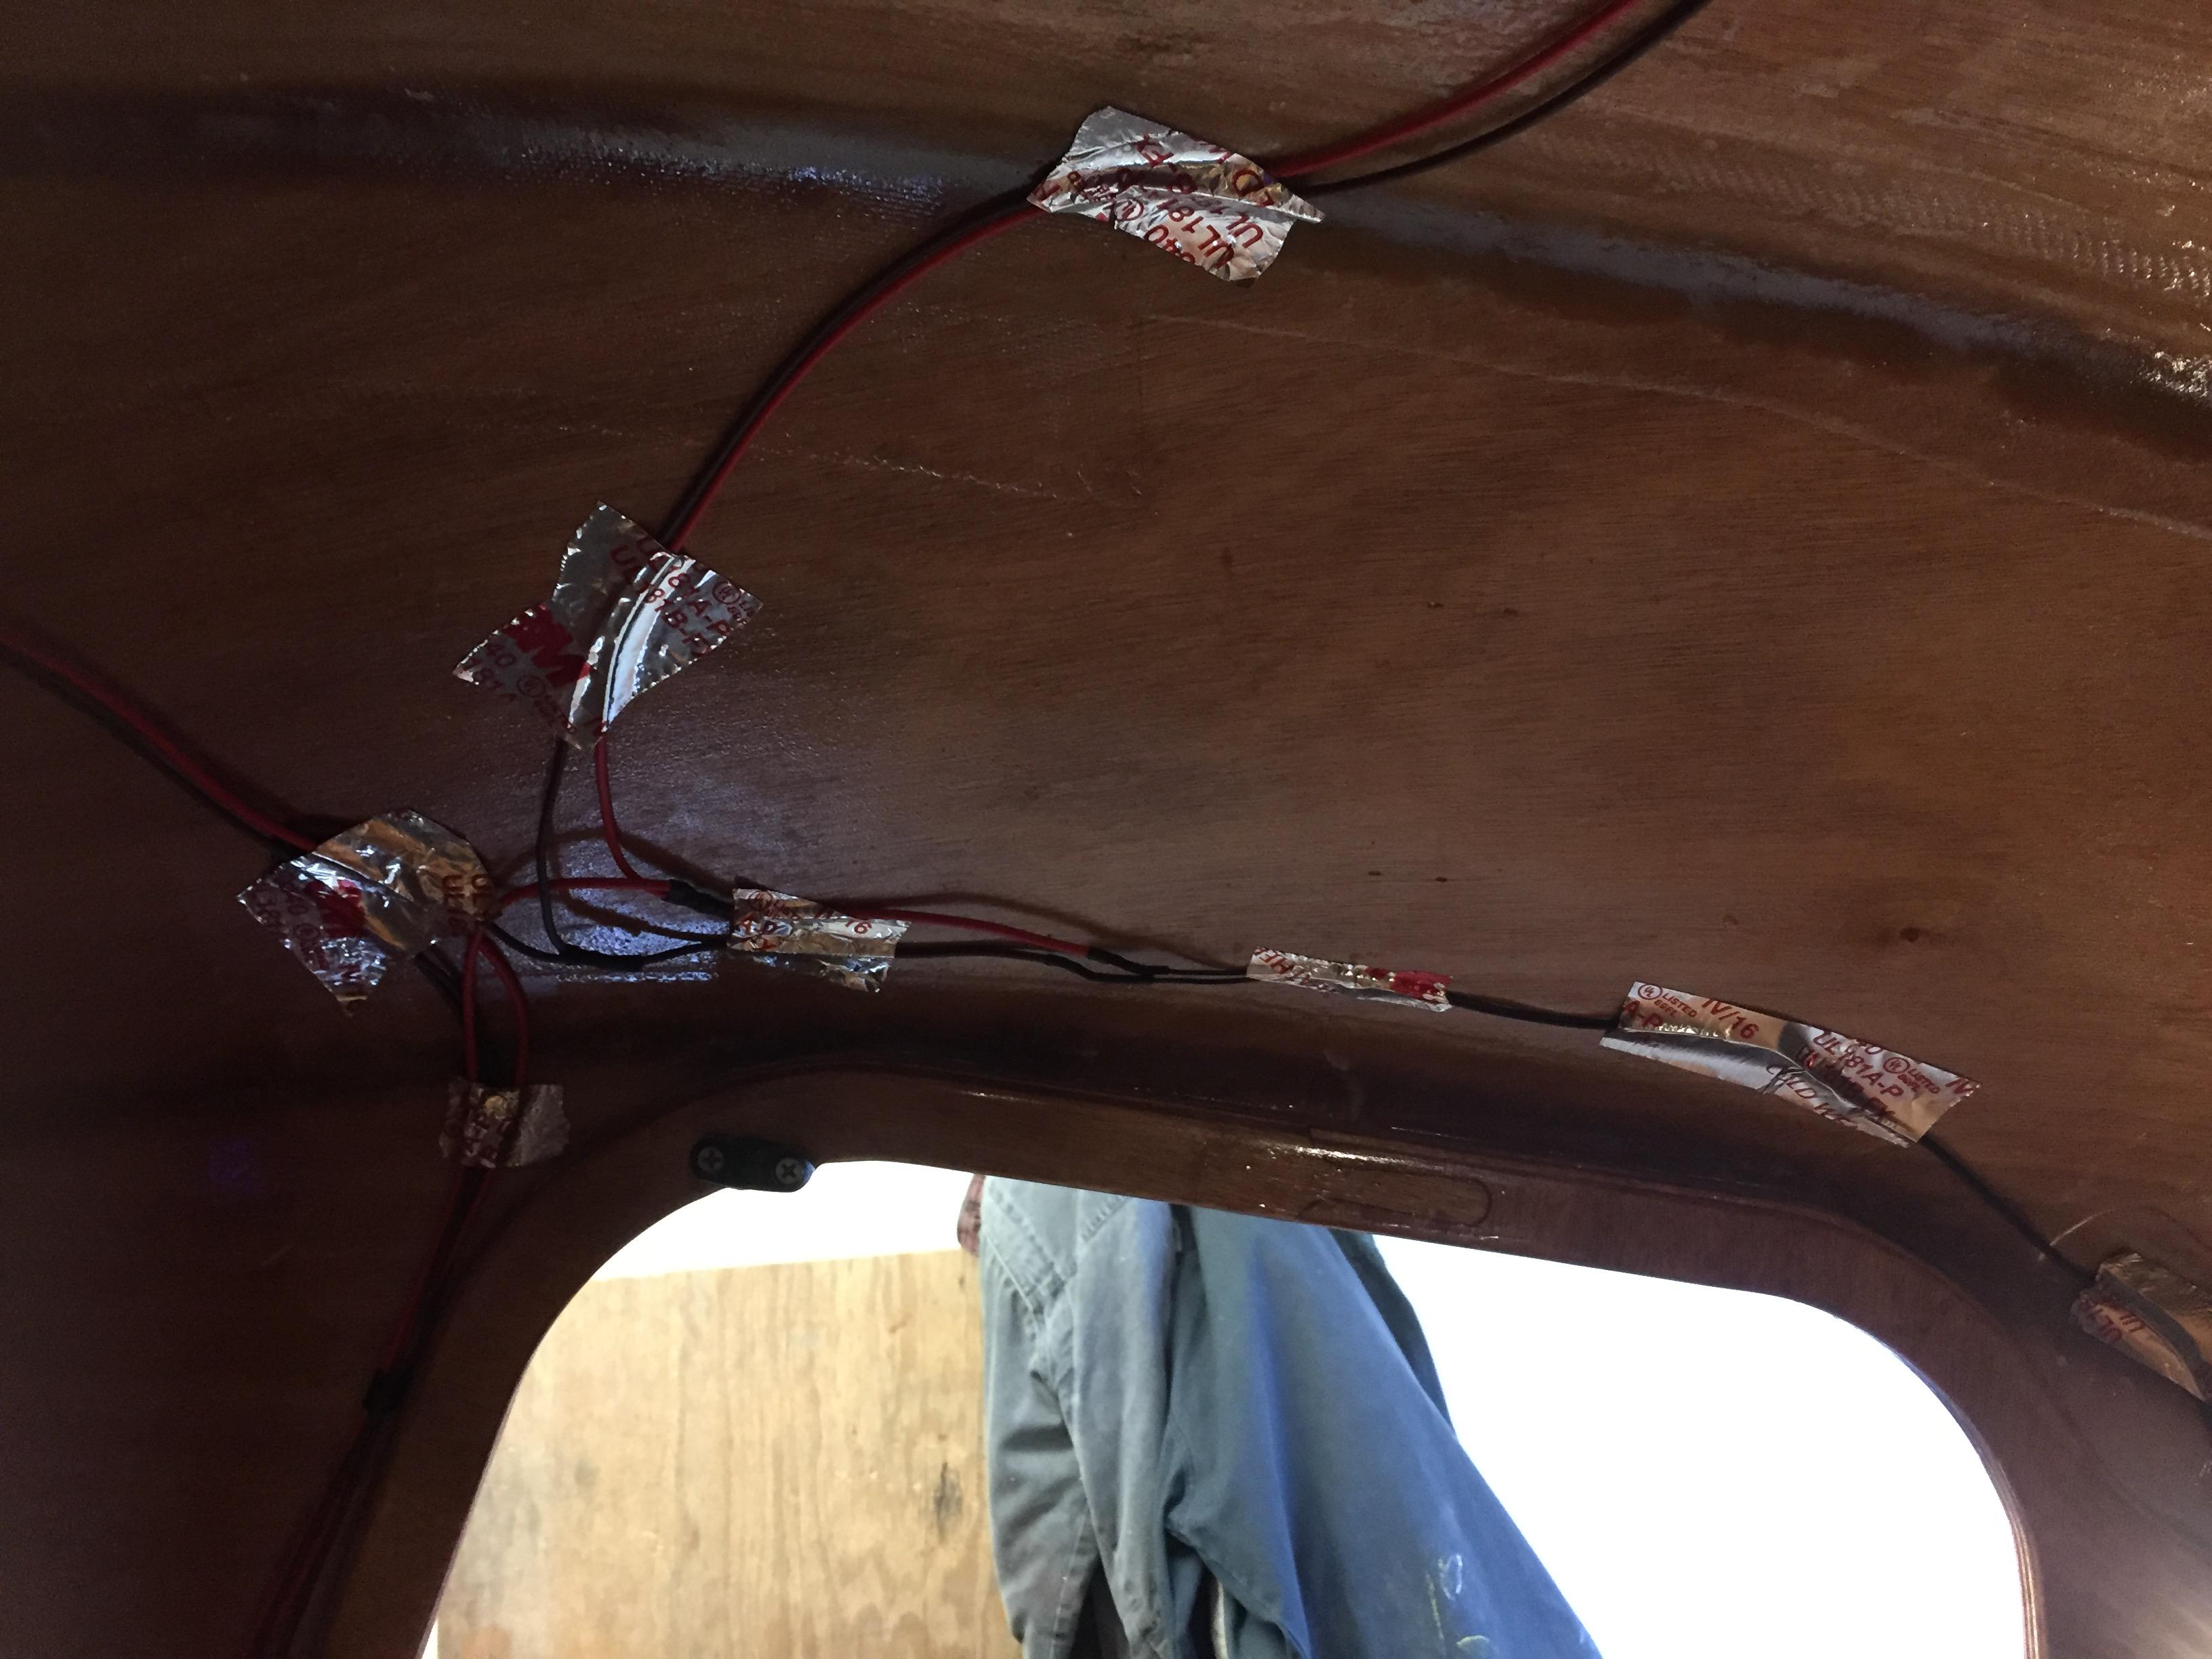
Building tip: Aluminum dryer duct tape works very well for holding wires in place against the shell before installing the headliner.
 Participant
Look in the Completions gallery — there is a TD with some forward windows installed. Not sure a single window that big is a great idea structurally though. The pics I have seen with forward windows had two smaller windows versus one big one. That said, the main structural component is the 4 glass layer “arch” formed at the junction of panels 1&2, designed for supporting the roof racks. If I did a big single window I might put in some extra glass tape or even a wood stiffener bar glued in across the top and bottom of the window opening.
Just a thought…
Don
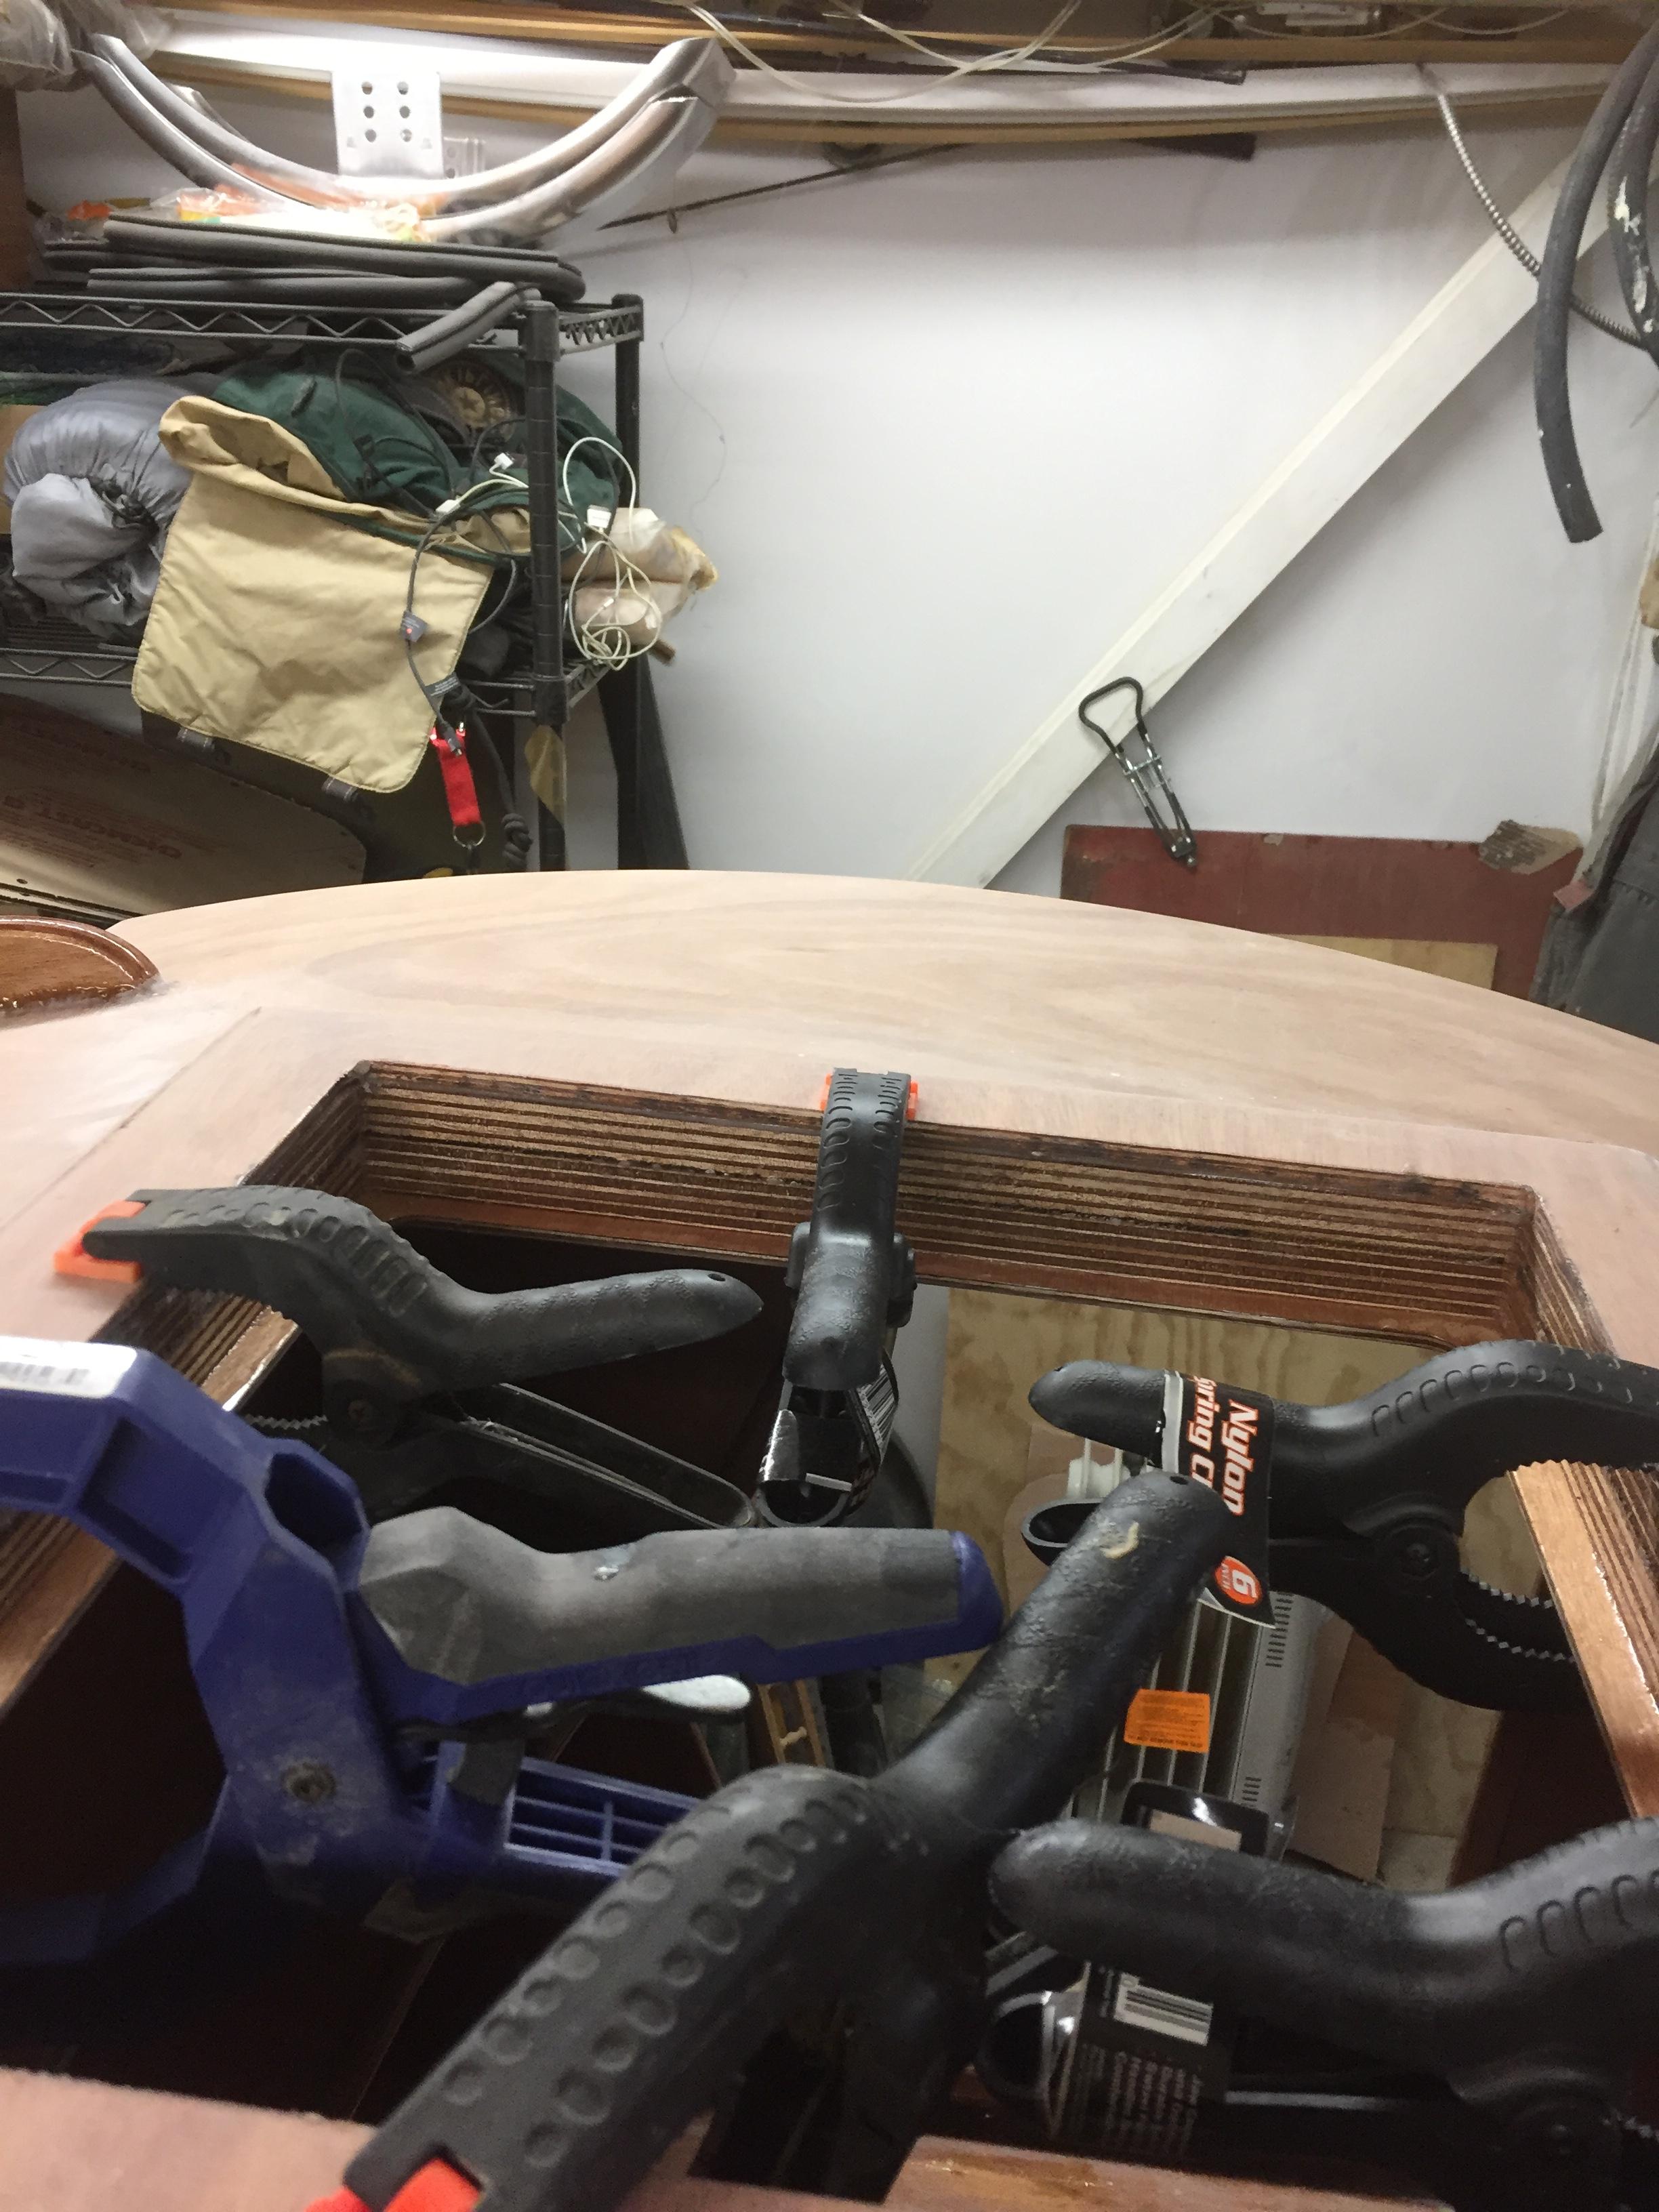
ParticipantI bit the bullet and bought a new router and set it up on a piece of 3/4 plywood as a router table, albeit a little makeshift. Did a couple of pieces and it worked well enough. I think I am going to put in a fence though, the foam is soft and running the edge using the round over router bit bearing and getting it perfectly consistent is trickey freehand. The fence will help a good deal with that, for strait edge pieces at least.
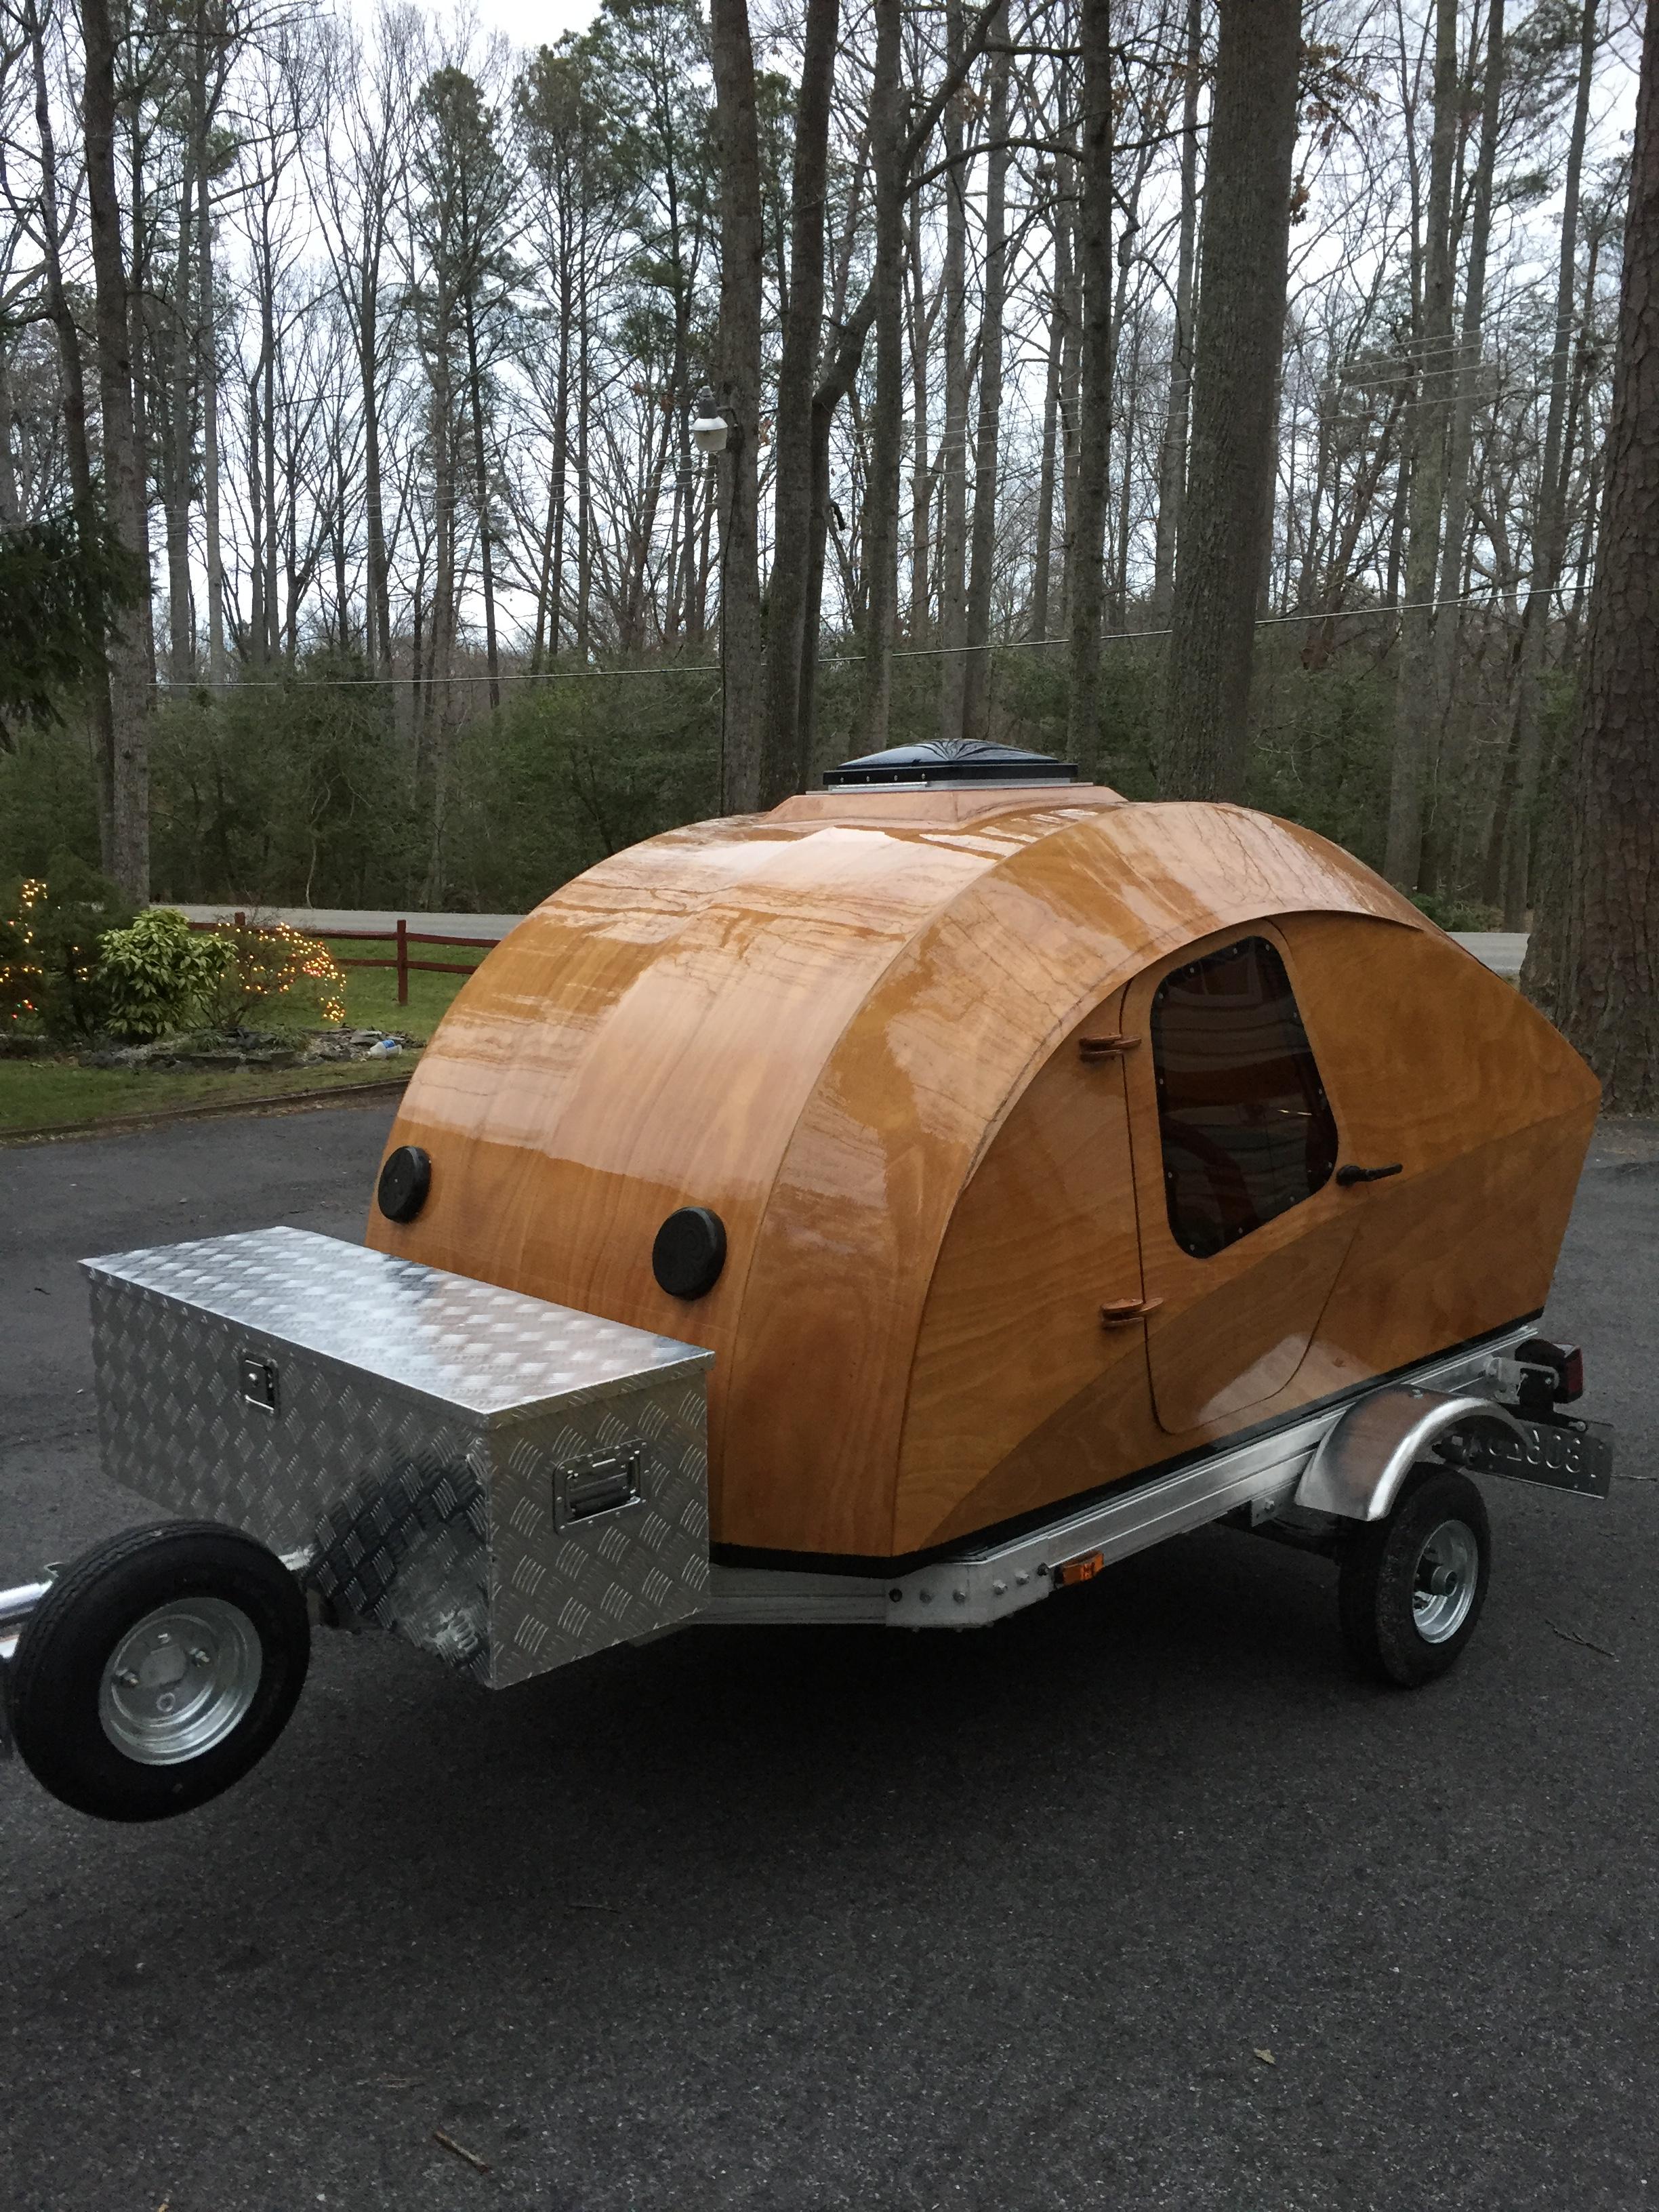
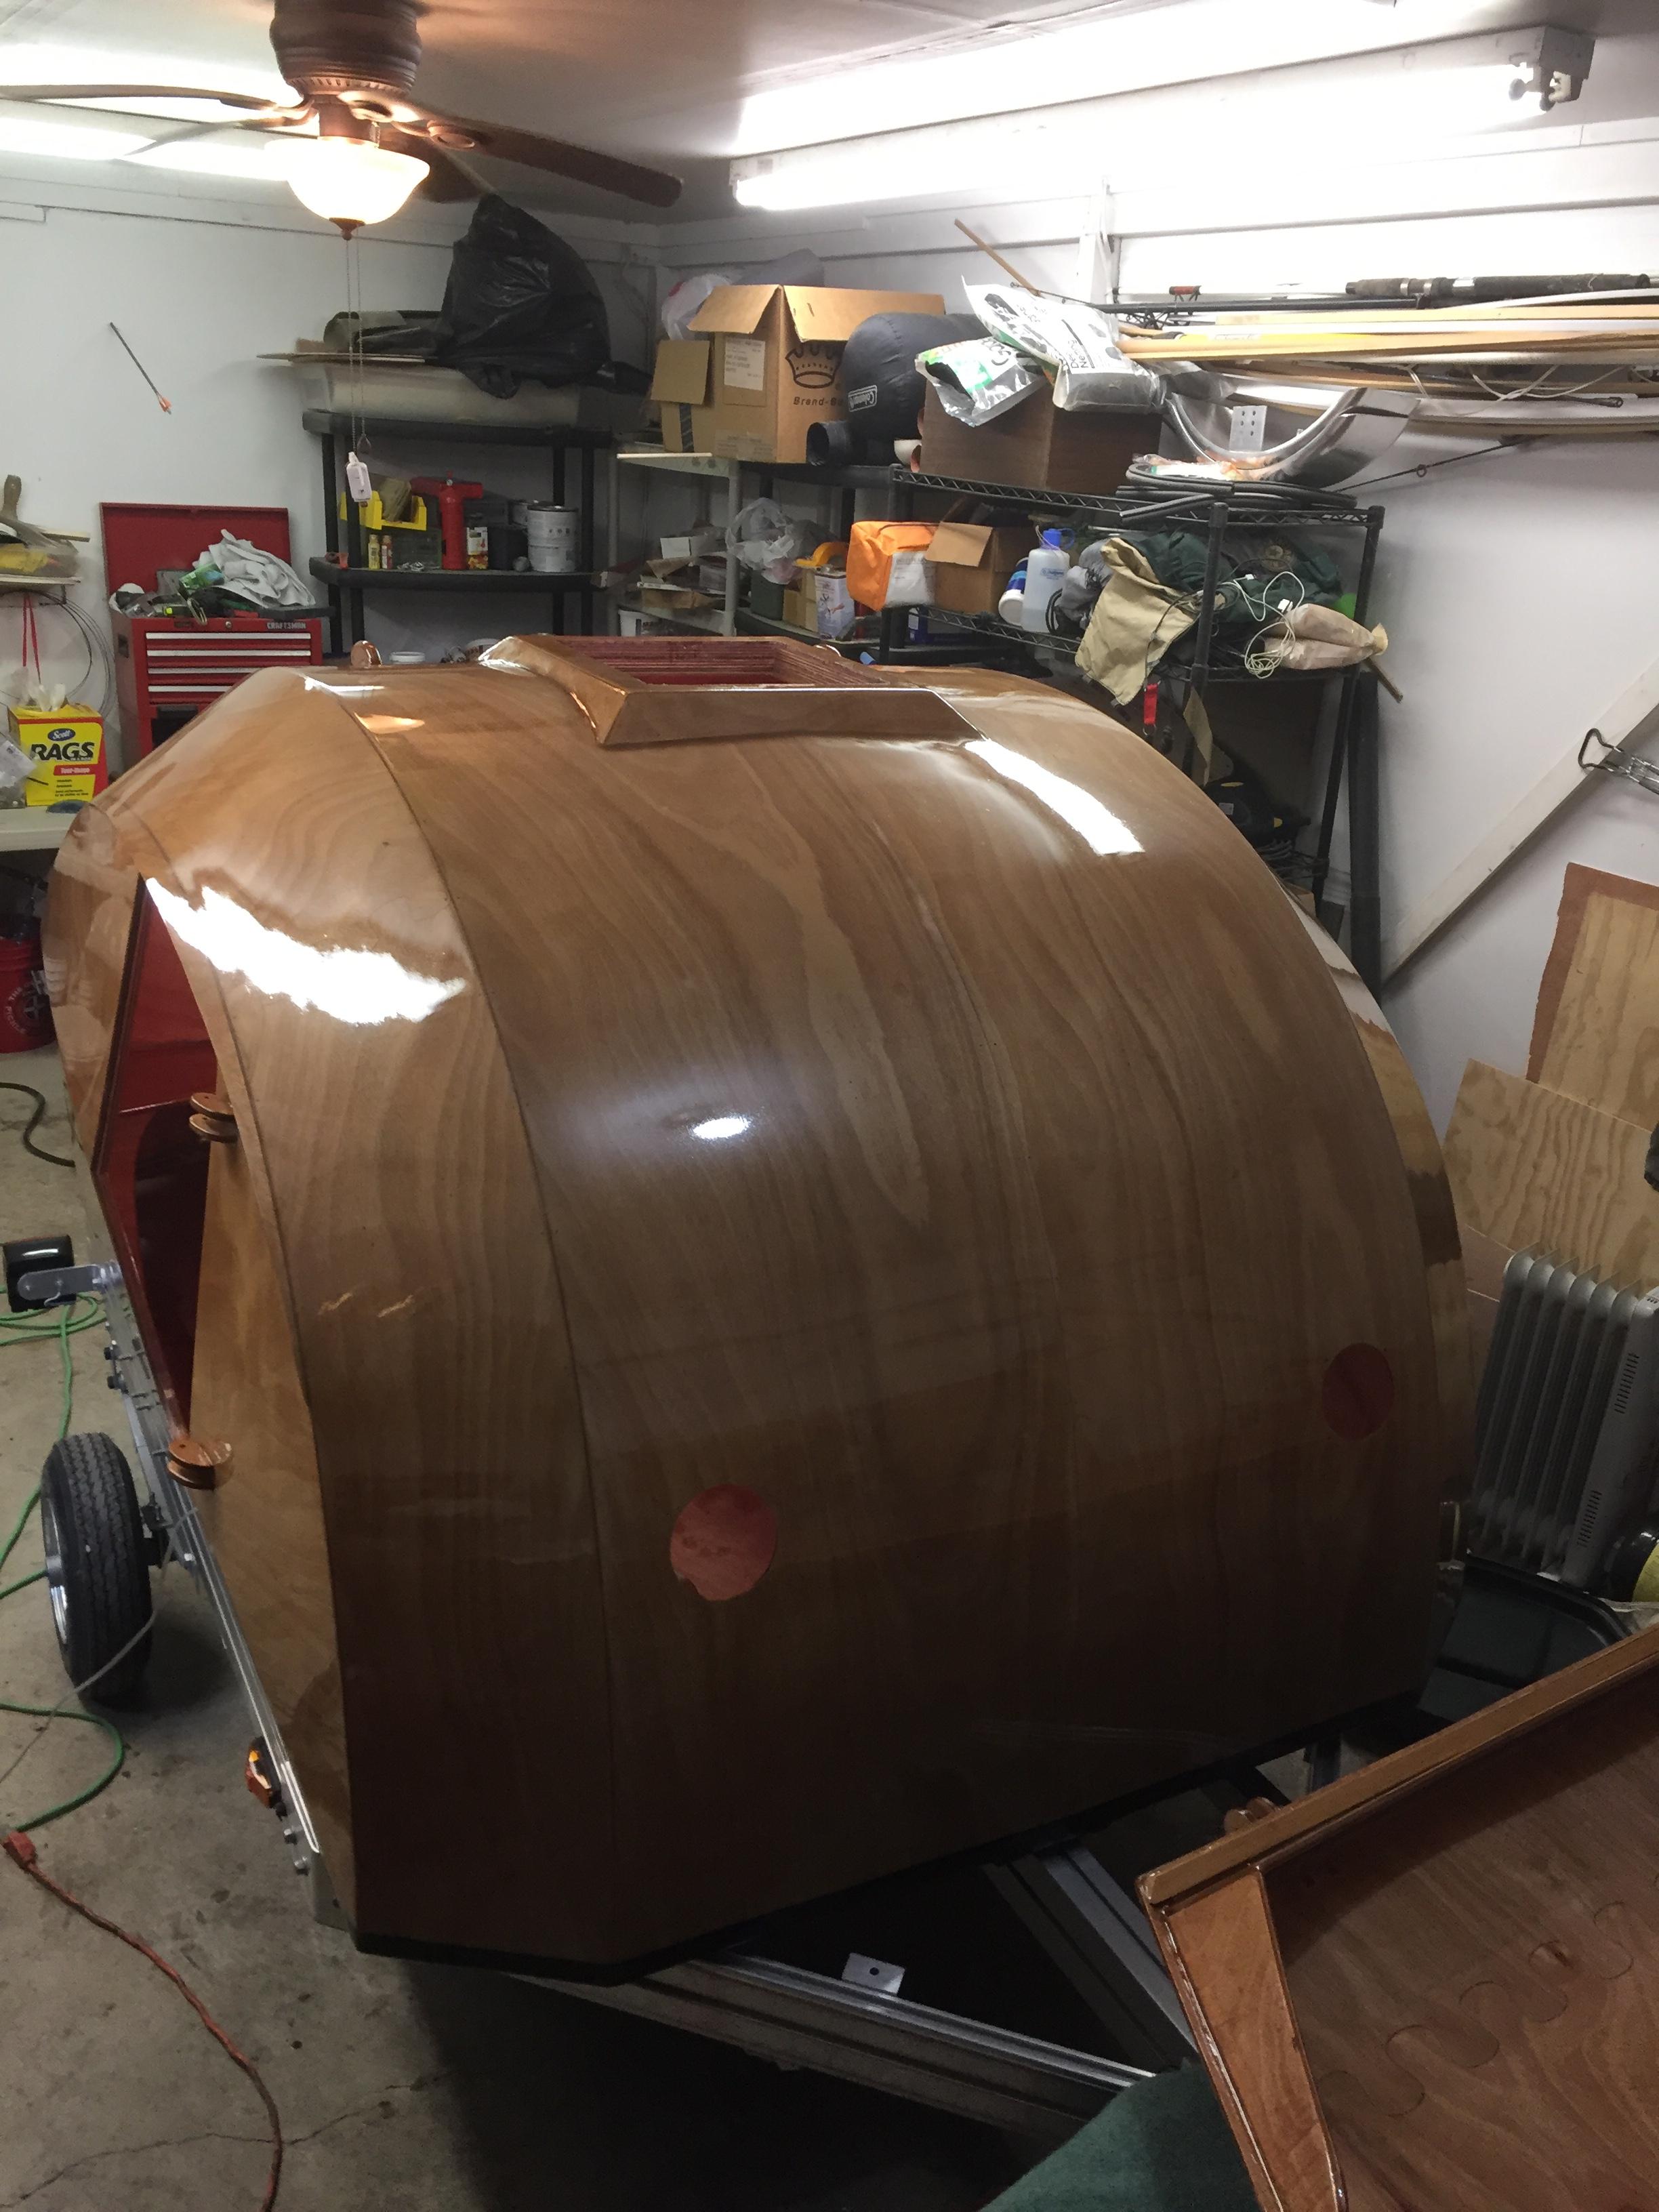
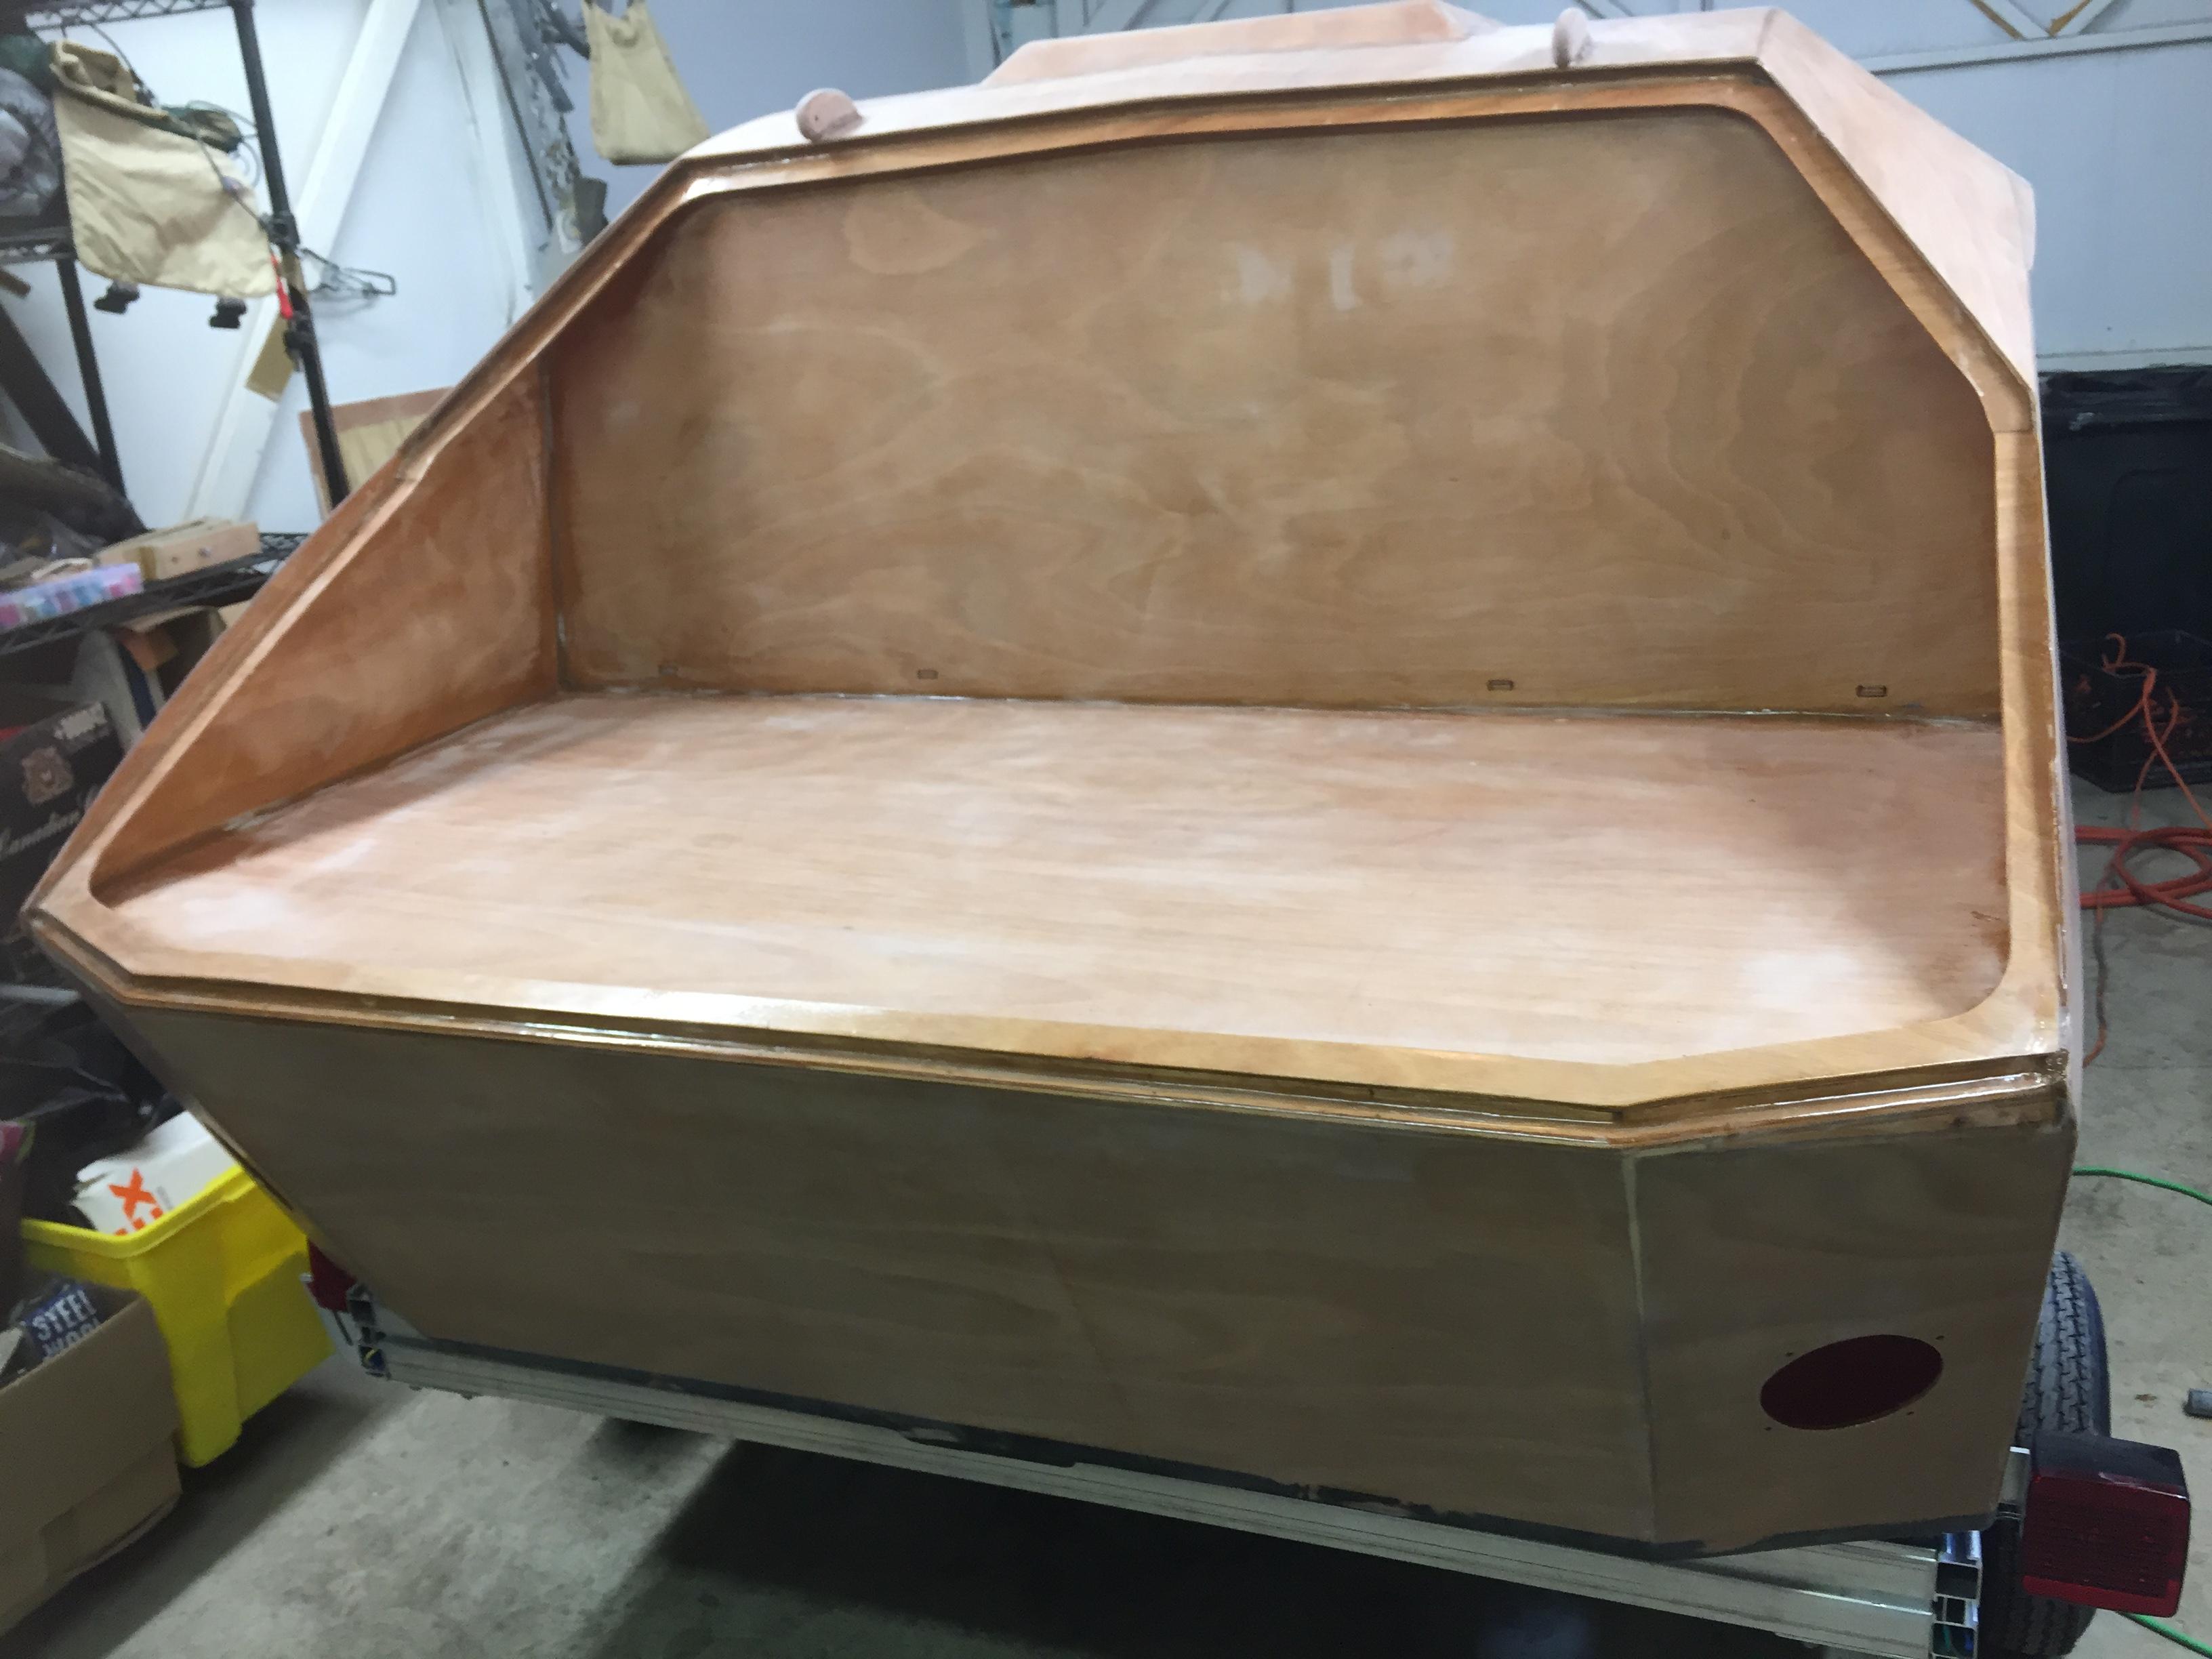
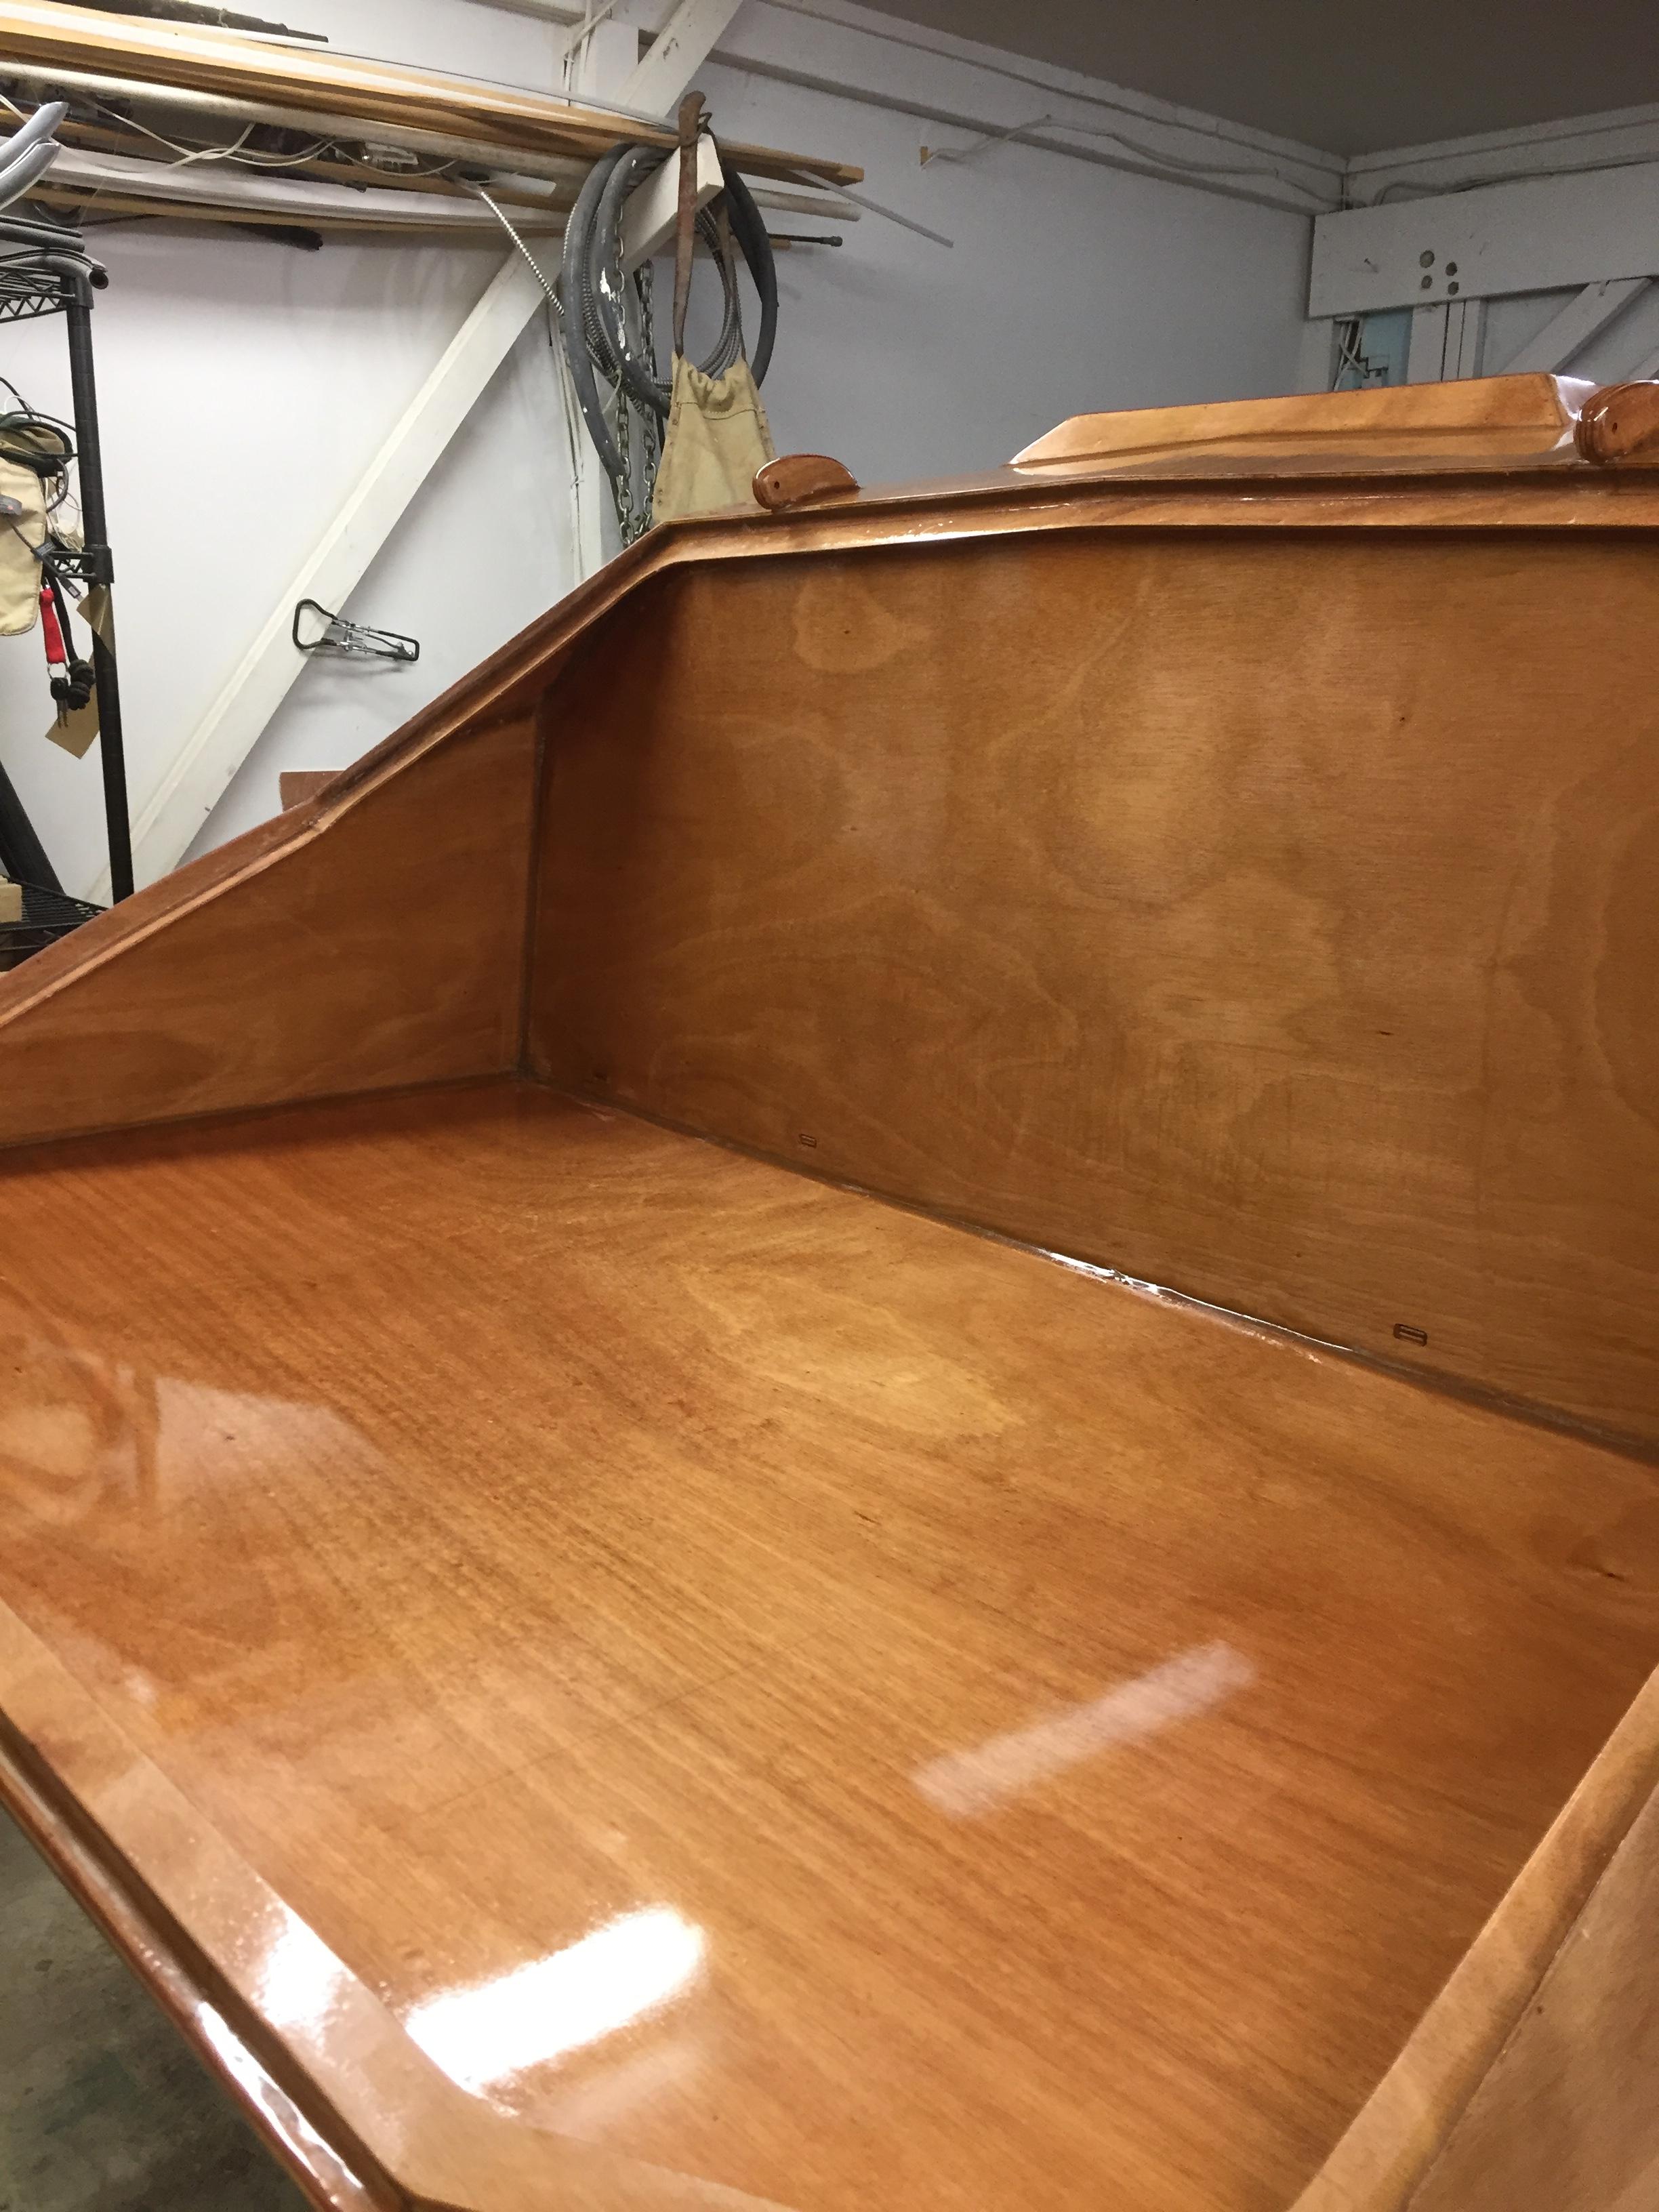
ParticipantThird coat is on the shell. 2nd coat on the galley hatch exterior, one coat on the interior. 3 coats on the door exterior, two on the door interior. Galley module not started, as it needs sanding and I’m trying to minimize sanding while I am doing varnish.
I did sand with 320 grit between the first two coats. It’s amazing, the surface is getting easier and easier to sand as it fills in and gets flat. I scuff sanded the entire exterior in about 30 to 45 minutes, including the small areas that need hand sanding. SO much faster than sanding epoxy where a sanding pass took two to three hours with 120 grit! I think I am seeing the payoff for all that time getting it prepped.
I bought some scotch bright sort of stuff yesterday, a little coarser than the green kitchen scrubber kind. I think I am NOT going to sand the third coat before applying the fourth coat, just scuff it with the scotch bright.
After each sanding I am doing a initial rough alcohol wipe down with a “dirty” rag, then a 2nd pass with a alcohol “clean” rag, then a wipe down with a tack cloth. My shop is by no means “dust free” but it’s not horrible. I biggest source of “nits” has been cat hair! We have several cats and I am starting to change shirts before going out to the shop to varnish.
Inevitably there is some small amount of extra varnish after each application session. I have been using up this otherwise scrap varnish on the interior floorboard, the walls, etc. so as to not let it just go to waste. Wouldn’t want to pour it back into the can, and those quart cans are expensive! I am about to open up my third quart can but I think that will do it.
ParticipantThanks. Bought a quart can of contact cement today, no idea if that’s enough but it ought to be close. Let me know how it goes!
don
ParticipantVarnishing! I did a MAJOR shop cleanup, pulling the camper out since it’s bolted to the trailer now. Put all the tools away, organized, and de-dusted.
put on. The first coat of varnish. Sure is easier to work with compared to epoxy!
Before and after pix, just the first coat:
 Participant
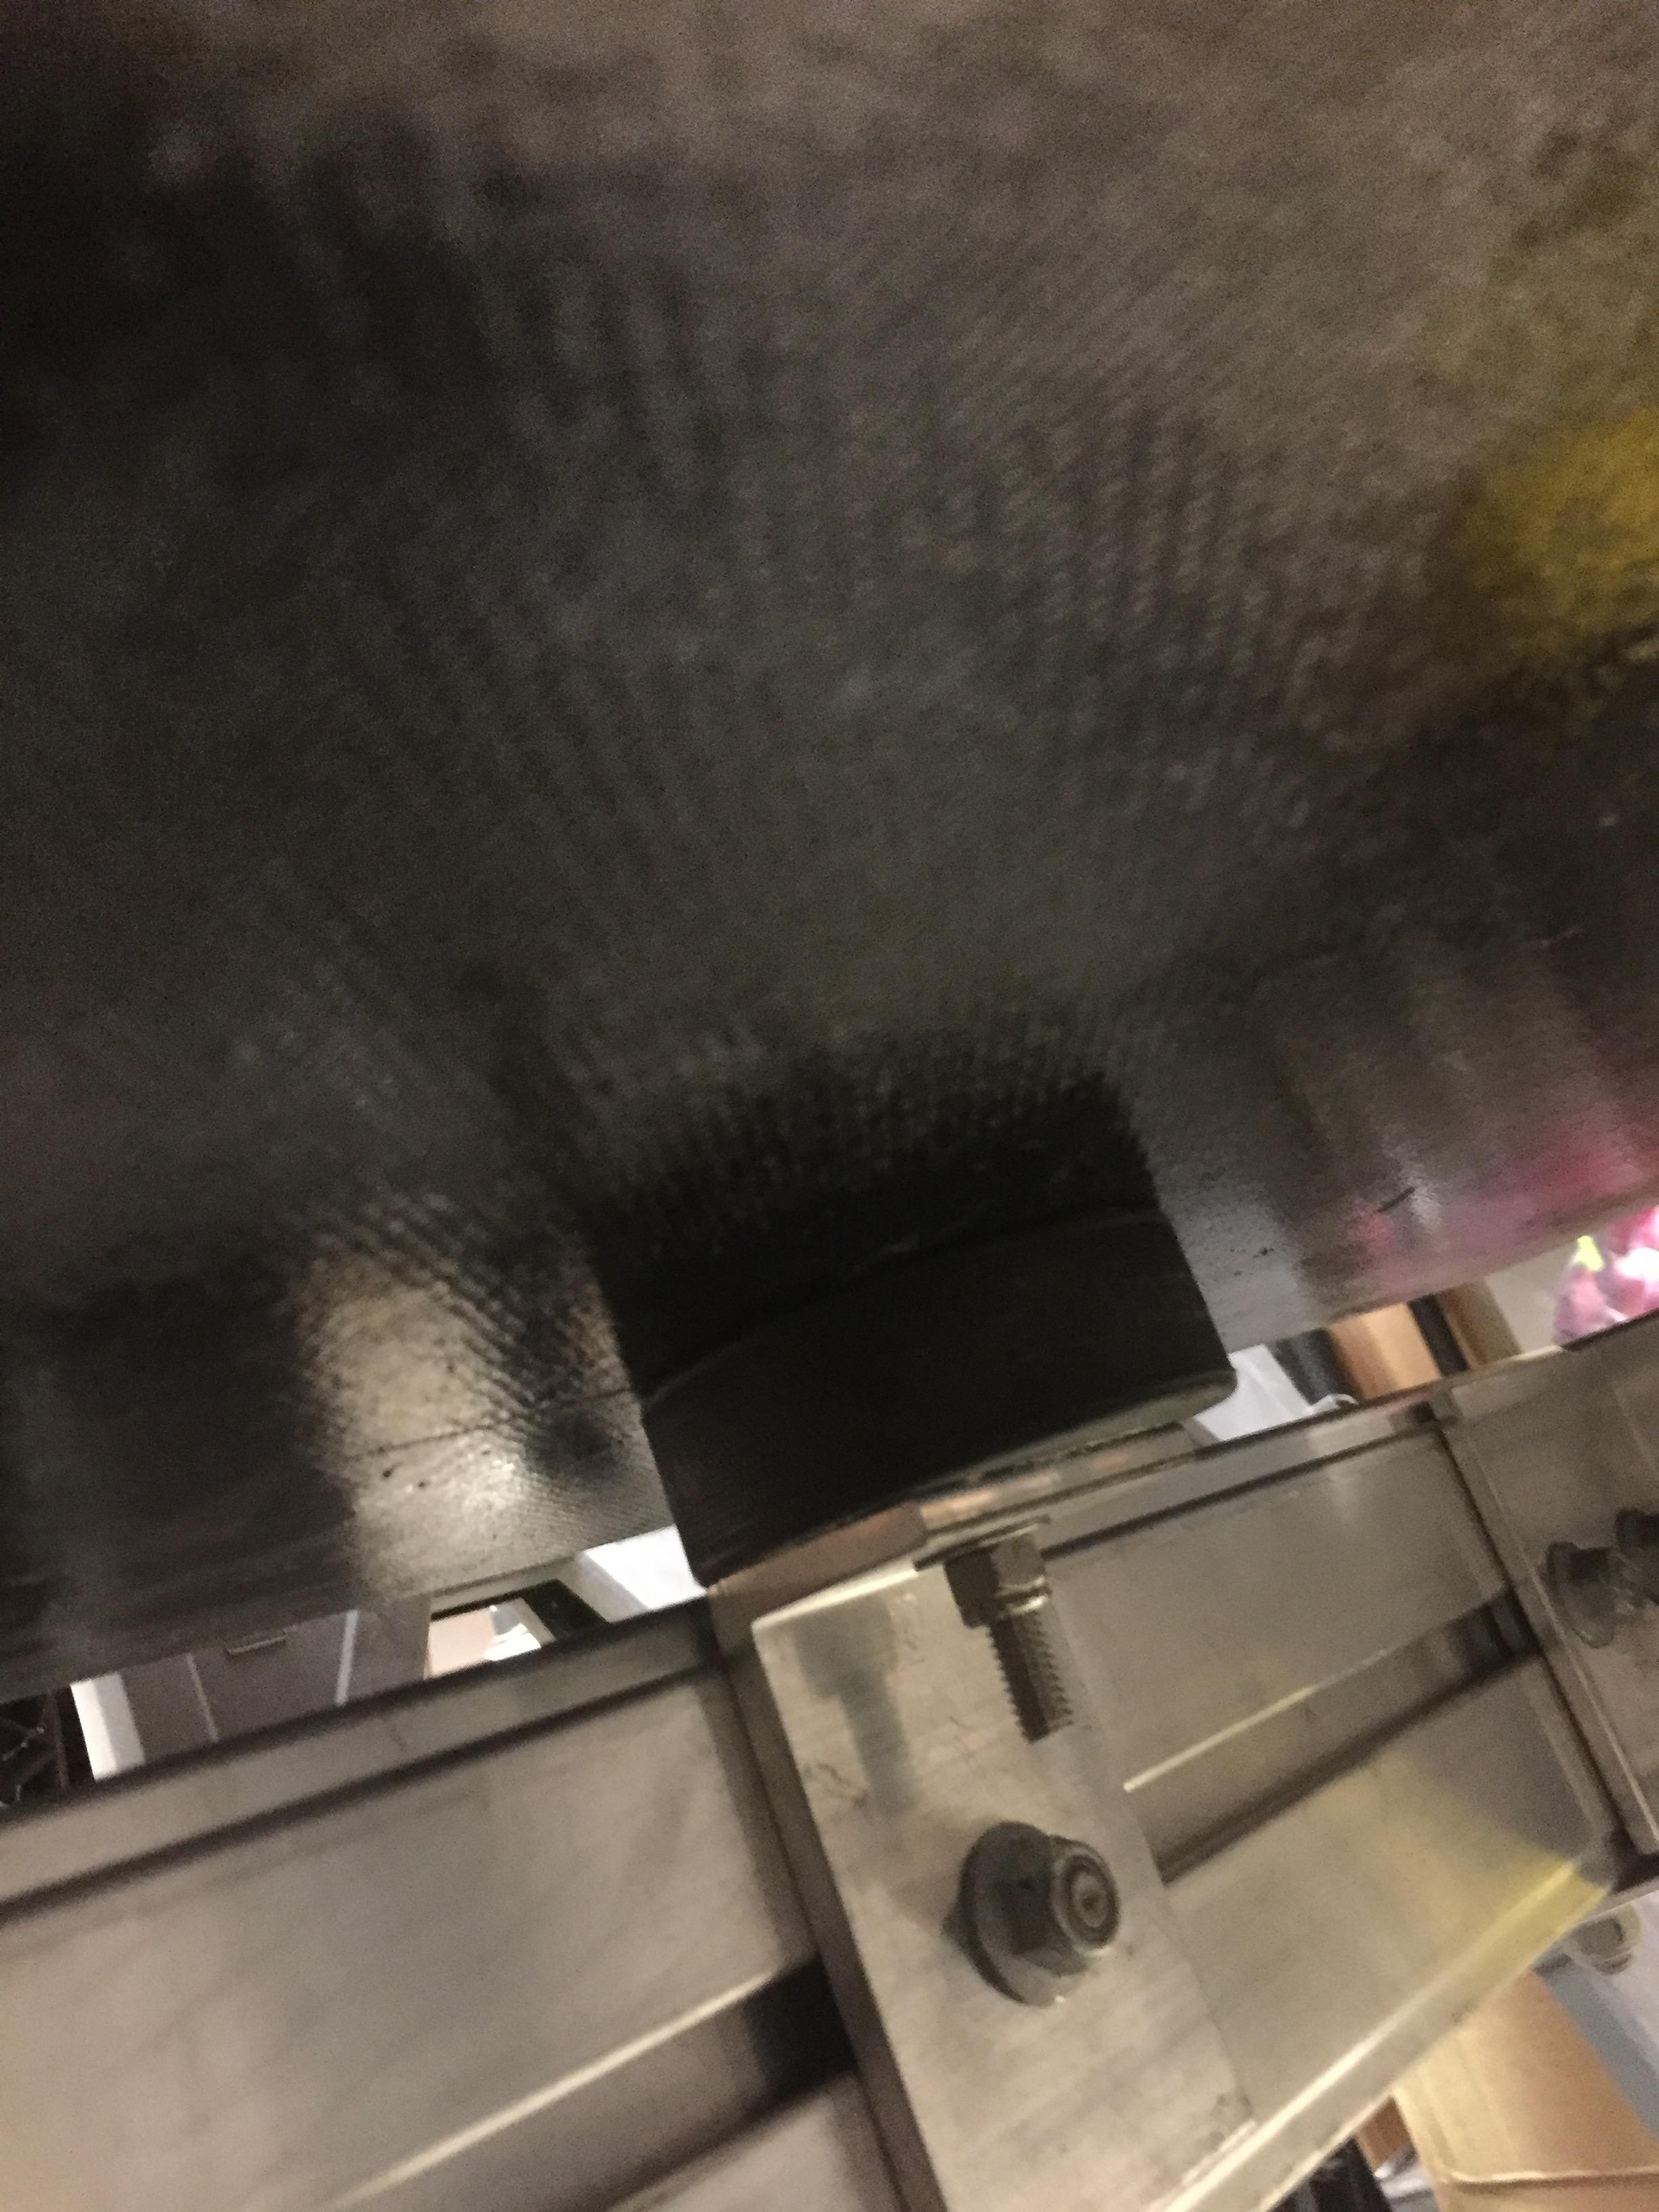
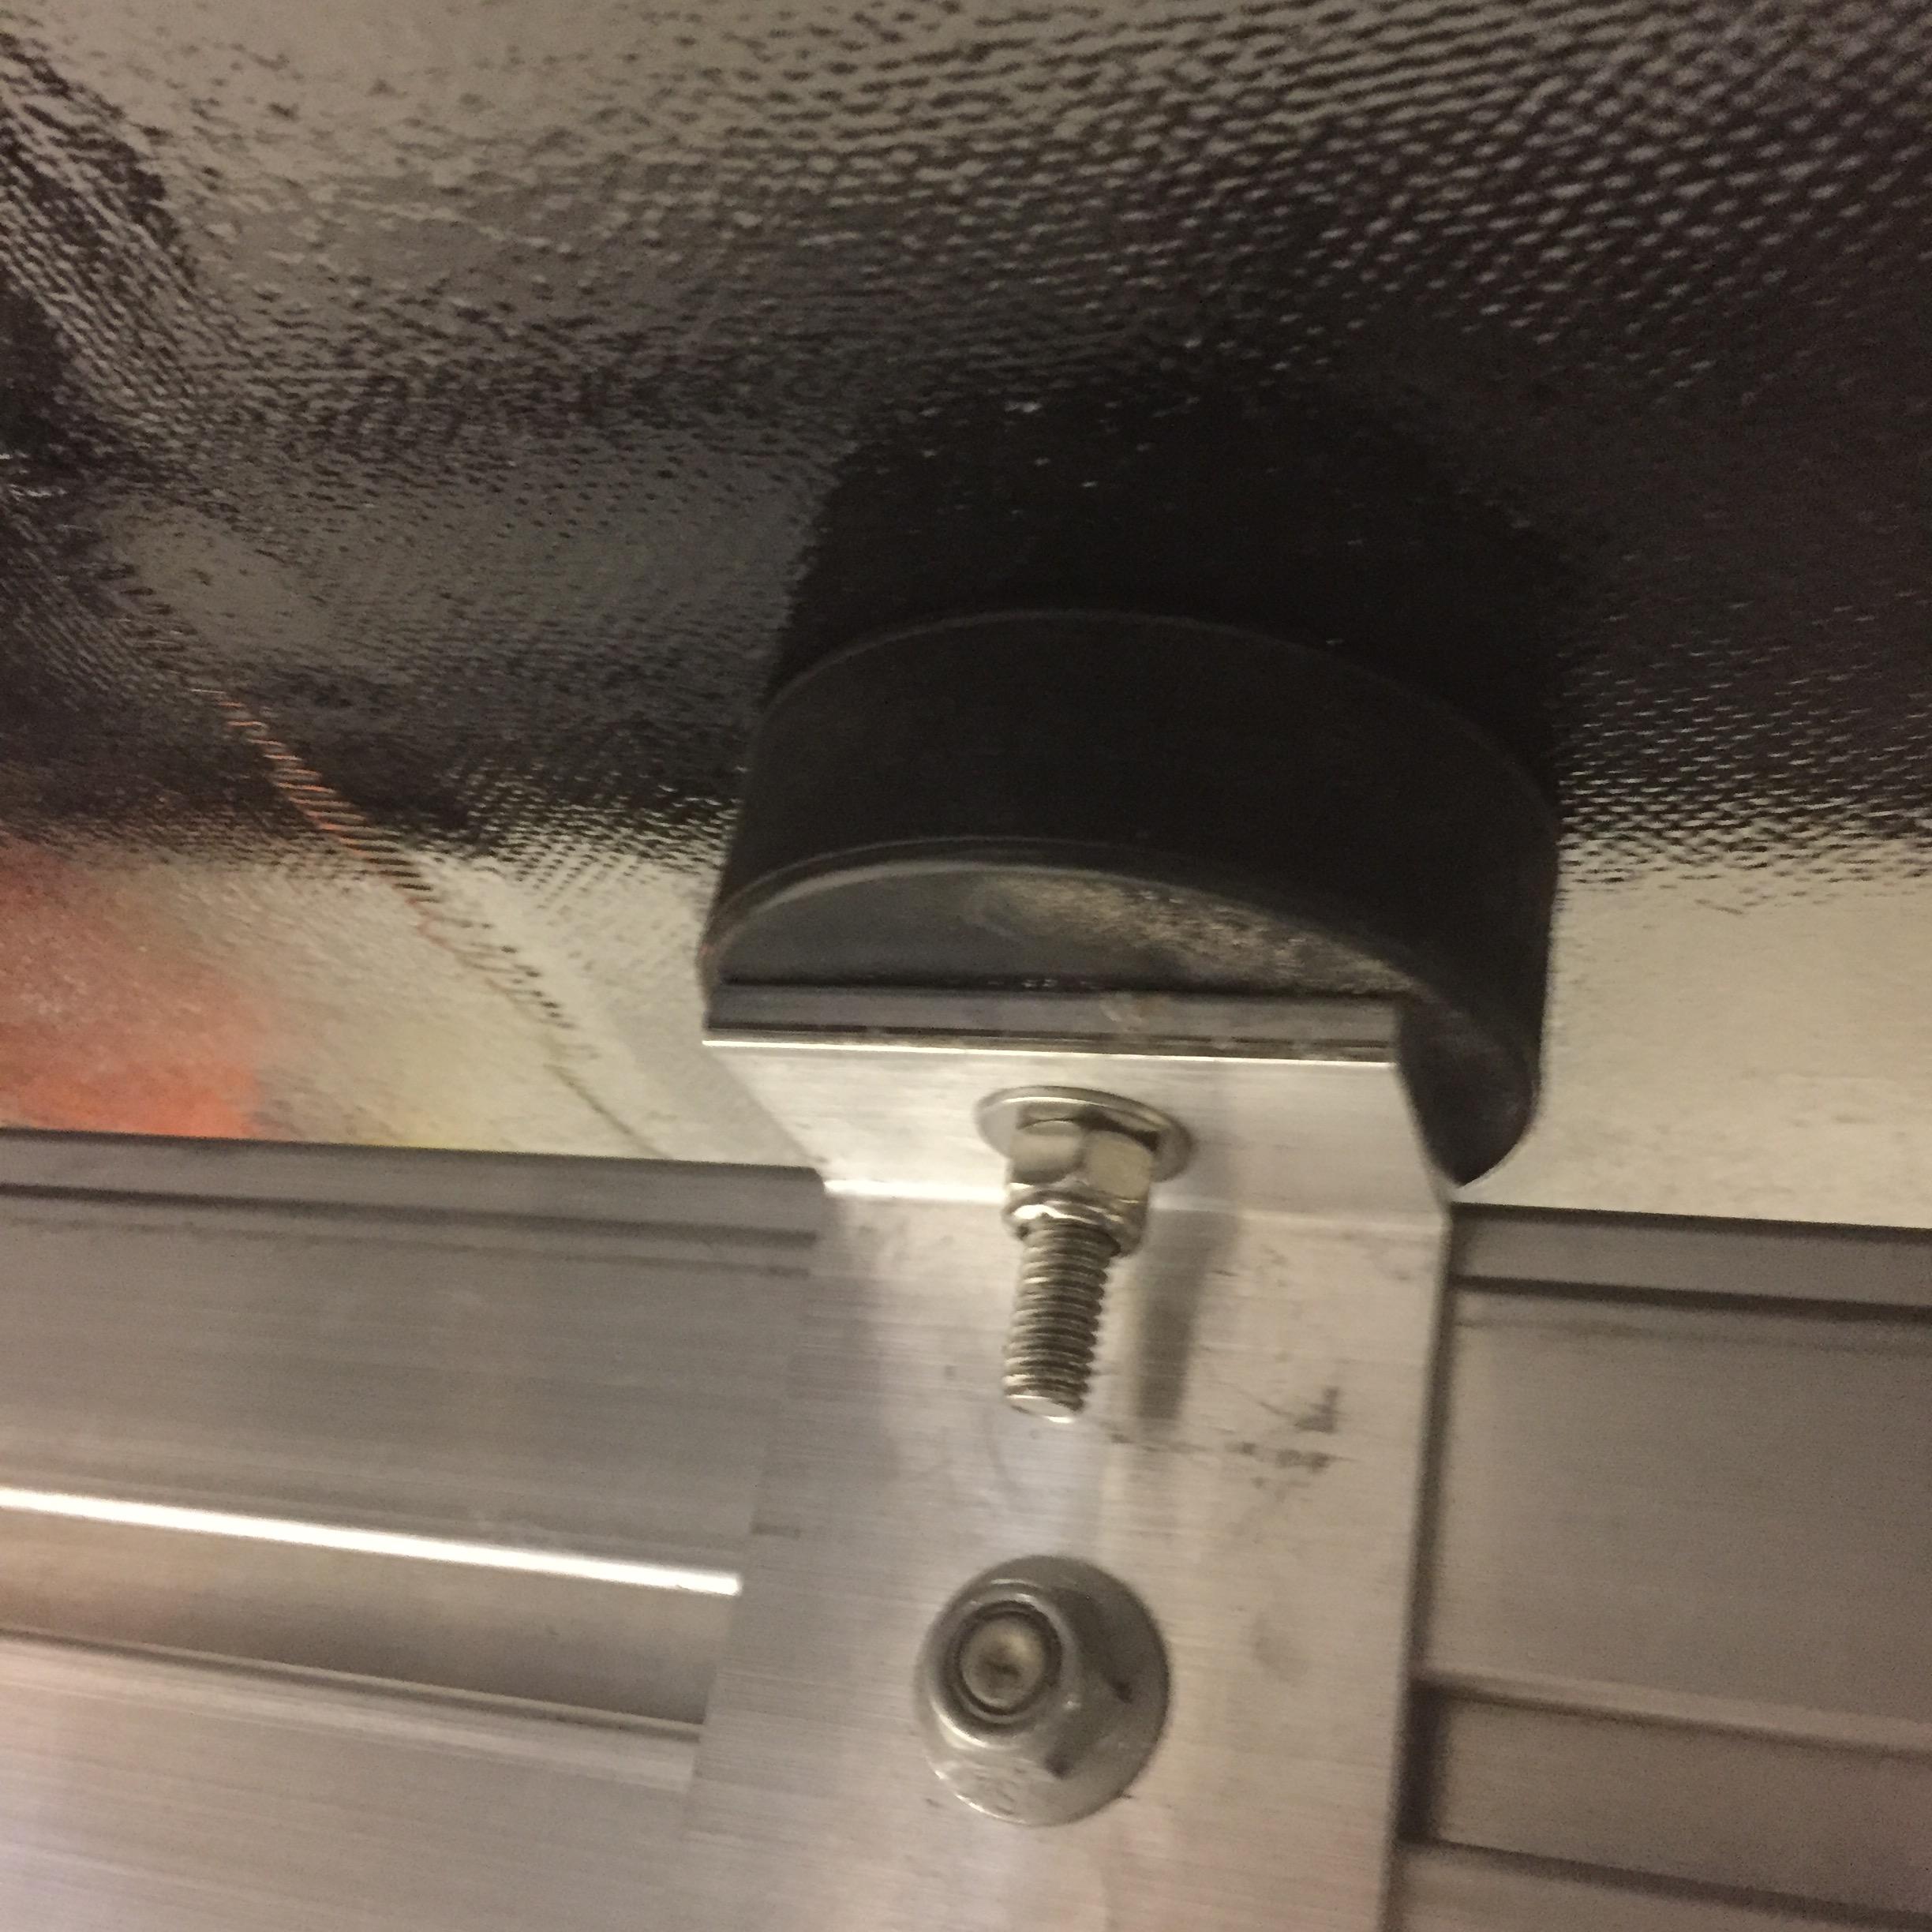
My kit had the trailer bunks and hardware for using apparently the Harbor Freight trailer, I guess. No spacers and only six 5″ or so long bolts. Quick trip to the hardware store got me what I needed. As for the hockey pucks, it was a practical soloution that fit the need well.
ParticipantInterlux Schooner 96 varnish. Did a MAJOR shop cleanup and de-dust effort today. After mucking and putting all the tools away I set up a couple of box fans and took the backpack leaf blower to the shop. Sure is easier now that the shell is bolted onto the trailer, moved it out to the driveway and blew the dust off of it with compressed air. Tomorrow is the first coat of varnish!
-
This reply was modified 7 years, 1 month ago by
ParticipantParticipantPics of the hockey puck spacer mounts.

 Participant
I’ll take pictures and post. They really are ideal, they left a 1/4″ gap between the butt block and the Trailex trailer.
I’d note that CLC did not supply the carriage bolts for the Trailex trailer, they supplied the long bolts needed for the Harbor Freight trailer. I got 5/6 x 3″ bolts (they specified 2 1/2″ bolts) to allow for the 1″ thickness of the pucks. Worked fine.
An important note: Get BOTH 5/16 plain nuts AND 5/16 nylock nuts (stainless). I only used the nylock nuts and stainless washers, and it was a pain in the butt. The carriage bolts don’t “seat” until there is some tension on them and I fought them taking up the “slack”. In hindsight, I would put the plain nuts on first, tighten them up, then follow with the nylocks. Would be MUCH easier.
I have one nylock nut that is stuck, and cannot get it to either tighten up nor will it come off, I think I buggered the thread with the needle nose vice grips I was using to hold the bolt still while taking up the slack. I’ll cut it off with an abrasive disk and do it over, but it’s a pain and doesn’t need to be.
ParticipantThey worked perfect. Recommend, better than plywood.
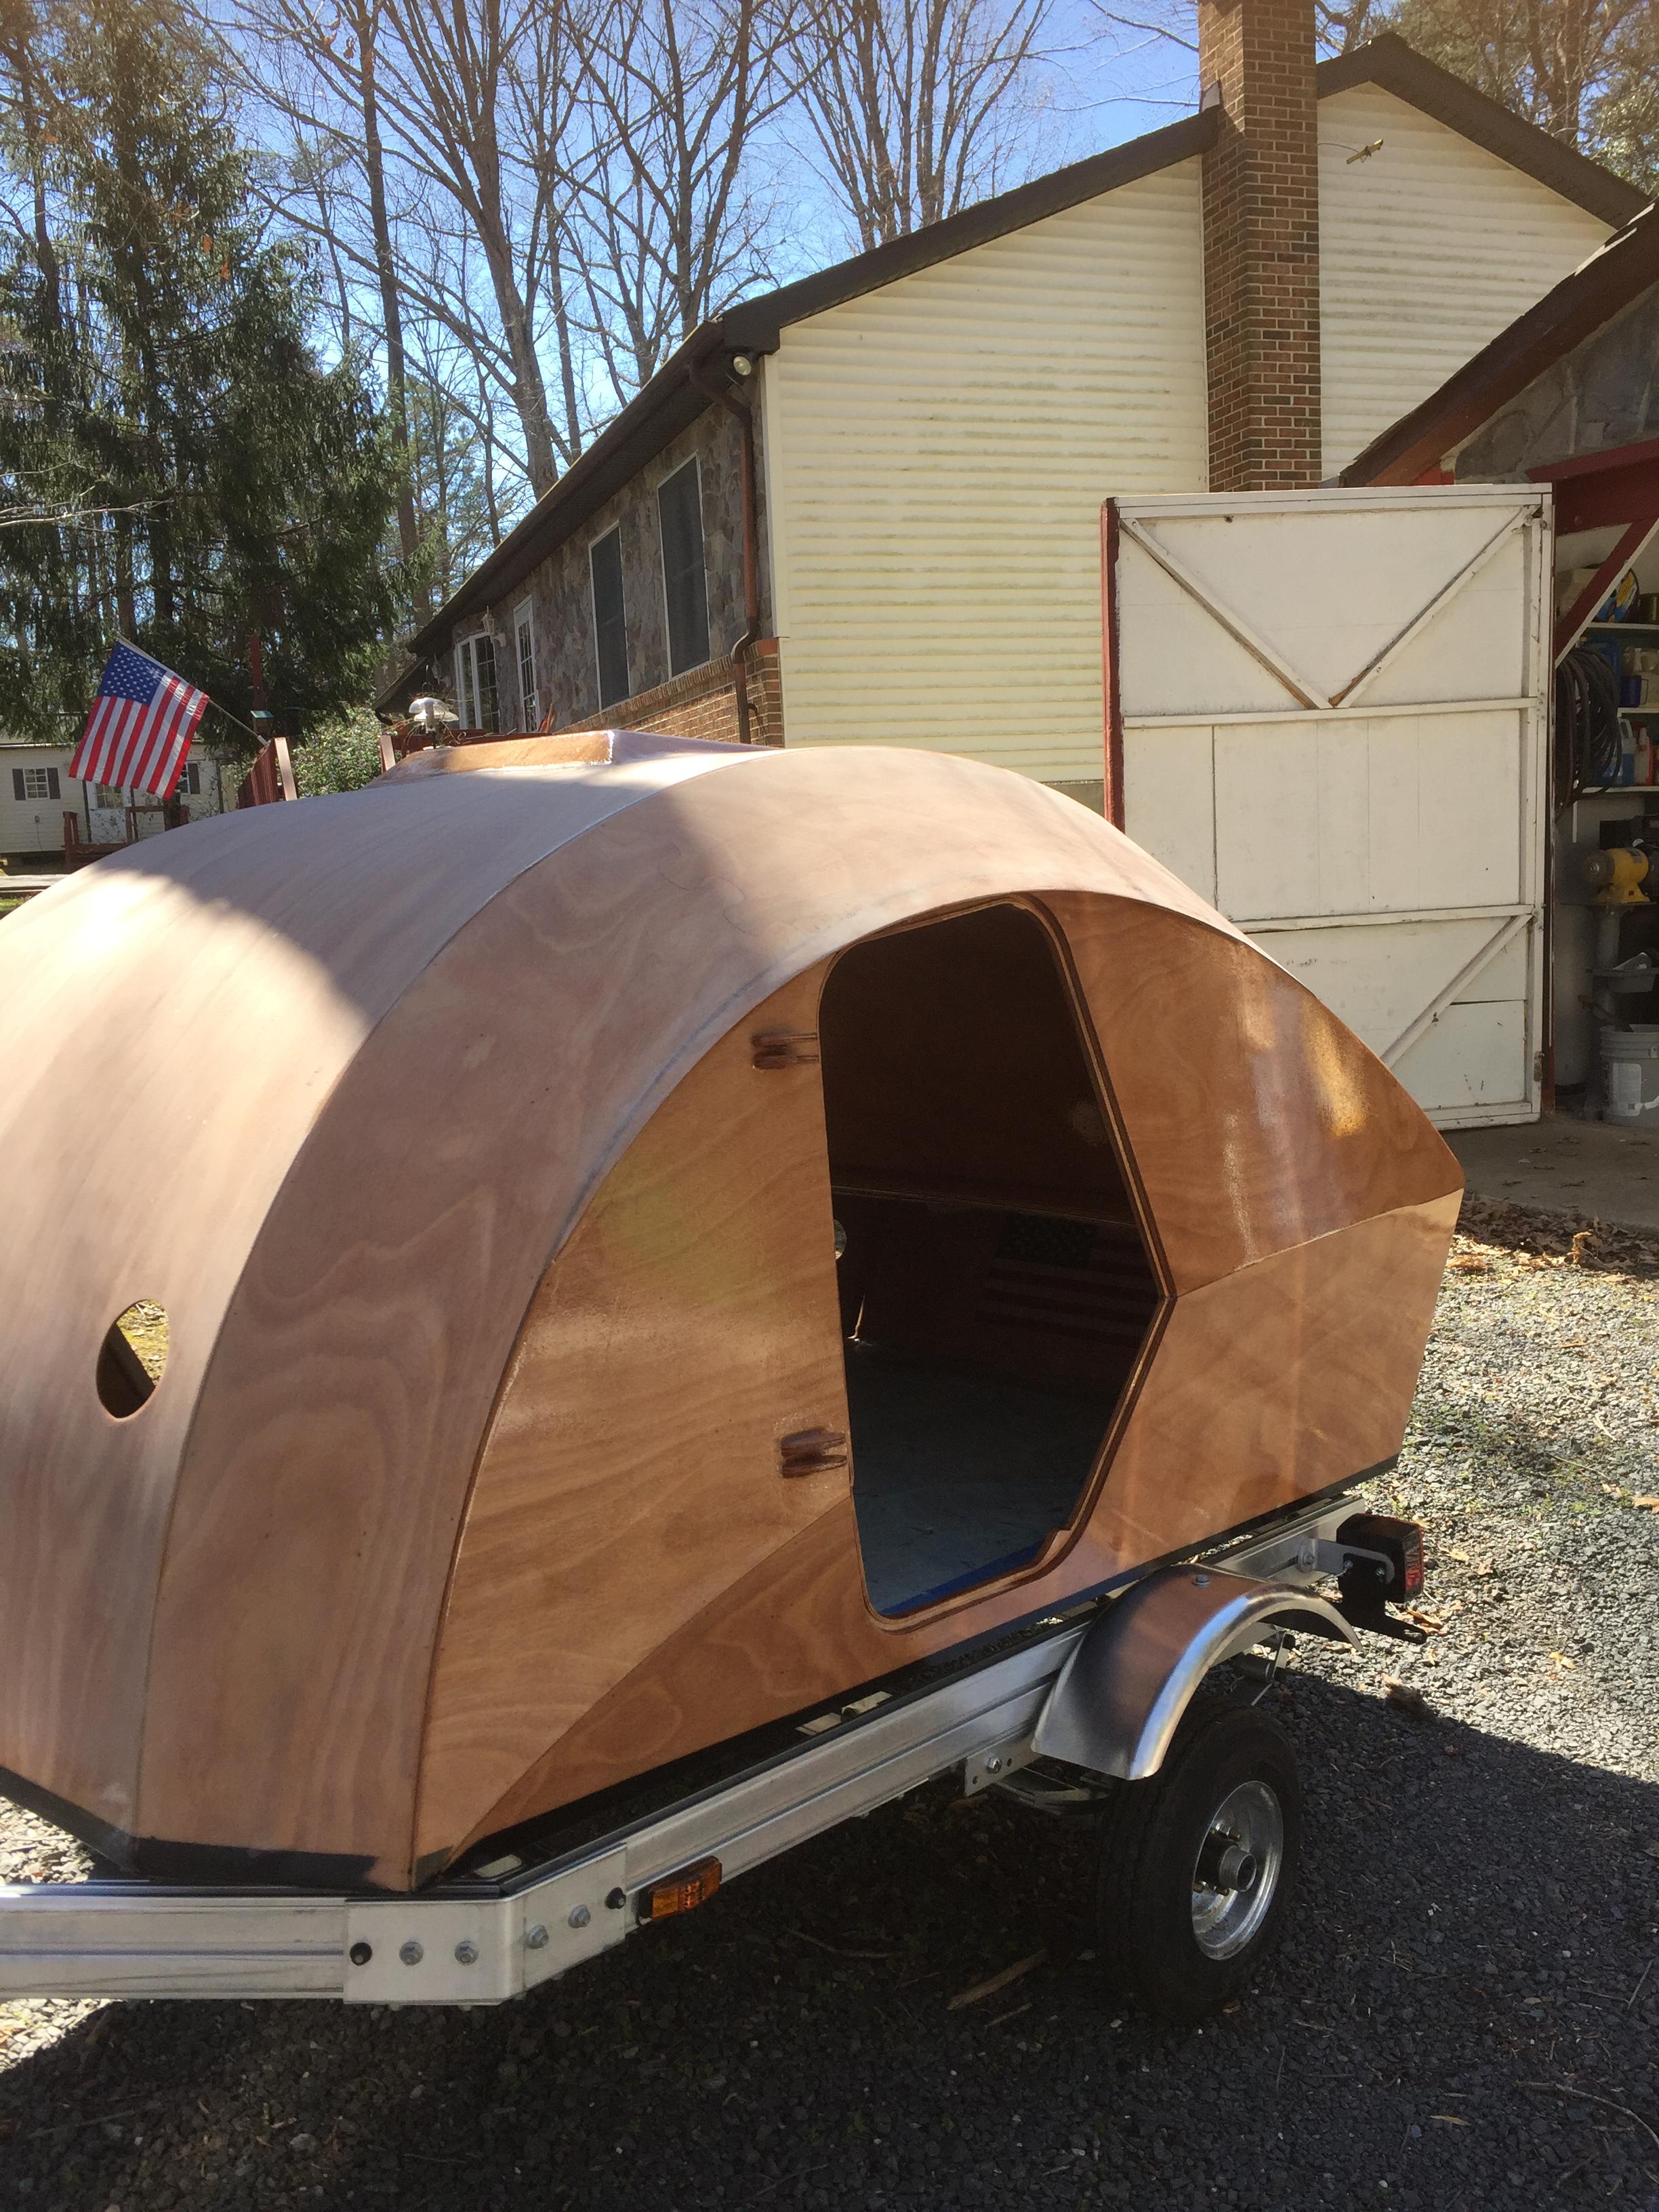
ParticipantSet the shell onto the trailer today. Looks like the hockey pucks will work PERFECT. They are 1″ thick and leave a nice 1/4″ gap from the butt block to the trailer. Since they are rubber, I am not going to use the rubber fender washers at all.
I aligned up the shell on the trailer and drilled the mounting holes. I make a little makeshift “drill bushing” that fit into the mounting flange holes and used that to drill nicely aligned pilot holes. It was just a piece of aluminum tubing that i wrapped masking tape around until it just fit into the trailer flange holes. I then used some electrical tape on a #30 12″ drill bit to match the drill to the ID of the tubing. Worked well, drilled all 10 holes in about 15 minutes, and followed up with a 5/8″ spade bit from the top. The holes came out quite clean. Masking tape on the bottom and the fill epoxy is curing now. Total time to mount onto the trailer will be about 2 hours.
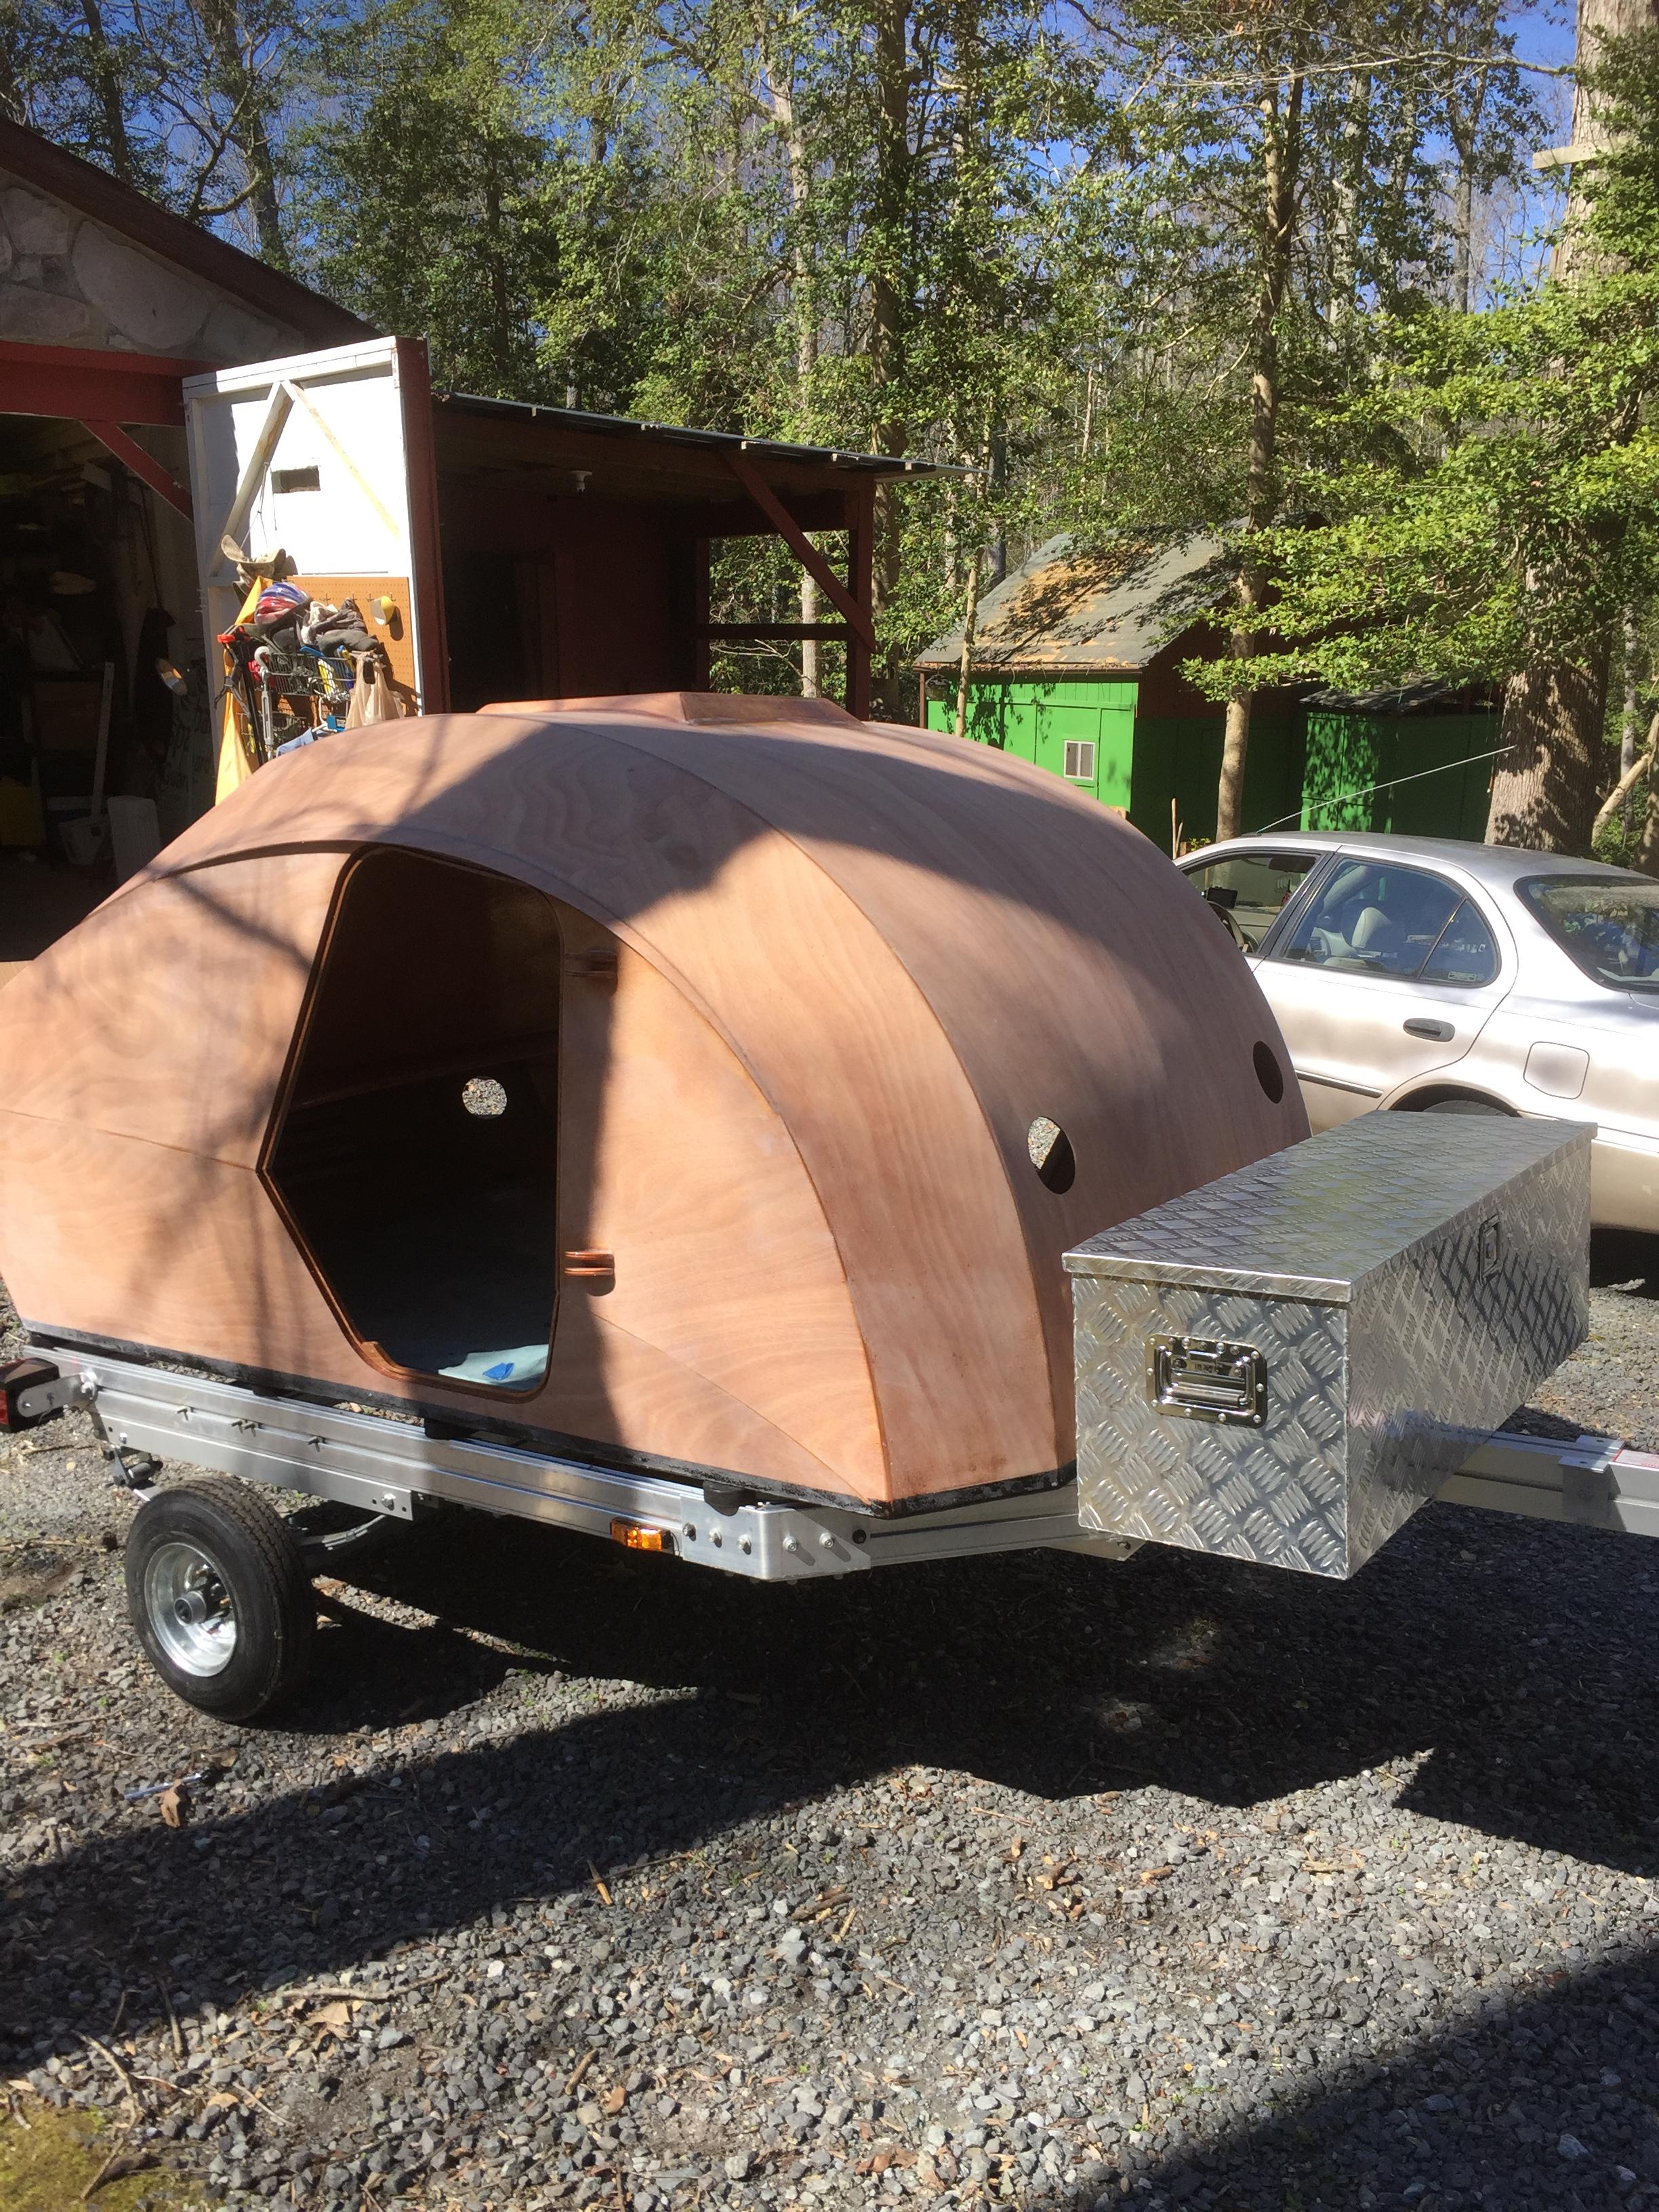
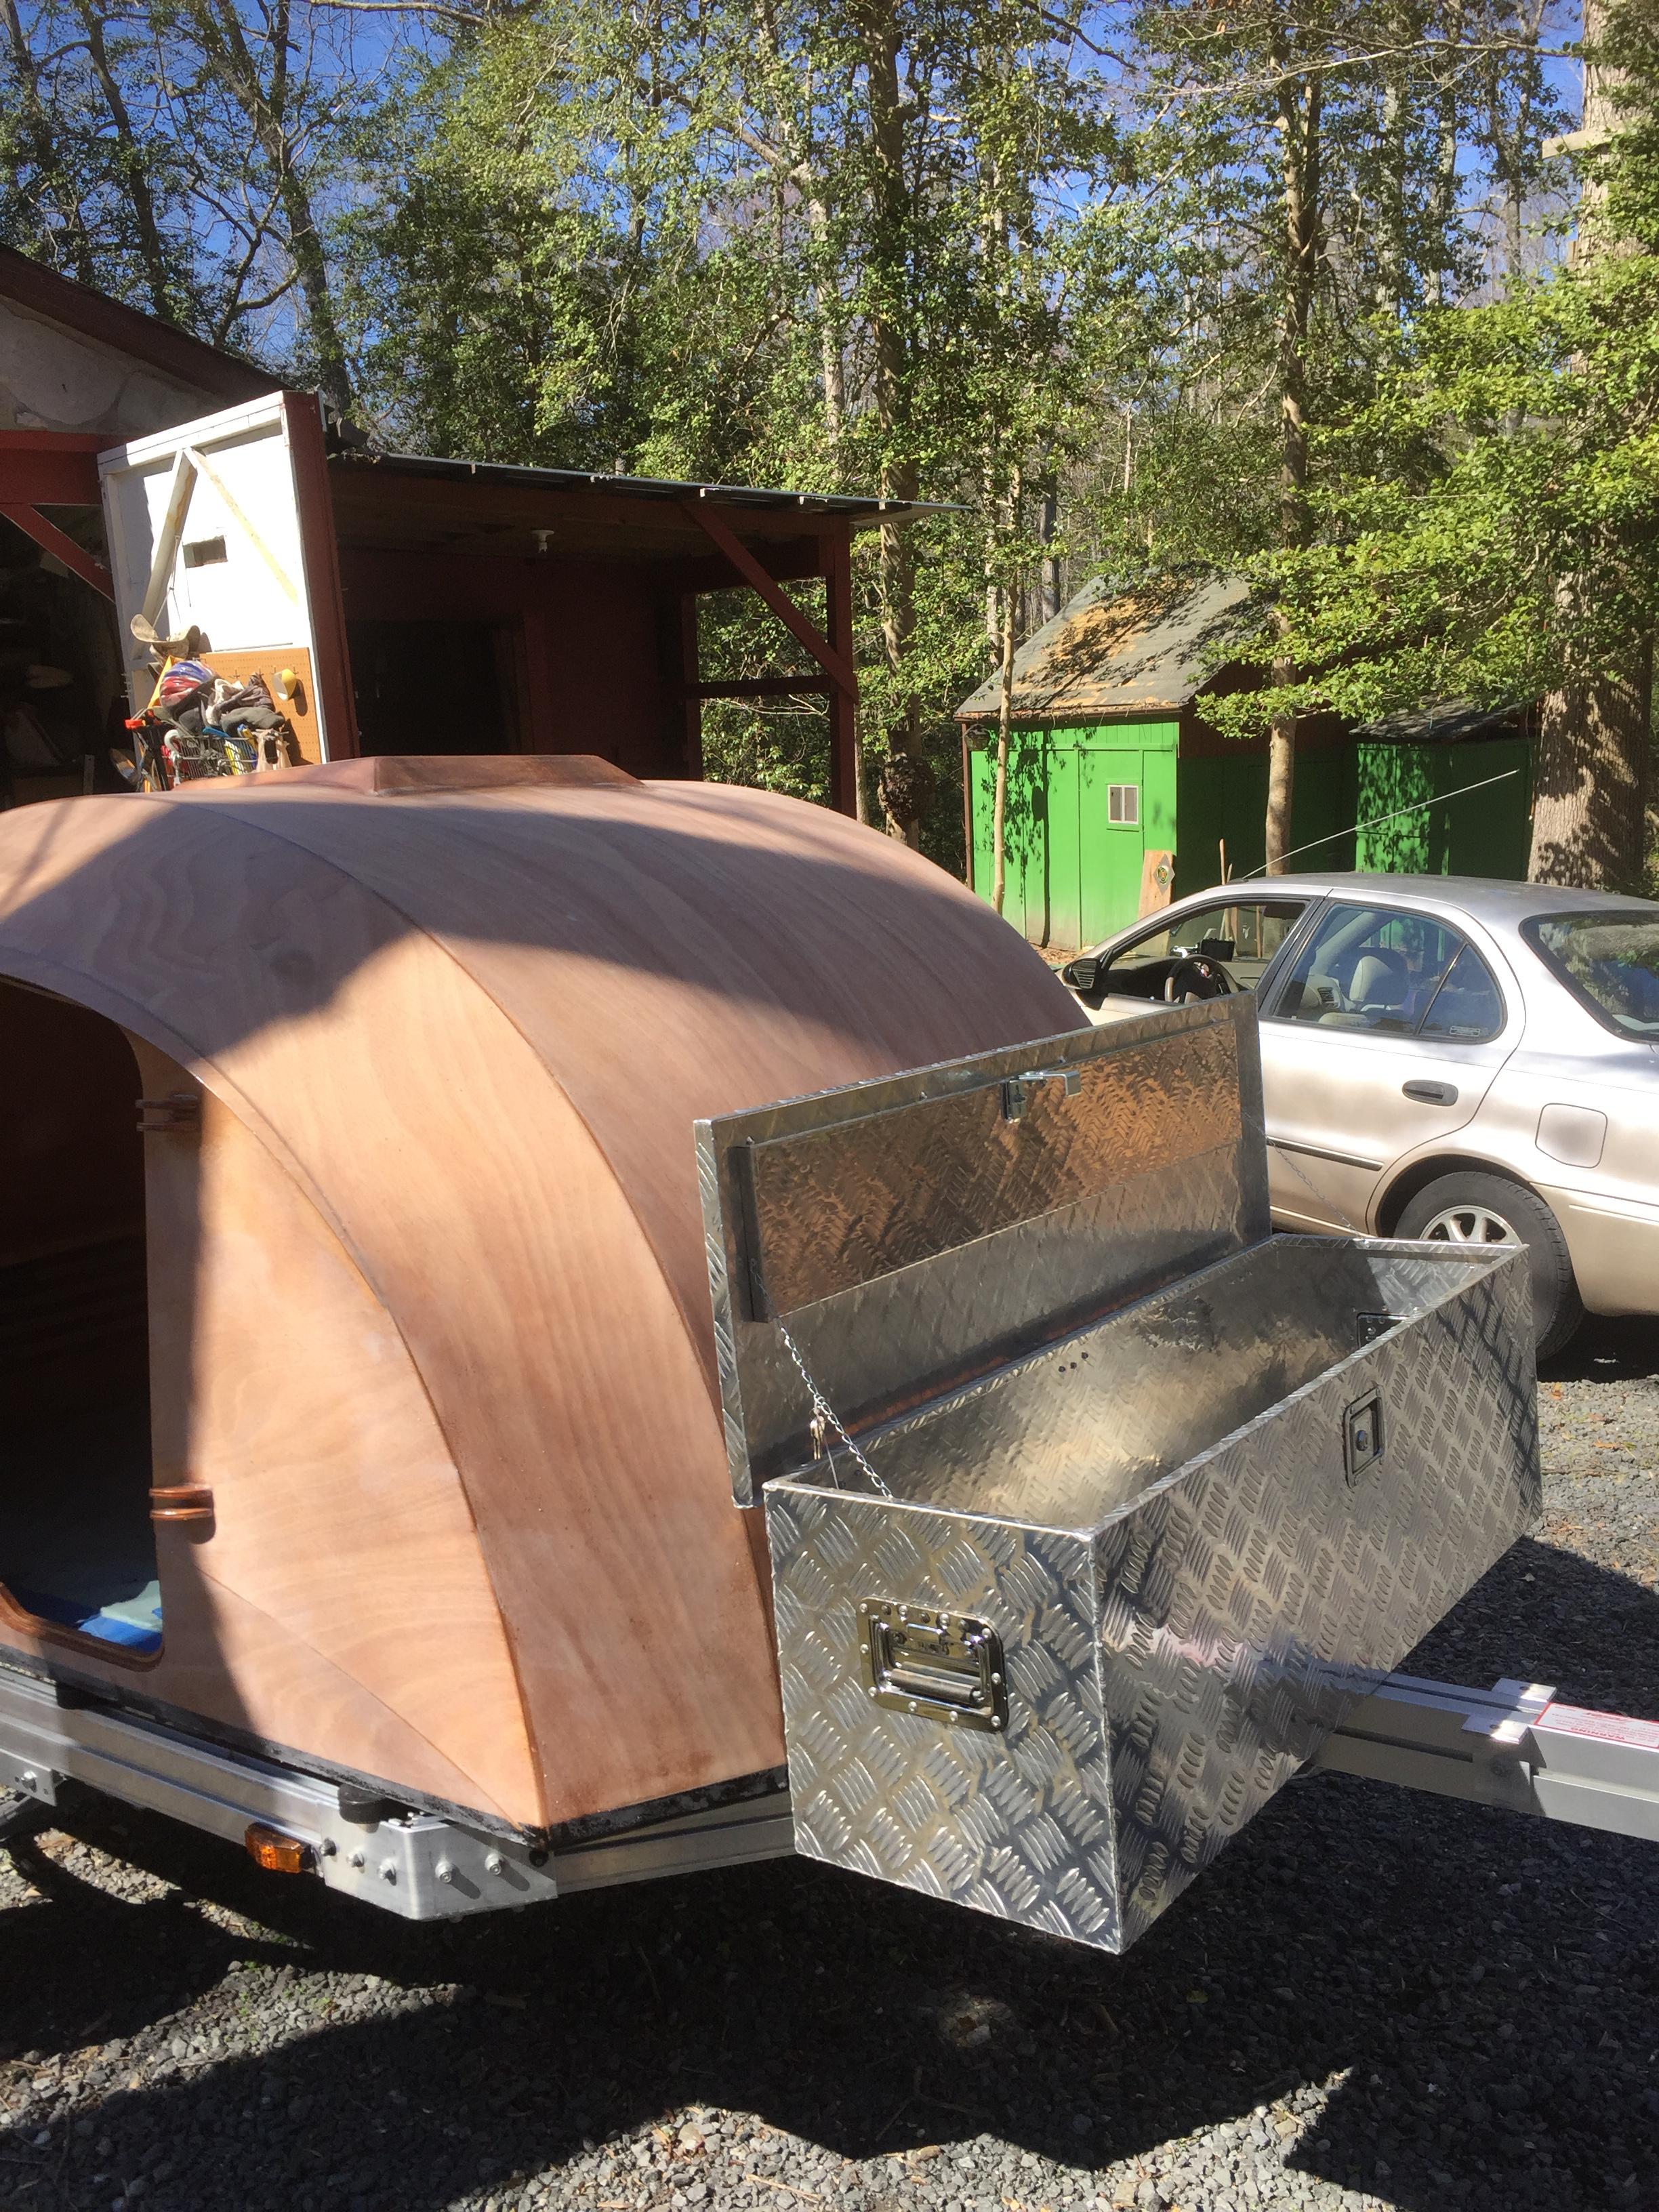
I set the aluminum tounge box on there just to see the look of it. It’s actually kind of nice that it’s not a separate sub-project at this point.
-
This reply was modified 7 years, 1 month ago by
-
AuthorPosts