Welcome to TeardropForum.com › Forums › Teardrop Builders’ Forum › Door fit
- This topic has 50 replies, 12 voices, and was last updated 2 years, 1 month ago by
southcitystl.
-
AuthorPosts
-
February 3, 2017 at 5:03 pm #533
Eric
ParticipantProbably would have helped some to have glassed it but glassed plywood still bends as is the case with preglassed hull panels in boatbuilding. Its a moot point for me. I just went down and studied my doors again and came up with the following: the amount that the stiffener laps onto panel 3 is not enough to hold an angle with that panel above the filleted seam immediate area. The door side plus the window sill plus the acrylic window do not have much resistance to bending at all hence my problem #1 (see earlier post). A strap on the front of my door may help but only if I stiffen the door front side panel 3 (or problem #1 will get worse. The angle and lushness of the rear of my door (where CLC put their strap) is held nearly perfectly by the two actuating rods and the handle cam. Putting a strap their seems pointless to correct my problems, but has anybody with my problems tried that? Feel free, John Harris, to join in on the discussion. I am thinking of doing the following: use a bevels guage to get the actual papanel-panel4 angle of the shell at the front door frame. Cut a stiffener say 1″ tall by 3/4″ thick out of some cherry I have laying around with the desired angle in it. If glued inside the door up against the window sill it will lap 5 1/2″ onto the panel part of the stiffener, or most of the way to the bottom of the door. It may very well solve both of my problems. What does every/anyone think? I think the door needs a lot more rigidity on its entire FRONT side top to bottom. This should help those who are seeing a “twist” in their doors. No? It will make my doors heavier but the weight will be immediately next to the hinges. 3/4″ okoume ply (unused trailer bunks) would be lighater. What do you think? Feel free to criticize.
February 3, 2017 at 5:11 pm #534ParticipantThat should have said” lap onto panel 4 part of stiffener”. And that should have said “use a bevel guage to get the panel 3 panel 4 angle of the shell. . .” And that should have said “the angle and lushness of my rear door side. . .”
Man I hate this site’s word correction software that corrupts what I write. Anybody know how to disable it?
February 3, 2017 at 5:32 pm #535friz
ParticipantProbably a frame with some depth around the entire perimeter of the door would have been the best solution. my trailing edge bottom also has a bow in it that will need to be corrected. I figure, I will throw wood at the issue until i get something that works. I too have the floor stiffeners left over to play with.
February 3, 2017 at 5:51 pm #536ParticipantI just checked the shell and inside door surfaces with a long bevel guage: my doors are sprung out on the forward edge! So I’m with Fritz: keep adding lumber till it all fits: first attempt will be that 3/4″ x 1″ trailer bunk stiffener up against the forward window sill and lapping 5 1/2″ onto the existing door bottom stiffener almost to the bottom of the door. I’ll do the same cut in the existing stiffener that you did except perhaps deeper into the fillet. I think you will find that the glass over your trial cut won’t be enough , probably you’ll have to add lumber. Feel free to disagree/correct me.
My camper won’t leak and is good enough to take on the road, but I would like to get my door fit better than it is so far. Gonna have to sand some varnish off and add lumber.
February 3, 2017 at 6:22 pm #537ParticipantI’m with you Eric. I’m pretty sure that I got them close enough not to leak, but I doubt they will be pretty.
February 3, 2017 at 11:00 pm #541ParticipantThe question I am asking myself/agonizing over is whether to make that saw cut that you made in the existing stiffener, and if so whether to make several like the art of kerfing. I am worried about appearance. Or . . . perhaps for ultimately a better appearance, I should be more aggressive and cut into the existing stiffener at the panel 3/4 chine line and chisel out all of the stiffener above the panel 3/4 chine (the ramped part) and replace it after I get the new stiffener (which I figure will be2a total length of 21 1/2″) glued in. That way I would end up with hopefully just a thin glue line between the old stiffener and the replacement ramp piece. What stimulated this idea is the fact that when I test bend the door (try to unspring it) it bends starting just above the hinge (at the end of the ramp in the existing stiffener) and this visibly seemed to affect the hinge angle (not sure why or if it matters). I guess the biggest reason is the thought that most of the offending spring back probably occurred under that stiffener ramp area. It wouldn’t be fun chiseling out that ramp with the headliner and gasket already permanently installed, but multiple cuts with my oscillating saw might help a lot. What do you think Fritz, taking into account that my bevels measurements pretty reliably indicate that I need more panel 3/4 angle? The problem is that I “baked in” the spring back with the ramp portion of the existing stiffener so if the ramp is not removed the bending I introduce will be above where the spring back occurred (at least in theory as I invision it)???
Any opinions Fritz?
February 3, 2017 at 11:03 pm #542ParticipantIn answering assume that I have the lots of time it would take to chisel; I’m retired.
February 6, 2017 at 2:09 pm #548ParticipantI don’t think i am in any position to give advice. I’m just as perplexed with my ever changing door as everybody else. I’m waiting to see what happens when i get my seals in place. Sounds like I will be in for more surprises.
February 7, 2017 at 1:02 am #557ParticipantI am probably going to live with it for the time being as my teardrop is otherwise finished and road ready. I did ask John Harris what if anything he would do. I did notice in completion photos posted on this site that other teardrop doors have the exact same two figment problems. For anyone in the earlier stages of construction, I suggest that they glue their door stiffeners in BEFORE they cut their doors out ( accessible by crawling through the open transom. One end is located by copper wire through the cnc drill hole, the other through a hole that you drill yourself with a 1/16″ bit. I wish I had as that would go a long way towards avoiding any spring back that the stiffener glue in problem may contribute to or “bake in”. I hope Mr Harris weighs in, as I believe that the majority of teardrop builders will have some version of this problem.
February 7, 2017 at 7:27 pm #560dragonflyda
ParticipantI’m going to cut the doors soon – how exactly might you do this (glass the inside of the door before cutting)?
Thanks.
February 7, 2017 at 11:46 pm #566SOMDTD
ParticipantThat’s a possibility, glassing entire inside of the doors. I think Eric does not mean that though, he is saying to glue the bottom door stiffener into place before cutting the door free. You would have to sand-to-fit the stiffener without the door in hand though… might mean crawling in and out through the transom multiple times. Ugh.
Glassing the whole door inside might have other issues as well, particularly with regard to window frame fit.
February 8, 2017 at 2:15 pm #571ParticipantYes SOMDTD Said what I meant. I firmly believe that the advantages are well worth crawling in and out (three trips on the first side one or two trips for the second side in and out through the transom. This method will bake in any twists and the chine angle in the door. I REALLY wish I had thought of it then. There is zero downside other than the trips in and out.
February 17, 2017 at 9:06 pm #614ParticipantHi,
I just glued in my door sills… a painstaking process to be sure. What I discovered is that the door sills are flat but the shell of the camper is NOT! I intentionally did NOT clamp the forward door sill to the shell while glueing and filled in the gap with epoxy/cellofill glue. My theory is that the doors have the same curve to them since they are cut from the same panels. I also tapered the ends of the door sill where the upper “bow” and the lower “bow” meet, due to the roughly 3/32″ of filler and glass tape where the panels meet. I tapered the top of the upper sill for the same reason. I could have ground the glass away but did’ want to do that much sanding as well as the strength it would take away from the door area.the rear door sill shell is a LOT flatter so a clamped like crazy there. I will say, once fully worked in, the door sills fit nearly perfectly! I rounded the interior side with a 3/8 round over router bit.
One thing I have learned along the way is epoxy that goes on is epoxy that needs sanded off later! Tip: Take epoxy cleanup seriously, SO much easier to thougoughly clean wet fillet goo than sand it off later! 🙂
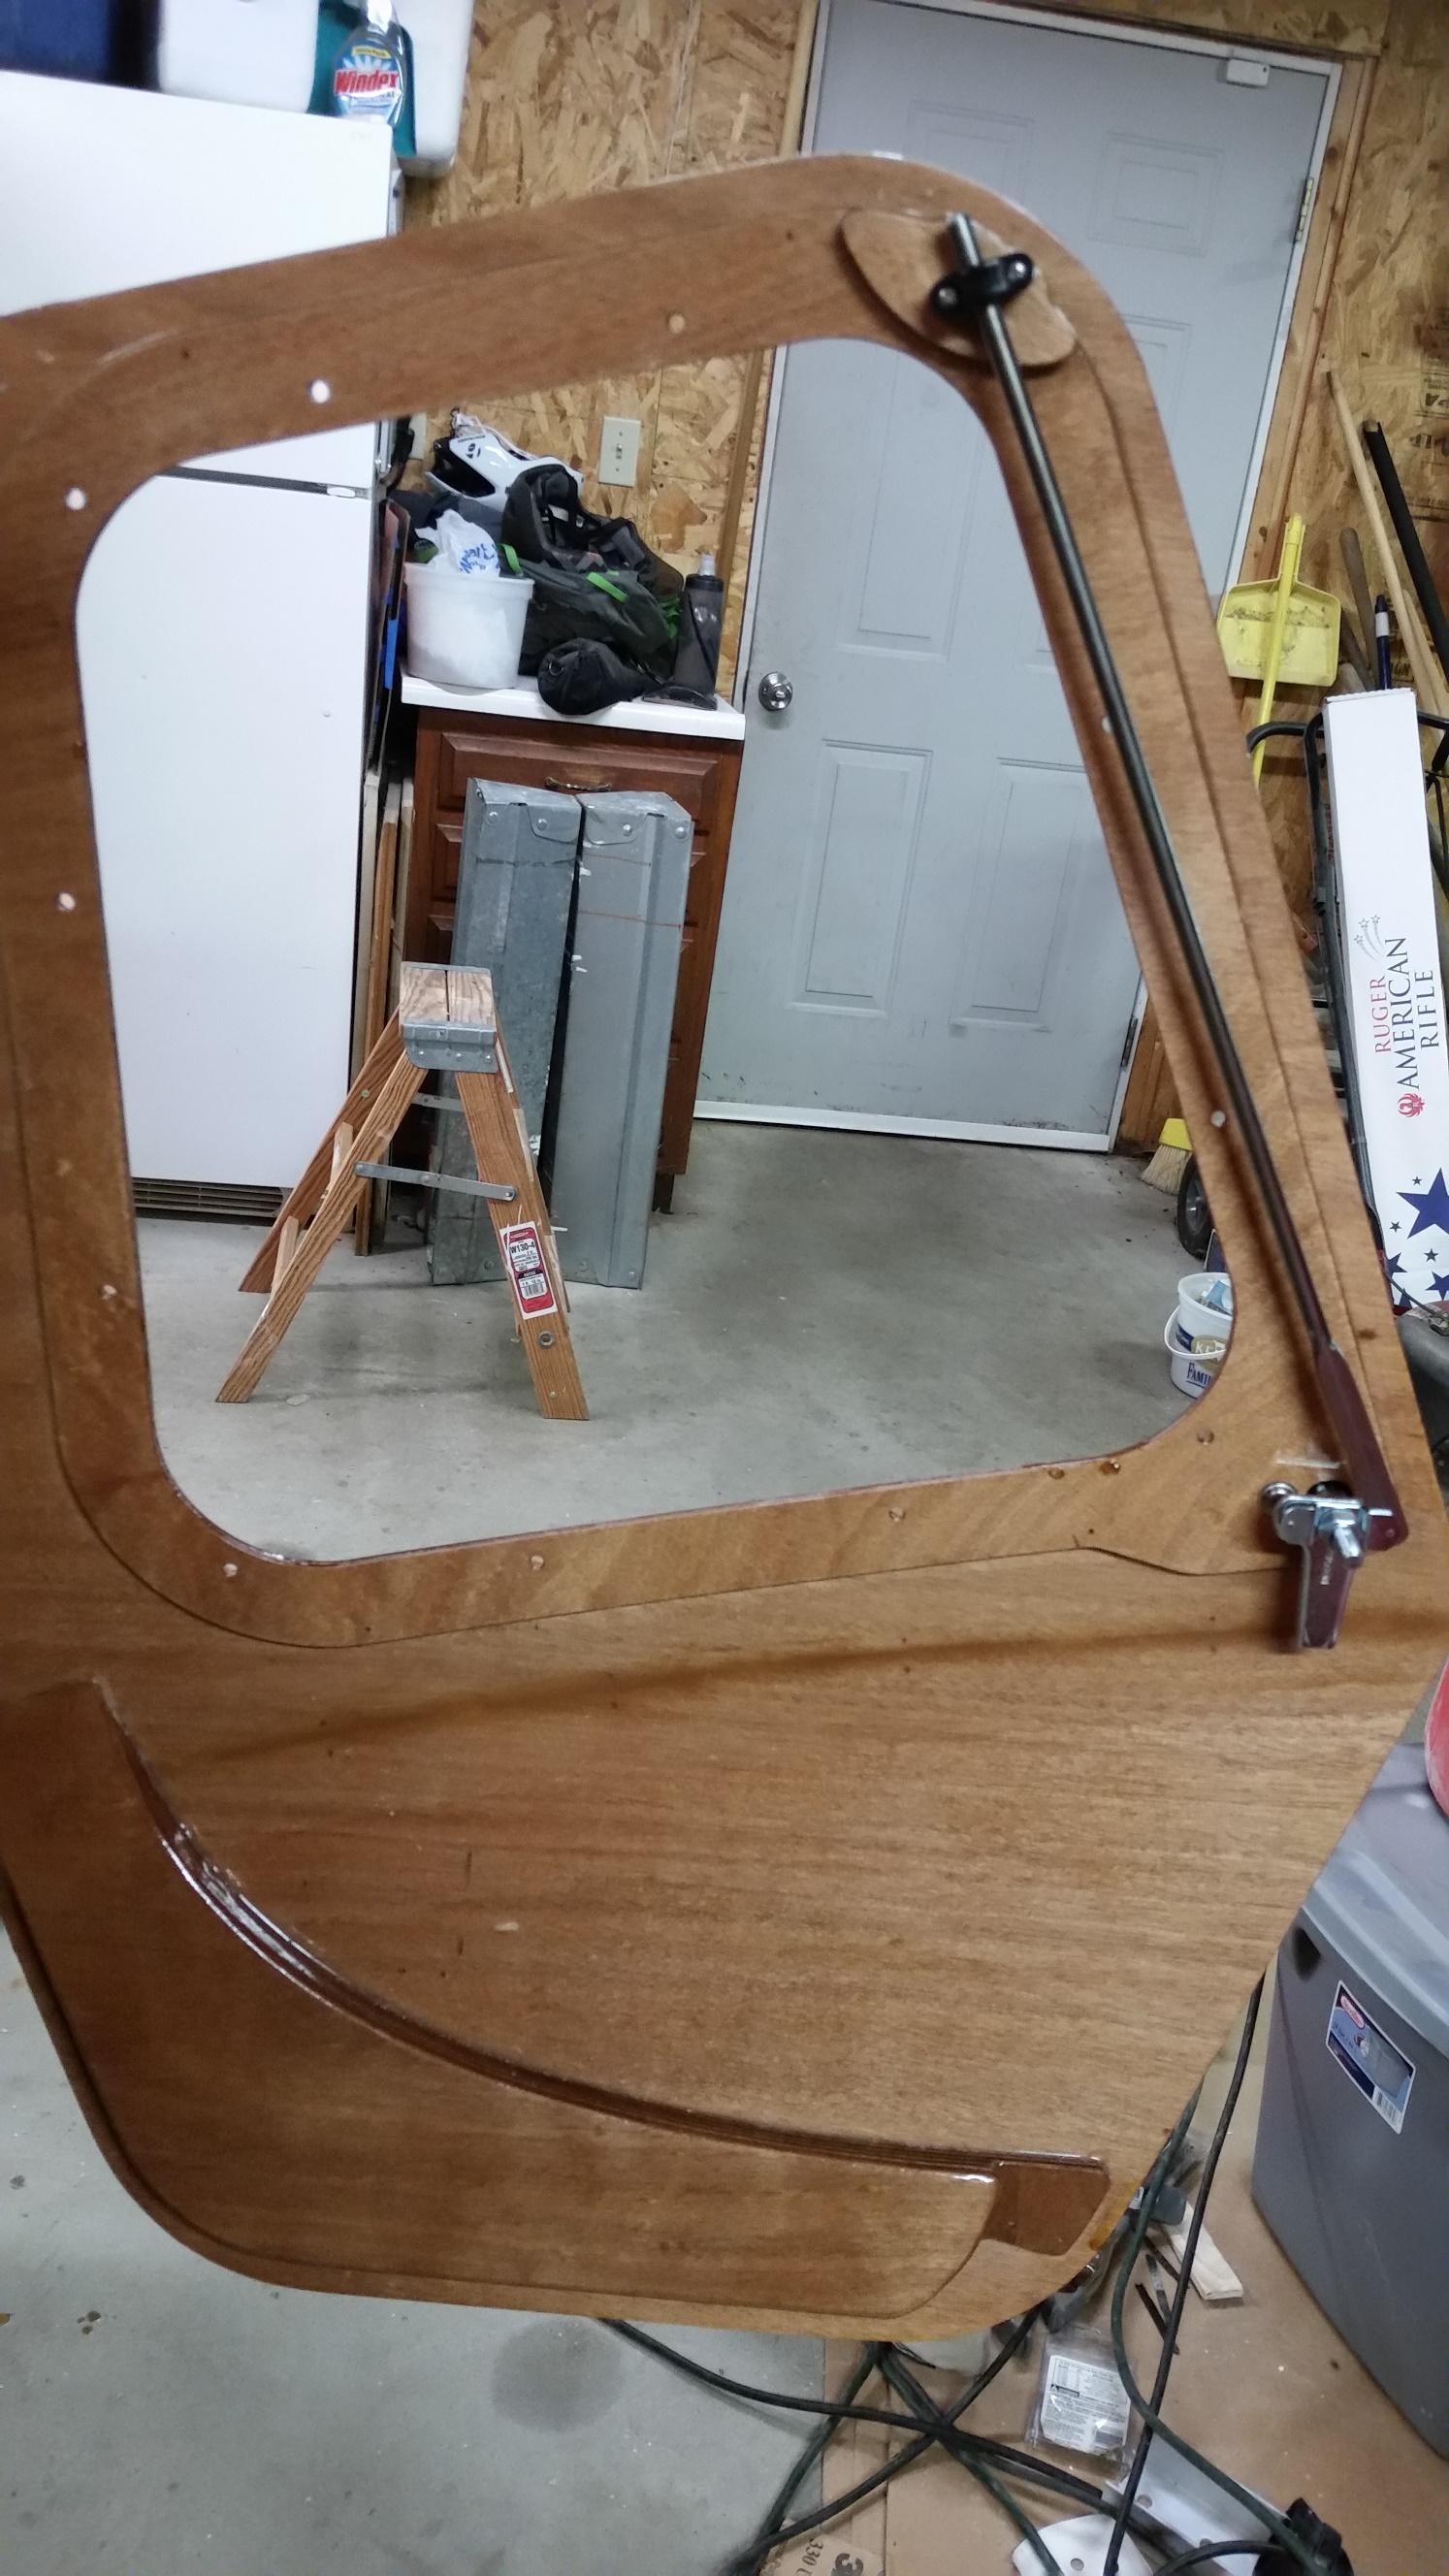
March 12, 2017 at 9:26 am #653ParticipantI am starting to work this issue with my doors. I am considering a soloution involving a turnbuckle and an eyebolt through the door stiffener. It’s the forward bottom edge that is sprung out on mine, about 3/8″. I like the turnbuckle idea because I will be able to adjust it incrementally after installation.
April 28, 2017 at 11:30 am #731ParticipantI am fitting my door hardware and found my stiffeners are incorrect. Anyone else have this issue?

-
AuthorPosts
- You must be logged in to reply to this topic.