Welcome to TeardropForum.com › Forums › Teardrop Builders’ Forum › Mistakes, oopsies, and blunders
- This topic has 17 replies, 5 voices, and was last updated 7 years, 4 months ago by
SOMDTD.
-
AuthorPosts
-
February 12, 2017 at 9:28 pm #587
Bob D.
ParticipantAnybody else do something as stupid as I did? I had the assembly up on its side prepping to fiberglass the seams on the side panels (#2 to #3, and #3 to #4). I pressed a little too hard while sanding a CA adhesive stitch and popped it. No biggie. I put in a new copper wire, tightened it up. Came back around to the open side with the CA and squatted down to apply the adhesive… and jammed my right knee into the #4 panel and split it. Bad.
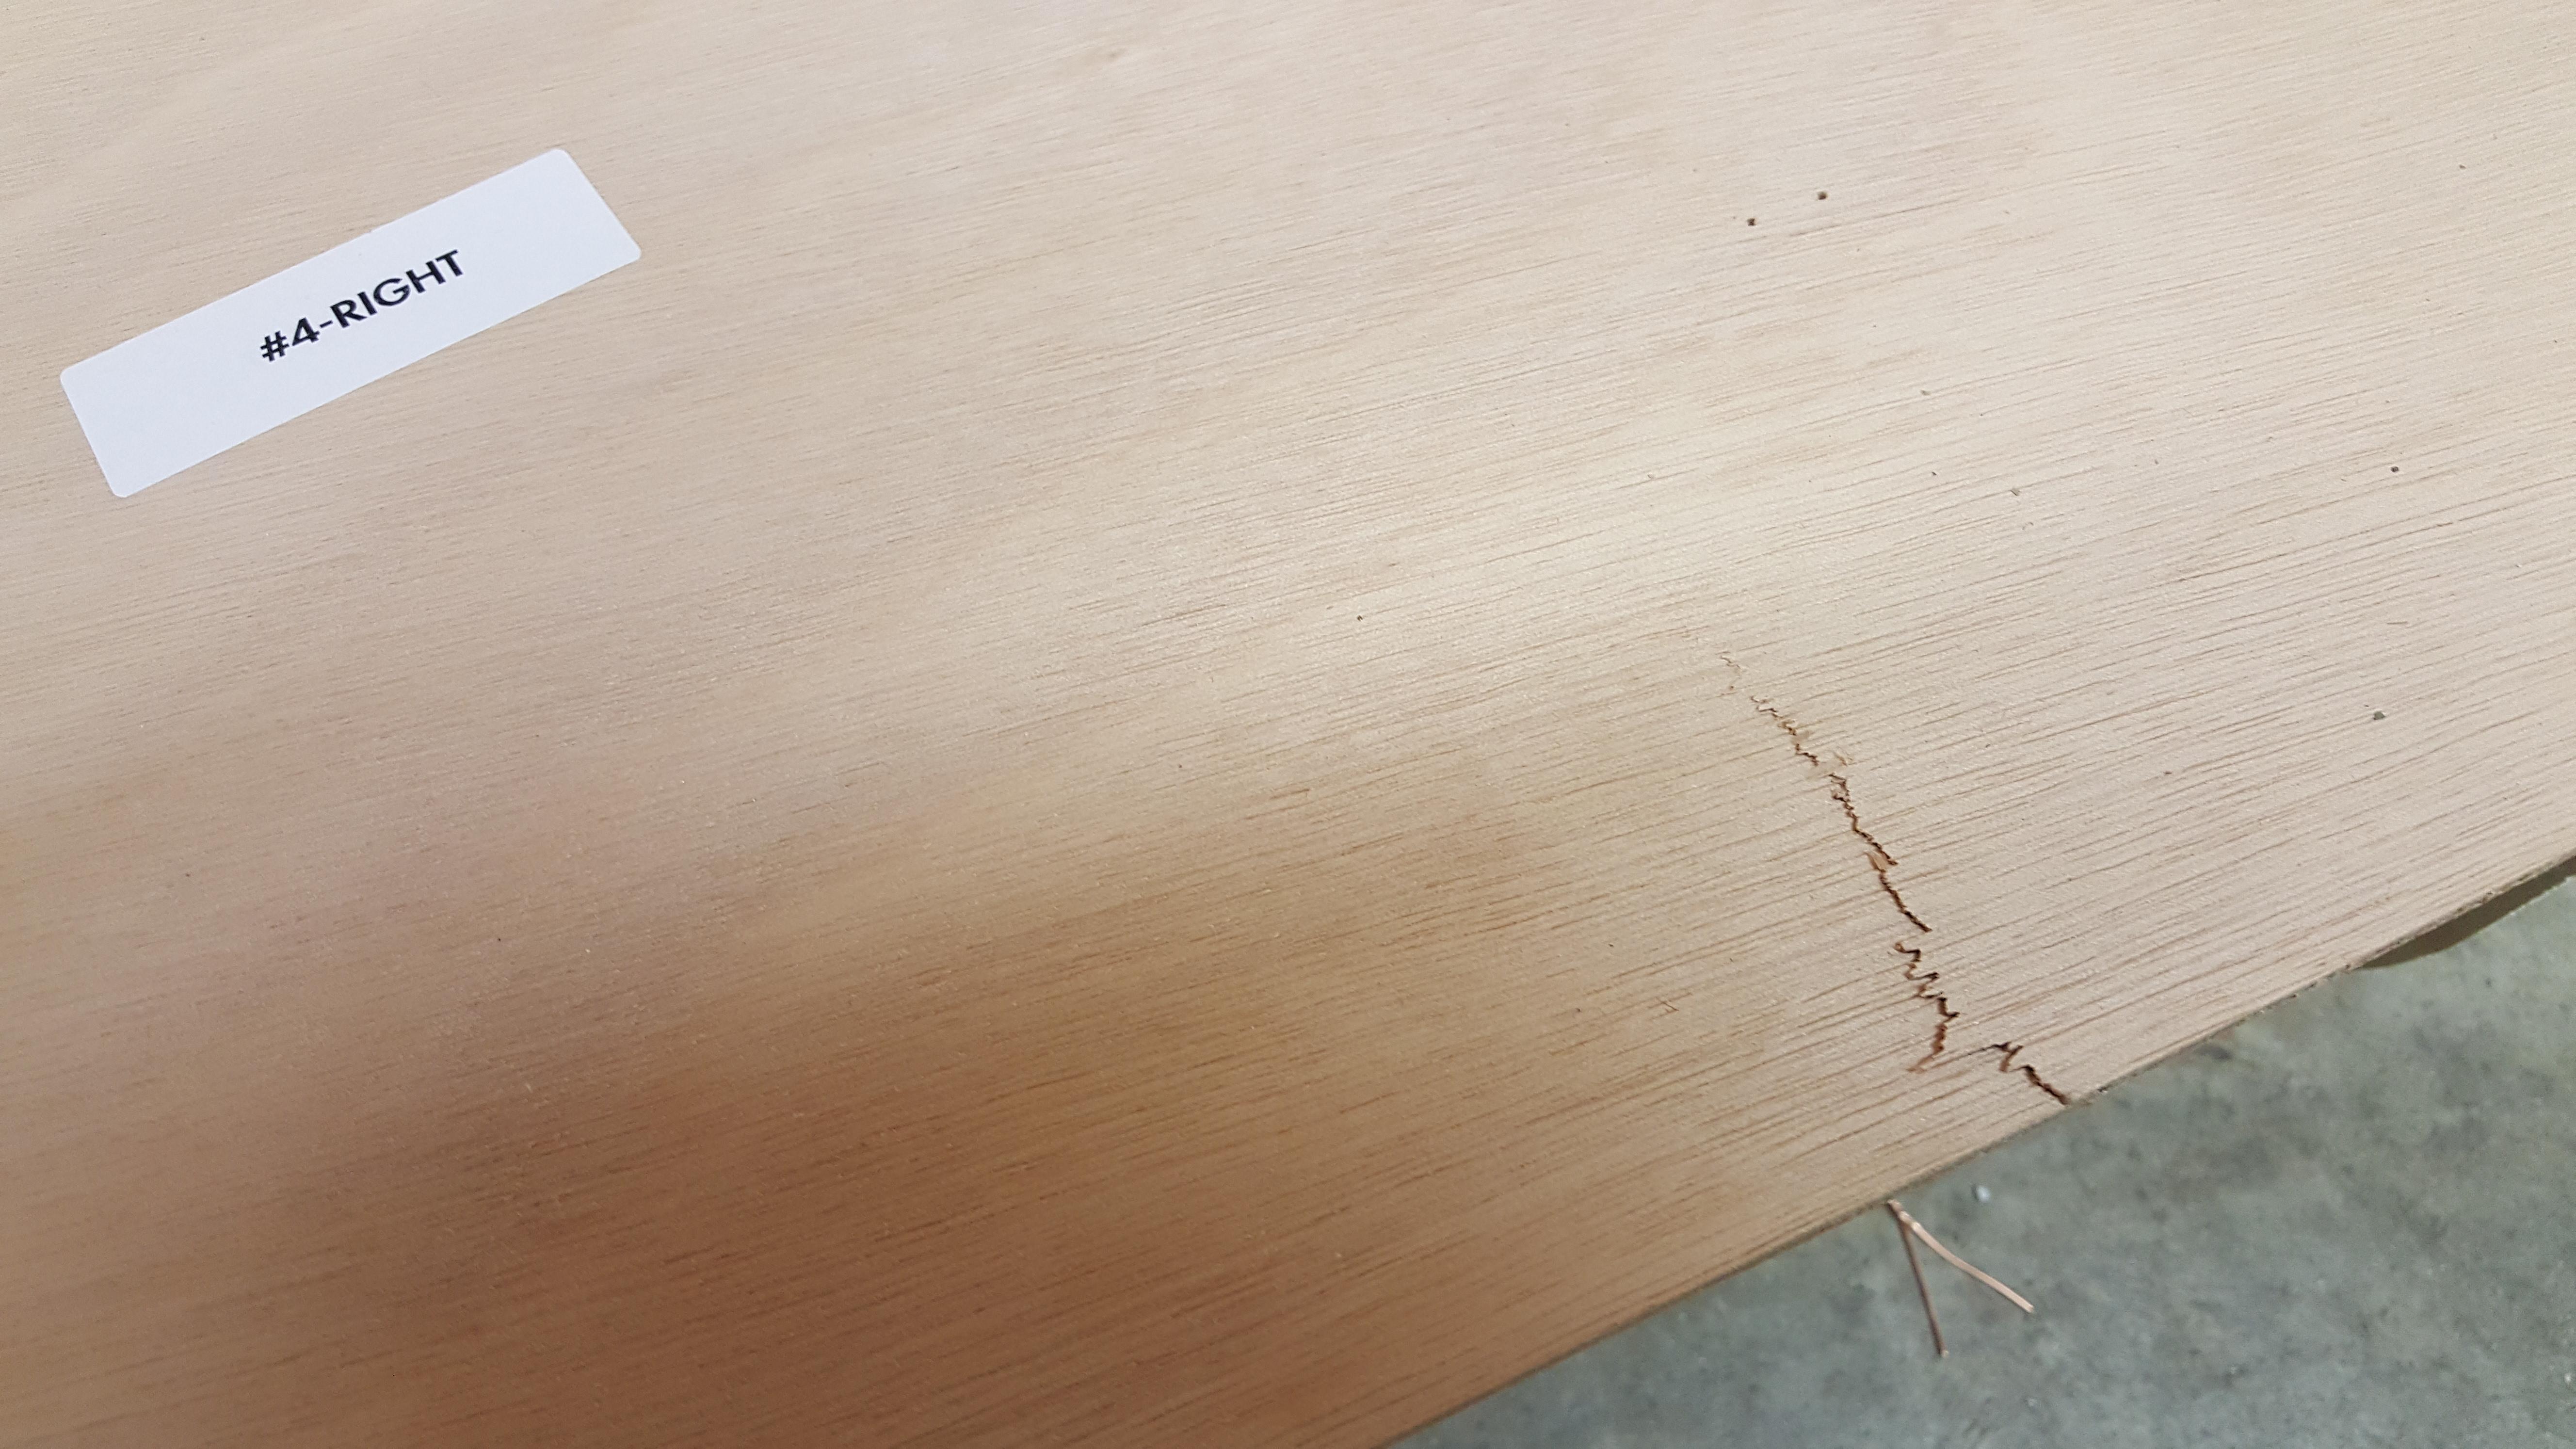
Have any of you guys done anything like this? Will CLC sell just a #4 panel? I wrote them but it’s the weekend. The only good thing is that I haven’t fiberglassed this panel in yet so if they do sell a panel I can just put a new one in and call it good. I’m going with a bright finish, so there is no way I can just try to mend this. I’d honestly just smash it up and use it for firewood and try to sell the trailex trailer locally if I can’t get a replacement. It has to look right and painting it is out of the question.
-Bob
-
This topic was modified 7 years, 5 months ago by
Bob D..
February 12, 2017 at 10:27 pm #589ParticipantA suggestion by a friend was to cover the area with a name plate of some sort. It’s only about 3″ long, but it’s in a VERY visible location. Maybe something like this out of stainless?
 February 12, 2017 at 11:01 pm #590
SOMDTD
ParticipantPerfection is unlikely on a project like this. My project has a good number of minor defects and at least one major defect. This isn’t for score, it’s to produce a pleasing result that has practical application. That looks totally repairable, however replacing the panel is the best option. I bet CLC will cut you a new panel, but even if they don’t just lay it flat, apply a fiberglass patch over it and press forward. The crack will be visible but the fiberglass patch will essentially dissapear. In the end it can be covered with a sticker, a flag, or other decorative item.
Don’t lose heart, and believe me, this will NOT be that last imperfection. Even with the warts on my trailer, it’s still pretty darn nice looking, especially to others. *I* see the defects, but essentially nobody else does!
February 13, 2017 at 12:47 am #591Eric
ParticipantI produced two identical cracks in one of my number 2 panels just trying to push/bend it into place in the mold. This is an inherent weakness of three ply okoume especially near the panel edges.
CLC did offer to replace it gratis but I opted to take it out, glass patch it on a flat table with a heavy cement block on it for pressure, and I reinstalled the panel the next day. My teardrop is varnished and you can only see the hairline crack from one foot away and ONLY if you know where to look. Bottom line is the repair came out really well and I highly recommend it especially for the much less prominent number 4 panel.
That said CLC is REALLY good about replacing parts. We all break stuff and mess up at some point but I don’t let it discourage me from my passionate hobby – building CLC boats.
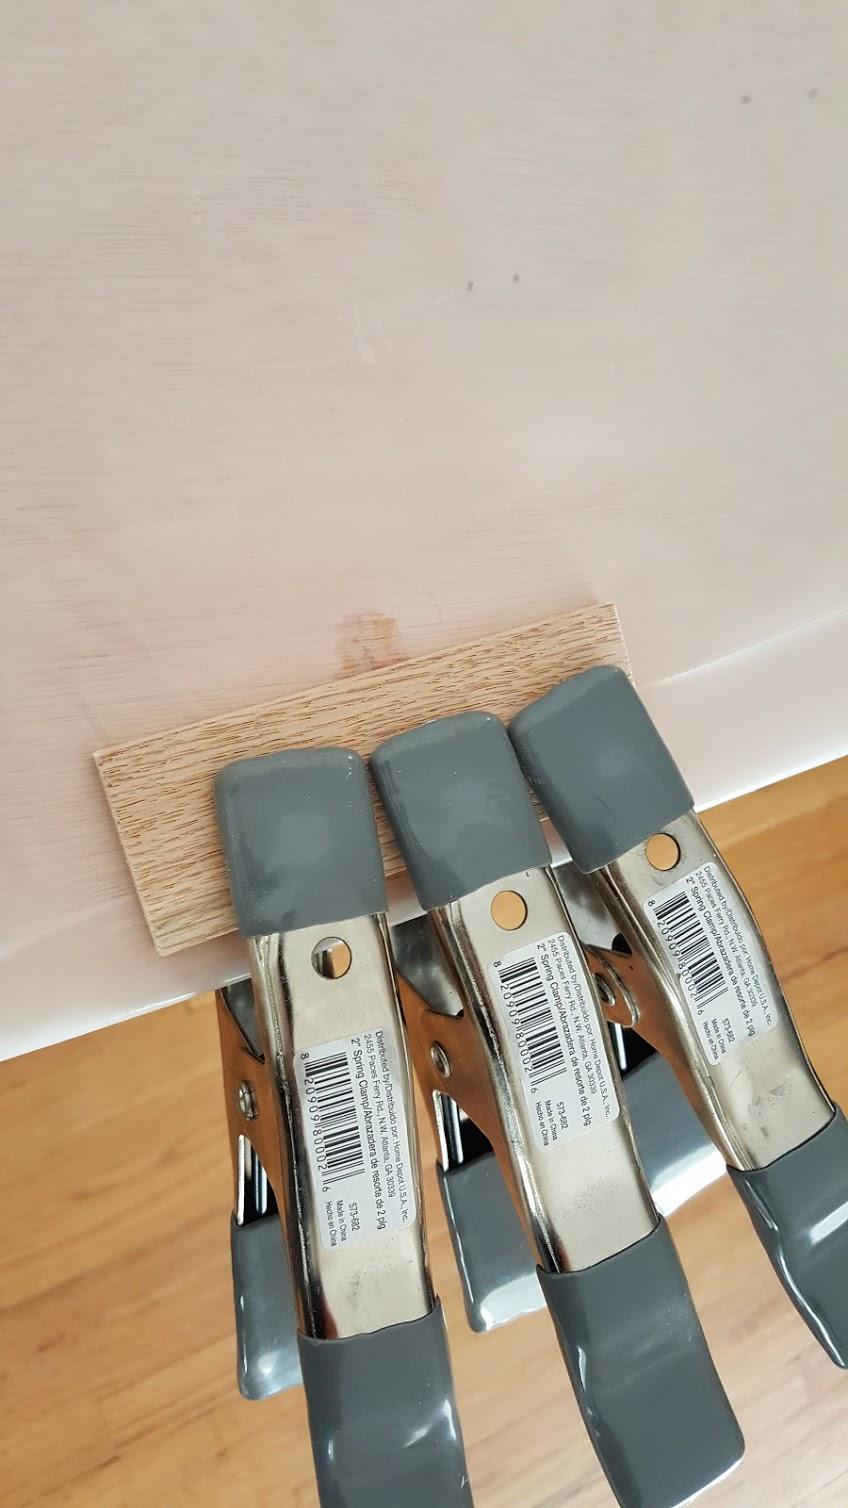
February 13, 2017 at 4:30 pm #593ParticipantI talked to CLC and they recommended using straight epoxy resin and getting it into the crack and clamping it up. So far so good. I’ll know tomorrow how it turns out.
 February 14, 2017 at 12:53 am #599Participant
Well. A glass patch adds the strength back in tension, and is invisible in the finished camper, and doesn’t take any longer. The cement block is merely a flat weight to provide clamping pressure. Nonetheless, since panel 4 doesn’t bend much anywhere , you should be good to go. If you have any trouble with the glue, just take it out and do a glass patch. Only the builder knows about these gremlins; everybody else will admire your teardrop.
February 14, 2017 at 6:51 pm #608Boardwalk
ParticipantCLC posted a short article on repairing a worn out kayak that had a much bigger issue. Seems that with a little patience and perseverance – you too can be saved 🙂
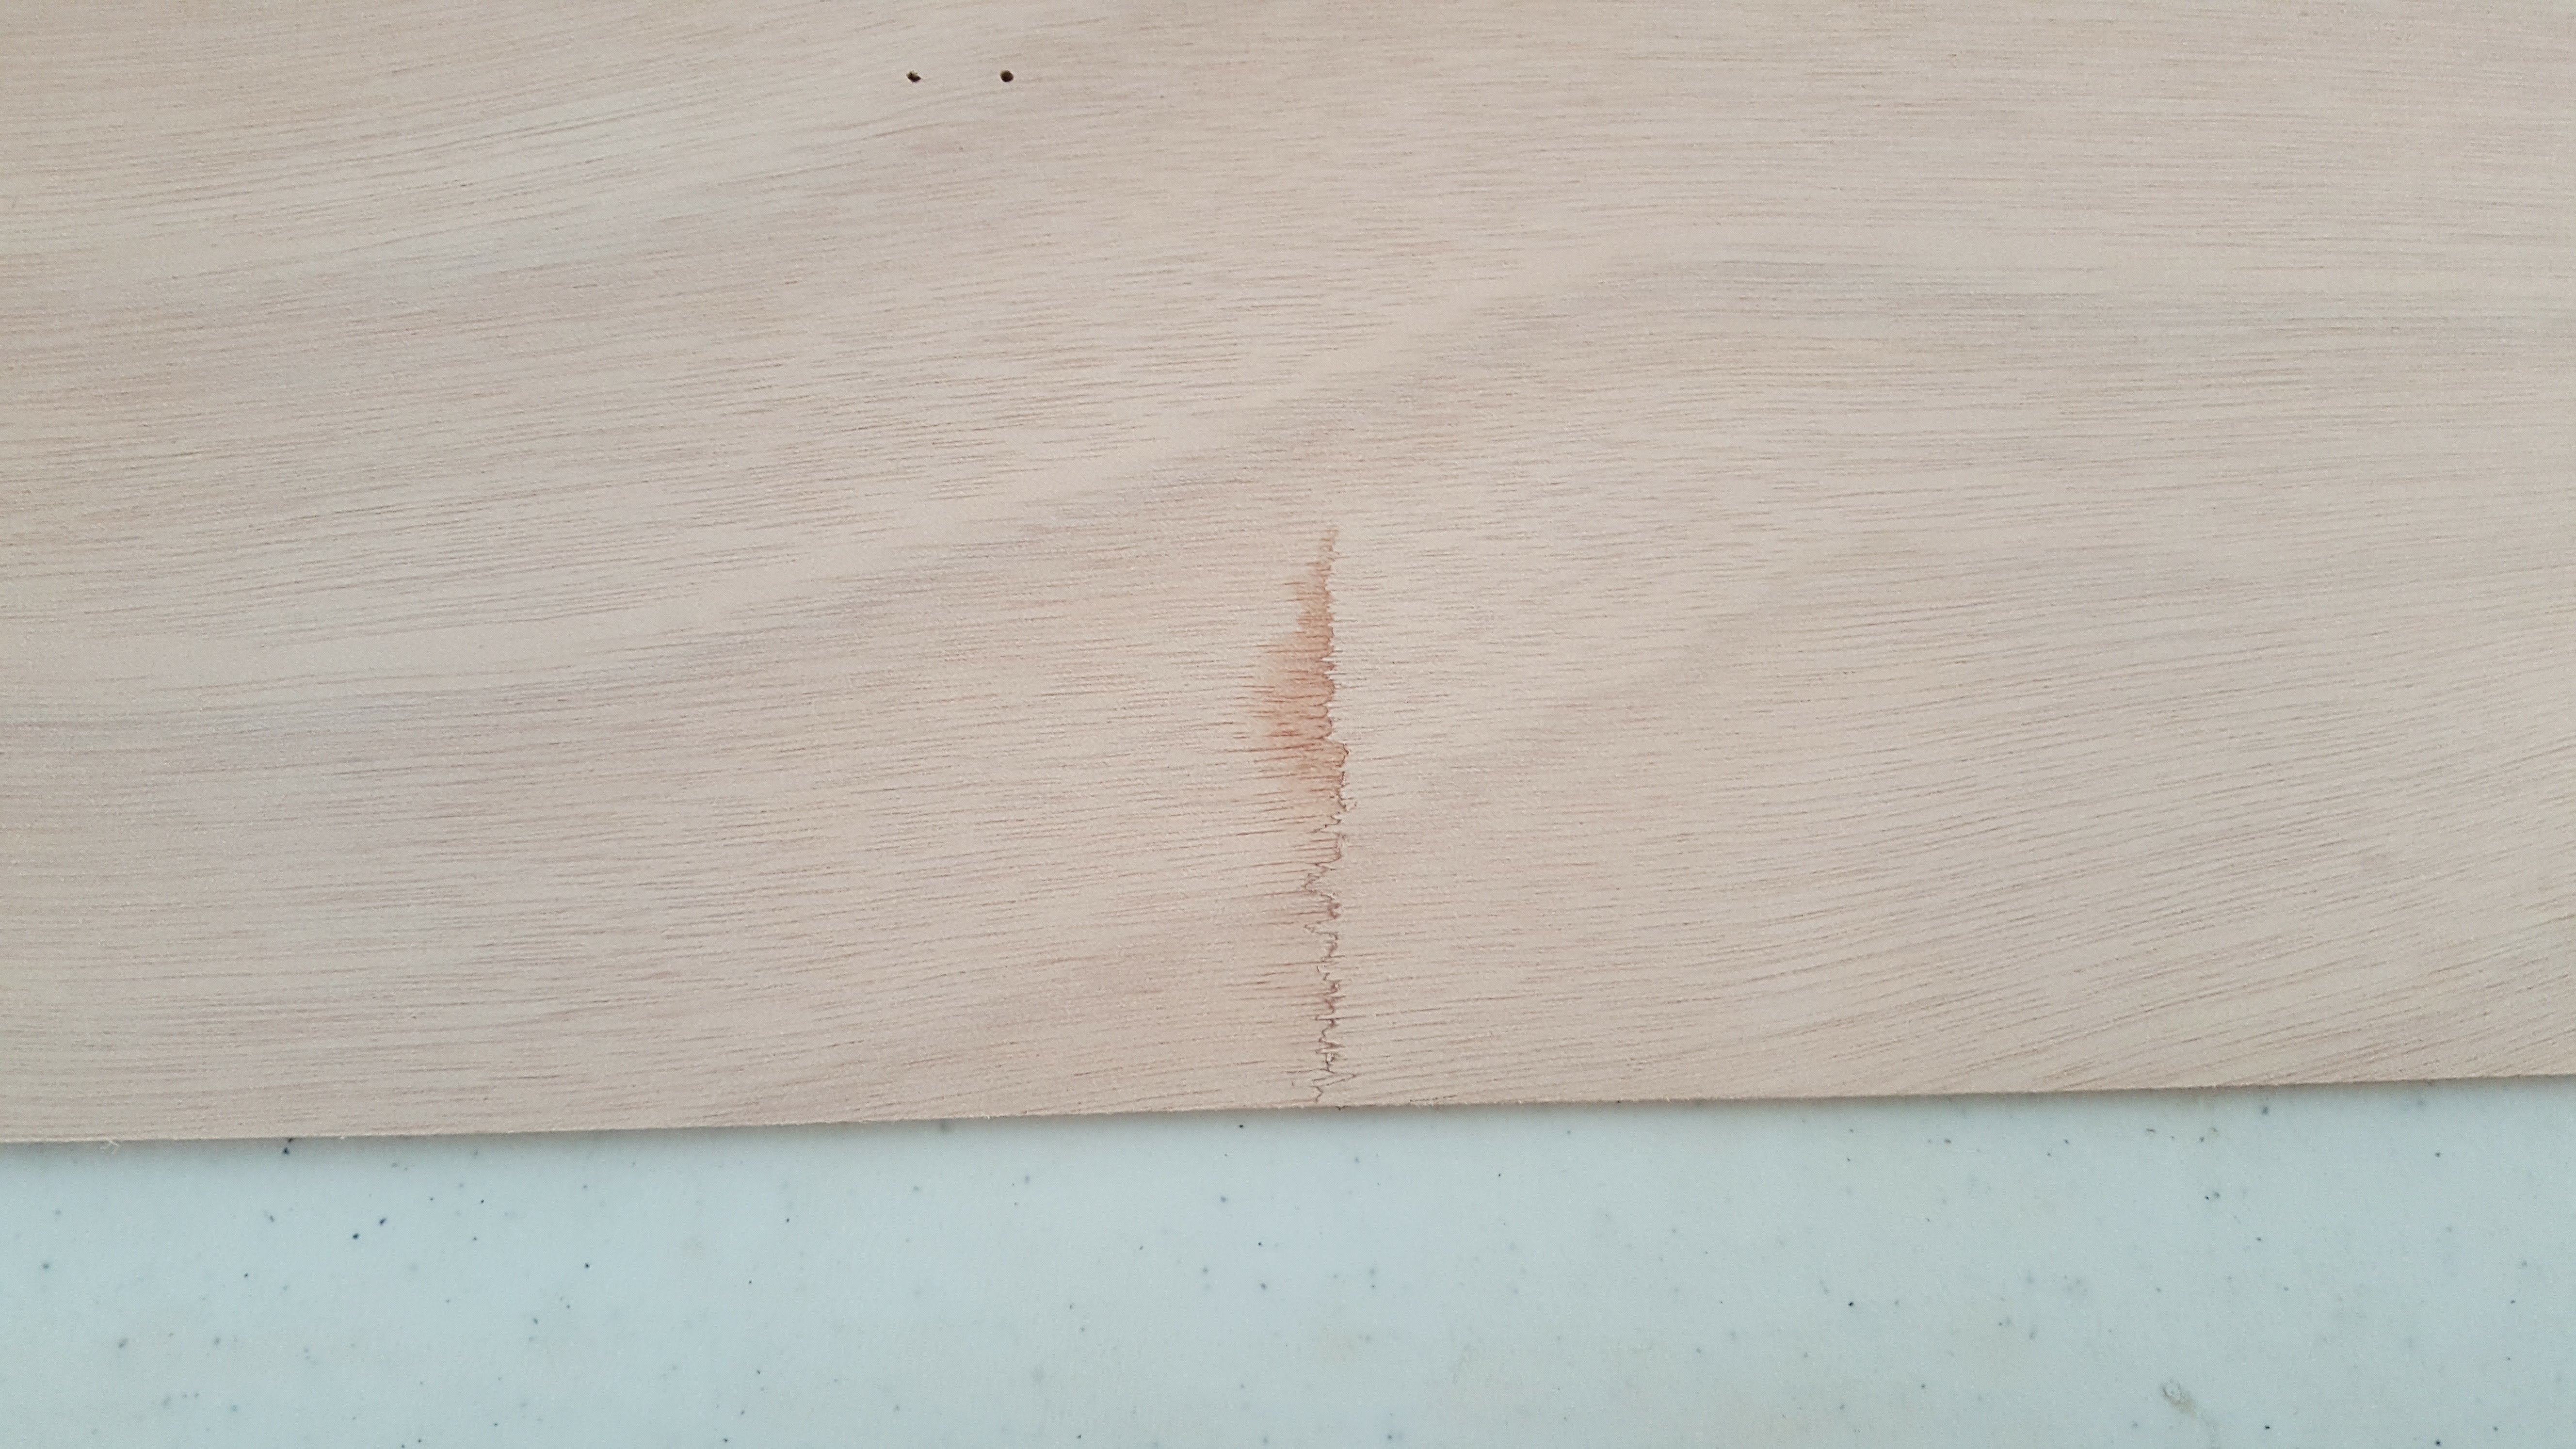
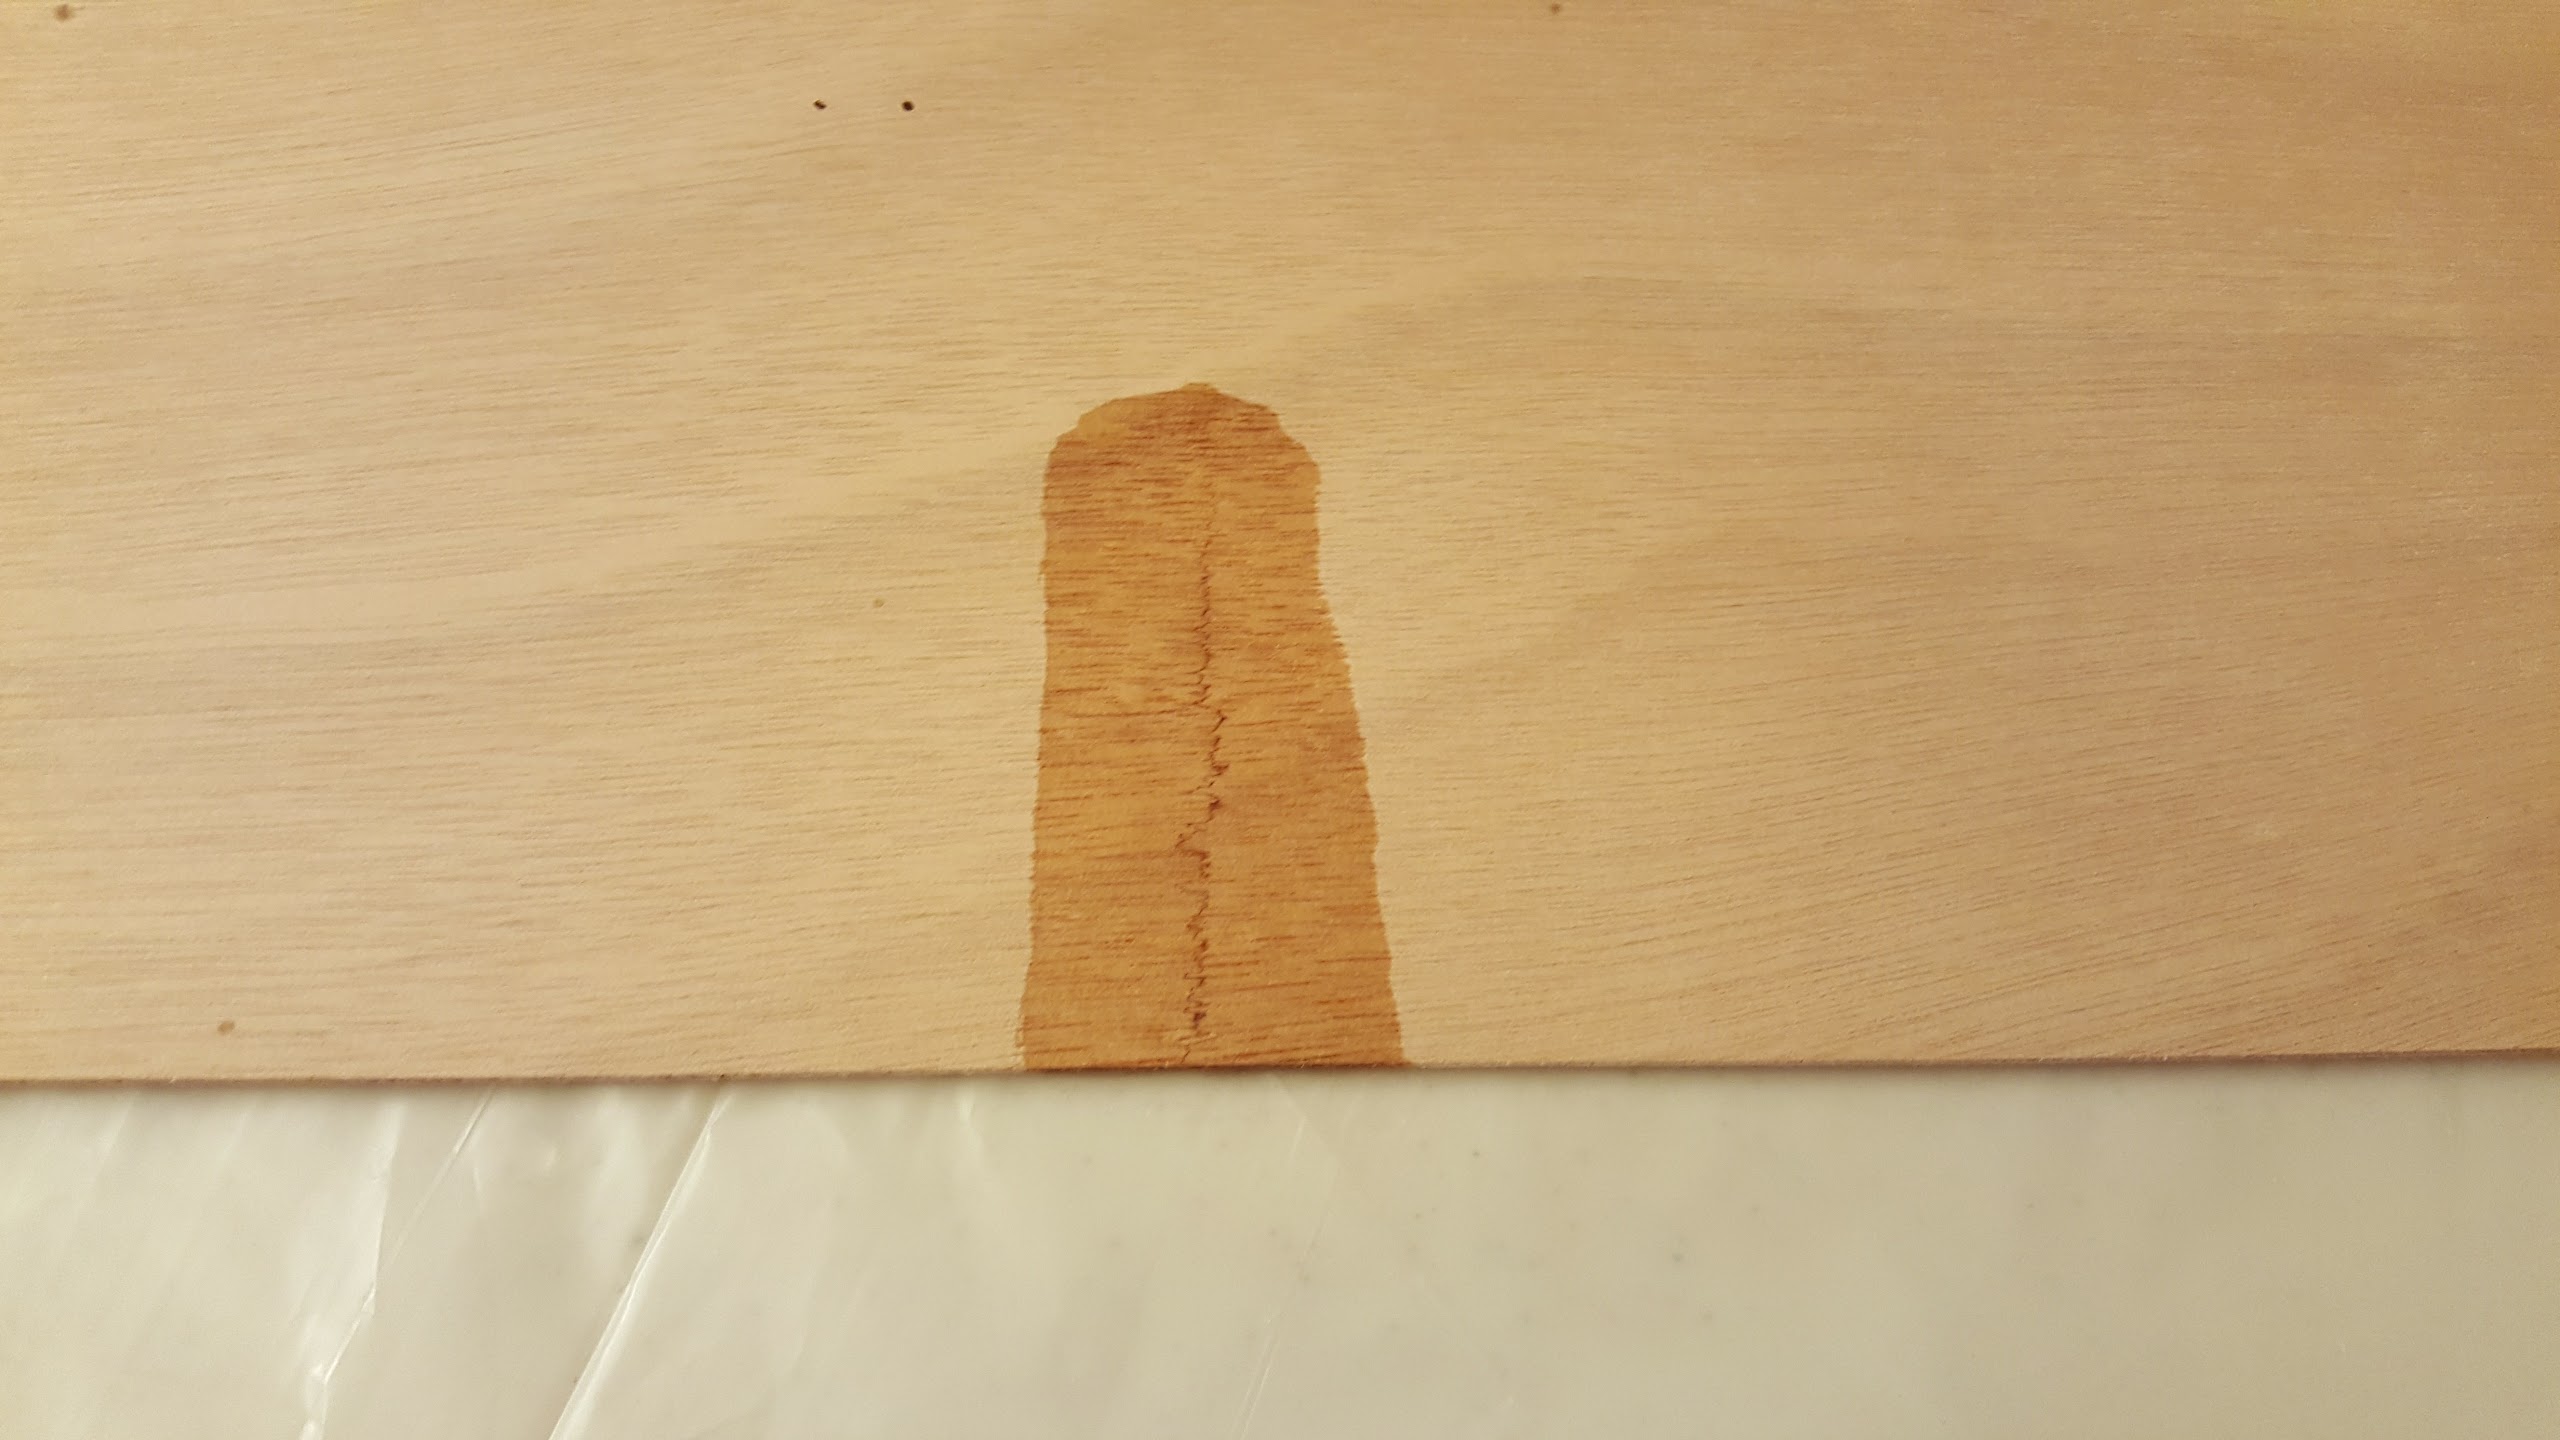
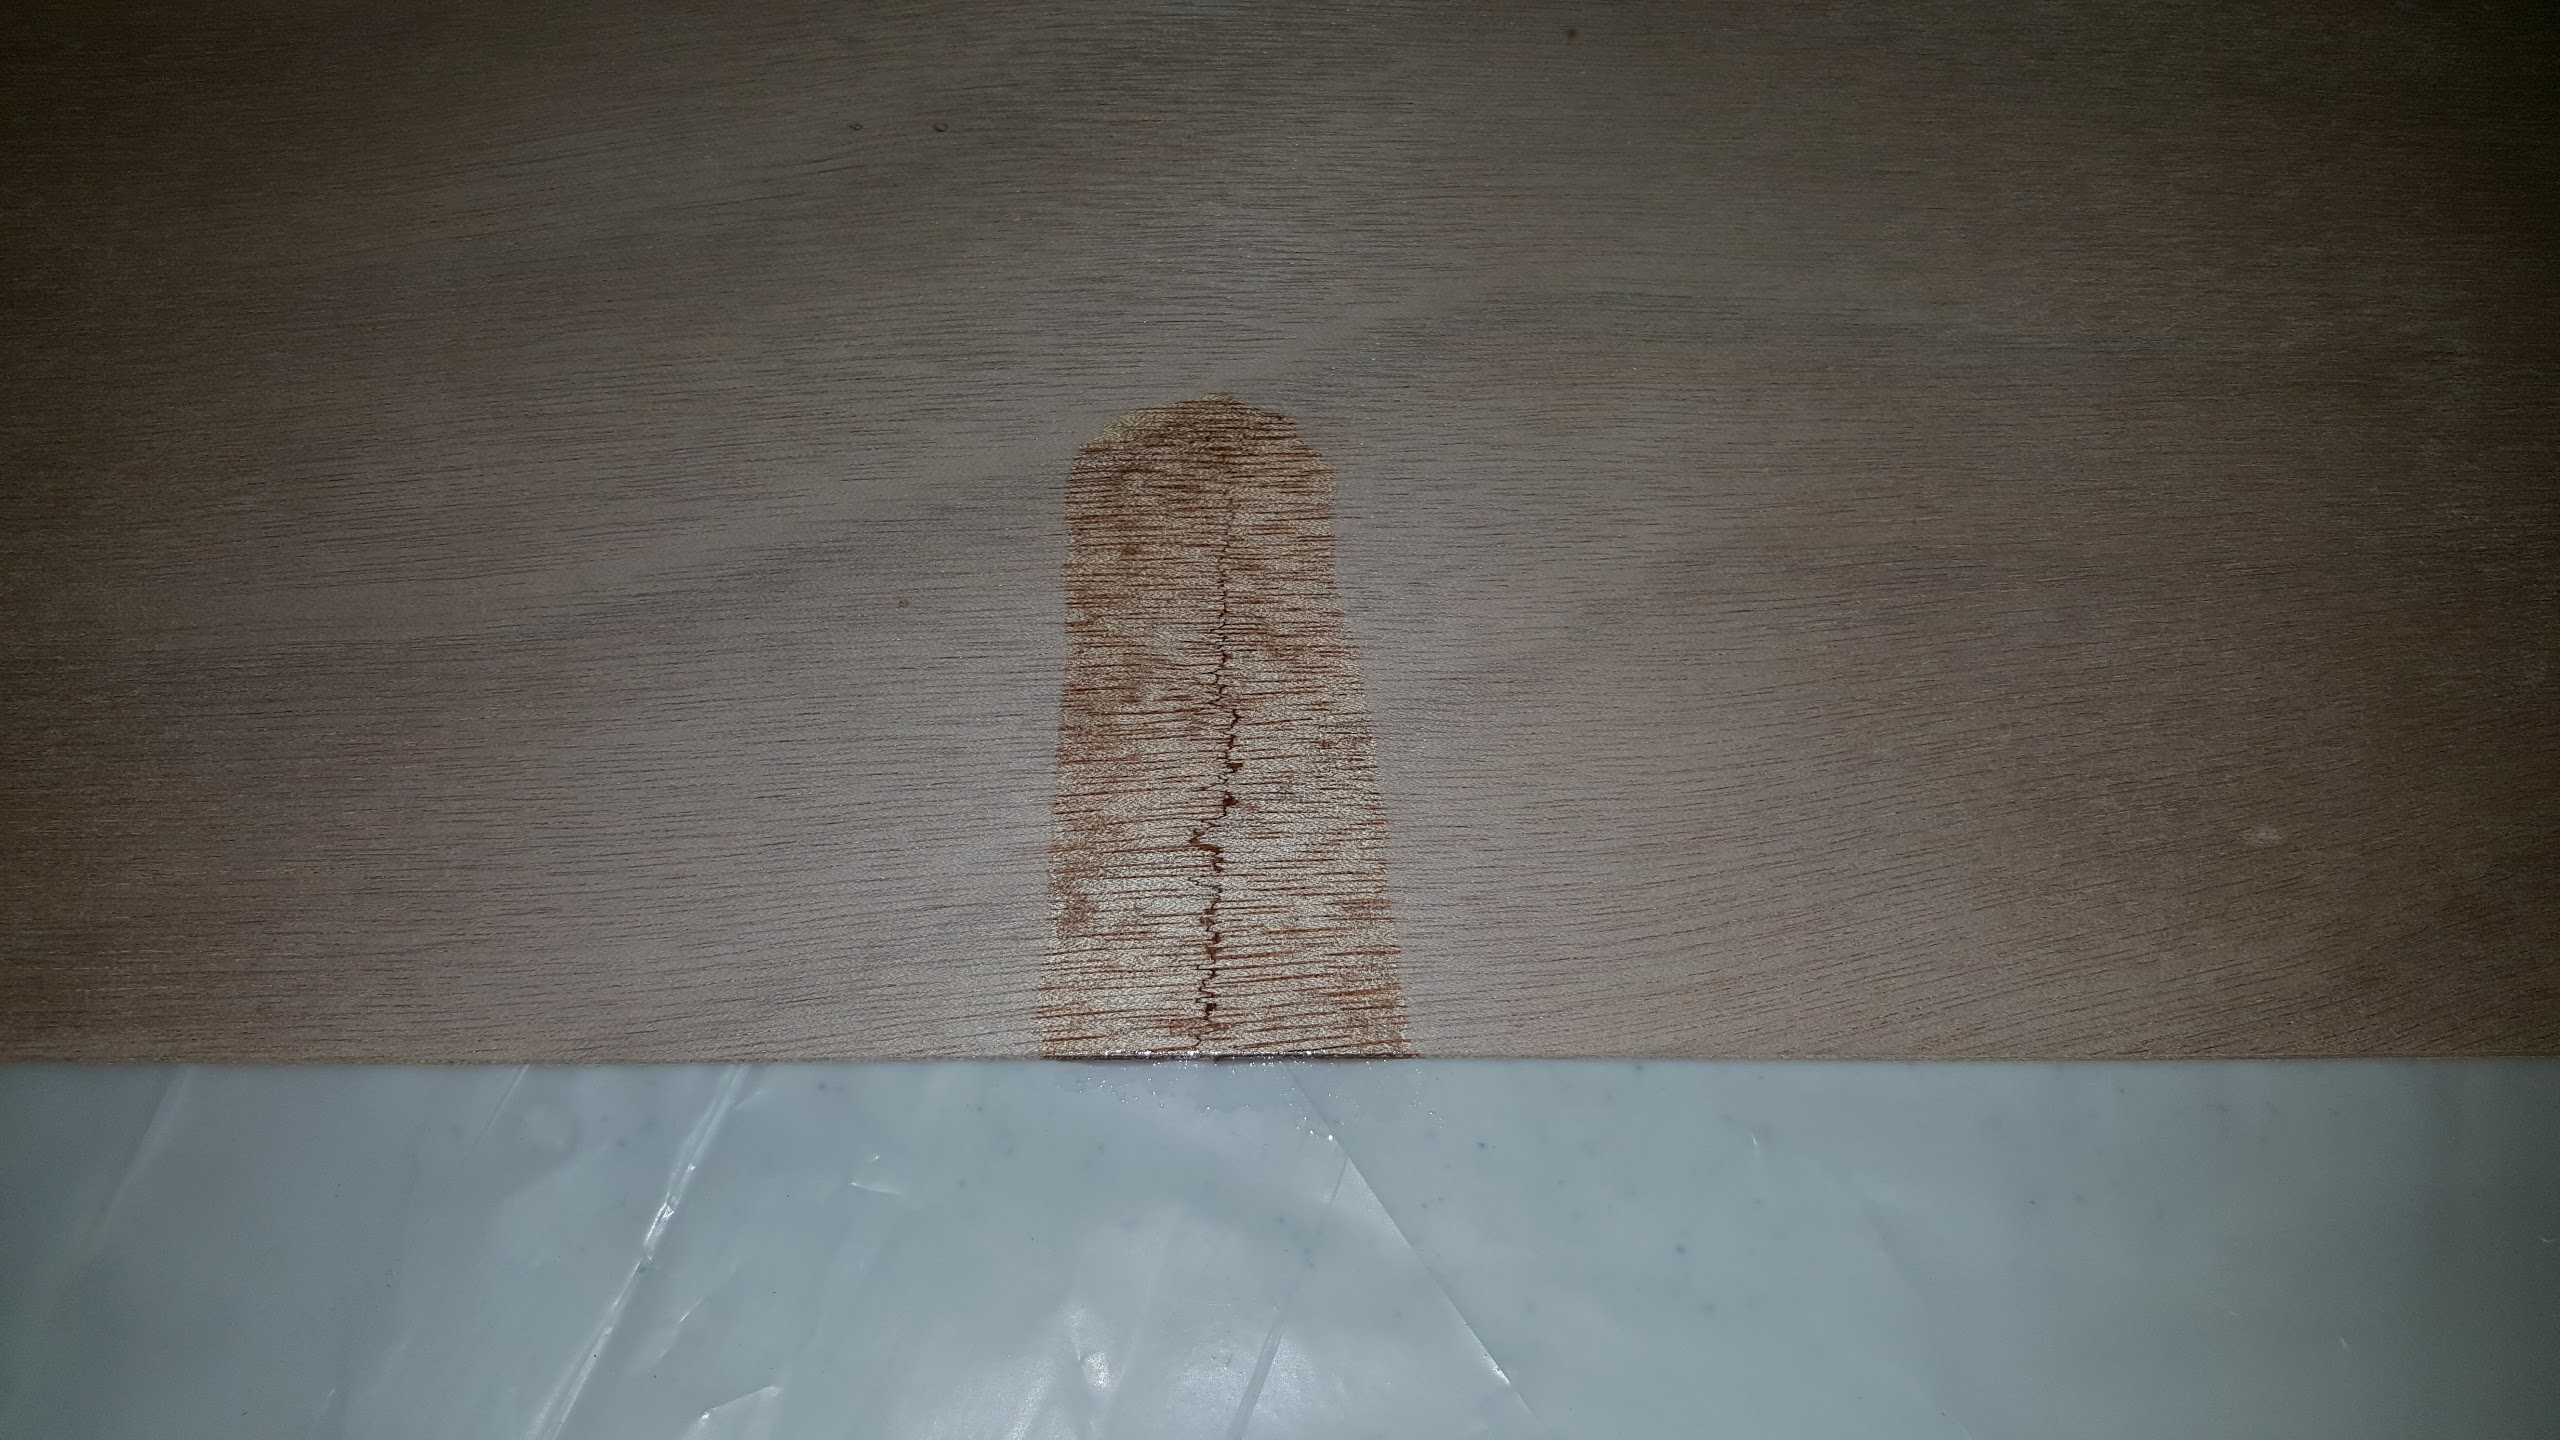
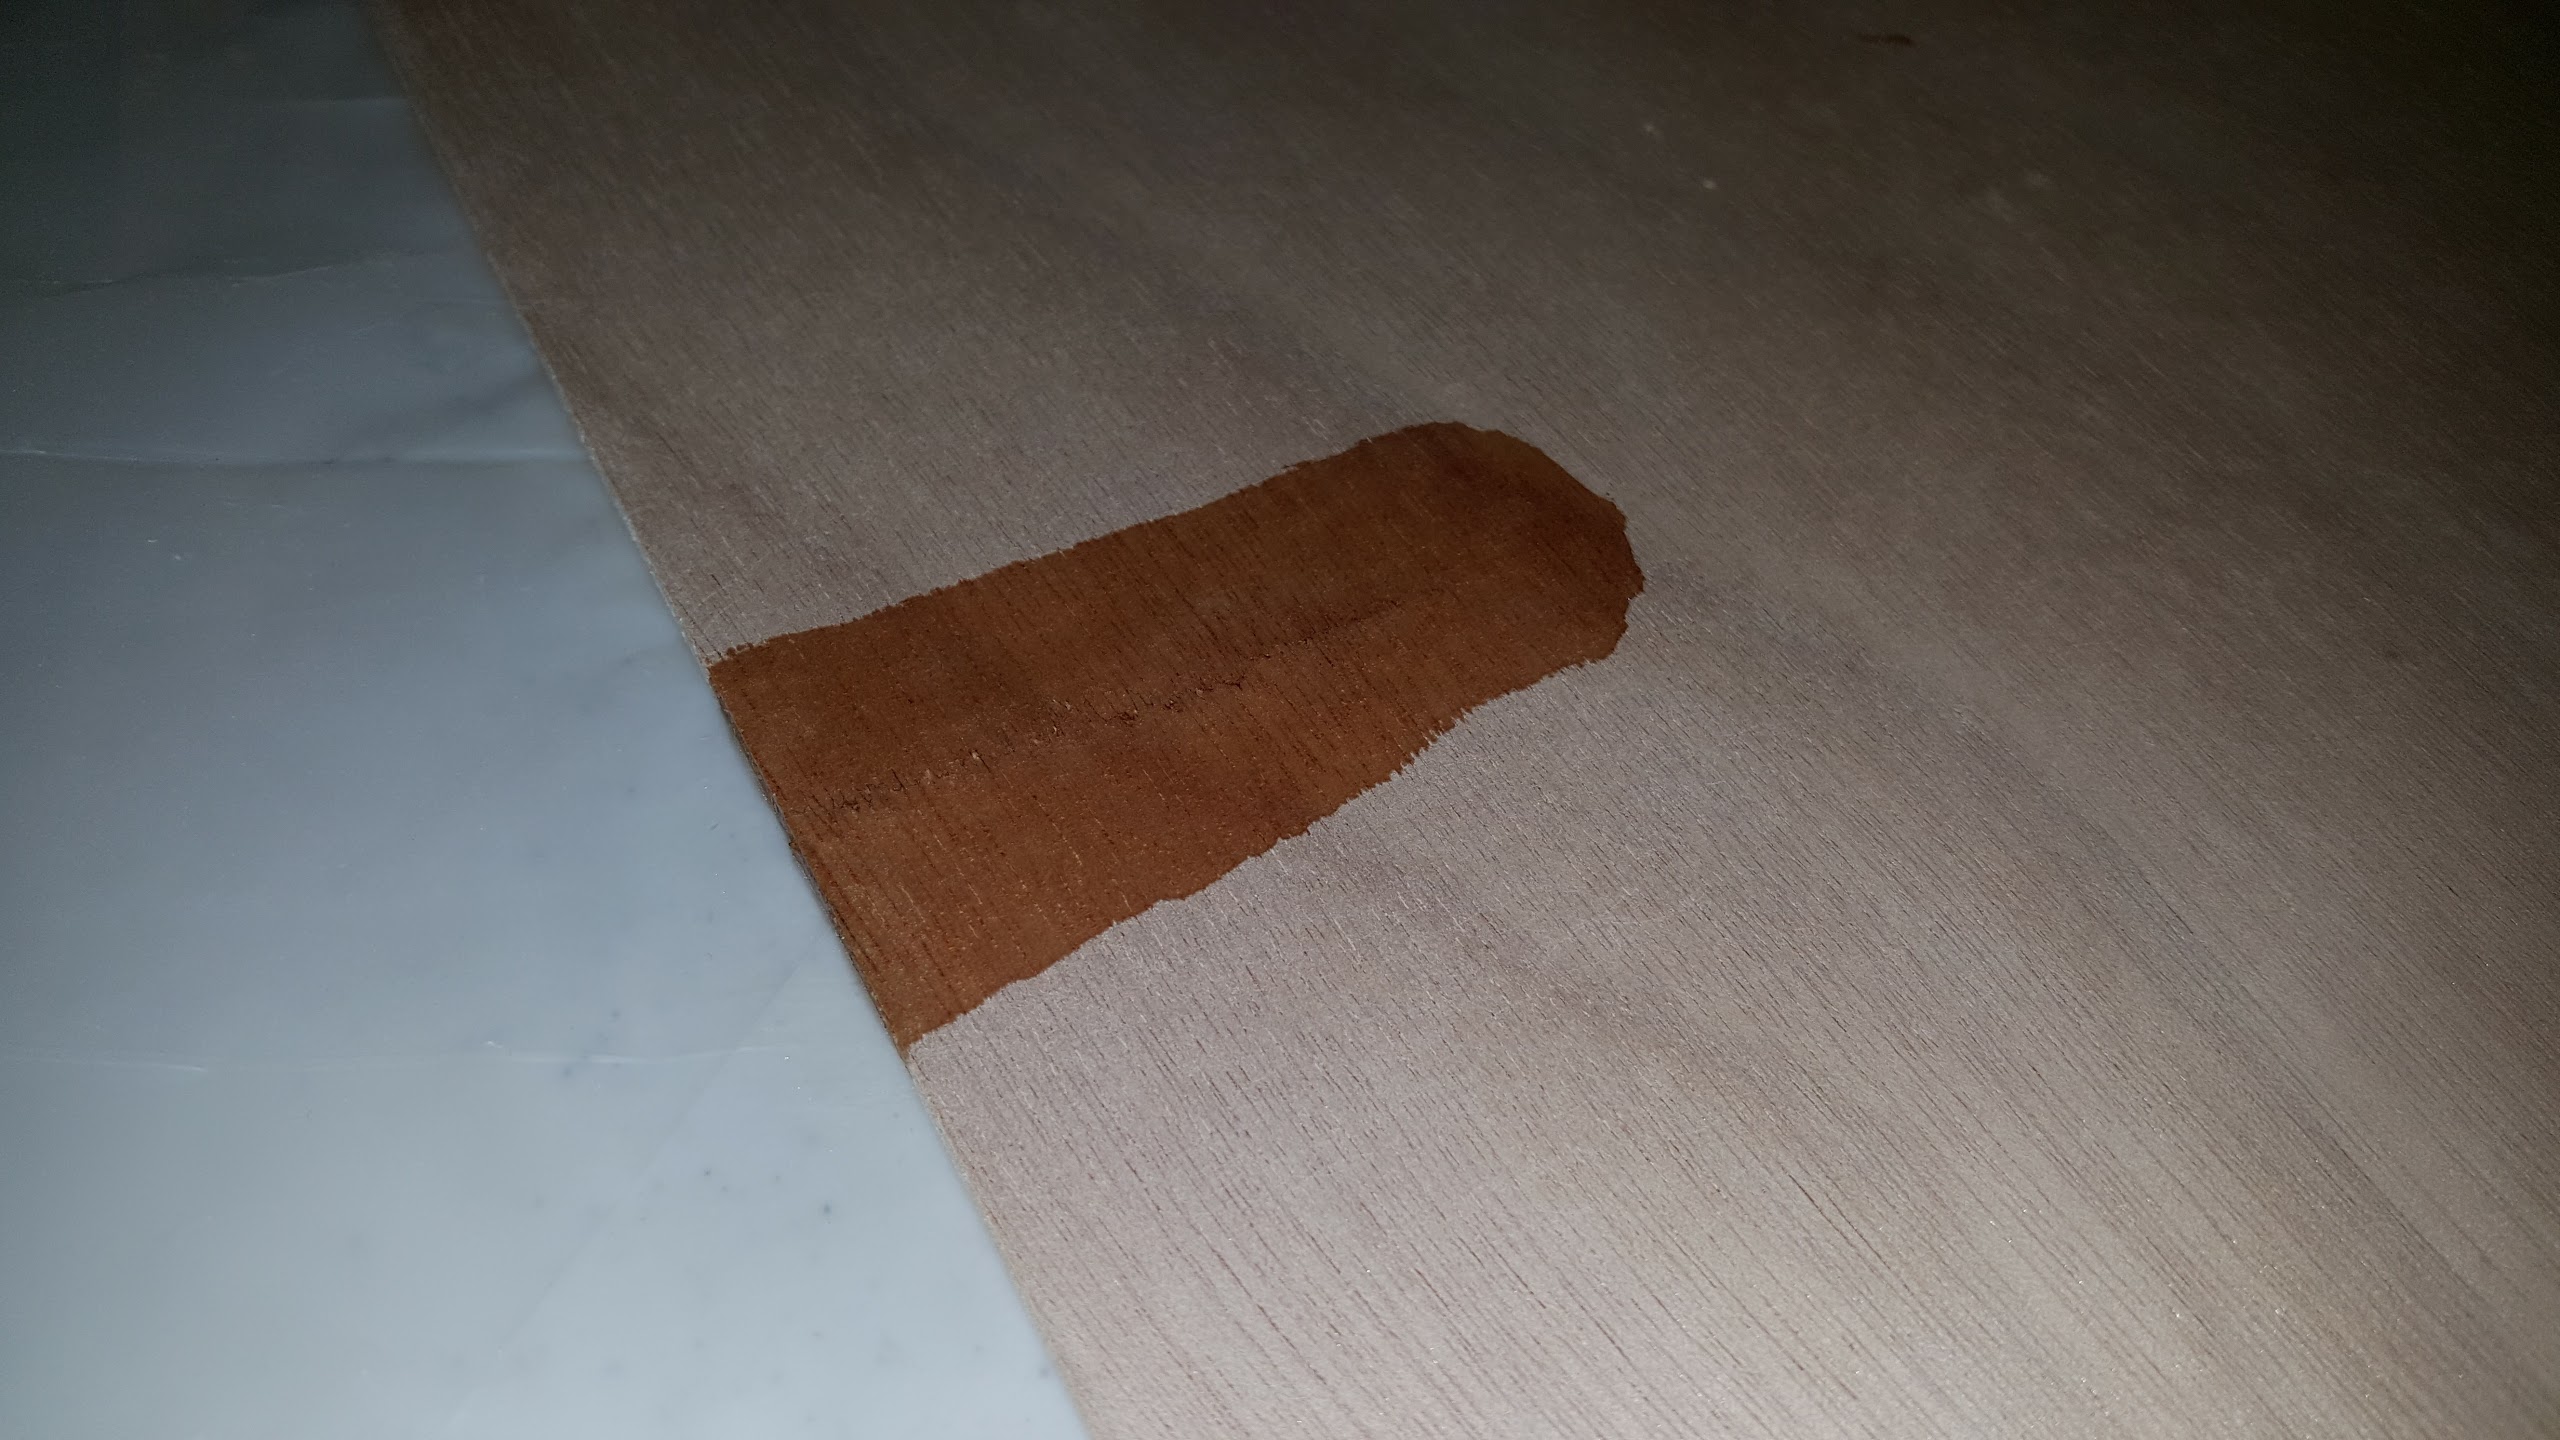
February 14, 2017 at 6:59 pm #609ParticipantHere’s where I am after gluing up the crack and sanding down most of the epoxy. It’s looking good. Talked to Ed at CLC and he suggested putting on a coat (I’m going with a coat as thin as possible) over the area to get a better idea of what it will look like when fiberglassed. I’ll know tomorrow. They seem open to selling me just that #4 right panel which is a great backup plan.
 February 14, 2017 at 7:37 pm #610Participant
You are obsessing. Stop it. Keep calm and build on. It’s a beauty mark, and a “there I was” story.
February 15, 2017 at 1:06 am #611ParticipantDitto. And you can throw a 3″x3″ glass patch on it, the fair the patch edges when cured. THE PATCH WILL NOT SHOW AT ALL WHEN YOU GLASS TO WHOLE CAMPER. IT WONT SHOW AND THE HAIRLINE BEAUTY MARK YOU HAVE NOW WILL BE KNOWN ONLY TO YOU. Don’t buy another panel. We all break stuff and then fix it nicely and move on. You are going to have a really beautiful camper. Mine has two such (repaired) cracks and looks beautiful.
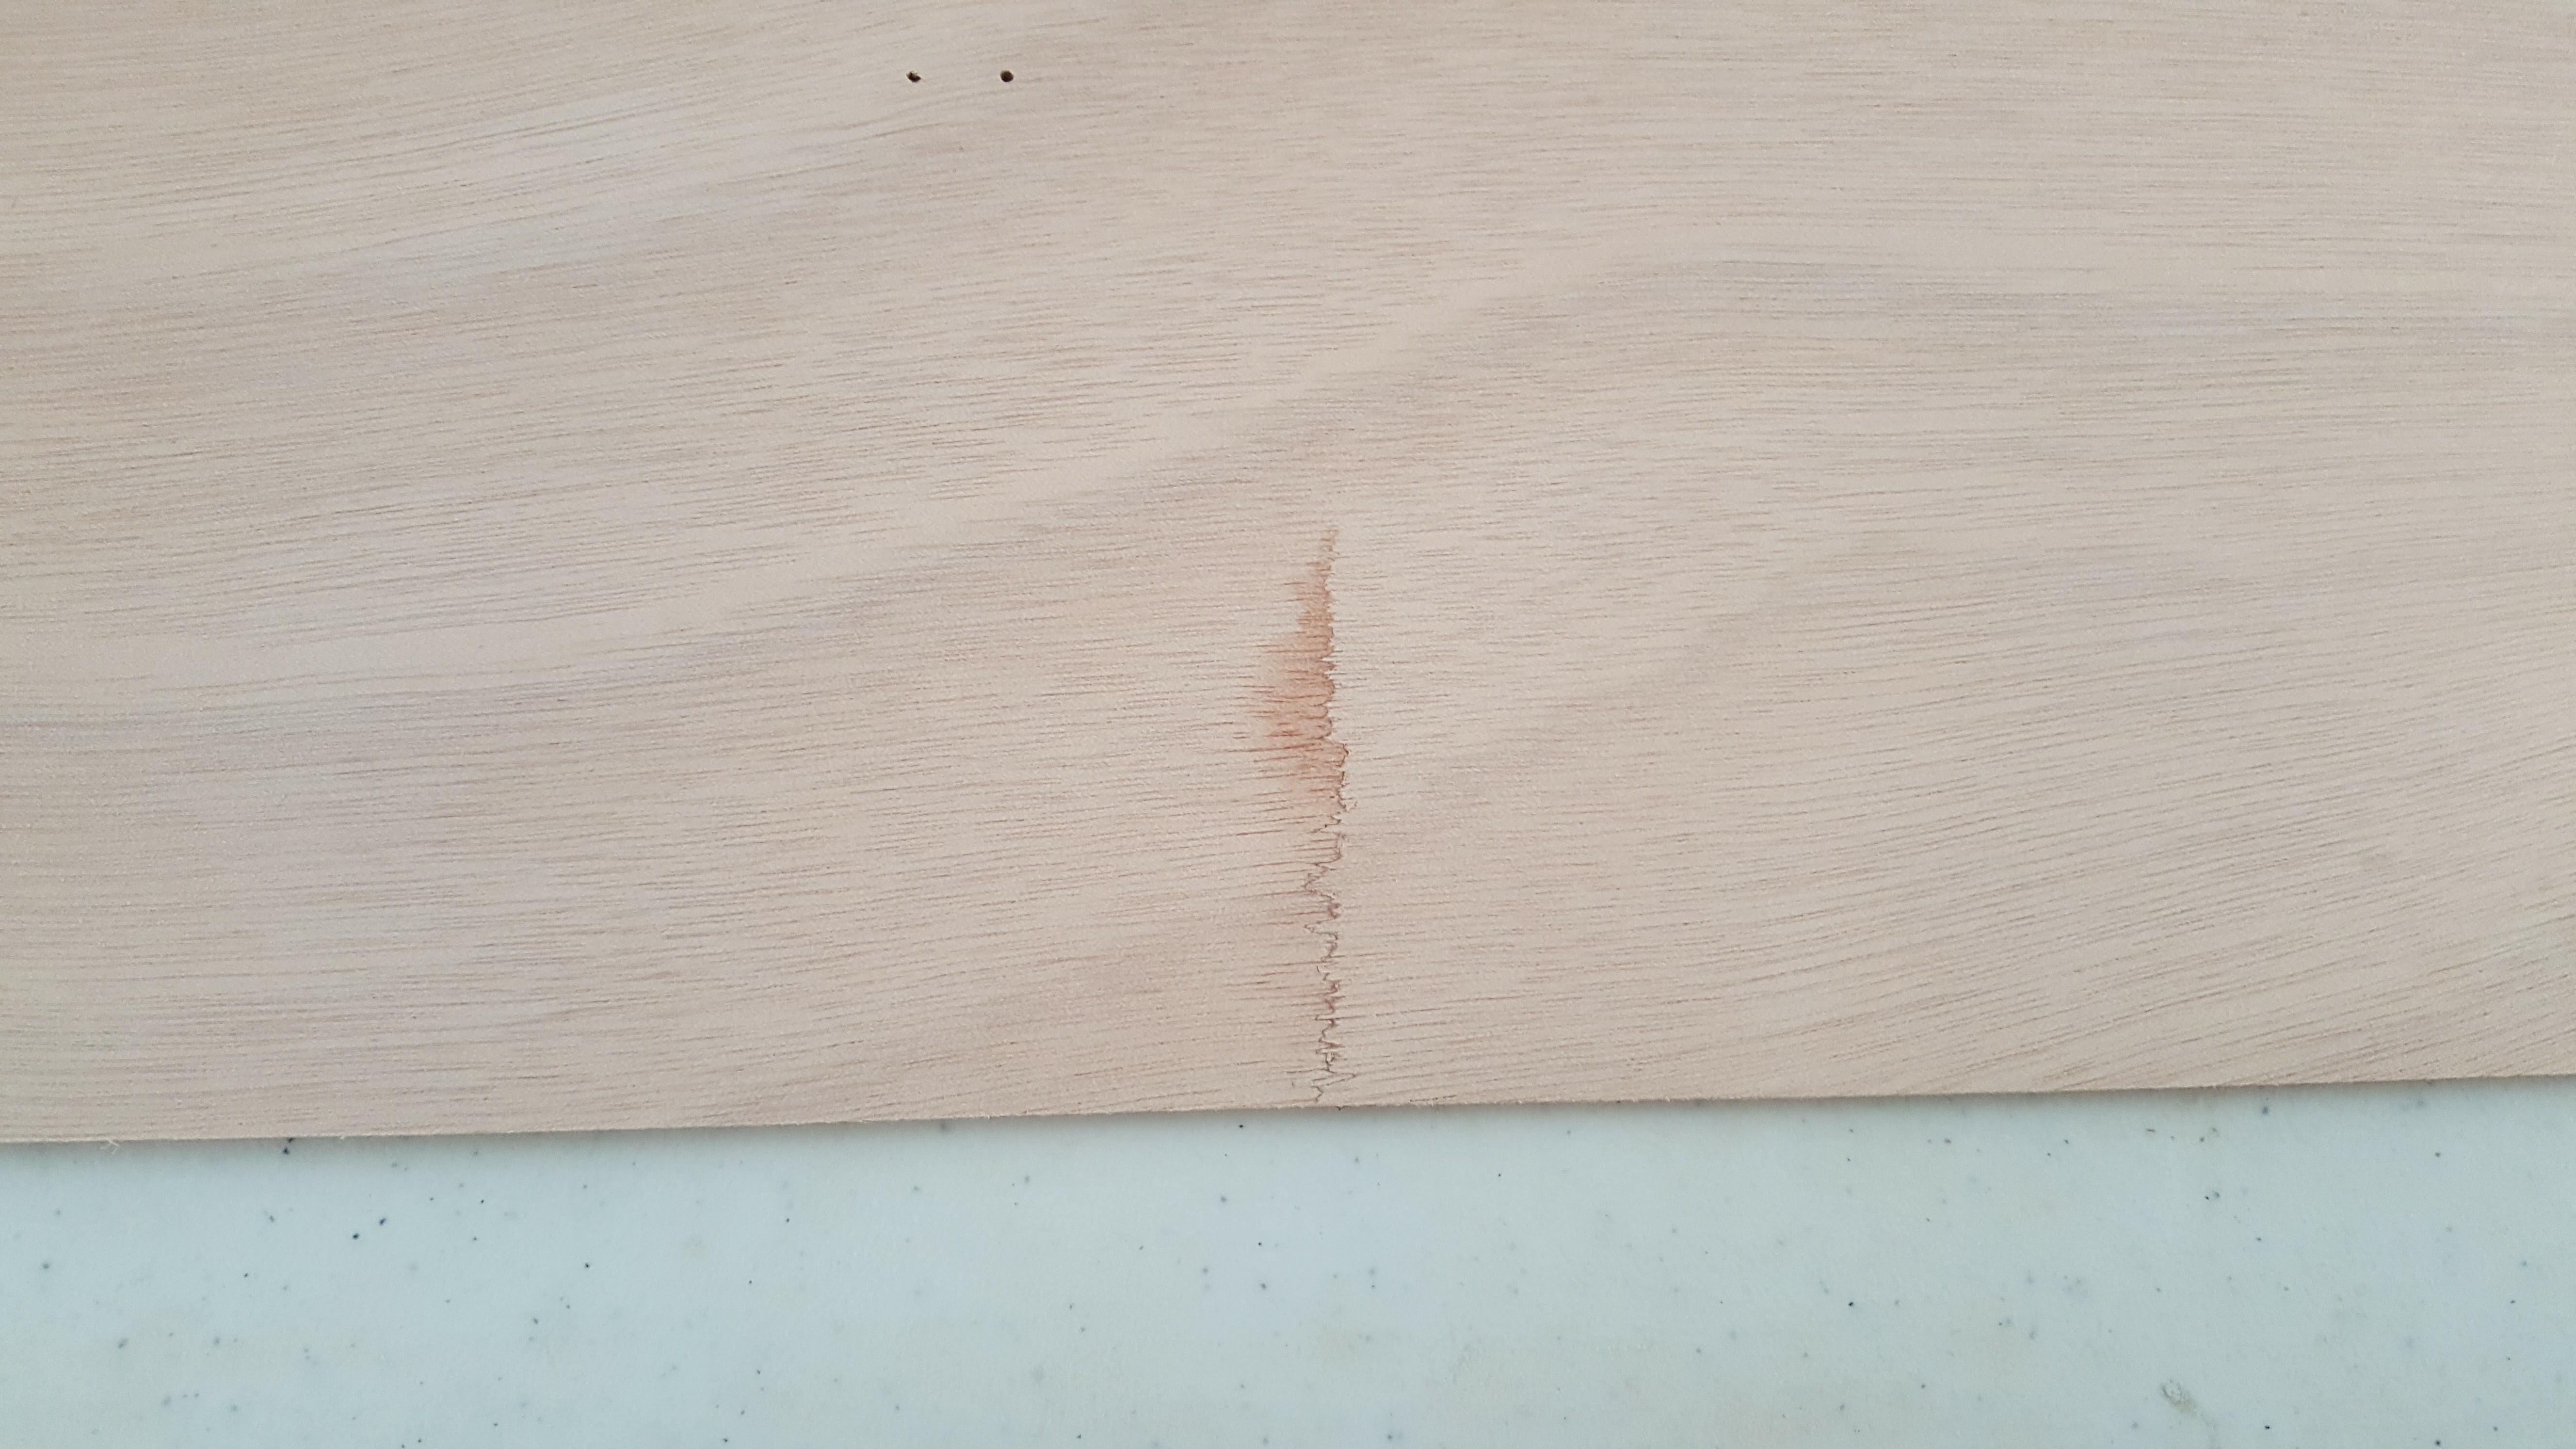
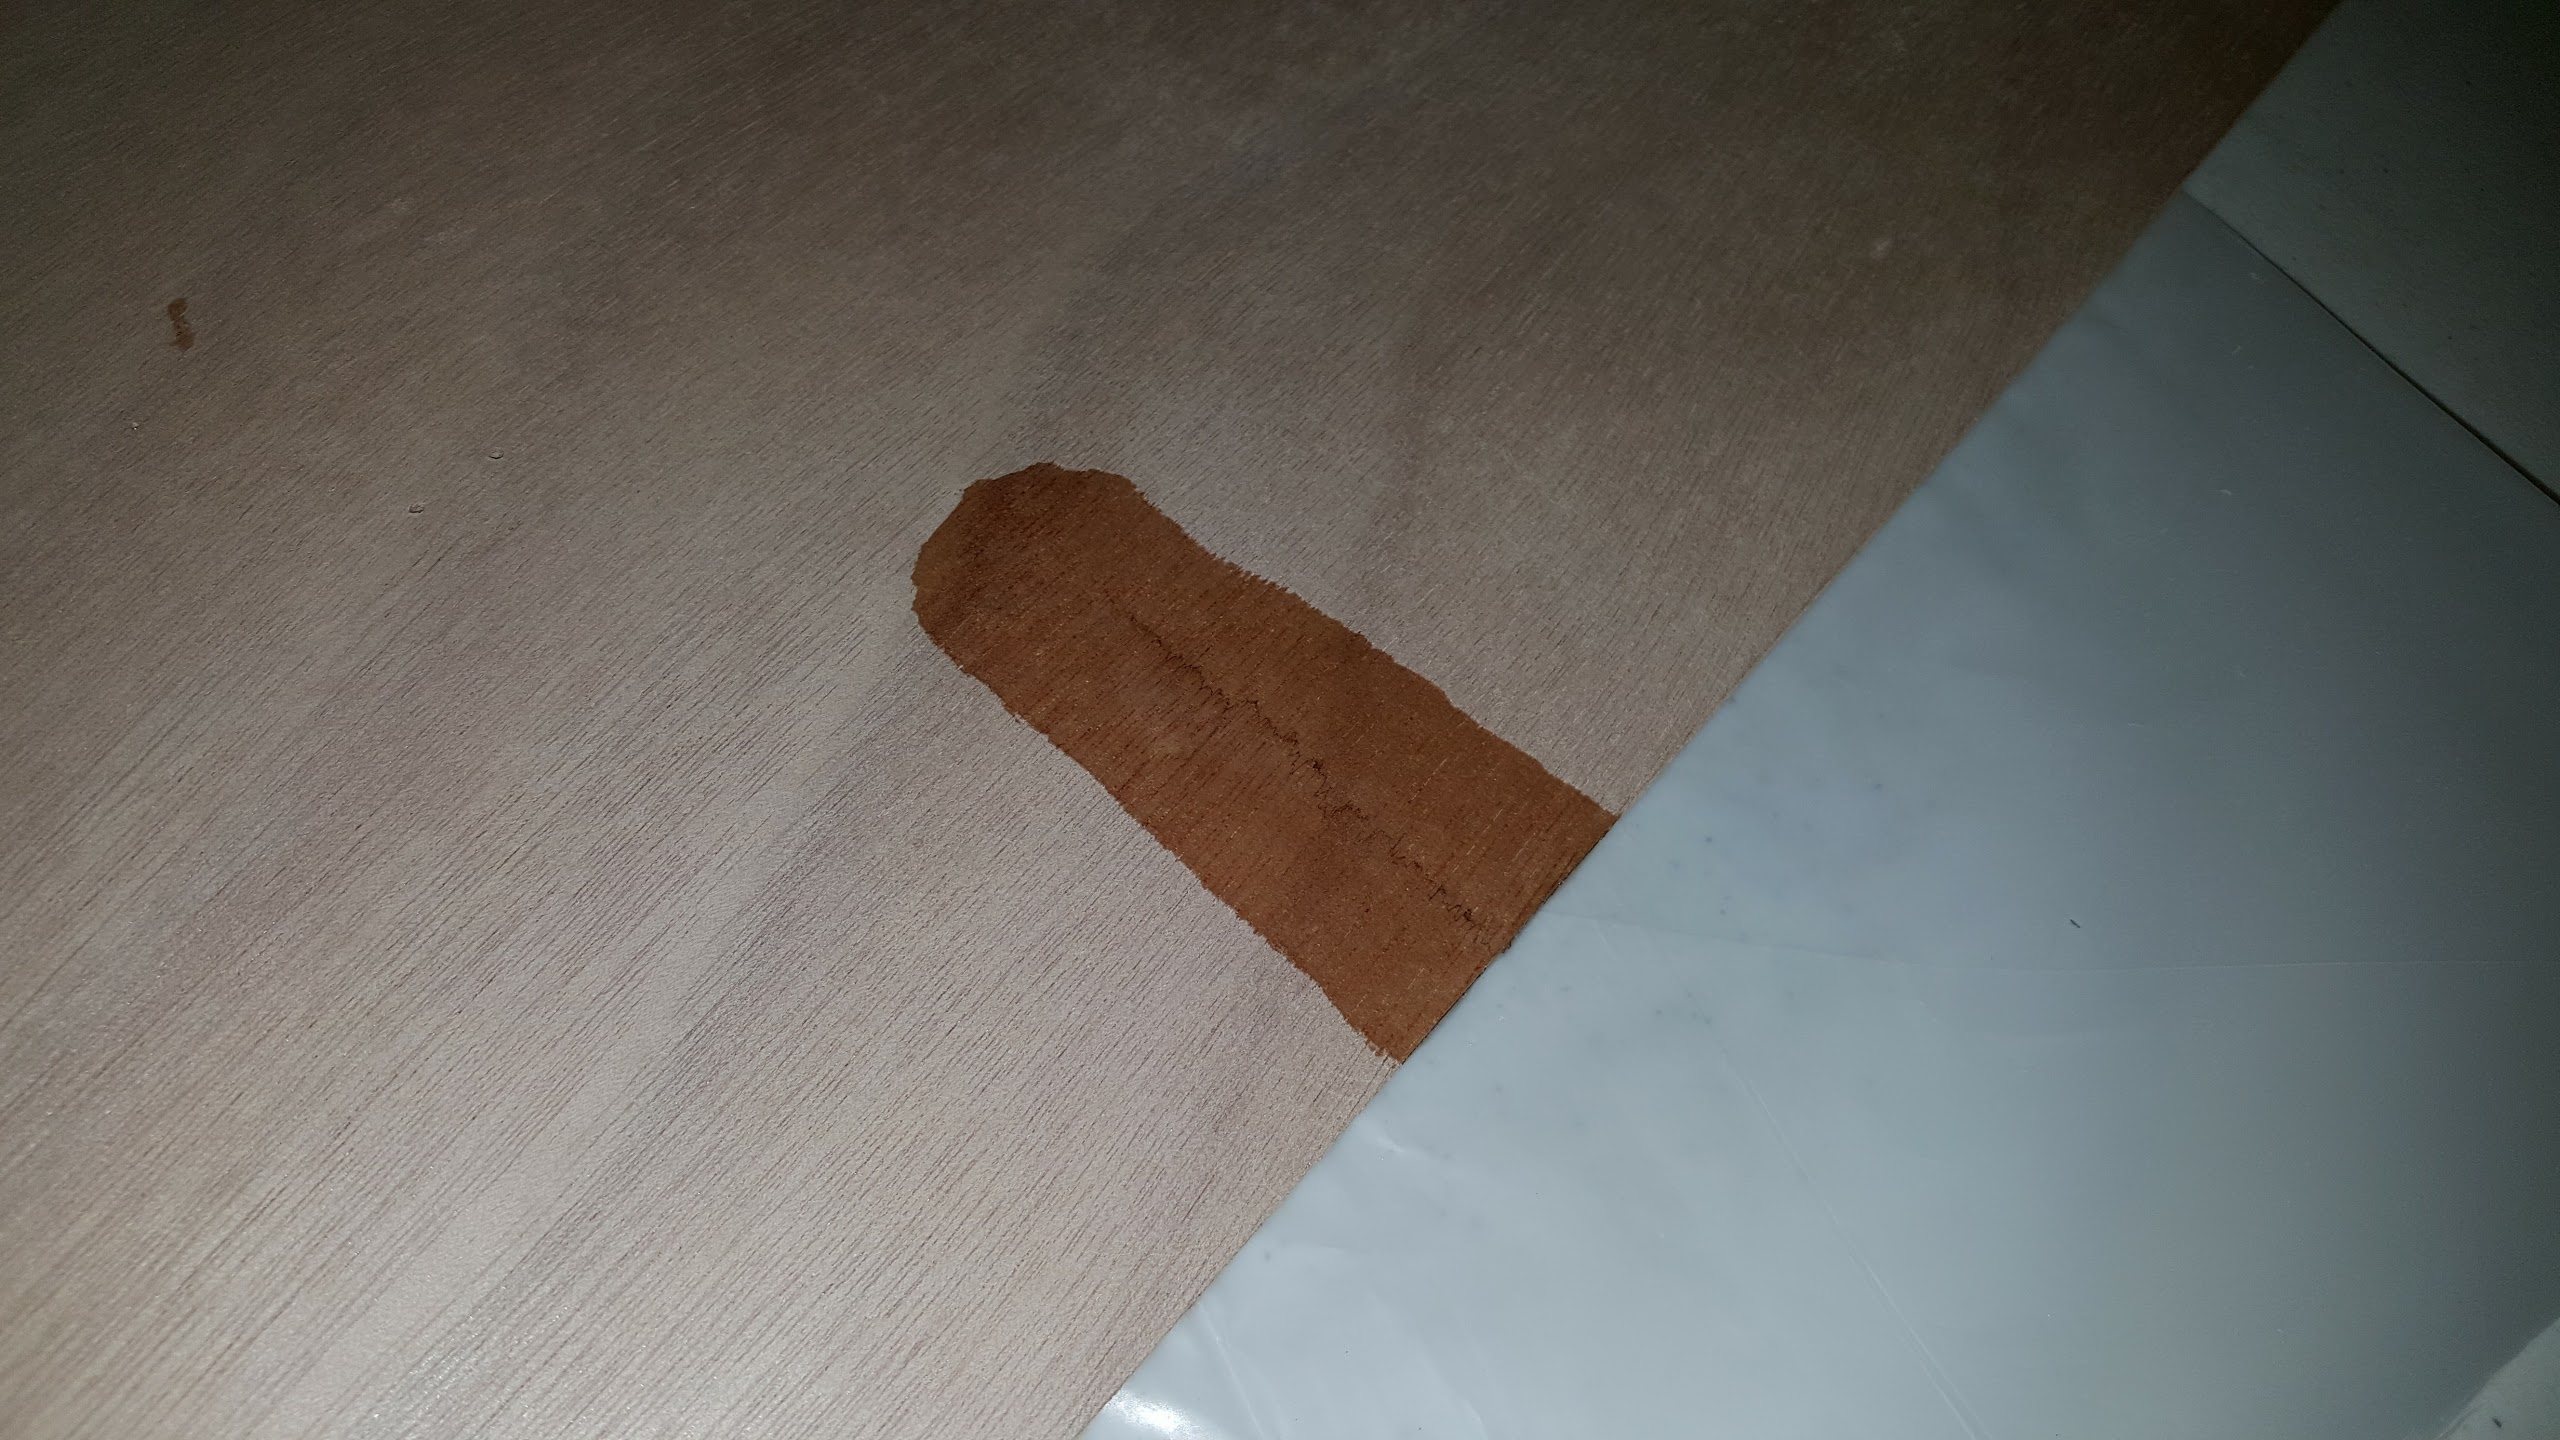
February 15, 2017 at 12:26 pm #612ParticipantHere’s what it looks like now. It’s about 3 inches long, and I plan to paint the bottom and first inch up the side a dark color so that’ll leave 2 inches or so visible. It’s worse toward the bottom so I may just keep what I have:
http://www.nerdhouse.org/crack1.jpg
http://www.nerdhouse.org/crack2.jpg
http://www.nerdhouse.org/crack3.jpg
http://www.nerdhouse.org/crack4.jpg
http://www.nerdhouse.org/crack5.jpg
-Bob
February 17, 2017 at 4:19 pm #613ParticipantI’m going to press on with what I have. The bottom inch will be painted over with a dark color, leaving roughly 2 inches of the crack visible. If it bothers me, I’ll blame all of you :-p
CLC did give me the option of purchasing another panel, and with freight it’s expensive as we’d all expect. If I lived in Maryland I’d buy another and pick it up, but I don’t.
-Bob
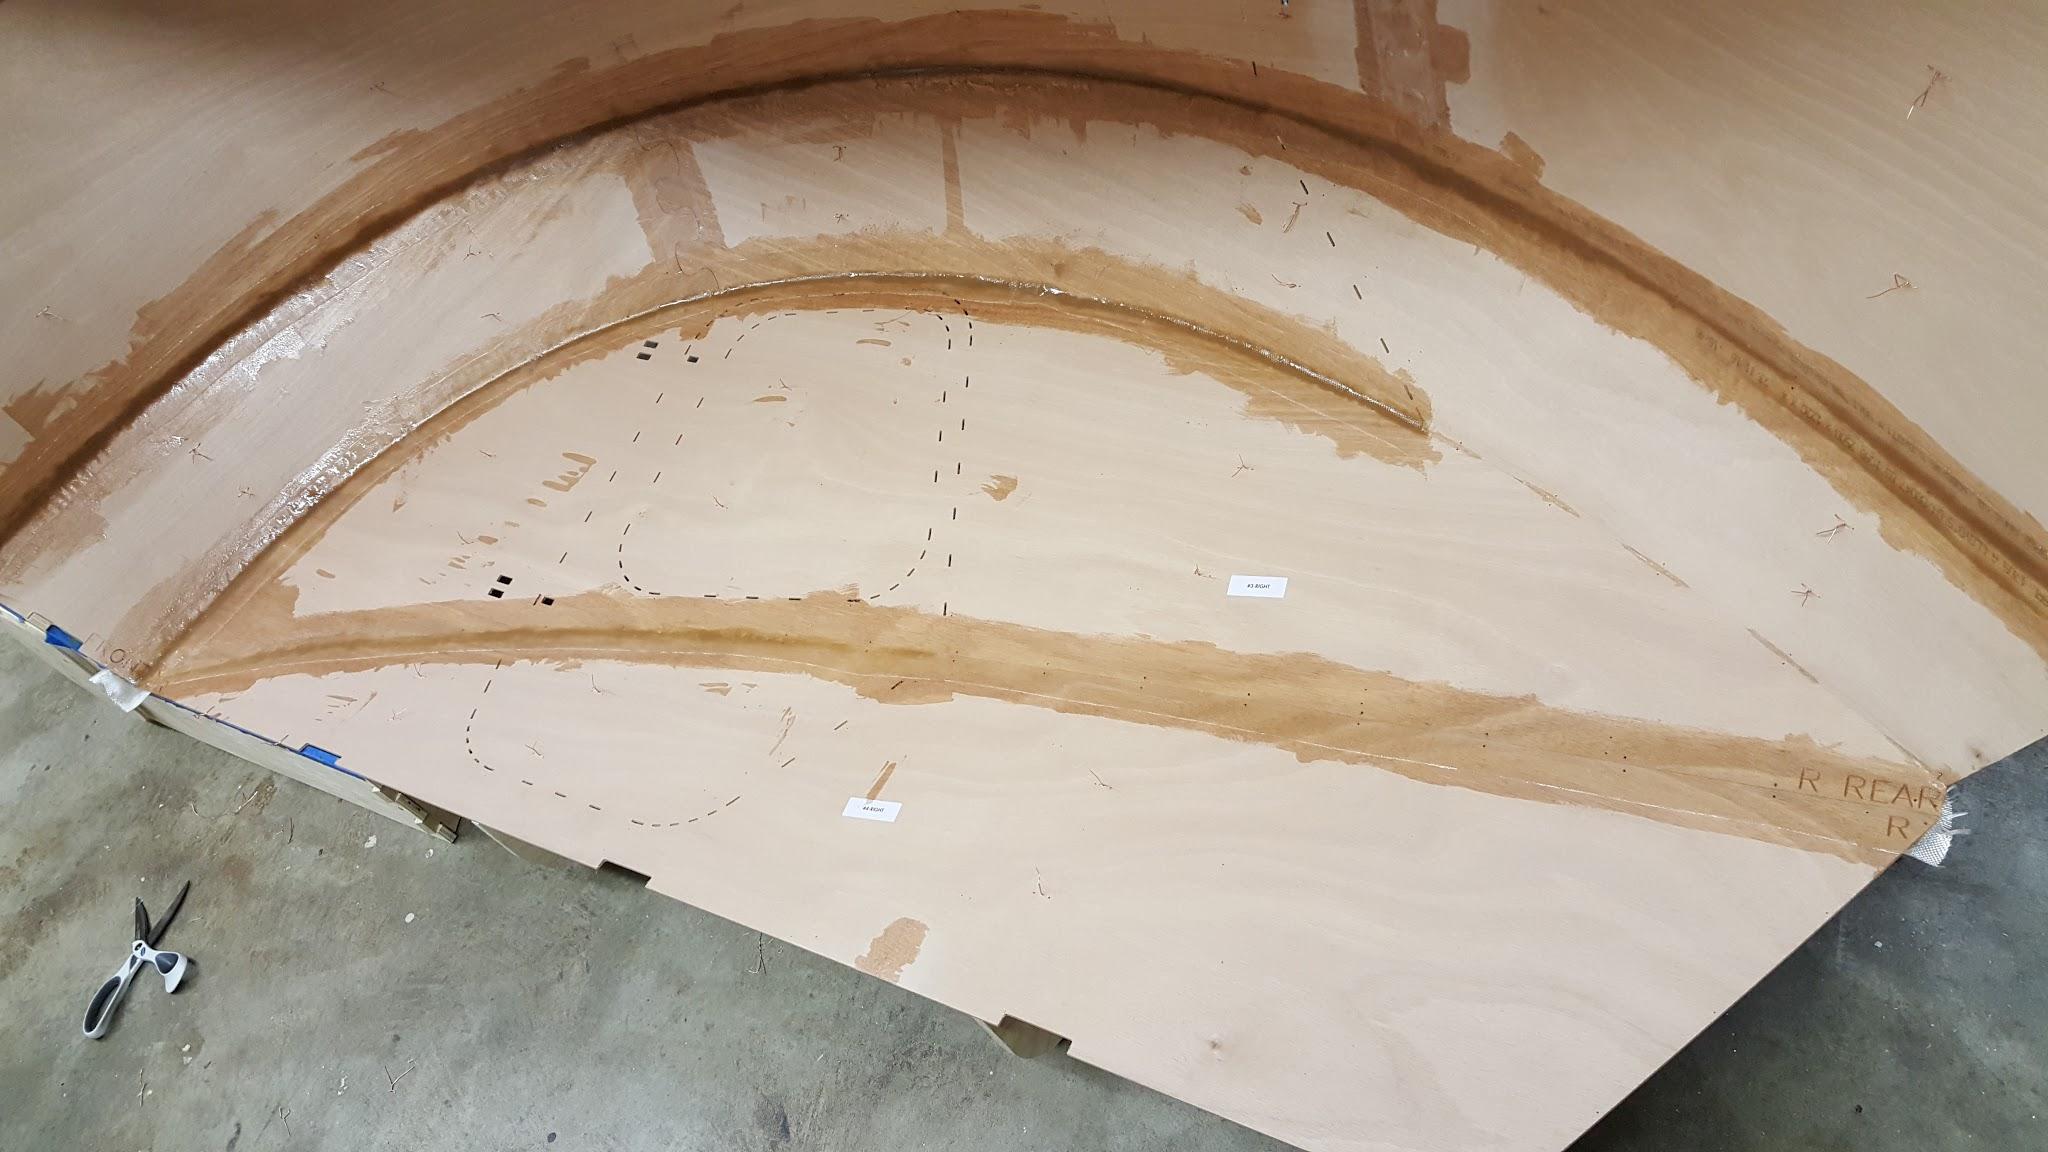
February 18, 2017 at 5:52 pm #619ParticipantGlassed in the panels so I’m committed now.
 February 18, 2017 at 6:37 pm #620Participant
Nice job on the tape! Better than mine for sure — I had wrinkles.
February 24, 2017 at 1:28 pm #633derek0
ParticipantLooks good, Bob. You’ll never notice it in the finished product.
I wanted to chime in and say that now is a good time to address the door issues you will inevitably face later on in the project. Now is the perfect time, provided you haven’t already progressed to gluing the floor in, to throw an extra couple layers of fiberglass onto the insides of the doors to prevent spring-out once they are cut from the shell. I think that should be a required step during assembly and SHOULD be adequate to prevent problems that everyone will be forced to address at some point if they don’t take preventative steps… You also might want to consider gluing in the door stiffener, although precise placement could be challenging due to limited clampability at this point.
I am forced to do a tedious work-around/ do over in order to get my doors to fit properly so I am 100% confident that a bit of effort at this step will prevent a LOT of stress later on.
Good luck and happy building!
-
This topic was modified 7 years, 5 months ago by
-
AuthorPosts
- You must be logged in to reply to this topic.