Forum Replies Created
-
AuthorPosts
-
jb
ParticipantI did almost the exact opposite – I bleached panels 2 and 3. The seams shouldn’t be an issue but they won’t stain of course. Use them to your advantage to separate the areas to stain from those you want to protect. The stain won’t penetrate the epoxy seams so it should not spread in those areas. Use a good painter’s tape with good edge-sealing properties and put the edge of the tape in the center of the epoxy seam. I used 3M precision masking tape (maybe overkill) and it worked great.
Since you don’t have a seam to help prevent the spread of stain in the door area, you might want to take extra precautions. My assumption is that even with good masking tape, stain will penetrate the grain and go under the tape, maybe as much as an inch or more. Epoxied areas were able to resist the penetration and spread of the bleach I used and might also resist stain. You should test this, but you might consider first masking the edge of the area you WANT stained then epoxy that line. Then remove the masking tape and proceed with staining using the epoxy as a mask/resist.
P.S. Make sure you sand down epoxy on the surface at the puzzle joints on #2. The gaps in the joints tend to be darker so your stain will probably make those gaps less visible. I also forgot to mention that you should plan on the stain making its way through any wire holes and guide mark holes. If you want the inside of your camper to be unstained you should brush some epoxy around the interior of these holes to prevent stain spread.
ParticipantDaniel, I fixed the permissions, sorry about that. The link should work now for anyone and I’ve changed it so anyone can add comments. If anyone would like to be able to add content (beyond comments), please send me your Google account address and I’ll give you edit rights. I’m pasting the text below for reference but it’s going to lose the spreadsheet layout.
page
note
160
1/2″ roundover on galley flat (see p. 259) can be done with router before gutter riser is installed.
152
A fine tooth plywood blade for a trim saw quickly dulled on the fiberglass and epoxy. Use something more durable (carbide tips)Manual recommends putting tape on mold. This should be more than a recommendation – a requirement.
118-150
Many builders have reported problems with the doors flexing and have recommended installing the door stiffeners and additional fiberglass on the interior of the doors before they are cut out.
-85
Many builders have reported problems with the galley hatch flexing. Supplemental stiffeners and fiberglass on the interior must be installed before the galley flat is installed.
-85
If any part of the shell is to be bleached, care must be taken to seal any interior holes and surface perimeter with epoxy to prevent bleach from penetrating and bleaching the inside surface (if it is to be left visible).
-100
Route 1/2″ roundover on buttblock (p. 194) before attaching to bottom panel
158
Cut hatch hole to the inside of the marked area to provide some extra support for hatch. When cut at the center line, the hatch is barely supported with less than 1/16″ on each edge. See note for p. 176.
176
Be careful to not remove too much material when beveling the edges of the hatch bezel. If you remove too much, it can make the bezel too small to rest stably around the hatch opening in the shell. See note for p. 158.-
This reply was modified 2 years, 10 months ago by
jb.
ParticipantDaniel,
I did some of the different things you mentioned after I found a lot of good suggestions by prowling through these forums while I waited for my kit to arrive. I think having them compiled in one place could be helpful. I started my own list based on what I actually did and what I later wish I did. It is here:
https://docs.google.com/spreadsheets/d/1P6cihcK_JuG2kd2YQ_8NA3aZuVqAtOObYdxDWJrXjJQ/edit?usp=sharing
I compiled it with the idea of being able to add notes into the hymnal/manual so I included page numbers which indicate the last point at which you’d need to decide which option to take. I’ll have more to add as I continue my build.
-
This reply was modified 2 years, 10 months ago by
Participant@wayne3676 I’ve had my eye on similar flush latches but haven’t figured which kind to get to latch on to the galley flat or the gutter. Can you share pictures of how you managed that?
Participant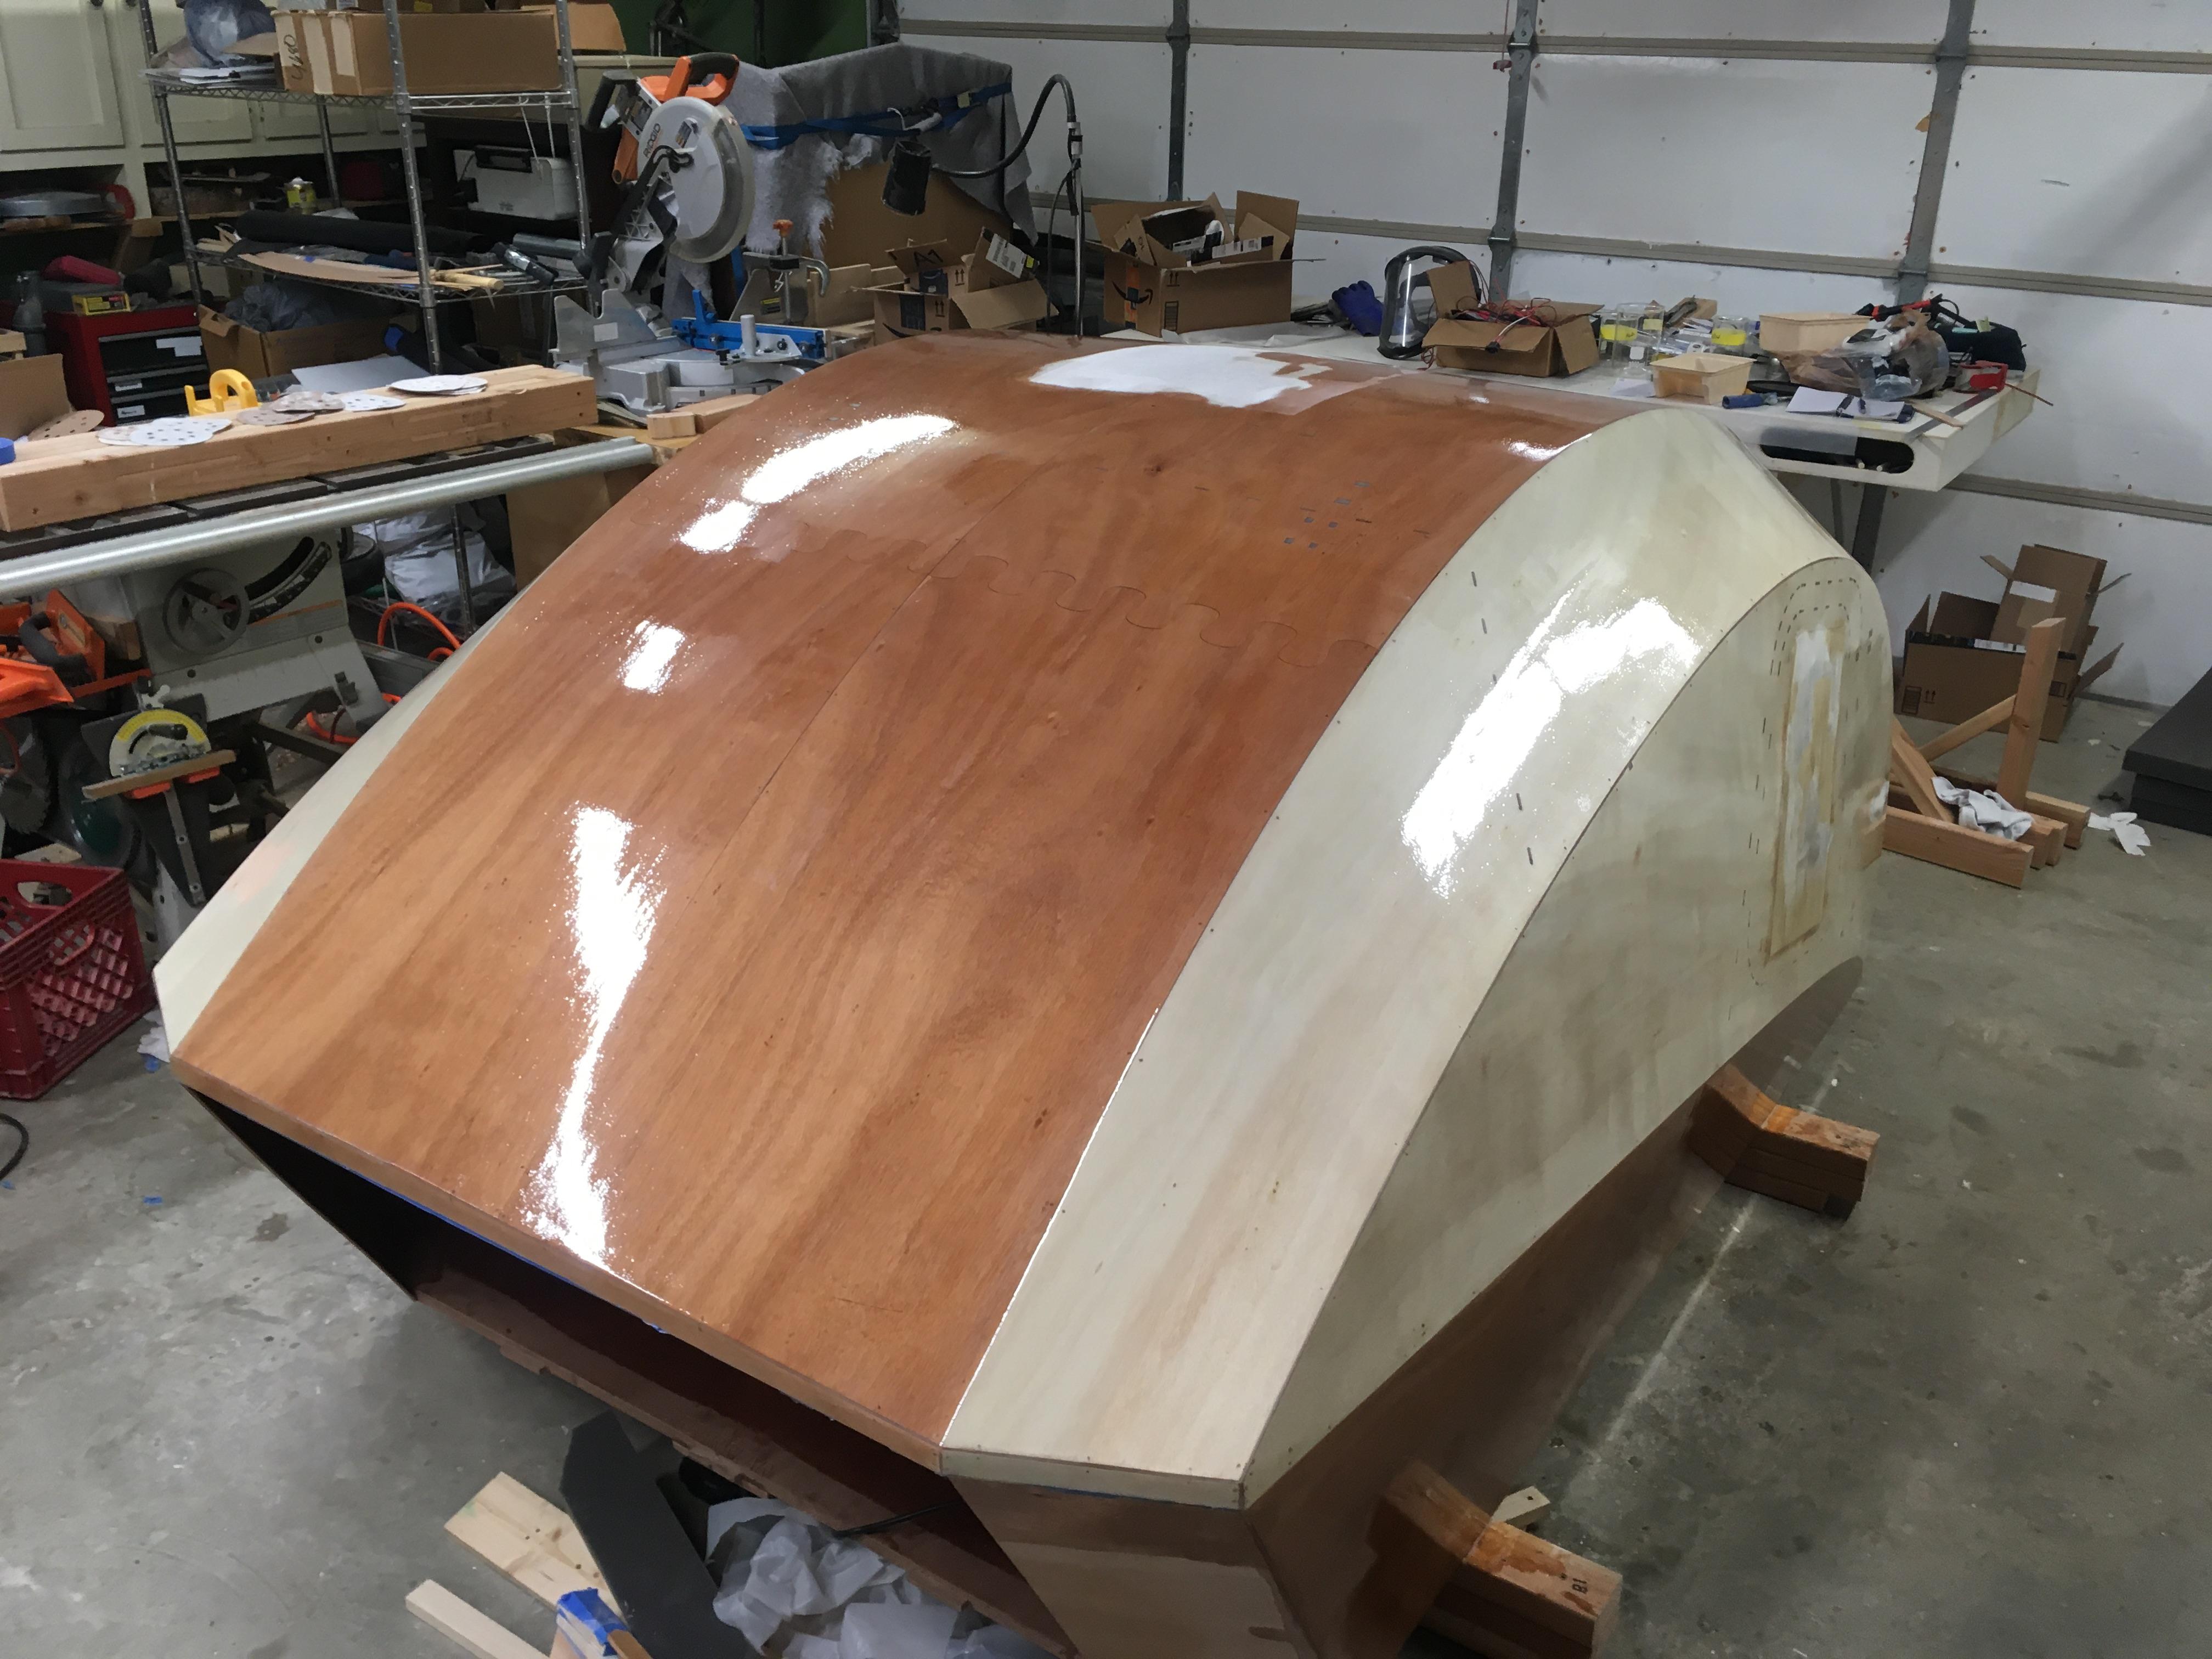 Participant
I think spooning it out would drive me bonkers and I don’t think I’d be able to get good results at all but I’d have to see it in action to know for sure. I’m using the pastry bag technique with used freezer bags and it has worked great for me. We buy cheap, medium-duty bags so I was worried about the seams bursting as I squeezed but so far no problems.
Participant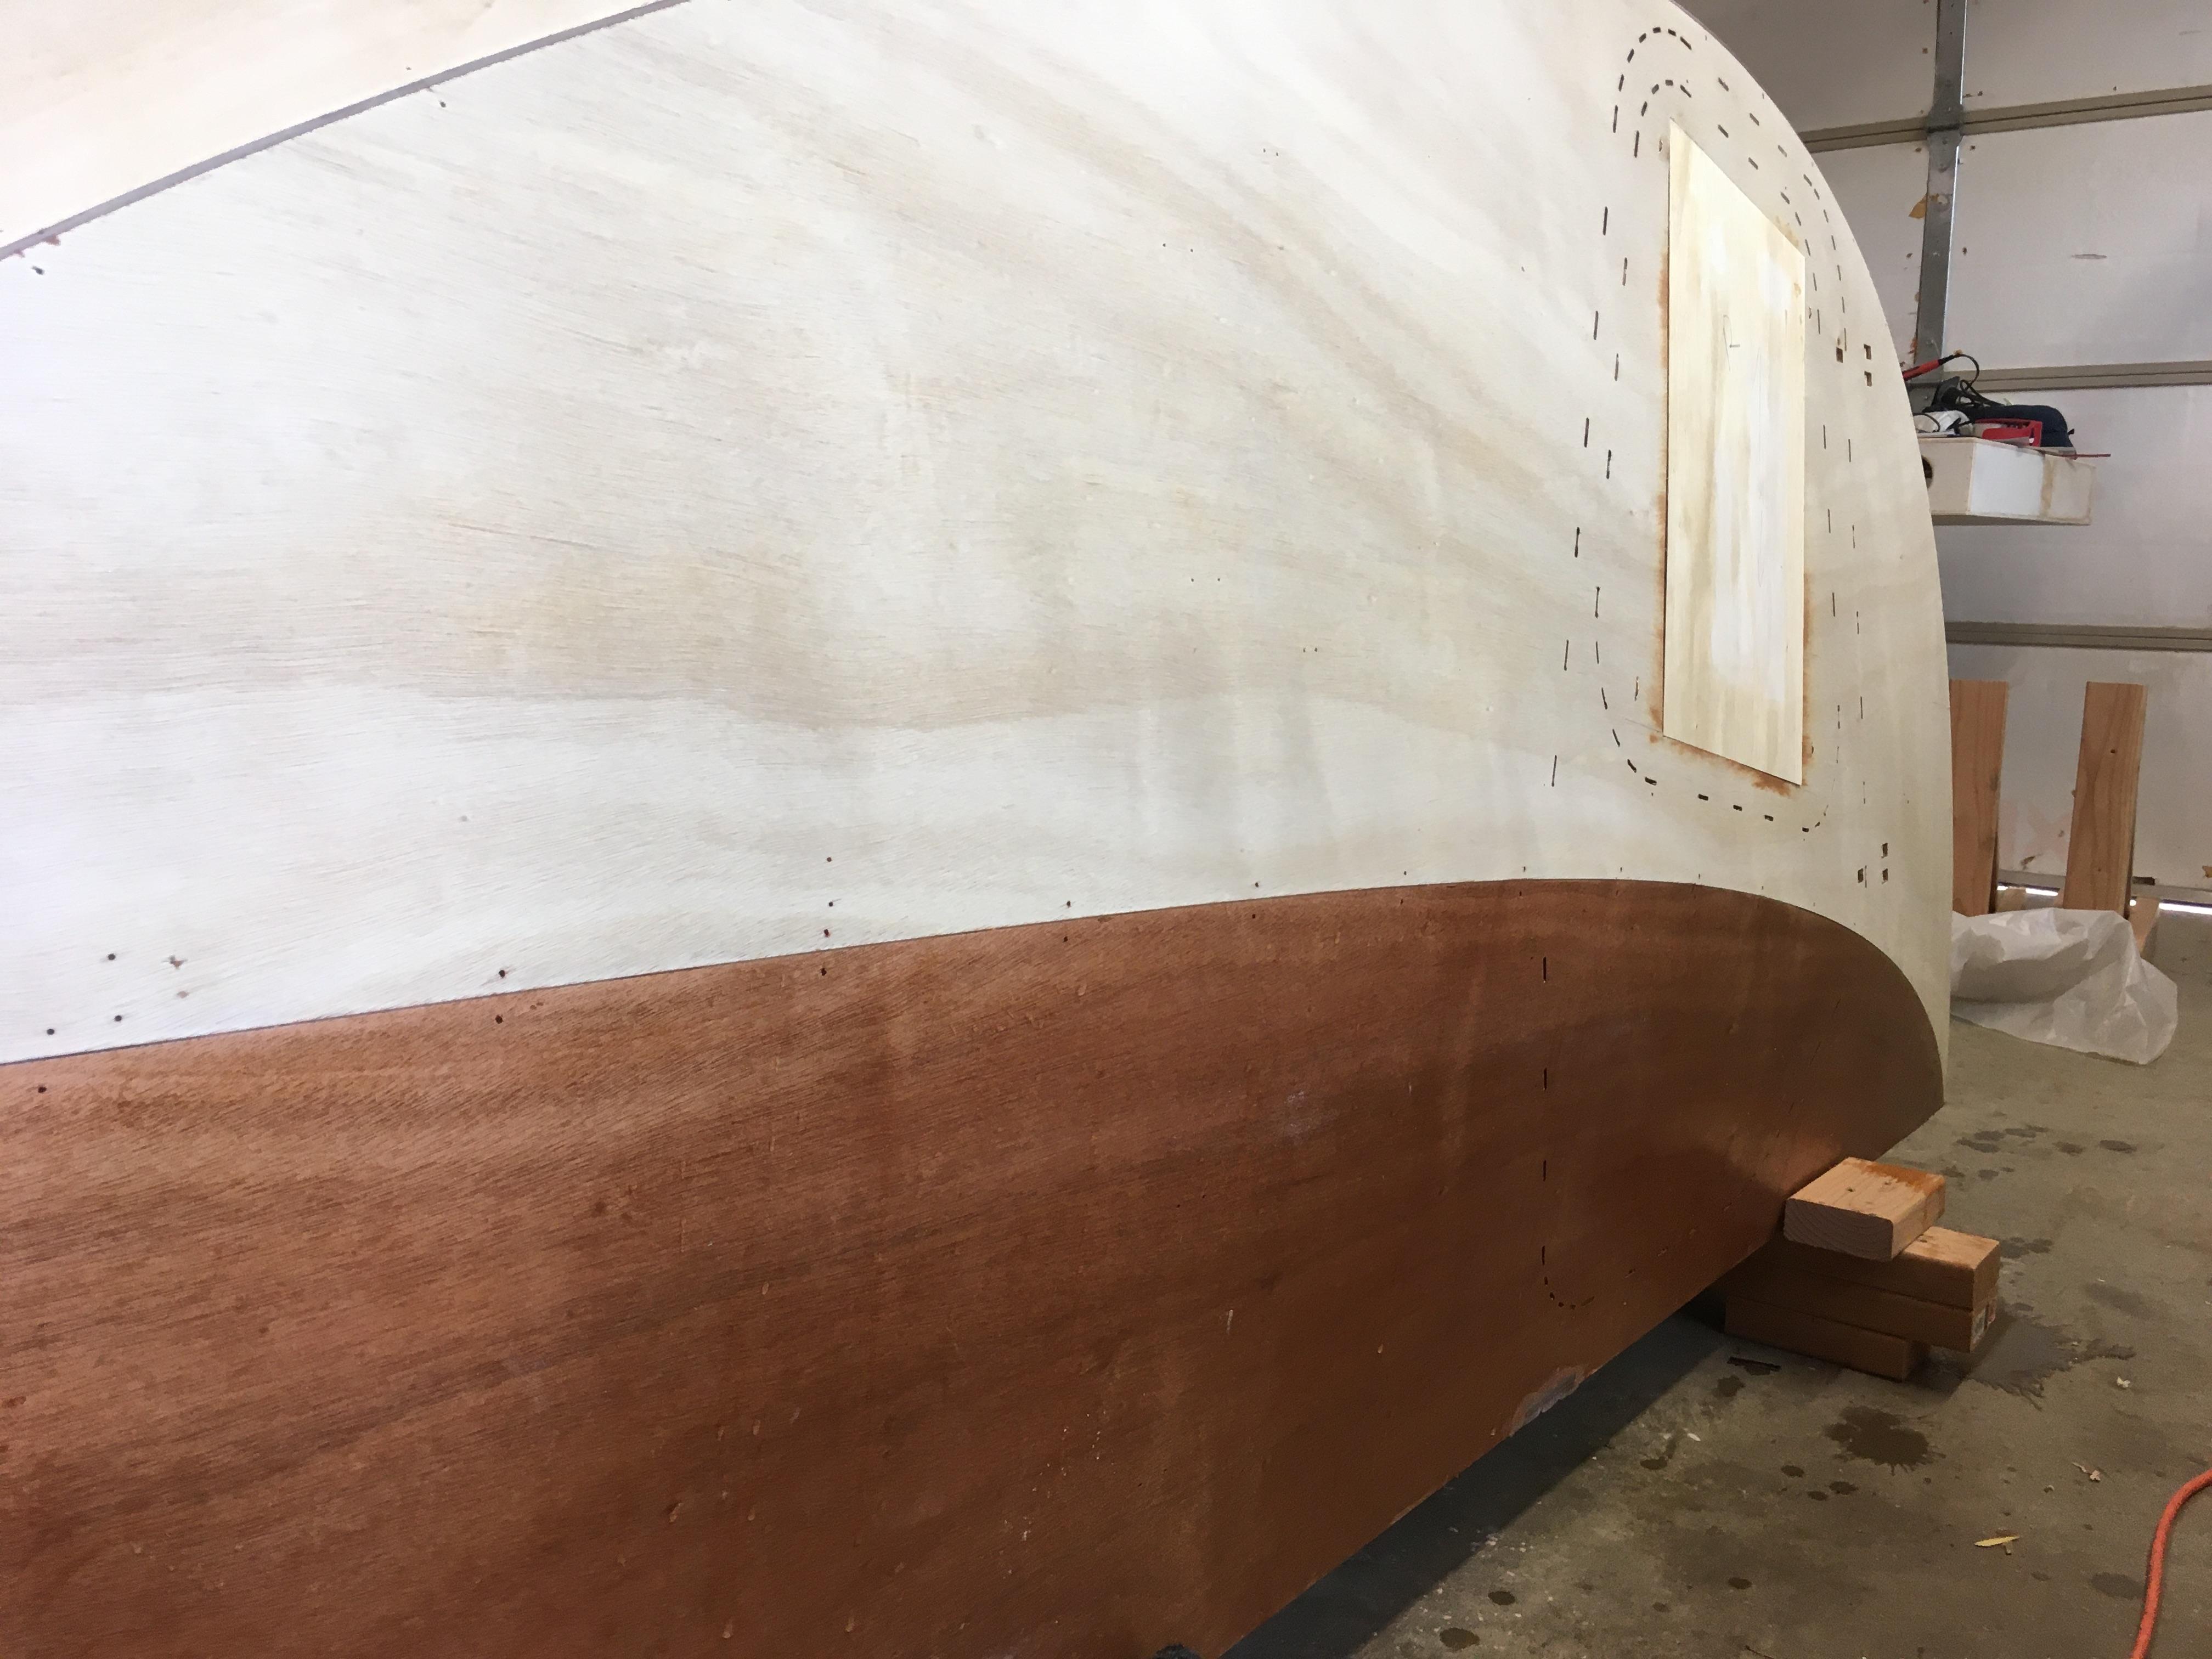
Detail
Participant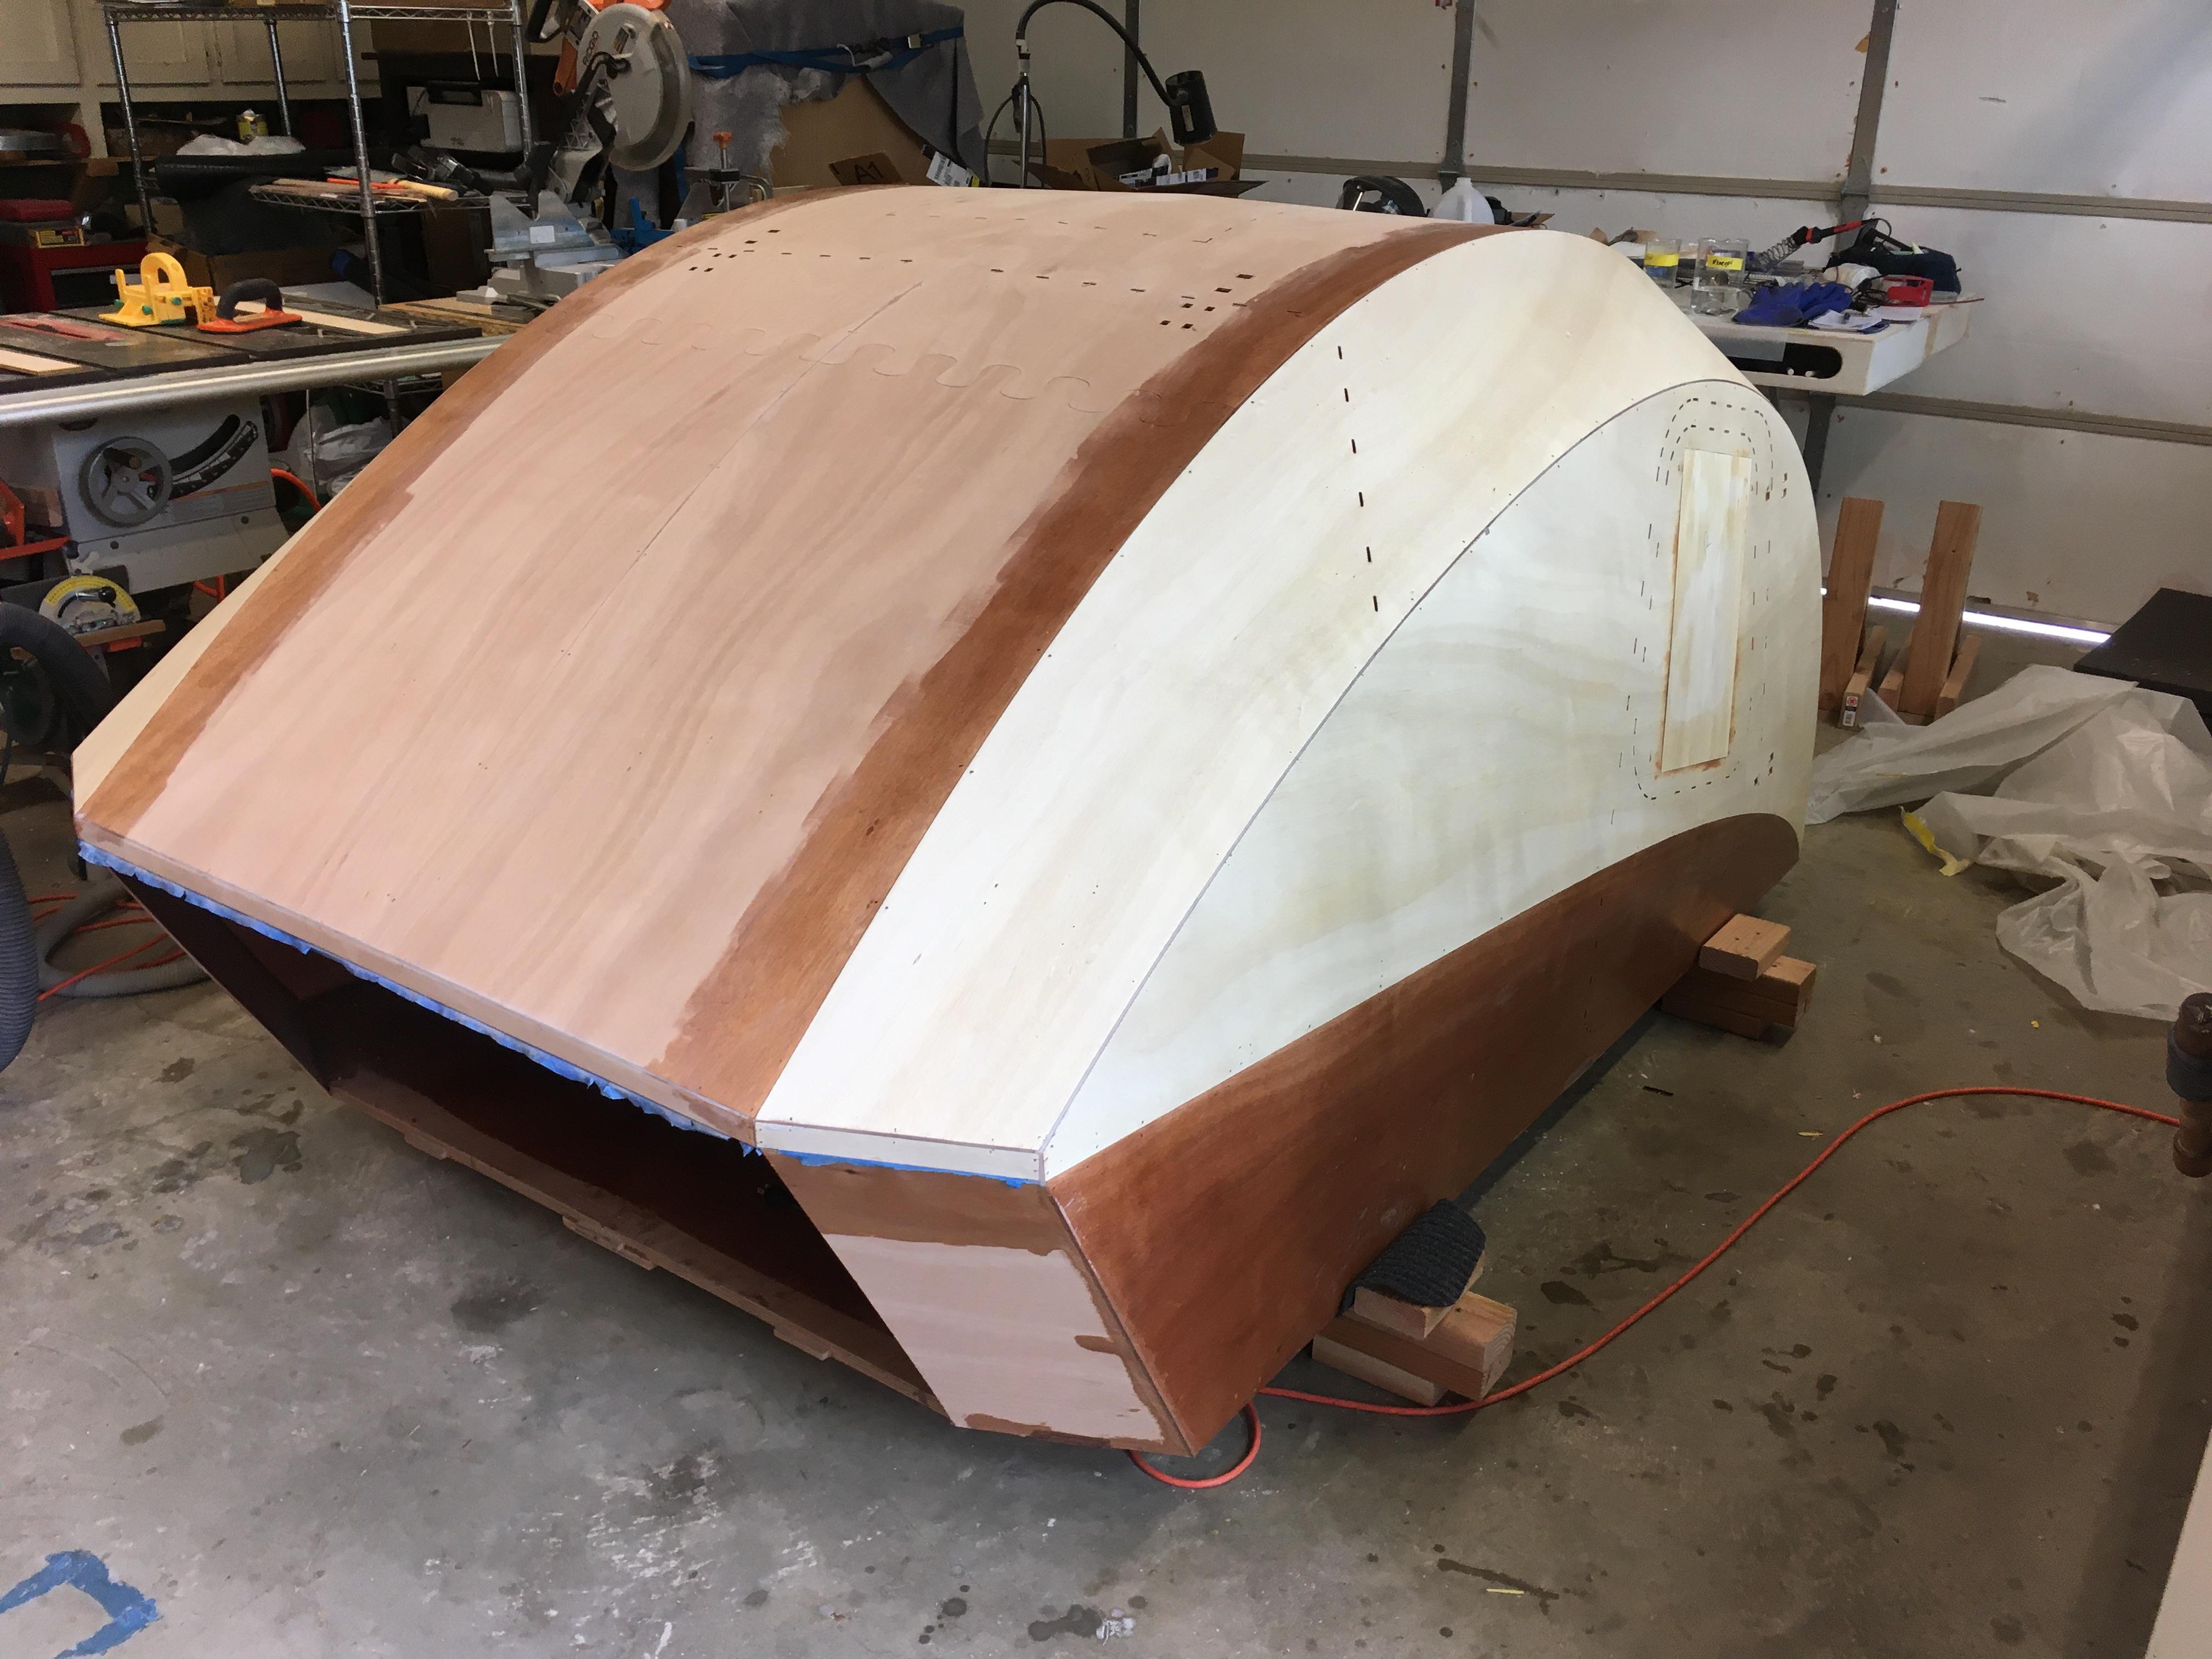
Bleached panels 2 and 3. Masked 1 and 4 with epoxy to prevent bleach from bleeding across chines.
ParticipantNo turning back now. I bleached panels 2 and 3 today with the intent of leaving 1 and 4 the natural color. I’m really happy with the results and am looking forward to seeing how it all turns out once I glass it.
(re-posting because original with images didn’t post, maybe this will work – images below)
Participant“Wow. I didn’t ask if it would “integrate” with the other style of plans.”
I wasn’t suggesting you thought it would integrate. I was offering a different answer than glcmranger. I could have just said “yes” but I thought it would be better to expand on that.
ParticipantWill it fit? Likely. Will it “integrate” not likely. The ICC top is just a flat surface with dimensions that are probably in ballpark for many teardrop plans. The CLC TD has some unique angles in the front and back which are mirrored in the ICC. Your other TD probably won’t have that so there will be some overhang/underhang in areas (maybe a LOT depending on your TD dimensions, but that’s probably an aesthetic issue more than a functional problem). Also the ICC is probably designed around some unique mounting points so you’ll probably have to adjust those for your TD.
ParticipantMike, tomorrow works for me. I’ll email your Yahoo address with details.
ParticipantThat’s a great bargain. If you weren’t 1000 miles away, I’d jump on it.
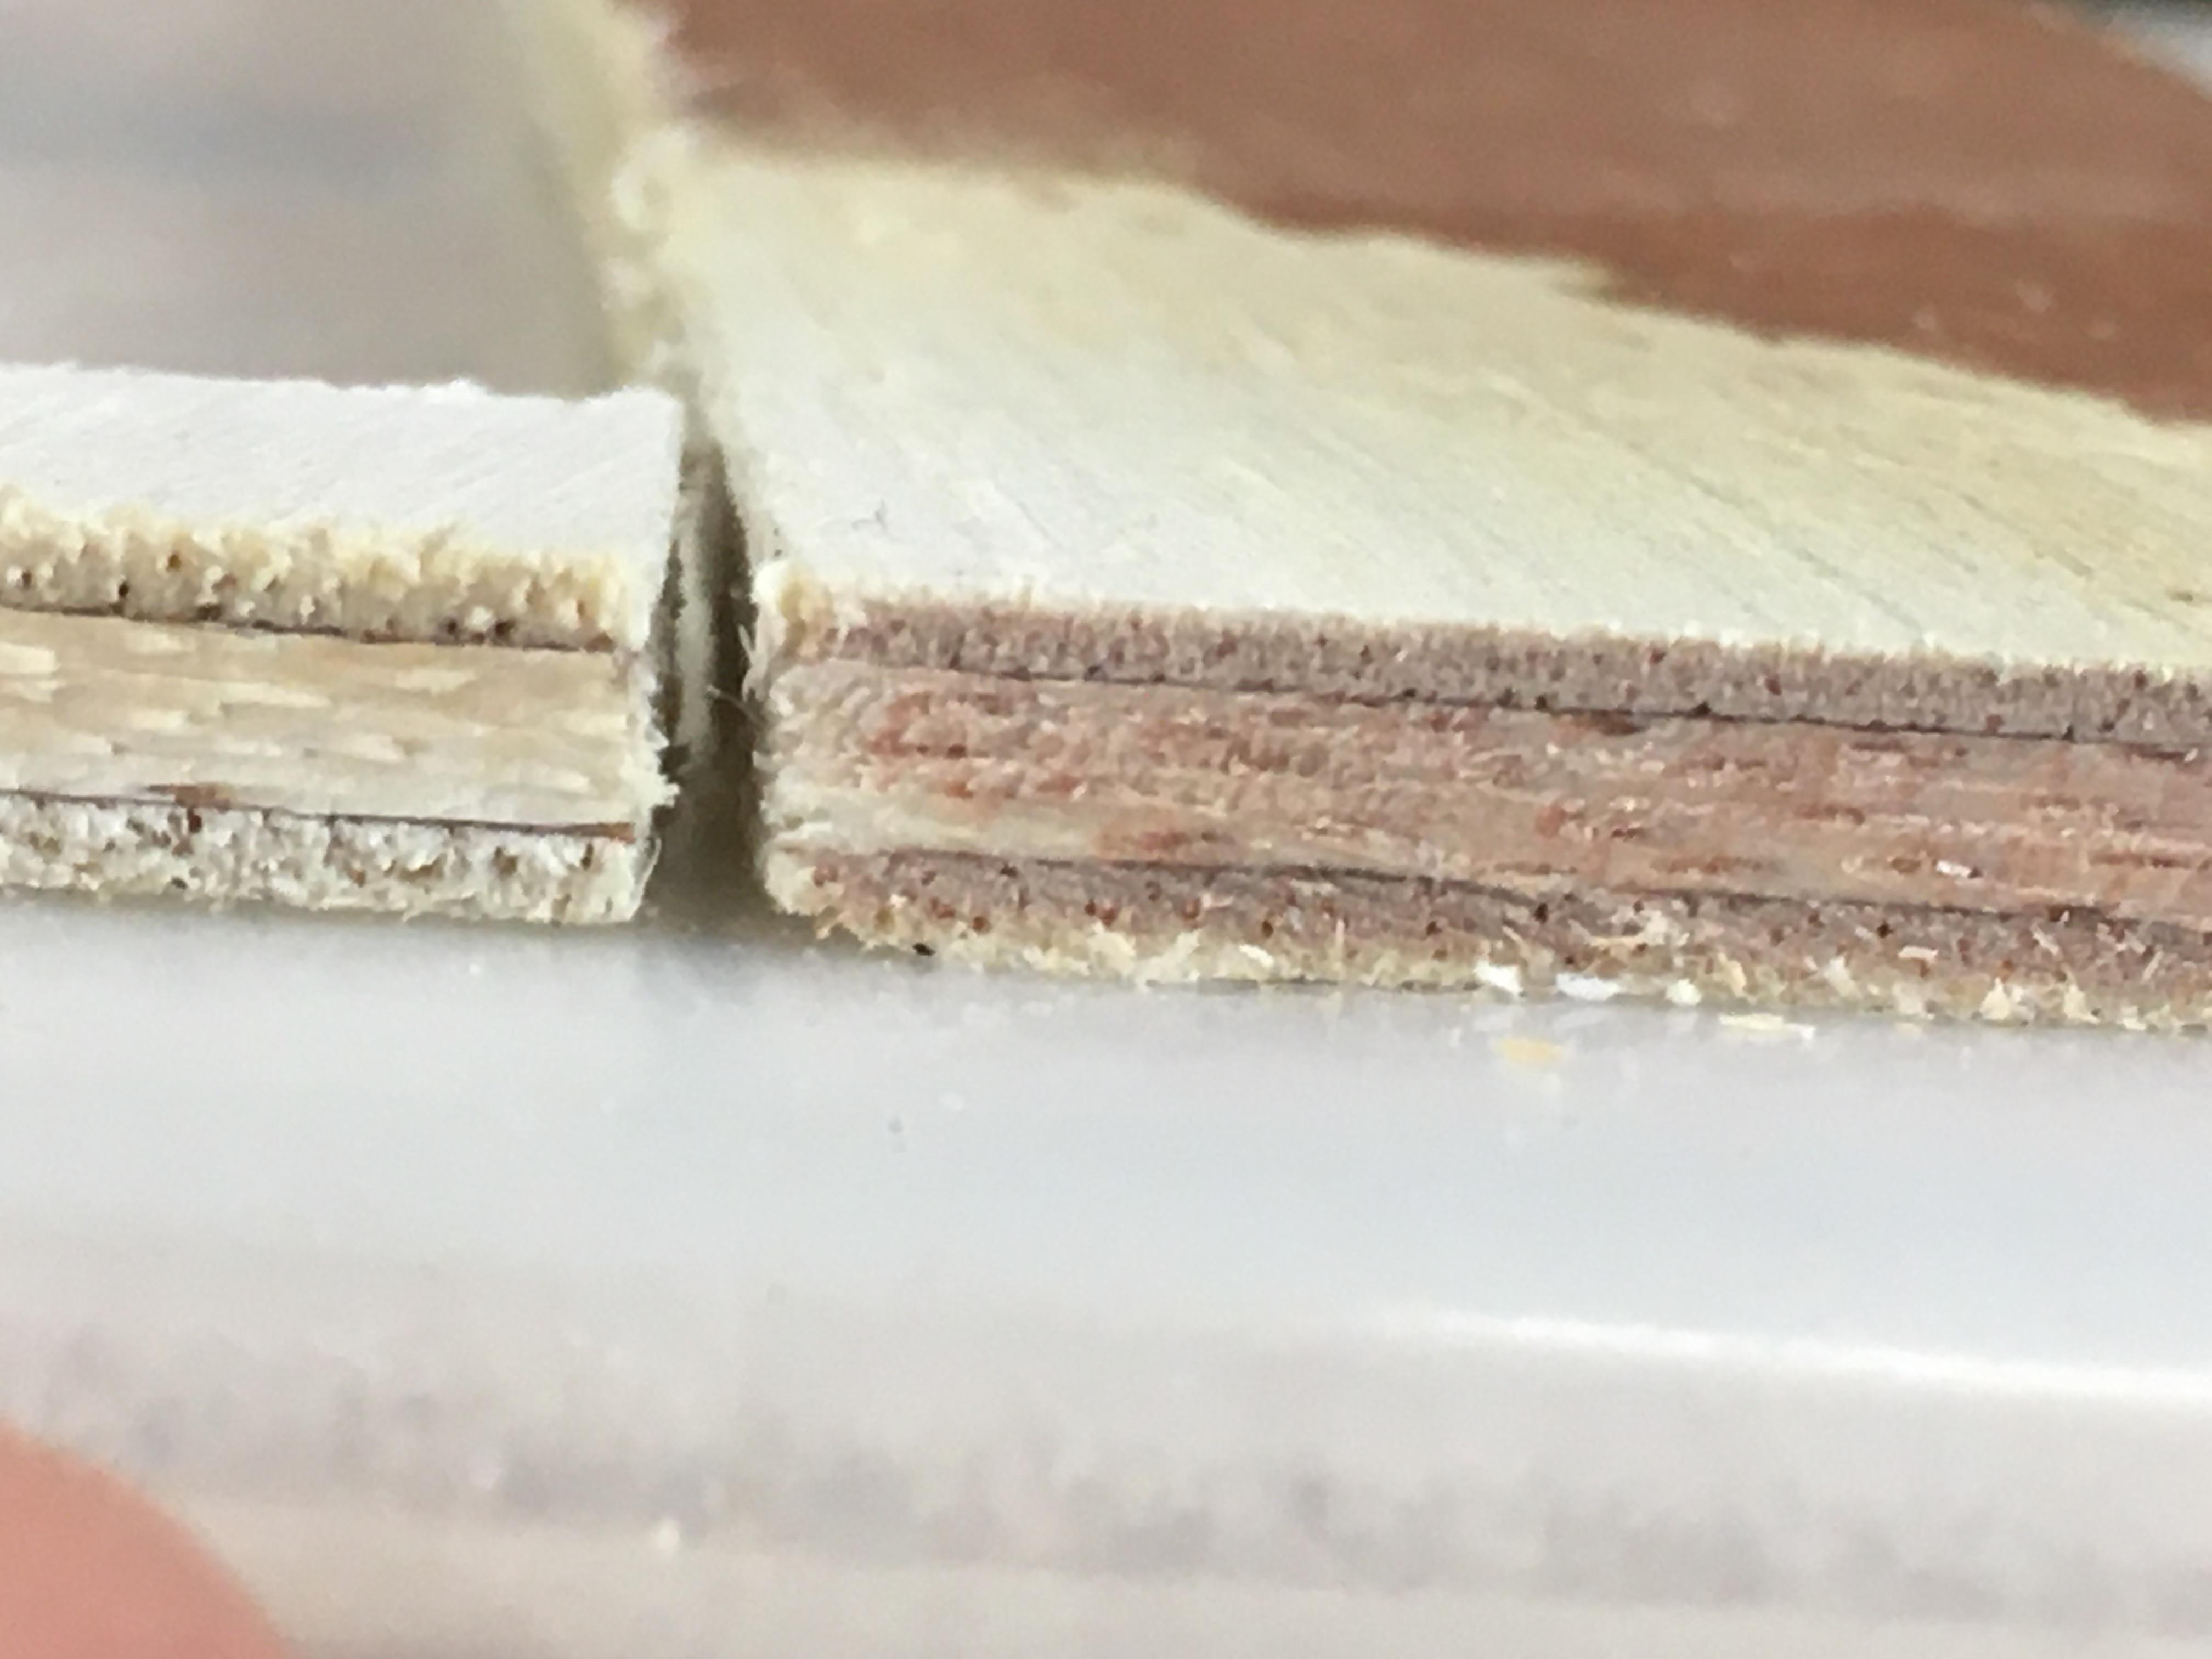
ParticipantEdge showing exposed, bleached edge and cross-section.
-
This reply was modified 2 years, 10 months ago by
-
AuthorPosts
