Forum Replies Created
-
AuthorPosts
-
jb
Participant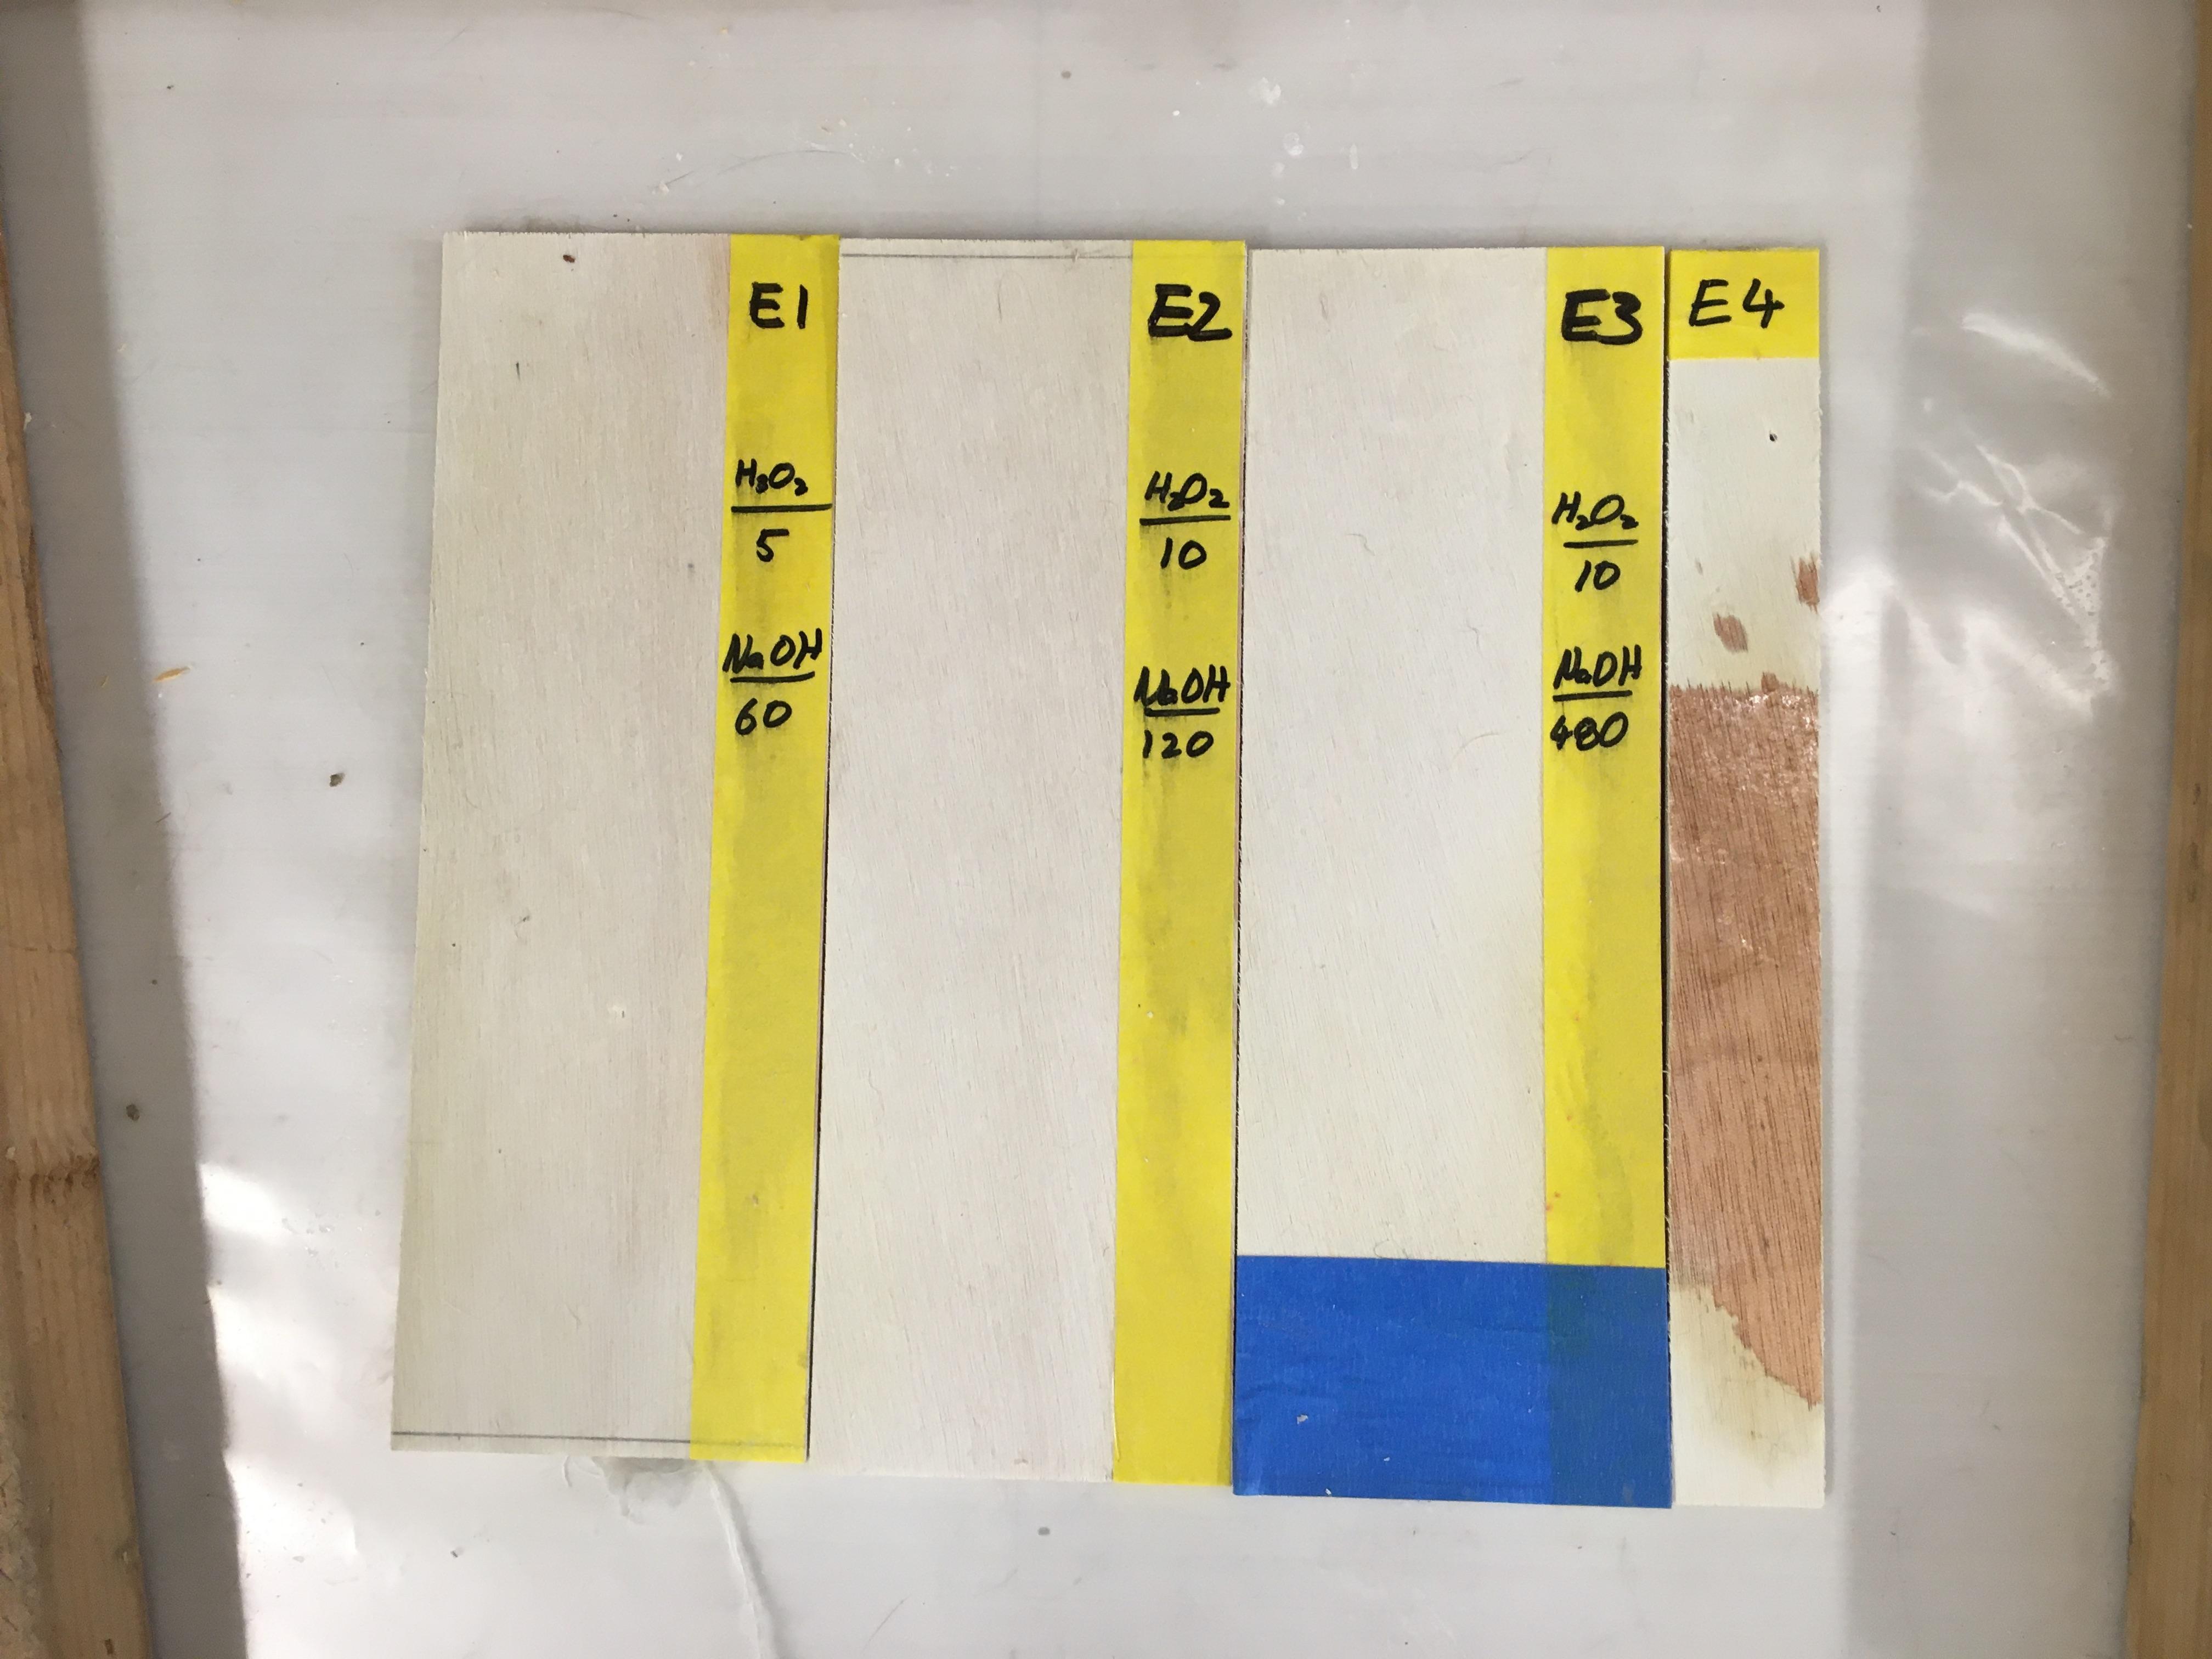 Participant
(first post didn’t get saved so I’m posting again without photos then will add those later)
I’d like to share my initial results from testing a two part bleach process on the CLC plywood. I’ll go into more detail in the next few days but please ask if you have questions – that will help me flesh out a more comprehensive write-up. I used a 27% hydrogen peroxide solution and 8% sodium hydroxide solution based roughly on the process documented at http://www.airbrushingwood.com/uploads/6/4/0/3/64033319/making_yor_own_wood_bleach.pdf
I wanted to determine if the bleaching process would damage the plywood to the extent that it might cause problems like delamination and determine the right combination of solutions and time to achieve the bleaching effect I am aiming for.
The “E” tests were to test for potential damage were extreme bleaching in which I left the bleach on the wood for between 1 hour and 4 hours. Test E4 is the same exposure as E3 but includes a section with cured epoxy which seemed unaffected by the bleaching process. The second “C” tests were for the target color in which I left the bleach on for between 5 minutes and 1 hour. I applied the hydrogen peroxide (H2O2) first then the sodium hydroxide (NaOH). For each test I let the solution soak in for a period of time before applying the next then I rinsed with water, then with vinegar and water solution (1:2 mix), then water again. The number of minutes for each solution is written on the tape on each test piece in the attached images.
In general, I don’t think the 4 hours of bleaching has compromised the strength of the plywood because it didn’t seem to penetrate very deeply and the test pieces showed no sign of delamination. But I do think the exposed edges might be a concern. The bleach wicked more deeply into the edges, especially on the edges where the grain pores were exposed (transverse section).
I just applied epoxy to the samples and will share those images soon. I can already tell that the epoxy will bring out more of the original color so the bleaching effect won’t be quite as dramatic as the un-epoxied tests might suggest but it will still be quite light compared to the unbleached wood.
ParticipantMike, I’m in Fort Worth but still in the process of building. I’ve completed the shell and the next step will be to fiberglass the exterior. In a couple of weeks I’ll be in a position to show it to you if you’re interested.
Thanks,
JasonParticipantAs a follow up to this question, is there another type of wood flour or other alternative that is much lighter than the MAS flour included in the kit? If I’m able to bleach the exterior, I’d like to keep the seams as light as possible as well. I imagine Cell-o-fill won’t get stiff enough for this purpose but perhaps it would work?
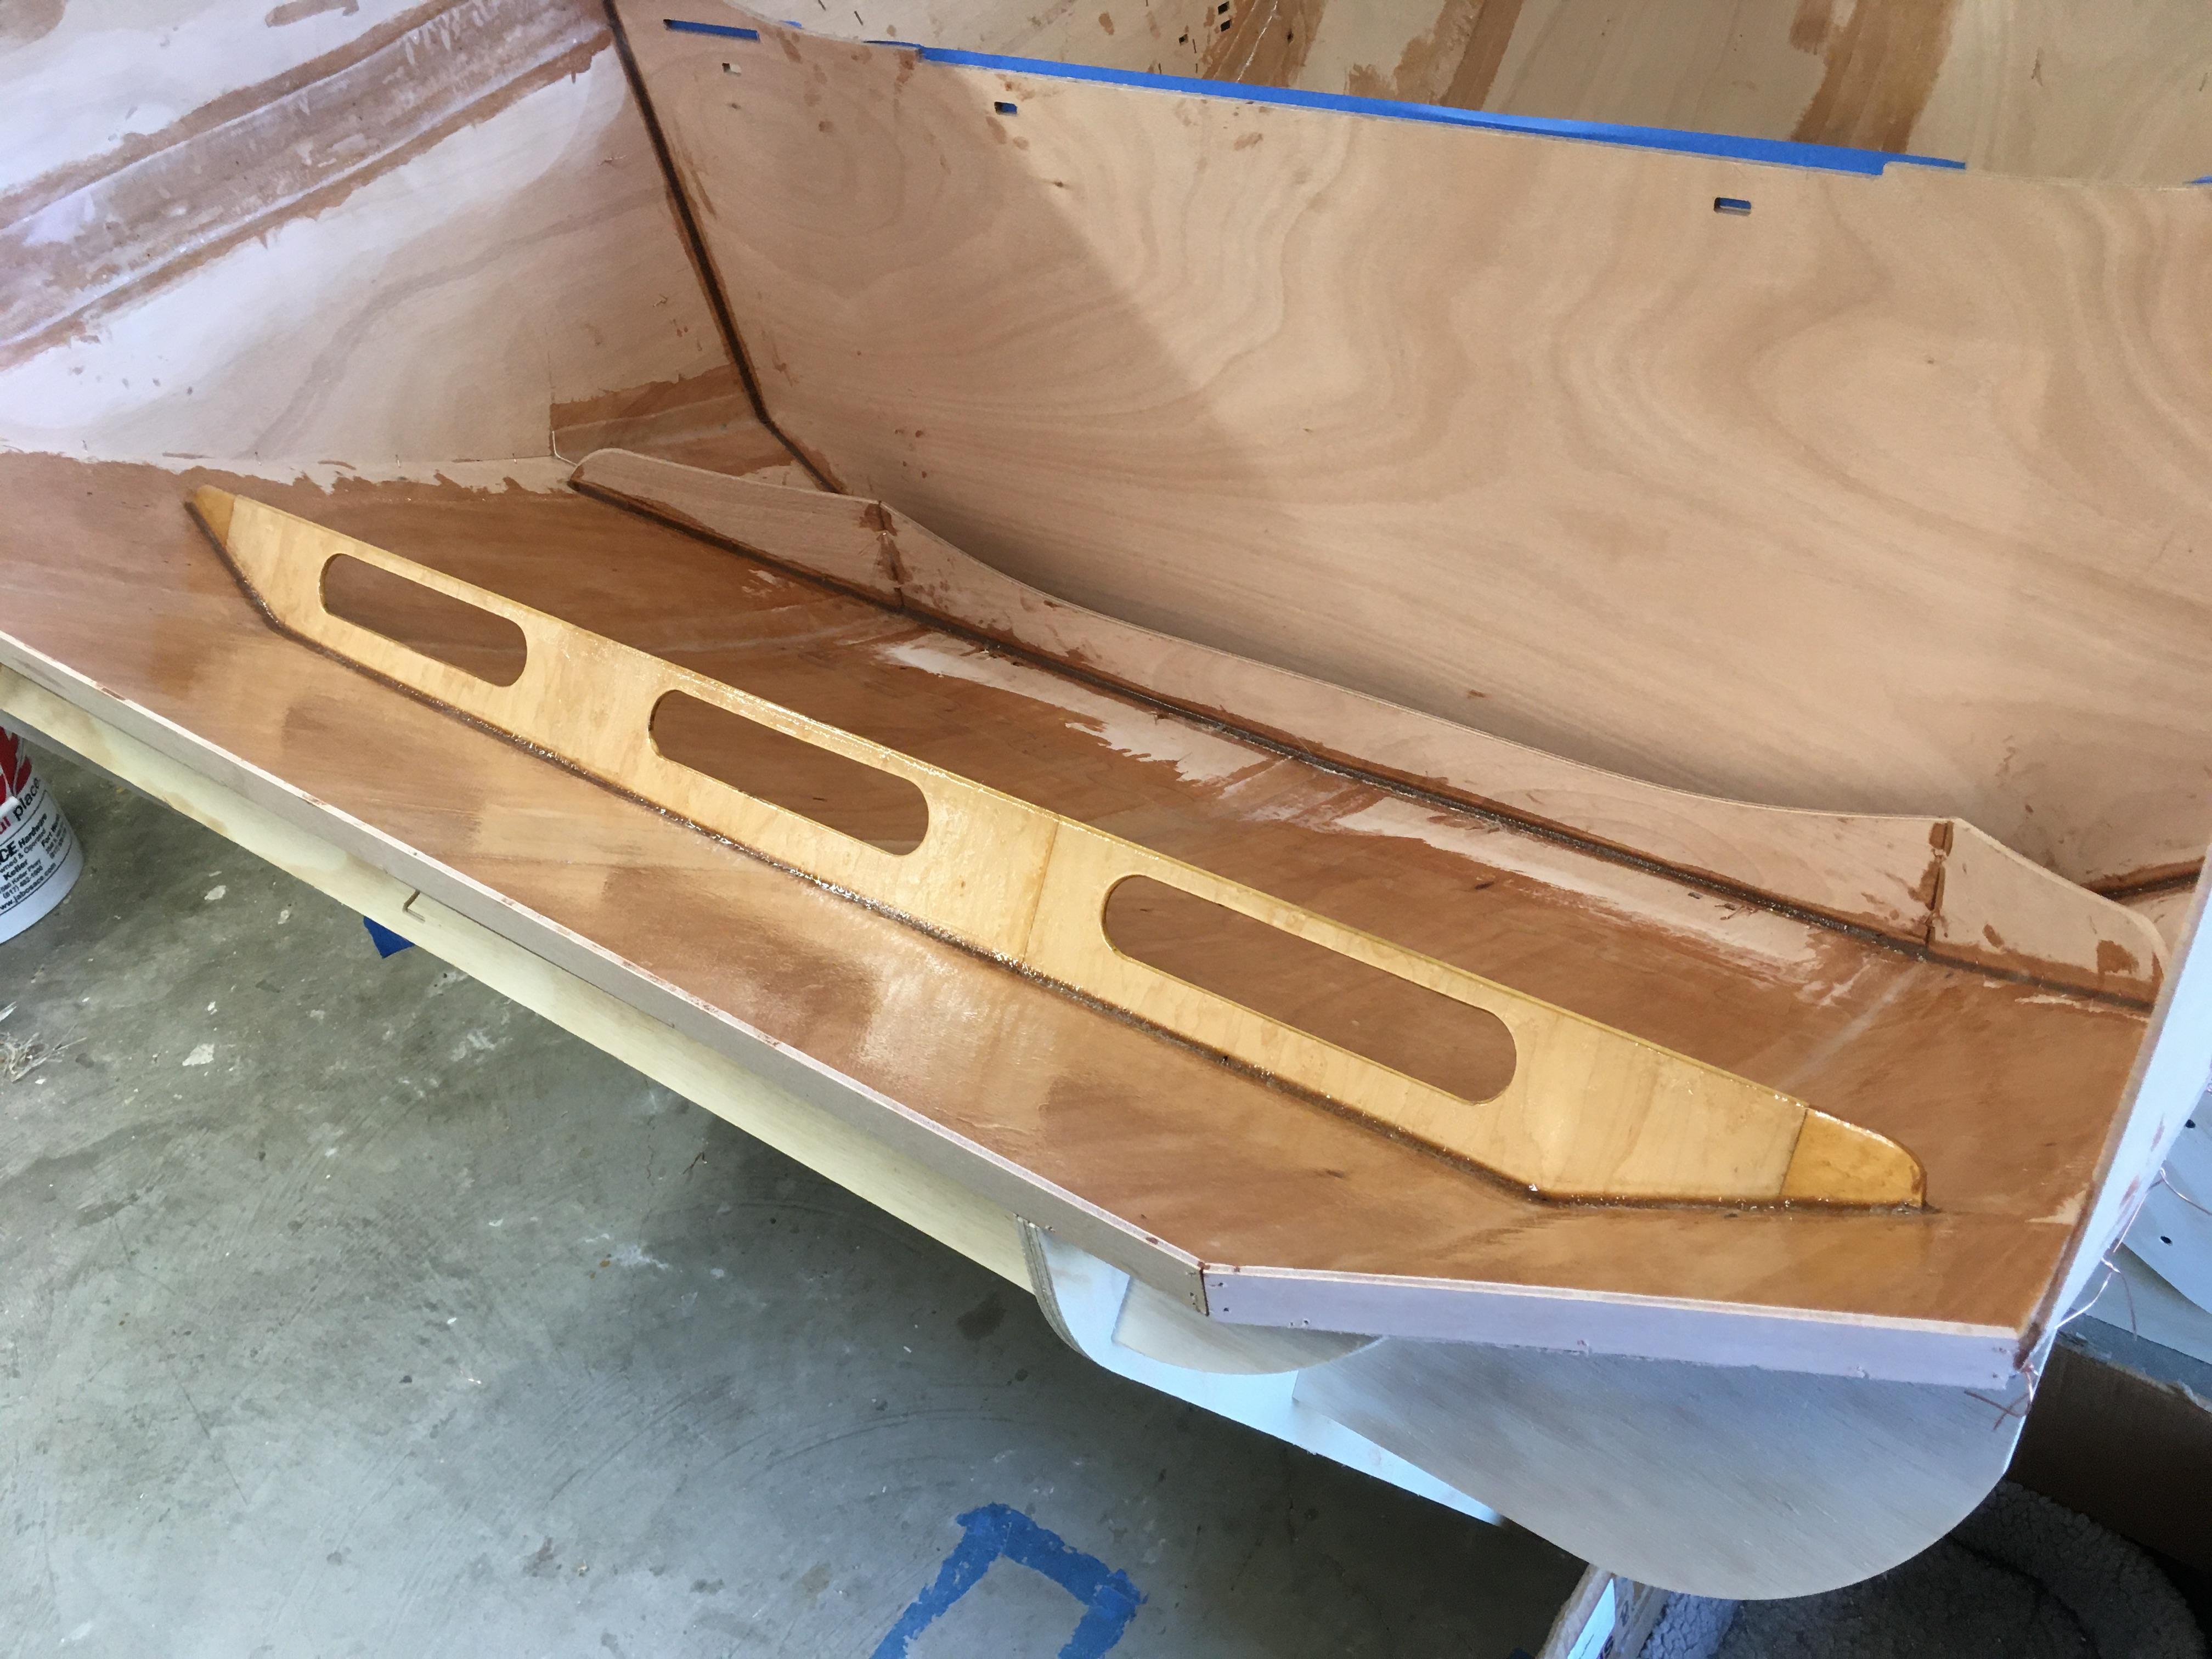
ParticipantThanks to everyone for the tips about the hatch stiffener. I added one and added glass above and below as an extra measure. I made mine out of 1/4″ plywood which I sheathed in glass and epoxy then cut out slots to hang things from (lights, dishrags, etc.). I doubled up the plywood on the back side at the chine where panel 1 meets 2 but I don’t have a pic of that handy at the moment.
-
This reply was modified 3 years, 1 month ago by
jb.
Participant@tpkrause86 I’m at the stage where I’m planning on adding a second hatch stiffener like you did. I planned on putting it pretty much in the same position as you did. Has this worked well for you? Anything you’d do different?
October 15, 2020 at 12:26 pm in reply to: Attaching camper shell to Northern Tools’ Ultra-Tow trailer #3238ParticipantDeepwoods, when you get to the point of mounting your TD to the Ultra-tow, would you mind sharing some measurements of the distance between the trailer support rails and the position you place the TD? I’m thinking of using the same trailer and would like to figure out how much support is exposed in front of the TD. I ordered my TD earlier this week but chose not to get the storage box because I plan on making my own to fit this trailer or something similar.
Thanks!
Jason
ParticipantYou won’t need a dust collector just for an orbital sander. Any shop vac should be fine. I recommend using a dust separator with your shop vac. It can help capture a lot of the dust before it gets into the vacuum and the filter so you don’t have to clean the filter as often and it will help keep the suction strong. I use an Oneida Dust Deputy (https://www.oneida-air.com/dust-deputy) but am about to make a Thien Baffle dust separator (DIY solution with many plans on the net).
-
This reply was modified 3 years, 1 month ago by
-
AuthorPosts