Forum Replies Created
-
AuthorPosts
-
mpilone
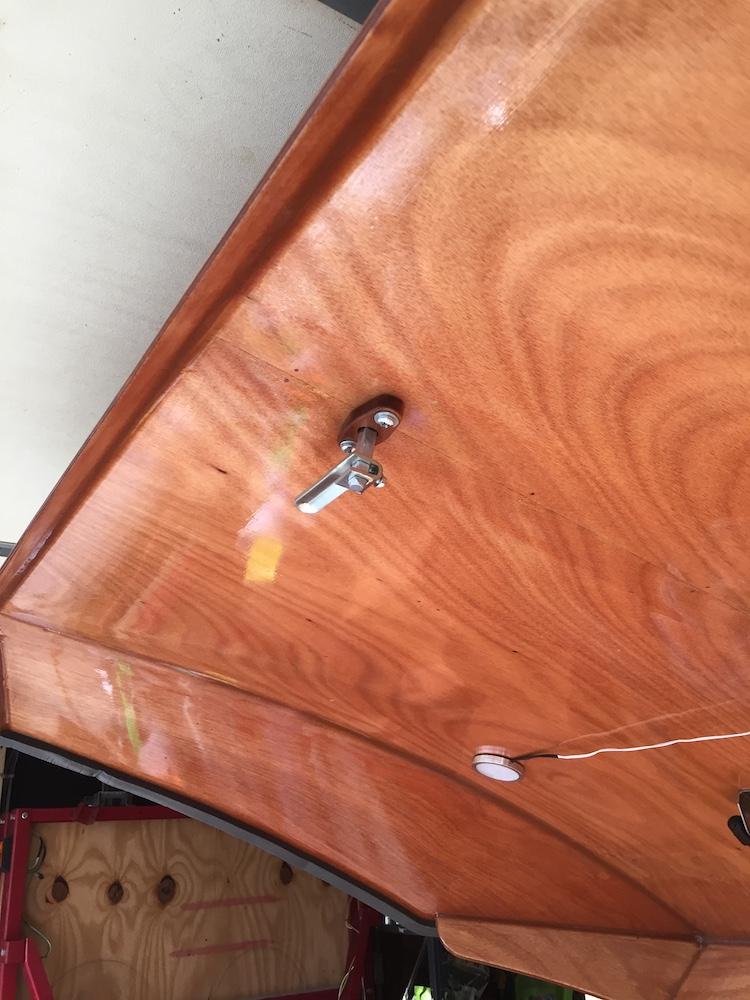
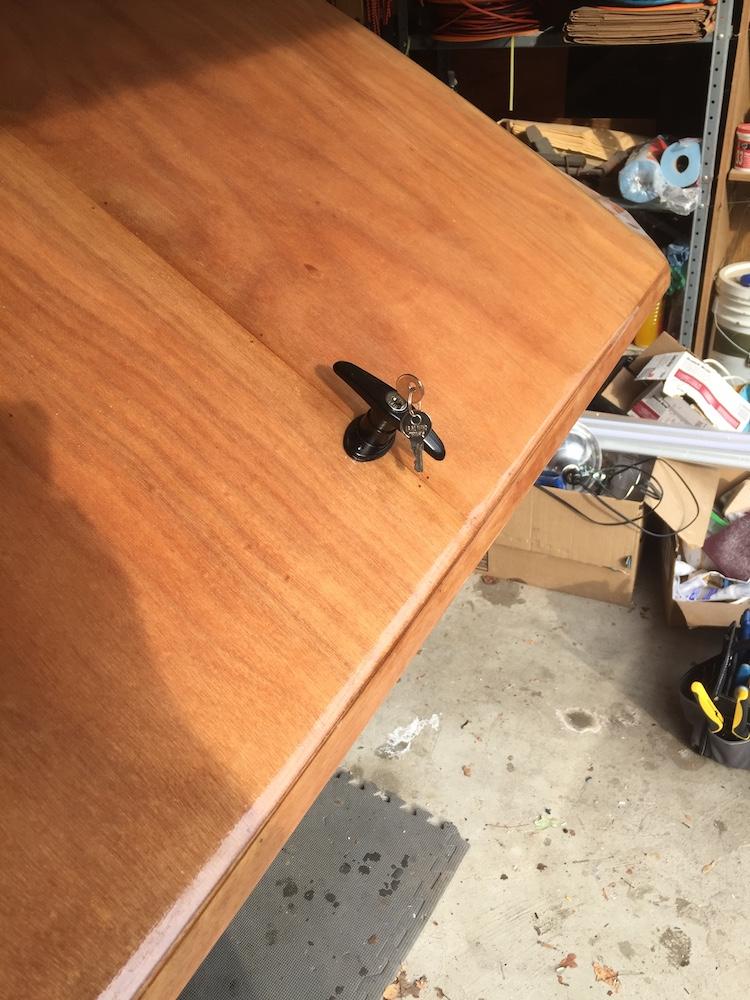
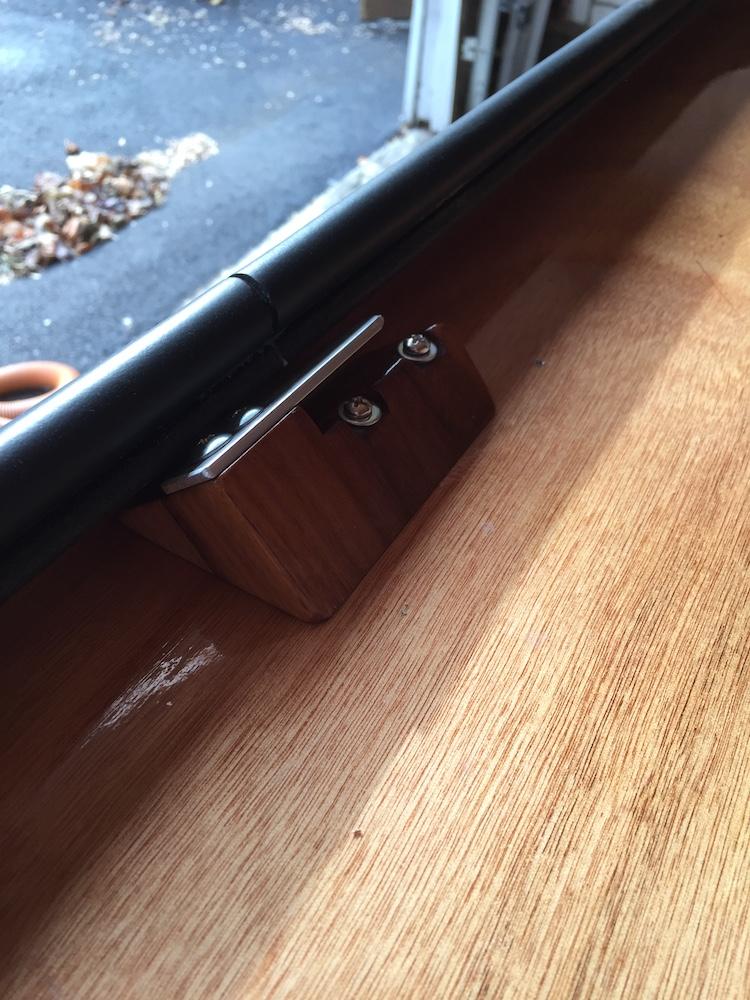
ParticipantI ended up going with a t-handle truck cap style lock. I build a simple latch plate for it on the inside of the galley. It isn’t as low profile as I would have liked but I do like that all the hardware is internal and I don’t have to worry about the hasp or lock banging on the camper.
I originally purchased a cam lock like the one’s Bill used but I was a little concerned that the 1/16th or so rim wouldn’t have enough grab to hold and not pull through the hatch. I’m sure you could make or find a washer to help spread the load a bit if you wanted to go that way.
 Participant
I believe it is because of the 12″ wheels. If I remember correctly the wheels have a max of 55 mph stamped on them. My guess is that they are good to 65, so lawyers said to write 55 on them, then Northern Tools saw that the wheels were good to 55 so their lawyers said to write 45 on it.
This thread discusses that people have used the trailer at 75 mph with no issues: http://teardropforum.com/forums/topic/northern-tool-5×8-aluminium-trailer-mods/
You could also upgrade the hubs/tires if you’re concerned and use the original wheels as spares. I think you’ll still end up a few hundred cheaper than the CLC trailer.
-mike
ParticipantI didn’t install a roof rack but I remember there was a video that had a few shots of it being installed in the Waterlust build video series on YouTube. I also remember the manual talking about it a bit in the section on glassing the body because you want the feet of the rack to bolt through the overlapped section of glass between the top and side sheets.
-mike
ParticipantThe original poster said that he/she wasn’t concerned about compensation for time so I think you’d be looking at $5 – 6K for the kit, trailer, electrical, supplies, etc. I would recommend doing some Craig’s list searching in your area to see what used trailers are going for. As CLC has pointed out in the past, at some point you start competing with used RVs that, while not as unique, can offer more amenities/space.
One thing to double check are the state laws regarding selling the trailer/RV. It seems like some states let you just register the trailer as a utility trailer while others require it to be registered as an RV. Also, if you make any modifications to the trailer, like with the Northern Tools kit, you might get some questions when selling it. Worth double checking to know what you are getting into. If you’re not taking it on the road, you could let the buyer be the first to register/title it.
That being said, my gut tells me you could find someone to buy it for 5 or 6K.
-mike
ParticipantBack to the original topic of hasps, has anyone tried a truck cap handle/cam like this one: http://amzn.to/2xNNHQY
It would work similar to @Bill’s use of the cam locks but give you a handle that matches the style of the door handles. In fact you could use a door handle here as well with just the cam lock lever and no rods. I did a quick search but I couldn’t find where CLC sourced the original handles from.
My hatch has a bit of spring in the middle so I think a single handle/cam in the center would be enough to keep it snug. The trick would be getting the locking block in the right place on the inside. I don’t know how Bill did that… twice 🙂
-mike
ParticipantGreat, thanks. As for images in the forum, you should be able to just attach them to your post using the Insert image option (see my meta-image below 🙂
 Participant
Thanks for the info. It sounds like the consensus is to run the CLC supplied weather seal (3/4″?) around the sides and top, directly on the edge of the hatch and then add a piece to the aft/bottom edge if needed after testing. Looking at my hatch I don’t have a lot of space between the top wooden drip edge strip and the edge of the hatch, maybe 3/8 to 1/2″. Did you find you had to cut or compress the CLC supplied seal to fit it along that edge or is my reveal shorter than average?
-mike
ParticipantThe manual isn’t 100% clear on this but it sounds like the foam gasket on the hatch should go completely around the parameter, correct? The manual says to start on one side up against the aft lip/stiffener on the hatch and go around the parameter but there no pictures of the foam going across the aft edge (where the hasp is mounted). If you did go across the aft side, did you hug the aft stiffener/lip or move it forward a bit to try to align with the rubber gasket?
I assume the foam is needed there as well to get a good seal against the rubber gasket but I wanted to double check before I put it on. I have a 10 ft roll plus the two scraps from the door weather stripping which I think will be enough.
-mike
September 28, 2017 at 10:30 pm in reply to: double checking about dashes before doing the main glassing job #1353ParticipantI would say you did the right thing. You’ll be cutting along those dashes later so any little bit of epoxy that gets through the glass will be removed when you cut through it and then when you sand down the remaining dashes/tabs. I recommend doing the same for the hinge holes if they’re not open yet. It is easier to drill/cut through just the epoxy and glass than to get through the small wood block now epoxied in the hole. I doubt you’ll need the tape on the inside for just applying the glass but it doesn’t hurt if it reduces your worry.
As rovineye said, you will want tape in a few of the later steps when you’re putting fillets in and you might have gaps like with the galley floor.
My general advice with the big glass job (lessons learned the hard way):
- Do it in two steps like the manual suggest for newbies.
- Only put enough epoxy on to make the glass go transparent, don’t float it. You can always fill it later.
- Watch the temperature. It is much easier to do if you can keep the work area cool. If you start to feel the epoxy get warm in your hand, toss it. It isn’t worth the few dollars in savings to try to use epoxy that is already kicking because it will just make a big mess. The quicker you get it out of the cup and spread the more working time you’ll have. Mix small batches (like 4 to 8 oz at a time) and work your way up if you feel comfortable with the working time.
- Use the tool that works best for you. I found a foam roller and squeegee worked well for large flat surfaces. A chip brush was good for dabbing in corners and odd edges.
- Layout and cut the fiberglass to avoid waste and save the scraps. I was pretty cautious with my cutting and I still only had about a foot of extra glass at the end. The scraps work well for areas like the fan hatch (inside and out).
-mike
-
This reply was modified 6 years, 7 months ago by
mpilone.
ParticipantI haven’t tried the stop loss kit but that seems like it would do the job. Basically you have to try to keep the varnish oxygen free when not using it. I read a bunch of other techniques online like blowing into the can before closing it, using can of compressed air/duster, using gallon freezer bags, etc. The stop loss kit looks like a professional (and less messy) version of freezer bags. Maybe if I have to order another can of varnish I’ll pickup the kit and give it a try.
-mike
ParticipantEverything I learned about varnishing was from the manual, YouTube videos, and Ken (faithie999) so your mileage may vary. I completed varnishing all inside surfaces and my galley module but I haven’t done the outer cabin yet. I used a 4″ foam roller to apply, a brush to tip (see below), and a foam brush to apply varnish in nooks and crannies (then tipped with the brush).
I couldn’t find the brush Ken recommended so I went with a Purdy Syntox brush which is a combination of Chinex/Nylon bristles. Lowes stocks it next to the varnish and poly, not with the normal paint brushes. However I’ve since seen Red Tree brushes on Amazon if you have the time to order. https://www.lowes.com/pd/Purdy-Syntox-Nylon-Flat-Sash-Paint-Brush-Common-2-in-Actual-2-in/999972050
I already had a set of foam rollers that I’ve been using and I’m incredibly happy with them. I wish I had them when I was doing the epoxy work. https://smile.amazon.com/gp/product/B005MI3RX2/ref=oh_aui_detailpage_o02_s00?ie=UTF8&psc=1
The 3M pads the manual (and Ken) recommends: https://smile.amazon.com/gp/product/B0002SQYF0/ref=oh_aui_detailpage_o04_s00?ie=UTF8&psc=1
When I varnished the galley module I only used a vacuum and then denatured alcohol to clean it up but I got a lot of bumps in the finish. I then purchased some tack cloths and I think it makes a huge difference. For about $1 each from HD or online, they are totally worth it. I get about 2 uses out of one before I toss it. https://smile.amazon.com/gp/product/B000CINDQS/ref=oh_aui_detailpage_o02_s00?ie=UTF8&psc=1
Another tip from Ken is to put plastic wrap in the can up against the top surface of the varnish when you’re done for the day. Otherwise you get a thick skin on top (like pudding) that is just wasted varnish. When pouring the varnish out into a disposable 4″ roller pan I run it through the cheap mesh paint strainers you can get near the paint sprayers at a big box store. They run about 3 for a $1.
From a temperature point of view, I found that if my shop was hot, everything worked fine but the varnish would get tacky really quickly so it was hard to maintain a wet edge. I would recommend rolling and tipping in very small areas so you can tip before it gets tacky and maintain the wet edge. More than a couple square feet before tipping and you’re going to run into problems with brush or start/stop marks.
Like Ken, I wasn’t willing to empty my garage or shop to clean it. I vacuumed the floors and any top surfaces I could get to. I also try not to sand and varnish on the same day. My routine is usually sand, vacuum, alcohol wipe down. Next day, tack cloth, varnish. Repeat. That gives a day for dust blown around from sanding and vacuuming to settle and the tack cloth picks it up quickly. So far I don’t feel like I’ve had a huge issue with dust in the finish but I have strategically allowed hundreds of spiders to form natural dust control webs around my shop.
Being a guy with hairy arms I also wear a clean long sleeve shirt which I feel like helps keep down the stray hairs especially when I accidentally bump a tacky varnished surface. If it fit with the respirator I might consider a beard net too.
Overall I’m actually enjoying the varnishing process. It might be the fumes getting to my head but I find it much easier to work with than epoxy and the immediate change from dull, gray, sanded epoxy to beautiful glossy wood is very rewarding.
-mike
ParticipantThanks for looking into it, Ken. What’s your plan now? Are you going to ask CLC to swap out the 20# for 30 or order them on your own and compare? Looks like they are going for around $30 a set (assuming ATT-SL34305 from https://www.jamestowndistributors.com/userportal/show_product.do?pid=11963 are the right model).
I definitely see the issue with the heavier hasp @szerby mentioned but I’m also concerned about the 30# pistons putting extra strain on the hinges and possibly lifting the hatch off the gutter gasket.
-mike
ParticipantThanks for the idea. I found this hasp at Home Depot and picked it up. After testing it with my hatch I’m concerned it is a little heavy. It seems to pull the hatch down a few inches. One option would be to reverse the install so the loop is on the hatch. Have you had any weight issues? Still happy with the setup?
-mike
ParticipantGood point, Bill. I got my hatch installed this weekend with the pistons and I agree that they won’t support much weight. I had picked up a multi-segment hasp as @apkley mentioned in this post (http://teardropforum.com/forums/topic/hatch-hasp-clasp/) but even that seems a little heavy. One option is to reverse it so only the loop is on the hatch but I’m still looking at options.
Do you get any water leaking through the tumbler?
-mike
ParticipantGreat. Thanks for letting me know. I’ll probably pick up a pair as either replacements in reserve or use them on my battery box. Glad they worked out for you; now you can let your son off the hook 😉
-mike
-
AuthorPosts