Forum Replies Created
-
AuthorPosts
-
mpilone
ParticipantI don’t remember where I got my specific one but it looks the same as this:
Just search for “locking t-handle”. They are commonly used on the back windows of truck bed caps. I haven’t had an issue with the single center locking point. Others have posted that they’ve had some issues with the hatch warping a bit and allowing water in the sides. You could always put one in each corner if you were concerned.
ParticipantI don’t think they will be “unseeable” but you may also be looking with a lot more critical eye than the average person checking out your trailer 🙂
I’m no expert but I think you have two options:
- Try using a syringe to inject epoxy into the bubbles to fill them.
- Sand through the glass to expose the bubbles, then patch with a small square of glass slightly larger than the bubble/exposed hole.
I definitely wouldn’t consider painting yet if that’s not what you want. It will require a little more work, but you can definitely expose and patch those bubbles.
-mike
-
This reply was modified 3 years ago by
mpilone. Reason: Fixed typo
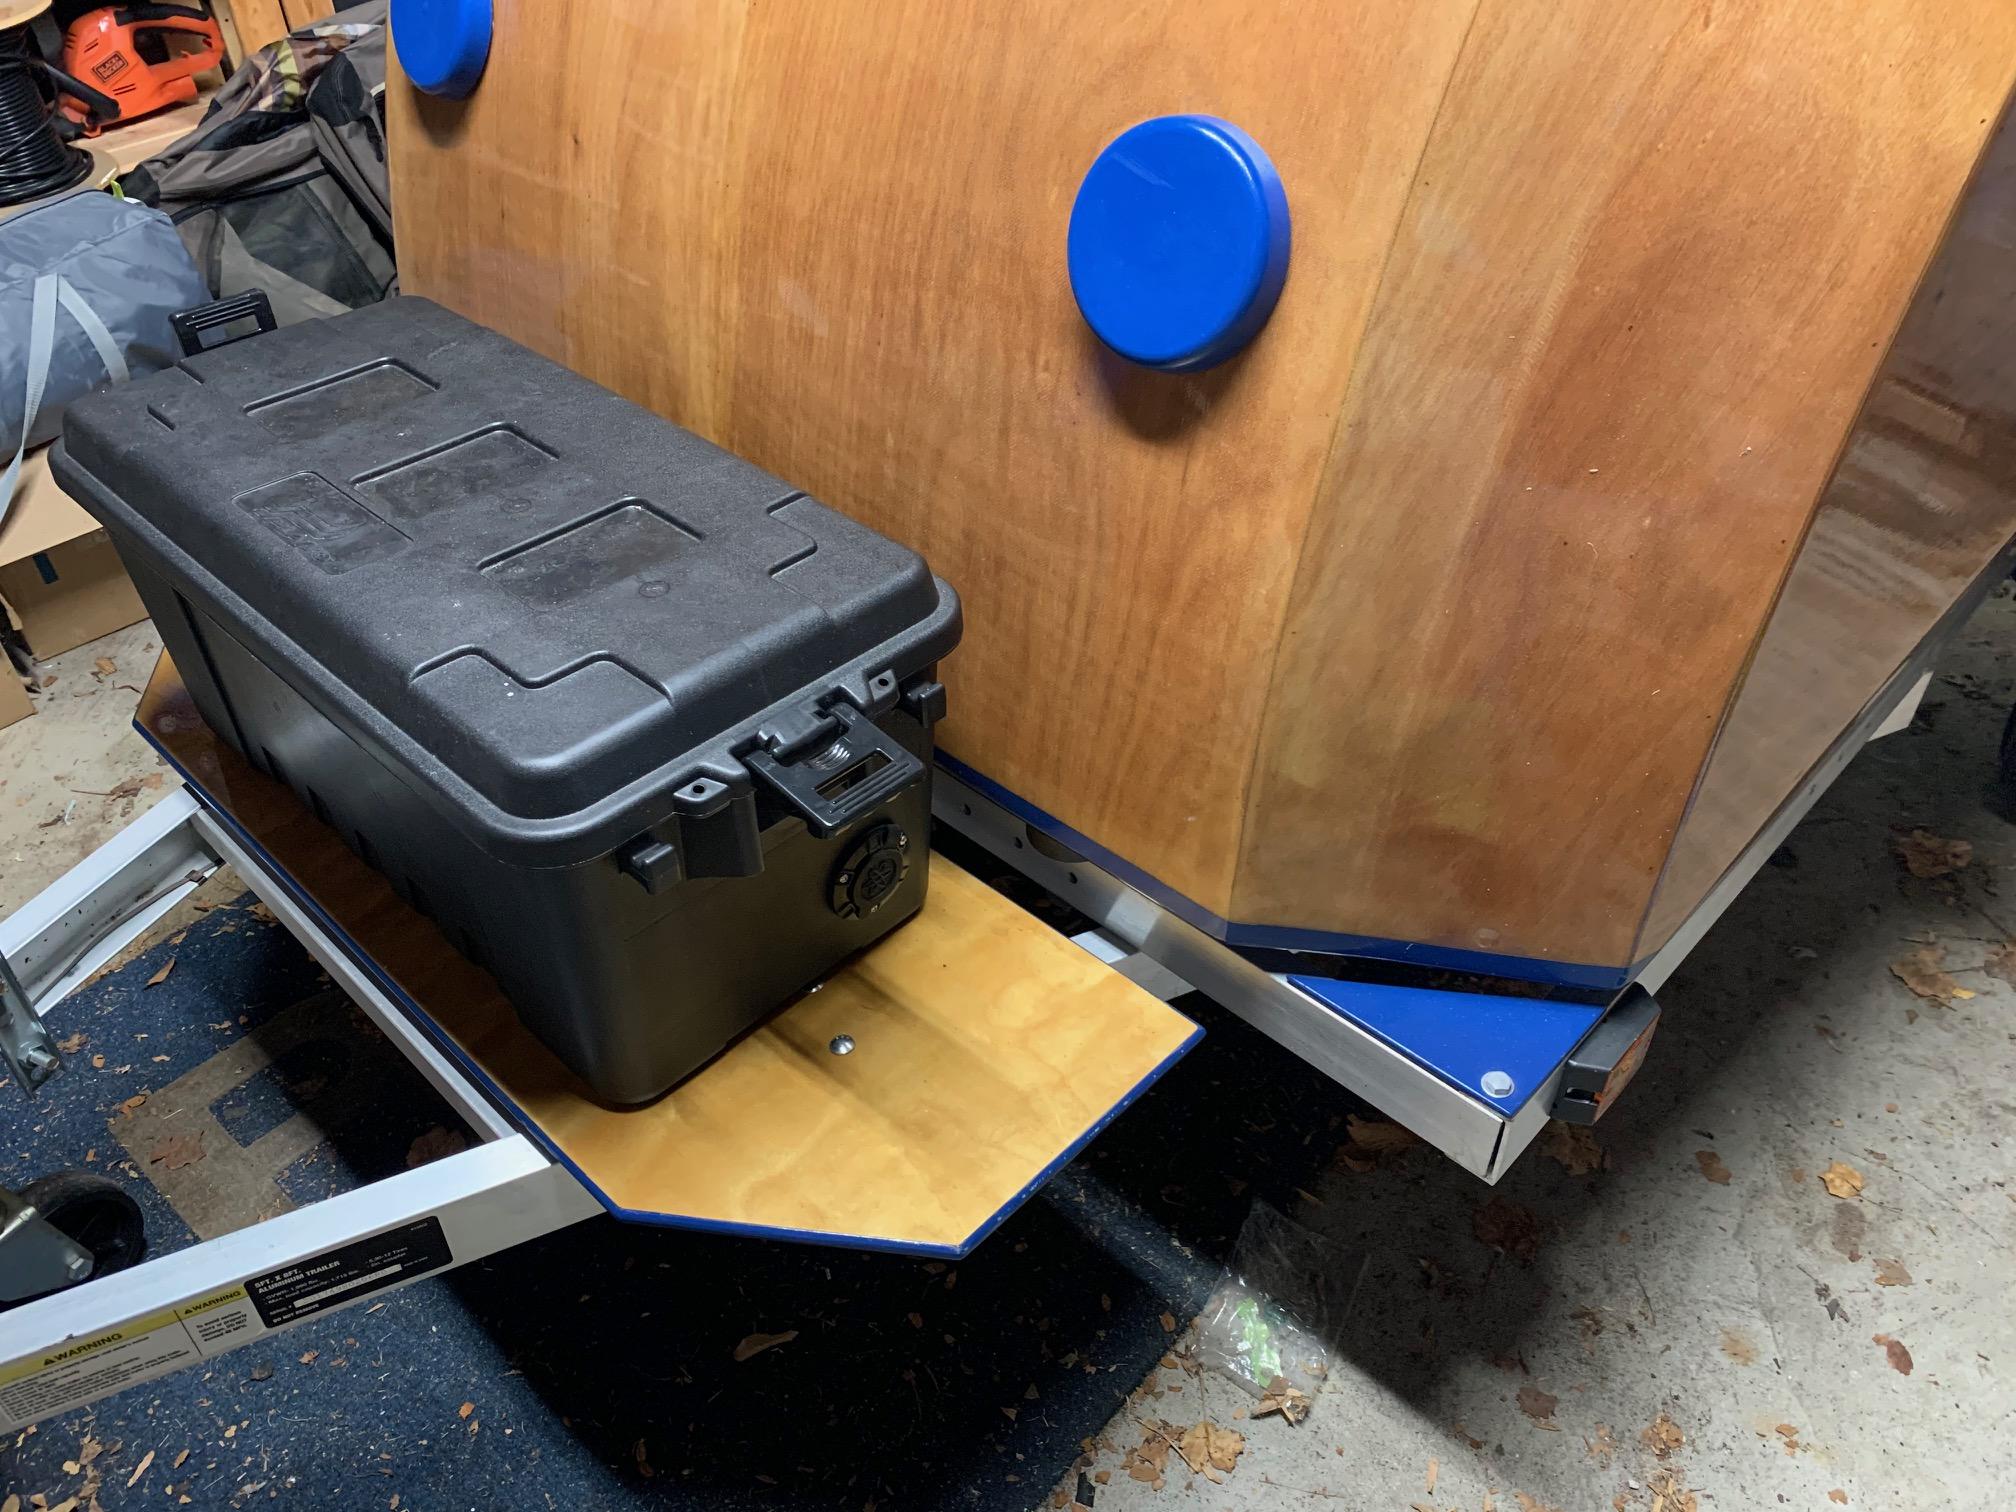
October 21, 2020 at 7:02 am in reply to: Attaching camper shell to Northern Tools’ Ultra-Tow trailer #3245ParticipantI used 8 pucks. Two on each crossbar.
I also pushed the body as far back on the trailer as I could and then trimmed the back of the trailer. You can see a bit of the front puck in the picture.
 October 9, 2020 at 2:18 pm in reply to: Attaching camper shell to Northern Tools’ Ultra-Tow trailer #3224Participant
I don’t know what happened to the link in that last post and why it is offering a Kindle preview, but just search Amazon for “Faswin 18 Pack Classic Ice Hockey Puck”.
-mike
October 9, 2020 at 2:04 pm in reply to: Attaching camper shell to Northern Tools’ Ultra-Tow trailer #3223ParticipantI use hockey pucks as spacers. Just drill a hole through the center and through the aluminum trailer rails. Worked like a charm.
-mike
ParticipantI installed some floor mat on the galley counter to provide some padding.
I then installed 3 d-rings on the galley counter, one on each side and one in the middle. When on the road, I use a bungee cord on one side to hold my cutting board in place and another on the other side to hold my stove in place.
I have the galley module and that holds most of the small stuff. I still need to install some elastic straps to the front of some of the pockets to keep the occasional spice from hopping out and rolling around.
-mike
ParticipantThere’s some good discussion on this topic, including pictures of how I swapped out the hasp: http://teardropforum.com/forums/topic/galley-hatch-locks/
-mike
ParticipantI didn’t really follow the CLC electrical system at all. I have details of my system here: http://teardropforum.com/forums/topic/my-electrical-system/
For the most part it was pretty straight forward. The only tricky part was the 3-way switches I put in for control of the lights from either side of the cabin but it definitely isn’t necessary.
-mike
ParticipantI believe I rounded the back corner of the shelf. If I remember correctly (it’s been a while), you fillet the shelf once it is in place so you can fill/cover the rounded corner later.
-mike
ParticipantThis was the original post by @friz I was thinking of:
This is the write-up I did on my electrical system using a lithium ion battery if it helps:
http://mikepilone.blogspot.com/2018/04/clc-teardrop-camper-electrical-system.html
-mike
ParticipantI put my battery in the tongue box but I went with lithium ion because it is so much lighter. It’s definitely more expensive but it was a simple all in one unit so I didn’t have to worry about chargers or inverters.
There are some posts about mounting the box under the rear of the camper in a battery box. That might be the best compromise for a lead battery because it takes the weight off the tongue but doesn’t put the weight on the galley floor.
-mike
ParticipantI’m traveling so I don’t have access to my camper but I seem to remember turning the latch bar around the opposite way which gave a little more clearance from the door to the frame. If you have enough threaded rod, you can also put a nut behind the latch bar to pull it out from the door to also give a little more clearance.
I would definitely suggest playing with different configurations on the latch bar before shaving the frame. There should be a way to get it to work.
-mike
ParticipantYeah, it is the 1250, but it looks like all the fans in this line have the same 14×14 inch profile so you could upgrade if you wanted to:
http://www.fantasticvent.com/fan-tastic-vent-s-retail-12-volt-fans.html
-mike
Participant@faithie999 I agree that the headliner kit is a little overpriced for what you get. As @apkley pointed out, the material scratches and nicks very easily and as you pointed out, it still requires a good bit of work to fit, trim, and round over all the edges. It does look nice when complete but not $300 worth of nice.
It is definitely thicker than the interlocking floor mat material and it has a nicer, suede like texture to it. I debated for a while on installing it and looked at using floor mats or carpet squares. I priced them out to about $120 for the same amount of material assuming you don’t want to piece together a bunch of small scraps. But after considering the time to make templates and cut all the odd curves and shapes I decided to go with the headliner and make more progress on the trailer.
It would be nice if CLC sold a $30 template set for the headliner and then let you pick your own material. Other than the CNC or printer time for CLC it would be pure profit and people could then pick the material that works best for them. While I do think the headliner is over priced, if you value your time at all I think it is the fastest way to get the job done. When this liner gets scratched and dinged, as it inevitably will, I’m hoping to use the pieces as the templates for the next set I make out of cheaper materials which offsets the cost a bit in the long run.
-mike
ParticipantBetween my galley lights and hasp I needed a little more lift from the springs so I bought these 30# lifts:
I only put one on for now with the original 20# from CLC but I’m happy with the performance. I’ve only used them for a few months so I don’t know how they’ll hold up long term but they were cheap enough that I didn’t worry about it too much. I also have a second set now (the other original 20# and the other 30#) as replacements if needed.
-mike
-
AuthorPosts