Forum Replies Created
-
AuthorPosts
-
caveprod
ParticipantPopeye re: the internal lock, looks good, I’m happy with mine, maybe I could pull the shelf off if I tried on mine but I doubt it.
ParticipantMy gas struts have always been too wimpy for the job, summer or winter, so beefier rates on them sound very advisable. Mind you, I would still use the stays in case a wind smacks the top down on you anyway. My stays do the job perfectly either way.
Everything else seems to work well over a year later. I get a little water in through the galley hatch some times, I’m still in seek-and-destroy mode for that one, its in the right back corner somewhere. It rains so rarely where I live that I dont get to recheck very often.
Which brings me to another pet peeve point perhaps. Some people have said drop the front vents because water seeps in. I havent had that problem, perhaps because I havent driven through too much rain, but I do love the front vents because when its hot, I can feel quite a breeze flowing past my face just from convection when the top vent is open. Put the fan on and you can be in a draft. It occurs to me it wouldnt be too hard to cut a seal out of a foam sheet using large circular hole drills to make them more reliable.
My wife doesnt like the top fan on because of the noise but she does suffer from claustrophobia. So maybe we crack the doors open sometimes.
Like other people I have lost a mushroom vent cap at some stage, in this case after I was showing someone the camper and didnt close it down properly afterwards. I do have a 3D printer and “freeCAD” software so after not finding a design to print from the web, made one myself (see image below)
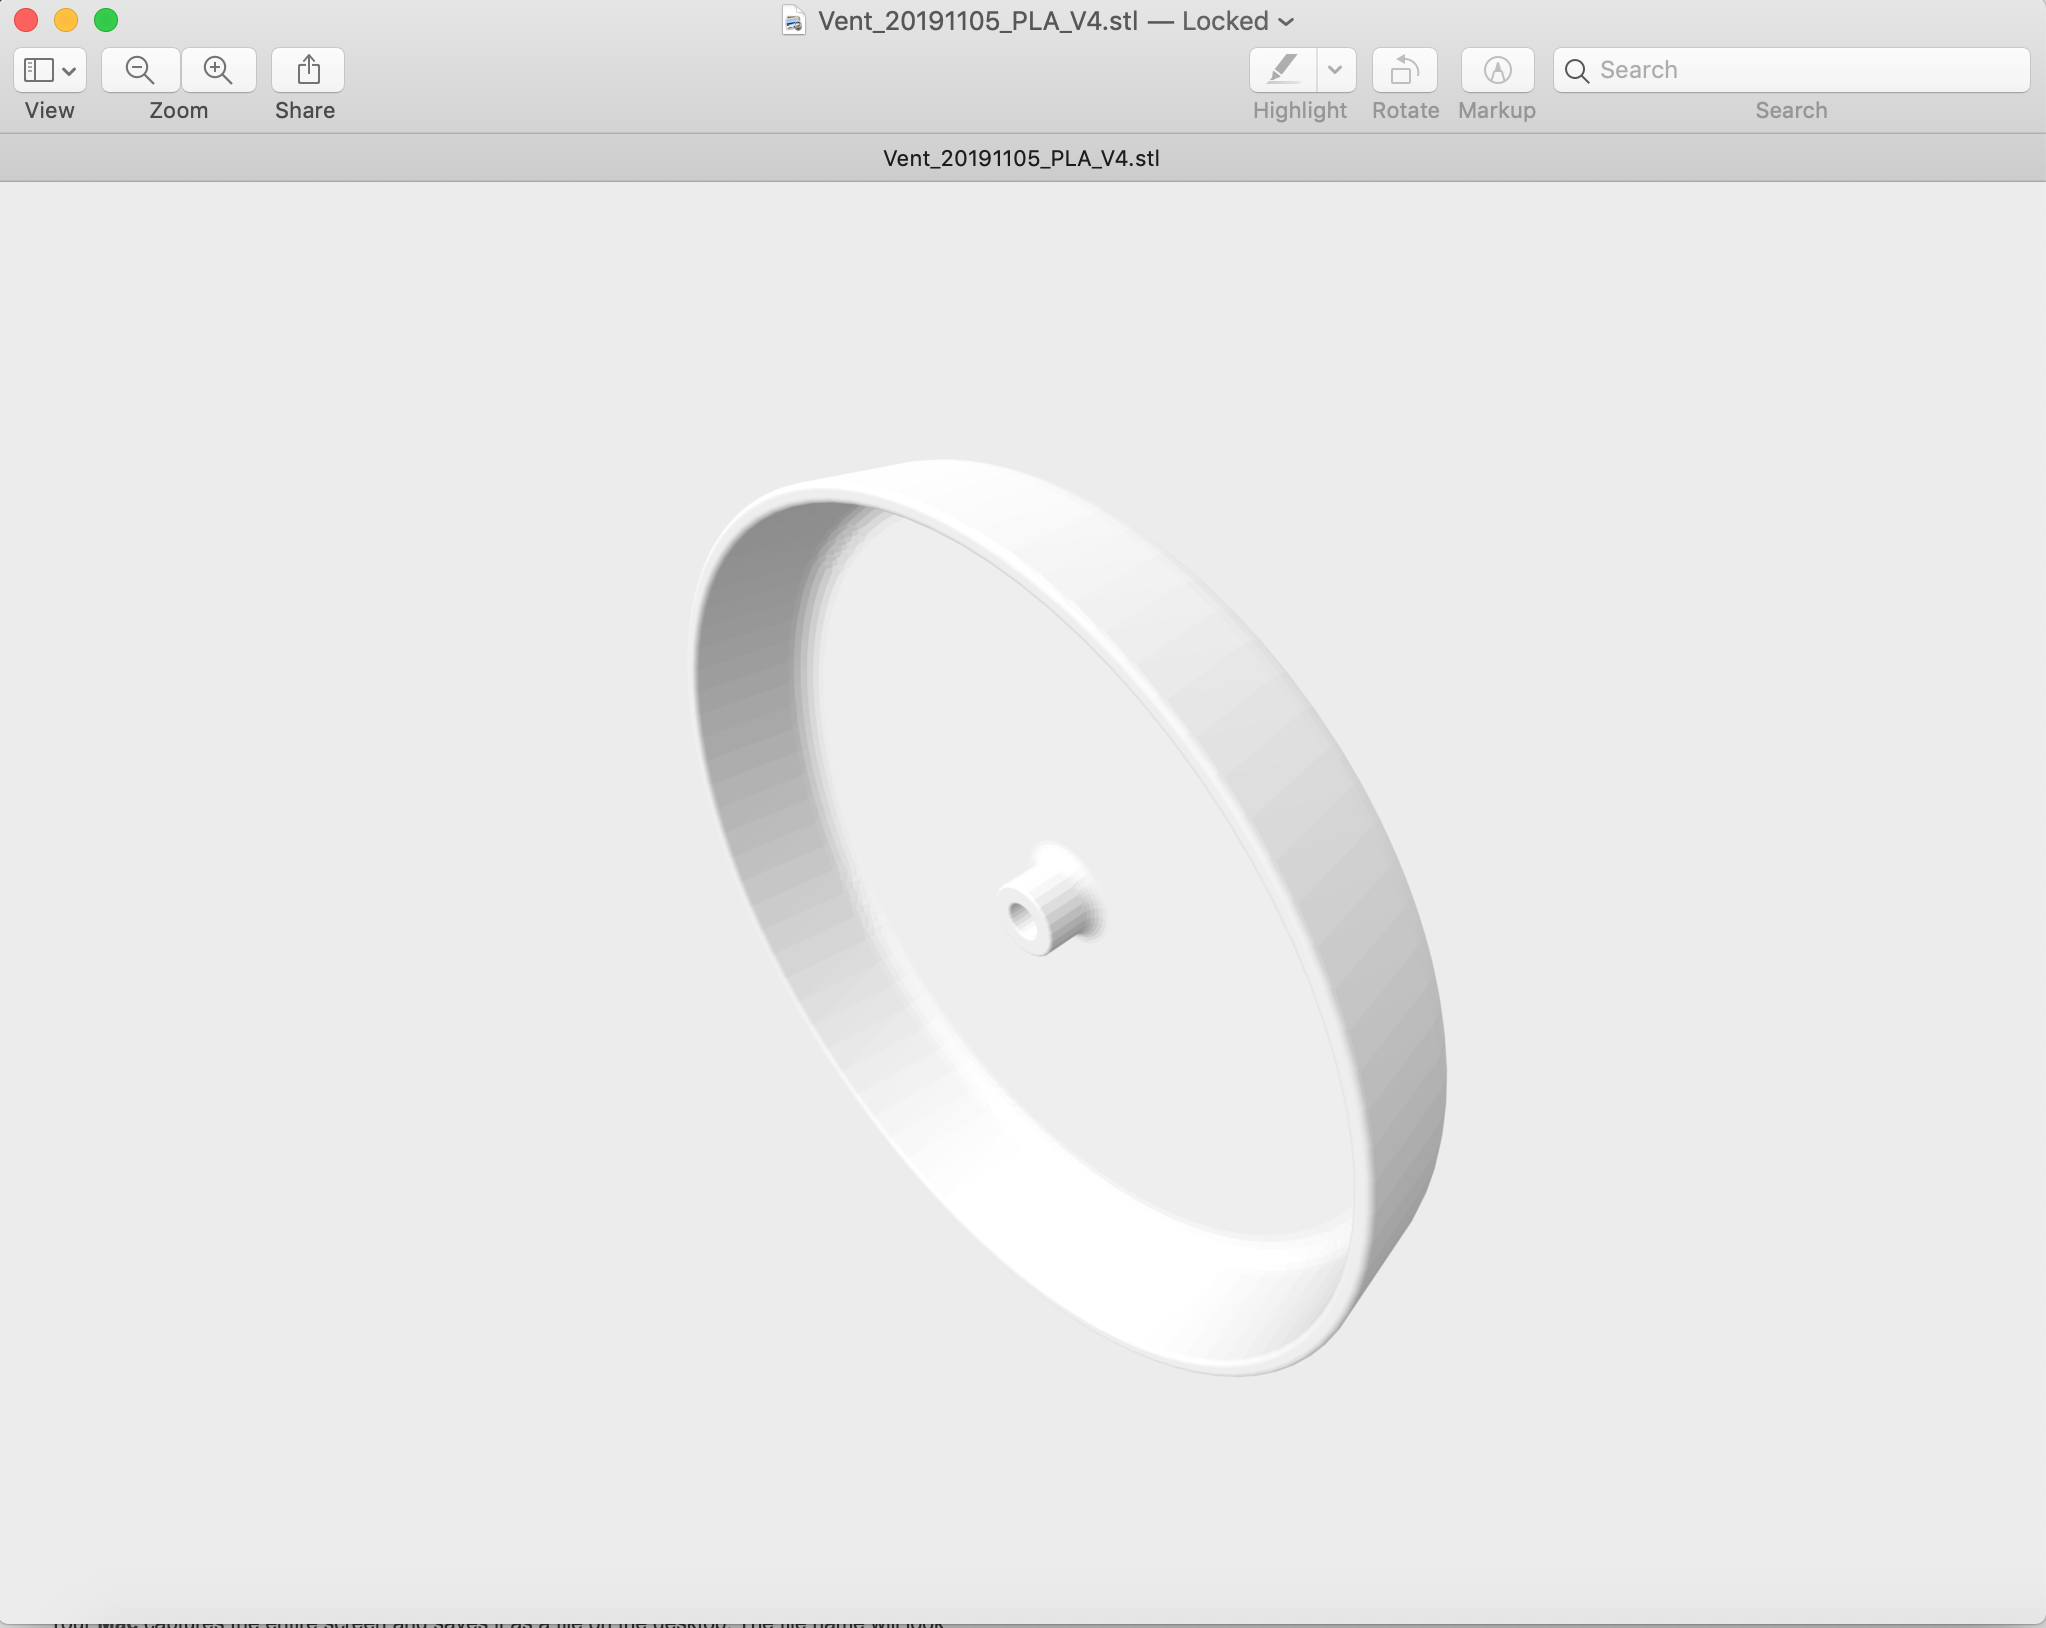
made an STL file, turned it into a gcode file, tapped the hole using a 5/16″ drill bit (I think it was) and it screwed back on. No writing to America to replace one every time I repeated my mistake. If anyone is interested I’ll try to work out where I can leave a link for the STL file so that any 3D printer could make more. I made this comment a few weeks ago on the home page of the forum and it never got published. Maybe I was deemed to be going into competition with CLC?. I’ll try linking it the way photos are linked and see if it works, else I’ll have to try something else. Interested to see if anyone wants these things to replace lost vents but I cant be bothered making them myself (unless you live in Melbourne), lots a people have 3D printers these days anyway.
ParticipantMy main suggestions having enjoyed my camper for over 12 months now with a build time of 12 months, is just keep sticking at it. I slowed down with the bits that worried me like fibreglassing and cutting out doors, but got back to it come hell or high water. I think the biggest option I included which I think is necessary is include the insulation, no matter where you come from. I am glad I included power from car/solar/240V.
The thing I included which I dont use is an inverter.
ParticipantI saw this thread a couple of days ago, and have suffered from “wet spots” in the galley… or pools actually. So its a useful topic for many, to bring up.
I’ve been investigating the problem sporadically in the past by removing the cupboards and putting blue tack retaining barriers in squares on the galley floor to find out where the leaks originate, plus adding more silicon glue to the “door” seal just in case. I came to the conclusion that my leaks originated on both sides from the drip catch foam area where it didnt track well with the door seal. Rain would run along the foam then leak in where the foam navigates downwards. I could also see that the foam wasnt being compressed in that area either.
I have added more foam in this area and may ultimately reroute the foam to follow the door seal better. Just need some rain to test the concept… or maybe use a hose if I lose patience.
I currently have some paper on top of towling on top of the cupboard to check for leaks.
ParticipantI wanted to keep the weight back. I can lift the front of the toe hitch with one hand, no problems.
 Participant
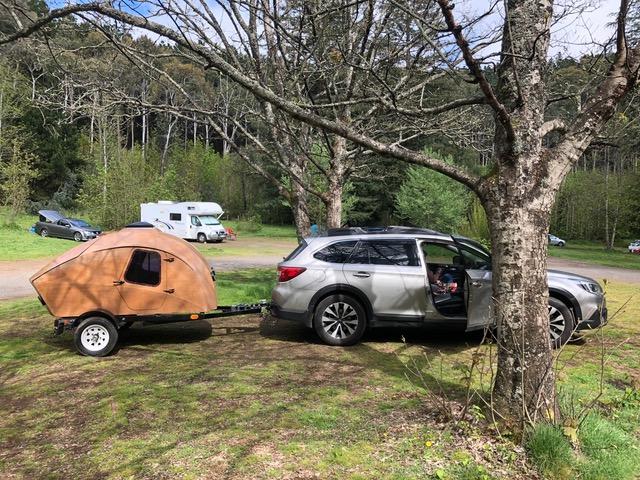
Completed camper? Not really, most of us would still tinker for a long time to come I expect. In my case I want to extend the length of the ex 8 x 5 (now 6 x 5) trailers draw bar later so I can put the storage box up front, there isnt room on this trailer currently.
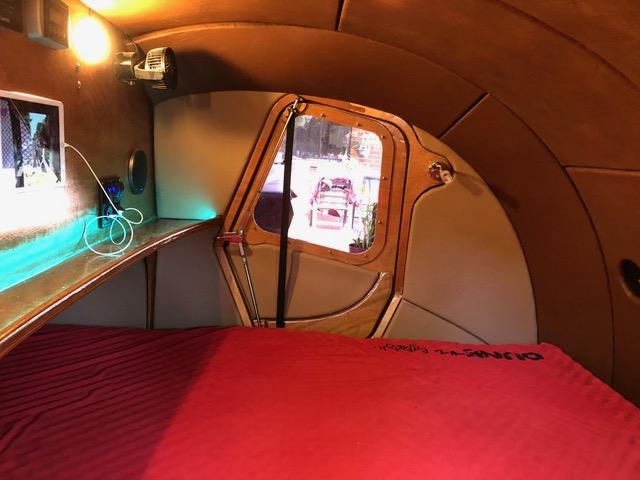
I put a two tone vinyl covering on the insulation and I think it looks magic. Added conduit as galley hatch stops and also internal door locks to keep the wife happy. Shove the camper in a local crater and it looks quite scenic & adventurous!
CLC Campers go down under!
 Participant
Yes, i bought the foam kit from clc, routed the edges (which was a lot easier than I expected) and bought 6 metres (7 yards?) of (different coloured) vinyl. I also ended up buying 6 litres of selleys contact glue. http://www.selleys.com.au/trade/specialist-products/contact-adhesive/
there’s nothing special about selleys, it’s just an example.
Mark the outline of the foam on the vinyl with a texta, leave an inch and a half spare for folding up and over. roll a thin layer of glue on vinyl and the foam, wait 20 mins and then press them together. Get it right as they wont let go.
just note which is the front and which is the back of the foam before you route and glue, not all the foam is symetrical.
they didnt think the foam was durable at the waterlust youtube, hopefully this is better, hopefully it never condenses water on me in humid weather either.
March 23, 2018 at 8:19 am in reply to: Joint between galley Flat and bulkhead failed when plywood delaminated. #1725Participant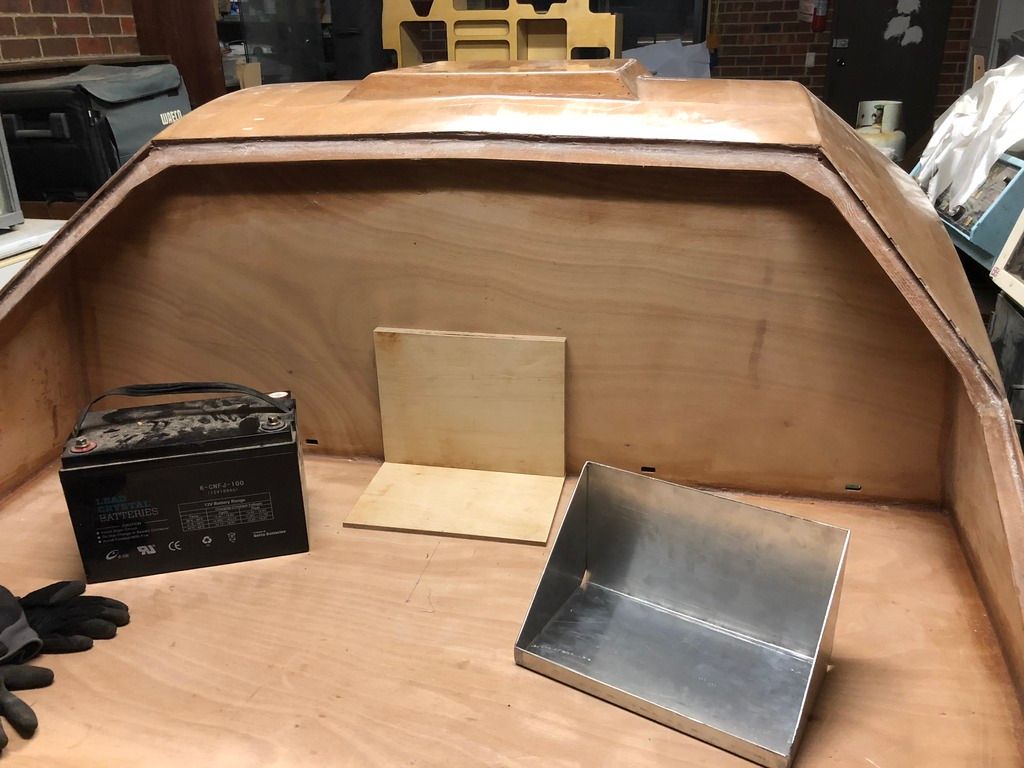
I have been worrying about this aspect for a few months now, and this is what I intend to do. Fibreglass tap along the seam, maybe along the bottom too, it might not look great, but it should be pretty hidden too.
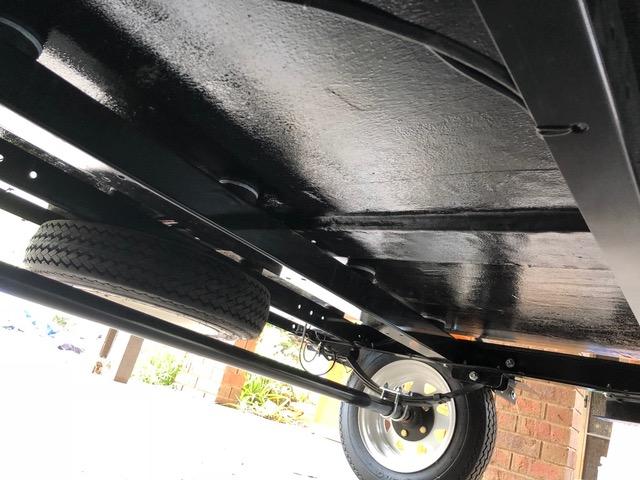
The marine ply boards are 9 and 18 mills thick respectively will be fiberglassed with matt to the bulkhead and the flat. The aluminium bracket will be screwed with maybe six/eight or more wood screws to the bulkhead and flat, the idea being that the load will be supported by the bulkhead as much as anything. I had thought about putting the lead crystal battery on the frame of the trailer, but then it is pretty inaccessible.
I hope my photo came out…
-
This reply was modified 6 years, 1 month ago by
caveprod.
ParticipantFor what its worth, the galley flat is in. I’m happy with the solution in the end, I agonised over it and put it off for a week or two, but in the end you just have to make it happen. My intended solution was to round the sides to make it easier to get in and take a sixteenth of an inch off both sides. It might have worked but I ended up taking an eighth of an inch off instead and then trying it. A Solution? The flat went in easily enough but I had maybe a quarter of an inch gap either side which I didnt fancy filling in with a fillet, so I used some 3/4″ quad, and it works and wont show since its underneath. Have now moved on.
Participantchamfered piece of wood as per the “drip catch” page 213-216? seems like a good call Faithie999. Did you have any insights into successfully getting the galley flat in BTW?
ParticipantGetting the galley flat in should have been a problem for everyone in my view. getting the copper wire through the sides seems impossible to me, although if people can lift the flat up a bit maybe they can poke the wire through somehow. for now it is impossible to get the flat in place, or even close to. (dare I tempt to bend the plywood to get it in?) I intend to shave a bit. probably mark an eight of an inch around the sides so I can gauge how much I have taken off. I didnt get my kit from CLC US directly so maybe that chamfered piece of wood is the temp spacer.. If it is spare, treat it as such.
ParticipantI’m far from an expert on these sort of things, but from my experience from a caravan, finding a small (inch and a half?) stick on level isnt a deal breaker looks wise. It may originally have come from ebay. Else keep a small level in your galley if you feel the need.
My local hardware store keeps tire levels cheaply which you drive up onto to get the trailer level if need be.

My preference is to use wind up lifts for the back of the camper frame to keep things level and feeling solid.
-
This reply was modified 6 years, 8 months ago by
ParticipantI’ve been worrying about this too, well at least the battery, for that vague reason, also the weight of the 30KG battery, the fear of a malfunctioning battery in that position and maybe accessibility issues too.
I’m still considering, but thinking about mounting the lead crystal battery that I have to the frame under the camper floor. Its a little more obvious perhaps and maybe unprotected.
It gets the battery in the air anyway.
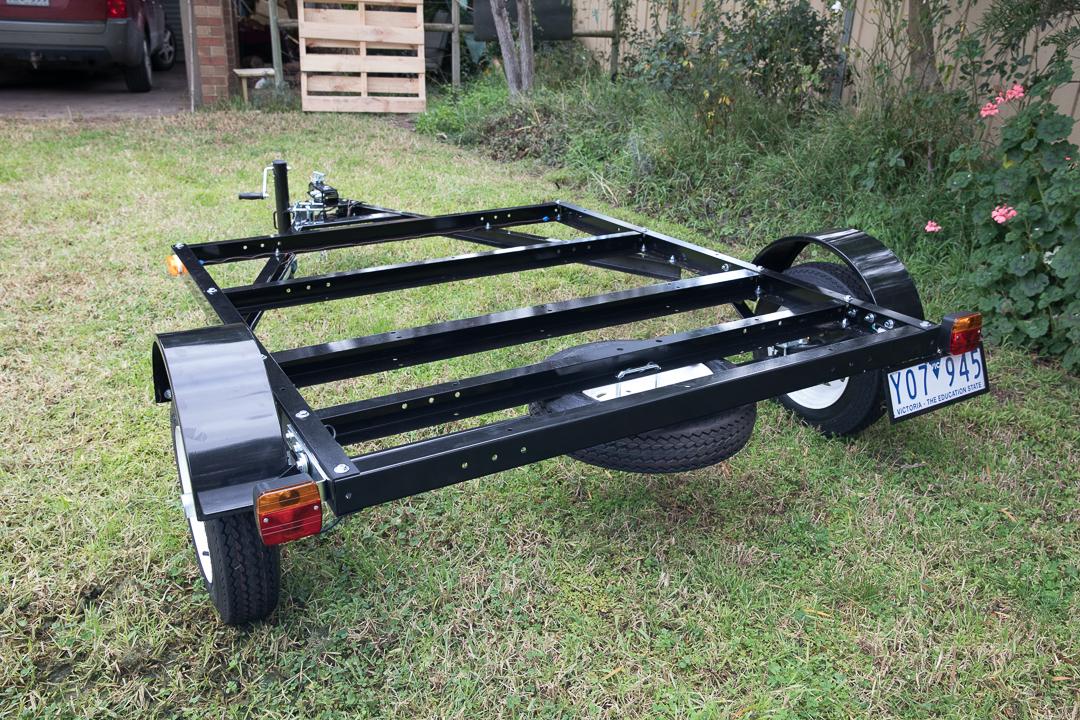
ParticipantHi Friz, your rig is looking very smart, and it looks like you have good clearance from the mudguard to the door. Where is your axle placement relative to the back of your trailer base please?
Also something that concerns me as I wait for my CLC kit to arrive, did you have to play with your mudguard placement at all to avoid the camper body as it doesnt look like you had to jack up the body to avoid the mud guards?
I bought a Carlex 8 x 5 trailer (I think they come from Tiawan) and cut it down.
 Participant
Not change the axle placement? Good to hear, I have been agonising about how far I might need to move my “cut down” 8 X 5 to 6 x 5 axle forwards. The spare tyre can go on the back and the axle can stay where it is. cheers.
-
This reply was modified 6 years, 1 month ago by
-
AuthorPosts