Forum Replies Created
-
AuthorPosts
-
apkley
ParticipantFriz,
I like the placement of your battery, but how do you keep it out of the elements? I don’t know how any electrical parts could be exposed to water. We drove through a massive storm this past weekend – I assume your wiring connects directly to the leads we see in the picture. Is that a sealed battery box, or is that the actual battery itself?
BTW, what type of brackets are those? I’ve been browsing and haven’t seen anything like them. Are they an auto store or home improvement item?
ParticipantWe painted the galley same color as our bottom (but not galley proper) and plan to paint the inside of the camper hatch due to the same reasons. The seams didn’t turn out so well, although we did try to smooth out the fiberglass tape.
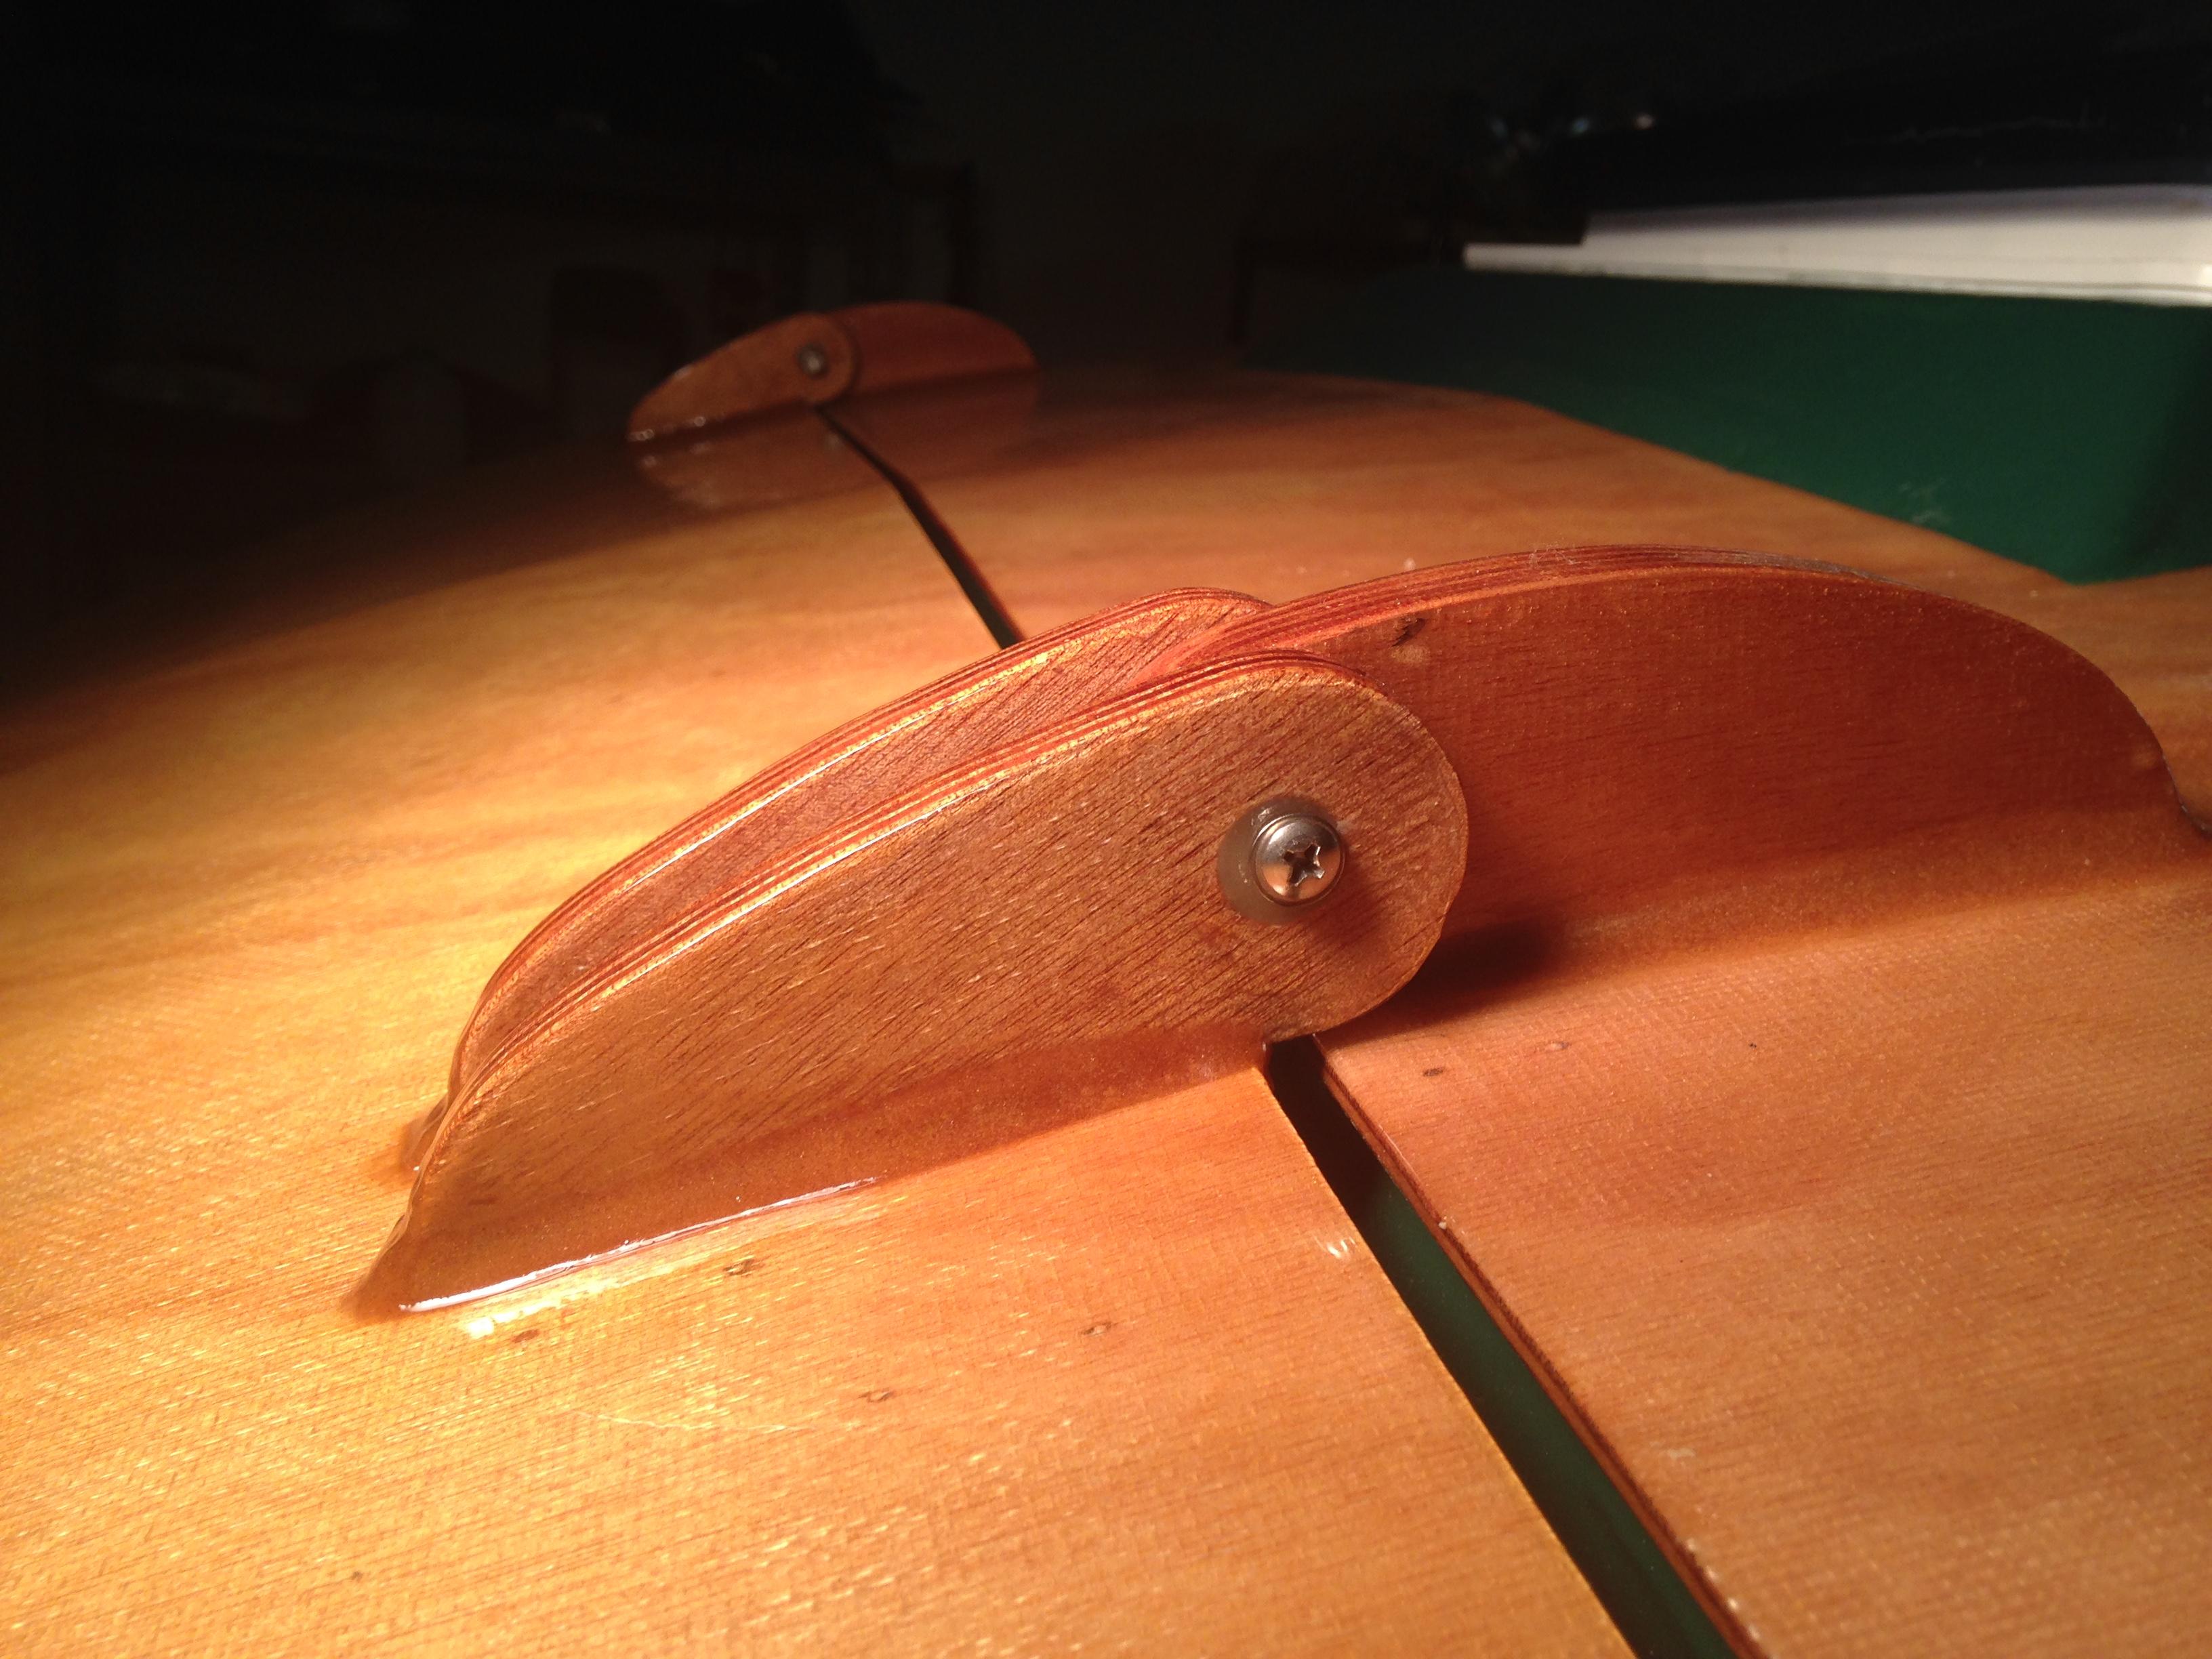
ParticipantI followed the directions for mounting the hinges, but… I absolutely recommend applying the Drill-Fill-Drill technique with cell-o-fill prior to this step. This technique is covered by CLC when mounting the shell to the trailer. This technique will give you superior strength on the moving hinges and – perhaps most critically – more room for slop when you finally fit your doors/hatch.
Even if you use the screws to tack-weld the hinge pieces into place to get the proper fit, there will be other factors to cause a misalignment (the galley gutter, the door hardware, etc). After you fillet the hinges to the shell, you will not read until much later in the Hymnal about heat-shrinking the screws prior to mount the doors. This is great advice, but the added heat shrink decreases the margin of error for lining up the holes and achieving a flush fit with the shell. Lastly, the DFD technique will seal the inside of the hole, saving you the step of trying to push epoxy into the hole to prevent water rot. I recommend making the hole at least twice the size of what is pre-drilled, but the hinges can take a much larger hole.

 Participant
This was our first CLC project and we went with the Interlux brand – also recommended to us by another camper builder who has completed many CLC projects. We went with Interlux Brightside Sea Green for our bottom and Schooner Varnish for the rest of it. We went up the side about 1.5″ and one quart was more than enough. We used the matching primer and three coats of green paint. Lighter colors will require more coats. We ordered 4 quarts of varnish and have about 3/4 of a can leftover (but we also did 4 overall coats and some touch-ups).
Ditto StarMan on the rolling/tipping technique, but the hardest part for us was managing the temperature and humidity. Higher temps and humidity will make you work much, much faster. Read the instructions and trust the makers’ recommendations. Keep the work area around 60-70 degrees and as dust/dirt/bug free as possible. Wet sanding between coats can only do so much.
For sanding the epoxied fiberglass… absolutely take your time! The smoother (aka more consistent gray) the sanding job, the better your varnish finish will be. We spent a full 6 weeks sanding the entire shell with 220 grit on the orbital. Probably spent about $200 in sanding pads alone. It was a miserable experience, but the results are amazing – almost like glass reflection. Definitely use an attached shop-vac to the sander to help prevent pigtails when sanding the epoxy.
For abrasions, don’t rush to paint too easily. We thought for sure some areas were ruined by our carelessness before ‘glassing but were very surprised to find that the end varnish result will look almost identical to the ‘glass coatings (just a little brighter). We also had several instances of bubbling in the epoxy and fiberglass which we had to excise like blisters which are now invisible after patching and varnish. If you want an approximation of the finished result, wipe with a rag soaked with denatured alcohol. The few seconds it takes the alcohol to dry will look almost like the varnish.
Aside from CLC, Jamestown Distributors (www.jamestowndistributors.com) sells lots of paint choices. They have videos for how to apply the paint. Good prices, too.
If you’re looking for more of a walk through of the whole build, check out http://myclcteardropcamper.blogspot.com/. He posts on this forum as DivingDuck and became a personal friend and has helped us out tremendously with advice and build tricks.
ParticipantSnap links for the straps! Brilliant idea!
ParticipantStarMan,
I notice from the photos you do not have holes for the front mushroom vents. Did you not install, or just not cut holes into the headliner yet? Curious because I must figure this out later.
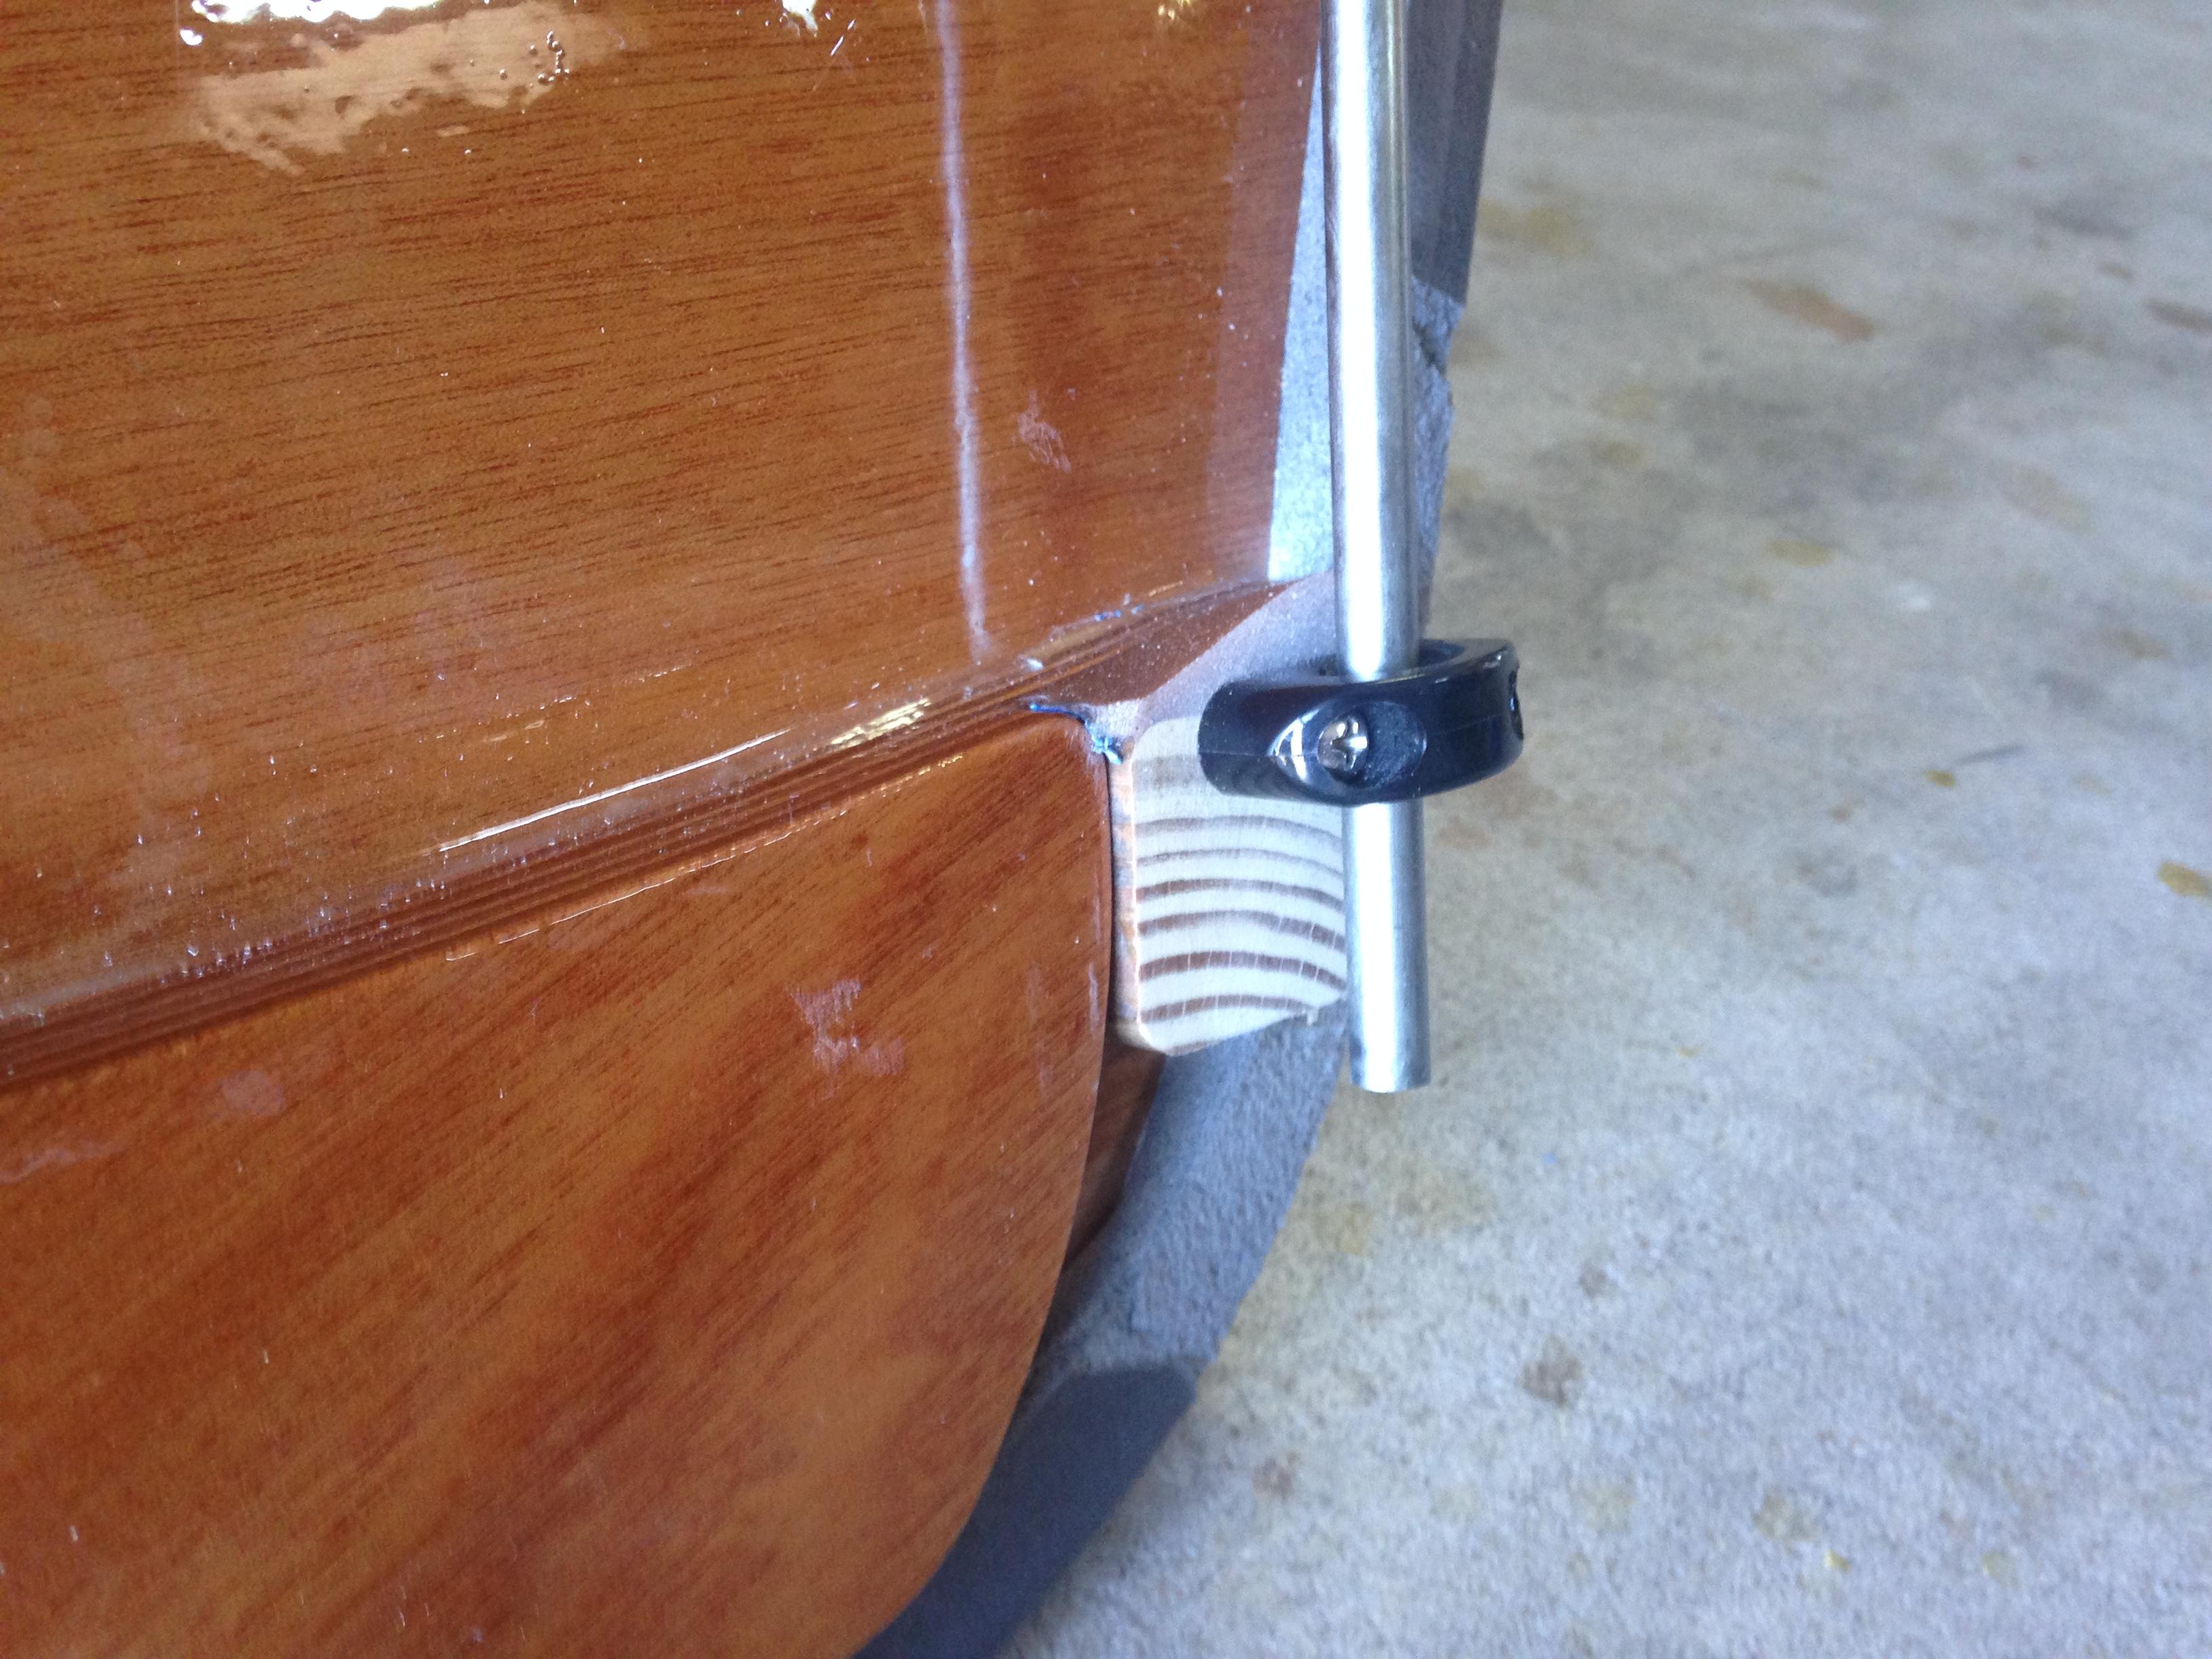
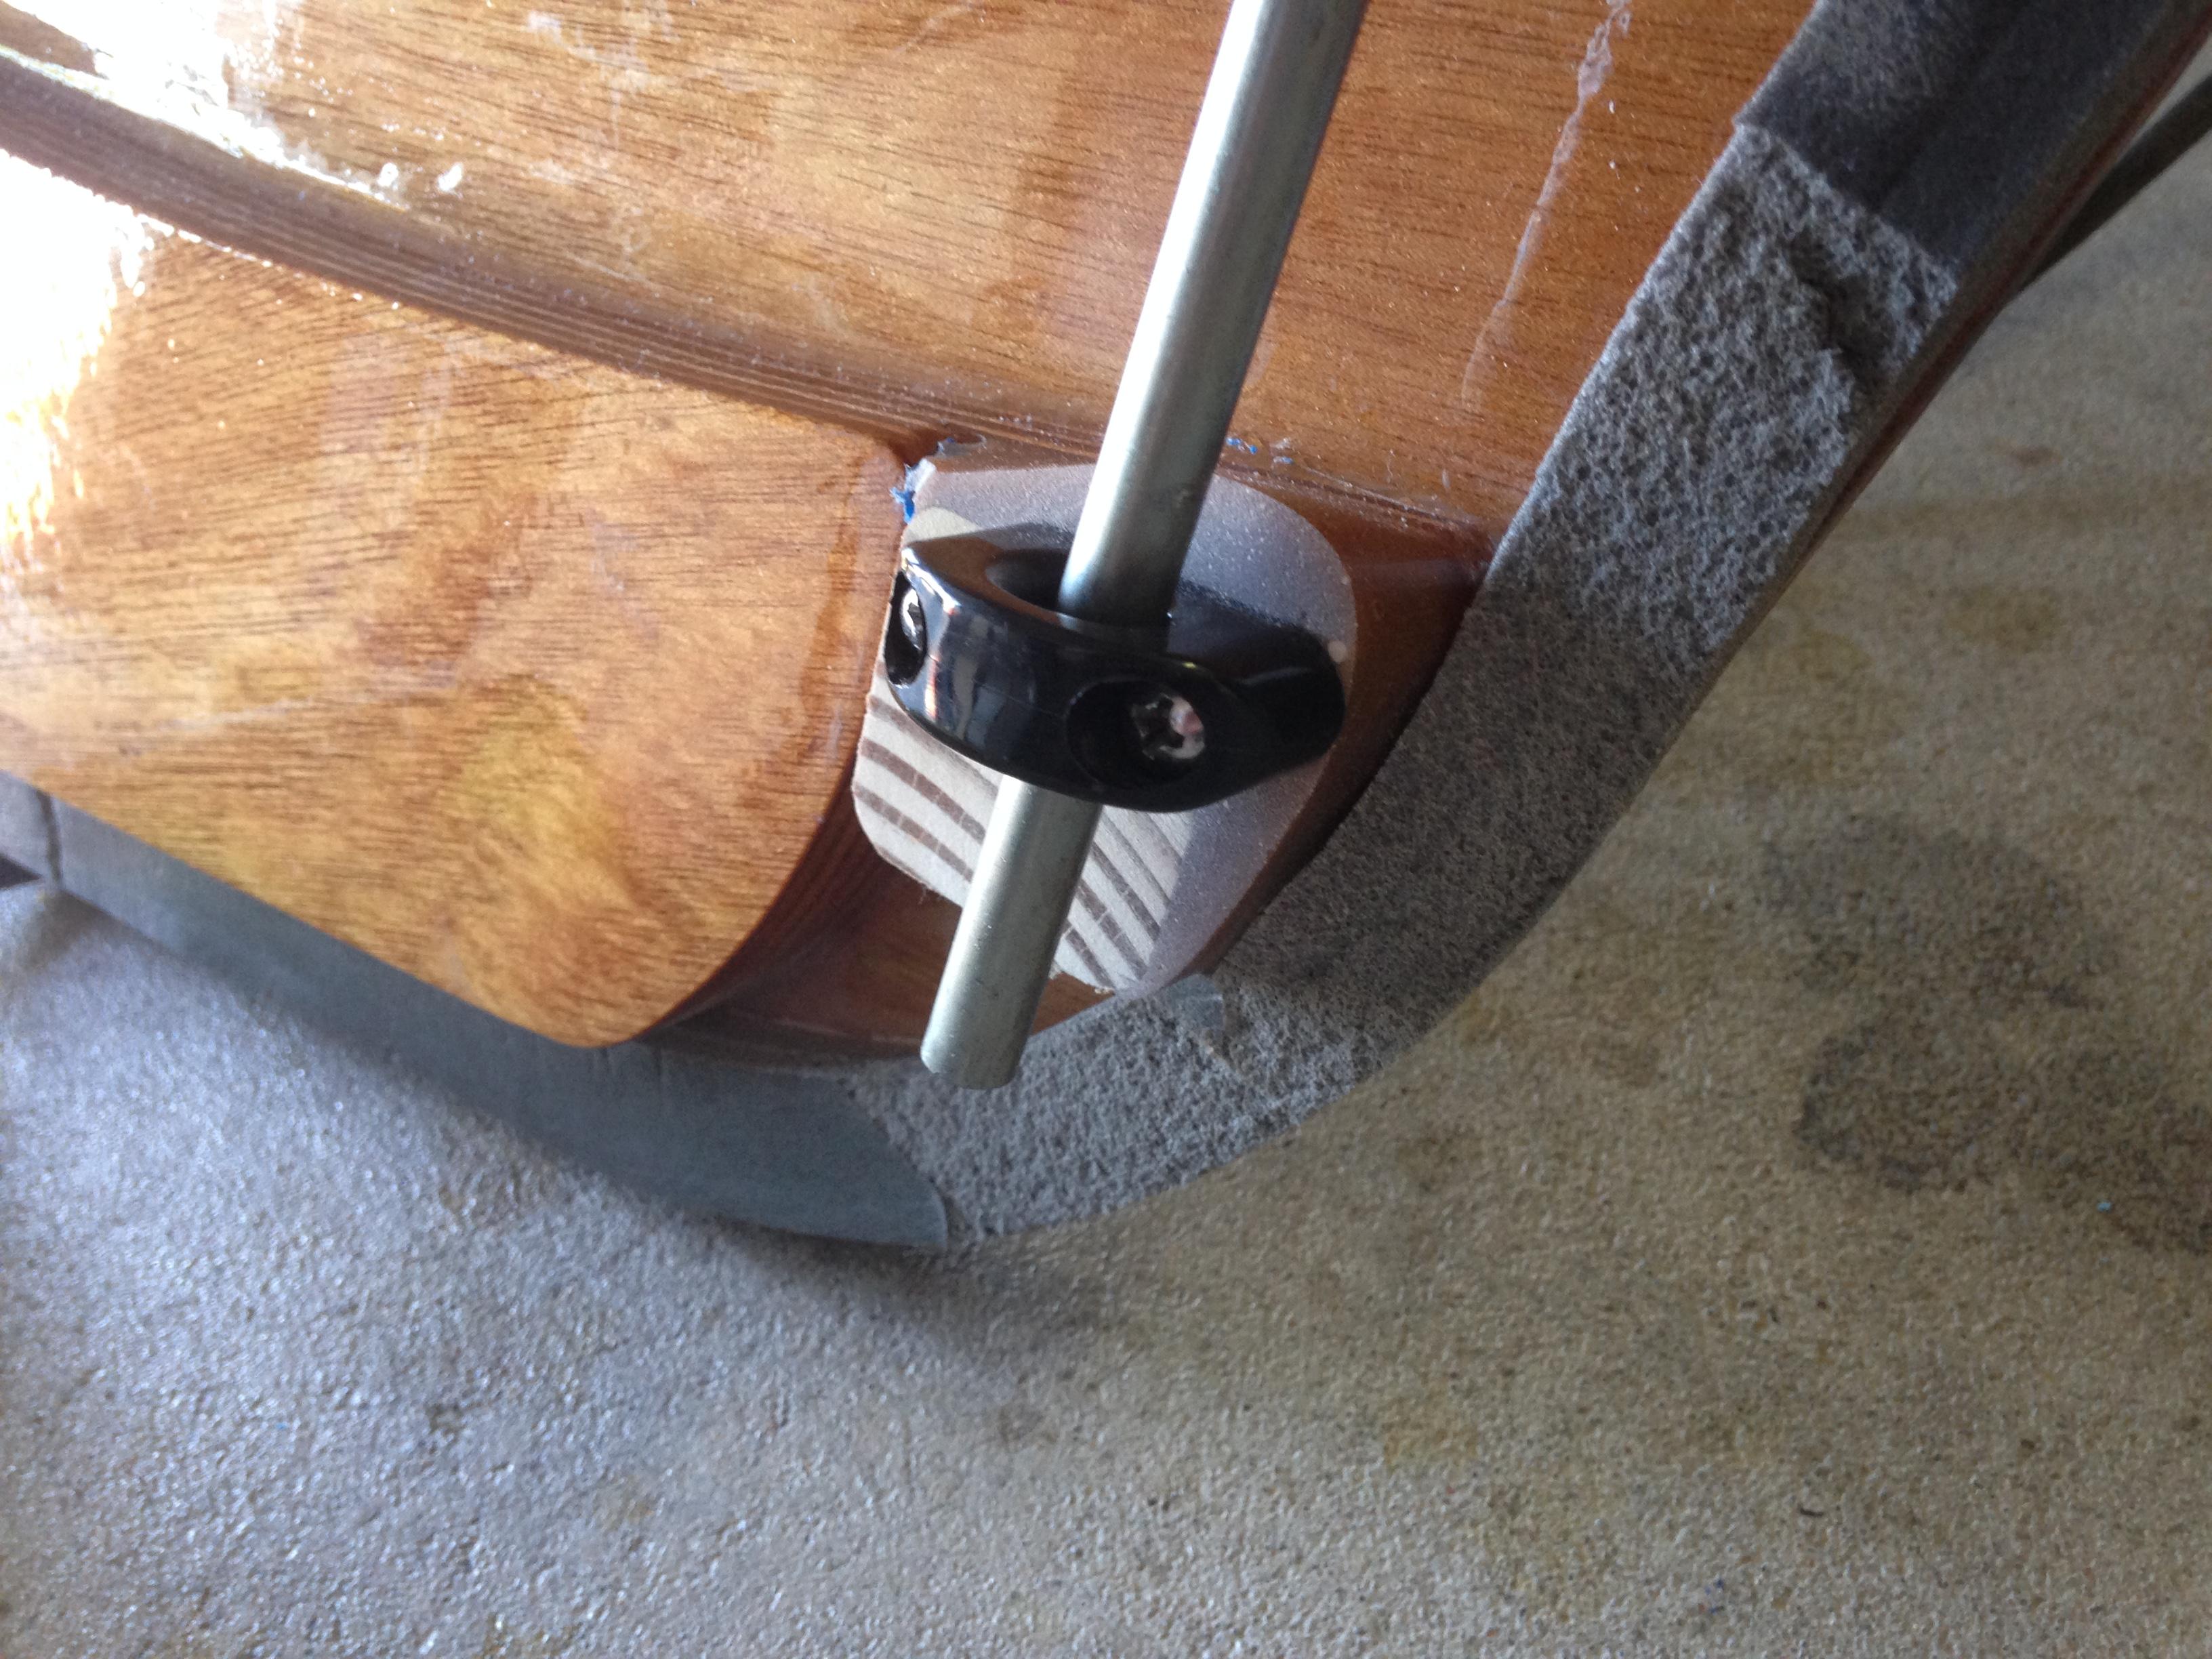
ParticipantAll, when you install the door hardware… the fair leads for the door actuating rods on the door and the door sill will not line up, especially the lower fair leads. This is due to the doors’ tendency to spring out after cutting. The manual offers a (weak) solution of adding washers to correct the difference. If you try this, you may have to get longer screws because the tension on the fair leads may pull them out of the door sill.
After trying to add a wood spacer – also an insufficient solution – we created a simple guide mold using tape applied to the edge of the door stiffener and filled it with wood flour epoxy (similar to pouring concrete). Ensure the mix is thick enough to be “wood” while runny enough to fill the space with no air bubbles. When dry, sand to the appropriate distance and place your fair lead. Drilling pilot holes is also a good idea.
 Participant
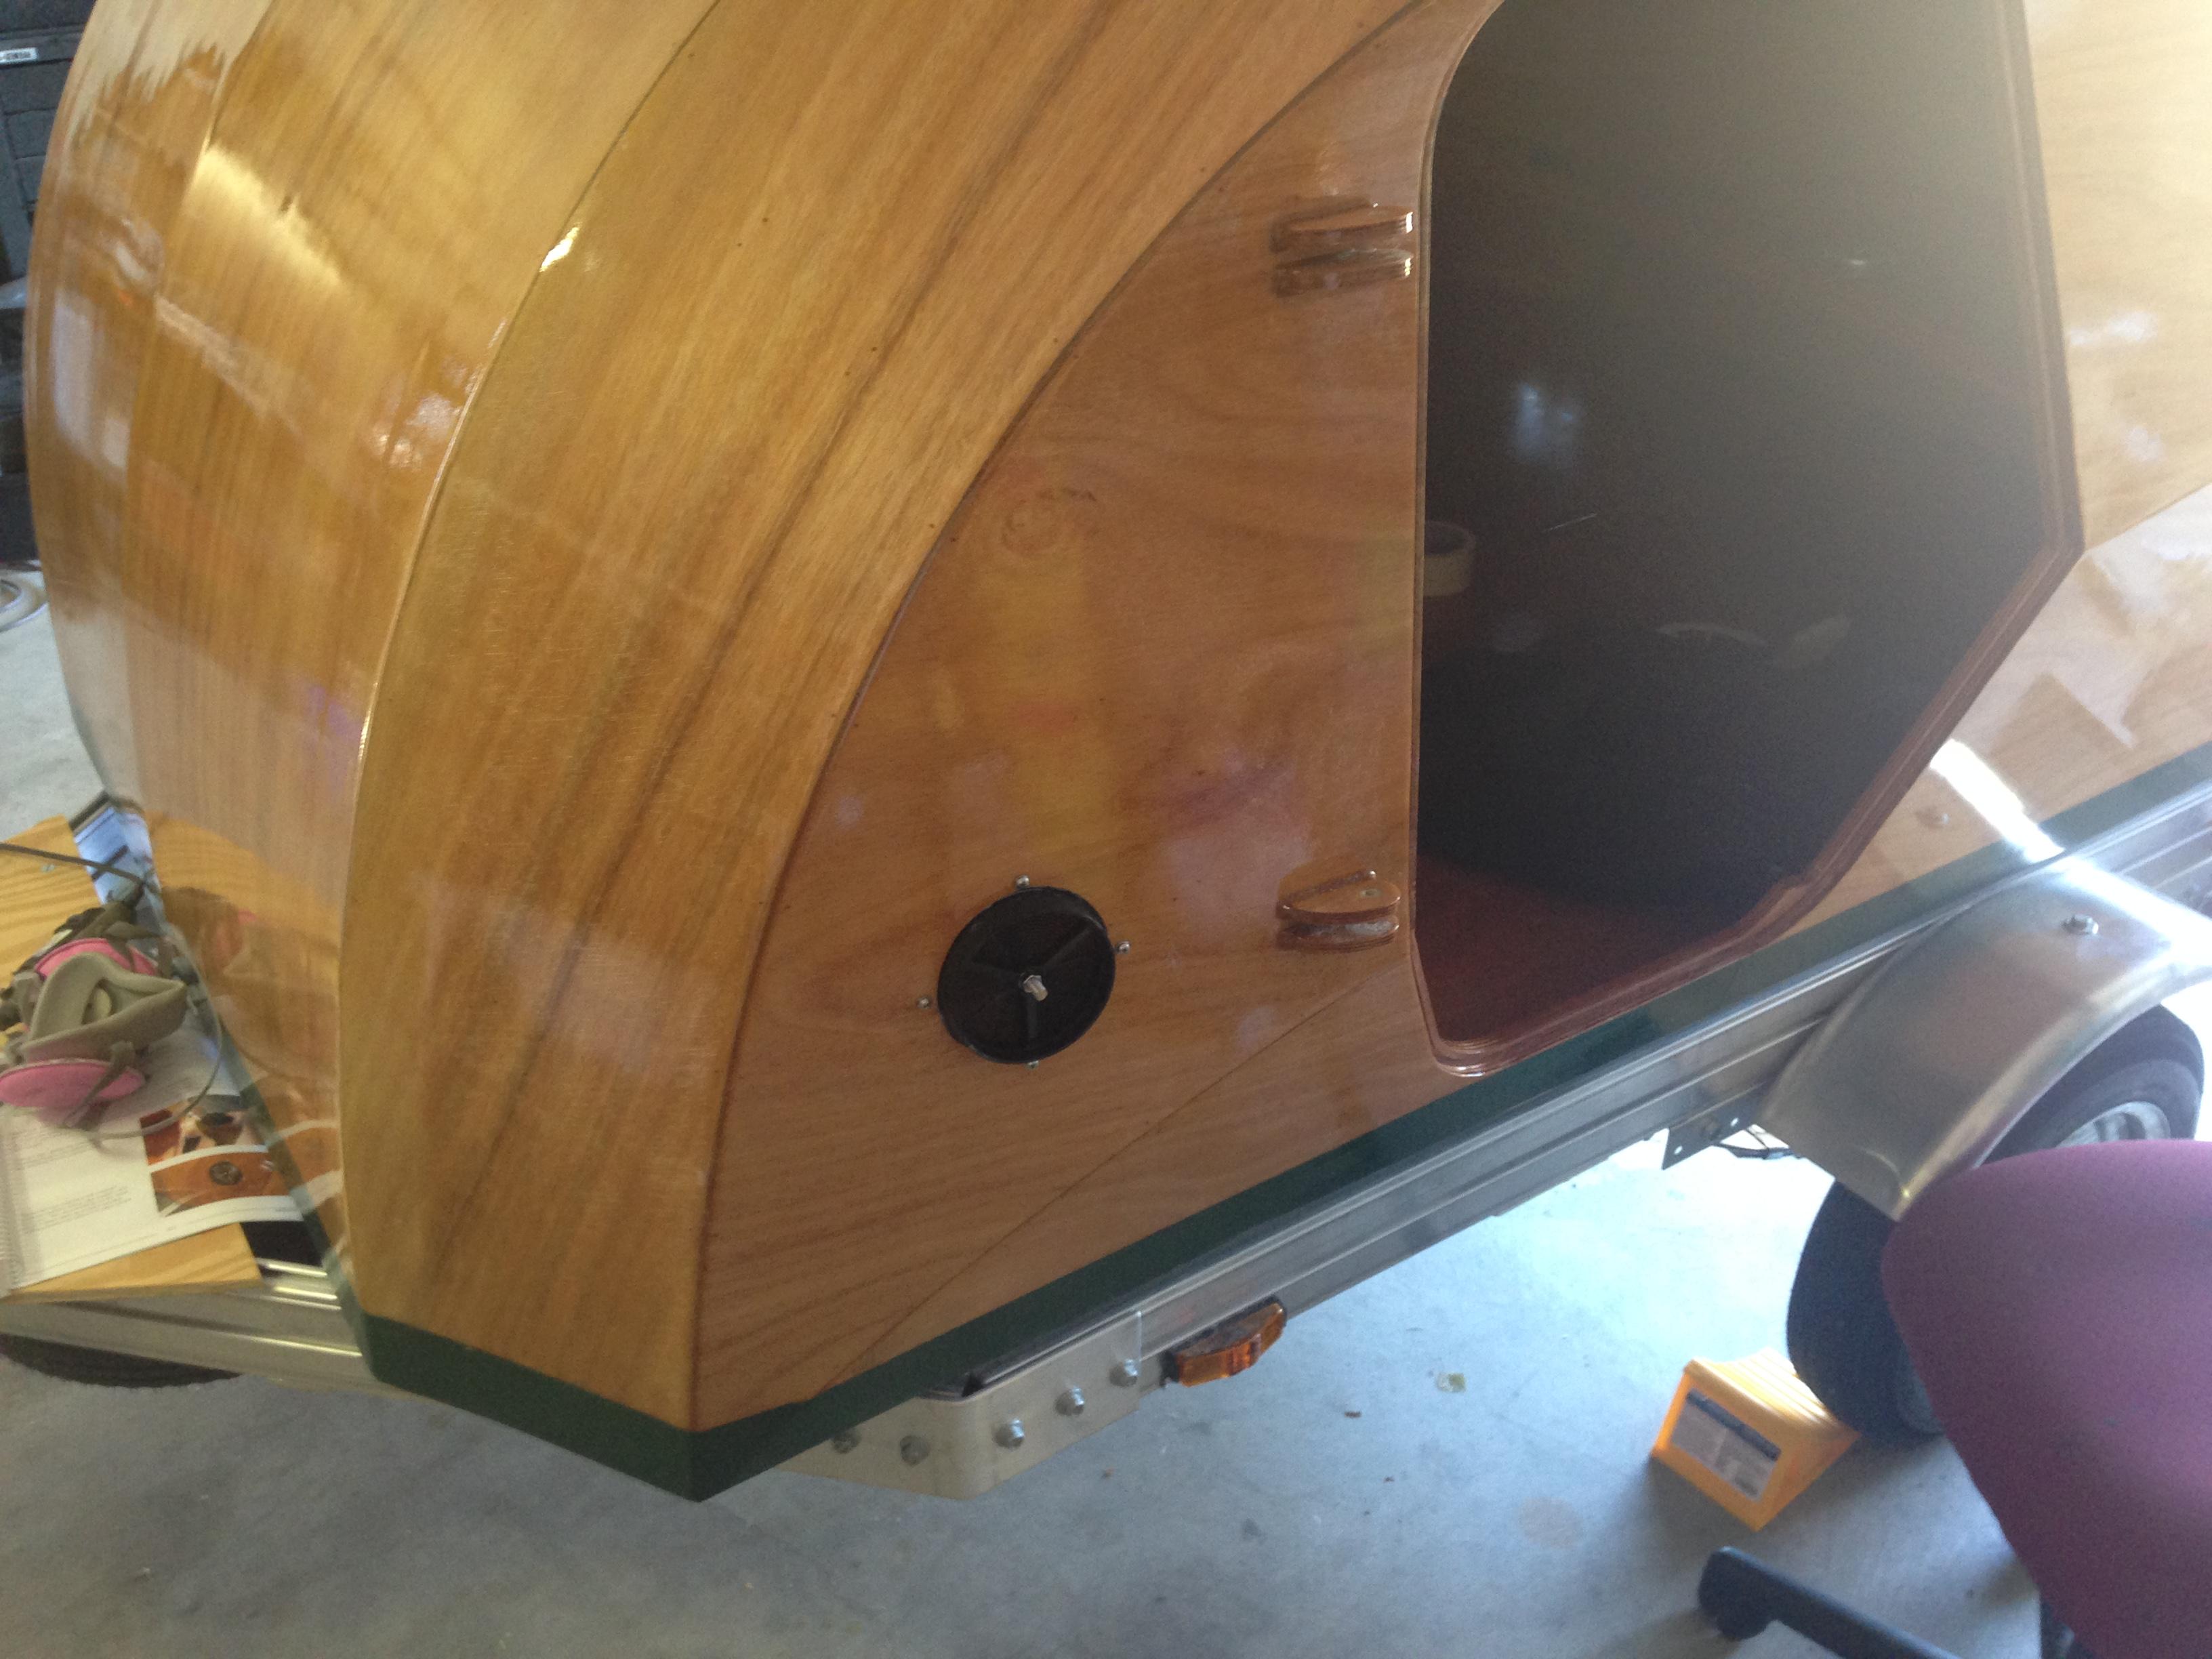
We opted to install the front pair of mushroom vents to the sides, forward of the lower hinges, reasoning that we would probably have some pillows or something blocking the forward vents if left in the original location. The side panel placement also offers a more consistent (less curved) surface to drill and install, and is still about head height for sleeping. The measurement is 14″ between the upper piece of the lower hinge to the seam, and the center of the vent sits exactly at the 7″ mark.
We did try adding the excess foam to the mushroom top and removed the rain baffle as stated in the manual, but were unable to get the foam to contact the vent when the top screwed down. Eventually we just cut 5-6 threads off the screw and it fit. Cutting the screw also allows it to screw almost to the shell, reducing the chances of wind resistance and shearing while driving.
 Participant
Ken, great solution. Thanks for the diligence on attaching the headliner. We will keep this in mind!
ParticipantAll, thanks for the replies – good to know I’m not the only one thinking about this. We’re still undecided at the moment and our maiden voyage is just around the corner in July. We’ve pushed off installing the full electrical system and headliner so we can focus on achieving minimum capability for the camper. I agree the Velcro would have to be glued, which is a disadvantage. I think strong double-sided tape is the way to go.
-
AuthorPosts