Welcome to TeardropForum.com › Forums › Teardrop Builders’ Forum › Headliner
Tagged: headliner
- This topic has 50 replies, 15 voices, and was last updated 6 years ago by
friz.
-
AuthorPosts
-
June 13, 2017 at 2:32 pm #909
apkley
ParticipantComing up on the headliner installation. Has anyone considered a less permanent method to install it? I’m thinking some heavy-duty velco or double-sided tape. The idea is to essentially be able to remove sections of the headliner like panels. The main reason is the ability to access electrical wires, or make modifications involving the shell in the future without working through the liner…
Correct me if I’m wrong, but contact cement is a permanent solution to adhering the liner to the inside of the shell? I have never worked with the stuff.
June 13, 2017 at 7:08 pm #914faithie999
ParticipantI have been pondering the same question, altho I still have a ways to go before the headliner installation. contact cement is fairly permanent, or at least somewhat destructive to the foam if you try to rip it off. what about trying Scotch spray adhesive, which I think is a weaker form of contact cement. people use it to temporarily glue patterns to wood for cutting out pattern pieces. even though the spray version is “weaker”, the large surface area of the foam pieces relative to their weight might allow the pieces to stay in place until you want to remove them. my TD is upside down right now while I work on the bottom, but when I flip it later in the week I’ll do a test with a couple of headliner sections. I really like the idea of a reversible installation.
June 14, 2017 at 2:54 pm #915mpilone
ParticipantFunny, I had the exact same question but I’m far enough away from the headliner that I haven’t worried about it too much. I was thinking maybe some kind of button snaps might be interesting if I could secure them on or through the headliner.
I thought about Velcro also but I don’t think the glue on most standard strips will be strong enough and will probably want to peel off on hot days in the sun.
I’m curious to see what others come up with while I continue my build. I don’t like the idea of permanently gluing that much foam to something that will need repairs, modifications, and enhancements in the future.
-mike
June 14, 2017 at 4:00 pm #916JakeM
ParticipantGood question. I put mine in a few weeks ago and used contact cement, but if you are worried about future changes/improvements, then I think you could definitely use a less permanent adhesive.
My gut says that a quality double sided tape could be a good solution. I found that once you start getting pieces in place, they kind of hold each other in. Worst case scenario is you try that way and someday a few panels fall down. Not a bad problem to have.
Another benefit is that if certain panels of the foam get damaged (I noticed that the CLC model has some big gouges) then you could replace single panels.
June 14, 2017 at 10:20 pm #921restonthewind
ParticipantAdd me to the list of builders with this question. I’m also considering Velcro, but the Velcro must be glued to the shell, and I’d like to preserve the beautiful wood on the interior. Double sided tape and “post it” adhesive sound promising. Adding more adhesive occasionally is not a problem. Let us know if you go this way.
I won’t use the headliner kit for two reasons. I’m omitting the galley, so I’ll line all of the shell with foam including the galley hatch. I also prefer a lighter color. The foam is available online in large sheets in several colors. I’ve seen the gray in the kit, white and a few primary colors. The primary colors are loud, but blue is a possibility. I may use white and paint or stain it, but I have lots of time to decide.
June 15, 2017 at 6:13 am #927ParticipantThis tape looks good:
June 15, 2017 at 8:29 am #929ParticipantDouble sided tape is an interesting idea. I use this carpet tape:
when stacking wood for cutting multiple pieces at the same time and it can really hold (sometimes too well and I mar the wood getting it back apart). I’m curious how it will stick to the foam and hold up to heat and condensation. Worth a shot.
-mike
June 15, 2017 at 10:10 am #930ParticipantThe Intertape product describes itself as permanent. The XFasten tape claims to be removable. So does this carpet tape which is a wider than the XFasten tape:
June 17, 2017 at 9:49 am #941ParticipantJake m–when you installed the headliner did you follow the manual’s instruction to use a 1/2″ roundover bit on all the edges?
thanks
ken
June 19, 2017 at 1:09 pm #943ParticipantKen,
Yes I did the 1/2″ round over and it turned out well. We used a fence and a router to do all the straight and externally curved edges. For the internal curves that couldn’t use the fence we just freehanded it with the bearing on the 1/2″ bit. Small mistakes could be fixed gently with sandpaper, and we were fortunate enough to avoid big mistakes.
June 21, 2017 at 5:59 pm #945StarMan
ParticipantGap issue:
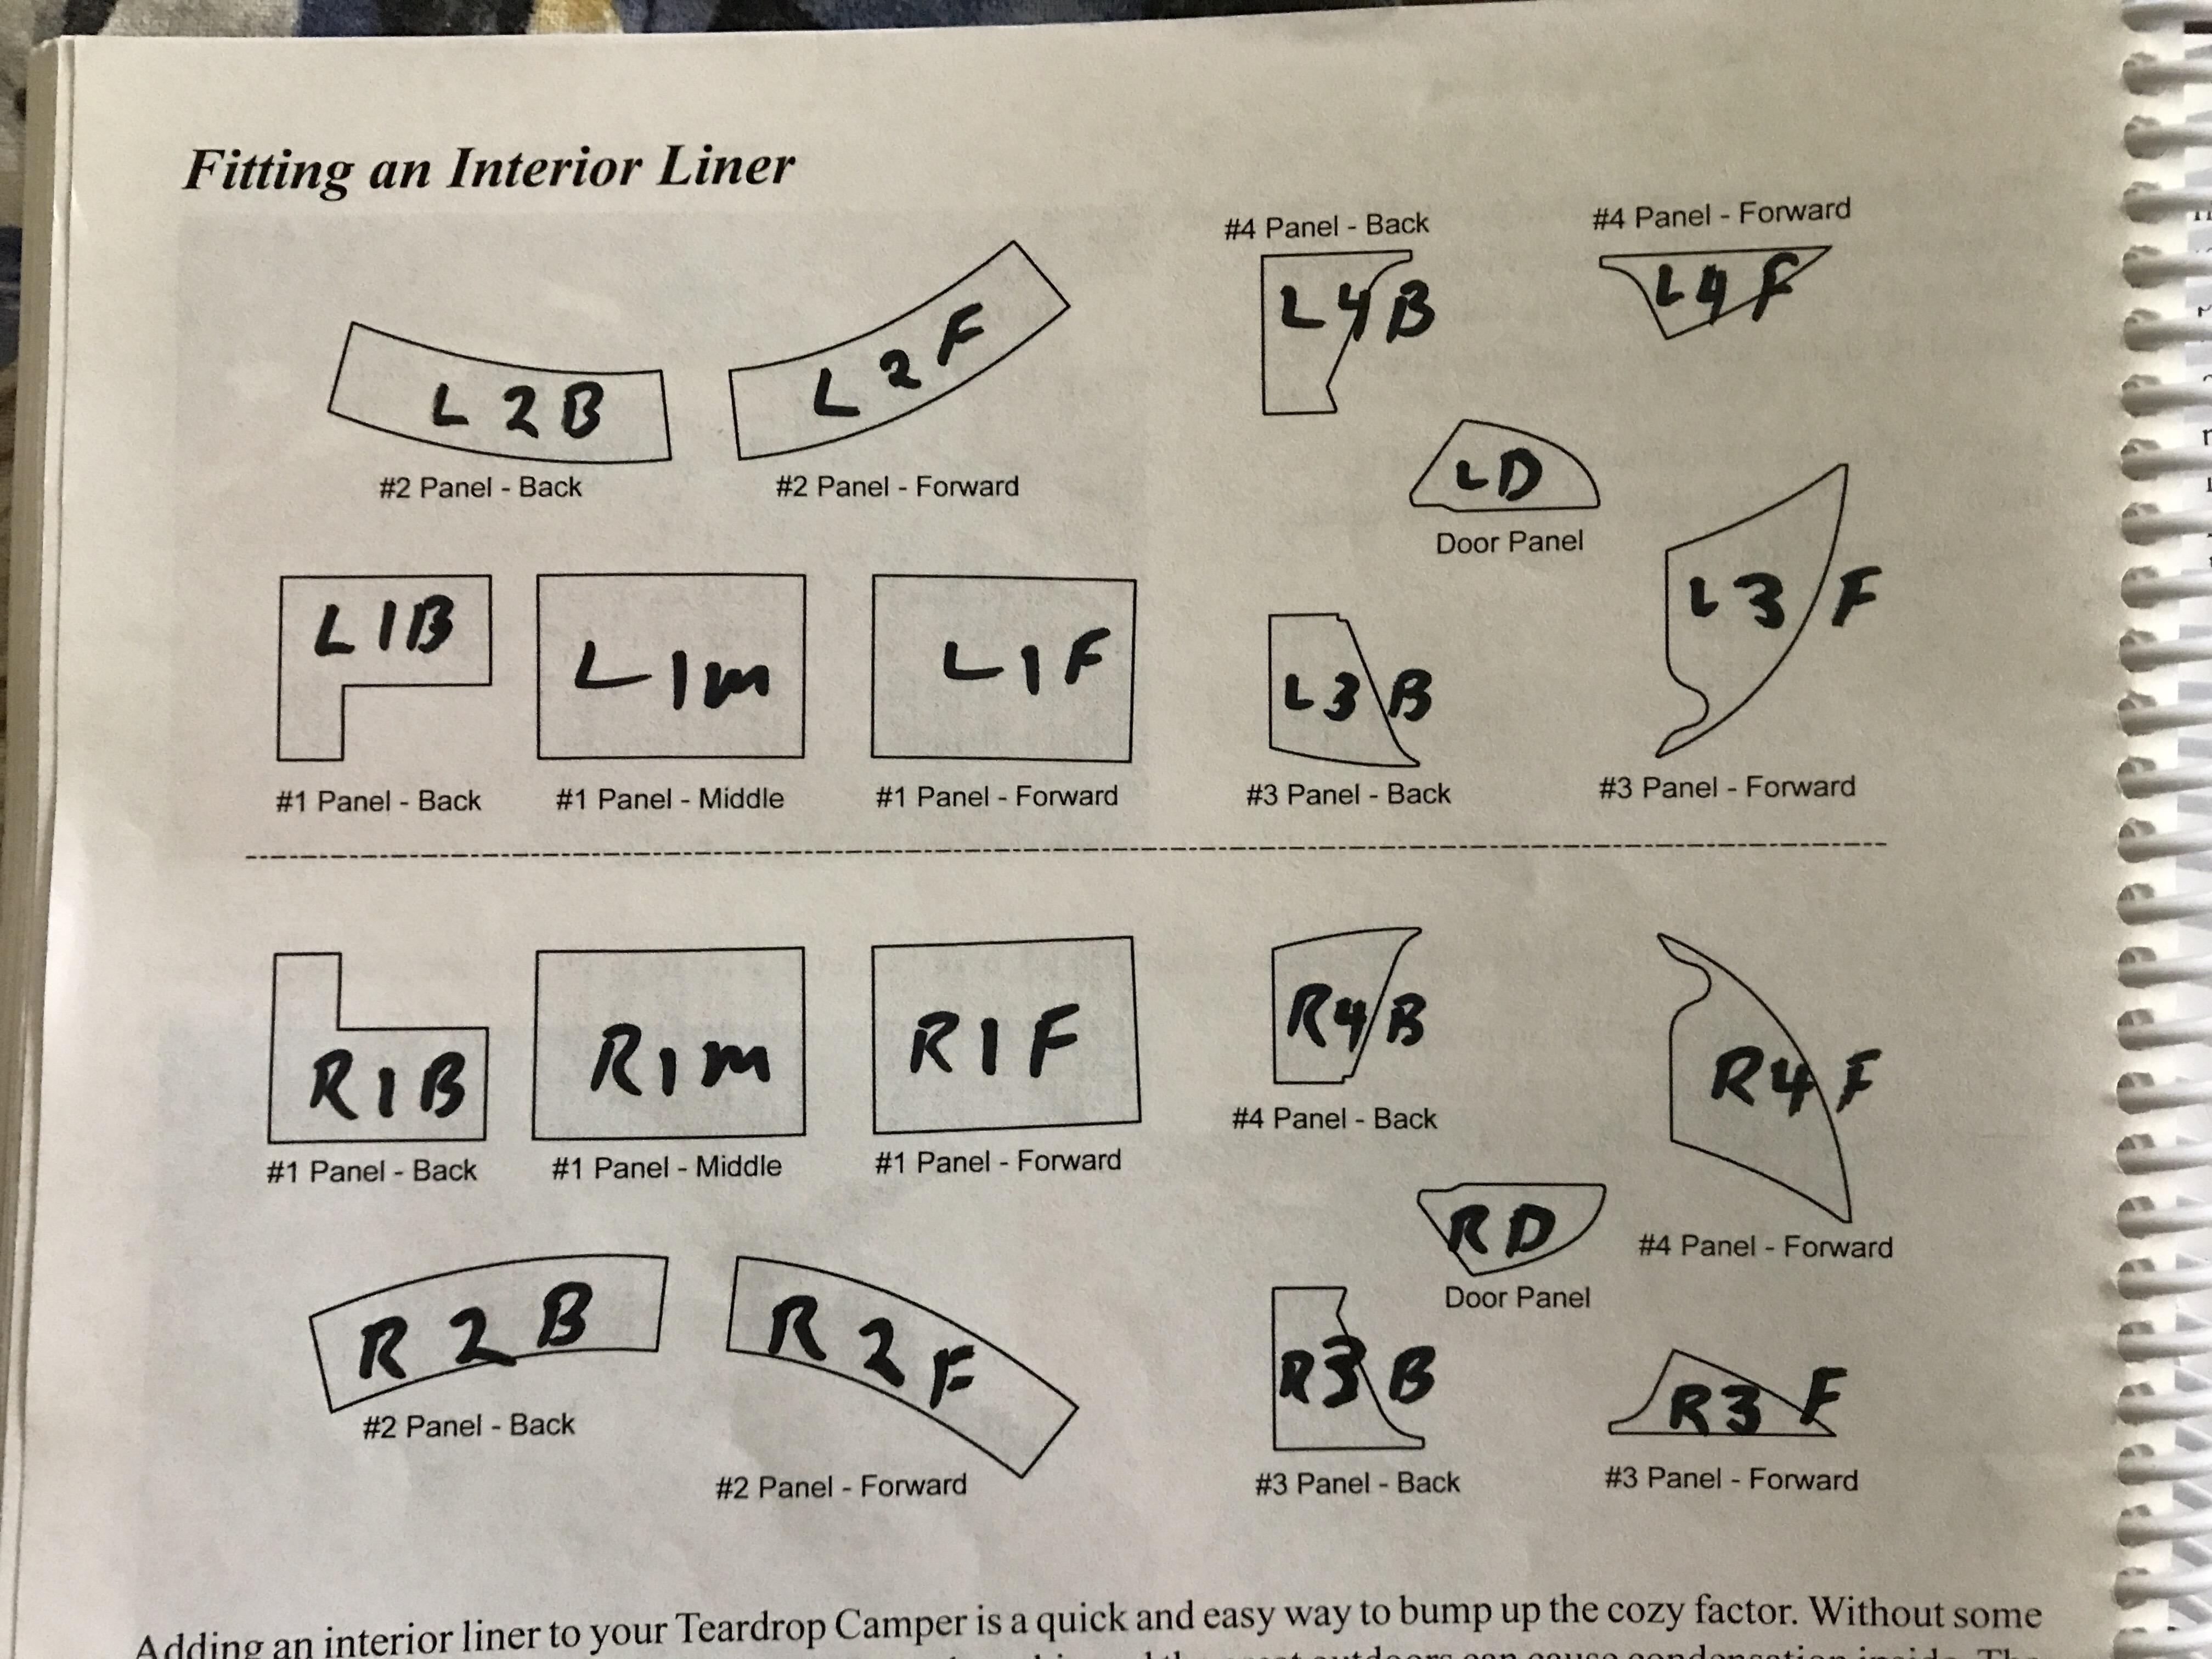
I am about to install the headliner. I just dry fitted the headliner and have discovered why some folks are having gap issues. The #2 forward and back panels need to be oriented correctly they may look uniform but there is a subtle curve and fit that can only be seen if you first dry fit them.
I labeled them so that is can orient them correctly once I am ready to use contact cement for the install. I am going to use standard Contact Cement for a permanent install.
The#1 Forward and Middle panels also have slight curve differences, that require them to be mounted in the one out of four possible ways.
There is a significant overlap on the all of the #1 and #2 panels. I guess carful trimming is in order.
I am going to just soften the edges with 220 sand paper. 1/2 inch round seems a little too much for me. I would rather make for a softer edge than to possibly eat up a panel with a router……
June 24, 2017 at 6:07 pm #950ParticipantAll, thanks for the replies – good to know I’m not the only one thinking about this. We’re still undecided at the moment and our maiden voyage is just around the corner in July. We’ve pushed off installing the full electrical system and headliner so we can focus on achieving minimum capability for the camper. I agree the Velcro would have to be glued, which is a disadvantage. I think strong double-sided tape is the way to go.
June 30, 2017 at 9:10 am #957comccoy
ParticipantThough still many weeks from the headliner install we have it and have been discussing mounting options. I see the greatest benefit being that it will help with condensation; especially with 2 people breathing all night with the hatches battened down in bad weather. If they were mounted with something like velcro would there be a concern that the panels would air gap where they contact the shell? I could see this leading to condensation behind the panels which may not dry easily and might starting growing stuff. Thoughts?
Also, having seen the model several times we could see where the foam had been dinged a lot over time. Has anyone considered covering the foam with fabric like a car headliner for a more durable surface?
July 5, 2017 at 12:36 pm #979ParticipantLiner install is NOW complete. Living is California now has at times been a pain when it comes to purchasing certain Chemical Based products. I accidentally purchased the Water-Based Contact Cement. (DO NOT USE!)
This Product from DAP is not in any way usable for this application. The foam liner just soaks it in and will NOT work. (DO NOT USE!)
So I took it back and got the Good-Old-Stinky Real Contact Cement. This stuff stinks to high heaven. So wear an appropriate breathing filter.
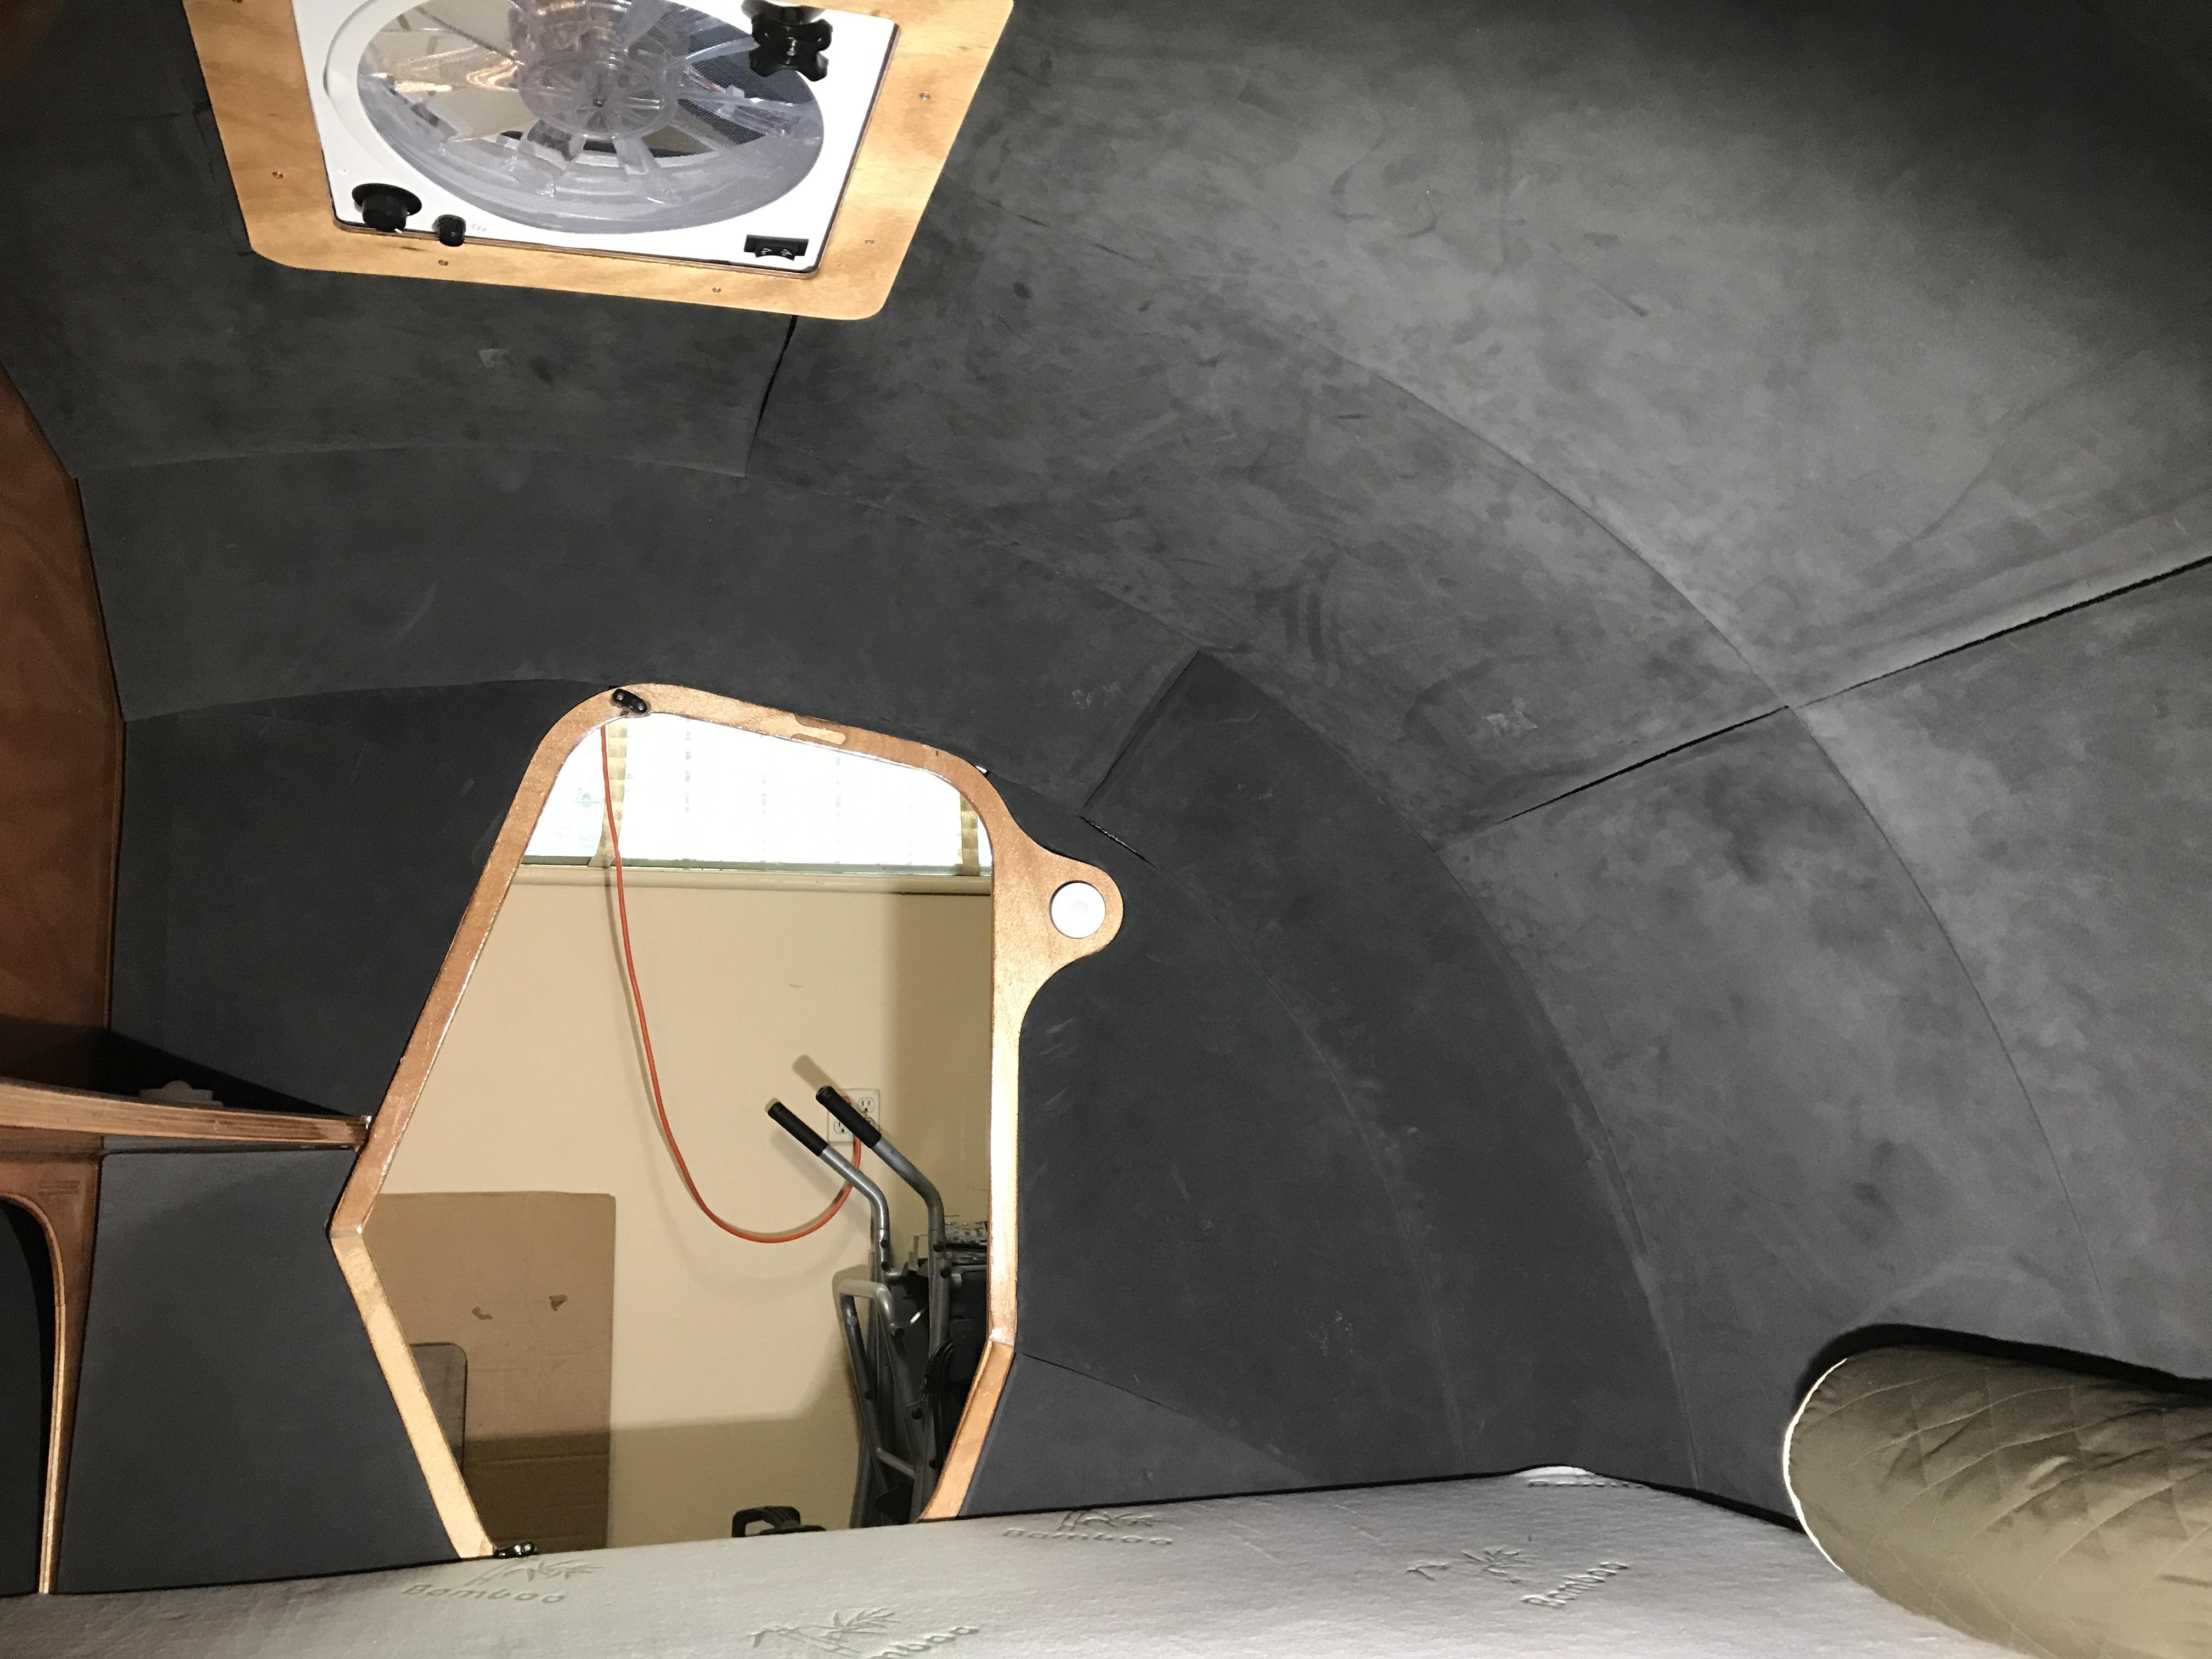
Be very careful on which piece goes to which location. I wish that the pieces were labeled to make this easier. So, it is up to you to dry fit and label which surface is out and which orientation is correct. I labeled the back of the panel with a sharpie indicating the panel ID and its orientation. The labeling also guarantees that you don’t accidentally apply contact cement to the WRONG side. I also had a lot of overlap a few panels and a gap of about an inch at the back side of the vent. I save the trimmed pieces and filled i the gap.
One last note is to be very careful when placing the liner to the contact cement, once it make contact…….well, it makes FULL contact. You can not remove or slide into place. Photos show my labeling scheme and the finished result.
 July 5, 2017 at 12:40 pm #980Participant
Oh, one more note about the liner. The Hymnal describes rounding the edges. No matter what I tried I just didn’t get a satisfactory look. So I opted to just leave the edges alone. I think it looks just fine. I did round and trim near the edges especially at locations of the filets. But this is done on the back side.
-
AuthorPosts
- You must be logged in to reply to this topic.