Welcome to TeardropForum.com › Forums › Teardrop Builders’ Forum › Bob's tips and tricks
Tagged: Door stiffeners
- This topic has 26 replies, 12 voices, and was last updated 2 years, 8 months ago by
madebymike60.
-
AuthorPosts
-
July 5, 2017 at 10:55 pm #990
apkley
ParticipantI followed the directions for mounting the hinges, but… I absolutely recommend applying the Drill-Fill-Drill technique with cell-o-fill prior to this step. This technique is covered by CLC when mounting the shell to the trailer. This technique will give you superior strength on the moving hinges and – perhaps most critically – more room for slop when you finally fit your doors/hatch.
Even if you use the screws to tack-weld the hinge pieces into place to get the proper fit, there will be other factors to cause a misalignment (the galley gutter, the door hardware, etc). After you fillet the hinges to the shell, you will not read until much later in the Hymnal about heat-shrinking the screws prior to mount the doors. This is great advice, but the added heat shrink decreases the margin of error for lining up the holes and achieving a flush fit with the shell. Lastly, the DFD technique will seal the inside of the hole, saving you the step of trying to push epoxy into the hole to prevent water rot. I recommend making the hole at least twice the size of what is pre-drilled, but the hinges can take a much larger hole.

 July 7, 2017 at 3:55 pm #997
Bob D.
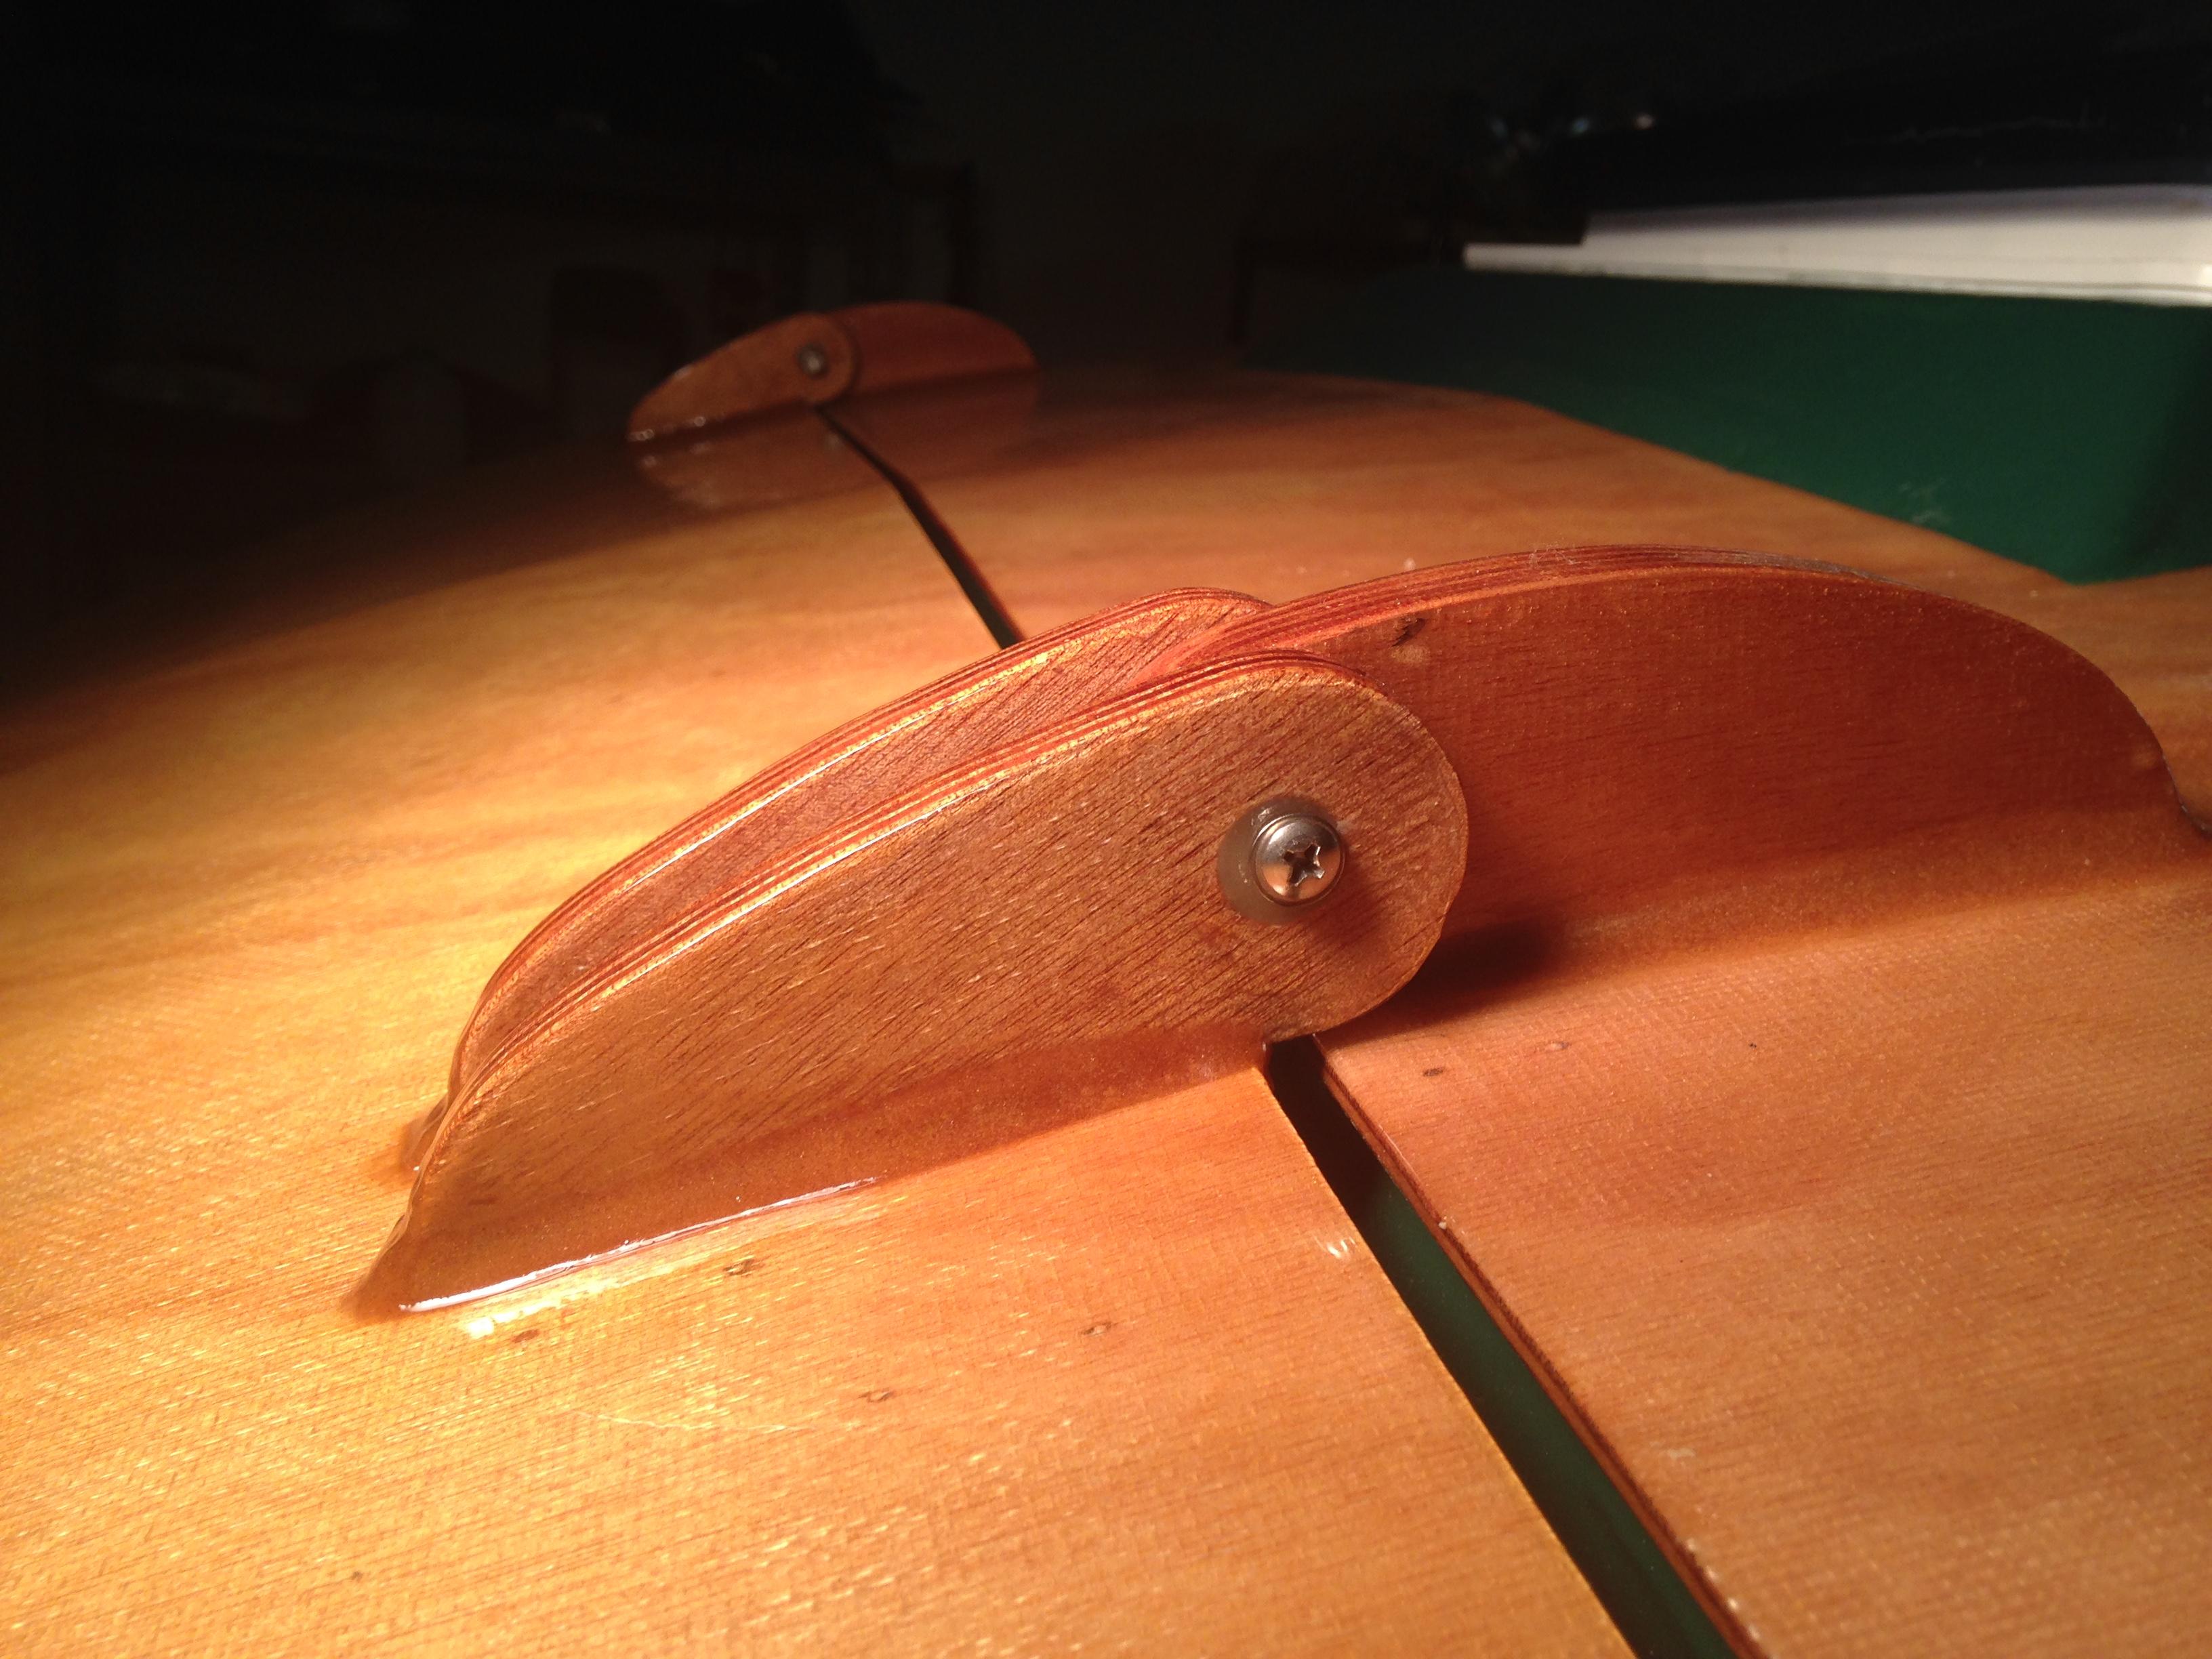
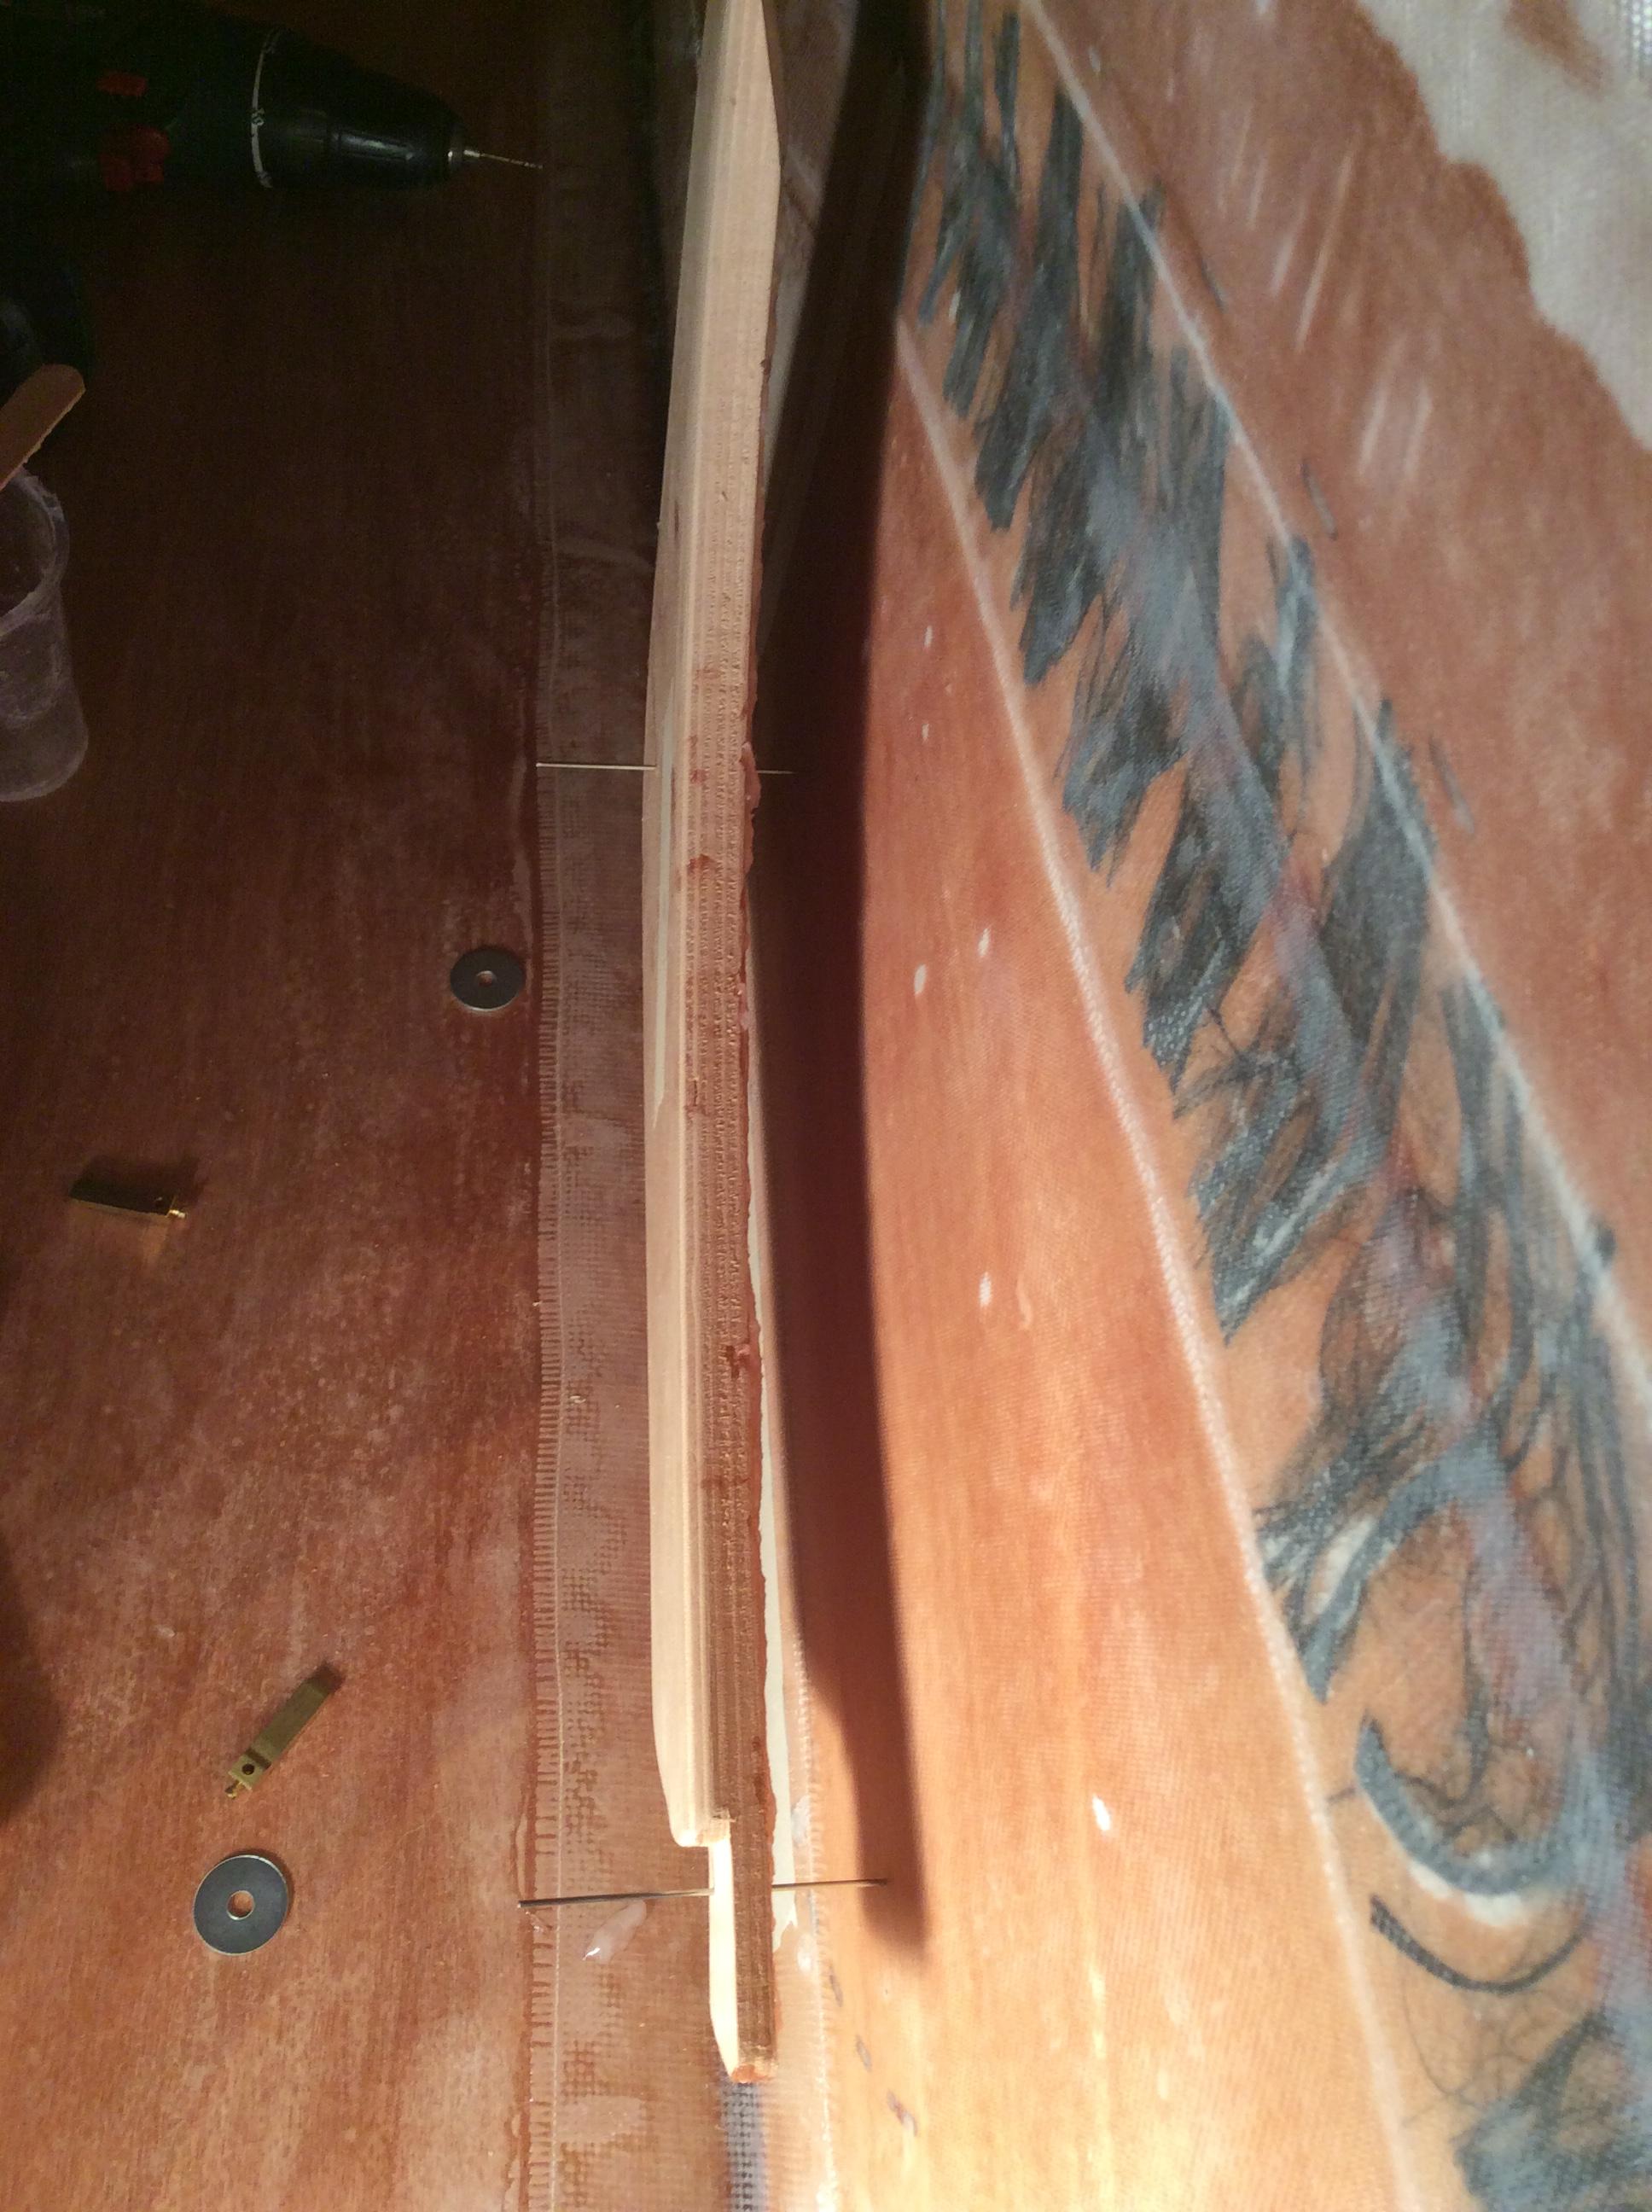
ParticipantHere’s what I did for lighting inside. Basically I clamped the door sill so I couldn’t split it, then drilled a hole on the edge where I wanted to route wires, then used a small saw to turn the hole into a keyway / slot.
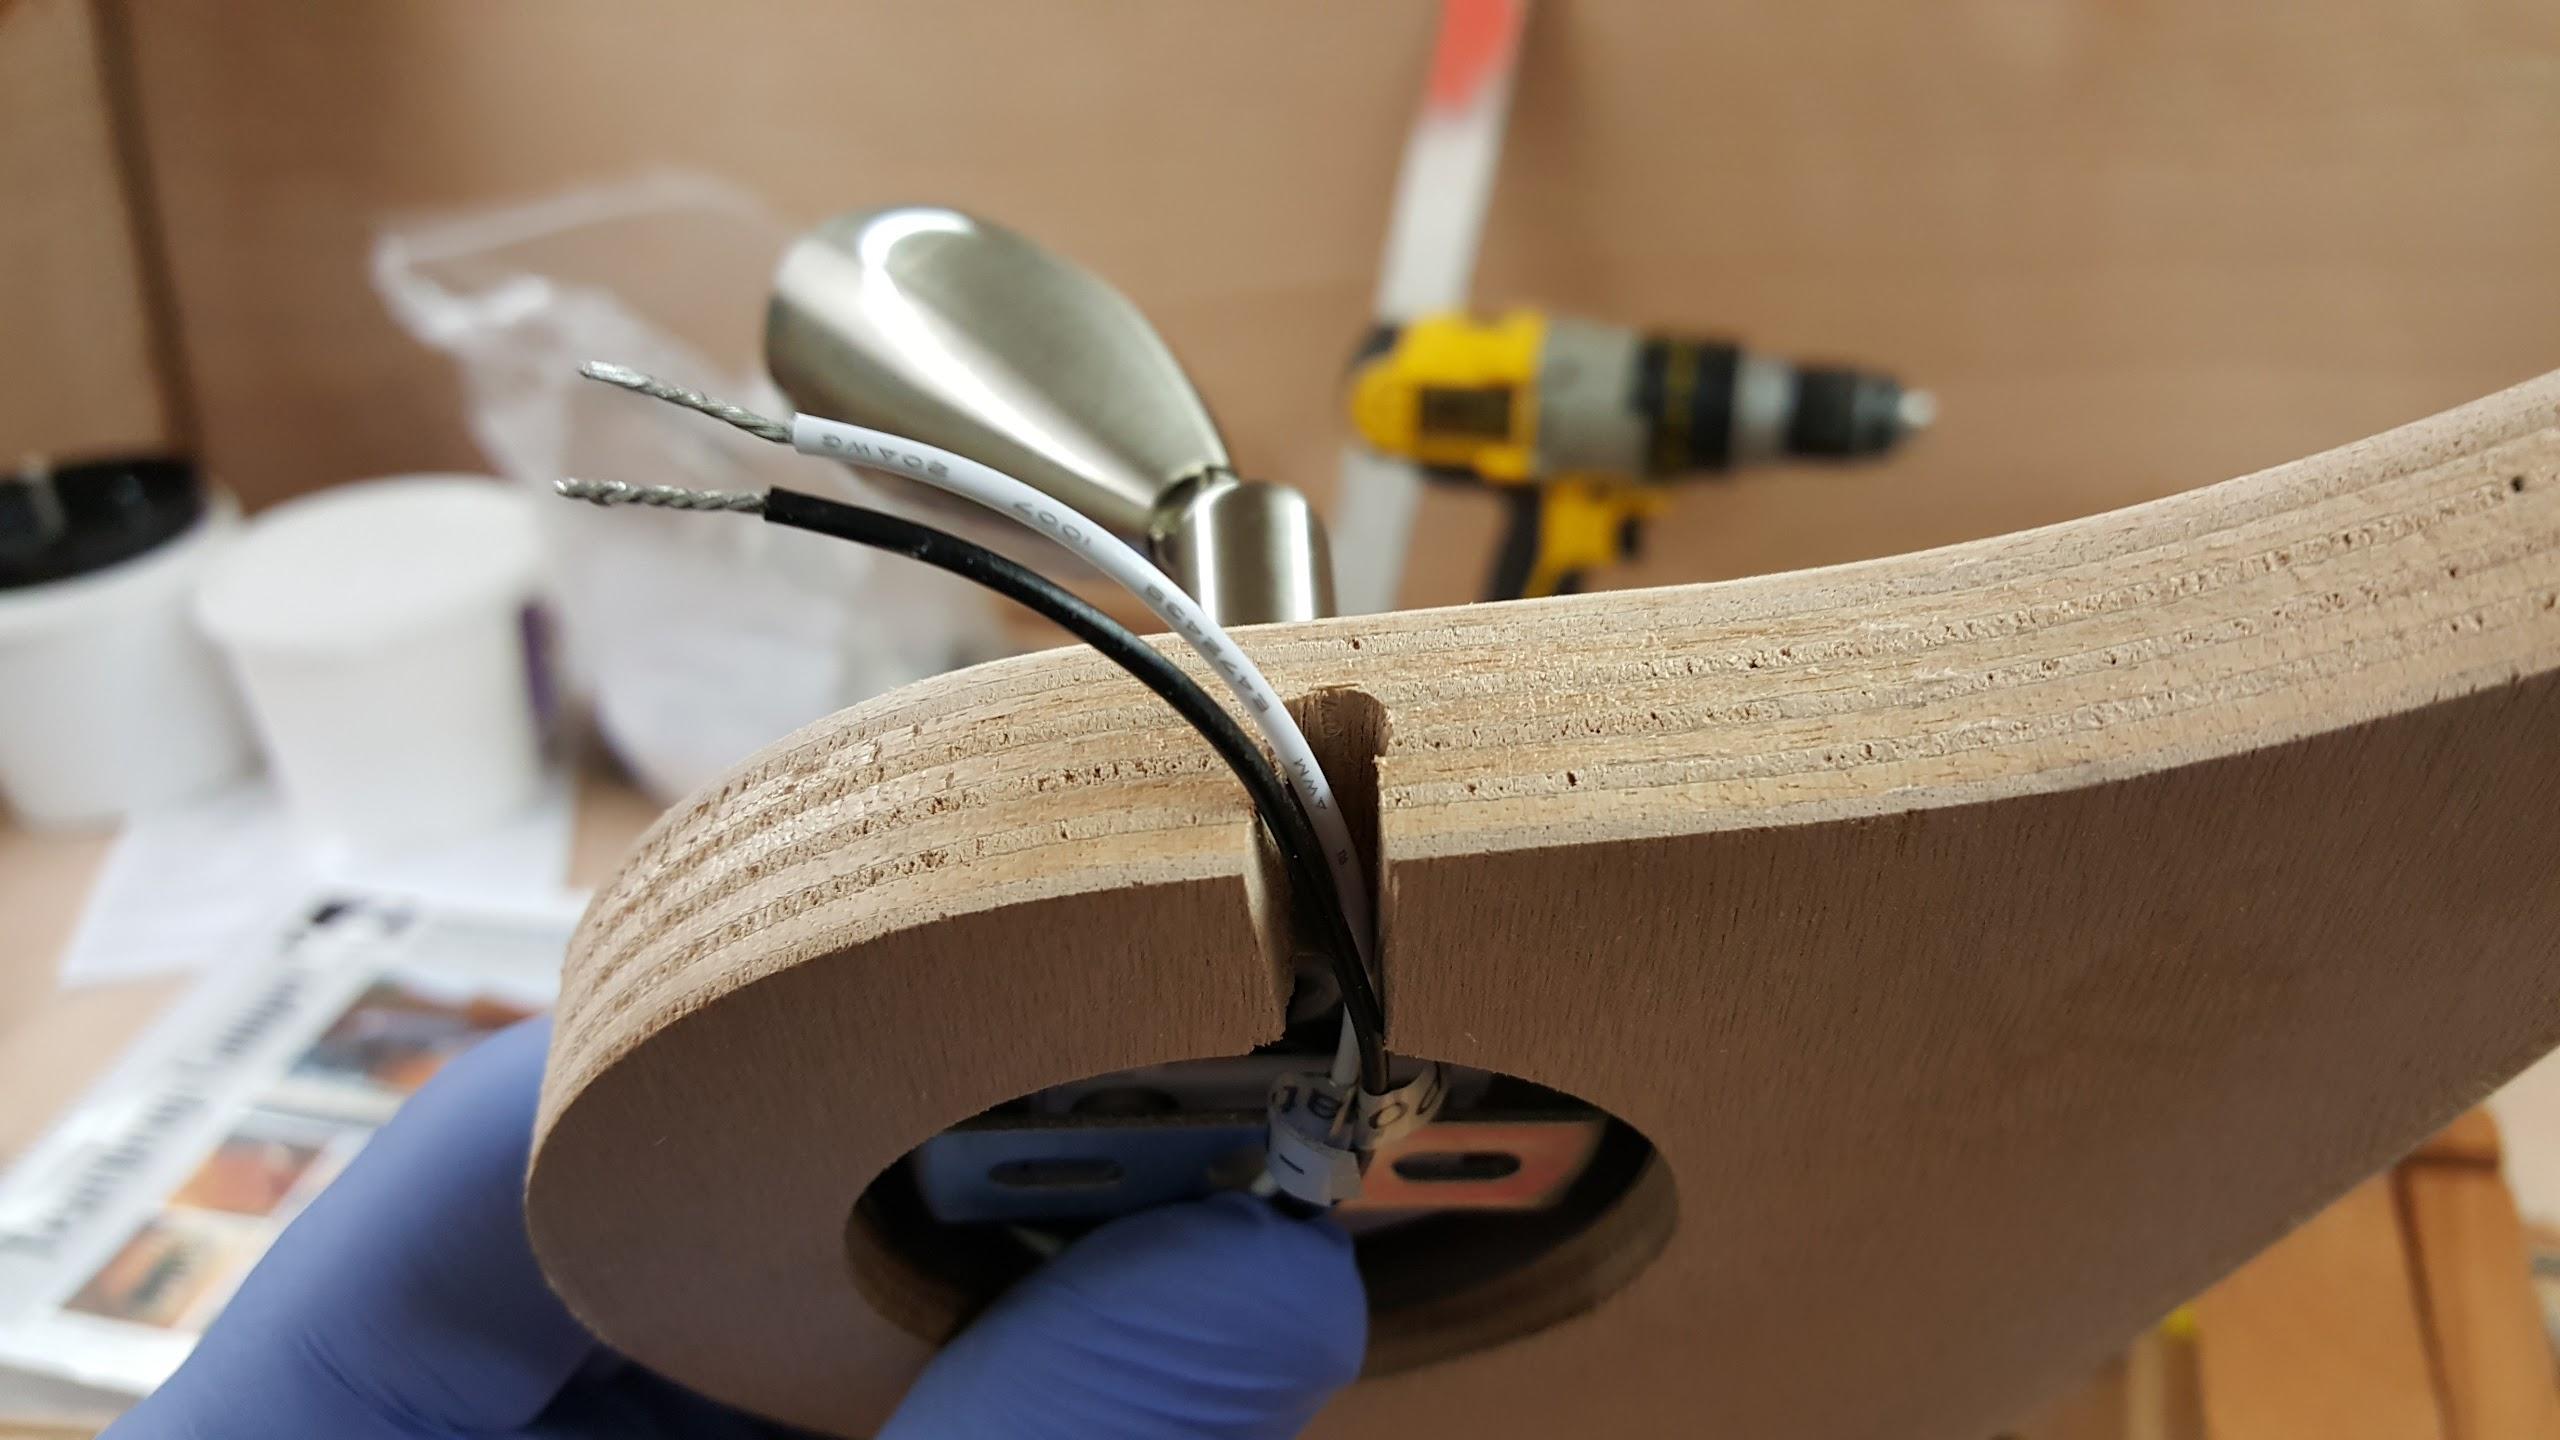
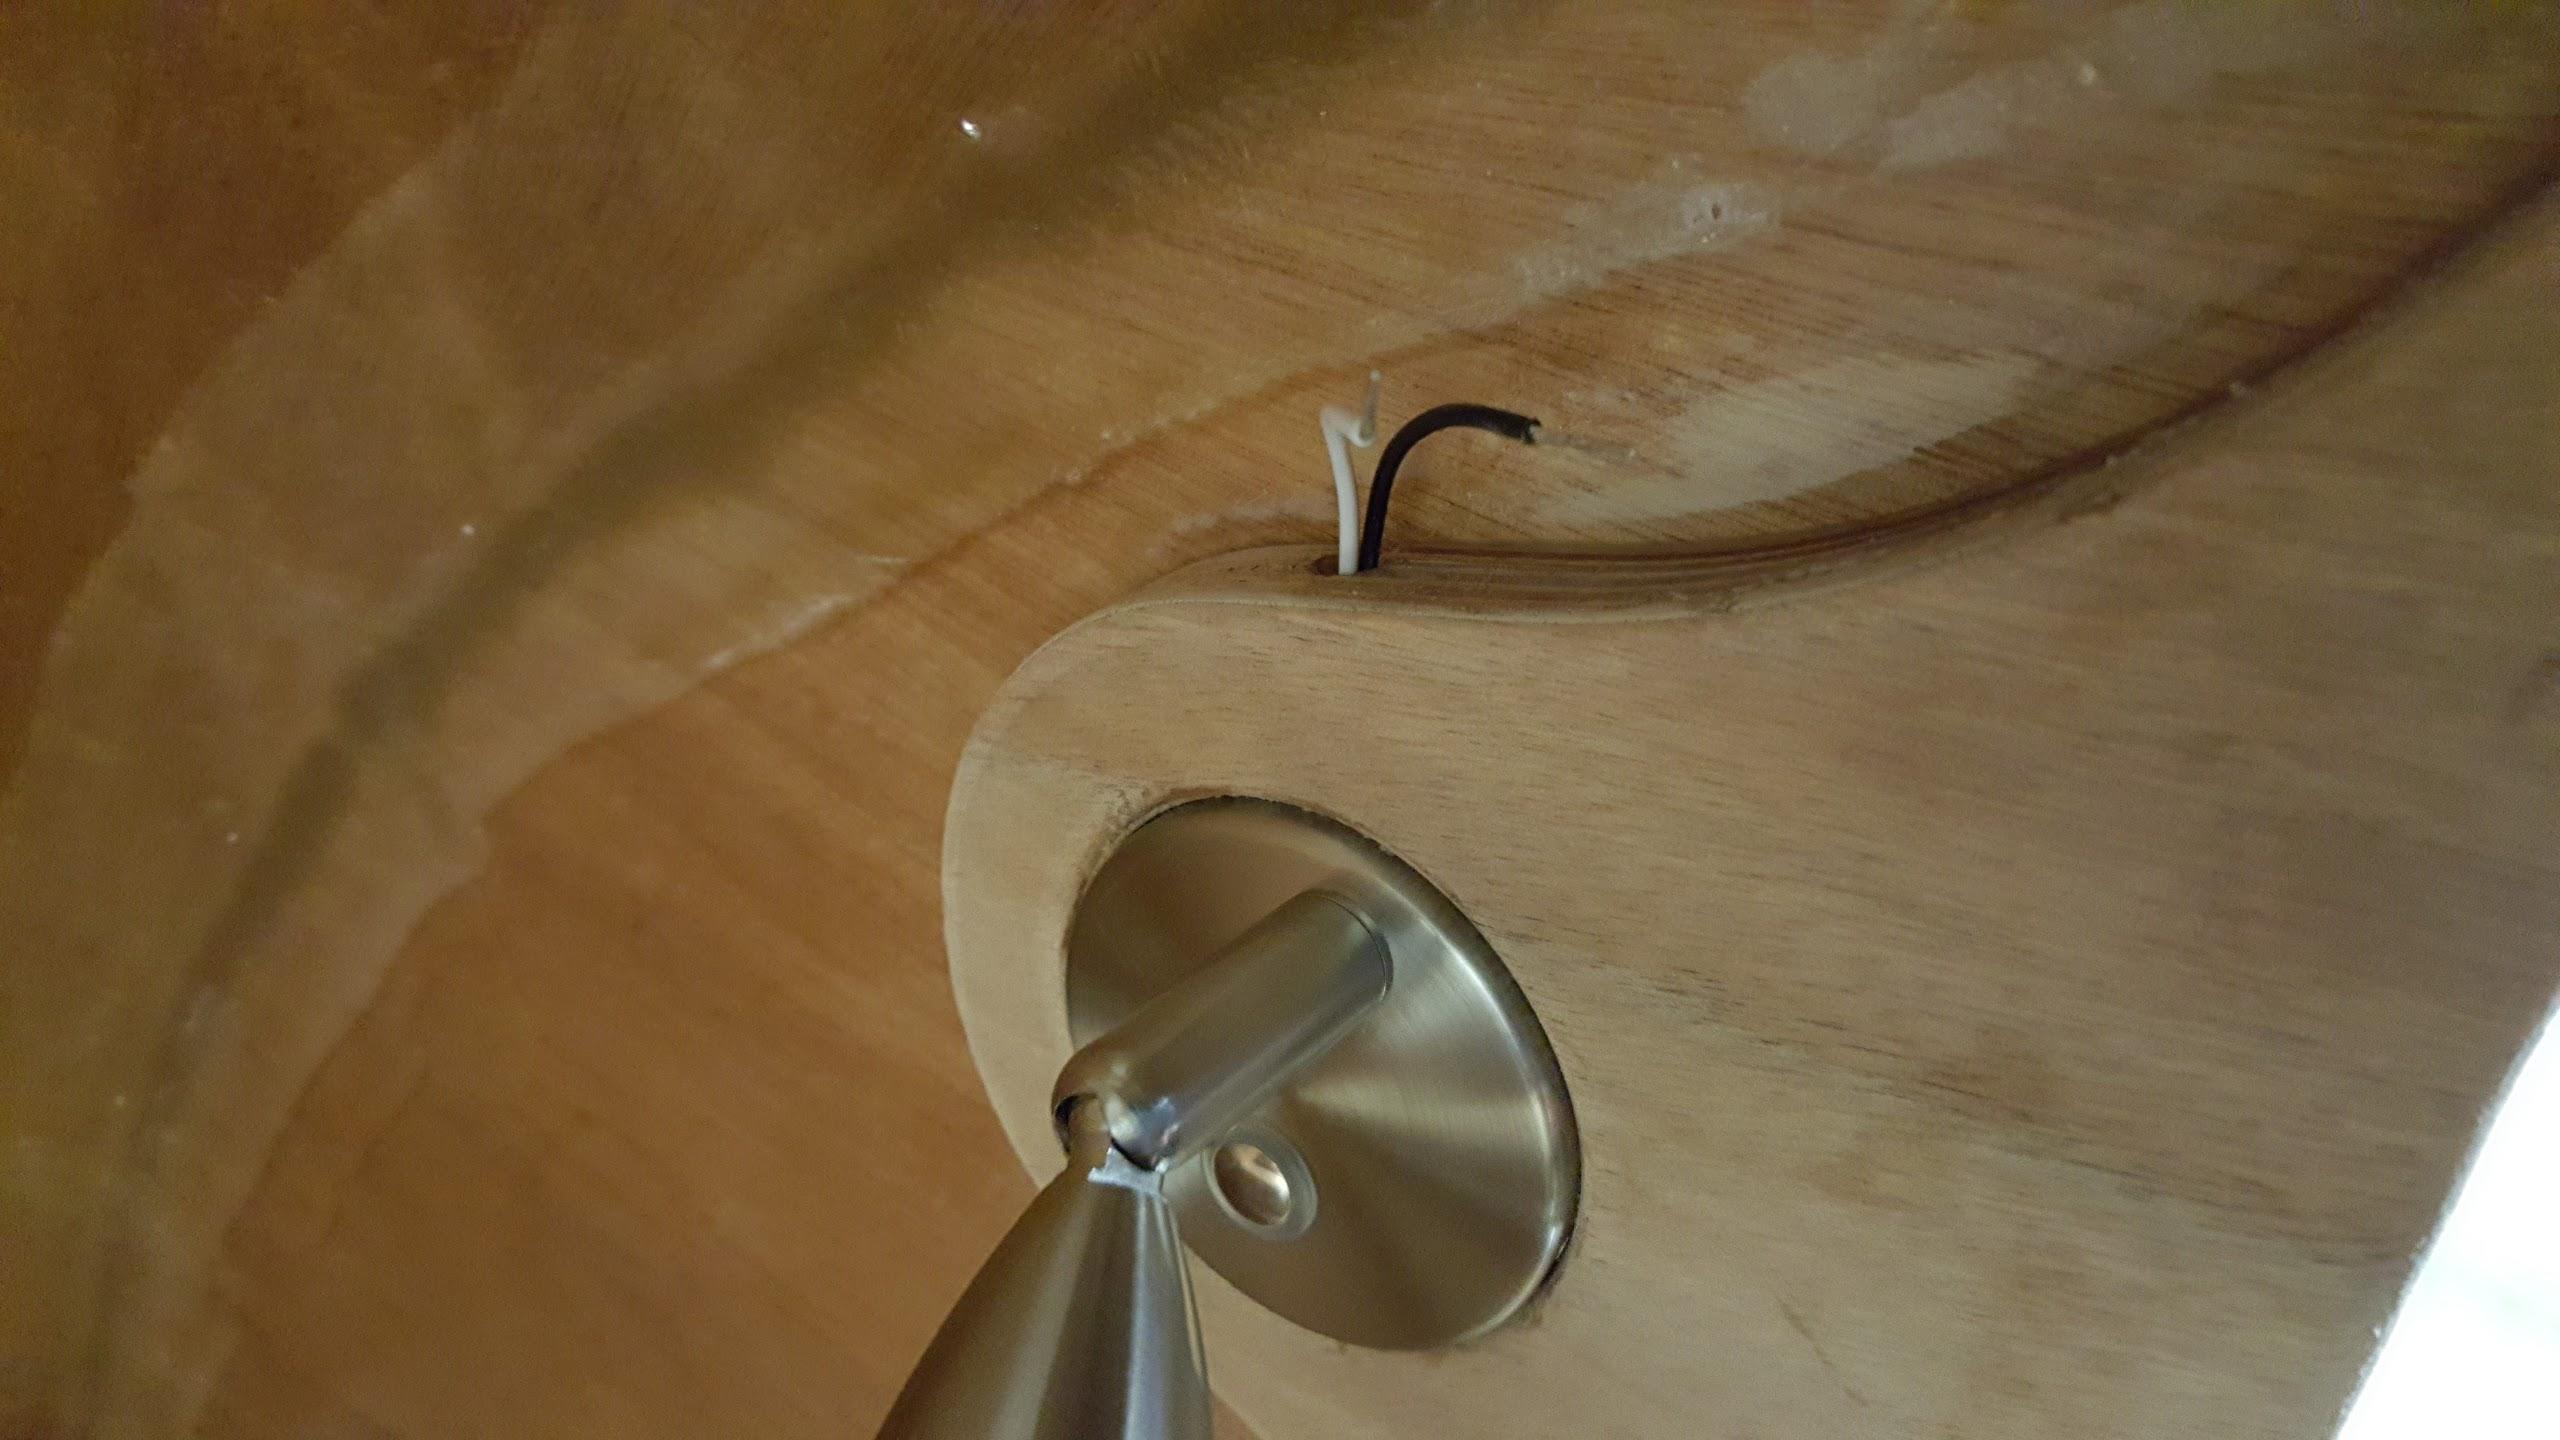
And installed:
The lights I’m using are these from Amazon: https://www.amazon.com/dp/B071DGQNDR?ref_=pe_623860_70668690
They seem to remember the dimmer setting between power cycles. The blue nightlight ring can be turned off so you don’t have a blue light shining into the camper all night.
Edit/update: forgot to mention that if I were doing this again, I would coat that slot with epoxy before gluing up inside the camper. I’m sure enough of the thickened stuff got in there because I had to push it out with some small tools, but it never hurts to purposefully coat it first.
Also, the above lights happened to just fit exactly. I’m going to use a small strap across the front rather than use any kind of adhesive. Maybe a strap (wooden strip and 2 screws) and a dab or two of silicone to keep it from moving around.
-Bob
-
This reply was modified 6 years, 9 months ago by
Bob D..
July 14, 2017 at 10:43 am #1050faithie999
Participanta couple of tips re: installing the cabin shelf.
1). notice that the rear corners of the shelf will interfere with the epoxy fillet on the outside walls. I didn’t realize that. had I realized, I would have cut a small triangle off the corners and if necessary those cuts could be hidden with a small fillet.
2). install the shelf before you install the door sills. due to the angle of the side walls, you need to have the shelf pointing toward the floor after you position it near the slots, ant then you can then rotate it upwards to its correct orientation. I learned that the front corners of the shelf/fiddle interferes with the door sill. I had to slide the shelf in with the front edge facing the roof, which makes for a much tighter fit due to the slant of the walls. I had to whack it with a rubber mallet, and snapped off one of the rear tabs (which the epoxy fillet will hide).
July 30, 2017 at 7:59 pm #1125catcamper
ParticipantBuy pinking shears, they are worth it to cut the fiberglass, also if your wife/partner/gf/neighbor/partner sews, it’s worth having them cut the glass to cut down on runs and crawling. Just as working with frosting, sometimes a smaller bag is better in order to get the size of fillet you want, we used both gallon size (larger fillets) and quart sized(small fillets and patch work) freezer bags. The quart sized bags fit awesome in the extra large cups from Subway (normally their movie promo cups). If we were to do another teardrop, we would probably buy a frosting spatula to help with the fillets.
December 29, 2018 at 10:19 am #2363Andrew
ParticipantHi Bob,
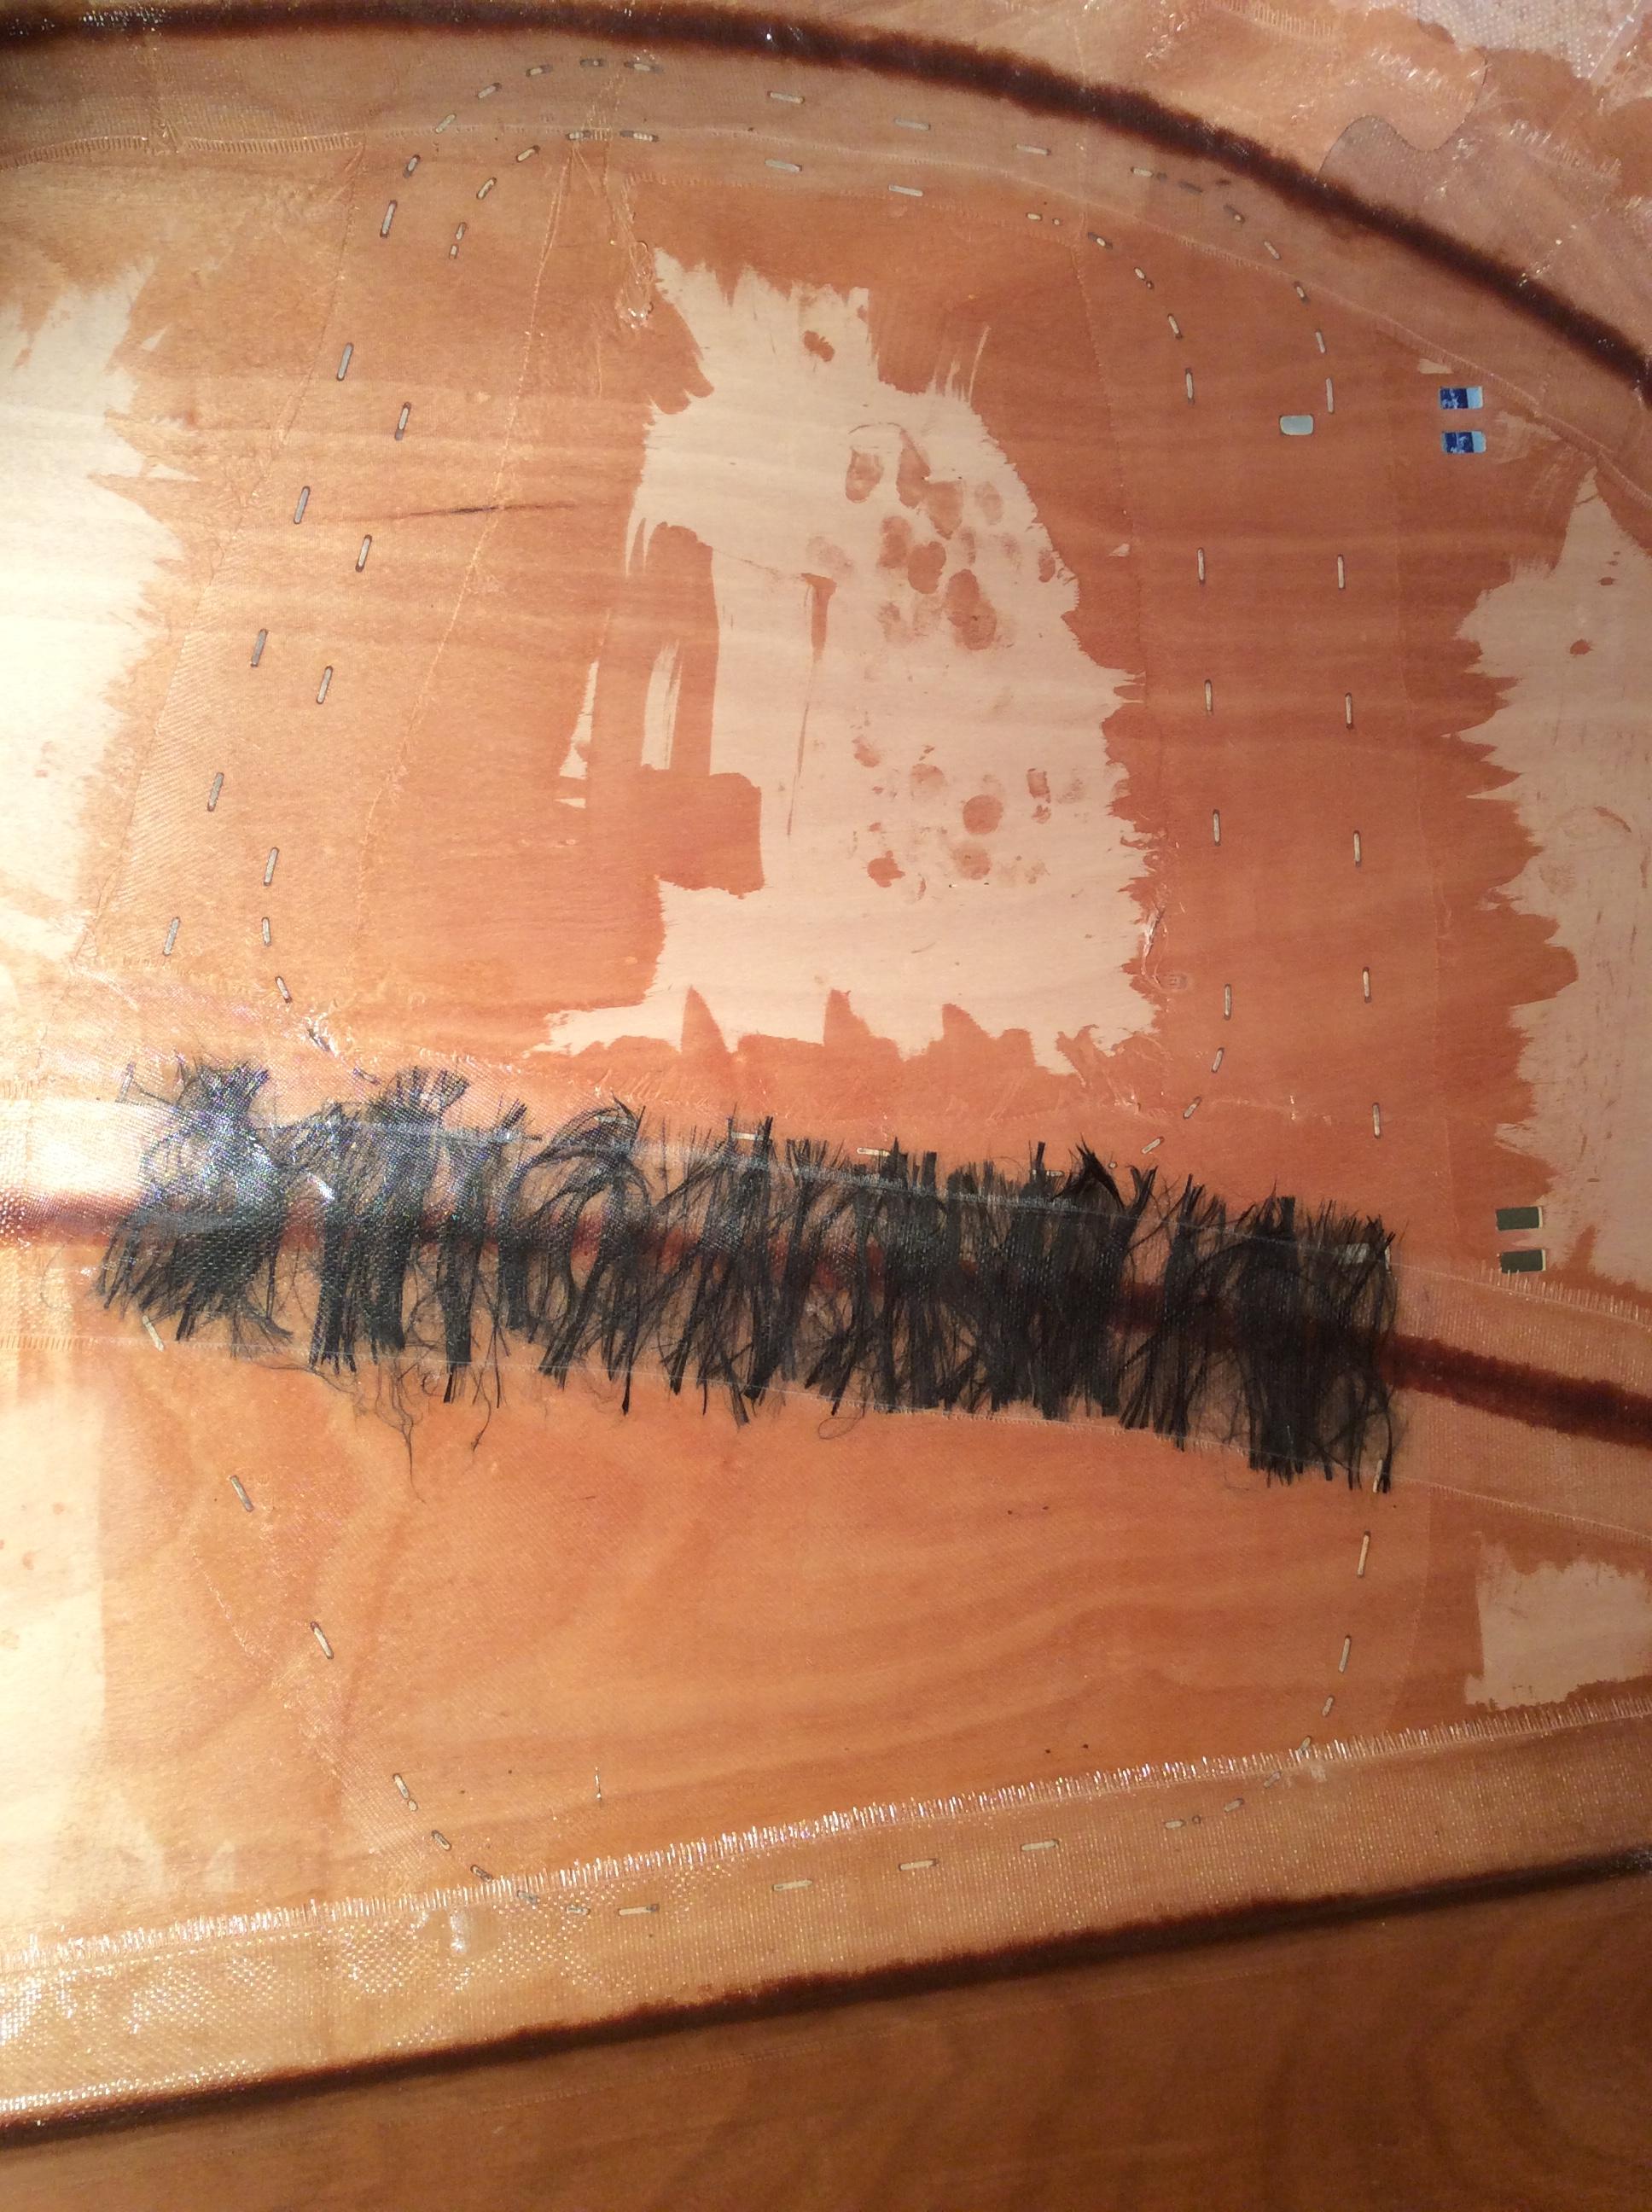
Your tip about fitting the door stiffeners before cutting the doors out sounds like a really good idea. I have added an extra layer of glass fibre and some carbon fibre strands I had lying around but wondered about applying your fix too? I have no idea if the carbon fibre will have any effect but thought I’d throw it in the mix!
How effective was your fix when you came to cut the doors out?
I’m just about to glass the exterior now so a way off cutting doors out, though I’m really keen to avoid the use of straps to fix the door fit and if doing things now can avoid that I’d like to give it a go.
Thanks,
Andrew
 January 8, 2019 at 5:00 pm #2388Participant
Sorry for the delay. Just seeing this now. I did install the door stiffeners before cutting out the doors but did not glass the inside (didn’t think of it till after I started cutting). There is no noticable springout on my doors, but I also do not have the windows installed yet. We’ll see! I’m only 2 years into this project. The first 90% went fairly quickly and then life caught up. I’ll get back to it in the spring, I swear. 😉
Also, I hung my doors with the door hardware kit, got them centered up real nice, taped them down, and THEN installed the hinges. Make sure you keep enough room in between the hinges for another epoxy layer or your trunk hinge won’t fit. I need to do some sanding before that goes back on!
-Bob
August 17, 2019 at 10:52 pm #2704Virginia Overlander
ParticipantSo you put door stiffener on before cutting out the doors. I have not read the book… winging it…. kidding picking up my kit next weekend and the engineer in me is hoping to address common problems as i build. Like doors springing flat when cut out. One thought is and extra layers of glass material on sides. 2 total on outside like on the top and one inside. Thoughts?
-
This reply was modified 4 years, 8 months ago by
Virginia Overlander.
August 18, 2019 at 3:45 pm #2706ParticipantHi Virginia Overlander.
i have now finished the TD and the doors did not spring out and do not need the strap to tension them. They fit really nicely.
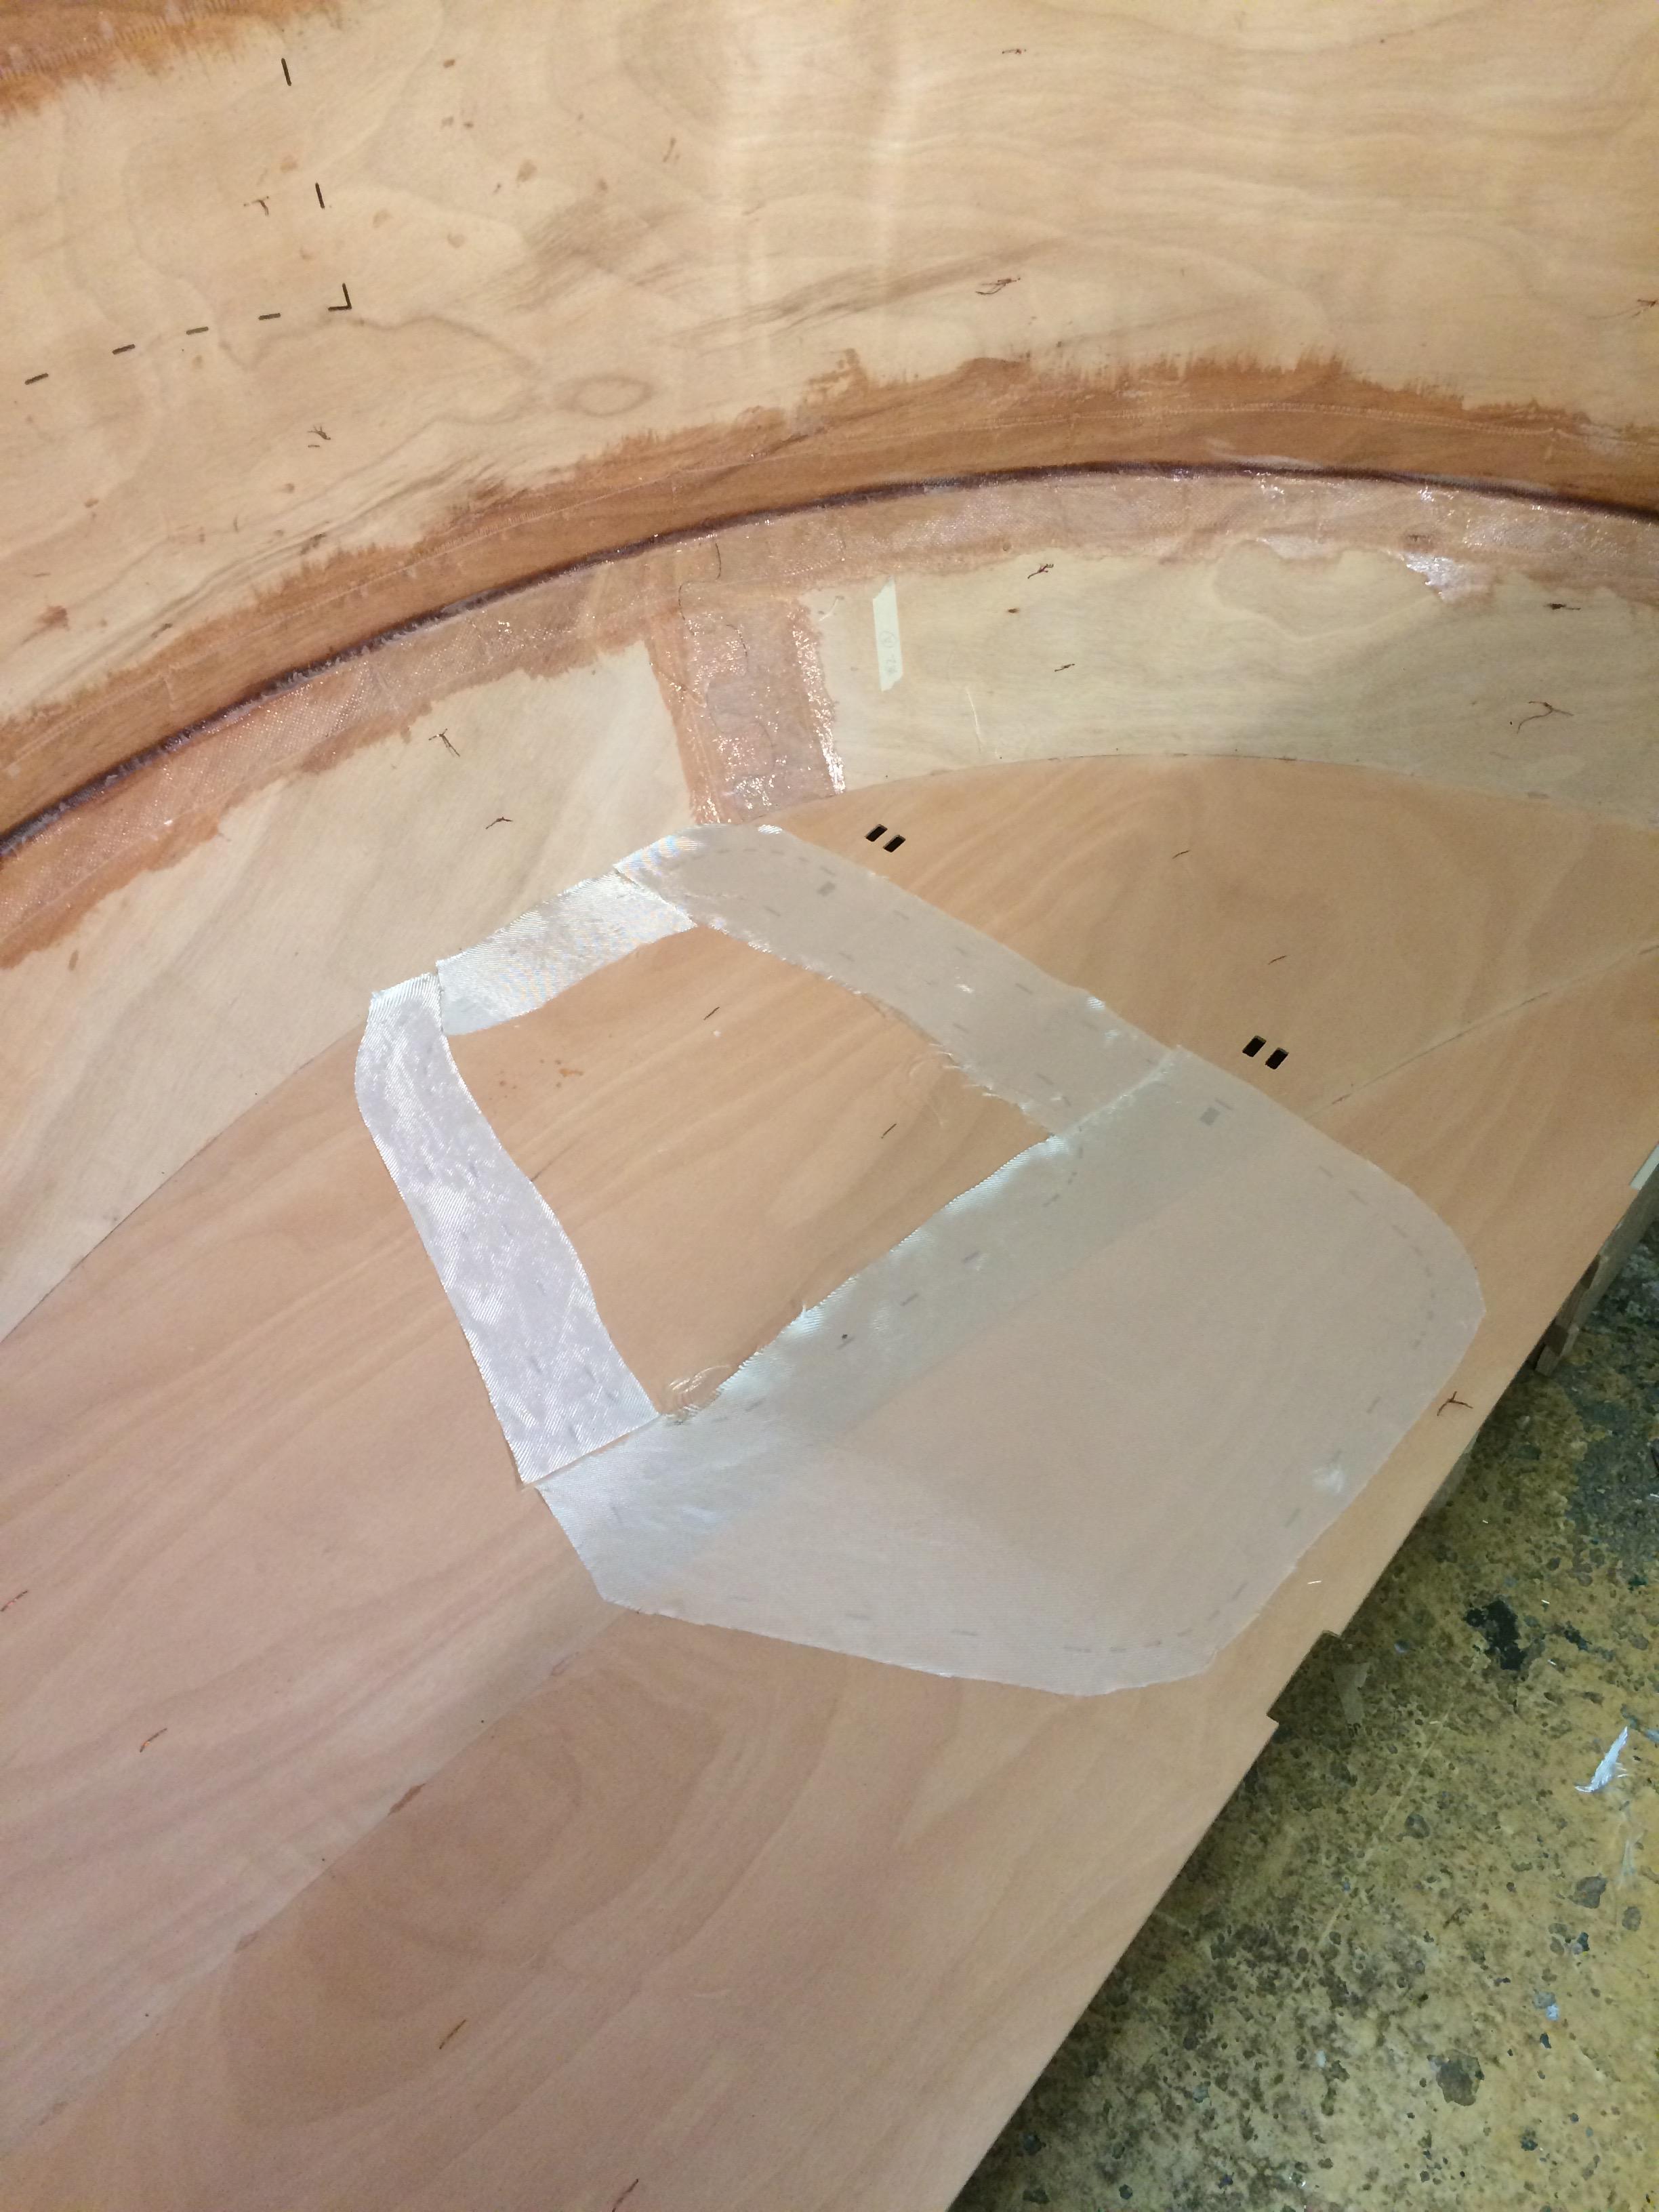
i did apply the stiffeners before cutting out the doors, as well as the extra layer of glass fibre on the inside of the door as shown above.
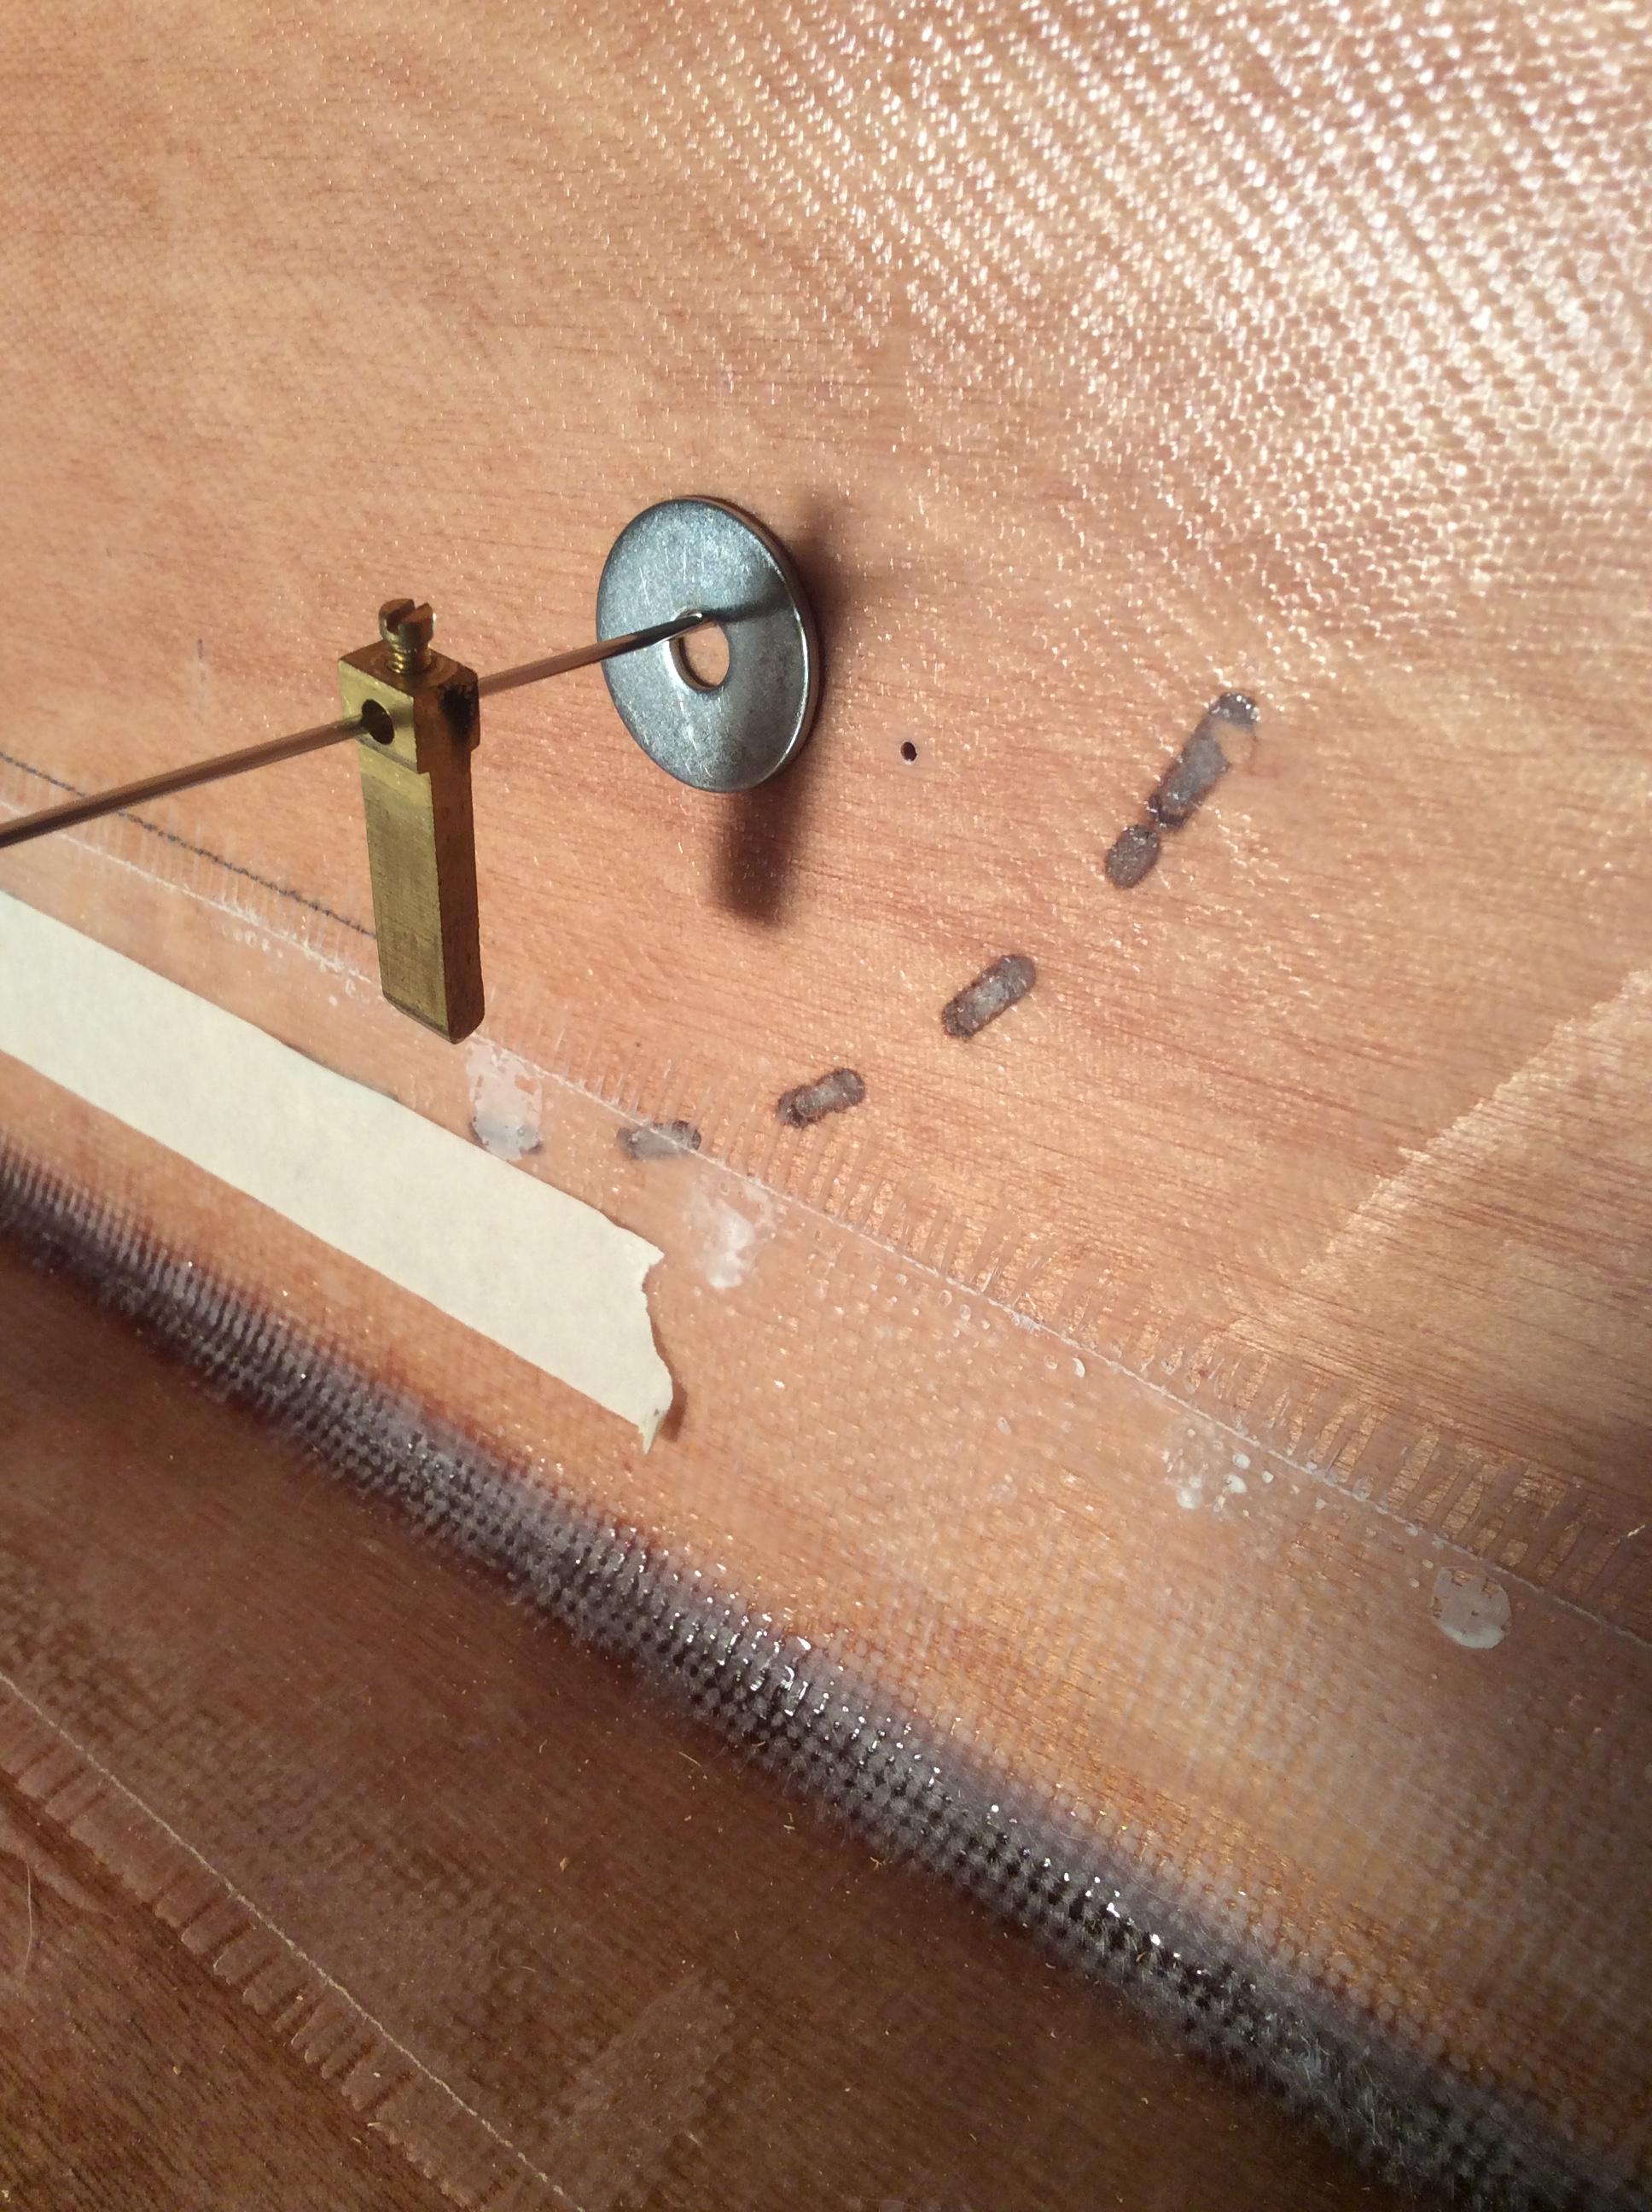
I aligned the door stiffeners on the inside of the caravan using some short steel rods of about 10cm long by 1.5mm diameter. I used one of the alignment holes at the bottom of the stiffener and drilled another through the stiffener and shell toward the front of the stiffener. Because the rods are rigid, unlike the copper wire, they keep the stiffener aligned correctly to allow the stiffener to be glued accurately in place.
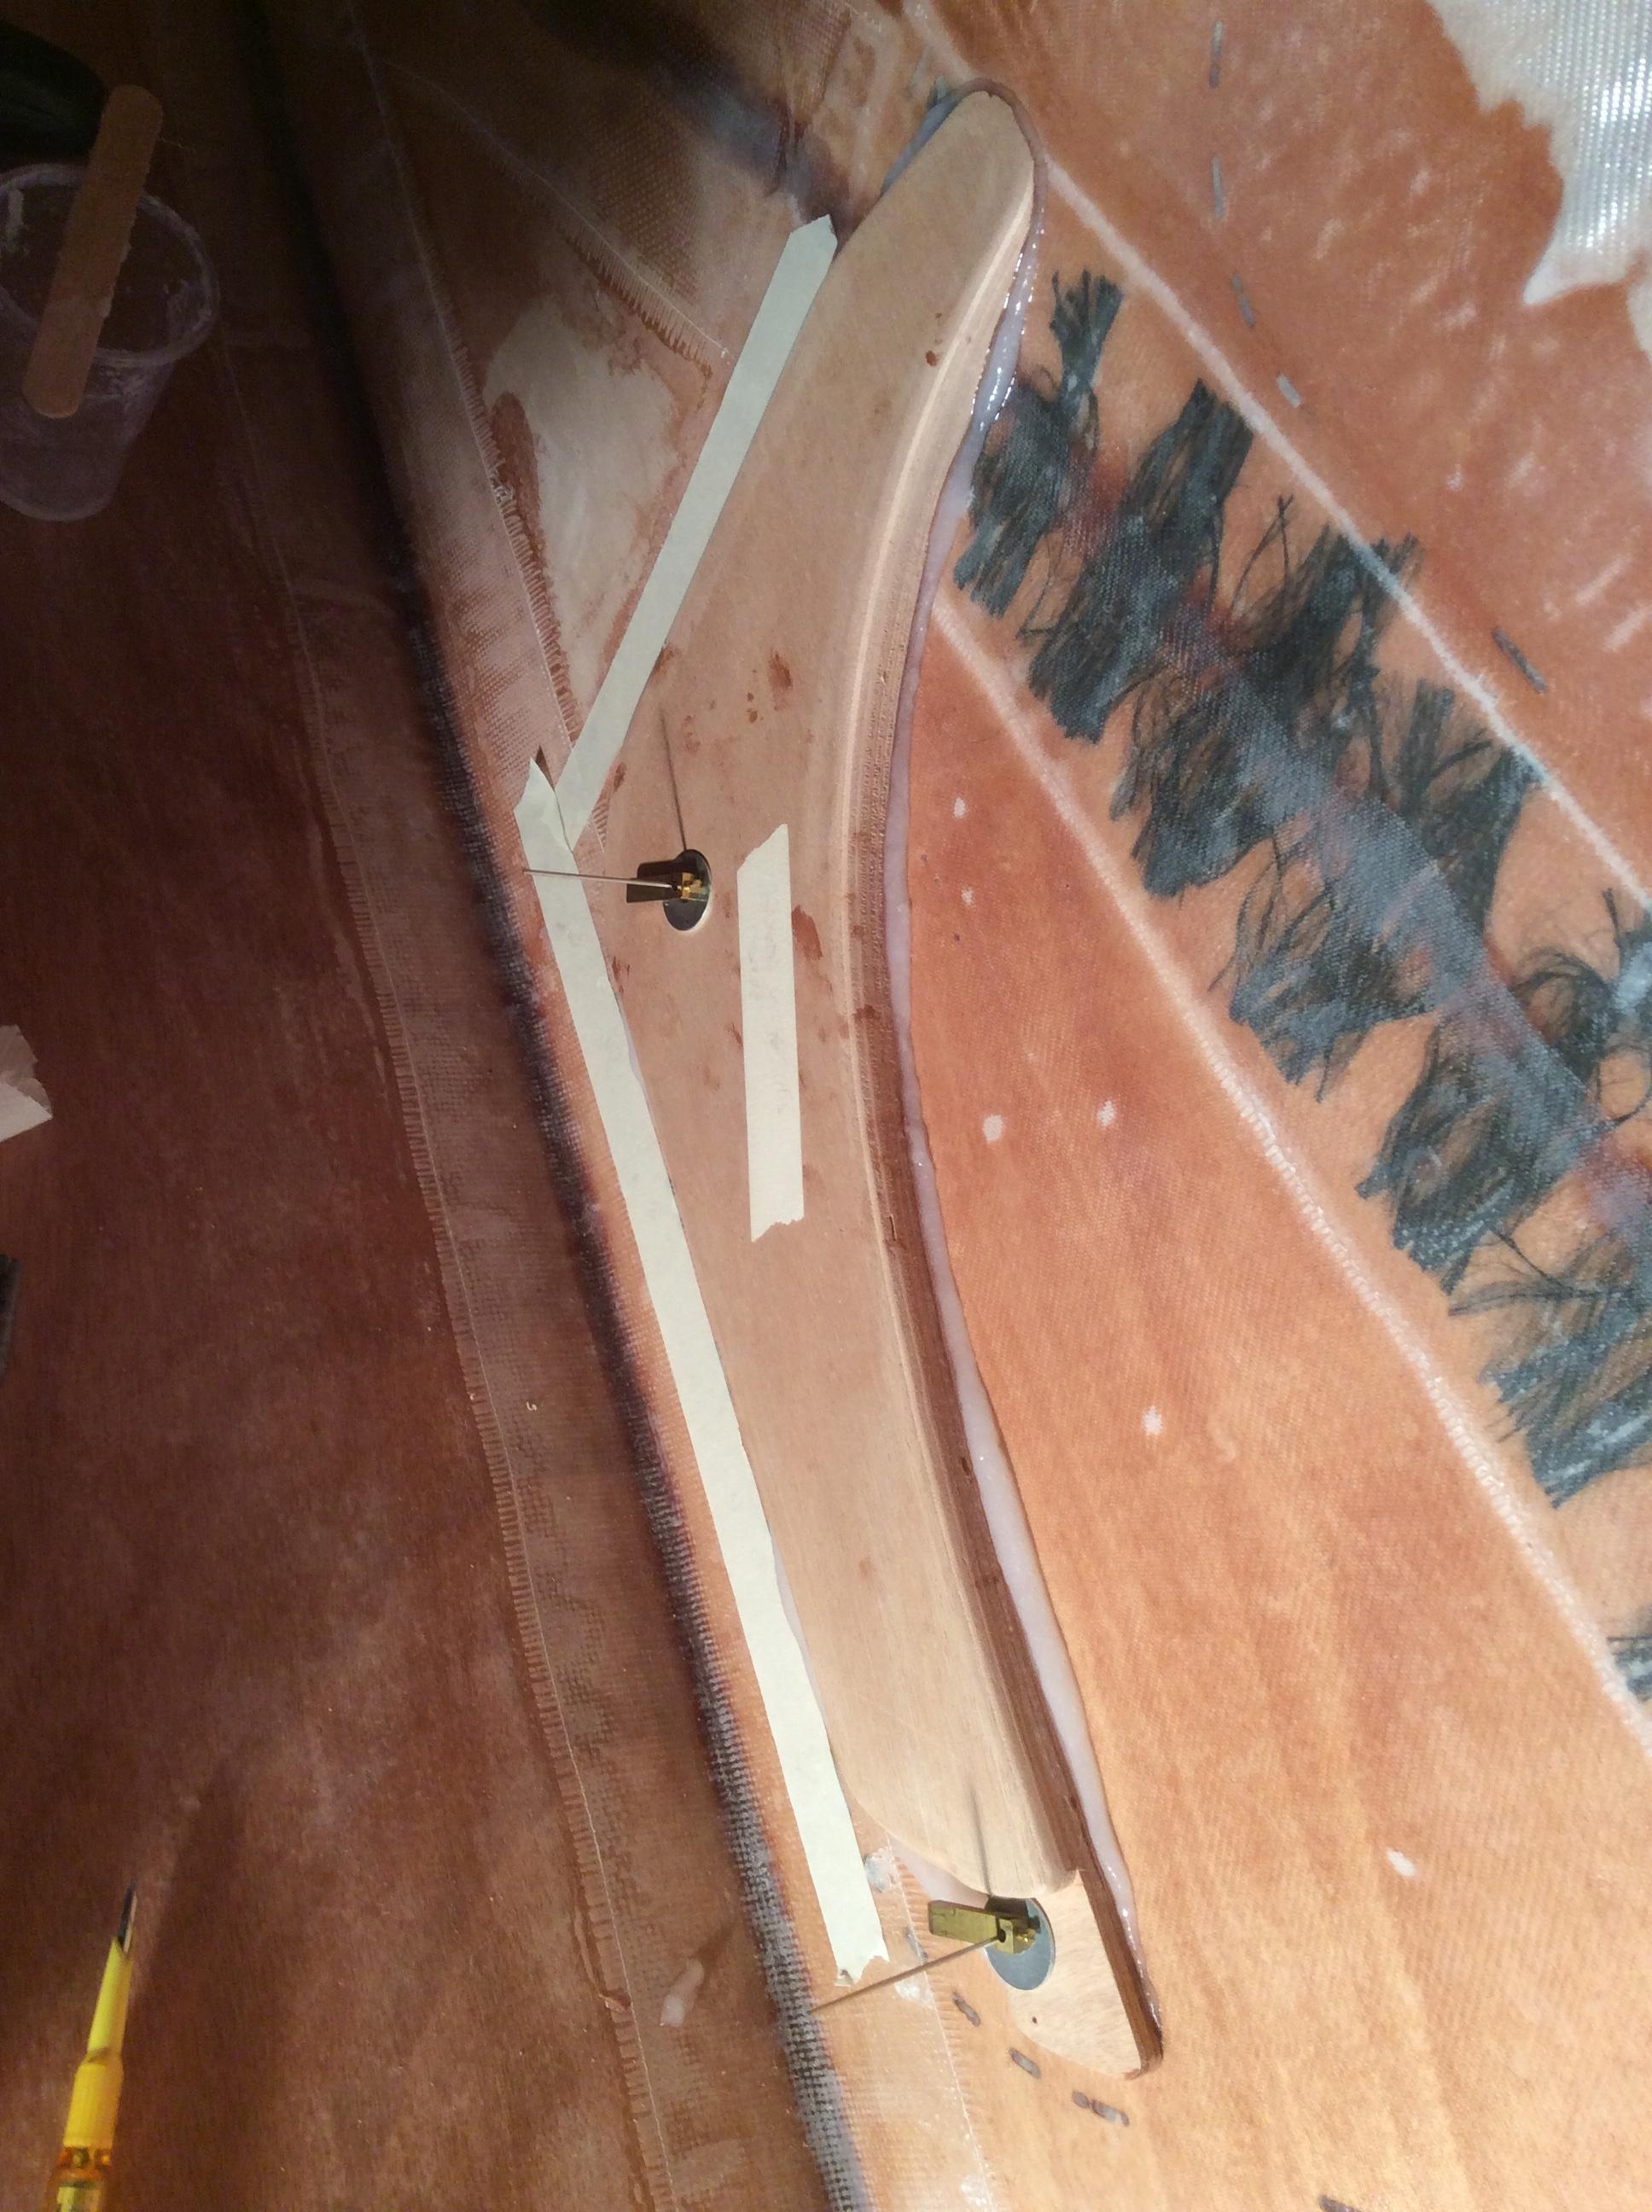
I used part of a (UK) mains plug which has a grub screw that holds the rod tightly. With one of these on the outside of the camper the other one on the inside can be used to pull against the rod, and with glue on the stiffener, it can be braced against the shell and the second gripper slid up against the stiffener to firmly hold the stiffener in place.
I left the ‘clamps’ and rods in place until the glue cured. To get the rods out I heated them with a blow torch until the epoxy softened and the rods could be pulled out. Take care when heating the rods to avoid scorching the wood, like I did! It is safer to heat the rod from the inside just in case. The hot rod didn’t scorch the wood it was me pointing the flame towards the wood that was the problem – I only did it once!
Clean up the oozing glue before it sets of course.
Hope this helps.
Andrew
September 2, 2019 at 1:41 pm #2739tjmulv
ParticipantHi,
I just finished my camper and we’re planning the maiden voyage for next weekend. I’ve gotten so much help from this forum I feel obligated to throw my two cents in.
So here goes:
I also put a layer of fiberglass on the inside, and my doors fit very well even though I didn’t install the stiffener before cutting them out. I was a little worried about the door sills not fitting well because of the extra thickness, but it wasn’t a problem in the end.
Based on info gathered from this forum, I filled in the rebate on the stiffener with a piece of scrap plywood rather than use washers. If you look at the picture in the manual, you will see there is no rebate on their stiffener.
Even though my doors didn’t bow out like some people have described, I still had to put in a lot hours to get them to hang right. Some of the things I did were:
– replaced 7/16 inch thick foam gaskets with 5/16 foam gaskets pretty much everywhere. It remains to be seen if that will keep the water out, but I think it will work just fine. The doors and the galley hatch fit much better and look better too. It definitely keeps the water out standing still, but I haven’t tested it going 70 mph on the Interstate yet.
– repositioned the fairleads to line up better
– did not cut the steel rods to the manual specs nor even the technical bulletin specs, which was supposed to correct the manual. Somebody pointed out on one of these threads that both were incorrect and gave specs that worked for me. Here’s the quote from Eric, “NO!!! 13 3/8″ is too short. They should be cut to 13 3/4″ and19 1/2″. Of this I am ABSOLUTELY SURE. If you cut them to 13 3/8″, you WILL be asking CLC to send two more.. My kit, hardware and build are exactly like everybody else’s. The ideal length is as long as you can get them without interfering with the door frame in the open position.” As you can see, he’s quite emphatic, and it worked for me.
– My hinges were a little off on one side so I used nylon spacers/washers in the hinges on one side to lift the door up a little.
– played with the cam on the door hardware to position the steel rods to line up with the fairleads
I cut the opening for the ventilator fan on the roof a bit smaller (at least a 1/4″ all around) than what is suggested by CLC’s guide holes, then sanded off the extra wood later. It’s not so much that the opening is the wrong size, the problem is that the hatch bezel doesn’t fit over the opening until weights are put on it to cause it to spread out over the opening. Having a little extra wood there makes it easier to position the hatch bezel before you put the weights on top (top of page 184).
Hope this helps someone out. Can’t stress enough about reading through the forum before starting a new task. Not all of the advice is great or will work for everyone, but it will open your eyes to potential problems on the horizon.
Tom
June 28, 2020 at 11:27 am #3097Danita
ParticipantI followed the advice to add the door stiffeners before cutting the doors. It is a pain to get in there and line everything up and sand the angle and so forth but the doors now fit perfectly with no spring out.
June 28, 2020 at 12:06 pm #3098ParticipantWe wanted a different color for the camper so stained it using the Behlen Solar Lux Dye stains. I have used these before for wood working. If you want a part of the camper stained it MUST be stained before you get epoxy anywhere near it. We did all of our staining at once and got 95% of everything looking good.
1. Get the color you want correct first. The intensity of the stain can be controlled by thinning with alcohol. Do a number of tests on the bottom of something, get the color you want then write down the dilution recipe that you used, 5 stain to 1 alcohol or whatever. We used two quarts of stain diluted with two quarts of alcohol to do the entire kit.
2.To get the stain even have person 1, using an old rag, flood the surface to be stained with alcohol, it should be wet almost to running off the surface. Then person 2 comes along with the stain and again uses a lot of stain, the surface may have some small puddles. Then have person 1 wipe down the surface with the rag used in step one. When they are done wiping the surface will look wet but have no standing puddles. Practice on the bottom side of the camper. This is a quick process, don’t let things dry without the final wiping.
3. Relax and breath deeply as the stain drys, it will look blotchy and faded and not what you were hoping for, the stain needs a bit of epoxy or finish to see the final color.
4. Once you are happy with the color do the entire camper. As you work, stain will go everywhere including thru all the wire holes from the outside to the inside. If you are lining the inside with the foam headliner this will be covered.
5. As you build the camper you will accidentally sand thru the stain layer, have a bit of stain on hand to fix those spots. We had problems with the edges on the hinges and on the shelf edge, we sanded thru the stain but the epoxy had penetrated deeper which meant that re-staining wouldn’t work.
Staining added a layer of complexity to the project. If you are building piece of furniture you may be frustrated, we are very happy with our camper.
3.
August 27, 2021 at 5:56 pm #3837madebymike60
ParticipantI did the door stiffeners before cutting out the doors also. Like Danita says, it’s a pain to crawl in and out but if it saves spending lots of time (or frustration) trying to realign the doors later, it’ll be worth it. I put wire through the two pre-cut holes and also I drilled an extra hole through each stiffener and door toward the front end and inserted wire to help hold them in place while arranging clamps. Here is my set up.
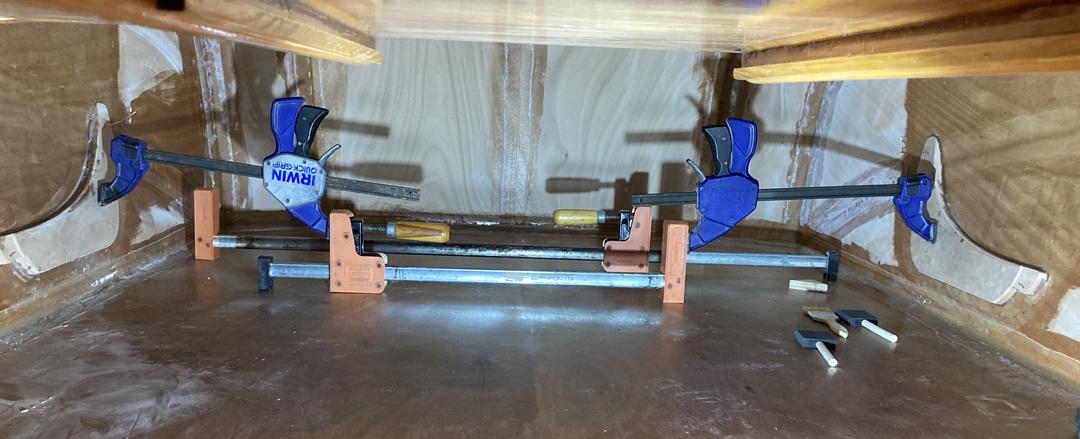
The stiffeners were flush nearly all the way around so they didn’t require much clamping pressure. If yours don’t fit well, one clamp on each stiffener won’t be enough. Follow the book or figure out something else. It worked for me but it wasn’t easy arranging three clamps in a straight line like you see here since they tend to go sideways as you add more pressure. Then again, I didn’t want too much pressure because I thought it might deform the camper shell and I’m trying to have everything keep the shape it happens to have right now as much as possible.
-
This reply was modified 6 years, 9 months ago by
-
AuthorPosts
- You must be logged in to reply to this topic.