Welcome to TeardropForum.com › Forums › Teardrop Builders’ Forum › Sanding the edges of glass tape and installing the bulkhead
- This topic has 5 replies, 4 voices, and was last updated 7 years ago by
restonthewind.
-
AuthorPosts
-
July 25, 2017 at 12:44 pm #1088
restonthewind
ParticipantIf memory serves, the manual mentions sanding the edges of glass tape after epoxy cures in two places, after the first application of tape to the puzzle joints between sections of panel 1 and after the first application of glass to the shell in the two step method. These edges are on the exterior and must be covered with fiberglass cloth after curing.
I also lightly sanded the edges of tape on the interior after installing panels 1 and 2, though not as thoroughly as recommended for the exterior in the two step method. After installing panels 3 and 4, I only sanded the most accessible tape and was even less thorough. The tape between 2 and 3 is difficult to reach, and my back still aches from the glassing. This tape will be covered with insulation anyway, so smoothing the edges seems less important.
I’m now installing the bulkhead and finally understand the notches at two corners and the puzzle joints (on the right below). These notches seem to accommodate the tape; however, the tape is considerably wider than a notch, so a notch does little good without removing material somewhere.
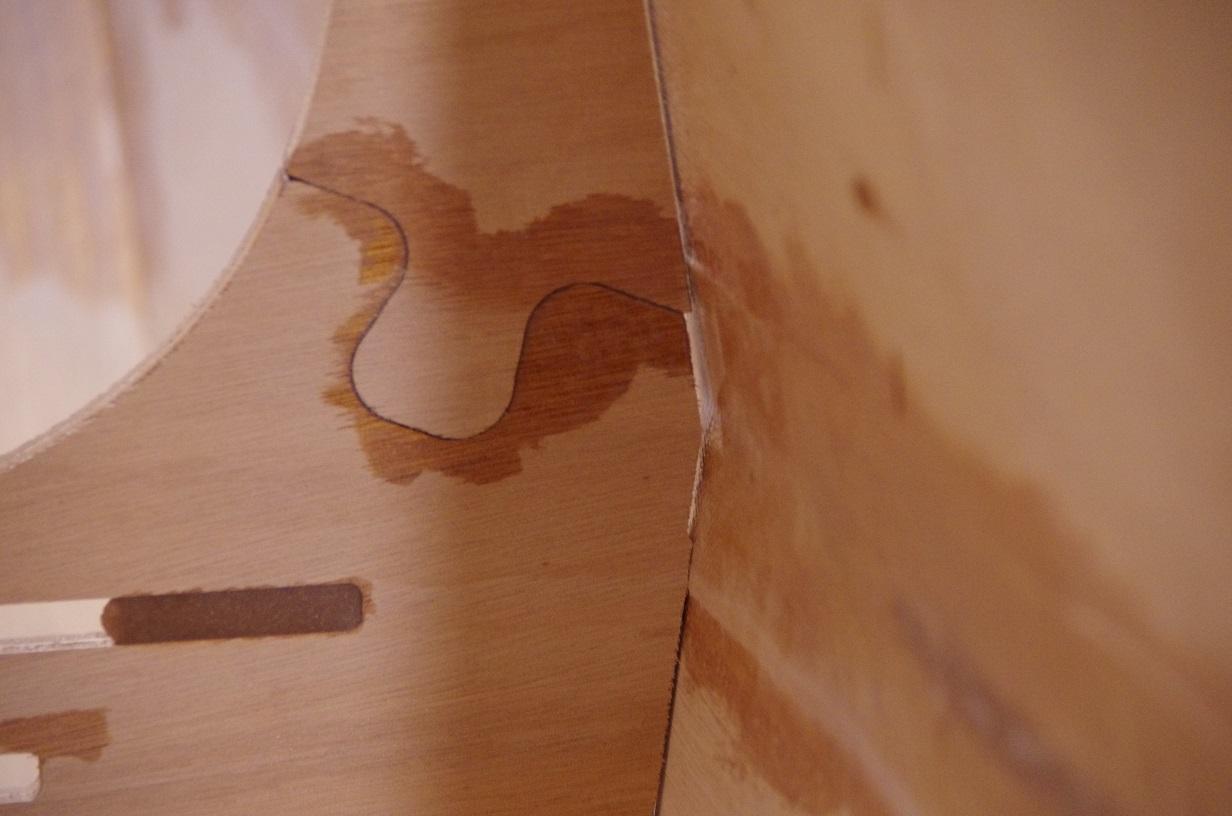
Should I sand away enough of the tape so that the remaining tape fits into the notch, or should I increase the size of the notch or am I missing something? If I do nothing, the bulkhead doesn’t fit tightly against the shell near the tape. The manual doesn’t mention this problem.
I’ve filled the notch for the galley flat (lower left in the picture above) with thickened epoxy, because I’ll eventually cut away the part of the bulkhead to the left. I’m building the camper without the galley. The hatch will open to create more interior space, with walls of tent material, like a popup up camper.
-
This topic was modified 7 years ago by
July 25, 2017 at 2:15 pm #1090mpilone
ParticipantI’m not an expert at all but I didn’t even notice those notches near the puzzle joint when I put my bulkhead in so I’m guessing mine wasn’t completely flush with the tape/shell. Given that you’ll be gluing the bulkhead to the shell with thickened epoxy my opinion is that the notch doesn’t really matter (gap or not) other than to help you line up and make sure the bulkhead is seated properly.
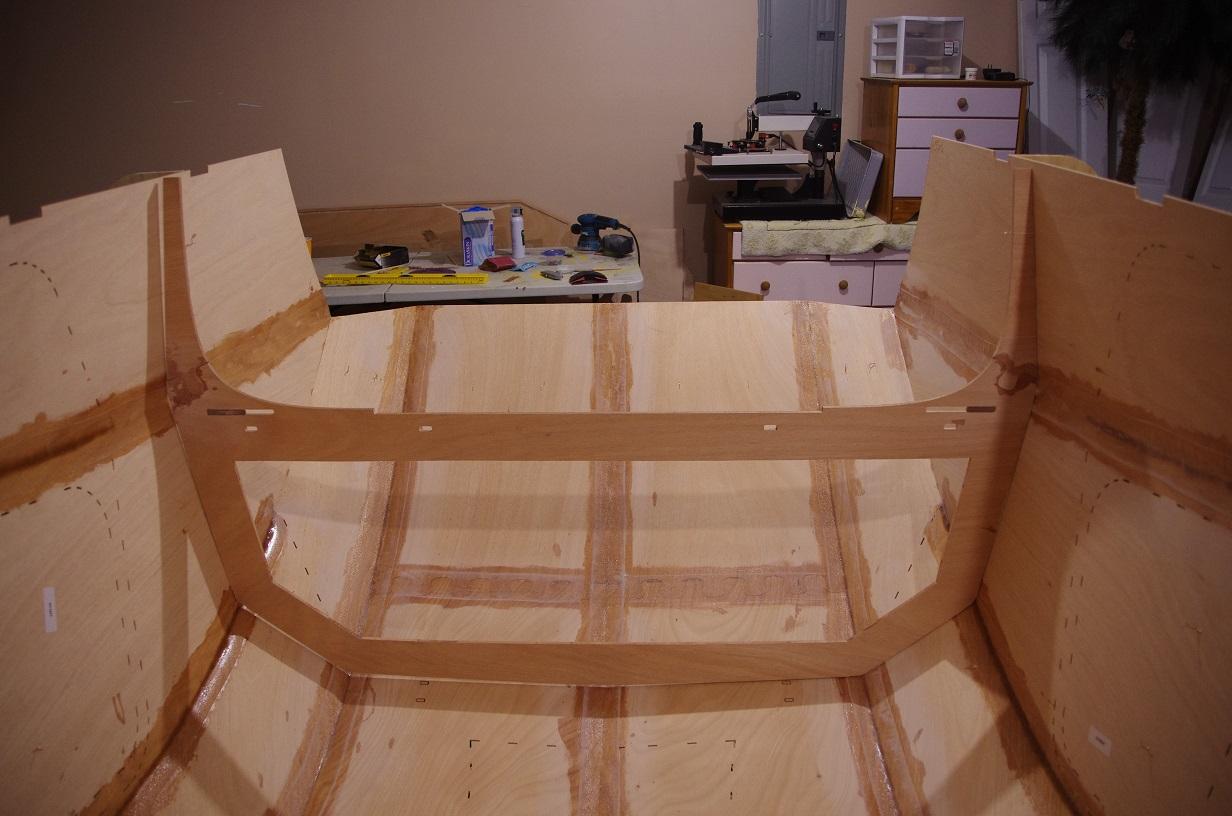
One thing to look at, which I didn’t realize until later in the build, is that the floor panels have two notches in them on the outside edge to receive the feet of the bulkhead (the two small ends now sticking up in the air). You’ll want to make sure you seat the bulkhead so those feet are even on both sides and aligned with the stitch holes. You only have about an 1/8th of inch forward and back on those feet.
From your second picture it looks like the foot on the left is higher than the foot on the right. You may want to sand the notch, or the entire left edge, to get that to sit evenly across the two sides. The feet won’t be even with the bottom of the shell (the part now in the air) but should be set back evenly to allow the floor to drop into the notches on the shell.
-mike
July 25, 2017 at 3:36 pm #1092friz
ParticipantI had it in mine also. I just assumed assumed it was a design element that missed the mark and was too insignificant to go to the trouble to remove. Thickened epoxy hides all.
July 25, 2017 at 5:53 pm #1094ParticipantI hadn’t stitched the bulkhead when I took the first picture. Now that I have, the legs look even, but I’m still crossing my fingers. An eighth of an inch isn’t much room for error.

The fillets would have covered any gap, but I made the notches large enough for the tape with a rasp and sanding block, and the bulkhead hugs the shell nicely. The rasp chewed up the edge of the plywood a little, but the fillet will cover that too. If had needed a cleaner cut, I’d have used the sanding block with coarse paper exclusively.
 July 25, 2017 at 6:32 pm #1095
rovineye
ParticipantDid you cut out your bulkhead for bunk beds or to grab a snack from the galley at night?
July 26, 2017 at 9:04 am #1096ParticipantI’m omitting the galley in favor of more interior space. I’ll install the galley flat but eventually remove most of it. After glassing the shell and cutting the hatch, I’ll extend the cut along the side of the bulkhead all the way to the leg, leaving only an arch. I’ll cut the flat similarly, leaving a ledge about three inches wide (same width as the border of the hole in the bulkhead). With the hatch closed, the interior will be a single open space with no galley. With the hatch open, walls of tent material attached to the hatch will create a much larger open space, like a pop-up camper.
http://teardropforum.com/forums/topic/omitting-the-galley-build-log/
I may also make a table top from the part of the galley flat I cut out. This table top will have a folding leg or two and will attach to the ledge with lift-off hinges. The tent material will be removable, so I’ll have either a pop-up camper or a galley (not separated from the interior) when opening the hatch.
-
This reply was modified 7 years ago by
-
This topic was modified 7 years ago by
-
AuthorPosts
- You must be logged in to reply to this topic.