Welcome to TeardropForum.com › Forums › Teardrop Builders’ Forum › Rear panels alignment problem.
- This topic has 24 replies, 7 voices, and was last updated 4 years, 11 months ago by
Jaus10.
-
AuthorPosts
-
July 4, 2018 at 6:06 am #1933
greenninja51502
Participant<p style=”text-align: left;”>I’m having issues with the 2 rear panels. The angle where the side panels are joined with fiberglass cloth is too severe so nothing lines up the way it should. I’m thinking the solution would be to get out the saw and cut the panels along the glassed seam to allow them to flatten out a bit, fillet the underside of the galley flat to the panels and reglass them. Any advice would be appreciated.
 </p>July 4, 2018 at 6:07 am #1934
greenninja51502
Participant July 4, 2018 at 6:10 am #1935
greenninja51502
ParticipantWell, I guess photobucket doesnt work here? Or maybe the size is wrong or something else. I need to figure out how to post pics here. I dont remember having this trouble at past forums but that was on my computer which had a hard drive failure…
July 4, 2018 at 8:19 am #1936friz
ParticipantI remember having issues in the rear corners also. I had one side that was too sharp in tha angle but was able to force it back in shape when I dropped the floor in. Another thing you can try is applying a little heat to your seam to relax the resin a little. Heat will make it temporarily pliable again. I hope this helps. Dont get discouraged. It will all come together eventually. The cool thing about this process is that it is very forgiving. Yes, you can always get the saw out and do over.
Cheers
July 4, 2018 at 8:37 am #1937friz
ParticipantAround post 69 is a photo dump that may help you. This is my build thread in TNTTT.
July 4, 2018 at 12:17 pm #1938greenninja51502
Participant-
This reply was modified 6 years ago by
greenninja51502.
July 4, 2018 at 12:53 pm #1940friz
ParticipantI think this was an area that I drilled some extra holes to pull the parts together.
July 4, 2018 at 1:06 pm #1941greenninja51502
ParticipantI tried that but the angle between the panels it too severe. Pulling it together throws everything else out of alignment. It looks like the angle at the far rear should have been almost zero but since it had no support from the mold it took the same angle as the rest of the panel. I’m trying to figure out how to post pics. Very frustrated right about now….
July 4, 2018 at 1:38 pm #1942abrightwell
ParticipantUse Google Photos to post pics if you can like you did in your previous thread. I’ve found using their ‘link’ share option to be the most reliable for my purposes.
As for the back quarter panels. I also had trouble with them. I felt like the hymnal wasn’t as detailed on this topic as it should have been. As such I made mistakes that to this day drive me nuts. I was able to ‘cover it up’ but it still drives me crazy to think about. So, I’d recommend contacting CLC to see if they have anything to offer. They’ve always been pretty responsive when I’ve called them.
-Adam
July 4, 2018 at 2:00 pm #1943greenninja51502
ParticipantI totally agree about your thoughts on the instructions about this section. Here is a link to google photos. The left side is worse than the right. What I can’t determine is if it is something that I should correct now, when it would be a lot easier, or later or if I’m just being too anal about it. From what you have stated I’m leaning towards fixing it now.
July 4, 2018 at 2:08 pm #1944greenninja51502
ParticipantAdam, could you elaborate on the mistakes? This would be a great topic that should be a sticky. Posting info about mistakes made in instruction and building techniques is very useful when learned the easy way instead of the hard way. Perhaps there is already a post like that that I haven’t seen?
July 4, 2018 at 5:13 pm #1945friz
ParticipantHere is where mine ended up. Still has shape to it.
 July 5, 2018 at 9:40 am #1946
abrightwell
ParticipantSure, I’ll do what I can.
Here are some pictures. I didn’t take many of the mistake as I wasn’t too proud of it. 😉
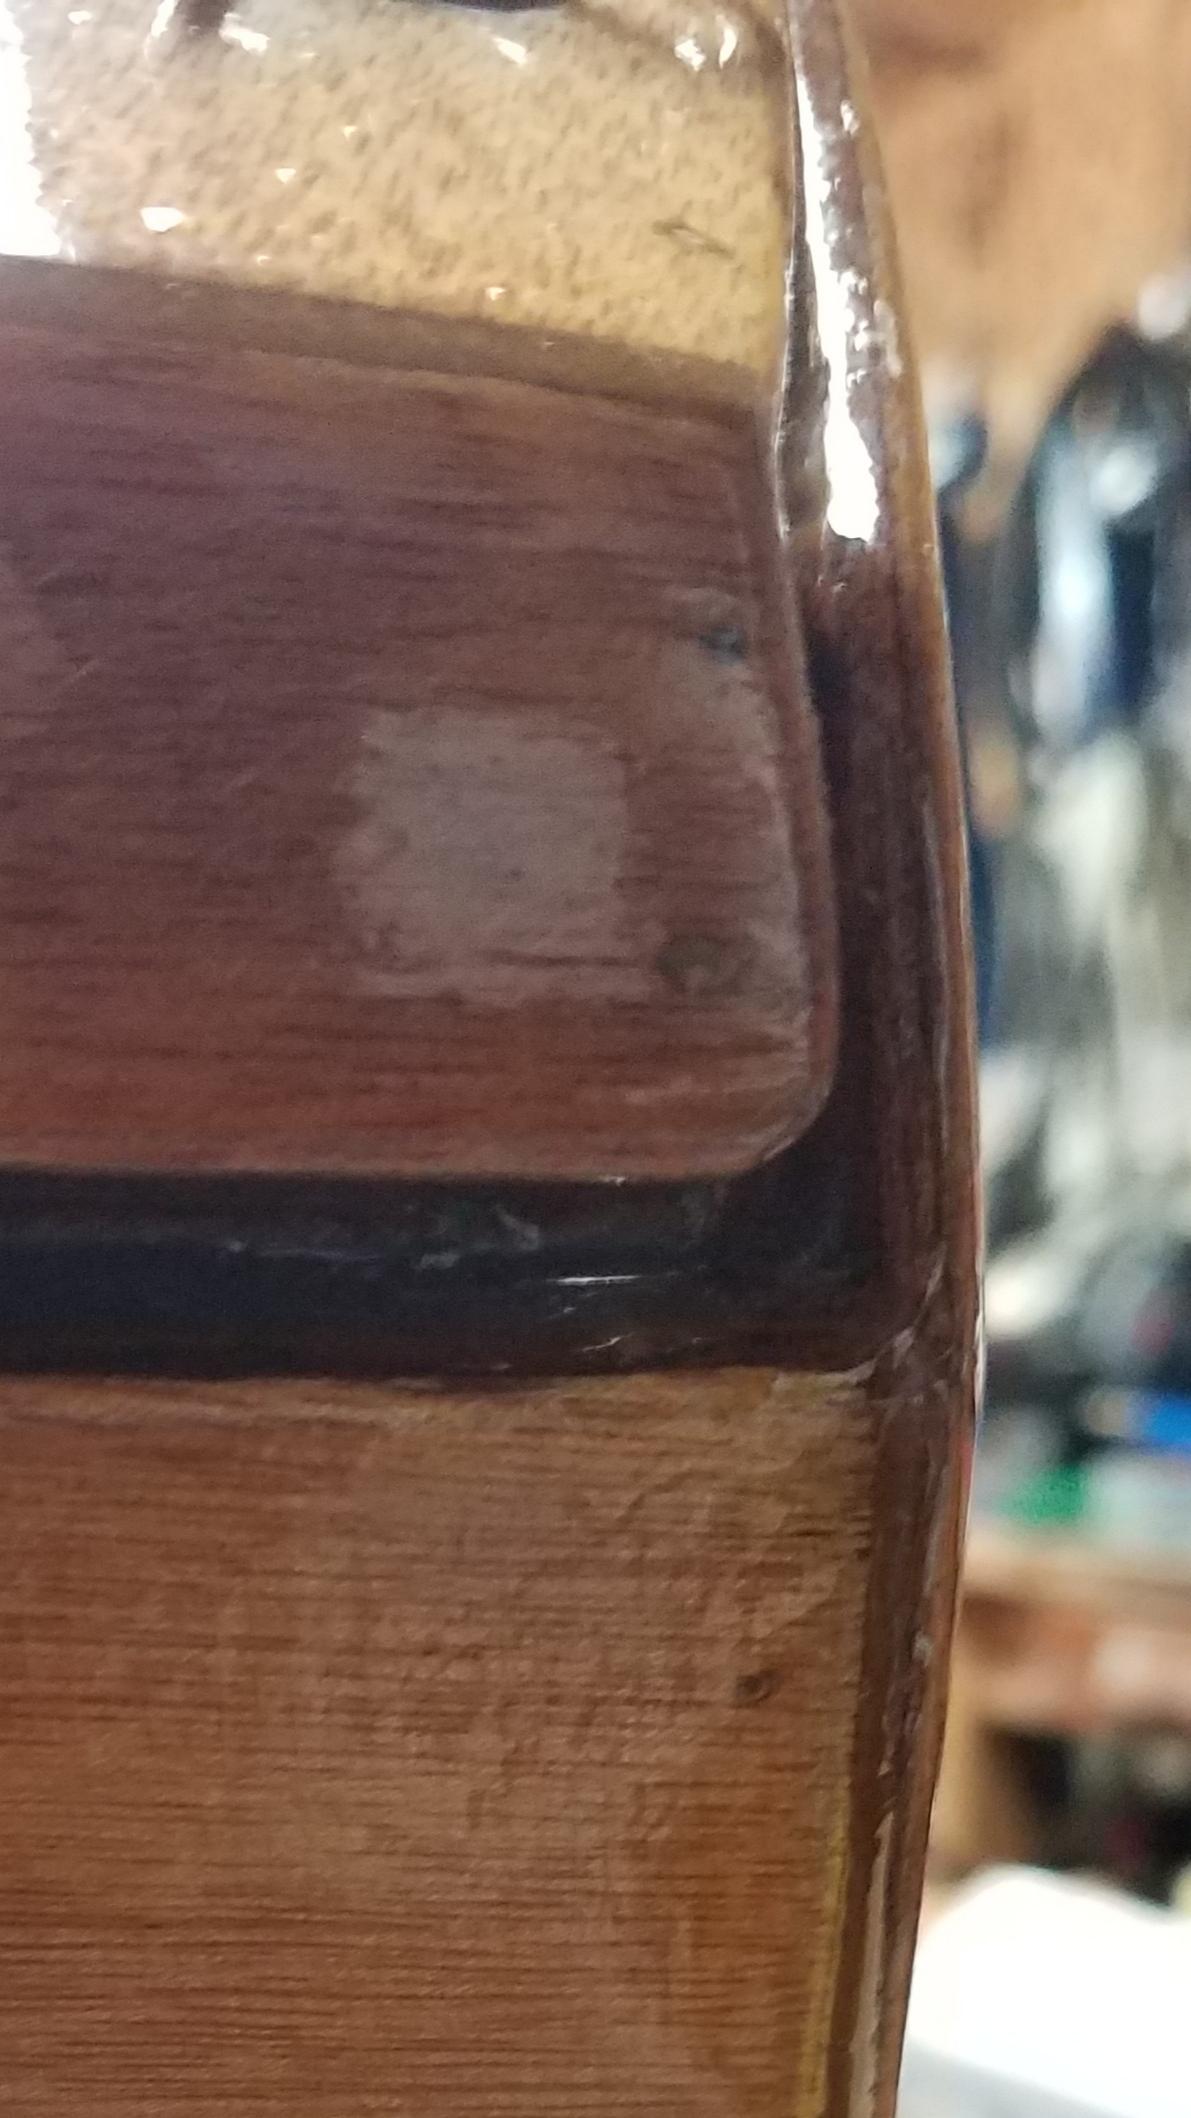
Ok, so, here’s what happened. If you look in the first and second picture, where the quarter panel meets the side panels. You’ll notice a significant space (1/4″ to 3/8″) where the side panels extend past the quarter panels. The issue I was having is that when I was trying to line up the inside edges of the panels, like every other joint had been done, there was a significant gap between the galley flat and the quarter panel. As well, the quarter panel was not able to ‘touch’ the galley flat in order to be tacked down. I looked around for pictures in the manual for whether it was correct or not, but couldn’t find anything and it just seemed like too large of a gap for the fillet. I knew it was wrong at the time but figured maybe something was a just a little off elsewhere in the build and that I could just adjust as necessary with sanding, planing, etc. So, I got it as close as I could and epoxied it in place. Only after the epoxy cured did I find a picture buried deep in the manual in I think the ‘extras’ sections that answered my questions. But at that point it was too late.
I considered simply cutting off the excess, but I was concerned about messing something else up. So, to ‘fix’ it… I used fairing compound (the green stuff) to build up the space between the overhang of the side panel and the quarter panel. I beat myself up over it for about two weeks, but had originally considered painting the transom, quarter and #4 panels anyway, so I was forced in to it.
Now that it is painted you can’t tell there was ever a mistake there… but I certainly don’t recommend anyone follow my lead on this one. I just tried to make the best of a dumb mistake. 🙂
FWIW, I’ve struggled the entire build with the ‘imperfections’ I’ve introduced. I’m very detail oriented and a little obsessive about these kinds of things. But I’ve learned to let some of them go and to just accept them as learning experiences. As I’ve noticed through feedback from friends, family and strangers that I’m the ONLY one that will ever notice about 99% of them. Though, I’d be lying if I said I didn’t have a ‘list’ of things to come back to. 😉
July 5, 2018 at 11:07 am #1947ArtisticAdam
ParticipantDon’t stress too much I too had some difficulties with this area of the build as well. So many pieces all coming together at odd angles.
I’m not entirely sure what step in the build you are on but I assume its the fitting of the quarter panels.
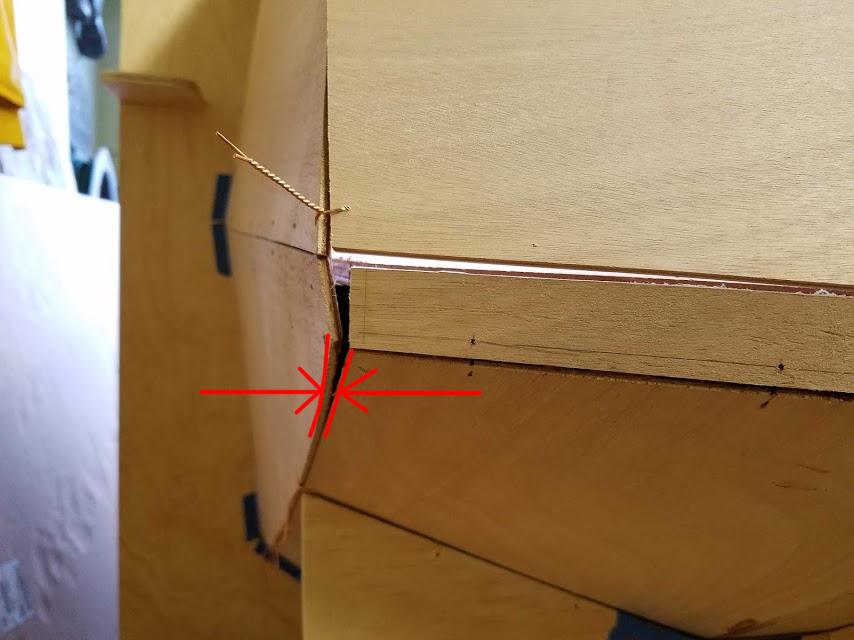
First thing I would recommend is to address this gap seen in your picture below. Was this seam already glassed because it looks like epoxy on that edge? If so it may not bee too much of an issue, you will be cutting along this seam to create the galley hatch. If it wasn’t glassed you can add a stitch back in to tighten up that gap for now.

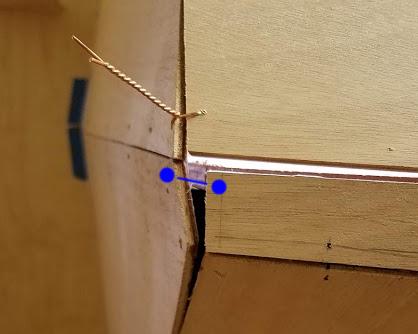
Next add an additional stitch point seen here in blue

You can remove both of these stitches after you have the quarter panels secured to the galley flat.
Now that those gaps are tightened up you can secure the galley flat.
Finally once the galley flat is in place and you are on step/page 95 of the manual you can do what I did that worked well to ensure proper alignment. When filleting the quarter panels in place I had temporarily stitched the quarter panels AND transom panel together. Then once the epoxy set up on the quarter panels i clipped the stitches and removed the transom knowing it would fit perfectly later on down the road.
Hope this helps.
July 6, 2018 at 5:23 am #1949greenninja51502
Participant<p style=”text-align: left;”>Great idea about temporarily stitching the transom. That really helped to figure out exactly what affect pushing the side panels in tight to the galley flat would have on everything else. I drilled a hole in the side panel, screwed a length of 2×4 to the galley flat and pulled the left side panel, 3&4, up tight to the galley flat with a long screw with a large washer on it so it wouldn’t pull through the plywood. Because of the angle between the 2 side panels it pulls the #3 panel under the #2 panel. I guess if I have to later it wouldn’t be too hard to take a little off the hatch lid sides if needed. Should the sides of the hatch lid overhang the side panels or vice-versa. I tried to find detail pictures in the manual but didnt see any. Either way I think it should be fixable with the plane or rasp. I still think the angle is messing things up more than it should and am wondering if heating it up will really let it straighten out enough or if I should just get out the saw and cut between the #2&3 panels about 6-8 inches to relieve the angle and reglass it after I get everything lined up. Here are some more pics of where I’m at.</p>
https://photos.app.goo.gl/dCLdm1SCuHE6apXL6https://photos.app.goo.gl/sZWYYcPBbbnHN9gZ7
-
This reply was modified 6 years ago by
-
AuthorPosts
- You must be logged in to reply to this topic.