Welcome to TeardropForum.com › Forums › Teardrop Builders’ Forum › Building the trailer without a galley
- This topic has 27 replies, 8 voices, and was last updated 7 years ago by
Bob D..
-
AuthorPosts
-
May 10, 2017 at 7:11 pm #790
restonthewind
ParticipantHas anyone built this trailer without a galley or with the galley accessible from the interior? Ideally, I’d like to omit the galley altogether, so I wouldn’t install either the galley bulkhead or the flat, and I wouldn’t cut the hatch. I could also install the bulkhead and flat but make the galley space accessible from the interior without the hatch.
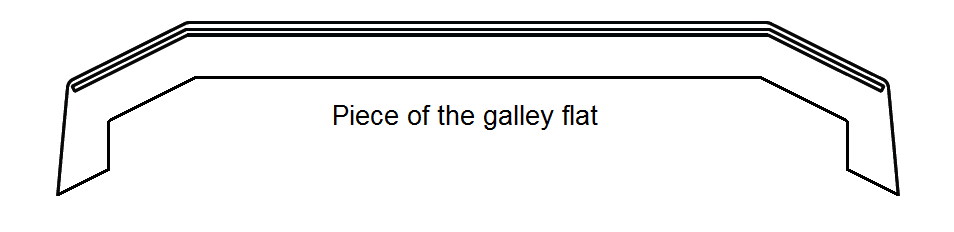
The most radical approach appeals most to me, but it seems risky. I don’t install the bulkhead at all. I cut a small piece from the rear of the galley flat, only to preserve the slots for the lower rear and side panels. I attach this piece to the shell with epoxy before installing the lower panels. The piece cut from the flat looks like this:

or this:
Would this approach affect the structural integrity of the shell? Does the bulkhead help the shell to keep its shape? If so, I could cut a similar piece of the bulkhead and install it in the bulkhead’s place, attached to the top of the shell (the bottom under construction).
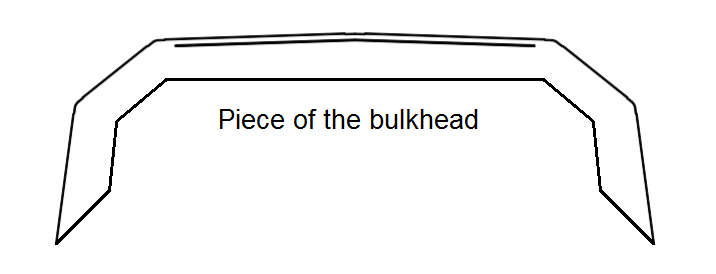
The complete bulkhead extends to the floor of the shell, but its legs presumably bear little load. This piece, if necessary, only supports the shape of the top of the shell. If unnecessary, it’s a bit less work and a bit more room to maneuver.
May 10, 2017 at 7:21 pm #791ParticipantA less radical approach only makes the galley space accessible from the interior. I cut a hole in the bulkhead, and I don’t build the hatch, but the build is unchanged otherwise.

Since the bulkhead supports the flat, a large hole leaving so little wood at the bottom seems risky, but I could install a table leg near the center of the flat screwed to the flat and the floor. I could also cut too, smaller holes and skip the table leg.
This approach seems foolproof (assuming I can build the thing at all), but I prefer removing more of the bulkhead, and I prefer omitting the galley altogether to either of these options. With the unused wood, I could build tables or something.
I ordered a kit today but won’t begin construction until early June. If anyone has built or considered building the trailer with similar modifications, or if you foresee a problem with these modifications, please chime in.
-
This reply was modified 7 years, 2 months ago by
restonthewind.
-
This reply was modified 7 years, 2 months ago by
-
This reply was modified 7 years, 2 months ago by
May 11, 2017 at 12:40 pm #798friz
ParticipantI have considered cutting a portal through to my galley big enough to slide a duffel bag through. For now I plan to have my duffel with my clothes at the foot of the bed.
May 11, 2017 at 4:13 pm #799ParticipantIf this was my plan, I would move the galley floor up 1/2 to 2/3 the height to the ceiling creating a headache rack to put stuff in. I would extend to footwell opening in the bulkhead up to the floor of the galley floor. and cut an opening in bulkhead to allow access to this space.
May 11, 2017 at 5:23 pm #800ParticipantI see what you’re saying, but I have little woodworking experience, and I’m trying to do less. I still need the galley or a piece of it to slot between the top of the shell and the lower rear and side panels.
In such a small space, I don’t want to dedicate space exclusively to any one thing, but I also don’t want to deviate too much from the design. A large shelf accessible from the inside isn’t a bad compromise with the design, and it still supports many more uses than the same shelf accessible only from the outside.
The hatch could be useful even with no galley flat, but it involves a lot of cutting. I’ve also considered building only one door, installing only the window on one side. Omitting the galley flat and bulkhead and hatch and a door seems to cut many hours from the build time. Cutting the shell generally scares me, but I can’t avoid one door, and I may hesitate less when I’ve done it.
May 11, 2017 at 5:57 pm #801ParticipantSanding will eclipse all other tasks. I think the time saved from omitting these items is really minimal in the entire scheme of things. This is a fairly forgiving medium. I have a couple places where my saw did not track perfectly and I fixed with thickened epoxy. I have to look for them to find them.
-
This reply was modified 7 years, 2 months ago by
friz.
May 12, 2017 at 1:53 am #804jctownsley
ParticipantI’m not sure you’d be happy without cutting both doors out. The CNC router pre-cuts portions of the door to make it easier for cutting. If you don’t cut it out, it will be very obvious where the door and window were supposed to be. Even if you fill in the pre-cut gaps with thickened epoxy, they’ll stand out.
May 12, 2017 at 6:13 am #805ParticipantThanks, JC. To omit the hatch, I’ll fill the pre-cut grooves with epoxy and cover with a black stripe. The same approach to a door seems possible, but you’re right. The second door also adds cross ventilation and a safety margin in case of fire. I’ll build both doors, but I’m still debating the hatch. My primary goal is more interior space.
What do you think of omitting the galley flat and bulkhead entirely, as suggested in the first post? Does the bulkhead bear weight on top of the shell, like a racked boat? Would the shell hold its shape without the bulkhead? With no galley or bulkhead (or the minimal pieces above), a hatch makes the camper useful for hauling things.
-
This reply was modified 7 years, 2 months ago by
May 12, 2017 at 12:08 pm #808Participanta little cellofill in the mix with the wood flour will lighten up the color if you need to make the routed lines less obvious.
May 12, 2017 at 1:07 pm #809ParticipantYou’ve persuaded me to worry less about cutting the shell, so I’ll build both doors and the galley hatch. I’ll install the piece of the bulkhead as illustrated above, extending down to the junction between the two side panels. Since it won’t support the flat, the legs of the bulkhead presumably aren’t needed, but I still think the bulkhead is needed to support to shape of the shell. I’d like to be persuaded otherwise. I also assume that the legs of the bulkhead don’t support loads on the roof of the shell.
I’ll cut the galley flat as in the first illustration in the first post, two or three inches from the end, and I’ll attach this part to the shell as designed. I’ll finish the rest of the flat and build supports for it on the sides of the shell. With the remaining flat sitting on these supports, the full galley flat is available from either side, but I can remove it if I prefer more interior space. I may cut the remainder of the flat in half and install supports for both halves, so I can have a shorter flat if I prefer. The shorter pieces will also be easier to maneuver.
-
This reply was modified 7 years, 2 months ago by
May 12, 2017 at 1:51 pm #811Bill
Participant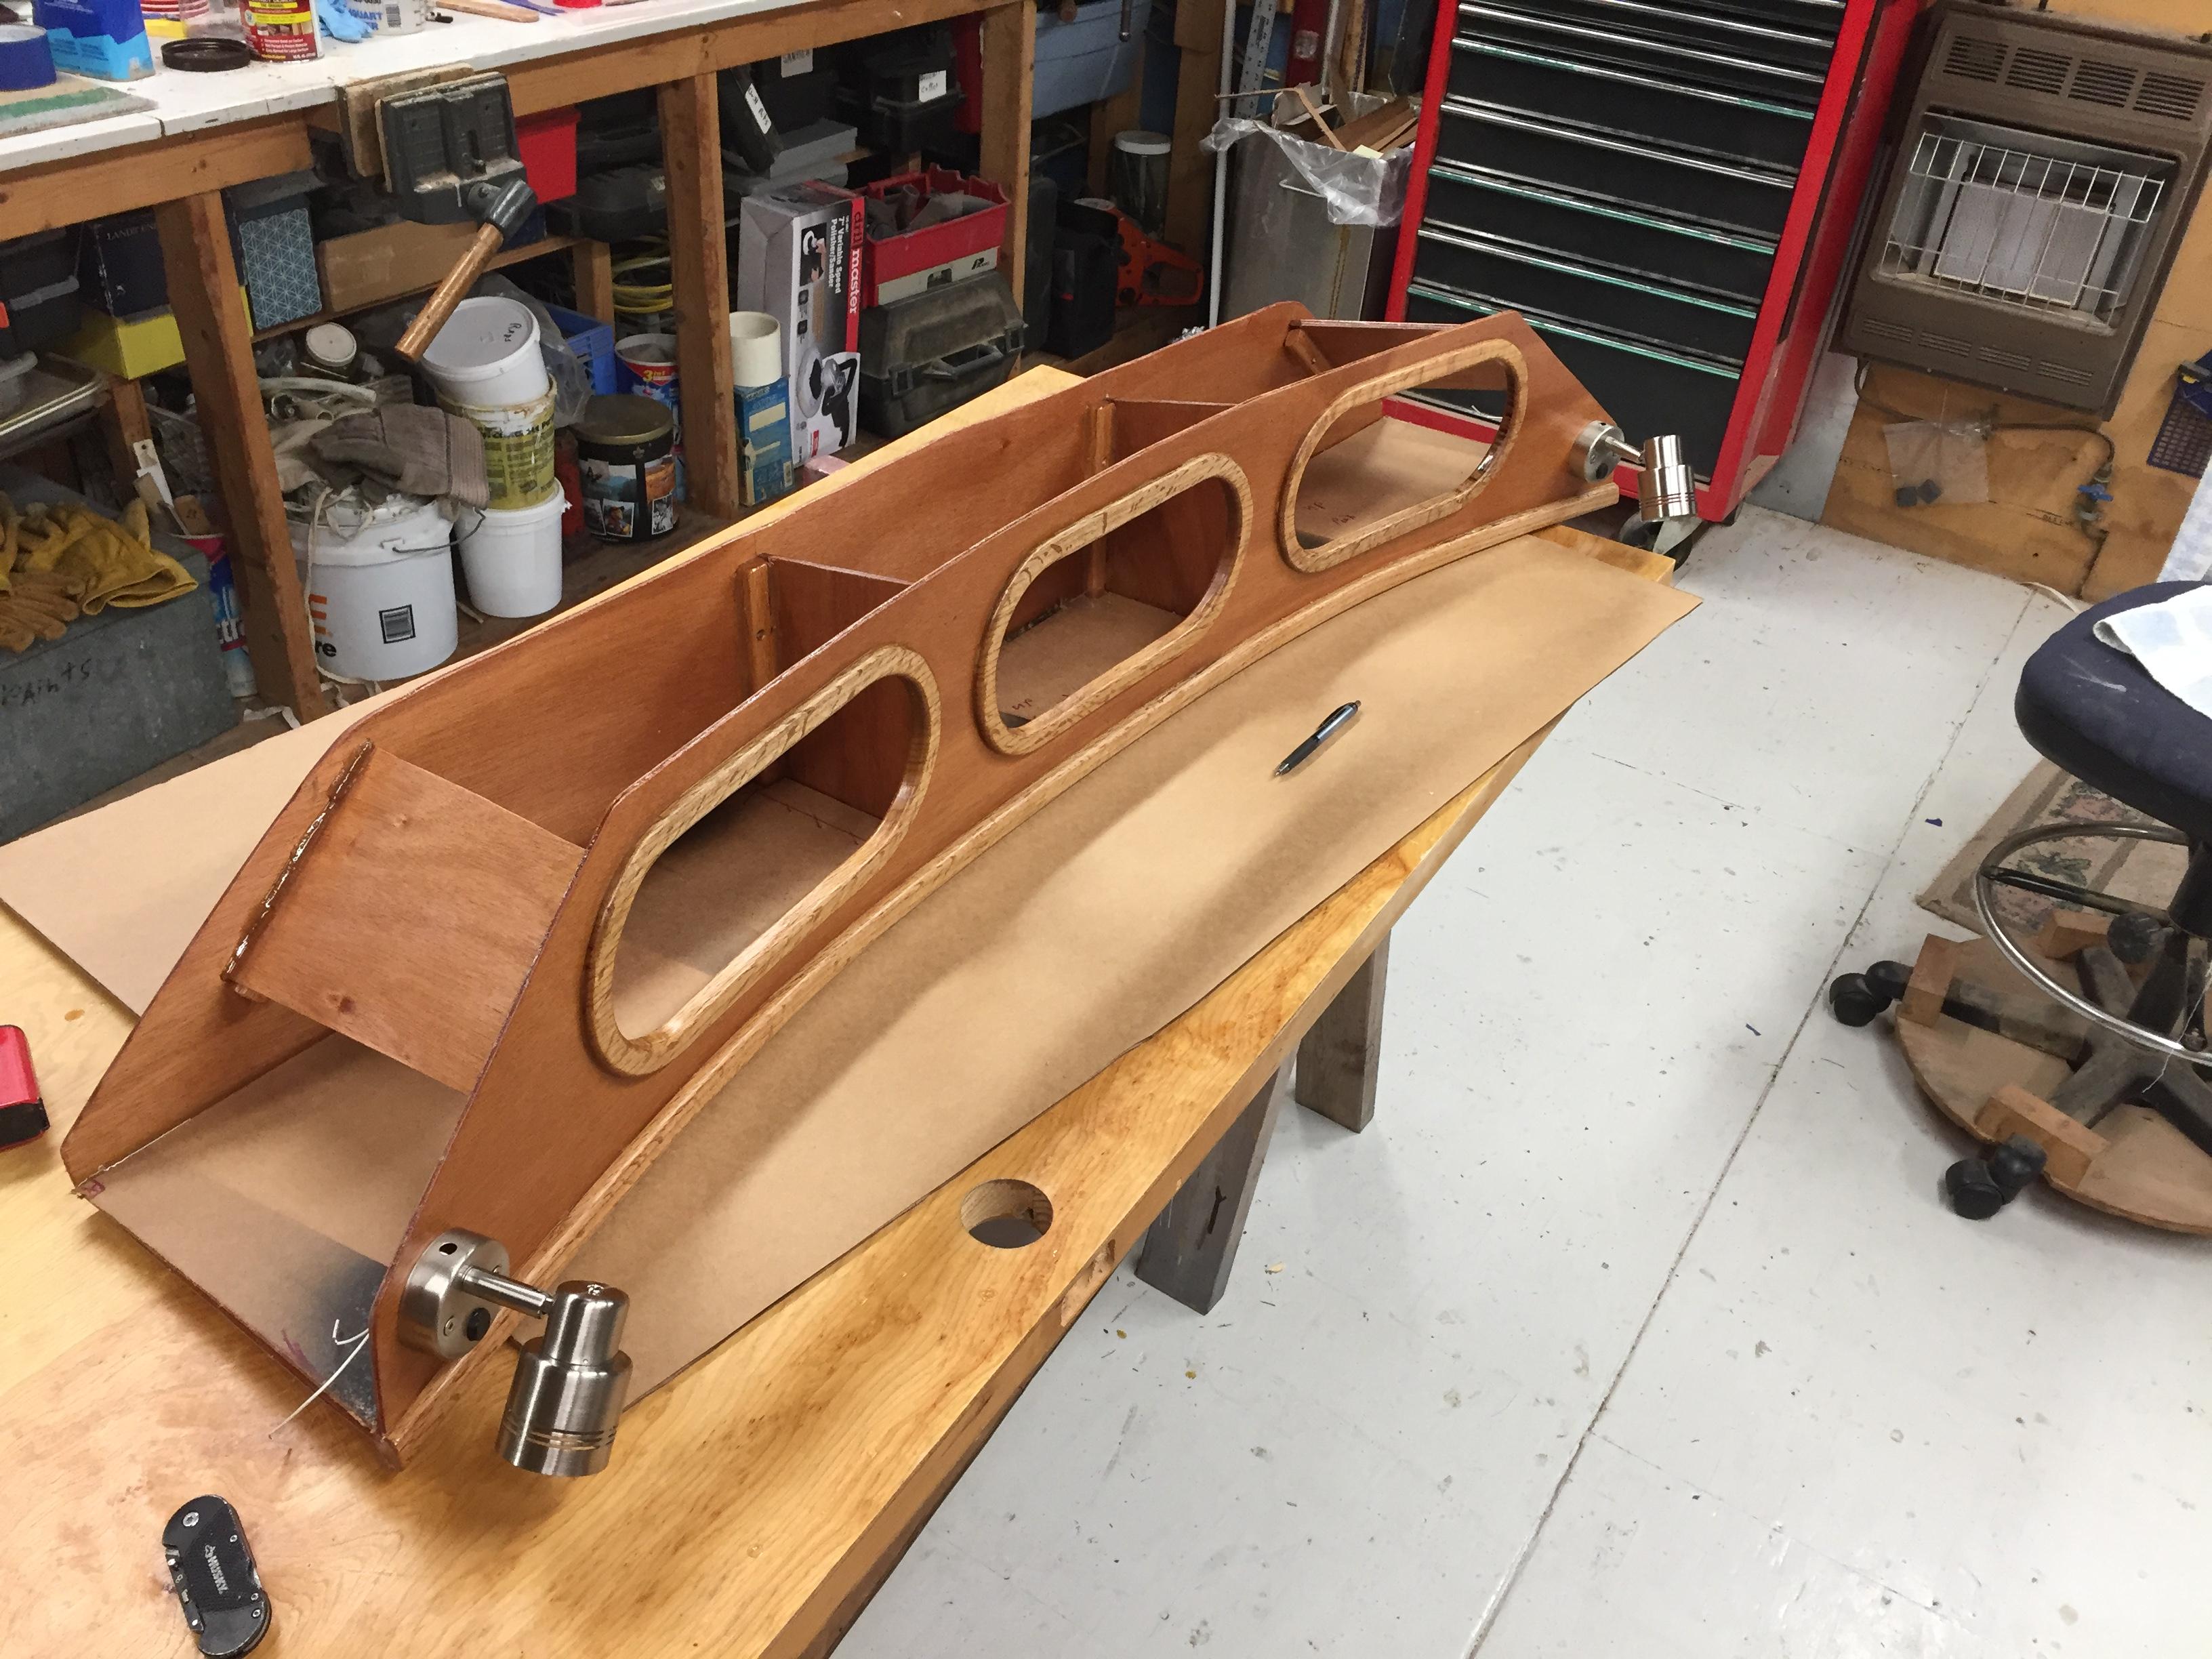
This is what I did for storage of a few clothes and toiletries. It mounts up against the ceiling insulation above the shelf and against the bulkhead. Two LED lights are mounted on either end, I won’t need the fans as the overhead one will provide more than enough air flow. I don’t need a sound system out in the wild either but will carry a Bose sound- link mini if I’m so moved. Since it’s curved the bezels I made that fit into the 1/8″ plywood needed to also match that curve so I steamed them for 30 min and then compressed them an a mold I made for 10 min. The front of this cabinet comes out to the roof fan bezel. I lined the bottom with some extra boat trailer carpet to help keep things from moving around. At first I considered cutting two holes in the bulkhead into the galley area where more speakers were to be but decided on this and will decide on using that area in the galley area for more items there. Because I saved all of the large sheets of packing cardboard from the kit I was able to make 2 or 3 trial models of this cabinet before committing to cutting wood. As soon as I finish wiring and insulation I’ll bolt the cabinet in.May 12, 2017 at 2:13 pm #812ParticipantNice!
May 12, 2017 at 3:03 pm #813ParticipantVery nice! I’m not carpenter enough to dare such a thing at this point, but I’ll have enough bulkhead to mount lights and 12V outlets. I’ll wire for 12V only. I can plug an inverter into a 12V socket, but I don’t expect to need it. I’m happy with earbuds, so I don’t need a built-in stereo or speakers, and I always have a laptop, so I don’t need anything like a television, but being online all the time is important to me.
Next year, I’ll take the camper on the road and live in it full-time for several months while traveling the east coast. I want to be completely off grid, so I’ll invest in a solar system with lithium batteries. I think I need one kW-hour per day on average and four days reserve at half that level, so 200-300 watt panels and two 100 Ah batteries. I imagine a wet bath beneath the camper between two trailer slats. It’s beneath a hatch in the floor and soft-sided (but air-tight and well-insulated) so it folds up for travel. Who says this camper is not a mini-Winnebago?
-
This reply was modified 7 years, 2 months ago by
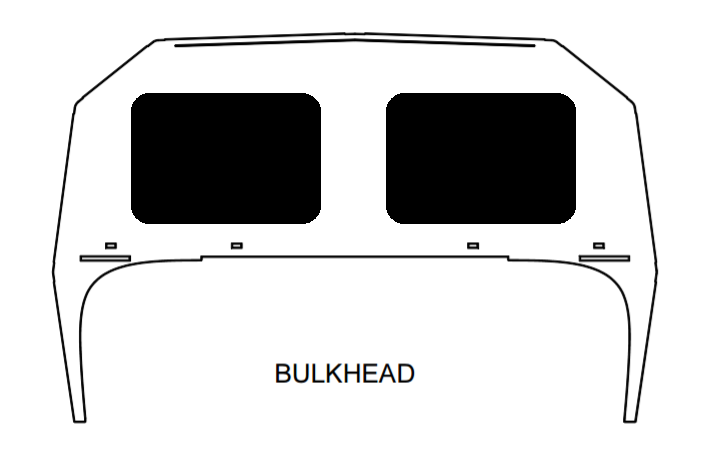
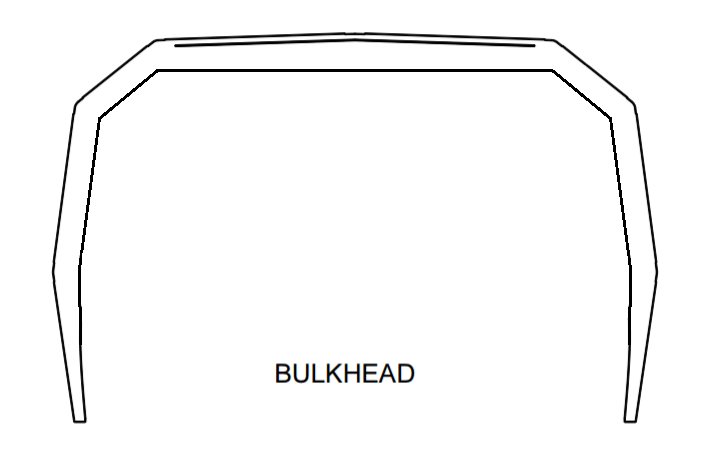
May 13, 2017 at 8:20 am #825ParticipantHere’s another cut of the galley bulkhead extending to the floor. The remaining wood is around five inches wide, except near the floor which looks more like two inches in the illustrations. Five inches seems enough to support the shape of the shell. Any stress on the bulkhead presumably isn’t great unless the roof is carrying weight, but I’d like to carry weight on the roof. According to CLC, roof racks can carry up to 150 lbs. Does cutting the bulkhead this way substantially reduce this weight?
-
This reply was modified 7 years, 2 months ago by
May 13, 2017 at 6:37 pm #829ParticipantCorrection: The width of the bulkhead above is more like 2.5 inches, seems too little wood.
-
This reply was modified 7 years, 2 months ago by
-
AuthorPosts
- You must be logged in to reply to this topic.