Welcome to TeardropForum.com › Forums › Teardrop Builders’ Forum › Blank vent solution
- This topic has 29 replies, 8 voices, and was last updated 6 years, 9 months ago by
Bill.
-
AuthorPosts
-
July 7, 2017 at 12:57 pm #996
Bill
Participant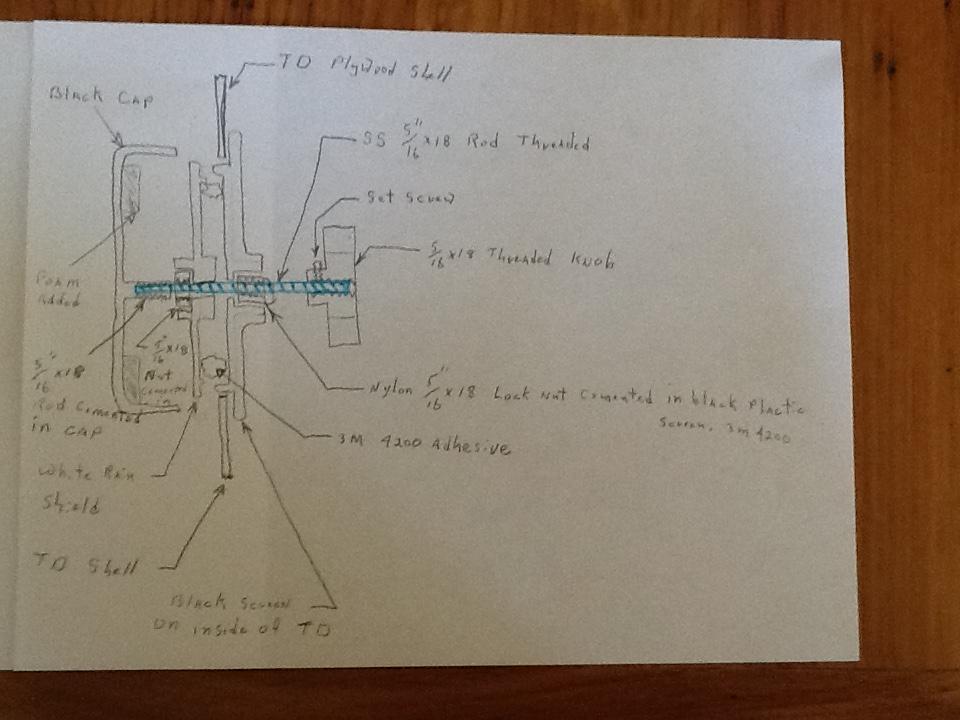
This is what I came up with and it has worked for me. 1. I used 3m 4200 for all cementing and I first cemented the white rain baffle to the black flange. 2. I cemented a ss threaded 5/16″x18 rod to the inside of the black cap. 3. I cemented a regular 5/16″x18 ss nut to the outside of the white rain shield and a 5/16″x18 ss nylon lock nut to the inside of the black screen. 4. I threaded the open end of the rod from the outside through both bolts and to the inside until I felt the foam that CLC had us place on the inside of the black cap sealed against the white rain guard. 5. I installed a threaded knob on the ss rod and locked it in place with a set screw that I made a taped out hole for.
This now allowed me to open or close vents from the inside, stop water, and protect against loss due to vibrating loose on the road.
Knobs came from Rockler, rod I found on Amazon and set screws from my local hardware store. In my opinion this vent is worthless as purchased and could have come with gaskets nut guides, rod and knobs.July 7, 2017 at 5:07 pm #999Boardwalk
ParticipantBill,
What was the problem you were solving for? Thanks
July 7, 2017 at 6:07 pm #1000ParticipantThe front vents would leak between the white rain shield and black screen. I was worried that if I forgot to tighten them down before traveling they would vibrate off. I figured that after a lot of use the black plastic would strip out. And lastly I wanted to be able to adjust them from inside.
Sorry I missed doing a good spell check on the title of Black, just now caught that.July 7, 2017 at 6:35 pm #1001friz
ParticipantThank you for developing this. I would love to eliminate my “travel plugs” in the future. Keep us posted on how it works out.
July 8, 2017 at 8:49 am #1002ParticipantThanks! I am still building, but will definitely keep this solution in mind.
July 8, 2017 at 1:16 pm #1003Participant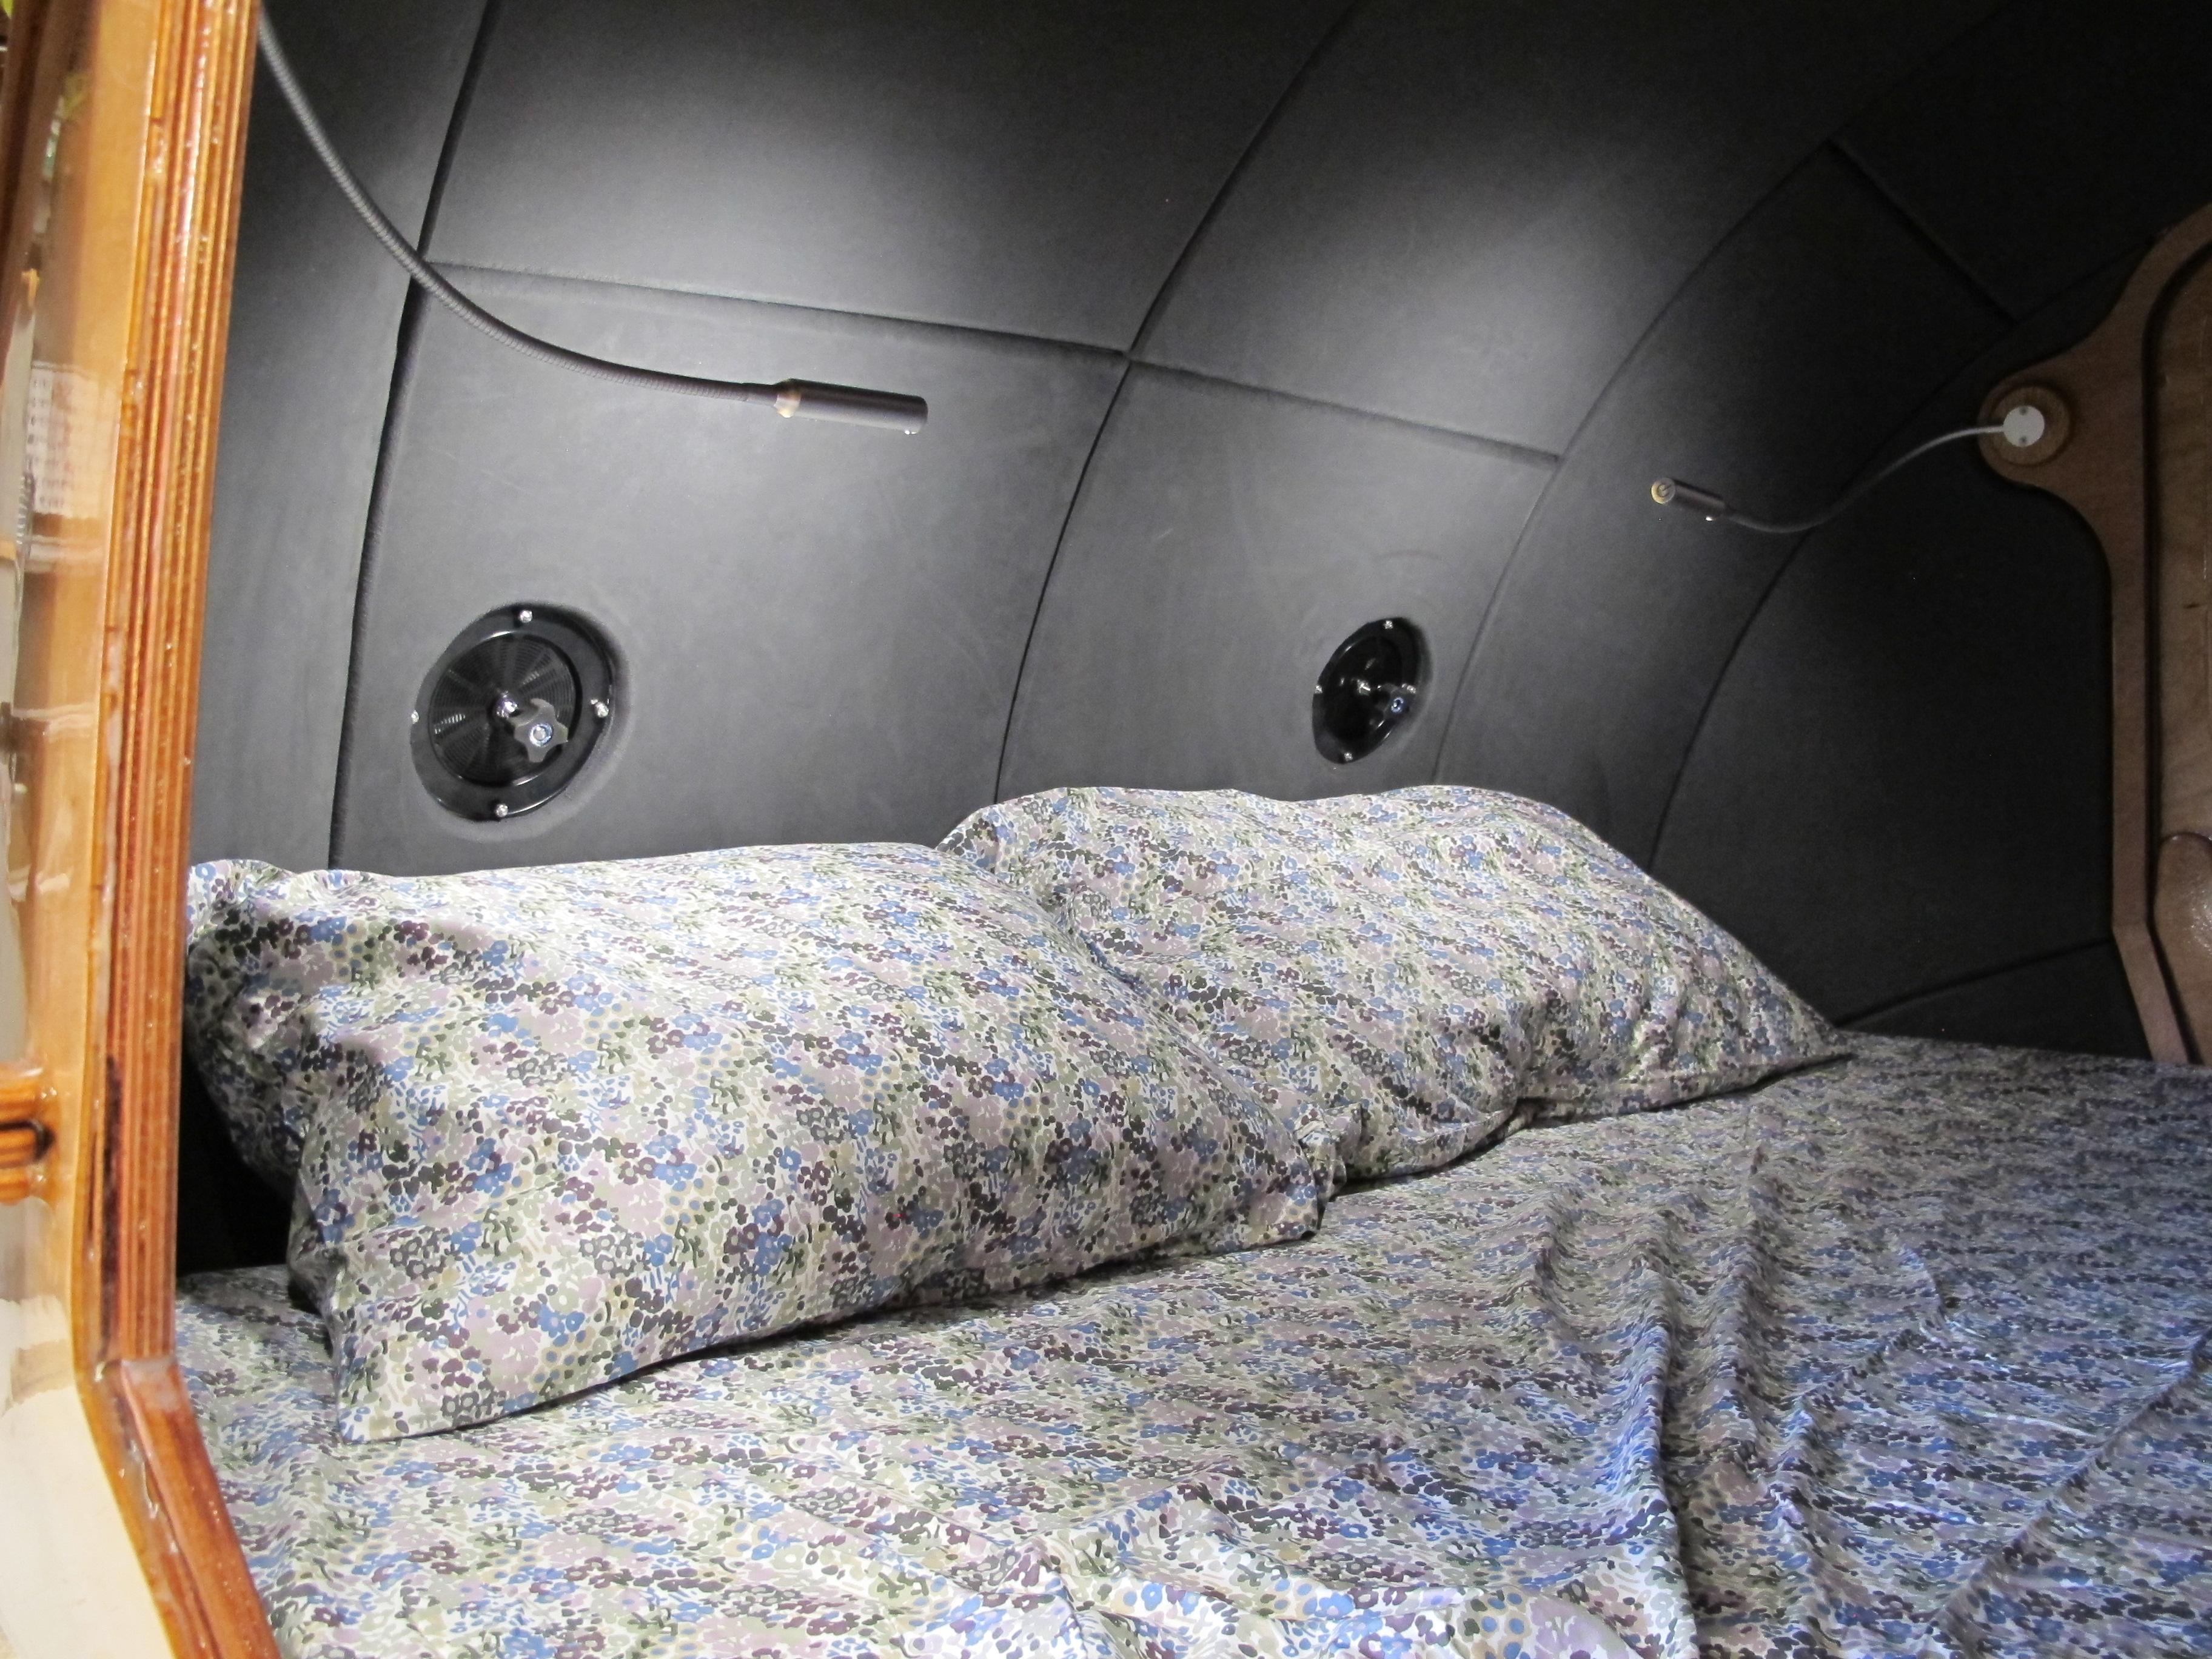
This is a pix of how they look, I have a closeup of one but this program won’t allow me to include two shots.July 8, 2017 at 1:21 pm #1004Participant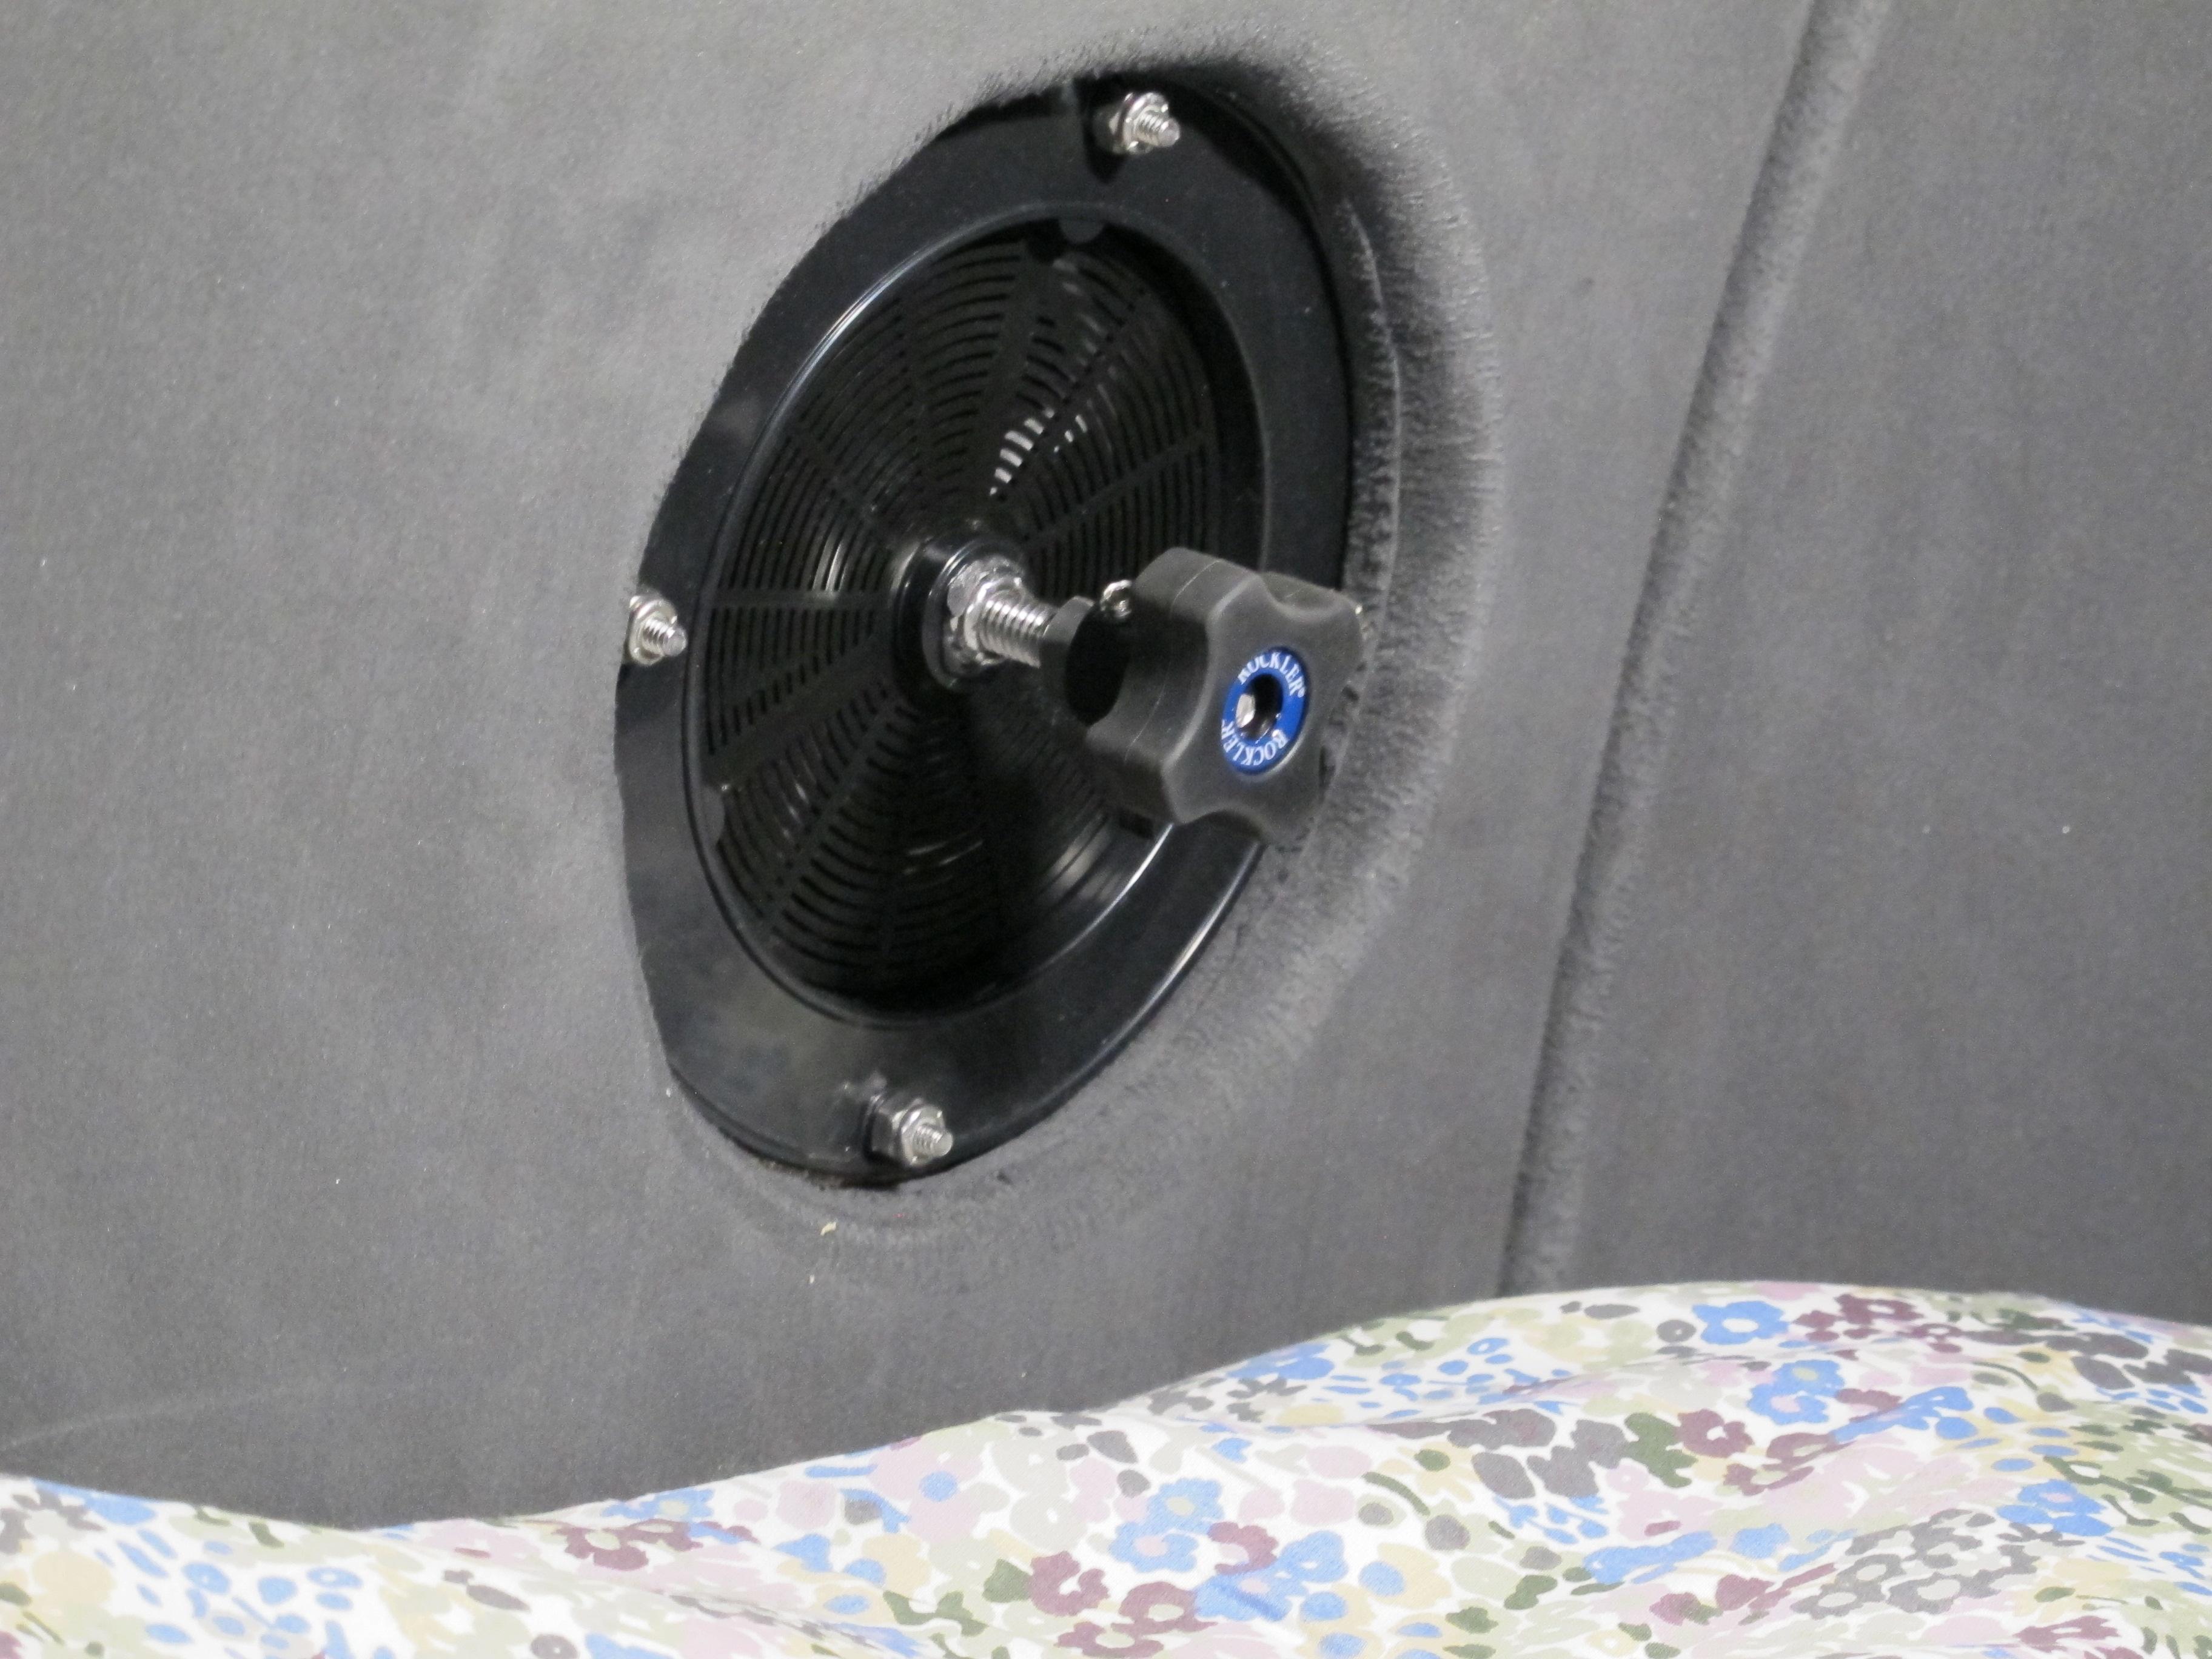
This is the closeup.July 8, 2017 at 1:44 pm #1005ParticipantVery Nice. Will plan to do the same thing.
July 8, 2017 at 2:14 pm #1006rovineye
ParticipantBill,
Looks like a simple solution. I may give this a go.
BTW, what style gooseneck lamps are those? I am looking at some now and like that style. Looks good with that mounting ring!
July 8, 2017 at 5:30 pm #1007ParticipantThe lamp is Acegoo goose neck led lamp and its touch controlled and dimable. It comes with a 110v plug in but runs on 12v DC so just discard the 110v ps and hard wire it in. I got it from Amazon Prime for $29.99. Pay attention to its polarity when wiring it in.
BillJuly 9, 2017 at 6:53 pm #1011JoAnnG
ParticipantAfter reading all of the issues with the vents I am considering not installing them at all. Instead I was considering installing thru hull ports for deck access (approx 4″ dia) and fix a screen to the inside. The caps could be screwed in and are held snug by a rubber washer when on the road. Has anyone else taken this approach?
I do like the lights and will definitely be installing a pair. Look like a great solution for reading in the evenings!
July 11, 2017 at 6:52 am #1030faithie999
Participantbill–where did you mount the gooseneck lamps?
ken
July 22, 2017 at 11:09 pm #1071Diving Duck
ParticipantSo did you find the 3M 4200 glue was able to hold the vent cap to the rod? That has been a concern for me–finding a glue that will work with plastic and metal both.
In my opinion, that particular vent is meant for regular RVs and mounted fairly high up away from splashing water, so the rain baffle would work pretty well if so. The vent was not designed to open and close–rather the cap is to be screwed down tight on the bolt, which is long enough to keep it from closing. I had to put in a shorter bolt to allow it to close down tight enough to seal on the weather stripping–but I like your idea better, IF the glue holding the cap to the bolt does the job.
July 27, 2017 at 6:08 am #1102ParticipantKen, I mounted the lights in the hole in the top of the door frame and ran the wire out the side to come out just before the side. Then it ran down the corner that the door frame made with the wall to the floor. The wire could be hot glued into place, it’s vary thin and hidden once the insolution is in. Ran it then along the floor and up the back of the bulkhead then behind the galley to my breaker panel. I made a round plug that fit into the hole with an overlapping flange all out of wood that allowed me to have a cavity behind it for extra wire and also to screw the lamp into.
July 27, 2017 at 6:28 am #1103ParticipantDiving Duck, the 3m 4200 sticks well as long as the surface is not oily, it’s a marine sealant, they also make a 5200 that also never hardens but needs to be sanded or scraped away to remove and it is said should not be used by a novice unless they have a note from their mother, the 4200 is a little more forgiving. The down side is its not cheap nor is 5200 and once opened must used in 24 hrs or the rest of the tube becomes unusable. If you decide to use it get the fast set up one even that one takes a day or so to set up and they also come in black as well as white but black is a little harder to locate.
-
AuthorPosts
- You must be logged in to reply to this topic.