Welcome to TeardropForum.com › Forums › Teardrop Builders’ Forum › Surface prep of panels
- This topic has 7 replies, 8 voices, and was last updated 4 years, 9 months ago by
Andrew.
-
AuthorPosts
-
October 9, 2019 at 1:59 am #2775
Jaus10
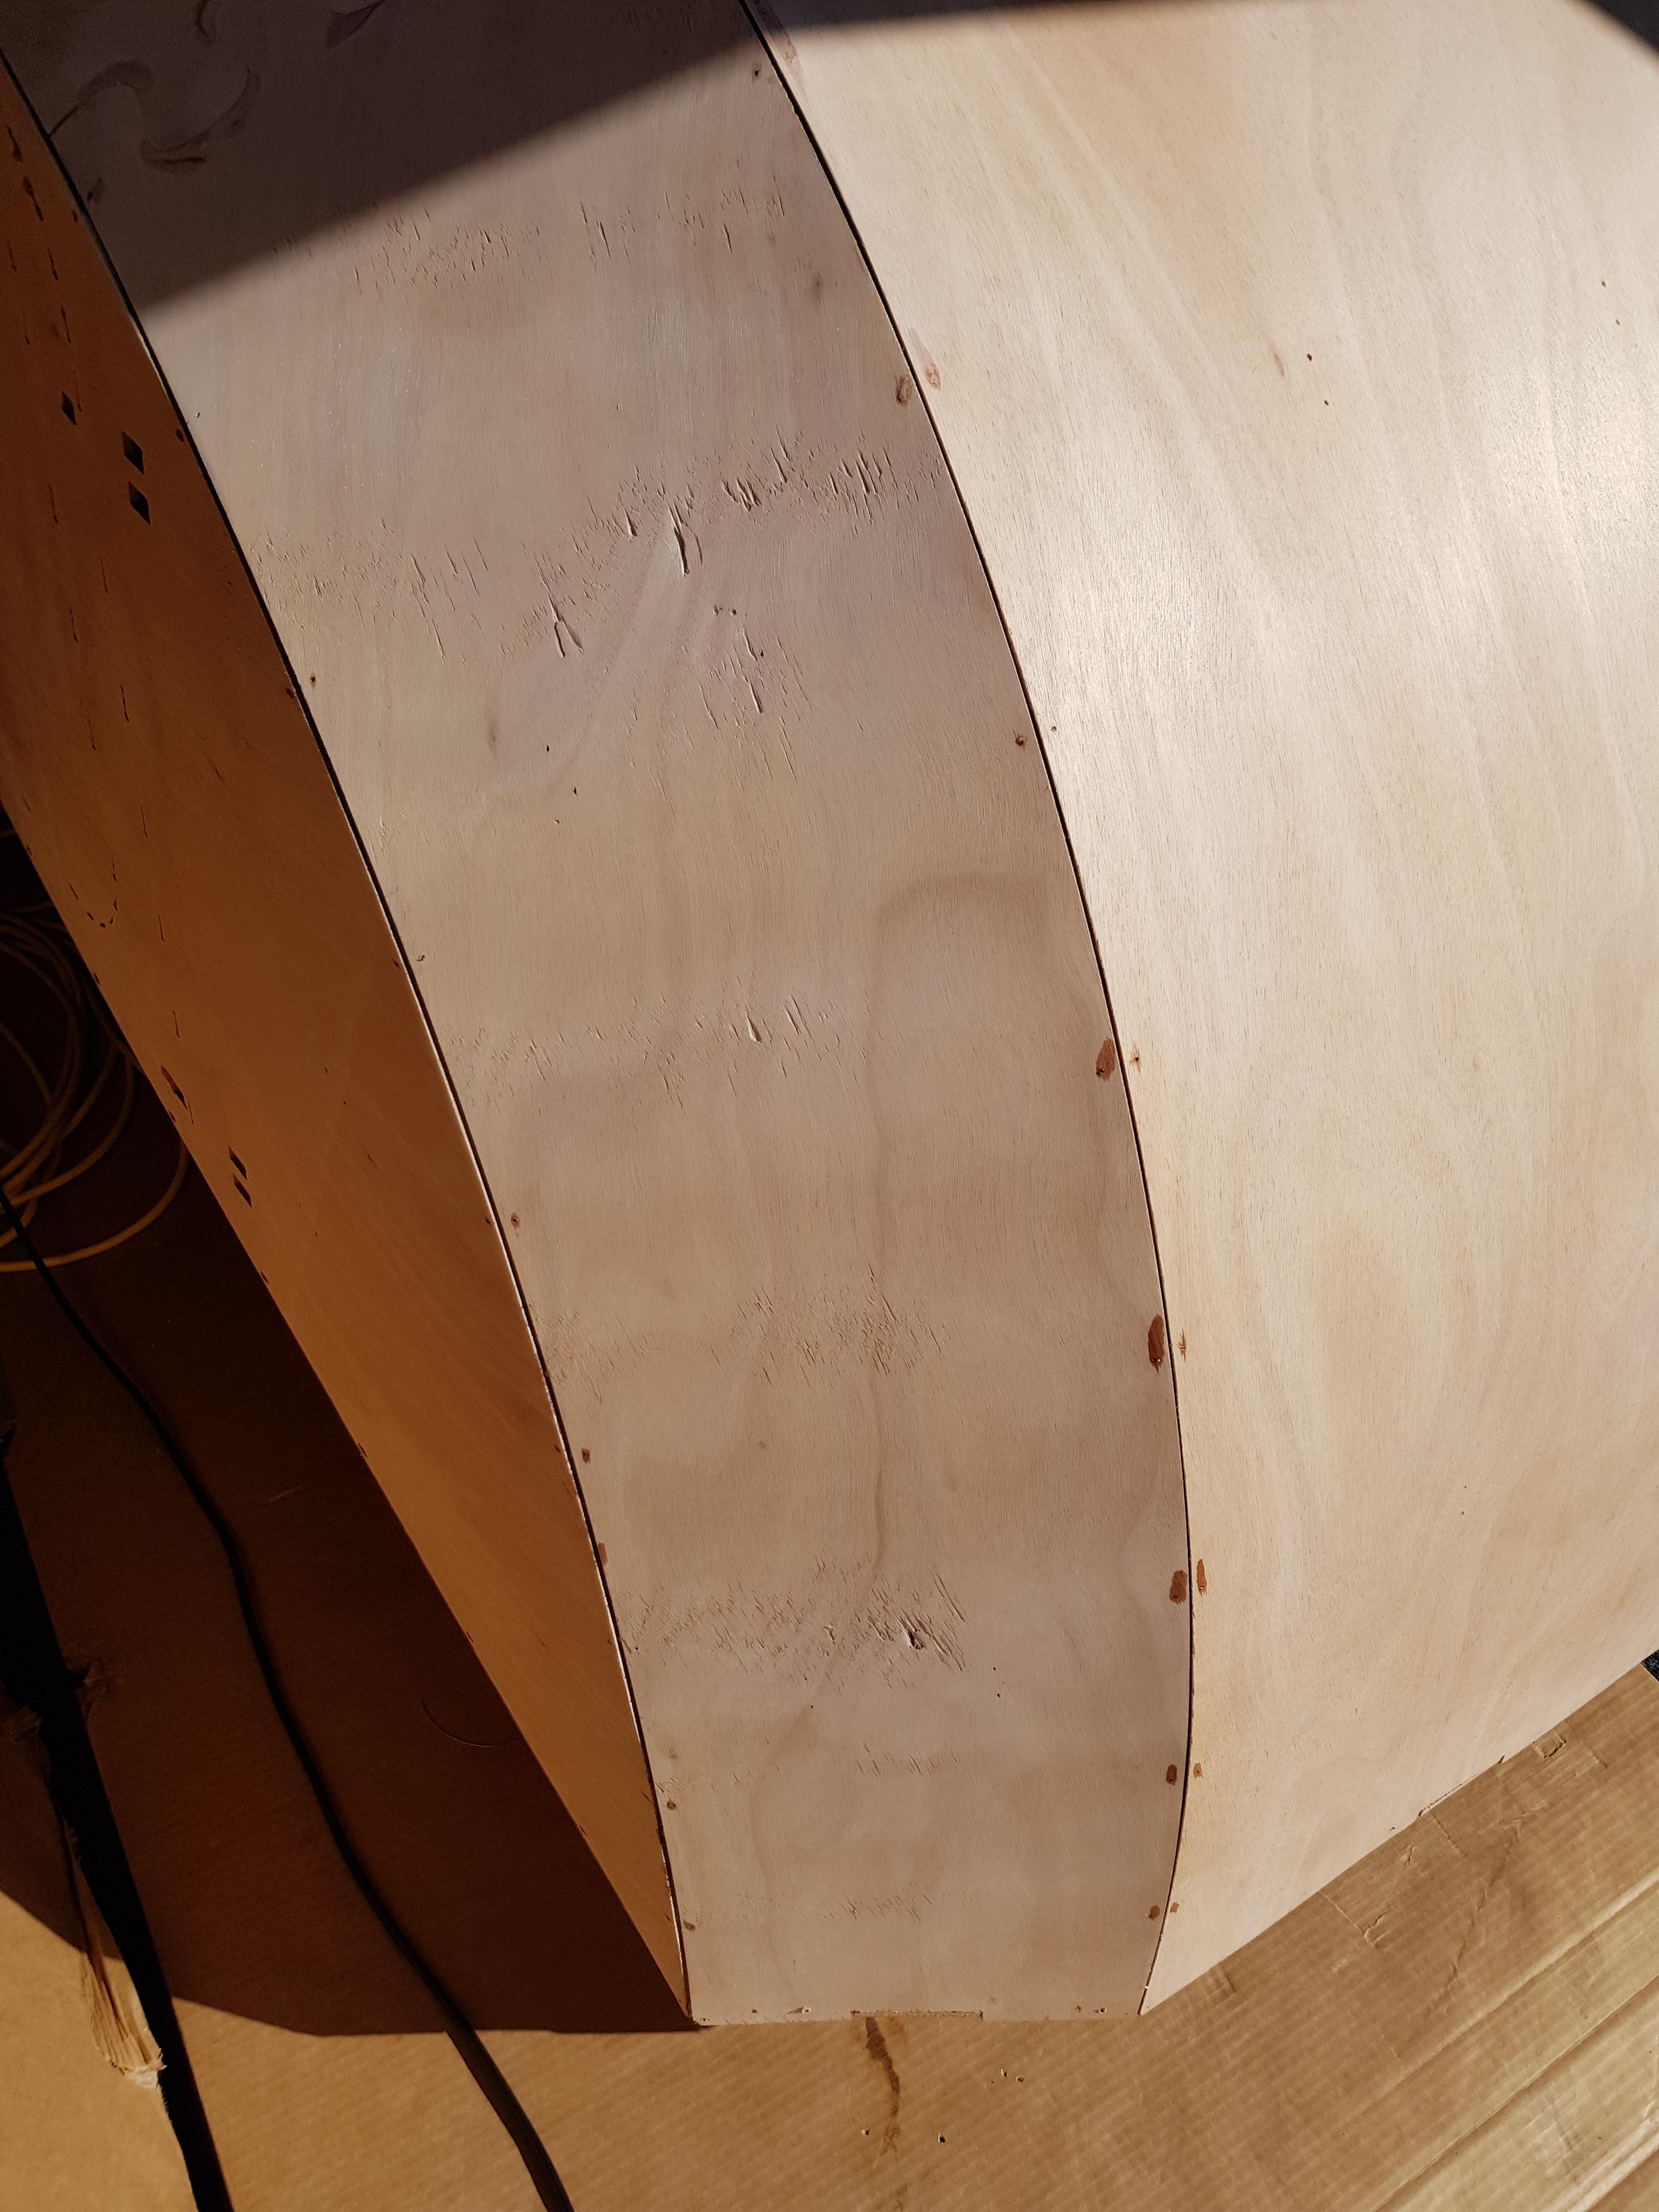
ParticipantSo I have hit the first major snag in what has been a rather snag free easy going construction. The shell is fully assembled and I am begining to sand the panels in prep for the big glass job and what will hopefully end up being a bright varnished finished camper.
The catch being one panel (all the rest seem fine) had a moderately rough surface that seems to have been exasperated when put under tension in the mould. I didnt think much of it but now sanding (220 grit) with an orbital sander the splinters are flaking off and exposing the next layer of laminate.
I have some photos below. They show the next layer of laminate begining to peak through. I have some ideas to address this but none of them are pretty and I thought I would put the call out for some advice in the hope my clear bright finish is still achievable.
Keen to hear everyones ideas.
Thanks in advance!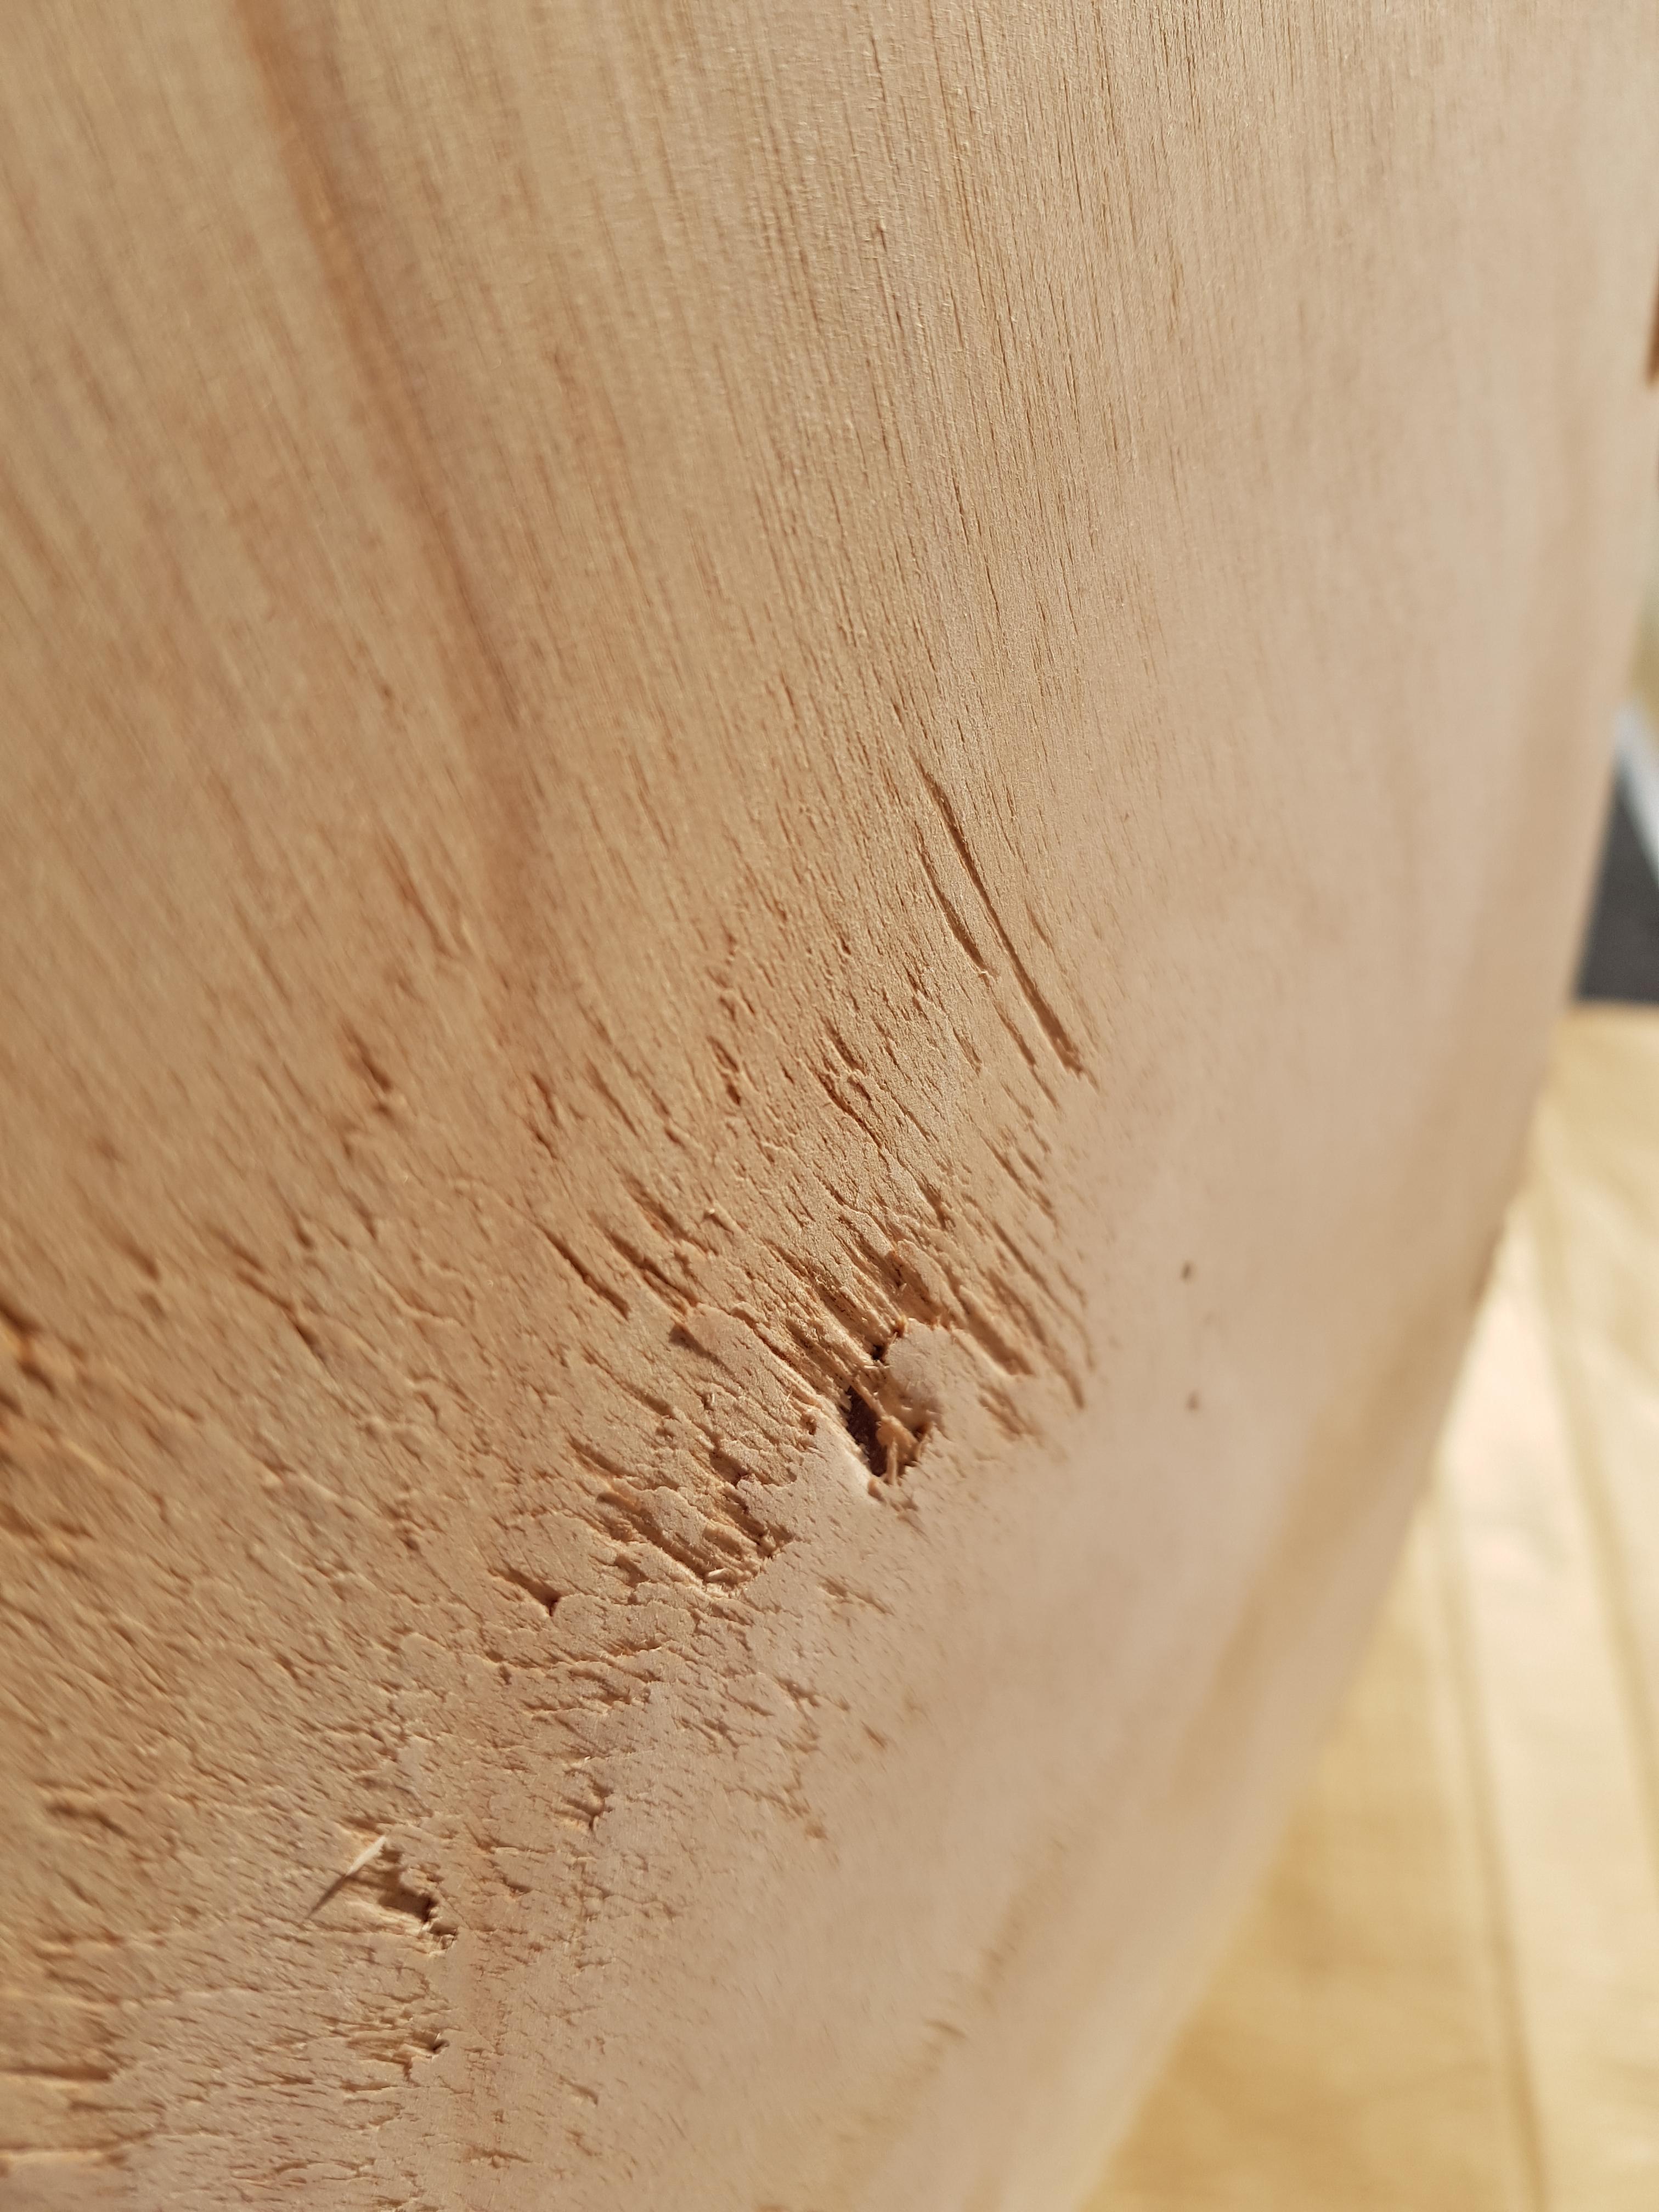
 October 9, 2019 at 6:28 pm #2776
PopeyeTheTrailerMan
ParticipantThat looks as if you got a bad sheet of wood. I’d bring that to the supplier’s attention and get a replacement. BS-1088 is very definitely not supposed to do that.
October 9, 2019 at 10:00 pm #2777marlin53
ParticipantThere was a post about a problem like this a few years back you might be able search that. Otherwise you could try putting some wood filler in holes, hand sand that flush then coat those areas with epoxy and sand. The epoxy should help hold the fibers in place.
October 11, 2019 at 1:08 pm #2782PatandRay
ParticipantThere is a penetrating, two-part product called Smiths. There is a boat builder near me that uses it. It would stabilize the wood fiber without adding “bulk”.
October 11, 2019 at 8:41 pm #2783wayne3676
ParticipantI had the same problem with my panels. I filled it with unthickened epoxy and put heavy plastic drop cloth over it let it cure removed plastic and sand. under the glass it hide the flaws well.
October 12, 2019 at 1:55 am #2784western_flyer
ParticipantYou could situate mushroom vents over the offending area. I put my front vents on panels 3 & 4 because I added knobs to be able to open and close the vents from the inside. The knobs stick out a couple of inches when closed and I would hit my head on them if I mounted them per the manual. They seal just fine, no leaks. Another possibility would be use one the decorative “onlays” that CLC offers. Maybe they would give you a discount for the less than perfect panel.
October 13, 2019 at 10:23 pm #2785stretchMike
ParticipantAgree you got a bad panel and that this should not happen. But it is fixable so that it will look respectable with a varnished wood finish.
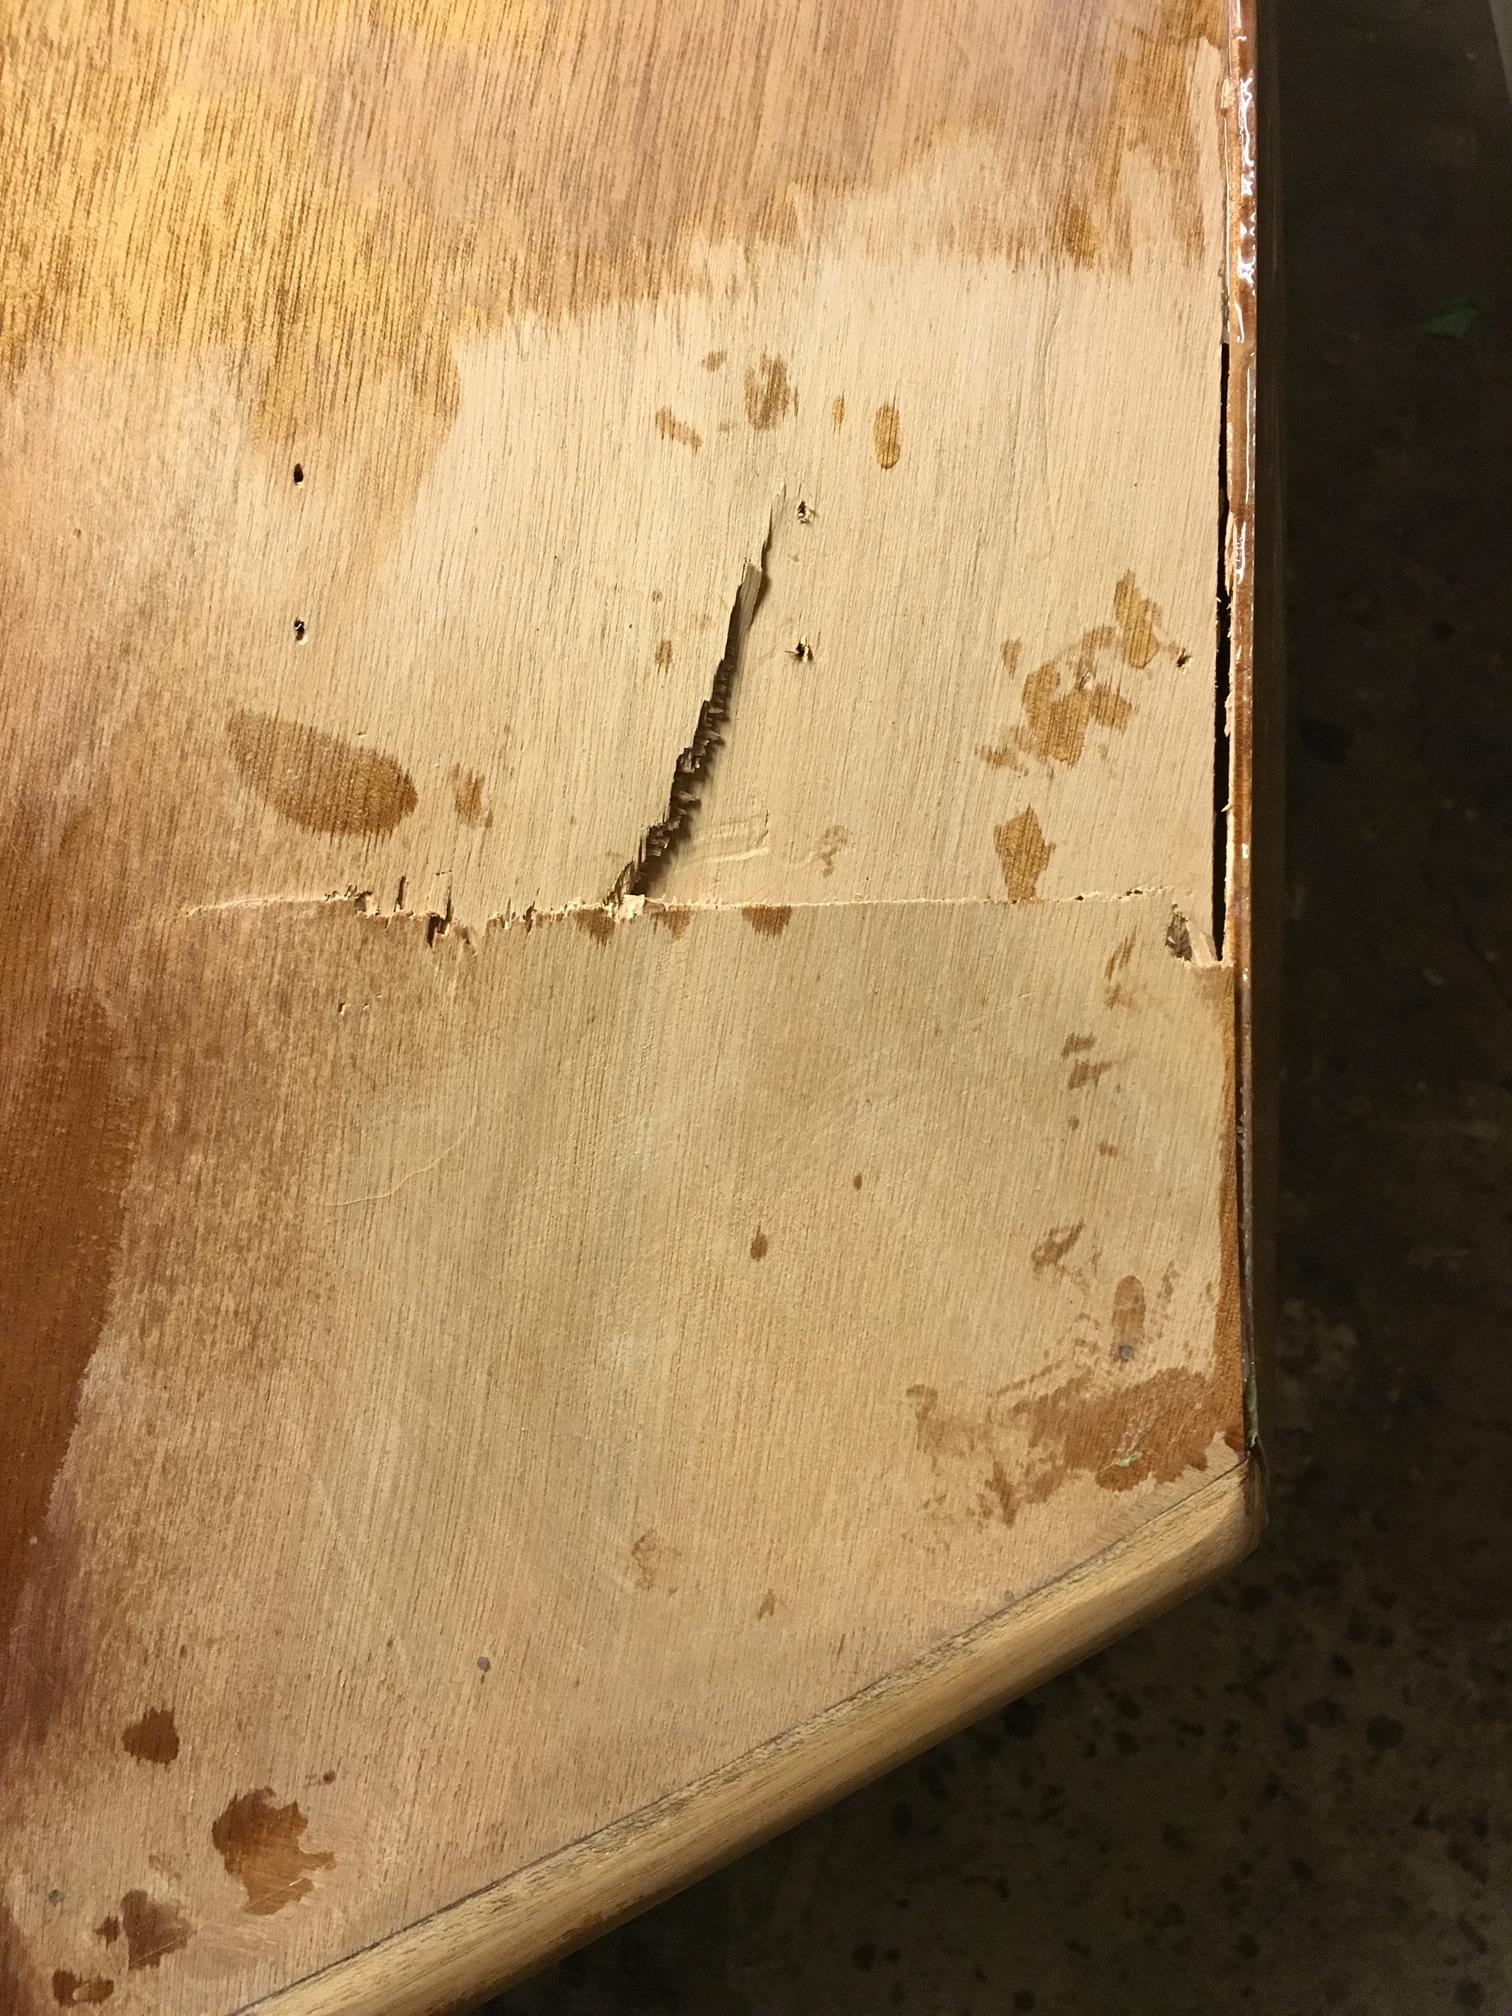
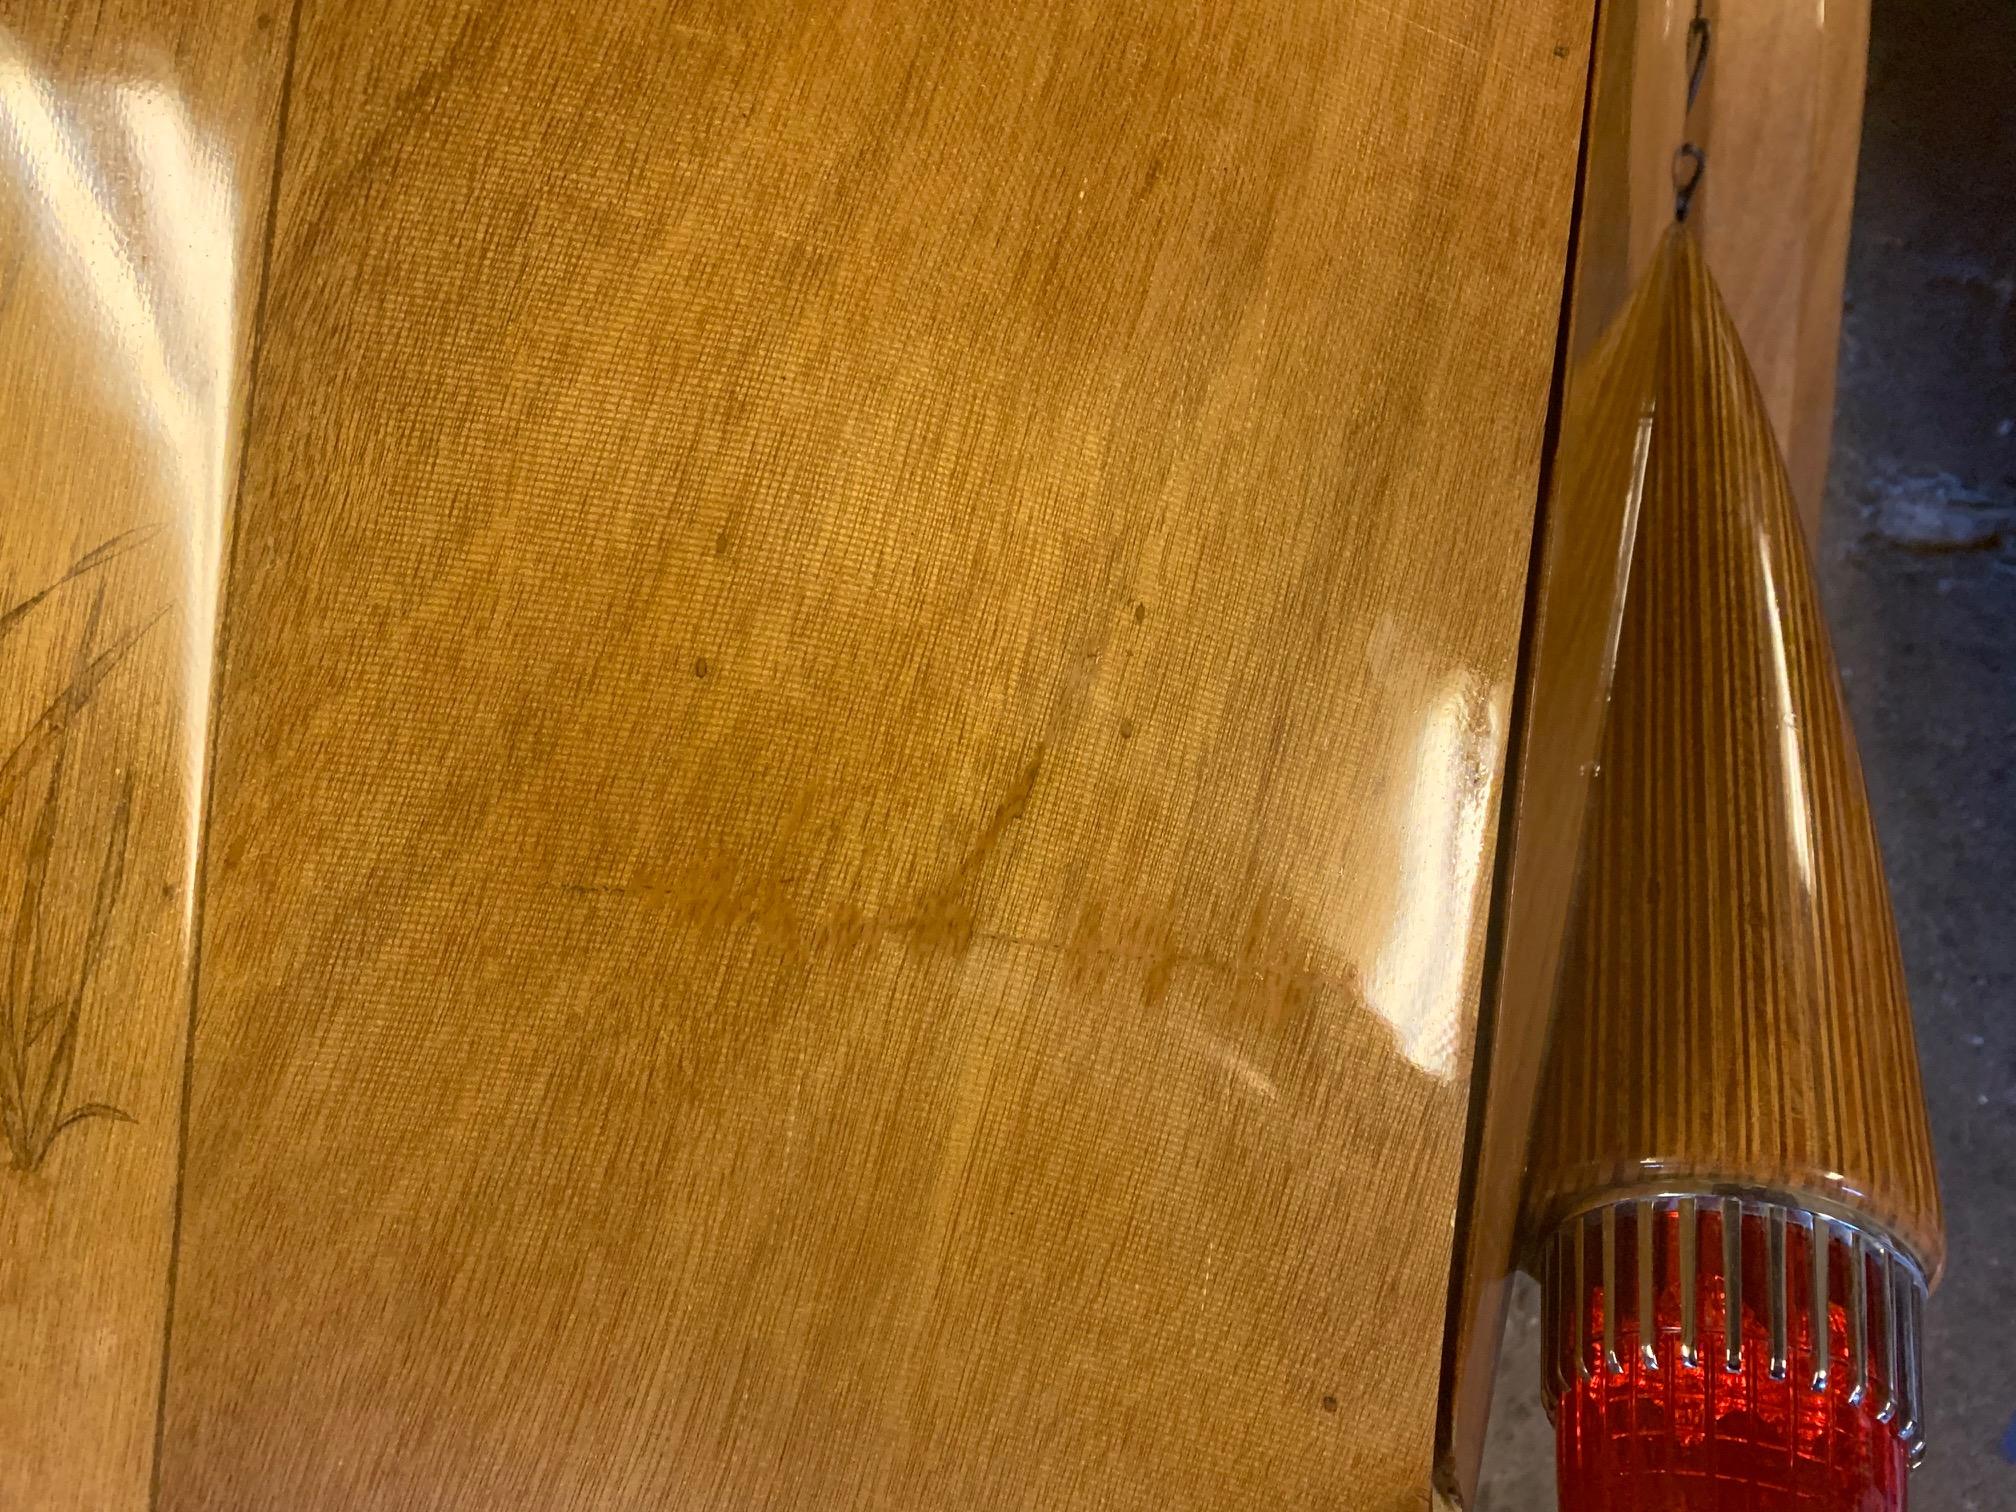
I can say this from personal experience. After taking my pristine shell out of the mold I put the mold on edge against my garage wall. Surely enough it fell and struck the shell breaking right through 1 panel.
Before and after photos:
Procedure:
- If there are loose fibres they need to be glued down with superglue or removed;
- Fill holes with wood filler. But not all one colour, instead roughly blend a couple of colours to give a streaky look when applied. I used “natural” and “red oak”. I would first test the filler on a scrap piece of ply and coat with a little epoxy to see how colour looks under epoxy. Adjust as necessary;
- Lightly sand and repeat for any remaining depressions or to adjust colour;
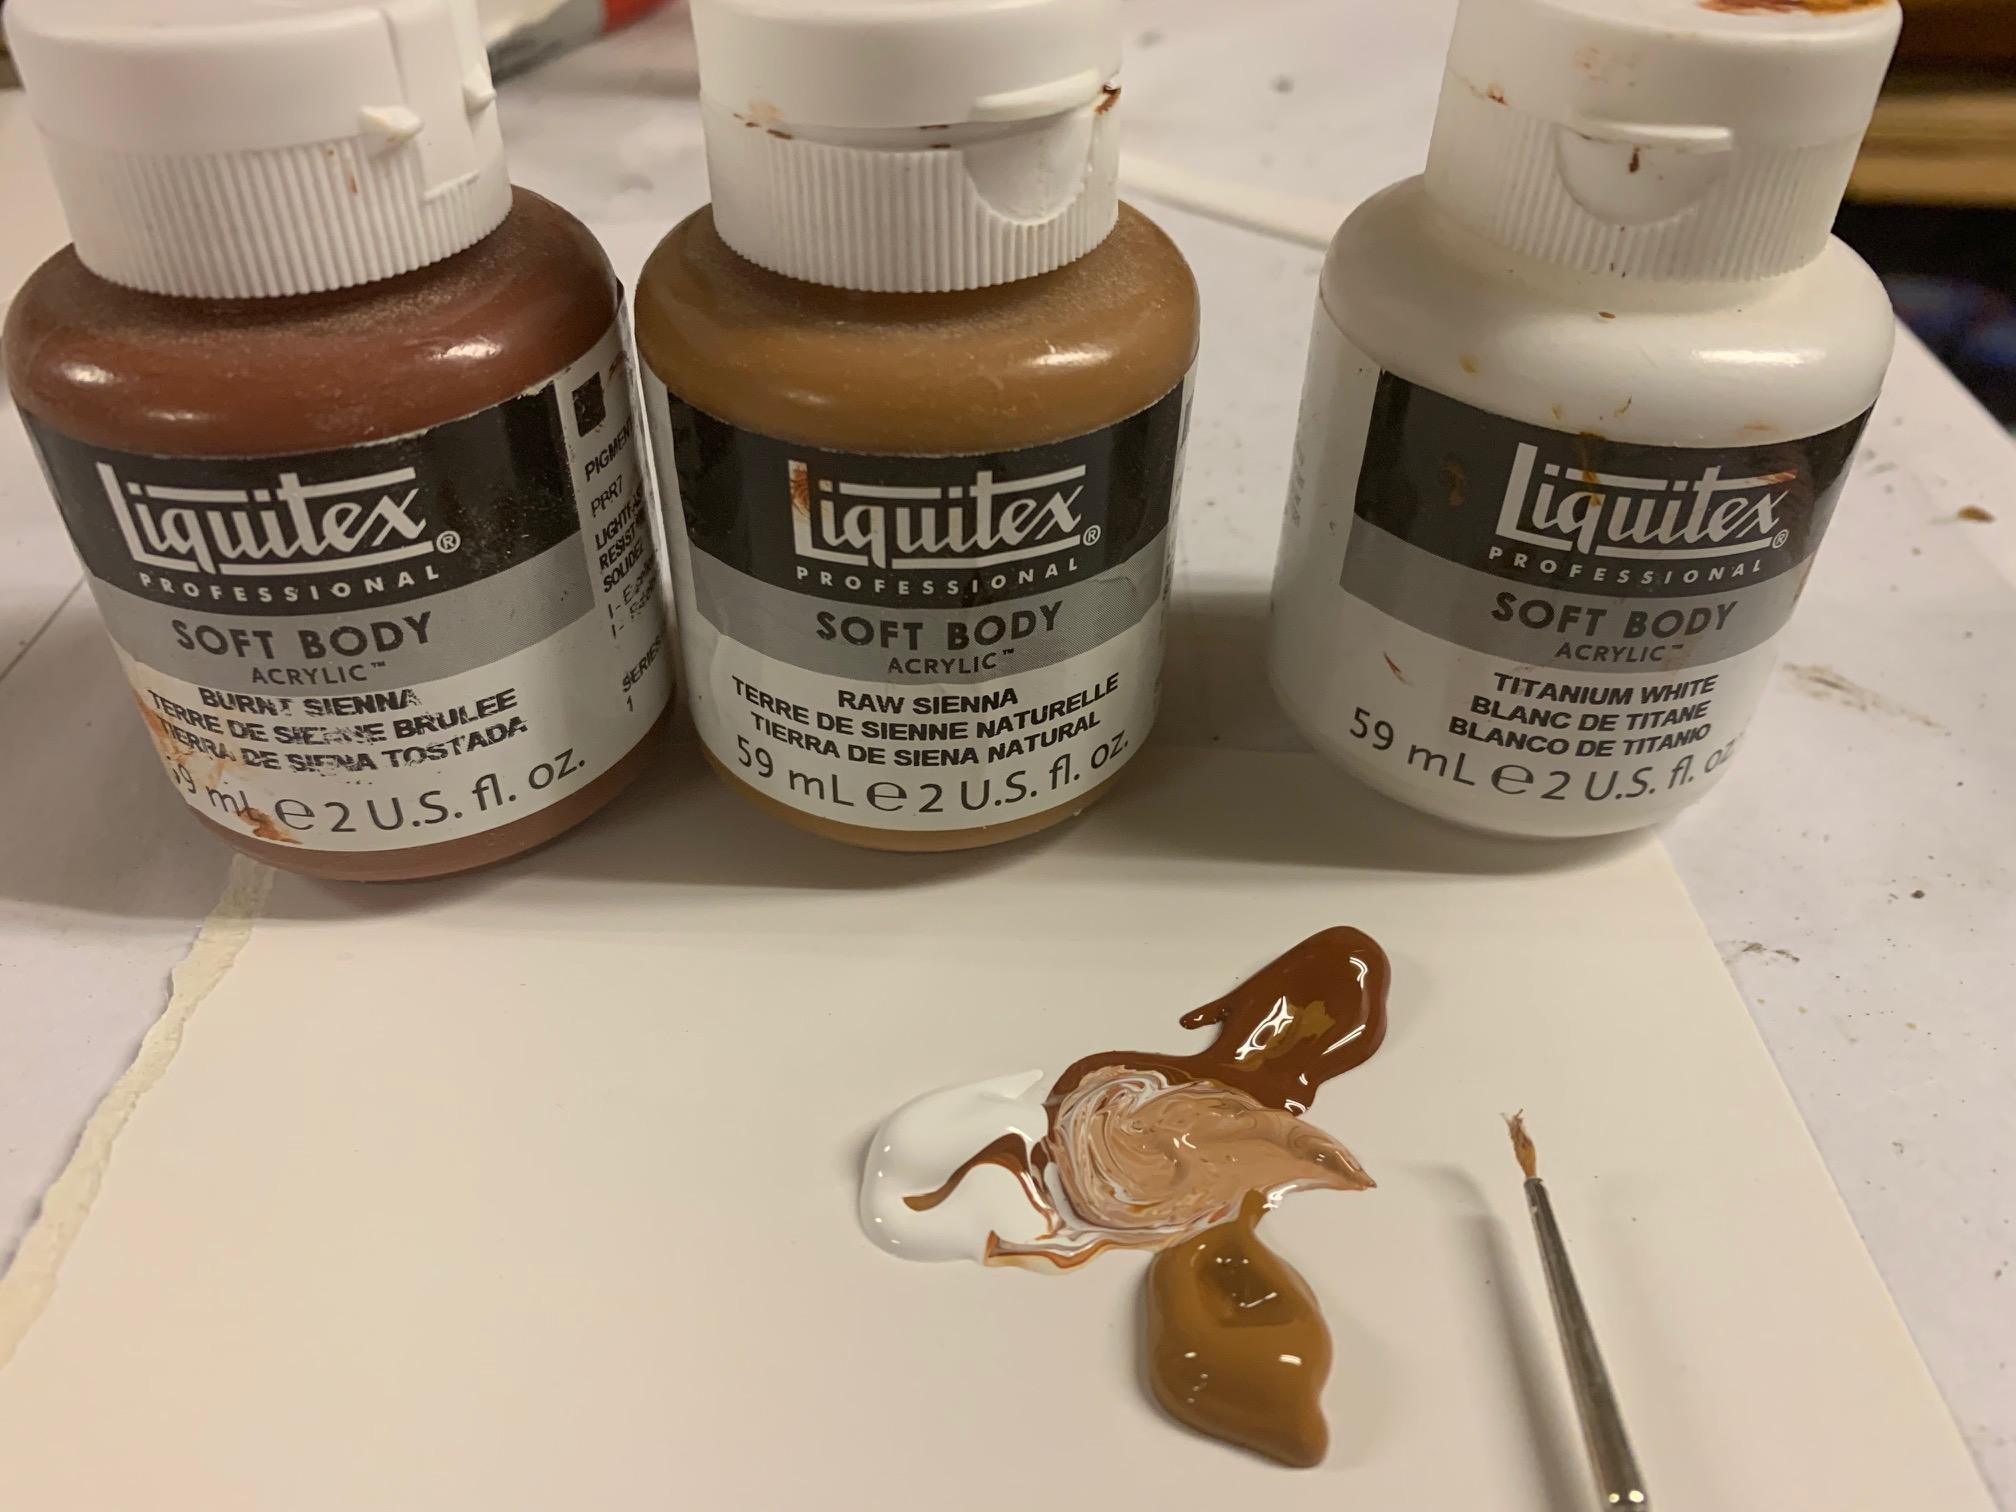
- To further blend filler with surrounding wood I used acrylic paint with a very thin brush. I used a mix of raw and burnt sienna and white. Apply sparingly in very light thin strokes following the grain. Again, recommend testing on scrap and under epoxy for right colour.
- Lightly sand to blend.
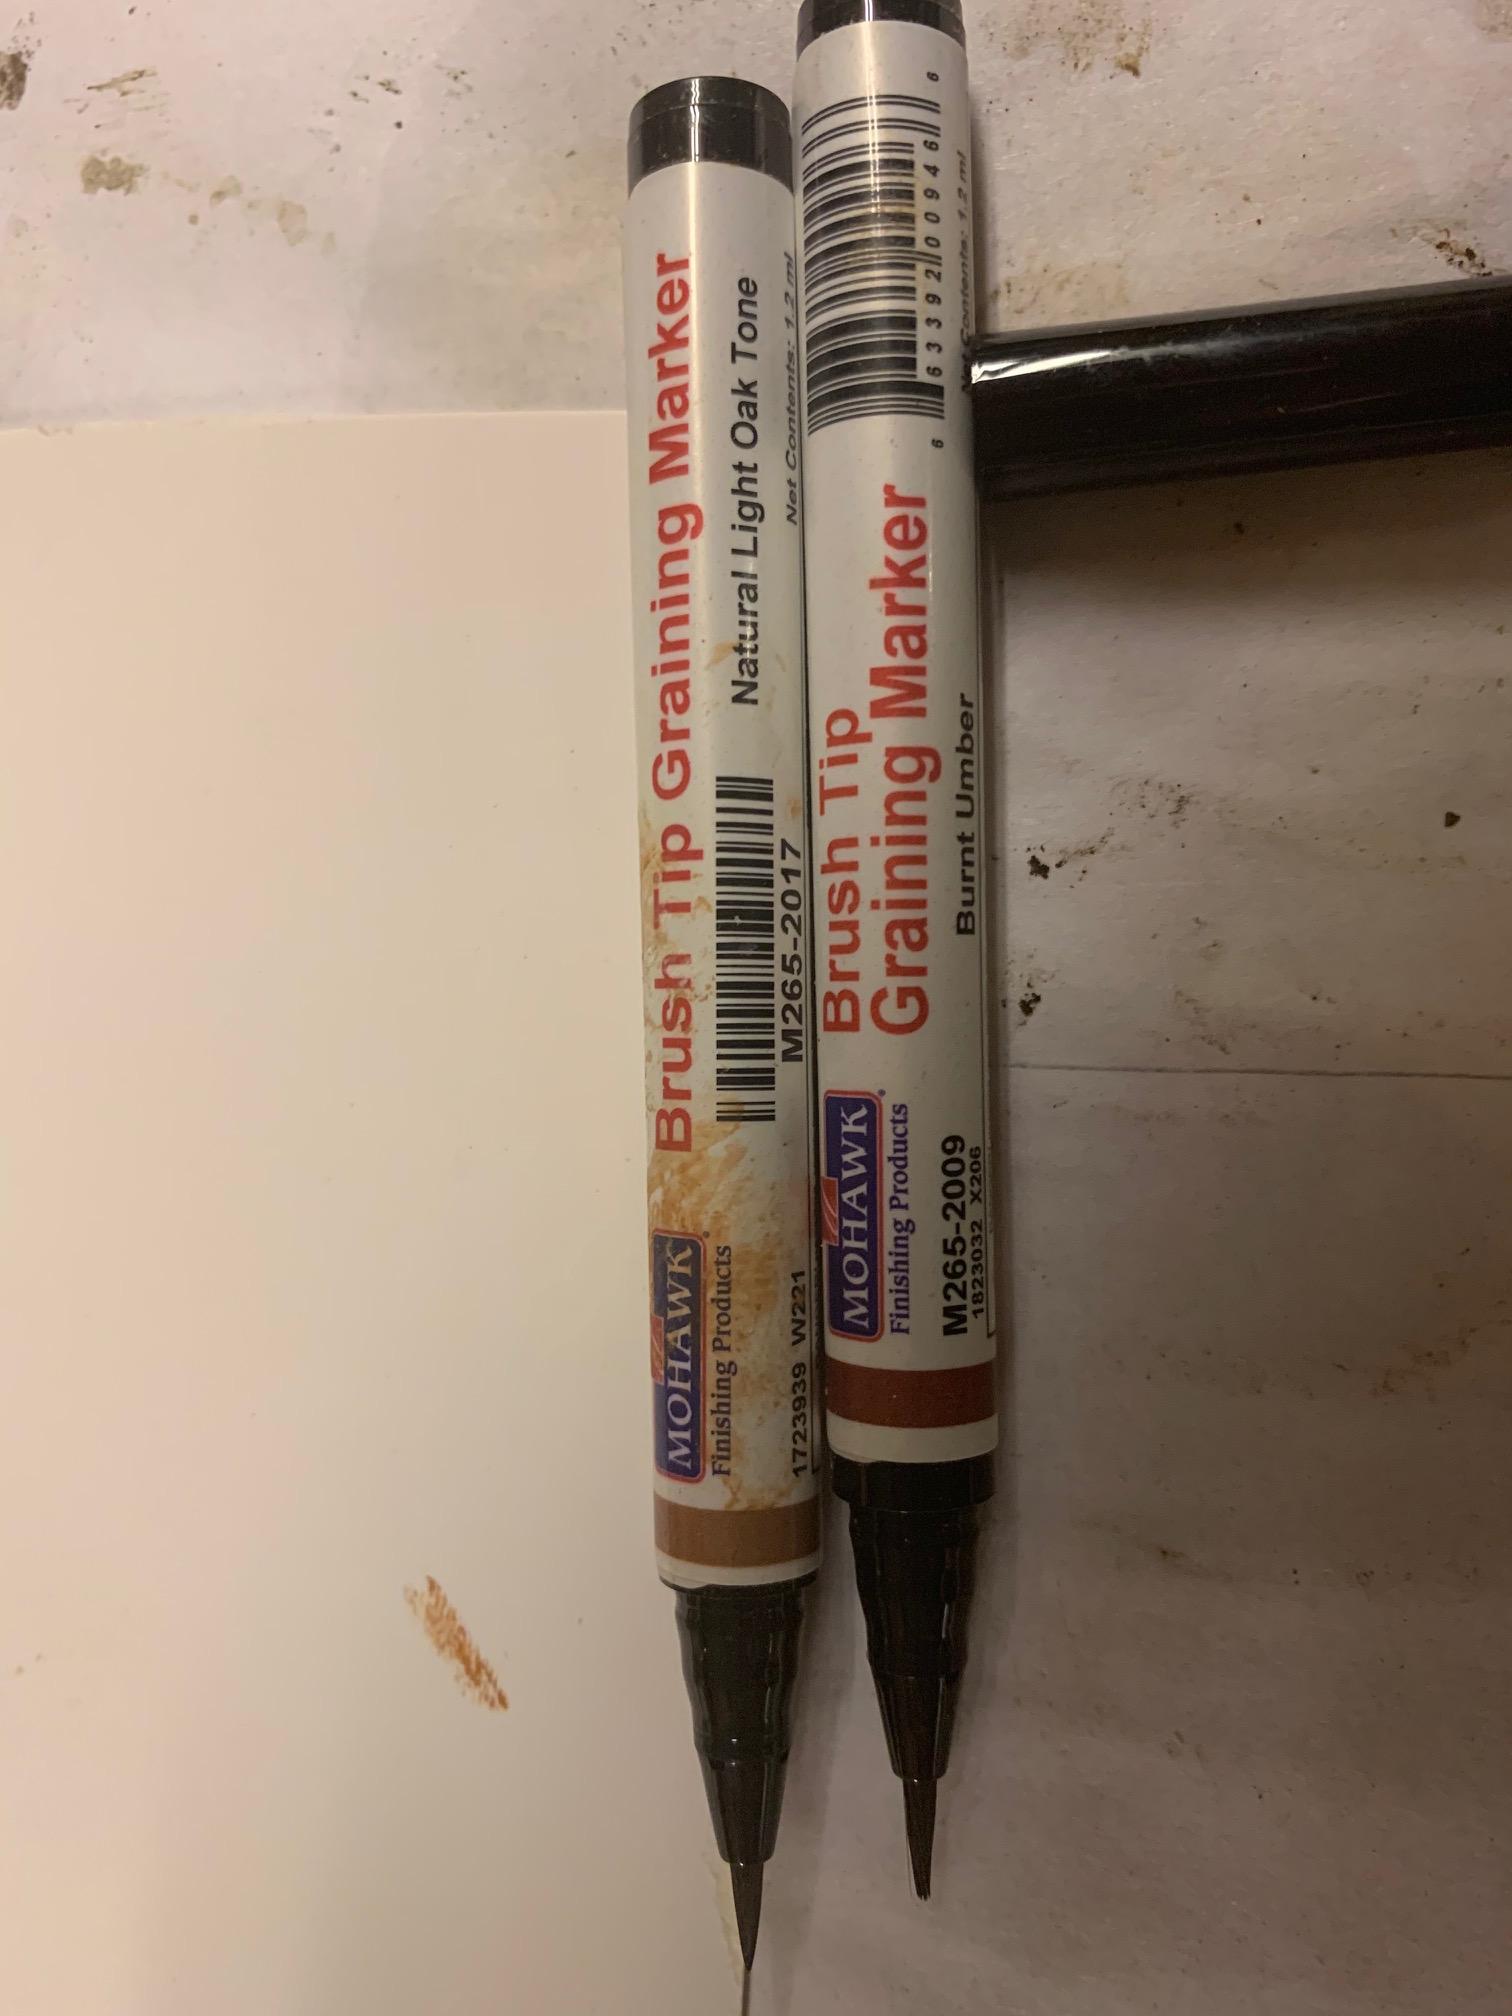
- At this point it should look much better, but you can still improve things with a graining pen. Photo attached. Use tiny strokes to paint on grain to match surrounding wood.
- When satisfied you can proceed to apply cloth and epoxy as usual.
- After the first coat of epoxy you will have an idea of how it looks. You can still adjust the blending by applying paint or graining pen between coats of epoxy.
It won’t be perfect, but casual observers shouldn’t notice the fix.
 October 14, 2019 at 8:16 am #2787
Andrew
ParticipantWow stretchMike, that’s a fantastic repair job, well done. Your heart must have sank when the damage was done but you must be delighted with the repair. I have noted your technique for future use in other woodwork projects.
-
AuthorPosts
- You must be logged in to reply to this topic.