Welcome to TeardropForum.com › Forums › Teardrop Builders’ Forum › Help with headliner and fabric
- This topic has 3 replies, 2 voices, and was last updated 1 year, 10 months ago by
jb.
-
AuthorPosts
-
February 4, 2022 at 1:47 pm #4174
madebymike60
ParticipantWhile there has been some discussion about the headliner and covering it with fabric, there doesn’t seem to be much in the way of technique, etc. so here’s my two cents worth. I hope it helps someone not make my mistakes. In no particular order, here are some suggestions and observations.
Before attaching any fabric, install all pieces of the headliner (at the same time) and make sure they fit together snugly. Friction will probably hold them in place but you may need a helper. I did not do this and am having to (somehow) trim pieces covered with a heavier fabric. I think I can just take some of the width (about 3/4 inch) off the four longer curved pieces covering #2 panels and be okay but I could have saved a lot of trouble by doing the test fit first.
Be absolutely sure which face of the headliner gets fabric before attaching the fabric. Some pieces look identical (a few actually are) and once you have them all installed in a test fit, somehow mark either the inside or wall side. For several, it would also help to mark which end goes toward the front of the camper. Again, there are subtle differences between some pieces and the test fit should help you figure out where and how they go.
What cut the headliner best for me was a 4 inch ‘wall stripper’ blade from Home Depot. Two or three passes made a clean cut.
At least one person on the forum said their headliner shrank after time. That doesn’t seem to be a common issue but leaving pieces a little big would be better than cutting them a little small.
I bought a heavier ‘outdoor fabric’ because I liked the durability and color – a lighter tan. Because it’s a bit thicker, it doesn’t always conform to the curves of the headliner and wrinkled more. A thinner material would probably stick better with fewer, if any, wrinkles.
A plastic scraper worked well for smoothing out the fabric and removing wrinkles, similar to removing air bubbles from a screen protector. This works best soon after putting headliner and fabric together.
I tried three different spray adhesives and 3M 90 has been the best. It’s more expensive but was worth it. 3M 77 and Gorilla brand did not stick as well. I tried one surface and two surface coating with each. The 90 doesn’t even suggest spraying only one surface and worked more like contact cement – once it gets tacky and you put the pieces together, they’re pretty stuck. Also, one thicker coat or two thinner ones worked well.
Don’t try to save a little fabric and cut it too close to the headliner. I did that for the first few pieces, leaving just enough fabric to cover the side edges, but it really needed to wrap around the back to stay well.
I’d start with the most square looking pieces to get a procedure down since they are easier than ones with more curves. I ended up with this multi-step procedure:
1) Lay the headliner on your fabric and trace its outline on the fabric.
2) Spray adhesive on the headliner face and inside and up to the outline on the fabric.
3) After allowing the adhesive to get tacky, carefully place the headliner back on the fabric. It might help to have someone pull (stretch) the fabric to eliminate wrinkles as you place the headliner.
4) Trim the fabric so you have at least a couple of inches to attach to the back.
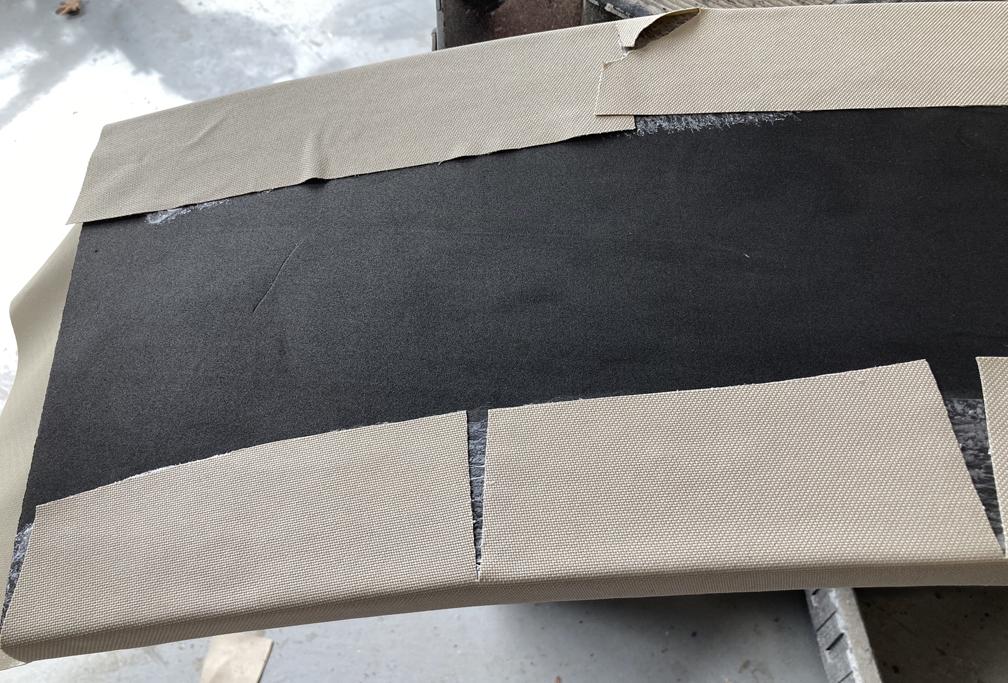
5) Cut the corners and along the edges of the fabric so it will lay flat on the back and therefore look neater on the front. (See the picture.)
6) Pick two opposite sides to start with by spraying adhesive on the extra fabric and where it will reach on the back of the headliner.
7) Once tacky, carefully pull the fabric around to the back, doing a small section at a time. I usually worked from the center of the piece to the ends.
8) Finish with the other two opposite sides.This picture shows two long sides that have been attached and why you wait until after that to do the ends – the fabric on the ends will need to attach to the glued down fabric. Also, you can see how cutting the fabric helped it lay flatter at the edges and look better from the front. A thinner fabric might not need all the cuts but this heavier one did.
If you do this, good luck and try not to do too much at one time. This has been one of the more mistake-filled parts of the whole camper experience from figuring it out as I go along to not taking my time so I hope this helps someone else.
-
This topic was modified 2 years, 5 months ago by
madebymike60.
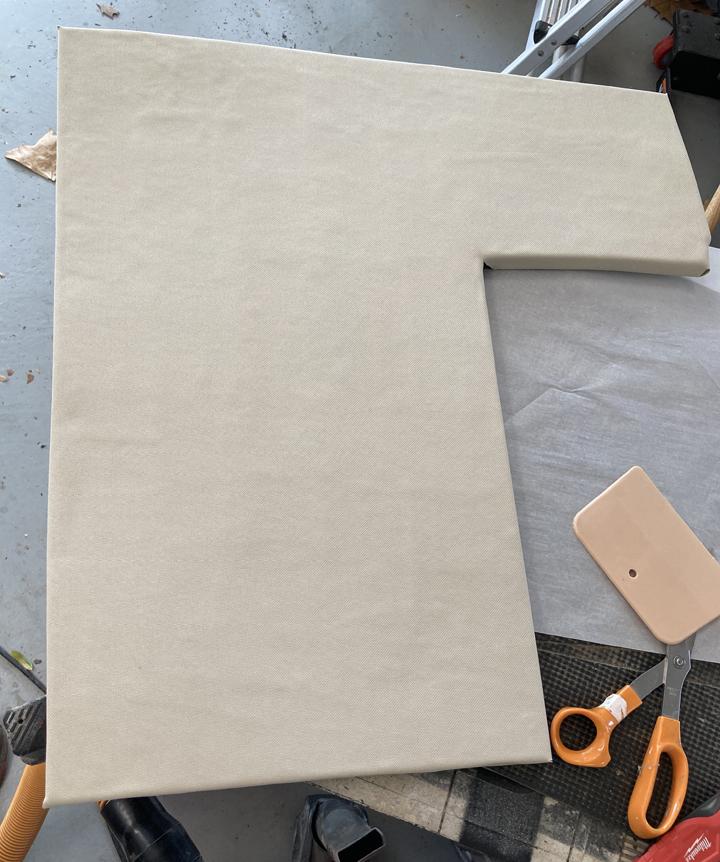
February 4, 2022 at 4:07 pm #4176ParticipantHere’s a pretty good front side. It still has some wrinkles/bubbles in it. They won’t come out completely and tend to show up more when the piece is installed (because it ends up concave) but it will be okay. This piece goes around the fan and did have to be cut to fit.
 February 4, 2022 at 4:11 pm #4177Participant
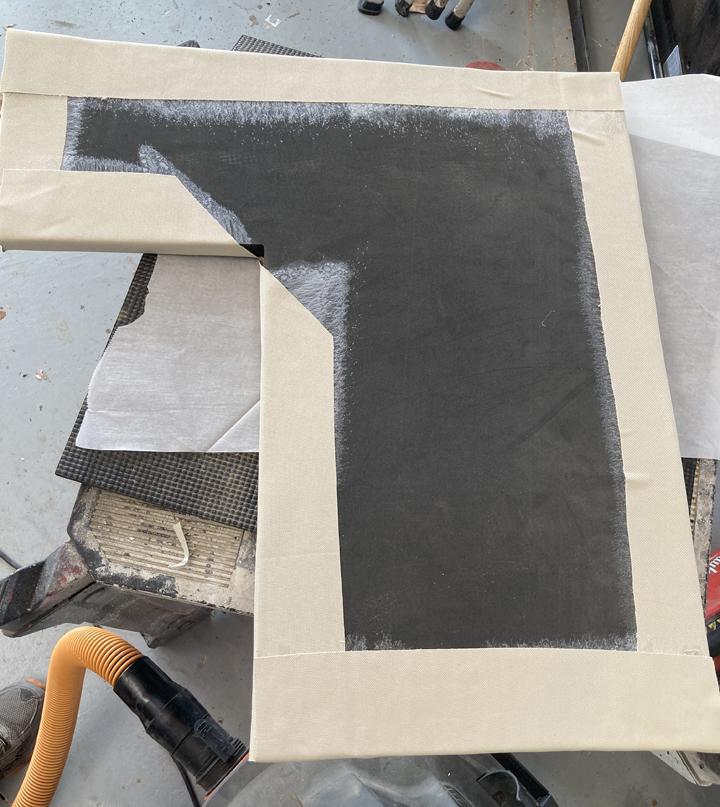
Here’s the back side of the same piece, just to show some cuts and folds. This was an easier piece to cover – ones with curves generally do not look this neat. It’s a good thing you can’t see the back of many of them.
 September 3, 2022 at 2:41 pm #4514
jb
ParticipantAll excellent advice, thanks for sharing! I’ve just started mounting the uncovered foam using magnets so I can remove the panels but I think eventually I will select a fabric cover and then use adhesive to attach the foam more permanently. I’ll add that I tried cutting the holes for the mushroom vent using a hacksaw blade and that ended up pretty rough and uneven. What ended up working great was a 4 3/8 inch Kobalt brand hole saw made for cutting drywall. Rather than blades, it has carbide grit embedded in the cutting edge.
-
This topic was modified 2 years, 5 months ago by
-
AuthorPosts
- You must be logged in to reply to this topic.