Welcome to TeardropForum.com › Forums › Teardrop Builders’ Forum › Galley gutters
- This topic has 9 replies, 4 voices, and was last updated 2 years, 10 months ago by
madebymike60.
-
AuthorPosts
-
March 3, 2017 at 2:59 pm #635
petesilverlake
ParticipantI am having trouble with the galley gutters. The glue does not want to hold the upper gutter in place. The glue works, I’ve had to peel apart fingers numerous times now but when take my hands off the gutter drops down on to the flat. The gutter only sits in the groove at an angle, so it is not completely in the groove but there is contact where I’m gluing. This only the top gutter, the bottom one looks to be even more difficult. Any help here would be appreciated.
March 5, 2017 at 1:34 am #638Bob D.
ParticipantIf there is glue on both pieces of wood, let it soak in for 10 secs or so before hitting it with the accelerator. And hold the parts together for a good half minute or more. That *should* do it.
March 8, 2017 at 4:44 pm #644derek0
ParticipantYes, I suspect that because of the angle of the gutter you are probably not getting enough glue on the bulkhead side of the mating equation. I seem to recall dripping some glue on the bulkhead above the gutter and hitting it with accelerant just as the glue touched the gutter. I definitely recall doing A LOT of sanding in that groove to get the upper galley gutter to slip into the groove in the bulkhead
I wrestled with the bottom gutter for a long time, and still got it wrong. My mistake was jamming the lower gutter up too high on the side panels resulting in a slight, outward bow of those panels. I ended up cutting the fillet between the gutter and side panel and regluing it to get everything straight again.
September 11, 2021 at 9:59 am #3890madebymike60
ParticipantHere are some ideas for the gutters. I’ll try to put them all together but because multiple pictures have been an issue, they may be in other responses following this one. Bessey makes a clamp that was helpful for holding the lower gutter in place (Bessey XV5-100 4-Inch VarioClippix Sliding Arm Plastic Spring Clamp). They have an adjustable ‘arm’ that allows you to open them up for wider clamping. One held the upper and lower parts together and others held the gutter in place for the CA glue. They’re not quite as strong as other spring clamps I have but I’ve found several uses for them while building the camper.
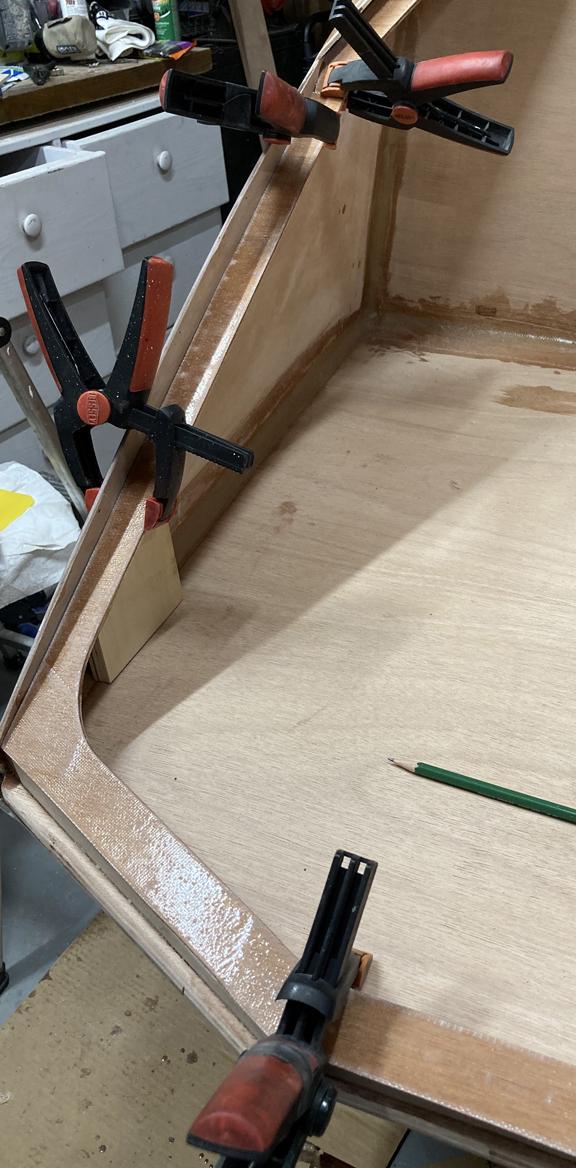 September 11, 2021 at 10:00 am #3891Participant
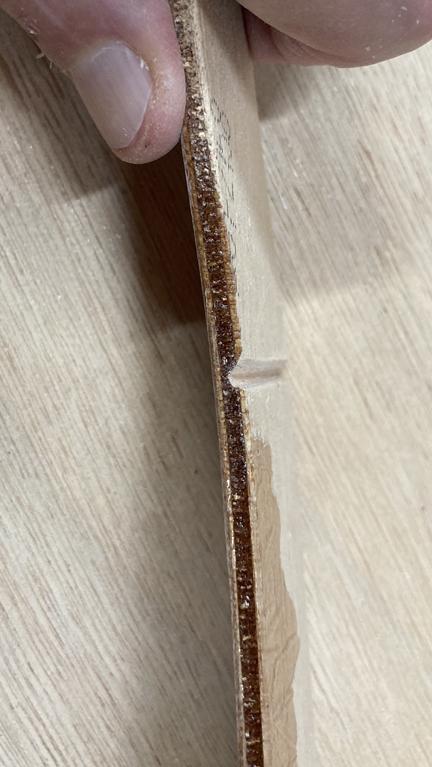
I had a difficult time making the lower gutter want to bend where you see one of the clamps above. This is at the bottom where it straightens to meet the other side. Rather than force the issue, I cut (very small) notches right at that bend. A slightly angled cut no more than halfway through should work.
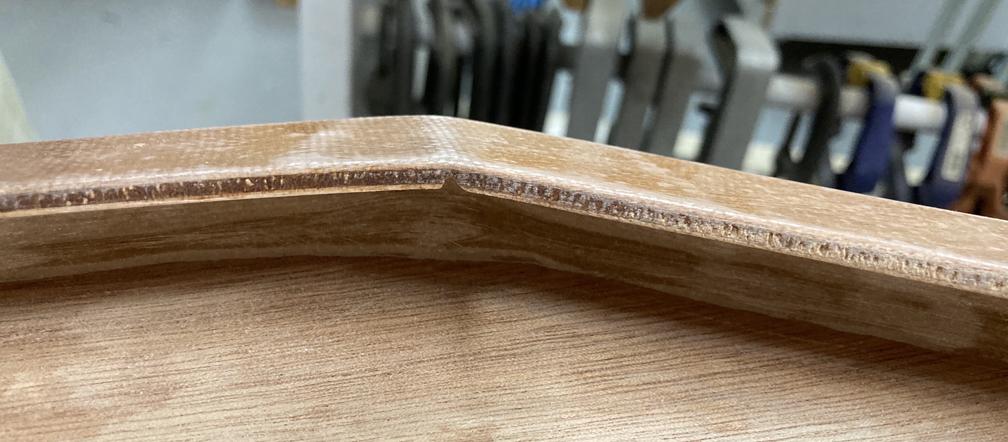
 September 11, 2021 at 10:01 am #3892Participant
Here it is installed. It helped a lot to make that ‘turn’ and get the gutter to lay flat without forcing it.
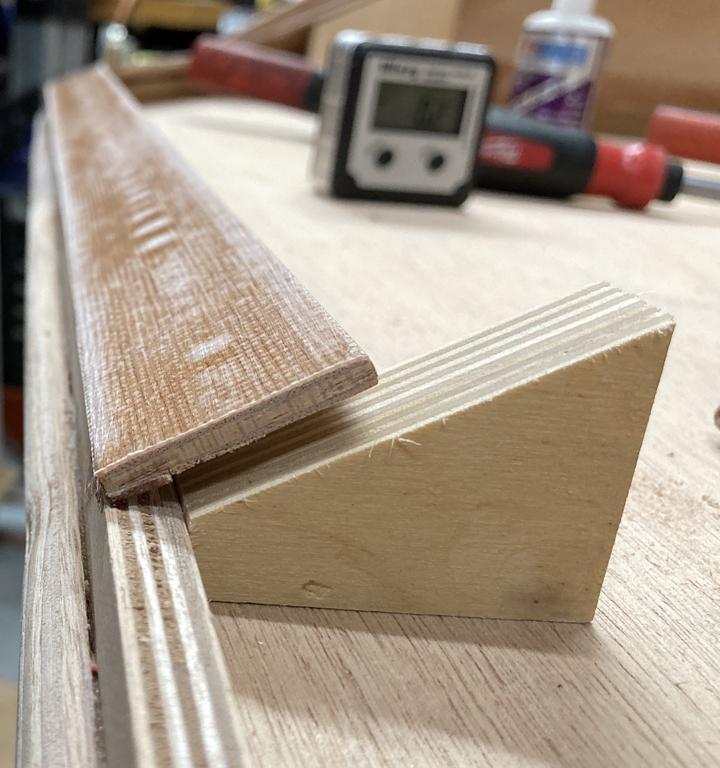
 September 11, 2021 at 10:02 am #3893Participant
To get the angle of the gutter right, I used someone else’s idea (thanks for it by the way) of wood cut at 29 degrees. I used a small and larger piece. Here’s the small one up close and larger one is in the blurry background behind the digital angle finder.
 September 11, 2021 at 10:03 am #3894Participant
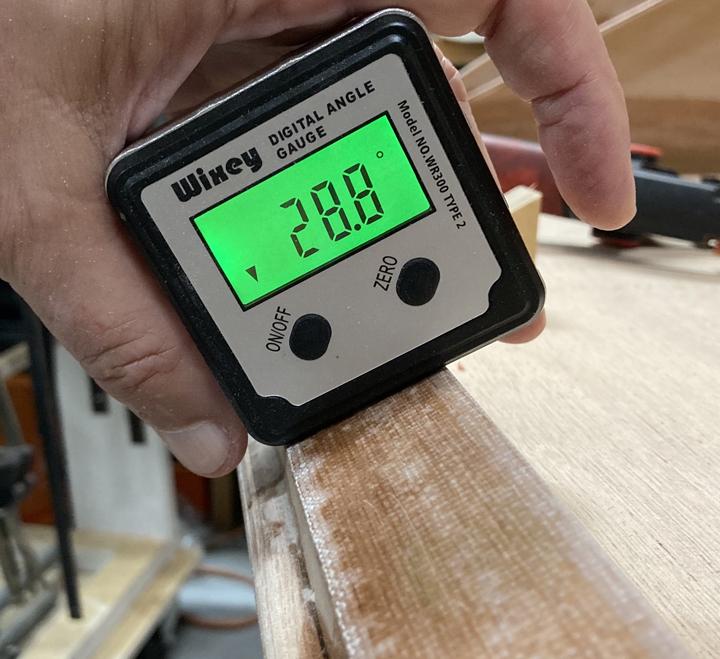
If you happen to have one, the digital angle gauge can also be used to get the angle right. Just set it at ‘zero’ on the galley flat and try to hold the gutter at about 29 degrees (or 28.8) before adding the CA glue.
 September 11, 2021 at 10:32 am #3895Participant
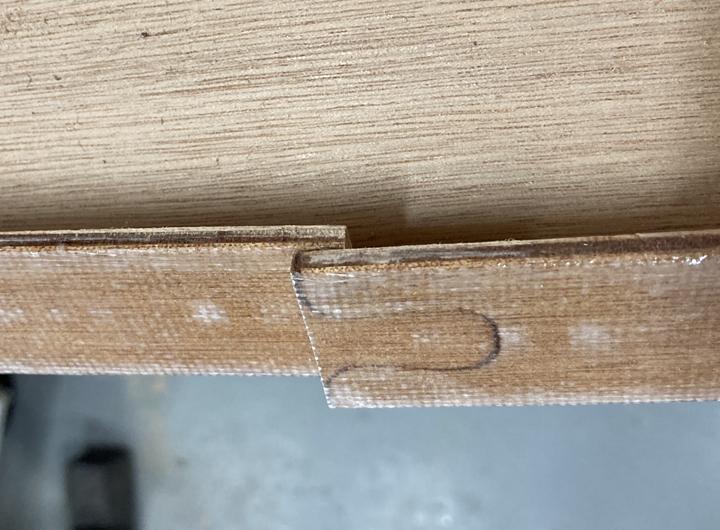
Two last tips…first, here’s how much I had to cut for the lower gutter to fit. By dry fitting, I could tell it was too big so I cut the gutter at the joint, clamped it in place and cut off the amount that overlapped. I didn’t need to cut where the upper and lower pieces met but everyone’s might be a little different.
And finally, page 162 of the manual has you put a fillet above where the gutter will go and taping off the slot for the gutter. On page170, you’re putting another fillet in the same area above the installed upper gutter. I did both fillets at the same time, after installing the gutters.
And finally again, (this time for real) I would not try to do all the gutter fillet work at the same time for two reasons. It’s a lot to try and get in place and neat but mostly because if you haven’t put a fillet at the back of the gutter riser (the long, thin piece that goes in the groove and the gutter sits on), this is a good time to do that. I’m not sure where the instructions ever mention adding that fillet but page 189 shows one in the diagram so they expect you to have it. Anyway, to reach the upper gutter fillet work, you’ll probably need to lean against the galley and you don’t want to do that with uncured epoxy there.
September 28, 2021 at 3:05 pm #3926ParticipantI’ve since seen what I overlooked in the directions before – they do show adding a fillet between the gutter riser and galley flat on page 174. I would still be patient and not try to do too much fillet work around the gutter at one time. This advice is also in the directions but if you’re more of a ‘picture person’, you might miss it. So much of this area will be visible every time you open the galley hatch and you don’t want it to be sloppy.
-
This reply was modified 2 years, 10 months ago by
-
This reply was modified 2 years, 10 months ago by
-
AuthorPosts
- You must be logged in to reply to this topic.