Welcome to TeardropForum.com › Forums › Teardrop Builders’ Forum › Fitting the galley hatch
Tagged: galley hatch fitting
- This topic has 9 replies, 3 voices, and was last updated 6 years, 1 month ago by
PatandRay.
-
AuthorPosts
-
June 2, 2018 at 10:55 am #1863
PatandRay
ParticipantThe galley hatch does not look like a good fit for the opening from whence it came. With the edges cleaned up and straightened and the hash marks sanded smooth the top of the hatch hits the opening but the rear edge seems to hang over the end of the transom 1/8th of an inch.
More concerning is the gap between the hatch and the #2 panel on both sides.
Questions:
1. Should there be a small gap at the top edge to allow for movement?2. How can the gap at the sides be fixed?
3. Is it possible for the hatch to flatten out after being cut from the shell? If so is it possible to fix it?
I will try to post some pics but if anyone has a suggestion, please let me know. I am running out of ideas and getting further behind schedule.
June 3, 2018 at 9:39 am #1864abrightwell
ParticipantI think pictures would certainly help get a better idea about your concerns.
There will obviously be a little bit of a gap around the edges, assuming for the kerf and sanding afterwards. And I’ve seen varying degrees of gaps across builds.
I doubt the hatch would flatten out, but I suppose anything is possible. I left mine sitting ‘vertically’ for over a month with the front edge (end with the stiffeners) on the ground and had no issues.
FWIW, I had concerns about mine as well, but minus one mistake (on my part), the galley hatch on mine fit well enough with ‘minor’ adjustments.
-Adam
June 4, 2018 at 1:26 am #1865western_flyer
ParticipantI had a heck of a time lining up the galley hatch and finally after the third failed try with tape used 2 inch deck screws. Centering the hatch I drove two screw through the “hatch lid” lip section spaced to near the bend but in the center section below panels 1. I glued the center thick hinge blocks to the roof and bolted the 4 side plates to the centers. I then drilled pilot holes down the centers of the side plates and tightened the screws until the side plates were flush and snug. A little tweaking to the back 2 screws and it all lined up beautifully. After the epoxy putty set, the screws were removed and the holes puttied closed.
I don’t mean to be overly critical because the manual is very complete, very well written and illustrated. BUT in places it assumes skill sets many of us amateur builders just don’t have – at least skills I don’t have. I’ve personally gone off script in a number of places to compensate for my lack of skill and neighbors ready and able to lend a hand at just the right time.
June 4, 2018 at 10:21 am #1866Participant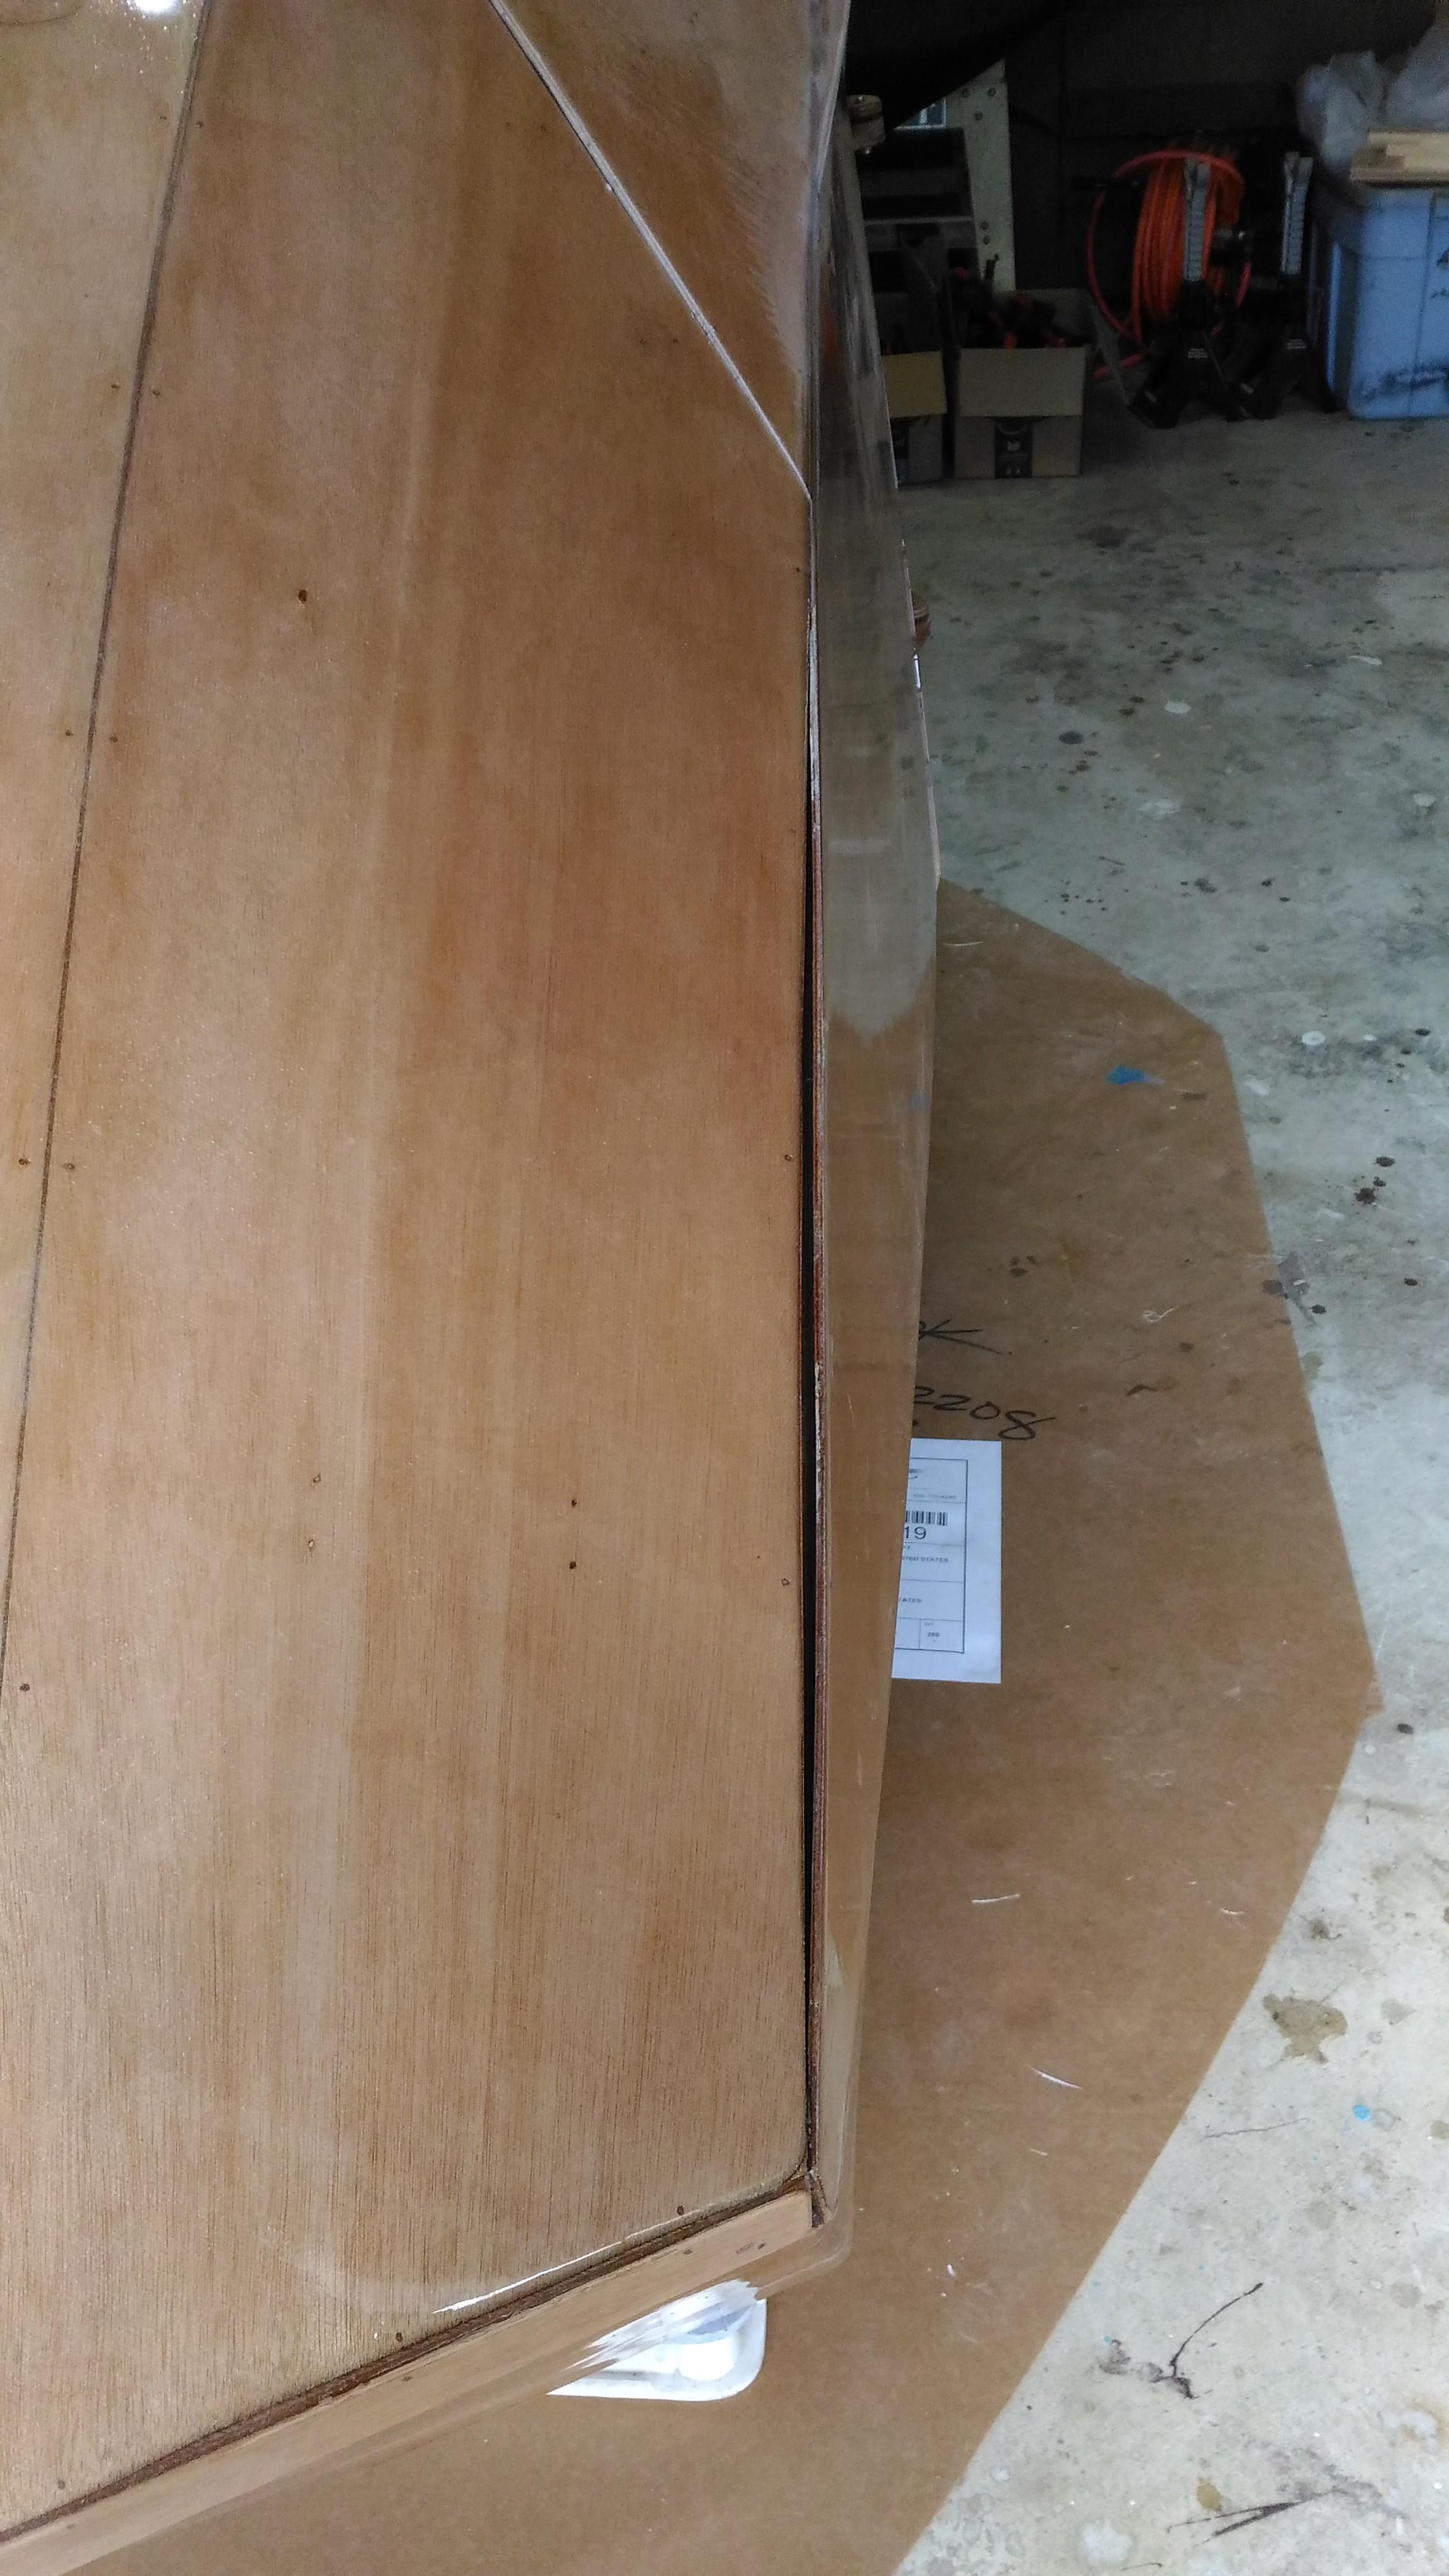 June 4, 2018 at 10:24 am #1867Participant
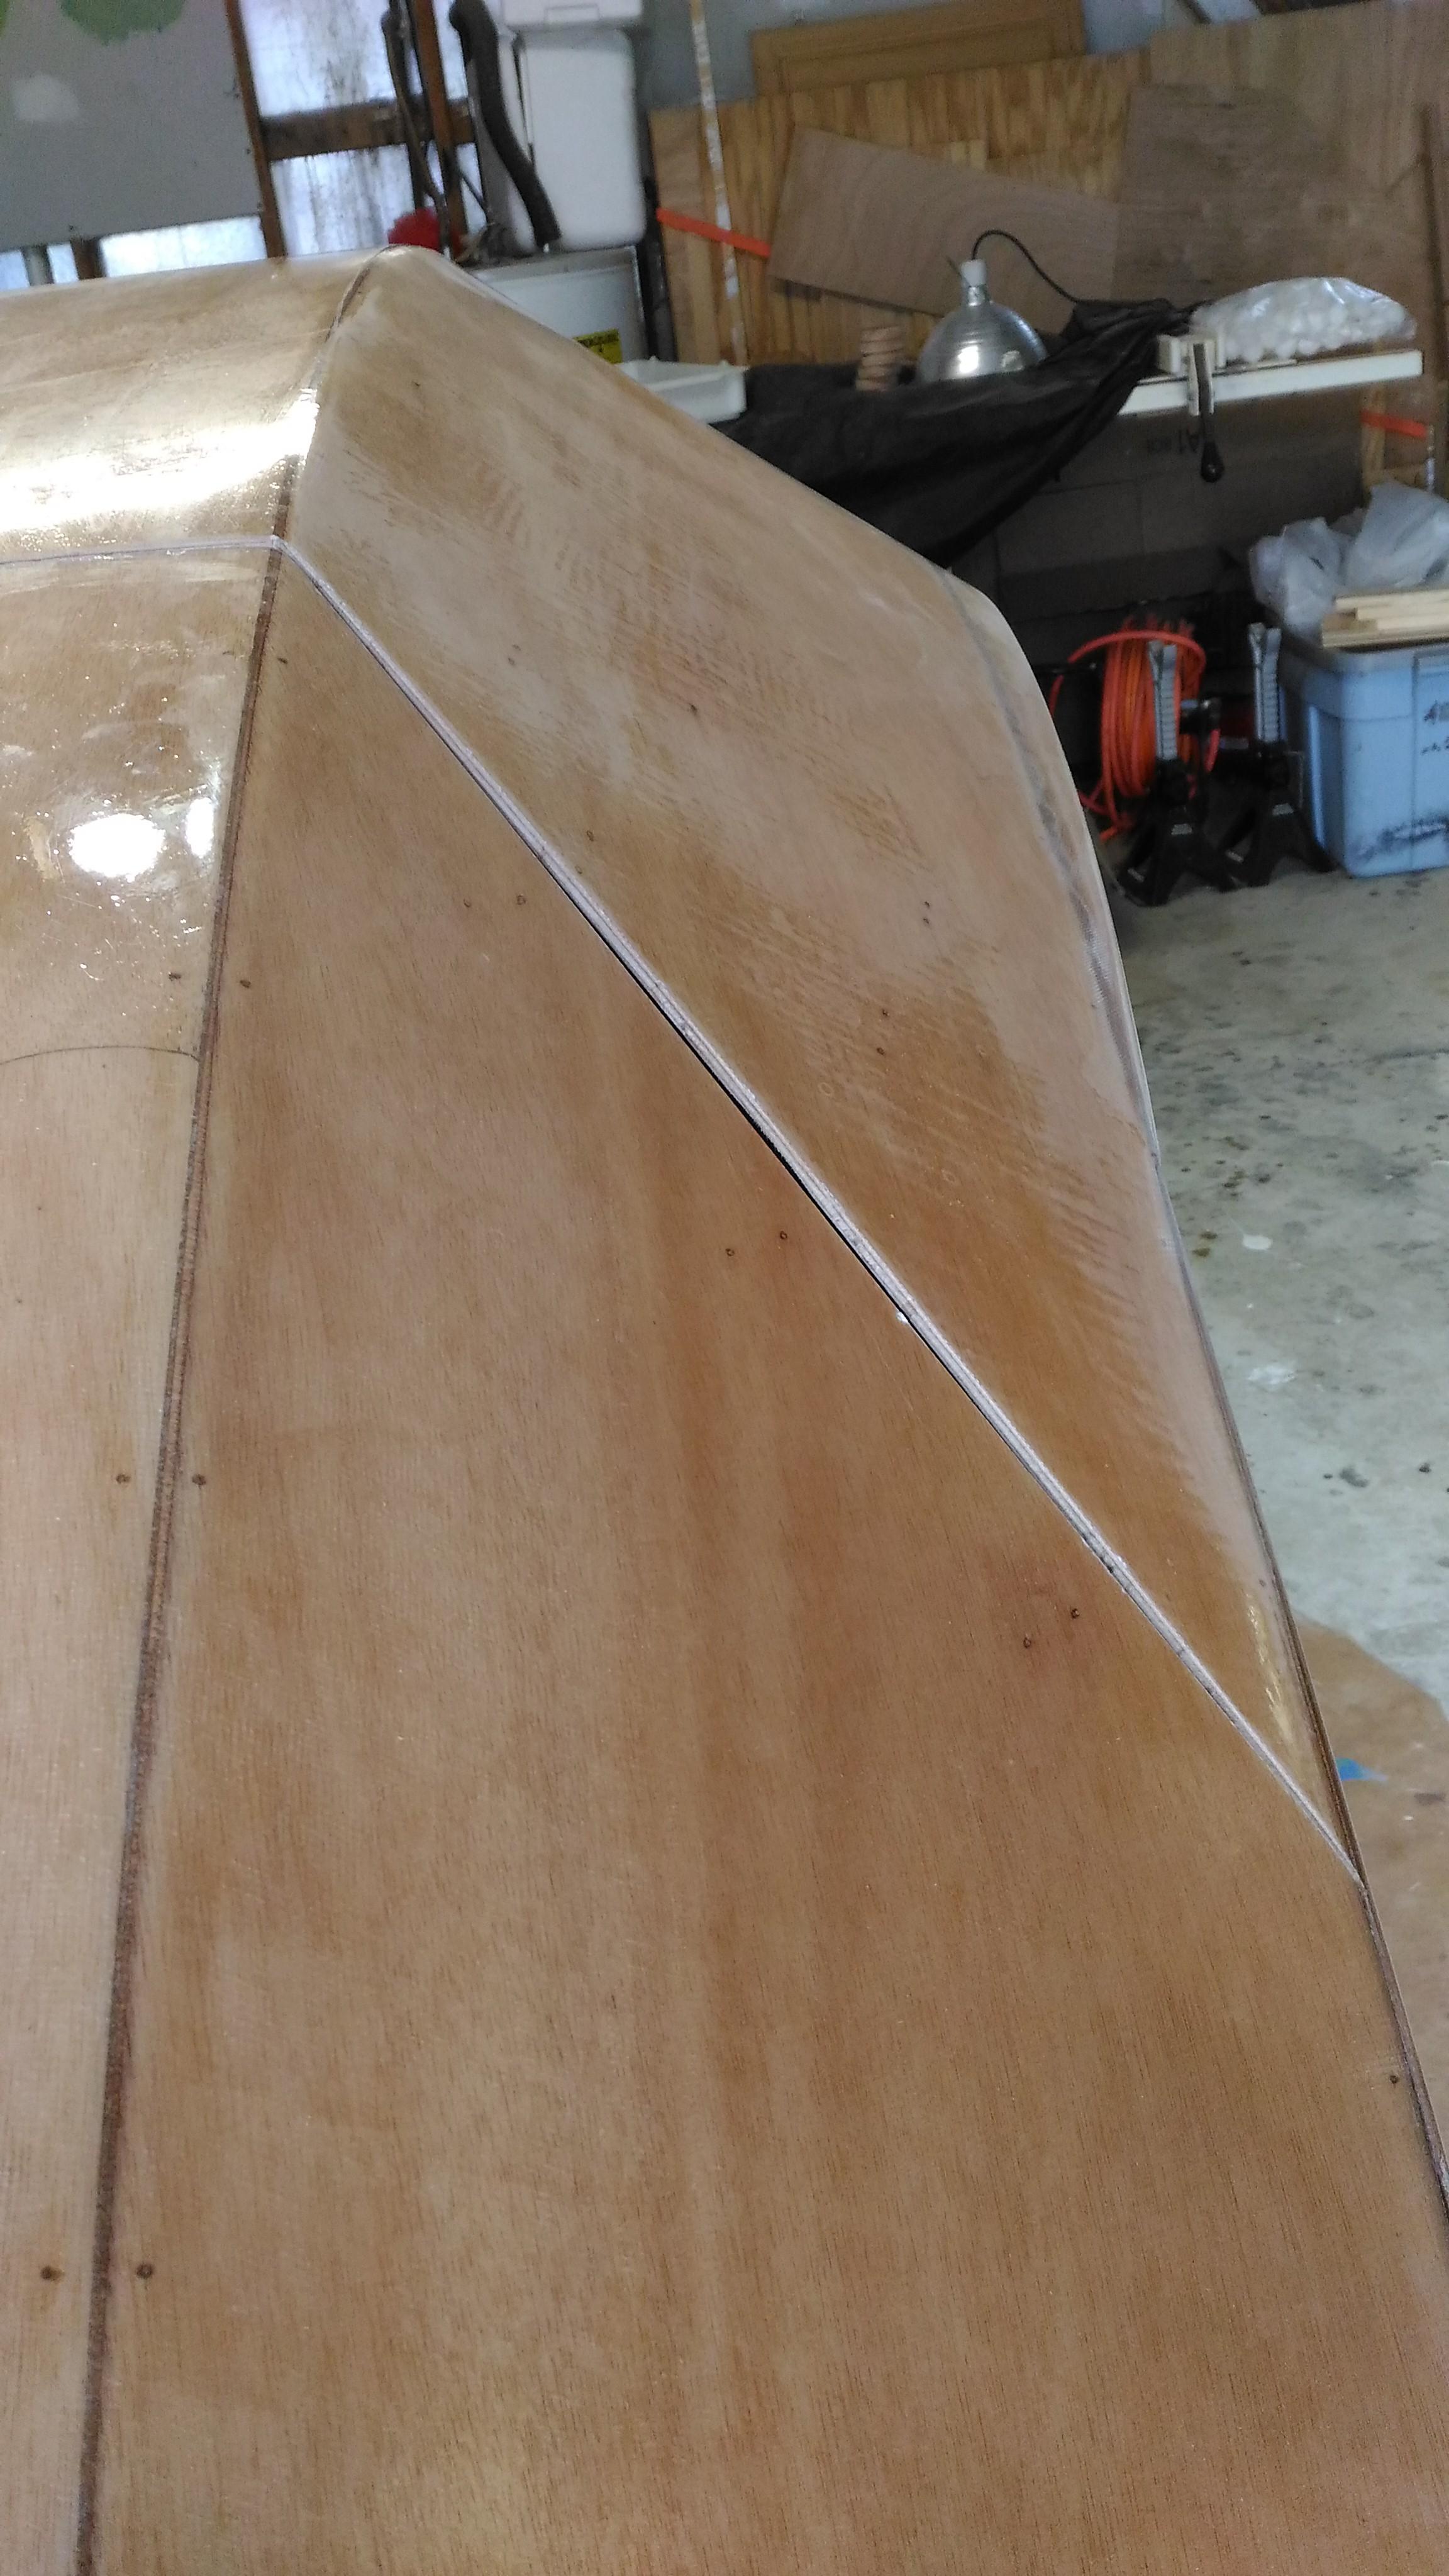 June 4, 2018 at 10:29 am #1868Participant
The 2 pics above show the issues I tried to describe. At the #2 panel the hatch edge is lower than the body on both sides of the teardrop.
At the number 3 panel, there is a gap of about 1/2″ between the hatch and the teardrop body.
Some time ago I saw a picture on the forum showing an edging of fiberglass around the hatch opening. The text expressed annoyance at having to use fiberglass to fill a gap but there wasn’t any further comment or explanation that I could find.
June 4, 2018 at 12:07 pm #1869ParticipantHmmm… I’m not sure what to offer on the #2 panel sitting lower. I’d recommend contacting the guys at CLC and getting their opinion.
As for between the side and the hatch, I accidentally ended up with a larger ‘gap’ than I had hoped for on one side. For me, I identified it as being due to an ‘alignment’ mistake when I was mounting the hinges. My goof, but I plan to fix it at a later point in time after I’ve got some miles on it and have determined if it really bothers me that much. What your picture shows doesn’t look any worse than what I ended up with on that one side.
In either case, I’d recommend talking with CLC. Their customer support is fantastic, IMO. I’m sure they’ll be able to get you the right solution.
June 5, 2018 at 3:39 pm #1873ParticipantThanks for the feedback. My woodworking experience is predominately around right angles. Ray “shapes wood” and follows directions. CLC said the pics looked great. We are proceeding with build and will just have to see what happens.
June 7, 2018 at 12:31 pm #1875ParticipantOne possibility is to paint narrow line of a dark contrasting color around both the galley hatch, the galley opening edges and the galley gutter. To get the idea of what I talking about turn to page 288 of the manual where they put a thin strip of vinyl tape on top of the eyebrow seam.
I don’t think the vinyl tape would be up to the rigors of the wear and tear the galley hatch is going to get. I’m going to use a black semigloss or satin polyurethane, which will tend to visually hide any irregularities along the hatch edges. I plan to do the same with the cabin doors. The black non gloss paint will blend in with the black gaskets and foam seals.
I’m finishing my TD with off white polyurethanes, but I think black edges around the hatch and doors would look especially nice with the bright (sailor talk for a clear finish) and black accents shown in the manual and online.
Keep the post and photo coming as you progress.
June 16, 2018 at 12:00 pm #1897ParticipantWestern flyer, I had also thought of the black paint edge. Your color combo sounds nice. I look forward to seeing pics. First step for us is to make sure it doesn’t leak!
I am asking because I have not seen it discussed anywhere…. are you supposed to leave a gap at the top of the gutter where it turns to cross the galley side of the bulkhead? The shape of the piece makes it seem as though fillets belong on the sides and across but not around the corner.
-
AuthorPosts
- You must be logged in to reply to this topic.