Welcome to TeardropForum.com › Forums › Teardrop Builders’ Forum › Cutting out the galley hatch
- This topic has 0 replies, 1 voice, and was last updated 2 years, 11 months ago by
madebymike60.
-
AuthorPosts
-
September 8, 2021 at 4:41 pm #3844
madebymike60
ParticipantHere are some ideas for cutting out the galley hatch that might help. I’m a woodworker and can follow a line with a saw but for something like this, where the results will be very noticeable, I’ll take time to be sure my cuts are as neat as I can make them. I used straight edges (aluminum or melamine) stuck in the right place (for my saw) using double sided tape. If you try this, make sure your straight edge is attached securely (use new tape from time to time) and I encourage you to make a ‘dry run’ once you have it in place. In other words, tilt the saw up (with the blade guard out of the way) and move the saw along the edge to see the blade teeth move right over where you want to cut. That’s assuming you use a circular saw of course.
Here is a piece of aluminum stuck to the top of the camper for a first cut. I was always aiming for the kerf to be in the middle of the pre-cut CNC oval holes, like the directions say. These cuts across the top of the camper were made first so I could install the galley hatch hinges.
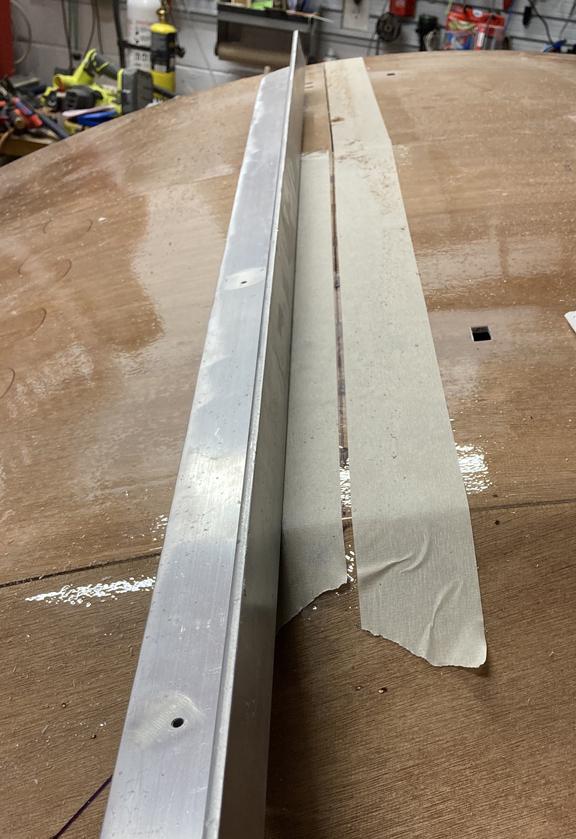
Here is a piece of melamine stuck to the camper side about an inch away from where I want the cut (again, based on my saw). I used a small 12 volt Milwaukee circular saw to make these straight cuts.
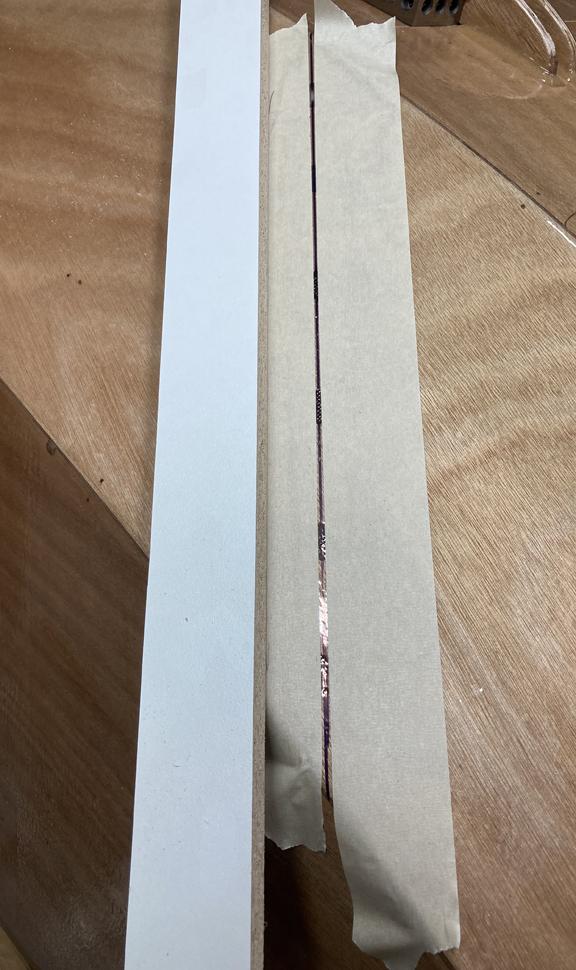
That’s how I did the four straight cuts – two across #1 panels and two diagonal ones down the sides of #2 panels.
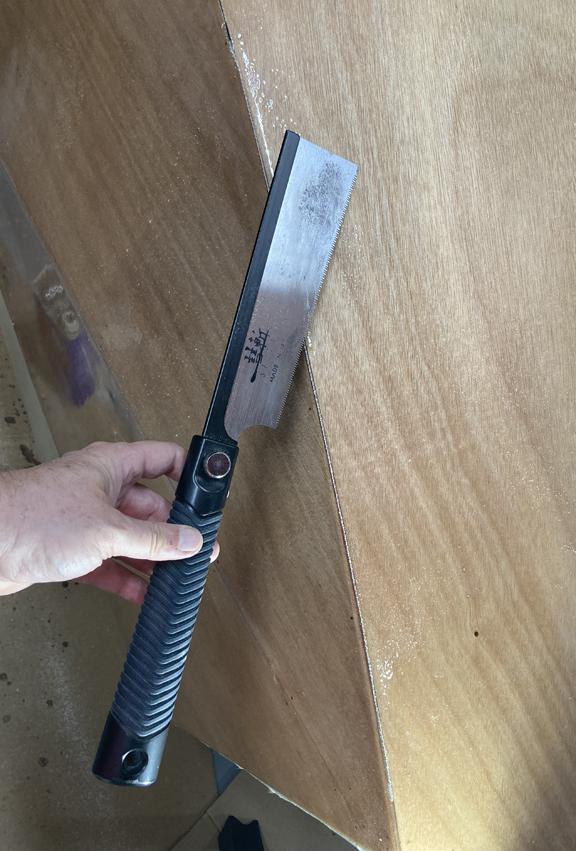
For the curved cut between panels 2 and 3, I held three different saws in place and tried to imagine following the curved line without good support, since you’re cutting on an outside corner. I just couldn’t see it happening.
Here’s what I used and it worked well. I used a small Dremel-type saw to start a kerf you can see at the top of the picture. The rest of the cut was made with the hand saw shown. There’s not much holding the two panels together – a little fiberglass and epoxy – so it wasn’t hard. The kerf is almost non-existent. Once the hatch is removed, it will be sanded some but the gap should still end up being quite small and I’m hoping harder for water to get into and nicer looking as well.
-
AuthorPosts
- You must be logged in to reply to this topic.