Forum Replies Created
-
AuthorPosts
-
Boardwalk
ParticipantA few things I would do different:
- Leak test before the panels are glued in. I am tracing two leaks and I am kicking myself for not testing BEFORE adding the foam.
- Paint the interior shell with black paint, wherever the foam seams meet. Makes the gaps less noticeable.
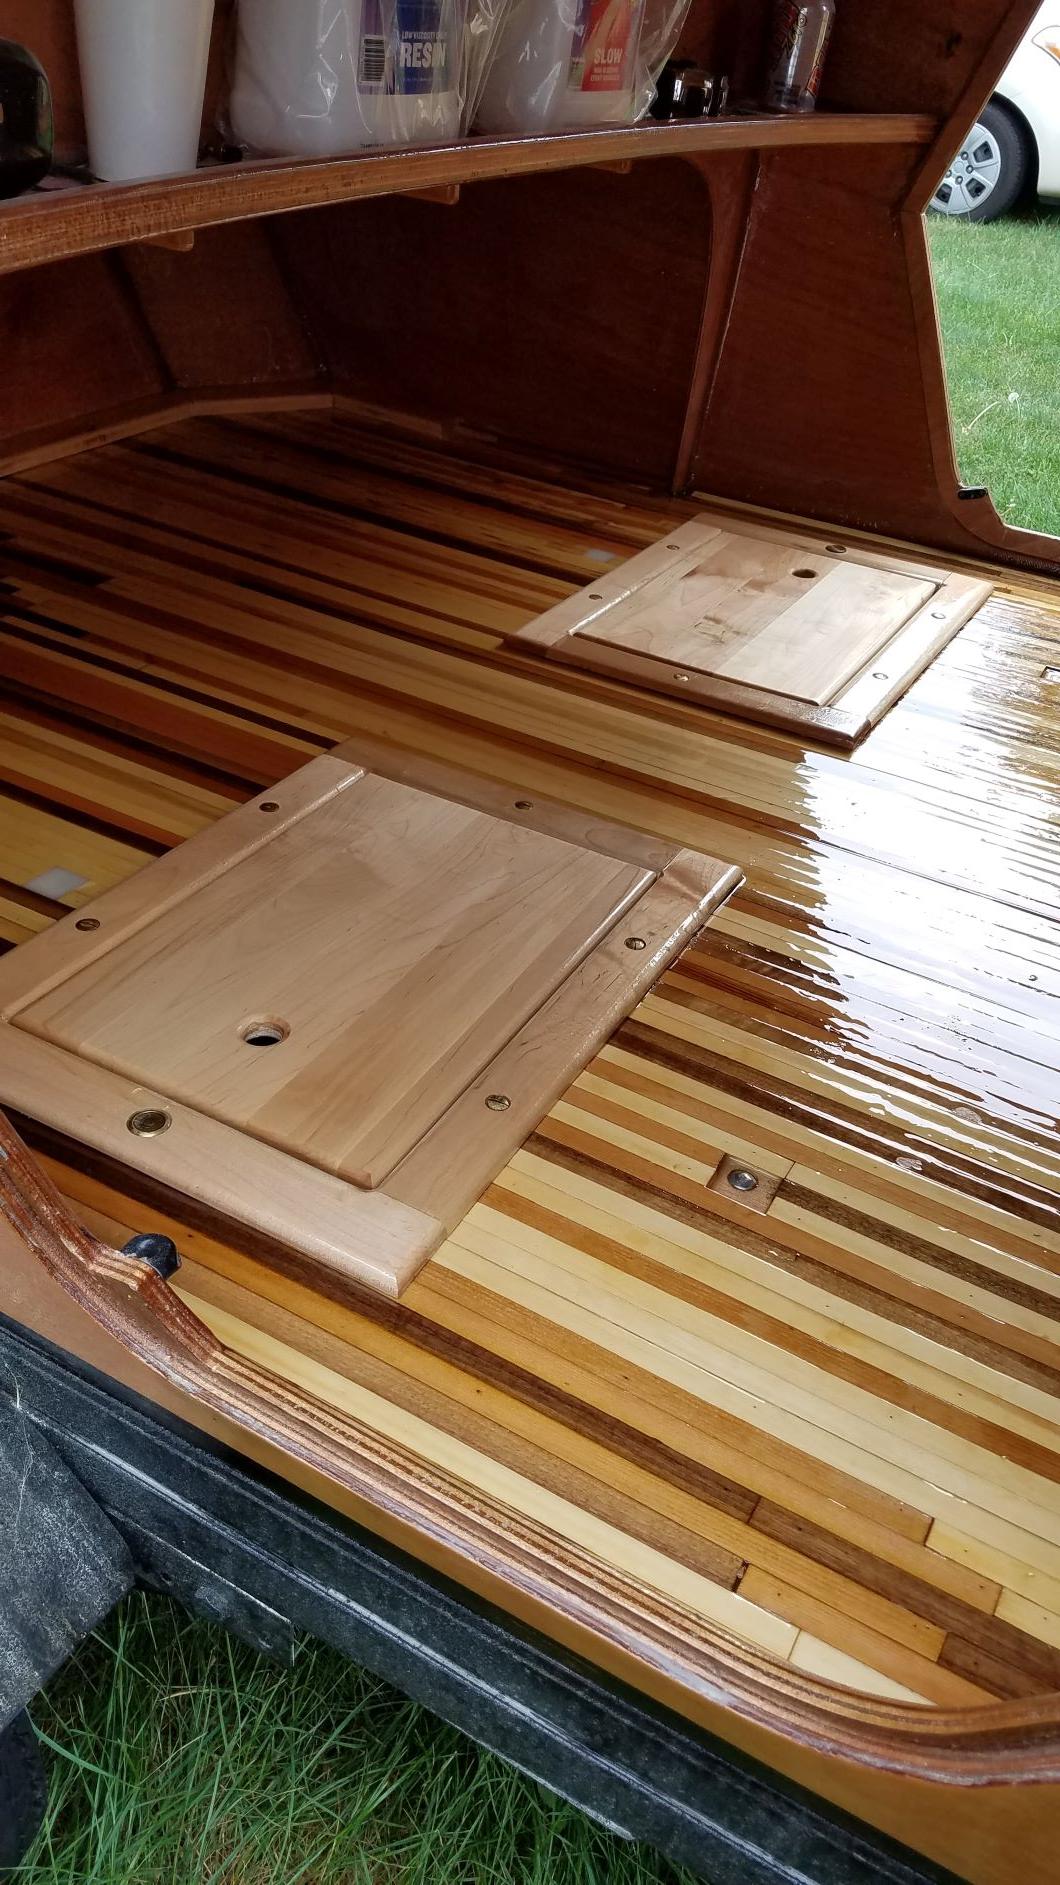
ParticipantI installed 2 boxes under the floor. I reinforced the cutouts with hard maple and sandwiched the floor and the frame with two additional frames to form the box and then the cover.
 Participant
Pictures helped a lot.
We’ve been getting a lot of rain here in Minneapolis lately and the Galley was always soaked afterward. Finally did a ‘cup half full’ test and it leaks from the top as the water runs off the main shell and into the gap.
I am pretty sure my weather stripping doesn’t match the photos above. When it stops raining – I’ll go look.
Should would be nice to not have to sponge out the galley after every rain. 🙂
ParticipantAwesome job.
- Any chance you can share how you wired everything up?
- What SKU was the Menards runner (if you have it)
Maybe we’ll have to do a ‘get together’ to get all the TDs in one place.
ParticipantI will be wrapping mine up in the Spring. I am in Andover, MN and traveled to Annapolis to build mine at the TD class. We are opening a DIY studio and I needed to postpone the finishing until 2018. I wonder how many Minnesotans we have out there.
ParticipantI live in MN and plan to finish my epoxy in the Spring. I am opening a DIY studio – so I had to postpone the finish until 2018. If you don’t have a heated space – I would wait to epoxy until it gets warmer.
ParticipantAt the June class – we used a composite riser. However, I think the hockey pucks are a really good alternative. That’s what I would have used if not for the class.
ParticipantI would suggest applying epoxy to the galley flat (both sides), bulkhead and shelf before install. Just a little hard getting around to all the spots once you have a full grown turtle.
ParticipantVery Nice. Will plan to do the same thing.
ParticipantThanks! I am still building, but will definitely keep this solution in mind.
ParticipantBill,
What was the problem you were solving for? Thanks
Participant2″ inch clamps are fine. (I was one of the students at the class)
We also used a few wood handscrew clamps and some c-clamps where we thought we needed a little more pressure.
ParticipantWhat size are the nuts? I may want some on hand before I go to the class in June.
ParticipantI don’t want you to think we are not listening.
If no one lives close by, I’ll be driving past the southern end of Michigan on my way back from Annapolis in June (I live in Minnesota). I am taking the June teardrop class at CLC. The trailer won’t be complete, but you should get a good sense of the scope of the project.
ParticipantDoes the teardrop fit between the fenders?
TDC measures about 66″ across (per the manual)
How does the door align with the wheels/fenders?You can mount the shell to the trailer wherever it makes the most sense. I would think that you would position the shell a little more forward than a 4×8.
How high off the ground is the back kitchen area ledge with this trailer?Since the Northern Tool website doesn’t list the height of the bed, I am going to go by some of the other posts on this forum. 12″ tires means approx that the base of the galley is about 42″ high. See post #579
Like the HF trailer, it says its max speed is 45 mph, is this them just covering their butts?I noticed this too. When I talked to the salesman at Northern Tool – he said that these tires are rated for 75MPH. I told him about the rating on the website and they reconfirmed the 75MPH. I didn’t ask for documentation.
-
This reply was modified 8 years, 11 months ago by
Boardwalk.
-
AuthorPosts