Welcome to TeardropForum.com › Forums › Teardrop Builders’ Forum › Galley Leak
Tagged: Galley Hatch Leak Seal
- This topic has 14 replies, 5 voices, and was last updated 7 years, 10 months ago by
friz.
-
AuthorPosts
-
September 4, 2017 at 12:57 am #1253
tmh2111
ParticipantI weather tested my teardrop last night. We had a good rain. The cabin stayed dry, the galley had a good sized puddle. Fortunately I have not installed the electric panel yet.
While I haven’t had a chance to do a full evaluation, it looks like, in the top right corner, water flowed the wrong way over the weather gasket, into the galley rather than outward onto the gutter. The little wooden strip in front of the stiffener seems to make good contact with the gasket across the top, except perhaps in the corner.
What sort of other checks can I do to troubleshoot? I’m going to run a hose along the lower edges first to see if there are other sources of incursion, and then gradually work my way up.
If indeed the top right corner is the only culprit, or even the top edge, what remediation might I try?
September 4, 2017 at 5:17 pm #1254faithie999
ParticipantMy son has my teardrop right now so I can’t verify, but what I would try is another layer of the 3/4″ wide foam gasket that you applied to the underside of the galley hatch. Any local hardware store stocks a variety of different widths and thicknesses of Frost King gasket material. I would start with a package the same width as supplied by CLC (3/4″?) but 3/16 or 5/16 instead of 7/16 thickness. I would start at the area you think is leaking and apply a layer of the gasket a couple feet either side of the suspected leak location. The frost king material is very compressible so I doubt that the additional thickness in one area would negatively impact the areas that don’t have a double layer.
September 5, 2017 at 2:02 pm #1255friz
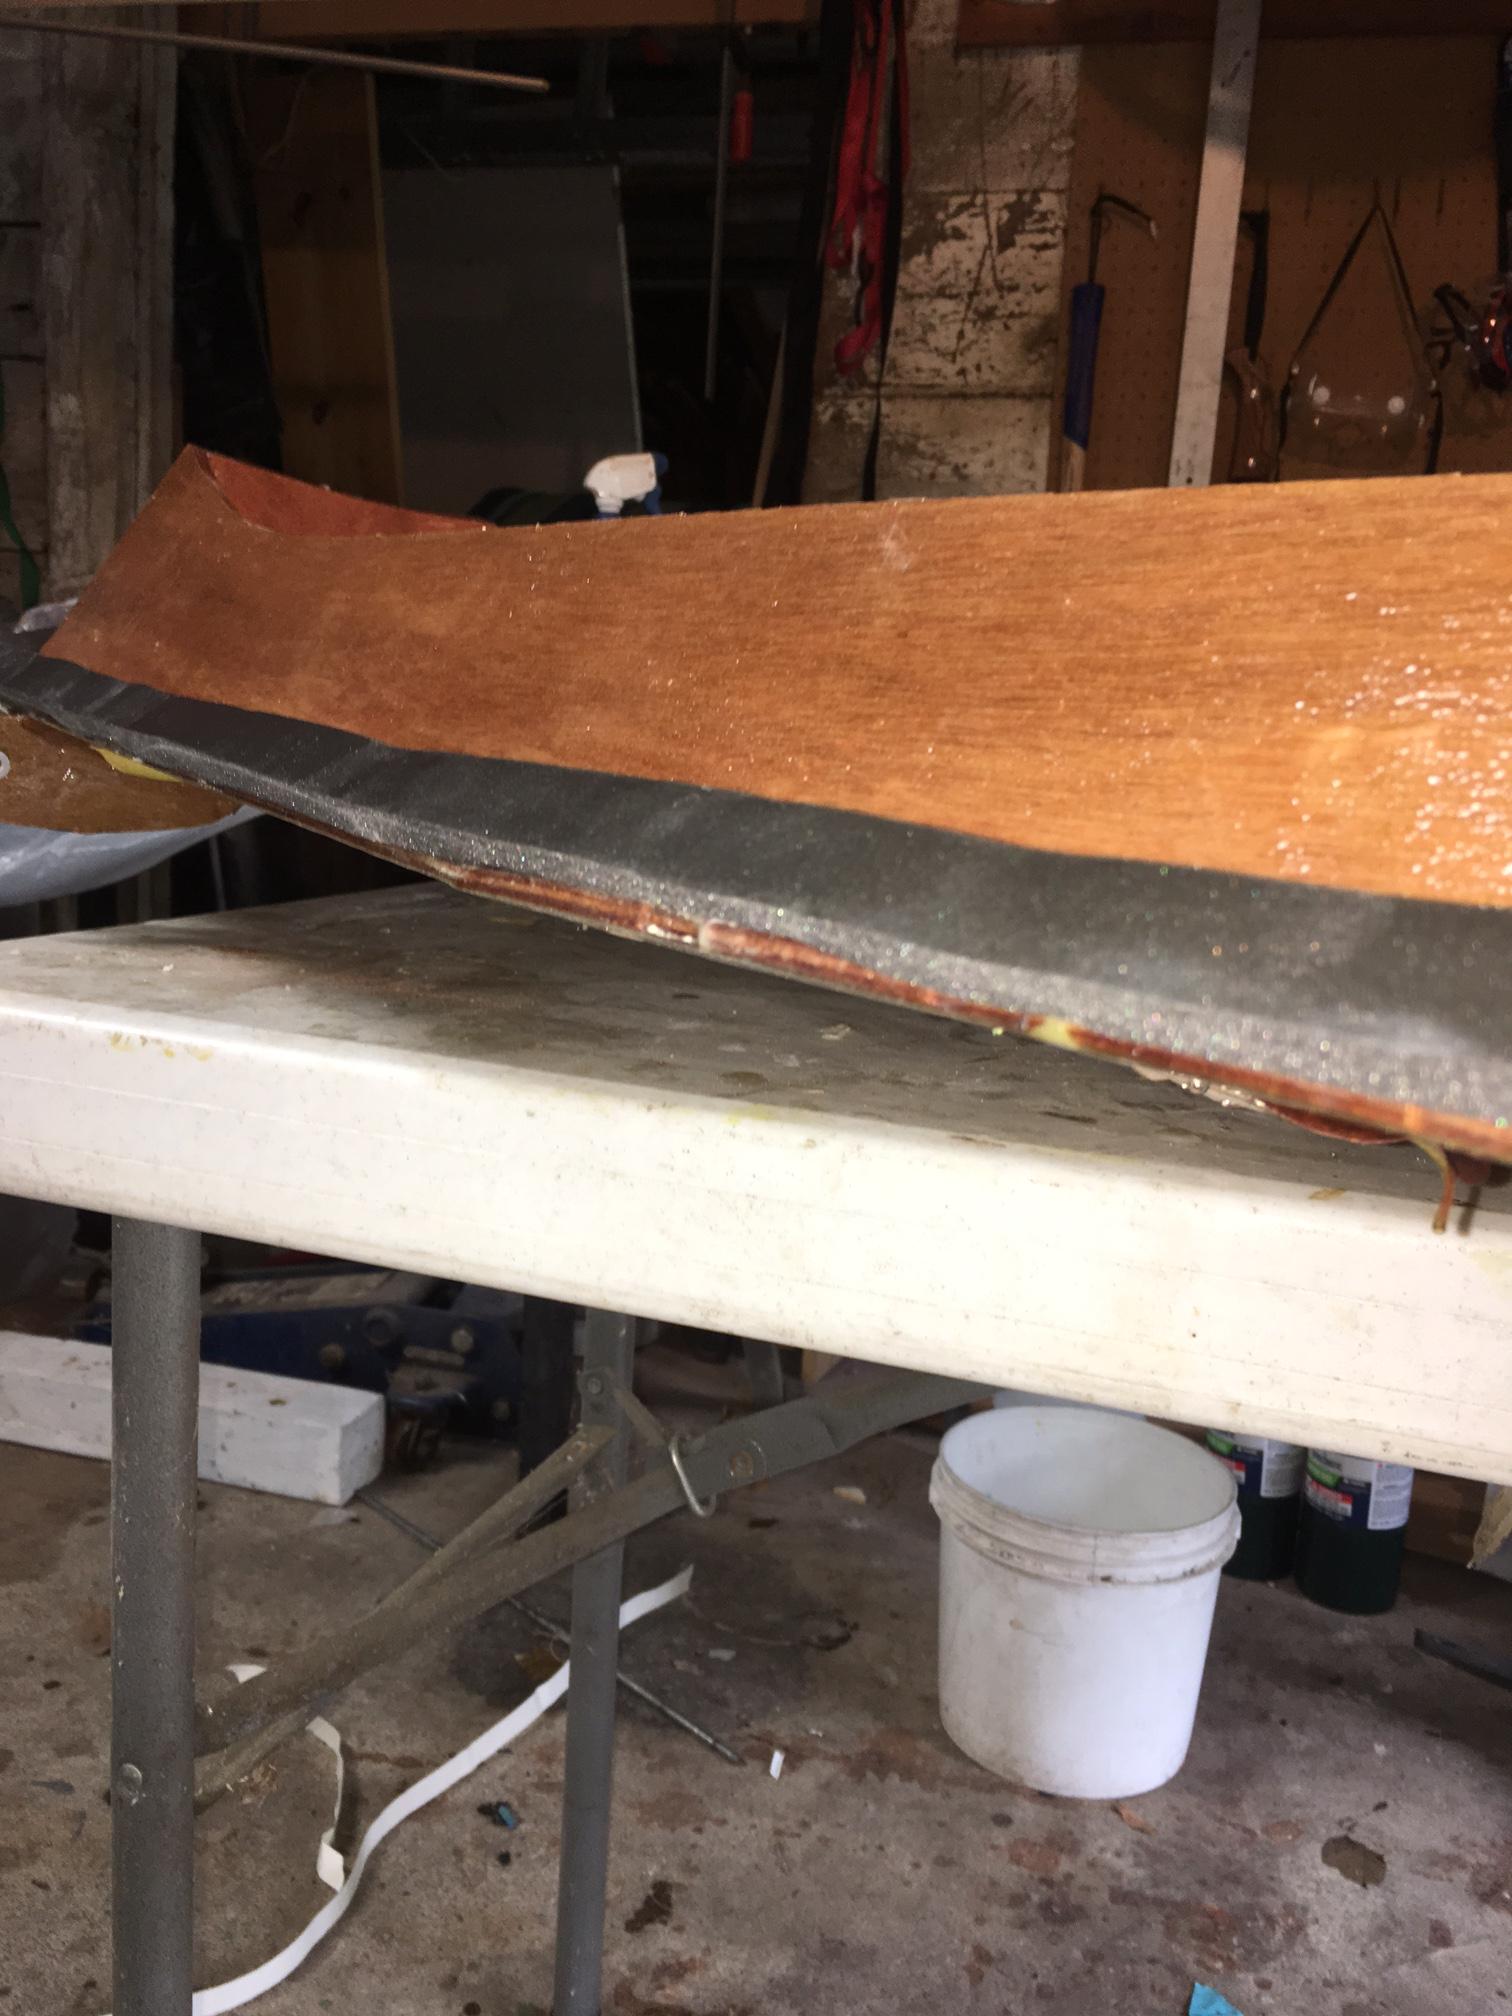
ParticipantI found that the 3m super trim adhesive did not properly seal the capture channel on the seal to the drip rail. I had to run a bead of the boat life sealant around the channel and the drip rail to seal this properly.
September 5, 2017 at 3:34 pm #1256ParticipantAh yes this was a clear case of RTFM. I neglected to see page 305 which says foam gasket on the underside of the hatch itself and CLC kindly showed me so. Friz, thinking ahead, where exactly did you run the bead? Do you have a picture?
October 10, 2017 at 9:06 pm #1368mpilone
ParticipantThe manual isn’t 100% clear on this but it sounds like the foam gasket on the hatch should go completely around the parameter, correct? The manual says to start on one side up against the aft lip/stiffener on the hatch and go around the parameter but there no pictures of the foam going across the aft edge (where the hasp is mounted). If you did go across the aft side, did you hug the aft stiffener/lip or move it forward a bit to try to align with the rubber gasket?
I assume the foam is needed there as well to get a good seal against the rubber gasket but I wanted to double check before I put it on. I have a 10 ft roll plus the two scraps from the door weather stripping which I think will be enough.
-mike
October 10, 2017 at 9:52 pm #1369ParticipantI only did the seal on the hatch lid on three sides. The top and both sides. Not the lower edge. I will say that in the main, it seems to work just fine. However along the top edge I have to put the weatherstrip right up along the top edge,
even in front of the 1 inch wooden strip in front of the hatch stiffener. There was about 6 inches where the foam strip sliped back a little bit away from the forward edge because I was not diligent in my lining it up, and I got a small leak. So in sum,The best results for me have been to run the foam sealing tape right up against the absolute perimeter on the left right and top sides.October 12, 2017 at 8:27 am #1370ParticipantI had a little bit of water intrusion under the aft edge of the galley hatch, so I added a strip of 3/4″ wide X 3/16″ thick weather seal along the inside of the hatch. there was a faint mark on the inside of the hatch from the molded rubber gasket so I was able to place the weather seal in the proper location. I closed the hatch for a few minutes and then checked the weather seal to make sure there was an impression from the molded gasket. there were a couple of places where there was no impression so I added another short layer of the 3/16 weather seal.
October 12, 2017 at 8:47 am #1371ParticipantThanks for the info. It sounds like the consensus is to run the CLC supplied weather seal (3/4″?) around the sides and top, directly on the edge of the hatch and then add a piece to the aft/bottom edge if needed after testing. Looking at my hatch I don’t have a lot of space between the top wooden drip edge strip and the edge of the hatch, maybe 3/8 to 1/2″. Did you find you had to cut or compress the CLC supplied seal to fit it along that edge or is my reveal shorter than average?
-mike
October 12, 2017 at 9:08 am #1372ParticipantNo, there is not a lot of space between the drip edge strip and the edge of the hatch. About what you say. I did not need to compress the foam gasket. It seems ( from my leak) that I just needed to be diligent about running along the edge of the lid. I will take a few pictures as I am about to re-run the gasket now. Any idea how to post them on this forum? Do I need a web hosting service?
October 12, 2017 at 9:15 am #1373ParticipantGreat, thanks. As for images in the forum, you should be able to just attach them to your post using the Insert image option (see my meta-image below 🙂
 October 12, 2017 at 10:38 am #1374Participant
mike–when I decided to gasket the aft edge of the hatch, I first used the 7/16″ thick size. that made the hatch bow out at the edges (with the hasp latched) telling me that thinner gasket would do. I removed the 7/16 and used 3/16. there is an impression on the 3/16 gasket from the molded rubber gasket telling me that it is thick enough.
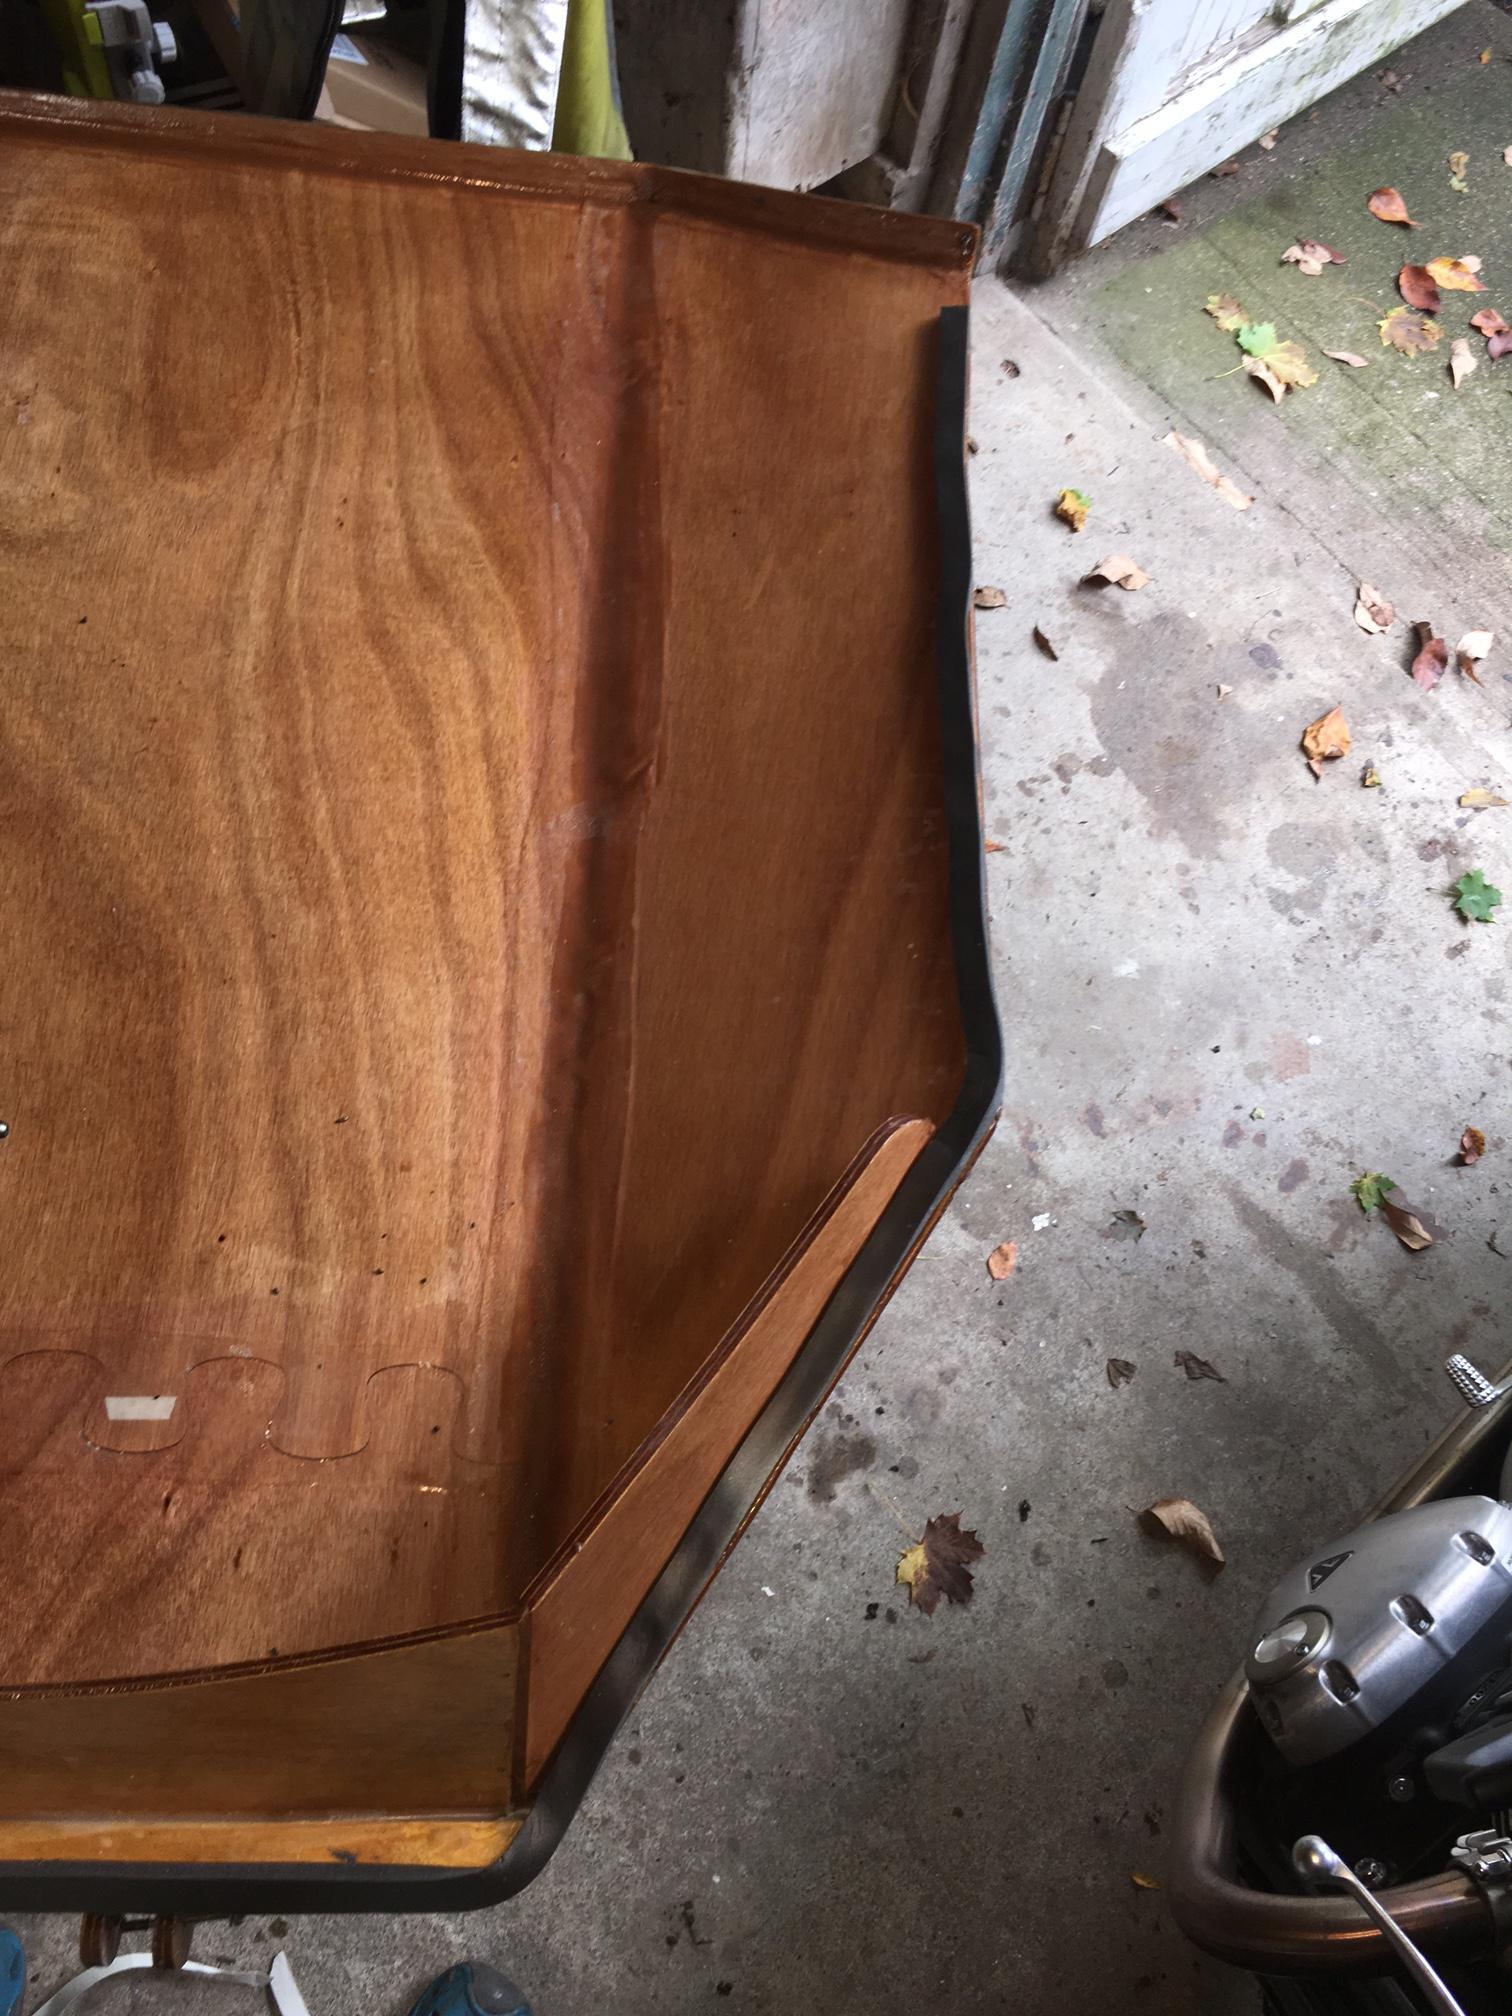
October 12, 2017 at 5:34 pm #1377ParticipantWell, this is what I did today (see attached pictures). I removed my first gasket, cleaned up the old residue with goo gone (and probably took some varnish with it), and then put down new foam gasket. As I said earlier in the thread, no problems with leaks on the bottom end of the hatch which is good because I ran out of gasket about 2 inches short of the bottom. I only ever had a problem with the top edge. So I made sure the new gasket hugged the edge on three sides. I suppose I will have to wait for the next rainy day, or pull the hose out, but based on prior experience, this should do the trick. Will provide updates.
 October 12, 2017 at 7:49 pm #1381Participant
I you decide to add more foam seal, most local hardware stores stock all the sizes of Frost King foam weather seal. it’s about $4-6 per 10 foot roll depending on the width and thickness. my local lowes stocks some sizes at about 1/2 the price of true value/ace/etc. curiously, my local Home Depot doesn’t stock any, but is available ship-to-store.
July 1, 2018 at 3:13 pm #1918Boardwalk
ParticipantPictures helped a lot.
We’ve been getting a lot of rain here in Minneapolis lately and the Galley was always soaked afterward. Finally did a ‘cup half full’ test and it leaks from the top as the water runs off the main shell and into the gap.
I am pretty sure my weather stripping doesn’t match the photos above. When it stops raining – I’ll go look.
Should would be nice to not have to sponge out the galley after every rain. 🙂
July 1, 2018 at 7:42 pm #1919ParticipantOne thing I found is that the clamping edge of the seal makes a very efficient conduit for water. After gluing my seal in place, I had to run a bead of sealant around the clamping edge to keep the water out. You may be able to see it in this picture.

-
AuthorPosts
- You must be logged in to reply to this topic.