Forum Replies Created
-
AuthorPosts
-
jctownsley
ParticipantFaith999, I had the same issue with my springs after a few weeks use. CLC offered to replace them or issue me a gift card for replacing them myself. I ordered the next set up from Attwood and they are great! Sounds like the issue is the weight of the epoxy. CLC’s camper was fine with those gas springs, but we have more epoxy (weight) on ours.
jctownsley
ParticipantJason – I’m in Portland, Oregon. Pictures are from visiting Jasper and Banff earlier this summer. Good luck on your build!
jctownsley
ParticipantWaterlust is building drawers underneath there teardrop. You can follow along on their youtube channel. The most recent build video shows them making the boxes. https://www.youtube.com/user/Waterlust
jctownsley
ParticipantOur teardrop is 95% complete. Ran out of time before our 12 day trip to Glacier, Banff and Jasper National Parks. So it went as is. Will just wait till fall now for another coat or two of varnish and some more interior finish work. Here’s our (mostly) complete setup. Stuff you’re seeing that’s not part of the standard kit: CVT awning, ARB awning room (that opens up outside and has zipper door to camper), 100 watt solar panel on tongue box, LED strip lighting on galley hatch, goose neck interior lighting, and mounted iPad/tablet holder inside.


jctownsley
ParticipantJust returning from 12 days in the teardrop to Glacier, Jasper and Banff. All our sites were fairly level. For checking front to back level (and adjusting with the trailer tongue jack) we just used our iPhones. Pretty handy level built right into it that shows levelness by degrees.
jctownsley
ParticipantI live on a boat and contacted our local sunbrella shop for a quote. I thought surely it would be cheaper than the CLC cover since there wouldn’t be a shipping cost. $1,800! That was for a basic cover with one zipper door. I too ordered the Amazon cover!
jctownsley
ParticipantSorry for the delayed response. Been out enjoying the camper in Glacier, Jasper and Banff! Unfortunately we live on a boat and don’t have homeowners’ insurance! Oh well. Made it on our 2,800 mile trip without any damage to the camper. So the insurance problem can wait a few weeks.
jctownsley
Participantsorry for the delay, been out of country for a week. It’s about 6′ wide (lengthwise bolted to roof rack) and extends about 7′ out. Easily big enough for a couple sleeping bags.
jctownsley
ParticipantI have a similar water device mounted in my tacoma. This is the one I have. Love it!
I’m a couple weeks from finishing up my camper and installing the rack, but I did purchase an awning. I have an “awning room” for it too. With a toddler and another kid on the way, my wife wanted a place for the kids to play as well as a place for her to stand up and change clothes. So the awning room will be on one side of the camper. It has two windows to the outside as well as a door. Then there’s an internal zippered side that allows you to get into the camper. The room attaches to the awning, but has its own floor and roof. Here’s a few pictures of it mounted to my tacoma. It’s not staked down in the pictures so looks a little floppy. Will post some updates once I finish my build!


jctownsley
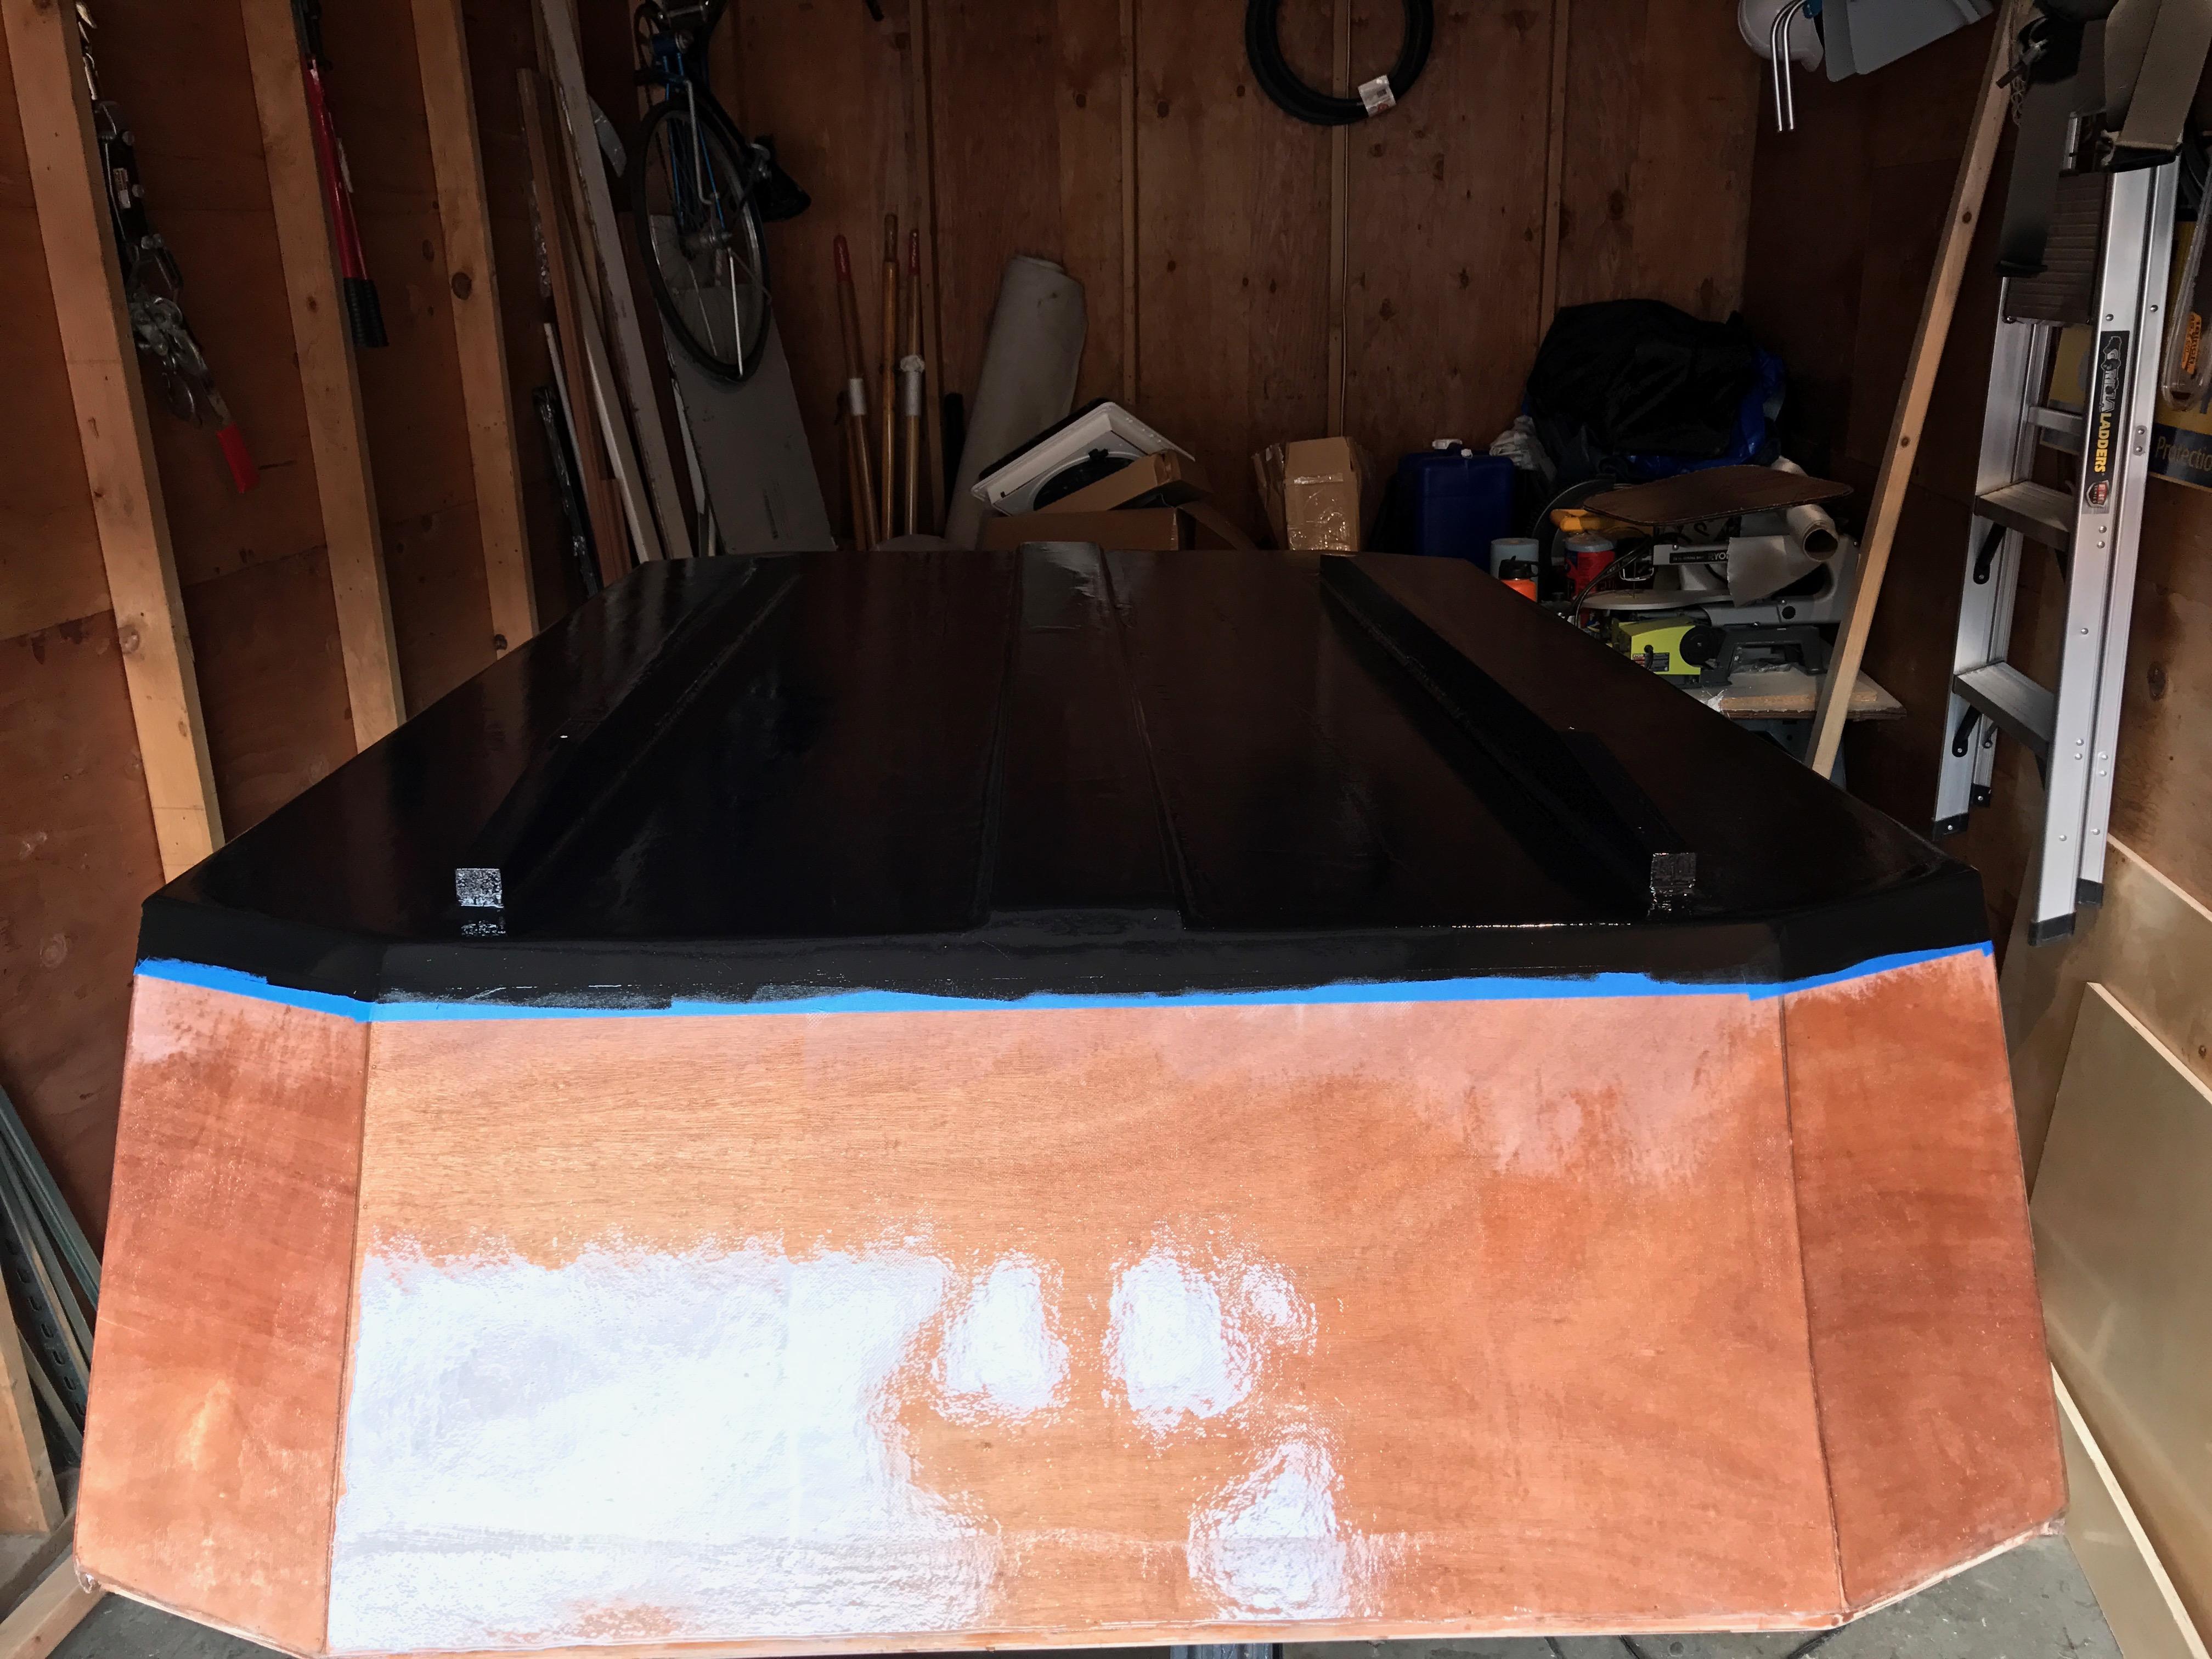
ParticipantI couldn’t find the “fine line tape” that CLC recommends locally. This is it. I didn’t want to wait for shipping, so I just used the best brand name blue tape I could find at Home Depot. Didn’t have any seepage painting it while upside down. The marine paint I used goes on really fine, so drips weren’t a problem. I was really impressed how straight and clear the line came out!
Looks like I didn’t take a picture while the camper was upside down with tape removed, but here’s a couple showing during and after.


jctownsley
ParticipantCLC recommended via email to sand back to edges of the “ovals” when I asked the same question. I was hesitant to do so because of the gap. I just dressed up the edges. Now that I’m near the end and mounting the doors, I think I’ll clean them up anymore as the ovals are bothering me. With the doors hung, I think I could use a little more gap anyway for easier closing and opening.
jctownsley
ParticipantI had the same question for CLC. They recommended at least a light fill coat on the bottom before painting. I didn’t apply a third coat for uniform finish though since it is getting painted instead of varnish (and no one will ever see the bottom!) I did apply at least two more coats on the side of the camper where the fiberglass overlaps the edges.
I made choice to paint while it was inverted to save having to flip it again later. I start varnishing on Thursday. Plan is just to tape over the paint line with high quality painter’s tape and be careful with the varnish.
jctownsley
ParticipantI’m not sure you’d be happy without cutting both doors out. The CNC router pre-cuts portions of the door to make it easier for cutting. If you don’t cut it out, it will be very obvious where the door and window were supposed to be. Even if you fill in the pre-cut gaps with thickened epoxy, they’ll stand out.
May 10, 2017 at 12:07 am in reply to: Anyone own one in the Oregon, Washington, Northern California areas? #775jctownsley
ParticipantSure thing, Jack. I’m at 503.547.9559. I should be working on the camper most of the day. It’s upside down right now for bottom paint, but hopefully by Saturday it’s flipped over so you can check out the inside.
April 16, 2017 at 11:57 pm in reply to: Anyone own one in the Oregon, Washington, Northern California areas? #721jctownsley
ParticipantI’m in Portland. Camper isn’t finished but you’re welcome to come by. The shell is together. You could climb in through the transom to check out height, or wait a few more days and I’ll have the doors cut out.
Josh
-
AuthorPosts