Welcome to TeardropForum.com › Forums › Teardrop Builders’ Forum › Portholes windows for better ventilation
Tagged: Portholes ventilation
- This topic has 22 replies, 10 voices, and was last updated 2 years, 2 months ago by
madebymike60.
-
AuthorPosts
-
September 8, 2021 at 8:40 pm #3877
madebymike60
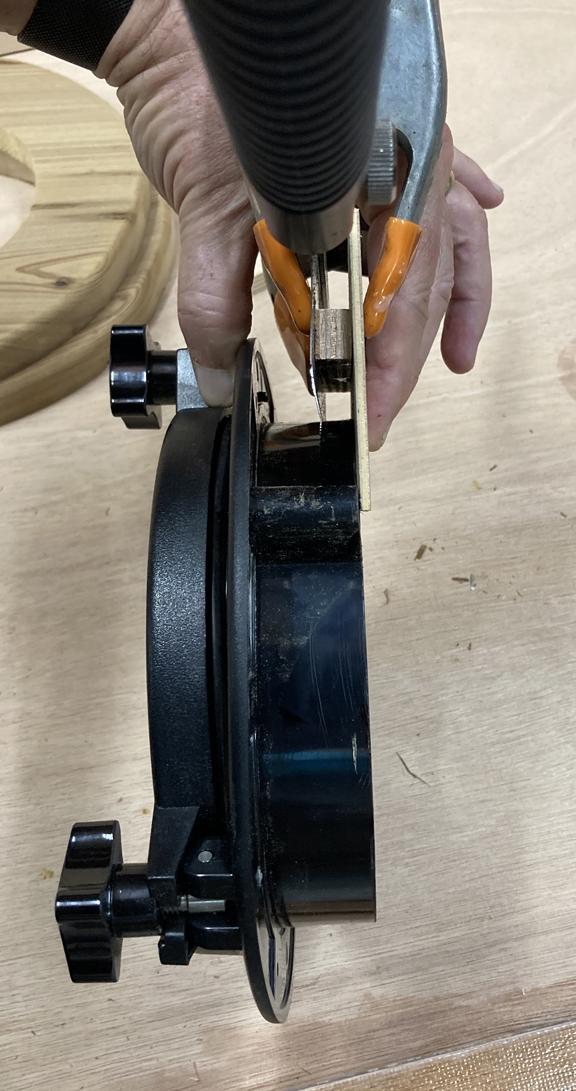
Participant(Part 3) I could have just made a thicker frame but solved it another way. I used a couple of scrap pieces of wood clamped to a hand saw to cut away a ring from the plastic. Here is the saw set up. It worked pretty well. The skinny piece on the right followed the edge of the porthole and the spacer in the middle (of the saw and skinny piece) keeps it at the right distance from the edge. I just took my time and scored it all the way around, then finished by cutting through.
 September 8, 2021 at 8:41 pm #3878Participant
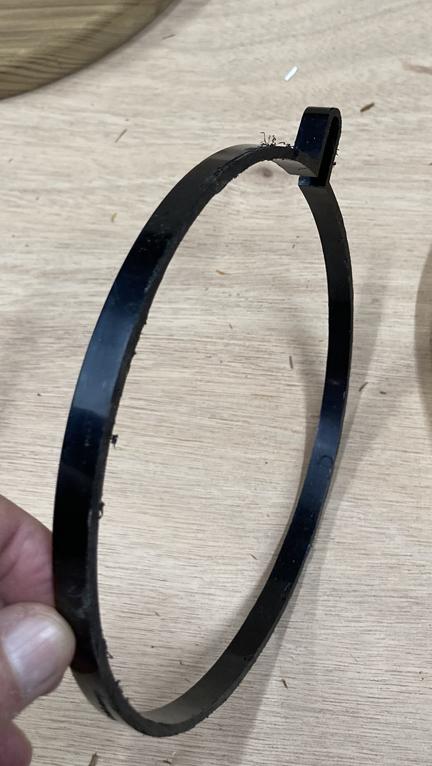
(Part 4) Here’s what I ended up with. I thought it would be thrown away but then figured out it could be used to make a screen for the porthole.
-
This reply was modified 2 years, 7 months ago by
September 8, 2021 at 8:46 pm #3880Participant(Part 5) To make the cut off piece into a screen for the porthole, first cut the ‘U’ shaped extension out right at its edges (so no extra circle is cut). For the ring to fit inside the window, you’ll need to cut a little more of the circle – about 3/8 of an inch for an 8 inch porthole. Use that small piece to glue the ring back together but dry fit it first to make sure it is a snug fit. Here’s what it looks like.
 September 8, 2021 at 8:49 pm #3881Participant
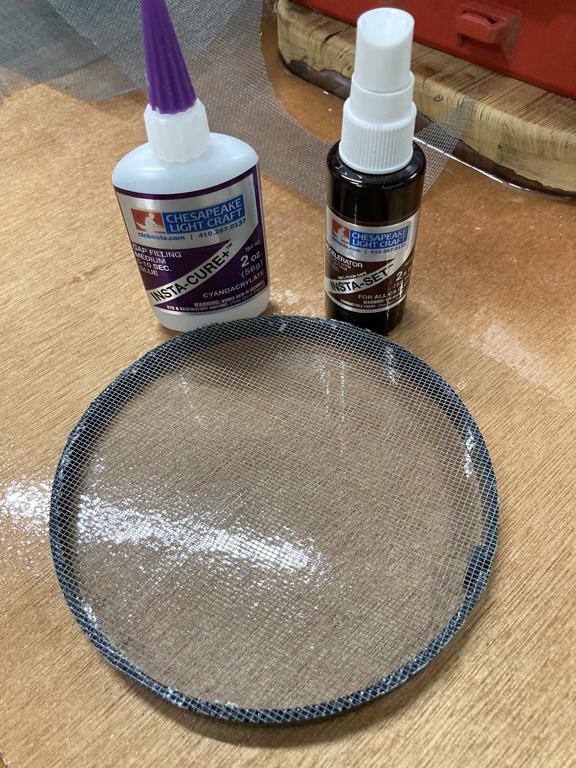
(Part 6) With the circle glued back together, attach some screen with the CA glue/accelerator combo.
 September 8, 2021 at 8:54 pm #3882Participant
(Part 7) Both sides turned out well. Each is a snug fit which will have to be pushed out from the inside to remove them.
 September 8, 2021 at 9:10 pm #3883Participant
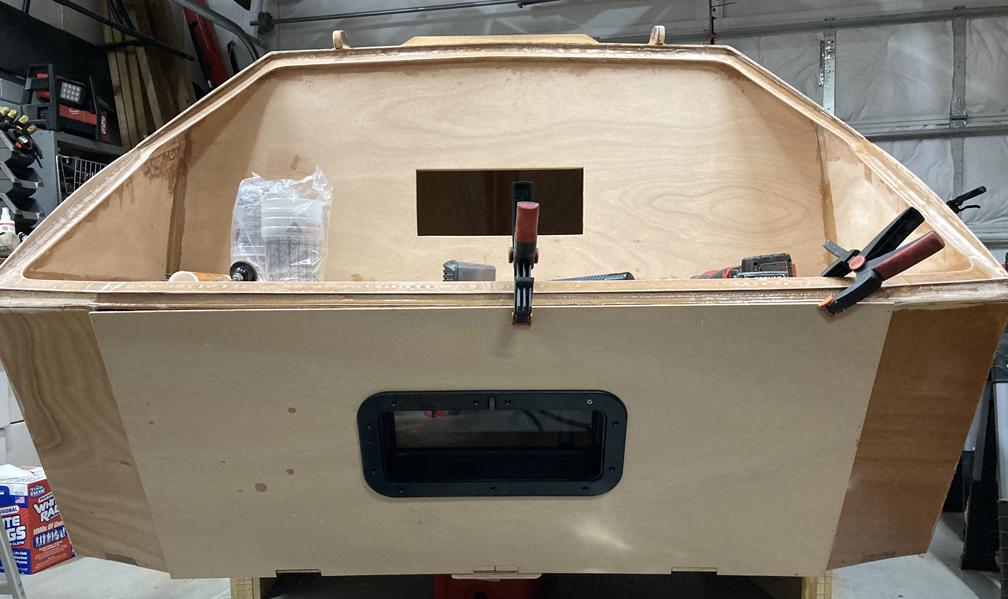
Here is my plan for some rear ventilation. I thought about two more round portholes toward the sides but decided on one rectangular one in the middle of the transom panel. I made a thick frame (about 1 and 1/4 inches) for the inside so that the plastic of the porthole will be flush with the outside trim piece when everything is installed and tightened. This was easier to do while the transom was still off. I’ll remove the porthole before fiberglassing the bottom and rear of the camper.
 February 4, 2022 at 4:20 pm #4178Participant
Here’s how it turned out from inside the camper. The frame is made from the same reclaimed wood as the front two round ones and is thick enough so the plastic trim ends up flush on the outside. My slide out ‘table’ and drawer are at the top and right.
 February 4, 2022 at 4:32 pm #4179Participant
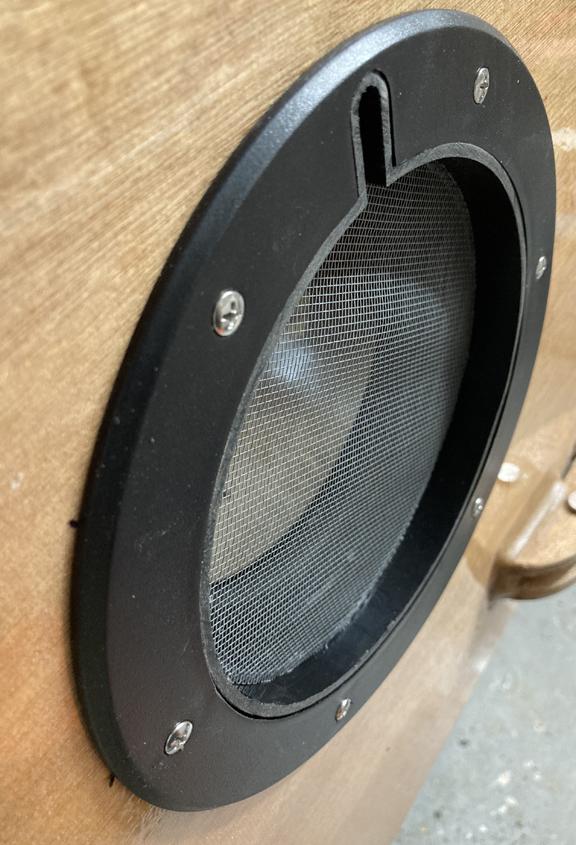
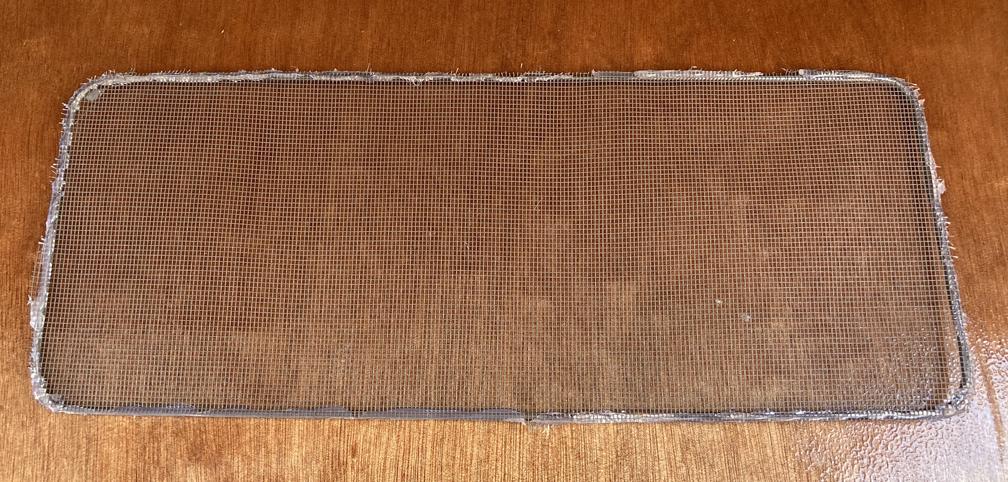
Here’s a screen for the porthole. I bent some pretty stiff wire into a shape a little larger than the opening of the window and hot glued screen to it. It’s not pretty but will work fine. It will only be in place when the window is open and just hangs on the plastic inside.
-
This reply was modified 2 years, 7 months ago by
-
AuthorPosts
- You must be logged in to reply to this topic.