Welcome to TeardropForum.com › Forums › Teardrop Builders’ Forum › Anyone using 12v lithium battery?
- This topic has 26 replies, 9 voices, and was last updated 4 years, 7 months ago by
Volund.
-
AuthorPosts
-
April 2, 2019 at 2:00 pm #2473
Anonymous
InactiveHi…i agree that CLC recommends re-gluing the joint then as you said you were planning on doing, apply fiberglass tape to the cabin side of the joint. while i still like the idea of lots of screws, i’ll do what he recommends. i thought i should also put a strip of fiberglass tape on the galley side of the joint.
June 23, 2019 at 7:53 pm #2532Volund
ParticipantDue to how we’re planning on camping, we’re starting off with a relatively low AH “solar generator”. The way we’re figuring it- we’re looking at charging phones, LED lighting and the fan- the fan being the biggest draw. For the most part we’ll have shore power, so the generator is really acting in UPS mode. Should work fine and we’ll be able to trade off for a real lithium battery setup if/when we need to.
July 9, 2019 at 7:28 pm #2552faithie999
Participantto close the loop:
after the galley flat joint failure back in 8/17, as I said in one of my first posts in this thread I didn’t like the idea of trying to get screws centered in the 3/8 plywood from underneath. I reglued (epoxy) the joint and used a bottle jack with a piece of 2×4 as cribbing to secure the galley flat to the bulkhead while curing. after the joint cured, I used fiberglas tape and epoxy on both the inside and outside corners of the joint.
then, because I didn’t want to tempt fate, and didn’t want to lift a 60-lb battery up high enough to get it into the battery box compartment of the galley, I built a holder out of 1″ aluminum angle and long carriage bolts and mounted it on the underside of the floor. the lead-acid battery I had used for shakedown was an old trolling motor battery that was pretty well shot, so I bought a 100 amp hr AGM battery. the bottom of the battery is higher than the axle so I have no concerns about ground clearance. 50 amp hrs of usable capacity will be plenty for the few times I’m camping without access to shore power. if that assumption proves wrong I’ll spend the big bucks on a 100 amp hr Li-ion battery that can be repeatedly safely discharged almost fully.
July 26, 2019 at 7:41 pm #2682PopeyeTheTrailerMan
ParticipantI know that this is an old thread, but earlier this year I got tired of all the BS with lead acid batteries and sprung for a 100 AH LiFePO battery. As everyone noted, it’s expensive up front. However, in just a few years it will have more than paid for itself by outlasting lead acids, even sealed AGM, as well as cheaper camping costs.
So how’s it working?
My camper has a 200-watt solar charger system that was $200 new on Amazon (pre-Trump tariffs). I wired it in parallel with the existing charger to the battery. Before the LiFePO I was always worried about how long the battery would last before being drained by the fans, lights, etc. Since I’ve installed the new battery I’ve never had to worry. During the day, even if it’s cloudy, the solar panels are putting in more than the full load can drain. Running the ceiling fan all night, along with occasionally running other fans, lights and recharging my tablet has yet to bring the indicated voltage below 13.1. It has been literally months since I last plugged into the mains.
Since the power is now so reliable, I routinely camp in primitive areas with no hookups. I’ve been saving at least $20/night at commercial campgrounds that way. If I do that for 50 nights, that’s enough tp pay for the LiFePO battery right there, never mind the longevity and replacement comparisons.
This battery has an electronic controller that handles shorts, overvoltage, overcurrent, etc. It shuts off inputs and outputs when needed to protect the battery. Basically, between the controller and the chemistry, it makes it act like an ideal battery that you can hook up to existing 12v lead acid charger and load systems and forget about. The amp-hour calculations are honest and straightforward – 100 amps for 1 hour, 5 amps for 20.
The controller makes it play well with existing lead acid systems. With those, it takes about 16 hours to fill a totally drained battery. But if you get special chargers you can fill it in 1/2 hour or so. I didn’t bother since the solar panels are continuously refilling it. In the garage, away from the sun, it holds its charge without being hooked to a charger, without being damaged the way a lead acid battery would be.
The lightness is also remarkable. I struggled to remove the existing lead acid battery with 2 hands. I easily installed the LiFePO with one. It was a bit too big to fit in the battery box, but since it doesn’t have acid in it and is completely sealed, I ditched the box and just wedged the battery in place with foam.
So the short answer is – I’m using a 12v lithium battery and I couldn’t be happier with it. If you can afford to put $4 a day for a year into your piggy bank, at the end of that year you can have a battery that will pay you back after 2 months of camping, then pay you back again at least 4 more times in the extra lifetime over lead acid batteries. You’ll also have the peace of mind of a reliable power system. Don’t wait, start saving your change.
August 4, 2019 at 8:00 pm #2691Participantdid you mount your solar panel on the roof of the TD? if so could you send some pictures?
August 8, 2019 at 8:46 pm #2693ParticipantHi faithie,
Sorry I was away from computer and didn’t see your message til today. Yes, I did mount them on top, on the Thule racks. I got the wider load bars so that I could put one panel on each side and still have room for the fan cover to open and to have a bit of bar left for potentially adding awnings and such.
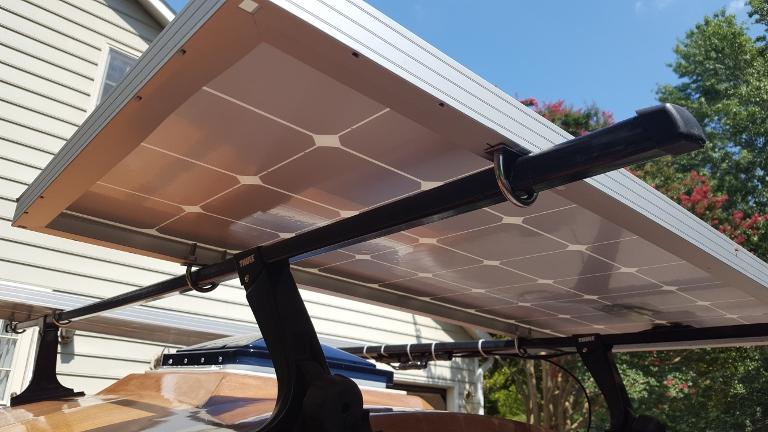
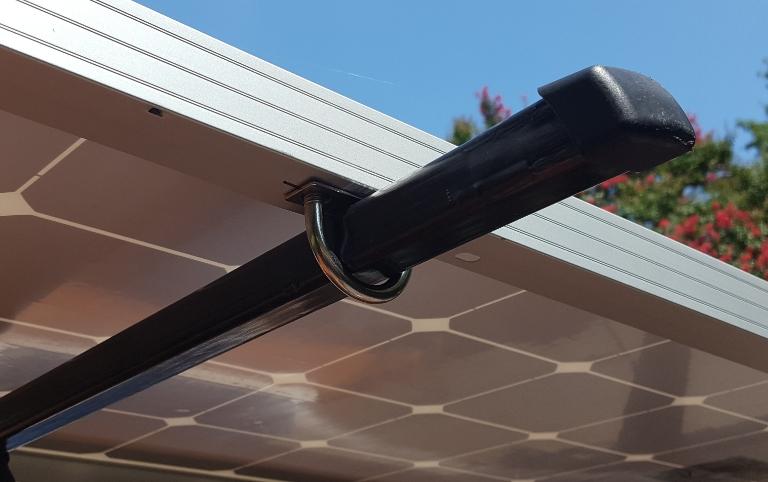
I mounted the panels to the bars using stainless steel u-bolts from Home depot. The size depends on the load bars. I had to drill holes in the panel frames since the existing holes did not match up with the load bar spacing. Be sure that the panels are far enough forward to allow the galley lid to open all the way without interference.
The wiring is zip-tied to the rear bar. One day I’ll add a low drag cover, but for now it’s OK as-is since the cables and connectors are weather-proof.
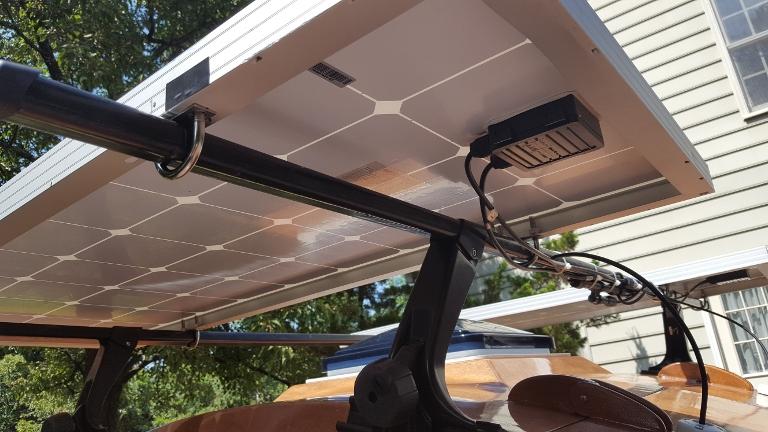
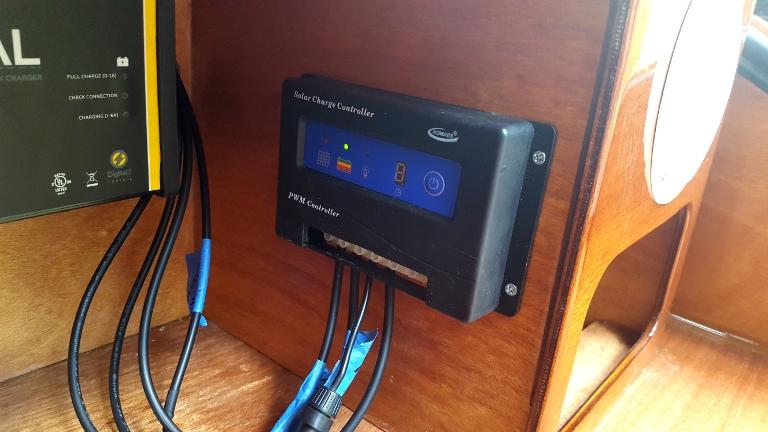
The panels are wired in parallel to give a nominal 12v at 200 watts max. The actual voltage can be over 20 volts on a bright sunny day. A single positive (left) and negative (right) lead go down to the controller that is mounted in the galley.

The wires each go through a CableClam (available from CLC) which allows a leak-proof passage through the galley lid.
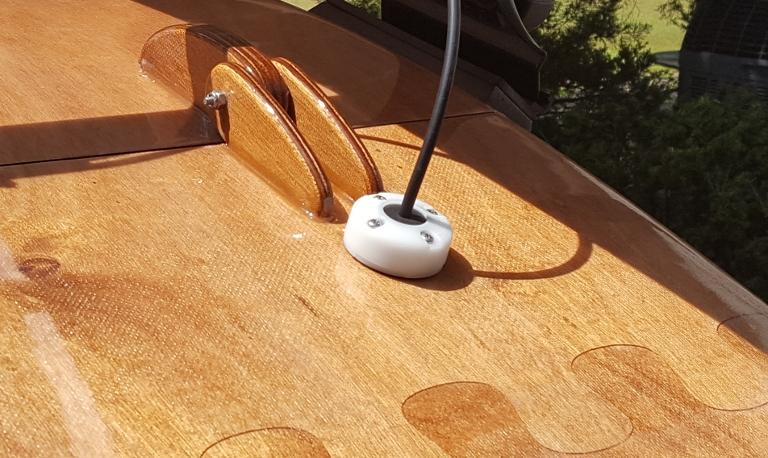
The wires end up in the solar controller, which is wired directly to the battery (through a fuse) parallel to the shore power controller.
Let me know if you need more info or pictures.
August 13, 2019 at 6:20 pm #2696Participantthanks for the pictures.
I helped my son put solar panels, converter, inverter/charger into his Sprinter. we learned from lots of reading on the internet that some brands of solar panel converters work much more efficiently at higher voltages. we wired his two panel in series, after making sure the converter we had purchased would handle the doubled voltage. if/when we add panels 3 and 4 we will go with a series/parallel arrangement, maintaining the voltage at 24v nominal/40v max.
ken
August 13, 2019 at 6:22 pm #2697Participantwhat model number of Thule racks did you buy? and do they attach to the TD by drilling holes in the roof?
thanks
August 13, 2019 at 8:39 pm #2698ParticipantI got it from CLC, not directly from Thule. It’s the CLC Roof Rack Package. It has custom mounting blocks (pictured in the link) that through-bolt to the roof. They simulate a car’s rain gutters and allow the Thule towers to clamp on just as for an automobile. I believe they’re only available (the bases) from CLC.
September 10, 2019 at 7:36 pm #2746Anonymous
InactiveHi guys, I have a somewhat related question. There are a lot of “all in one” Lithium Ion packs that incorporate charge controllers and 12V/USB outputs, like the YETI GoalZero 1400 (and millions more on Amazon). I figure if I just run a single wire to the 12V output (to a fusebox) for all my lights/fans and a AC and solar pass-through to charge it, this would be a lot more convenient and simple than installing multiple 12V outlets, USB ports etc.
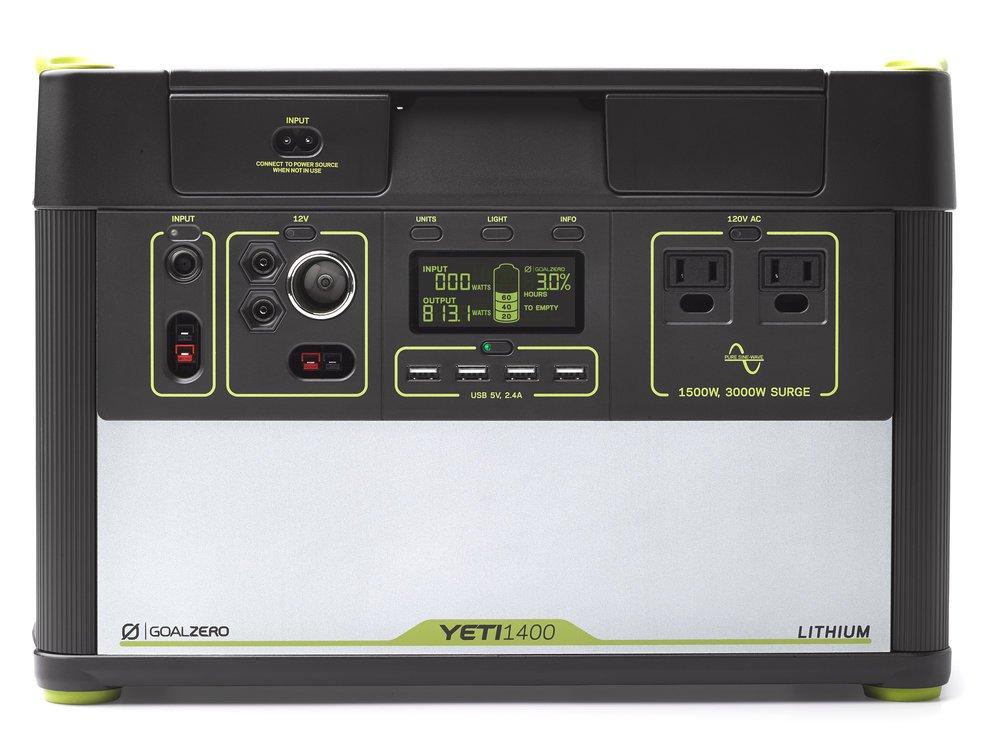

The “problem” is that these packs have all their outputs and charge indicator on one side of the unit, meaning that you would want this to be in the actual cabin. It would almost make sense to create an access panel in the bulkhead going through to the battery tray in the galley, creating a sort of shelf or cubby on the inside so that the battery can sit there for you to connect your various devices to it. Has anyone done a modification like this to the bulkhead? Would this create any structural problems?
September 11, 2019 at 4:47 pm #2747ArtisticAdam
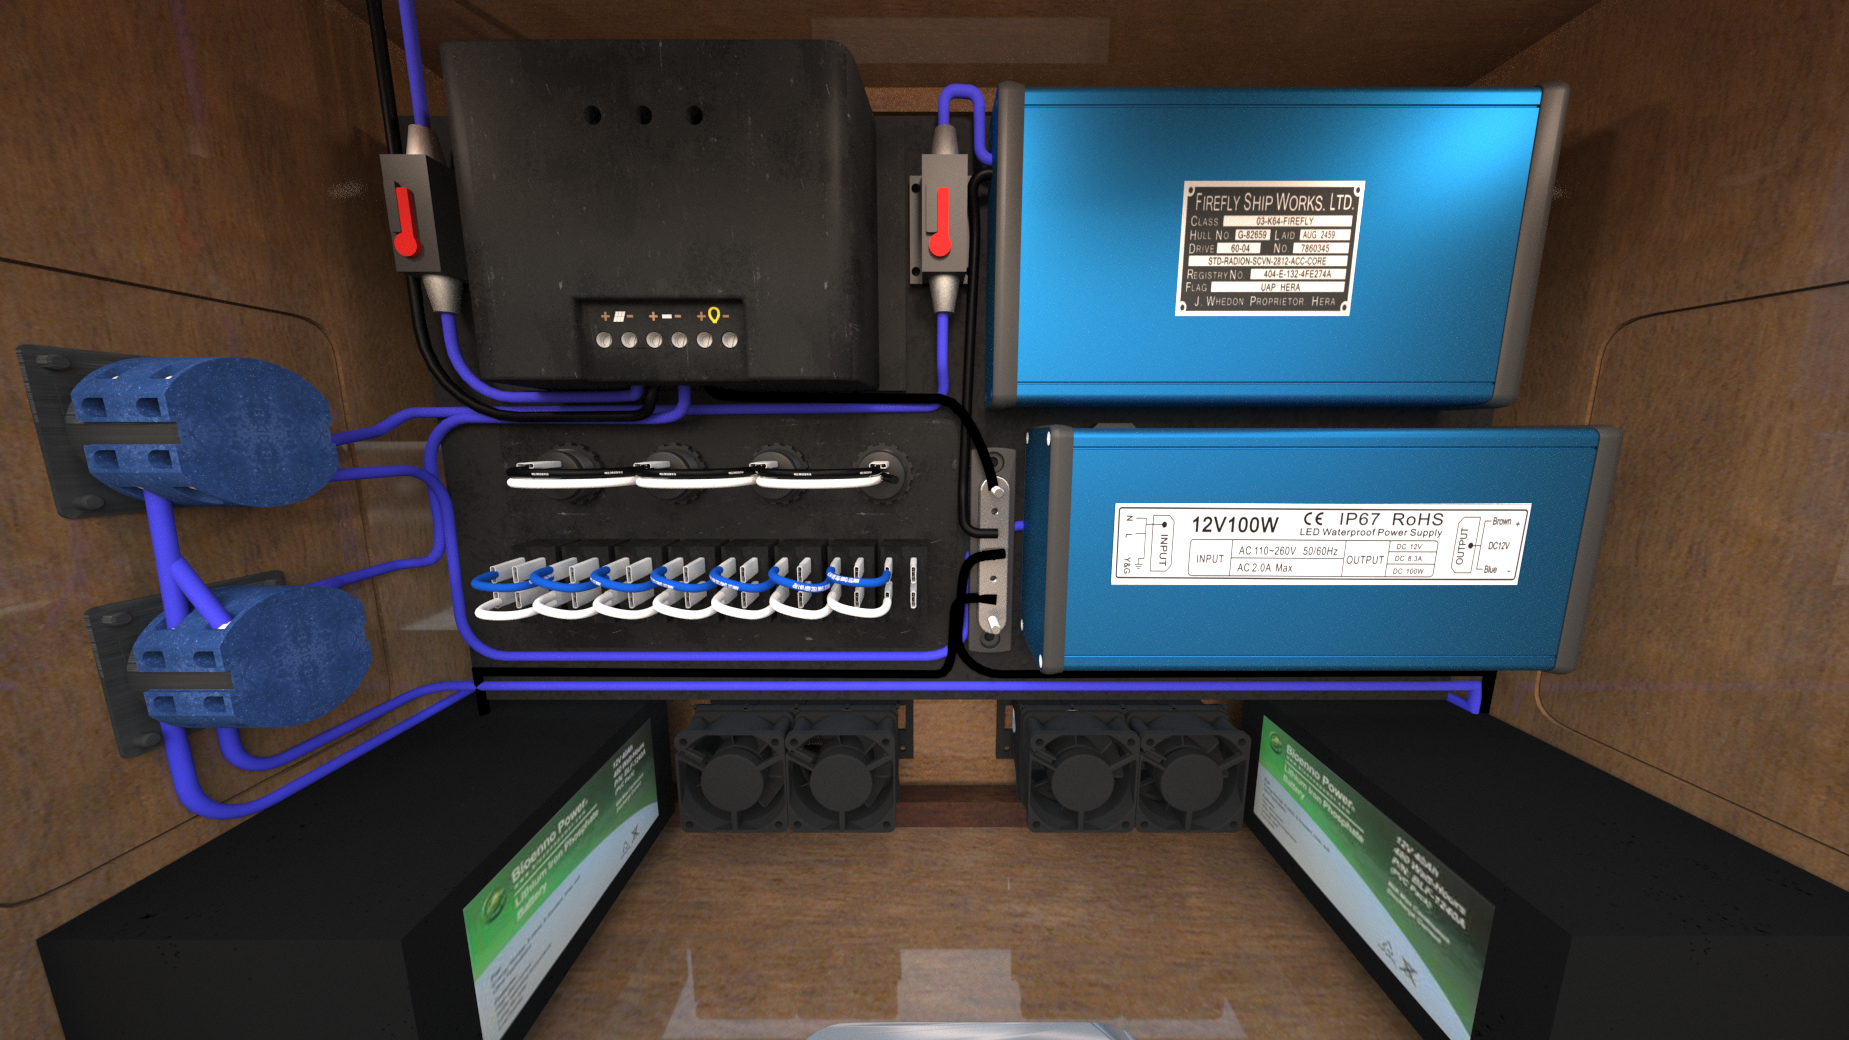
ParticipantI considered the GoalZero Yeti and similar battery packs when I started my build. Ultimately I decided for a custom built setup using 2x 20AH LiFePO4 batteries from Bioenno and their MPPT solar charge controller. Most of the portable systems were either too bulky or were limited in their output potential.
As for a cutout in the bulkhead. I did some extensive modification to mine. You can see here http://teardropforum.com/forums/topic/stained-clc-camper-build-progress/
I’ve had no structural concerns. The custom cabinets and center shadow box cutout are epoxied to the back of the bulkhead and galley floor offering a little added strength.
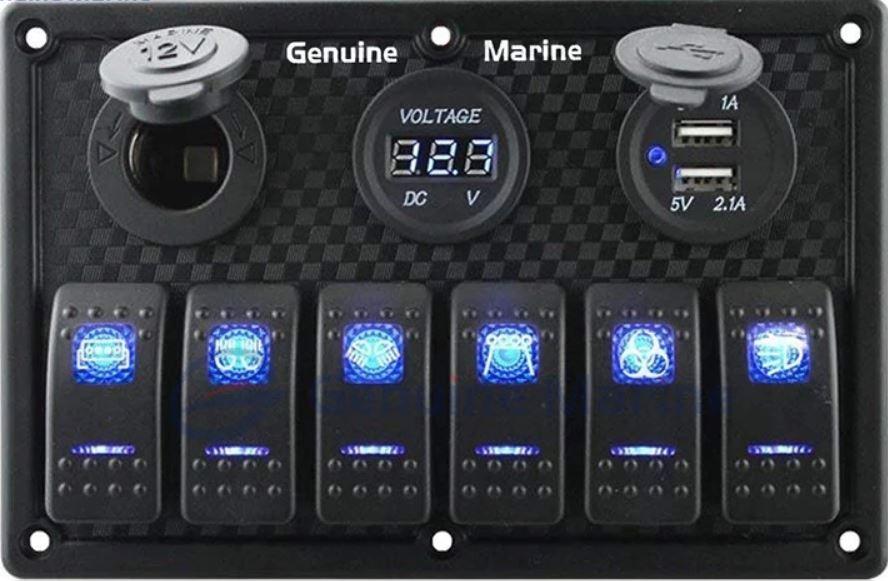
If you decide to go with an all in one battery unit, i’d recommend connecting each 12v output to a rocker switch panel mounted to the bulkhead. something similar to the image below. Many of these have in-line fuses per switch and a rudimentary voltmeter to check battery level. just pay close attention to your Amp draw and that you don’t exceed the battery’s rated output.
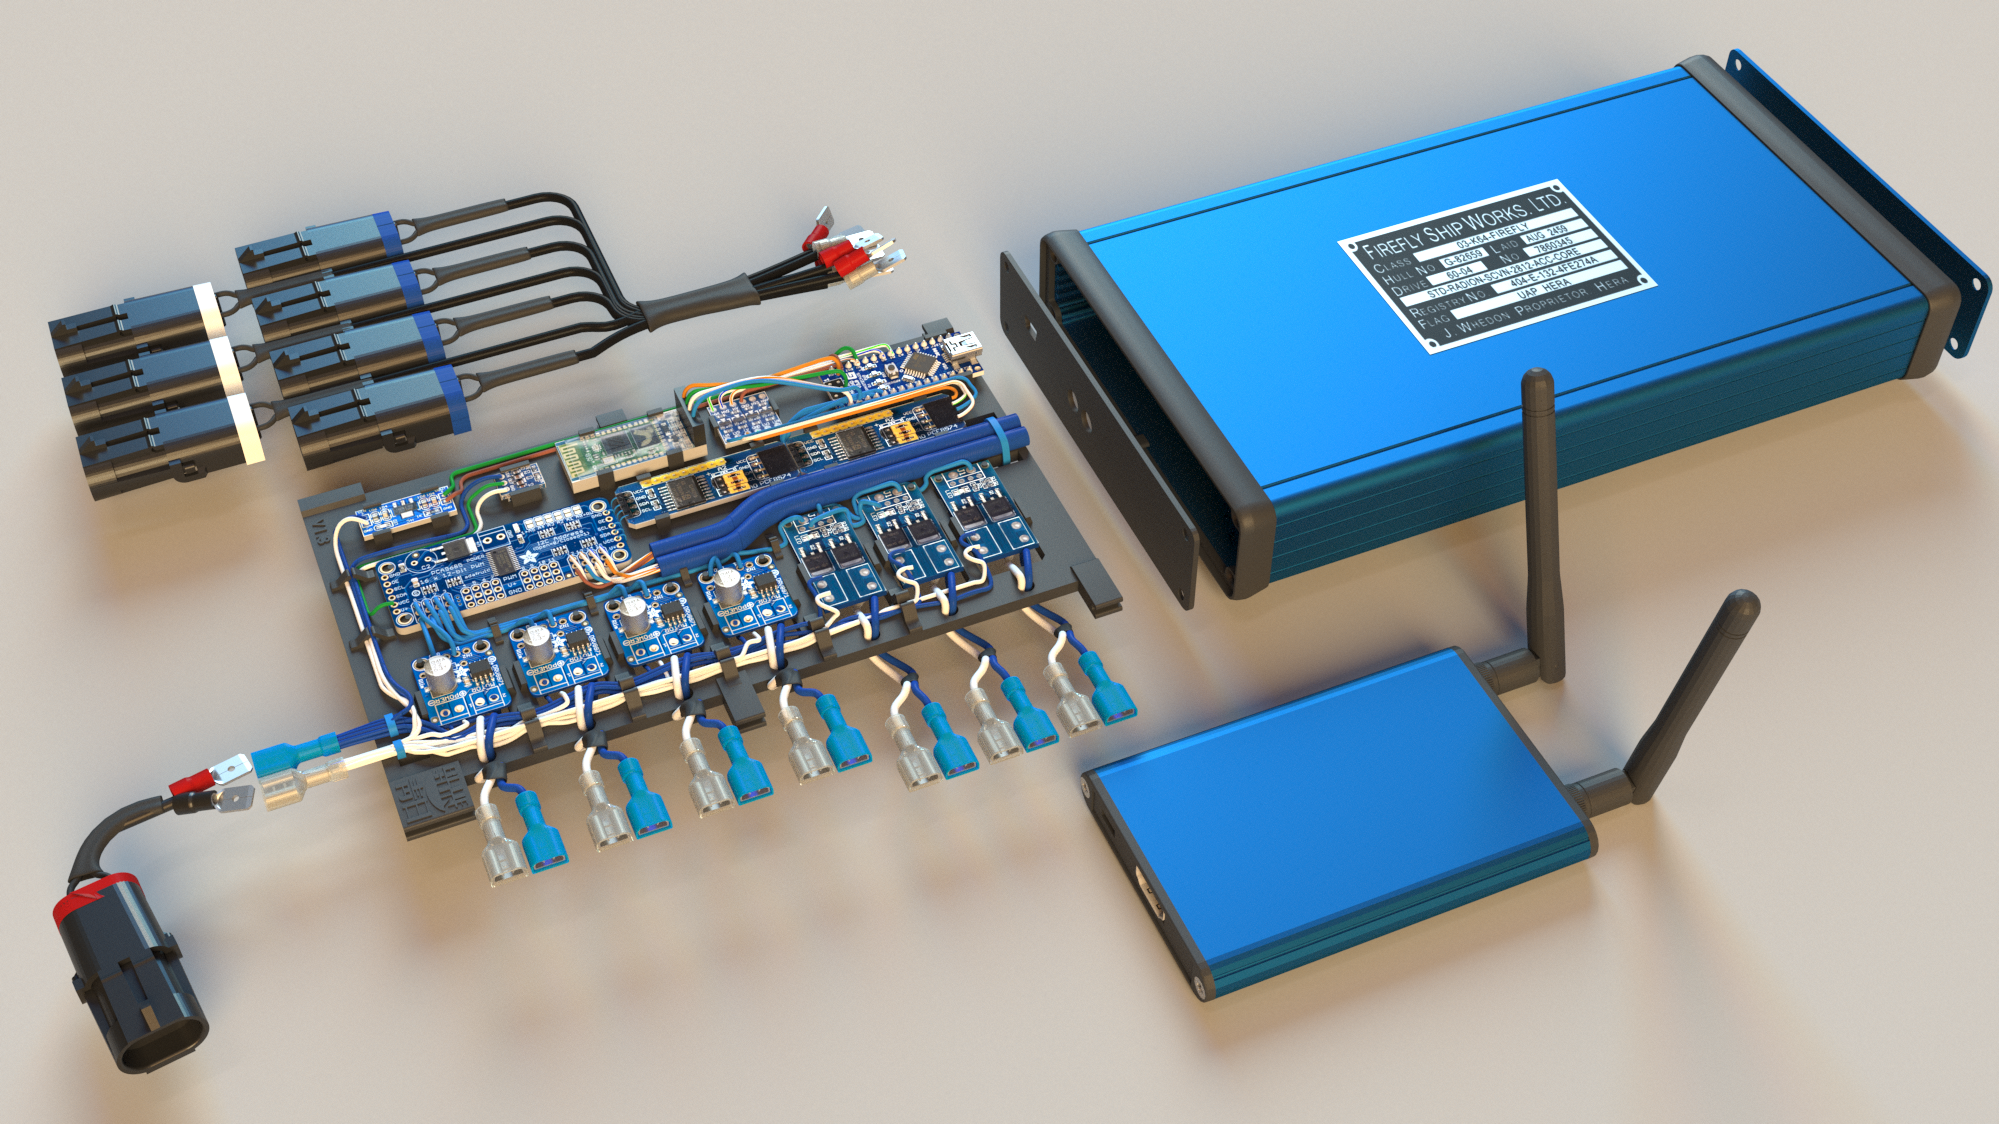
A side note: I’m currently in the process of streamlining my electronics setup and will do a full write-up in the coming months. In a nutshell it will be completely computer controlled and Google Home / bluetooth compatible. Lights will have dimmers, fans will have variable speeds, and the entire electronics compartment will be cleaned up of the rats nest of wires.
Example 3D render of my electrical compartment. I’m likely going to eliminate the Rocker panel entirely.
Prototype computer controller with the wifi router and Chromecast module:
 September 27, 2019 at 9:12 pm #2754Participant
I’m in the midst of redesigning our electrical setup-
Like Adam, we’re going with a Bioenno battery (but went with 40AH instead of 2x 20AH due to their note on not throwing them in serial)- we’re just going to run it off the included charger for the time being and will evaluate solar at a later point. The battery will feed a Blue Sea Systems fuse panel via a 60A fuse (battery is rated to 80A for 3 seconds- we should never hit anywhere near that so we split the difference). The fuse panel will protect each individual circuit which will be controlled by rocker switches like the ones in Adam’s photo above. We’ll feed 4x usb ports, LED lights and the fan, really pretty low power use.
-
AuthorPosts
- You must be logged in to reply to this topic.