Welcome to TeardropForum.com › Forums › Teardrop Builders’ Forum › Bob's tips and tricks › Reply To: Bob's tips and tricks
<p style=”text-align: center;”>Door stiffener install</p>
<p style=”text-align: center;”></p>
<p style=”text-align: left;”>I installed my door stiffeners before cutting the doors out because I didn’t want to change the shape of the door by clamping it tight to the stiffener. The strongest bonds (with glue, can’t vouch for epoxy) are with a nice layer of glue and no clamping at all according to the Internet (search my previous posts for the URL where the tests are documented if interested).</p>
<p style=”text-align: left;”></p>
<p style=”text-align: left;”>To get the sanded area roughed out to the approximate shape, I held the stiffener on the OUTSIDE of the camper and used a compass to scribe a line with a constant distance from the outside surface of the camper shell. I wish I took pictures because it was very simple and you’d see exactly what I mean. But I didn’t. Another method I considered was to use a contour gauge. I didn’t have one, but I did have a compass.
Once I got the stiffener sanded and fitting good enough I was faced with how to hold it level and also pressed against the inside surface of the camper shell.</p>
<p style=”text-align: left;”></p>
<p style=”text-align: left;”>Well, there were two alignment holes in the thin section for the door lock parts to mate with. I simply drilled a 1/16″ hole on the opposite side of the stiffener straight through the camper shell and used one of the several drill bits I bought for the project as an alignment pin. The manual says something about buying several because we’ll break them. I didn’t, so I had 5 or 6 to work with. Drill this hole from the inside. Resist temptation to drill through with the stiffener held to the outside. Even though it’s lined up, the hole won’t be perfectly perpendicular to the stiffener and it won’t line up once you move to the inside. Trust me on this. I have the experience to back it up!</p>
<p style=”text-align: left;”>Before glue up showing pins through shell:</p>
<p style=”text-align: left;”>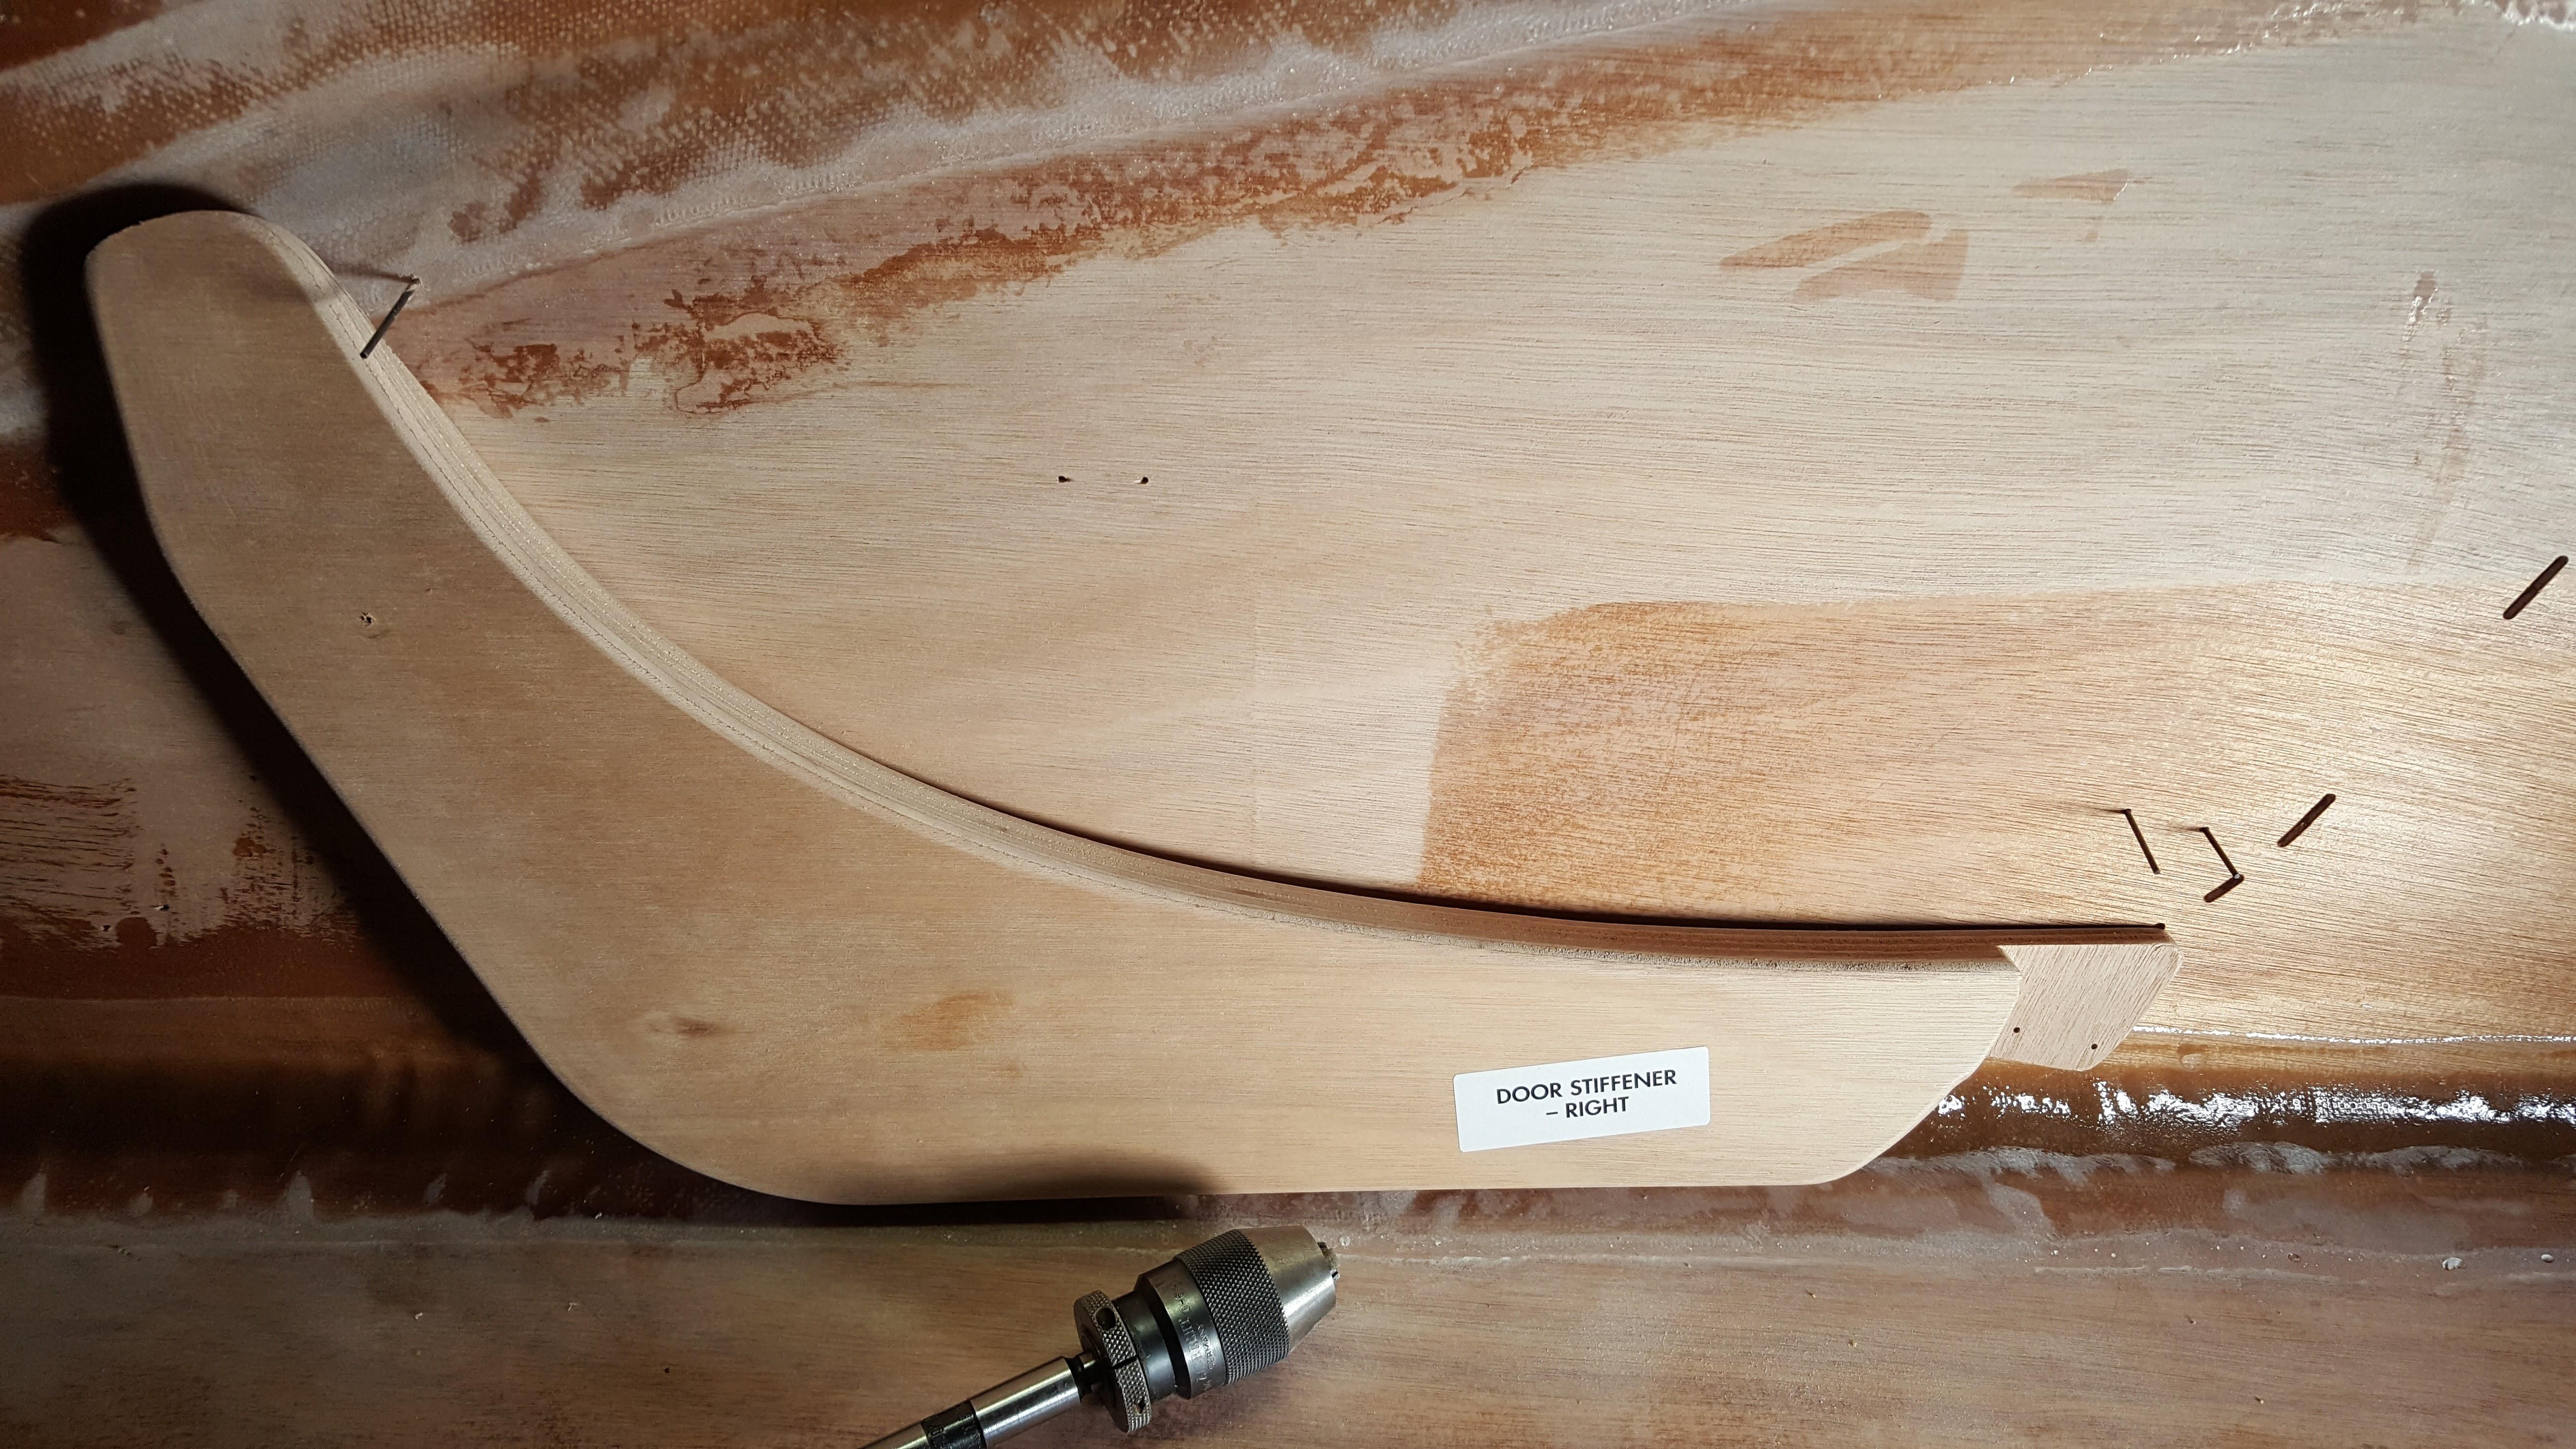 </p>
</p>
<p style=”text-align: left;”></p>
<p style=”text-align: left;”>And here it is after installing:</p>
<p style=”text-align: left;”>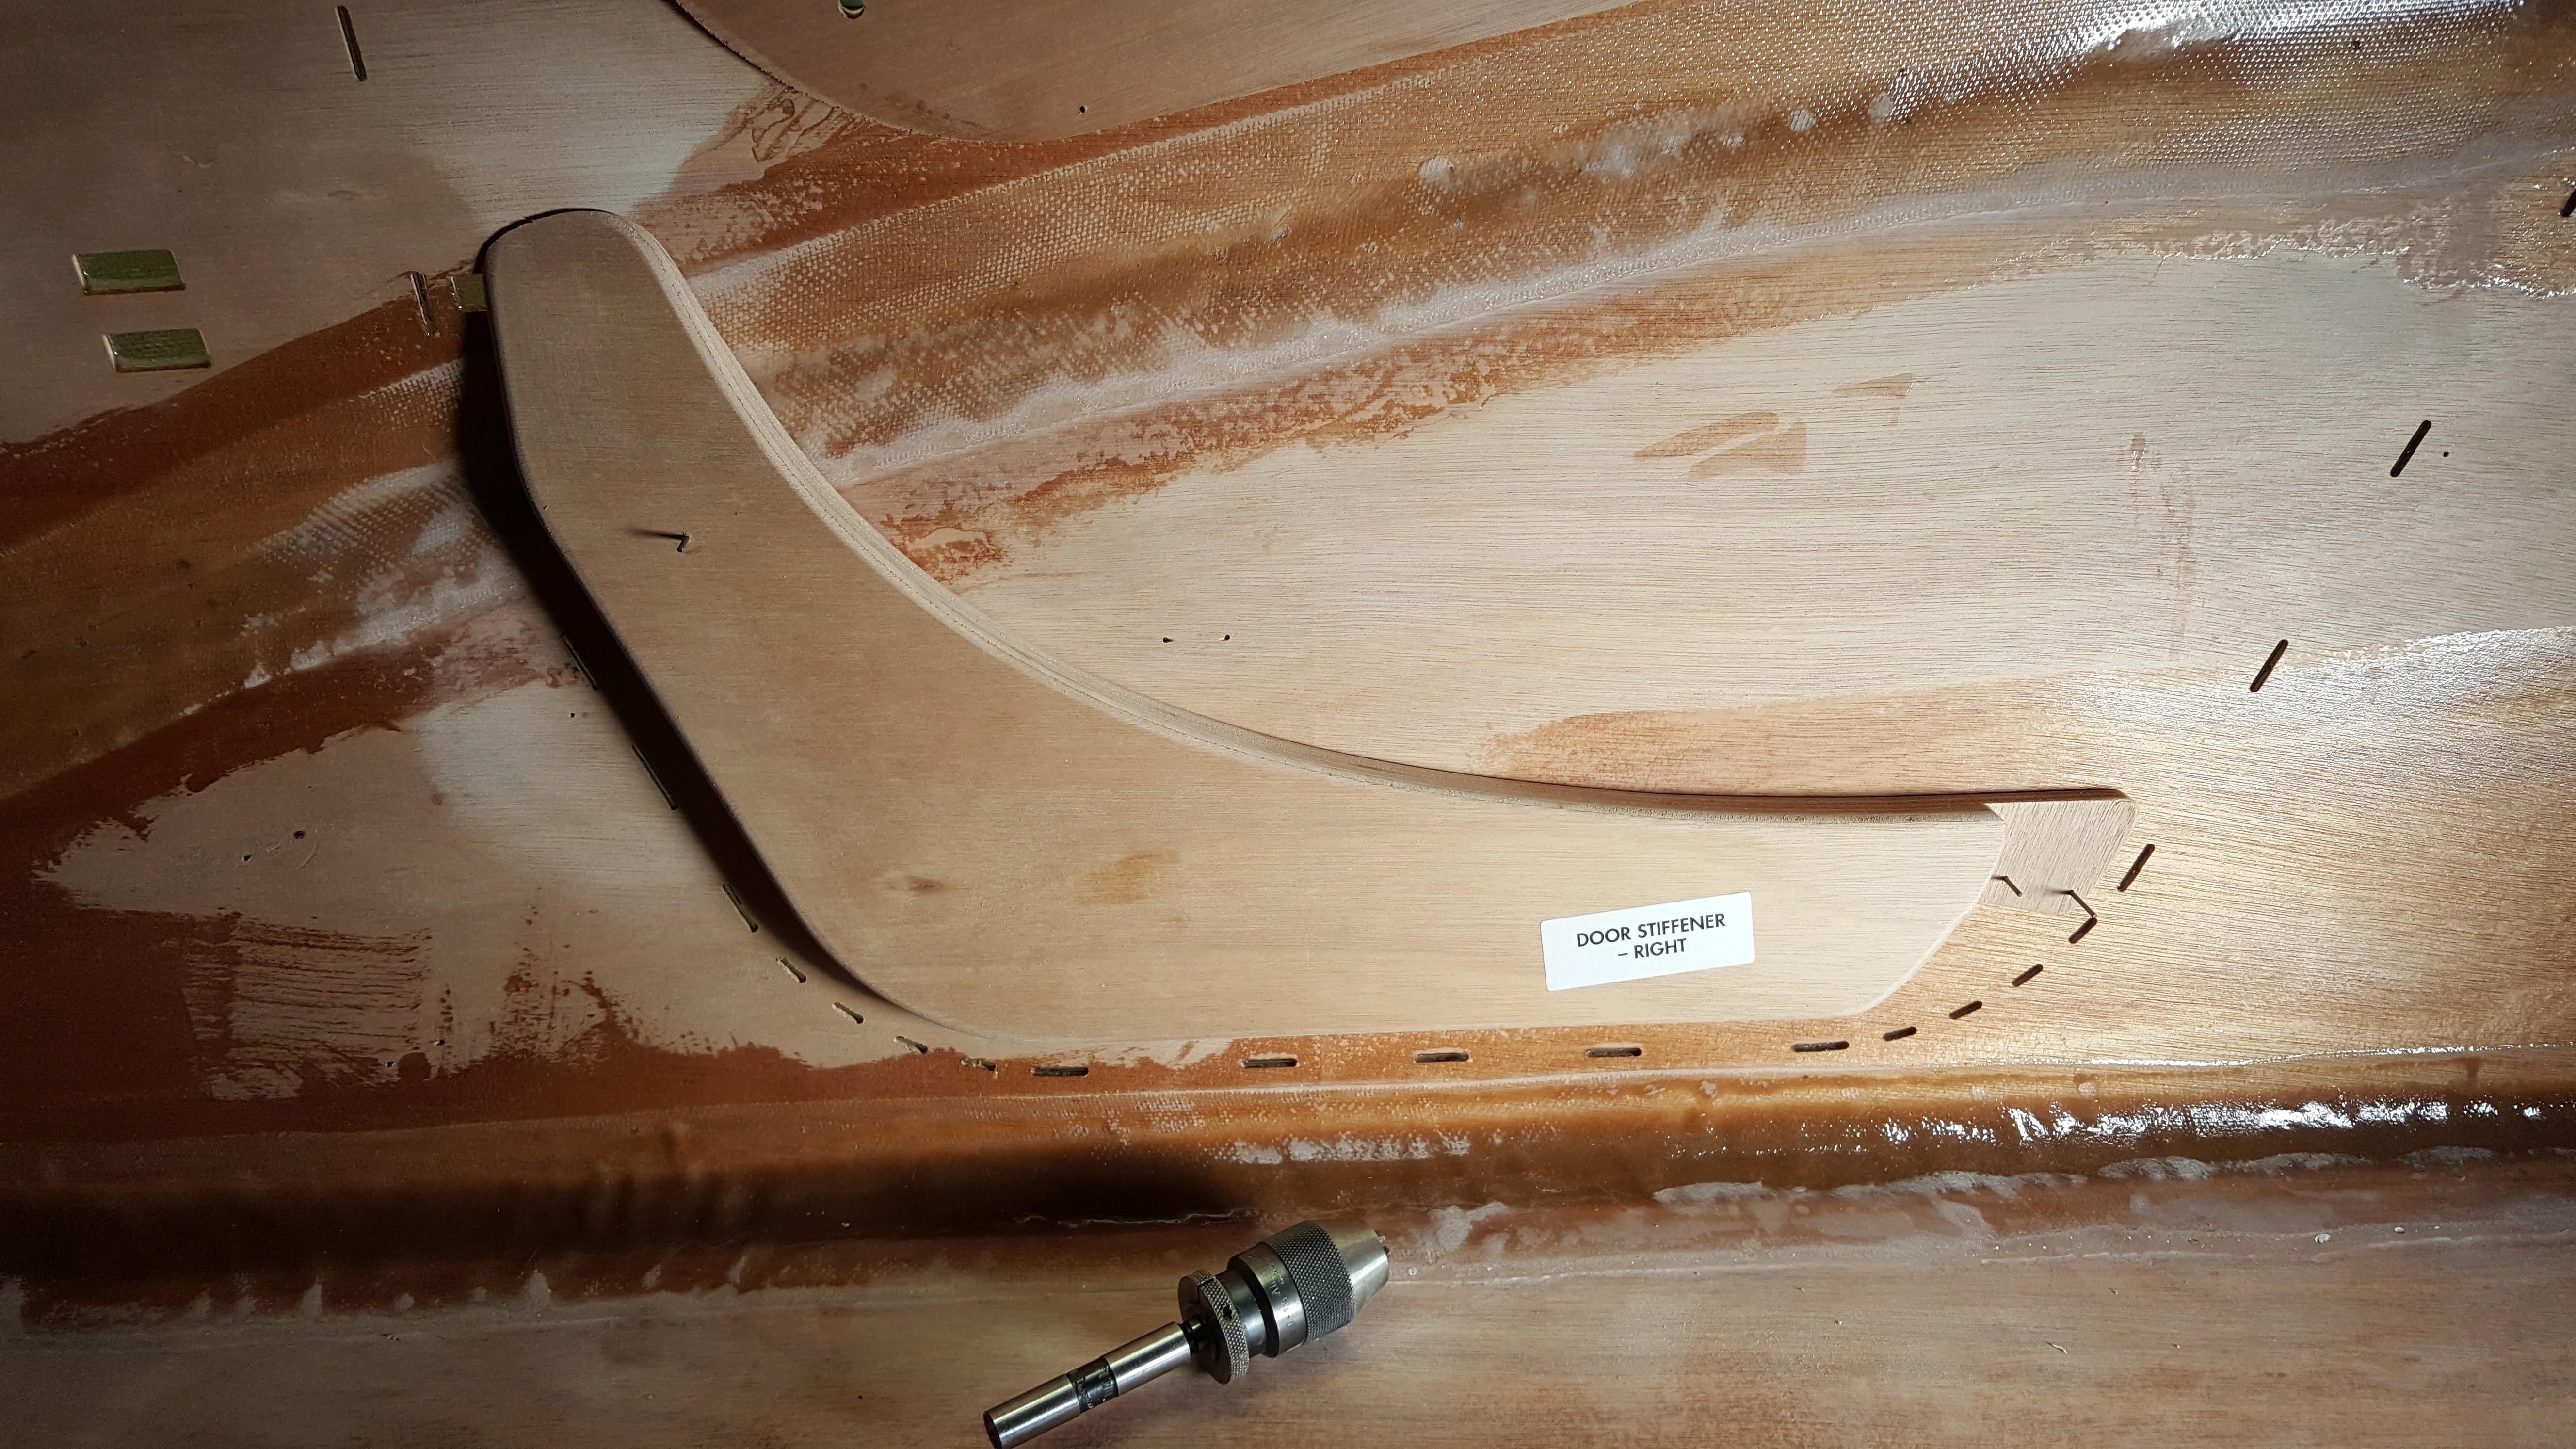 </p>
</p>
<p style=”text-align: left;”></p>
<p style=”text-align: left;”>Once I mixed up the epoxy cell-o-fill and spread it on the back, it was just a matter of lining up the pins, pushing it together and leaning a heavy weight against it. I used one of the metal plates that came with my hydraulic press. Worked great and didn’t get in the way like the clamps do when it came time to remove the excess epoxy mix.</p>
<p style=”text-align: left;”></p>
<p style=”text-align: left;”>-Bob</p>
<p style=”text-align: left;”></p>