Forum Replies Created
-
AuthorPosts
-
western_flyer
ParticipantI got a couple of what I call “beach backs” from Sierra Trading. They were inexpensive and importantly fold up to a small size. The fabric is pretty funky and plasticy; I plan to replace it with some nylon Cordura or other outdoor fabric down the road. A plus is they can be situated in either direction inside the teardrop and be used outdoors at the beach!
November 9, 2018 at 2:19 am in reply to: Tools and disposables. Favorites and were you got them #2267ParticipantWorld Paint Supply for cheap foam and bristle brushes.
https://www.worldpaintsupply.com/
Foam rollers from CLC and System Three, plus water based marine finishes from System Three.
Bought 3 doz cheap spring clamps from Walmart that I found to be next to useless. Wound up using small 1 1/2″ C-clamps left over from a couple of wood kayaks I built many years ago. The C-clamp were far superior.
ParticipantI added ladderlocks and keeper loops to tension the straps. About a $2.00 investment.
 Participant
I’ve never heard of Bearing Buddies before. They sound like the cat’s meow to prolong bearing life. I’m going to put a set on. Got to figure the size first.
Thanks for the info.
WF
ParticipantI have the 5×8 NT trailer but no long haul road experince, but the bearings look adequate considering how light the CLC teardrop is. I think it was on the NT Q&A section it was recommended to inspect the bearings fairly frequently. Maybe every 10000 miles and repack them as there are no grease nipples. My trailer’s bearing assys. do have grease nipples. I plan to check the the bearings often until I get a feel for their longevity. I also will order a pair of replacement bearings so if they seize up in the middle of nowhere I’m not trying to FedEx spares to the side of the road.
ParticipantI set up my shore power for 20 amp 120 VAC service. With everything plugged in and running I should draw less than 13 amps but the main power hogs, a hot plate and a small space heater should not pull more than 75% of the systems amp rating when run continuously, hence the 20 amp capacity. The shore power feeds into a 20 amp marine circuit breaker in the cabin, which feeds a 20 amp gfic/arc suppression outlet in the same gang box, which in turn feeds a standard 20 amp outlet in the galley. My battery power station plugs directly into the galley 120 outlet when charging on shore power. It’s all very simple with no fancy distribution panel. If you are running a TV, refrigerator, AC or other high draw electronics then a fancier system might well be called for.
ParticipantI wouldn’t mix up 12 and 120 volt wiring in the same conduit. I haven’t found any wiring codes for RVs but both residential and marine codes forbid it. A short inside the conduit would risk damaging if not destroying your 12 volt system. Then there is the confusion it could create. 120 VAC has the hot wire as black, the neutral white and ground green. 12 volt DC the hot is white and the ground is black. I’m using marine grade wire and the folks at West Marine told me to avoid confusion many boaters are using red for the hot wire to distinguish it from the black ground wire for their 12 volt. The latter is the scheme I’m using for my 12 volt wiring. My 12 and 120 wiring never touch each other.
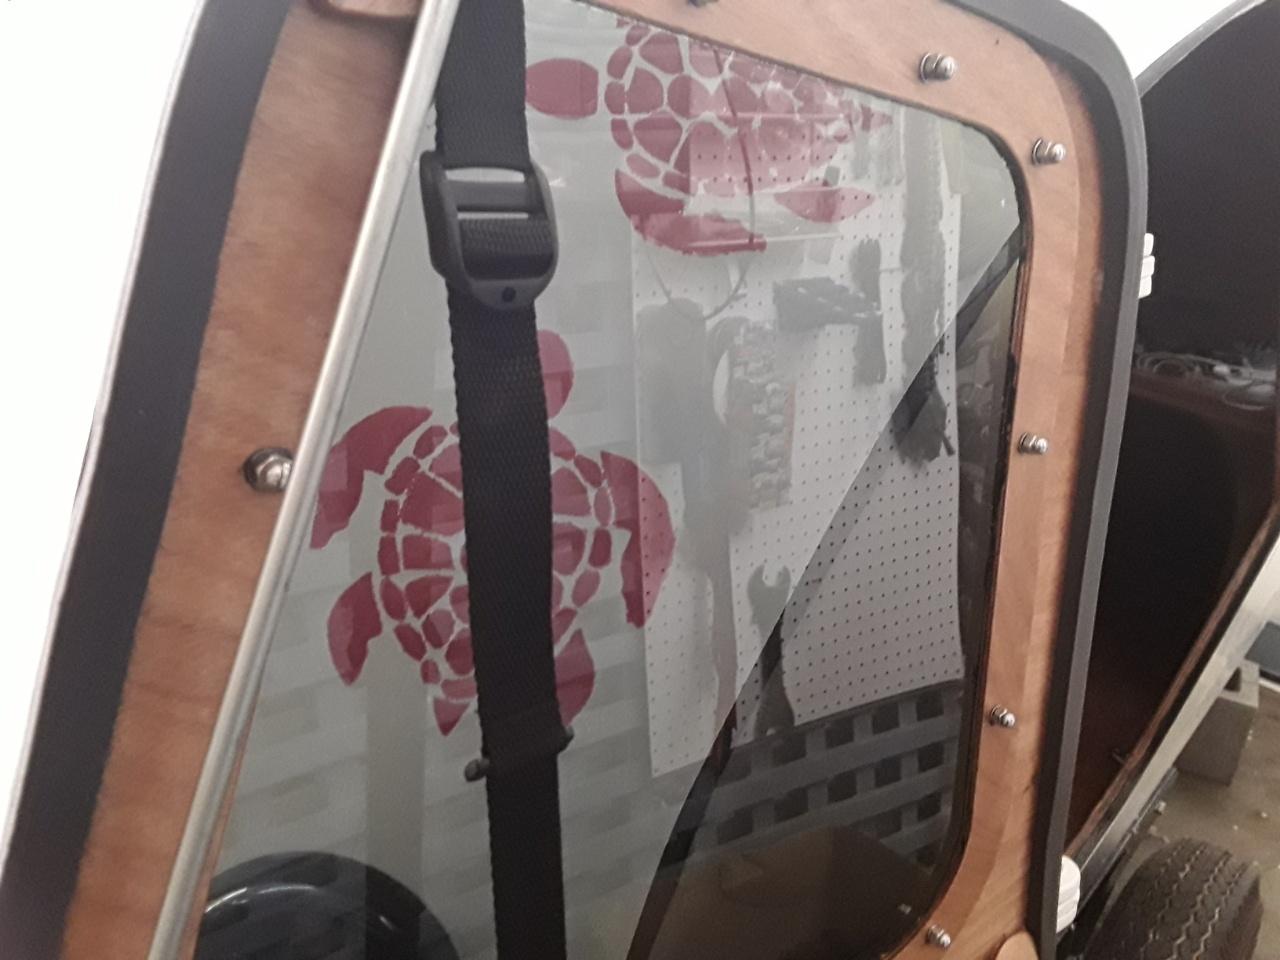
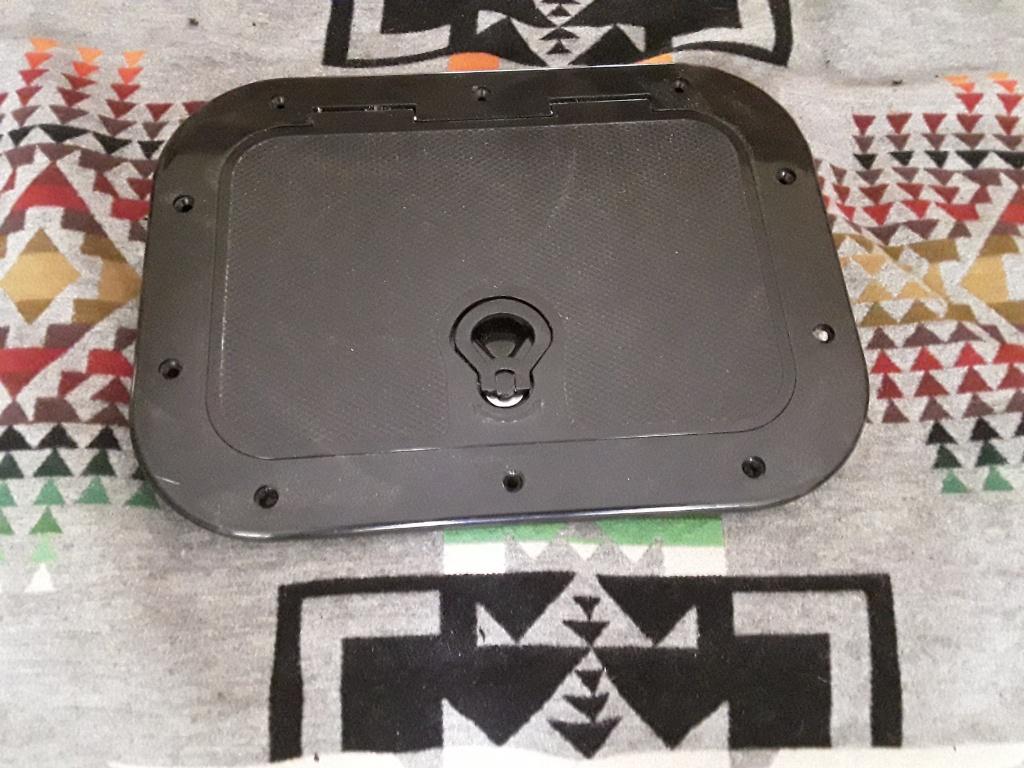
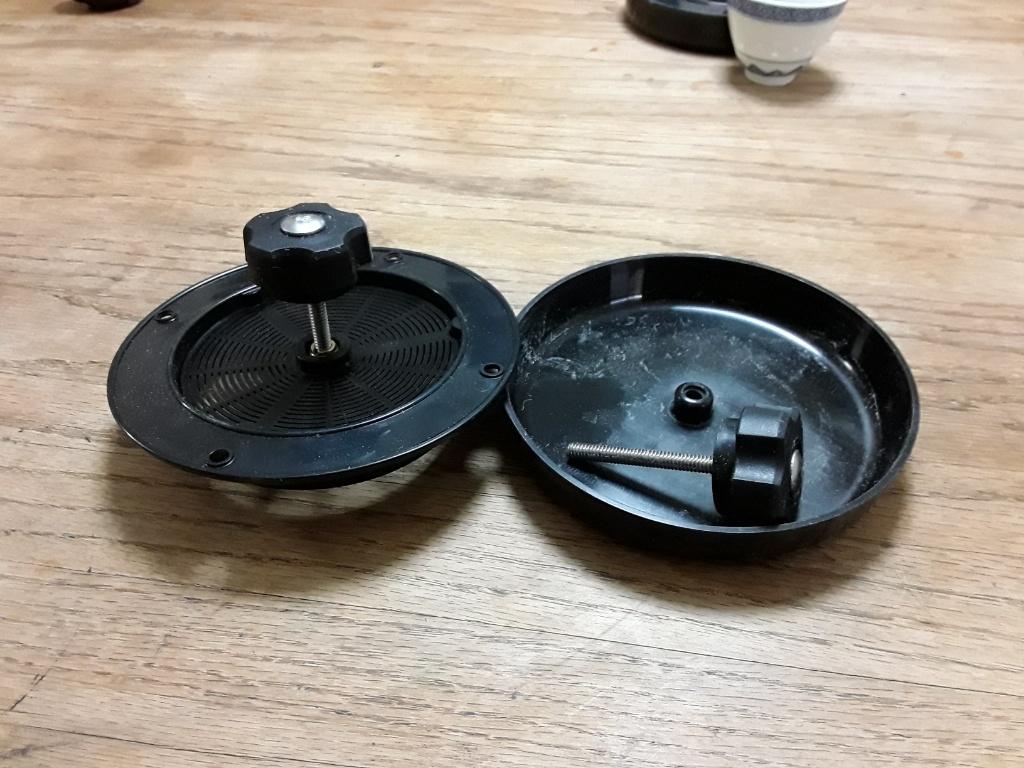
ParticipantI’m in the process of sealing my TD to the Northern Tool trailer and eventually covering and sealing up the underside of the trailer. For access hatches I am installing Attwood marine hatches. http://www.attwoodmarine.com/store/product/hatches. If you look around the internet they can be found at an attractive price. In sea kayak fashion I will also install 6 inch deck plates opposite the Attwoods to facilitate proper storage and retrieval of items. The deck plates are available on the CLC store page.
 Participant
Vinyl PVC is made soft with volatile plasticizers. Over time especially when exposed to heat and sun they will off gas and can effect surfaces that are in contact. My recommendation (decades in the recreational and industrial fabric trades) is to give it a good long test of a month or more in the summer Sun and see the results. My guess is epoxy will not be harmed. Varnish, which can have its own off gassing, could be problematic. A second consideration is how well does the PVC filter out the Sun’s UV rays.
I am mounting a diamond plate tongue box on the trailer and found some fake diamond plate PVC film that I thought would both add some nice design and protection to the exposed lower front end of the TD. I’ve changed my design motif and abandoned the film idea but it is interesting. If you decide to wrap your TD or just do a few tests please post the results.
ParticipantI would insert here that there is a variety of adhesives used on Velcro. I do mean Velcro and not generic hook and loop. Some of the acrylic adhesives used on some Velcro is rated in excess of 200 deg F. The rubber based adhesives used on most fabric store Velcro and velcro knock off hook and loops have much lower temperature ratings.
I’m not at the headliner step just yet but Velcro is very much in consideration.
ParticipantVery cleaver. It should slow the raccoons way down!
I’ve purchased two adjustable SS hasps to spread the clamping force out toward the edges of the hatch. I’ll post a pic when I get them installed.
ParticipantOne possibility is to paint narrow line of a dark contrasting color around both the galley hatch, the galley opening edges and the galley gutter. To get the idea of what I talking about turn to page 288 of the manual where they put a thin strip of vinyl tape on top of the eyebrow seam.
I don’t think the vinyl tape would be up to the rigors of the wear and tear the galley hatch is going to get. I’m going to use a black semigloss or satin polyurethane, which will tend to visually hide any irregularities along the hatch edges. I plan to do the same with the cabin doors. The black non gloss paint will blend in with the black gaskets and foam seals.
I’m finishing my TD with off white polyurethanes, but I think black edges around the hatch and doors would look especially nice with the bright (sailor talk for a clear finish) and black accents shown in the manual and online.
Keep the post and photo coming as you progress.
ParticipantI had a heck of a time lining up the galley hatch and finally after the third failed try with tape used 2 inch deck screws. Centering the hatch I drove two screw through the “hatch lid” lip section spaced to near the bend but in the center section below panels 1. I glued the center thick hinge blocks to the roof and bolted the 4 side plates to the centers. I then drilled pilot holes down the centers of the side plates and tightened the screws until the side plates were flush and snug. A little tweaking to the back 2 screws and it all lined up beautifully. After the epoxy putty set, the screws were removed and the holes puttied closed.
I don’t mean to be overly critical because the manual is very complete, very well written and illustrated. BUT in places it assumes skill sets many of us amateur builders just don’t have – at least skills I don’t have. I’ve personally gone off script in a number of places to compensate for my lack of skill and neighbors ready and able to lend a hand at just the right time.
ParticipantHere are my thoughts and a bit of progress with the mushroom vents. I definitely want to be able to open and close the vents from inside the teardrop. I found some threaded knobs at my local ACE Hardware and inserted SS carriage bolts with Loctite Red for a permanent bond. I don’t know if it is visible in the photo but the middle screen section was drilled out and a brass threaded insert screwed in. I haven’t decided on how to fix the knob/bolt to the mushroom cap and will wait until I cut the vent holes through the shell. The carriage bolt will have to be shortened but not until I see how it all fits together. What I do know is I don’t want the knob sticking out just above my head so the forward vents will be in panels 2 and probably higher than the manual shows. The rear vent will be in the quarter panels pretty much as shown but also with the interior control knobs. I thinking of putting a fifth mushroom vent somewhere in the galley, sides or hatch to be determined, and maybe a butterfly vent through the bulkhead to get some air exchange in the galley on hot days. That vent would not have the internal control knob and would only be operated from the outside.
 Participant
-
AuthorPosts