Welcome to TeardropForum.com › Forums › Teardrop Builders’ Forum › Bob's tips and tricks
Tagged: Door stiffeners
- This topic has 26 replies, 12 voices, and was last updated 4 years, 6 months ago by
madebymike60.
-
AuthorPosts
-
July 1, 2017 at 9:04 pm #959
Bob D.
ParticipantGuys and gals, I’m starting a new thread to cover and discuss where I’ve deviated from the manual. This I think is better than hijacking other threads! More to come. Please share ideas that worked for you.
-Bob
July 1, 2017 at 10:23 pm #960stevie
ParticipantWet a gloved finger (repeatedly) with denatured alcohol to smooth fillets. The instruction manual mentions it, but after most of the filleting has been completed.
You’ll hafta wait a bit for the epoxy to cure, but don’t wait too long. I built over the winter months and 2 hours wasn’t uncommon. Result is really smooth fillets that look professional.
July 1, 2017 at 11:09 pm #961Participant<p style=”text-align: center;”>Door stiffener install</p>
<p style=”text-align: center;”></p>
<p style=”text-align: left;”>I installed my door stiffeners before cutting the doors out because I didn’t want to change the shape of the door by clamping it tight to the stiffener. The strongest bonds (with glue, can’t vouch for epoxy) are with a nice layer of glue and no clamping at all according to the Internet (search my previous posts for the URL where the tests are documented if interested).</p>
<p style=”text-align: left;”></p>
<p style=”text-align: left;”>To get the sanded area roughed out to the approximate shape, I held the stiffener on the OUTSIDE of the camper and used a compass to scribe a line with a constant distance from the outside surface of the camper shell. I wish I took pictures because it was very simple and you’d see exactly what I mean. But I didn’t. Another method I considered was to use a contour gauge. I didn’t have one, but I did have a compass.Once I got the stiffener sanded and fitting good enough I was faced with how to hold it level and also pressed against the inside surface of the camper shell.</p>
<p style=”text-align: left;”></p>
<p style=”text-align: left;”>Well, there were two alignment holes in the thin section for the door lock parts to mate with. I simply drilled a 1/16″ hole on the opposite side of the stiffener straight through the camper shell and used one of the several drill bits I bought for the project as an alignment pin. The manual says something about buying several because we’ll break them. I didn’t, so I had 5 or 6 to work with. Drill this hole from the inside. Resist temptation to drill through with the stiffener held to the outside. Even though it’s lined up, the hole won’t be perfectly perpendicular to the stiffener and it won’t line up once you move to the inside. Trust me on this. I have the experience to back it up!</p>
<p style=”text-align: left;”>Before glue up showing pins through shell:</p>
<p style=”text-align: left;”>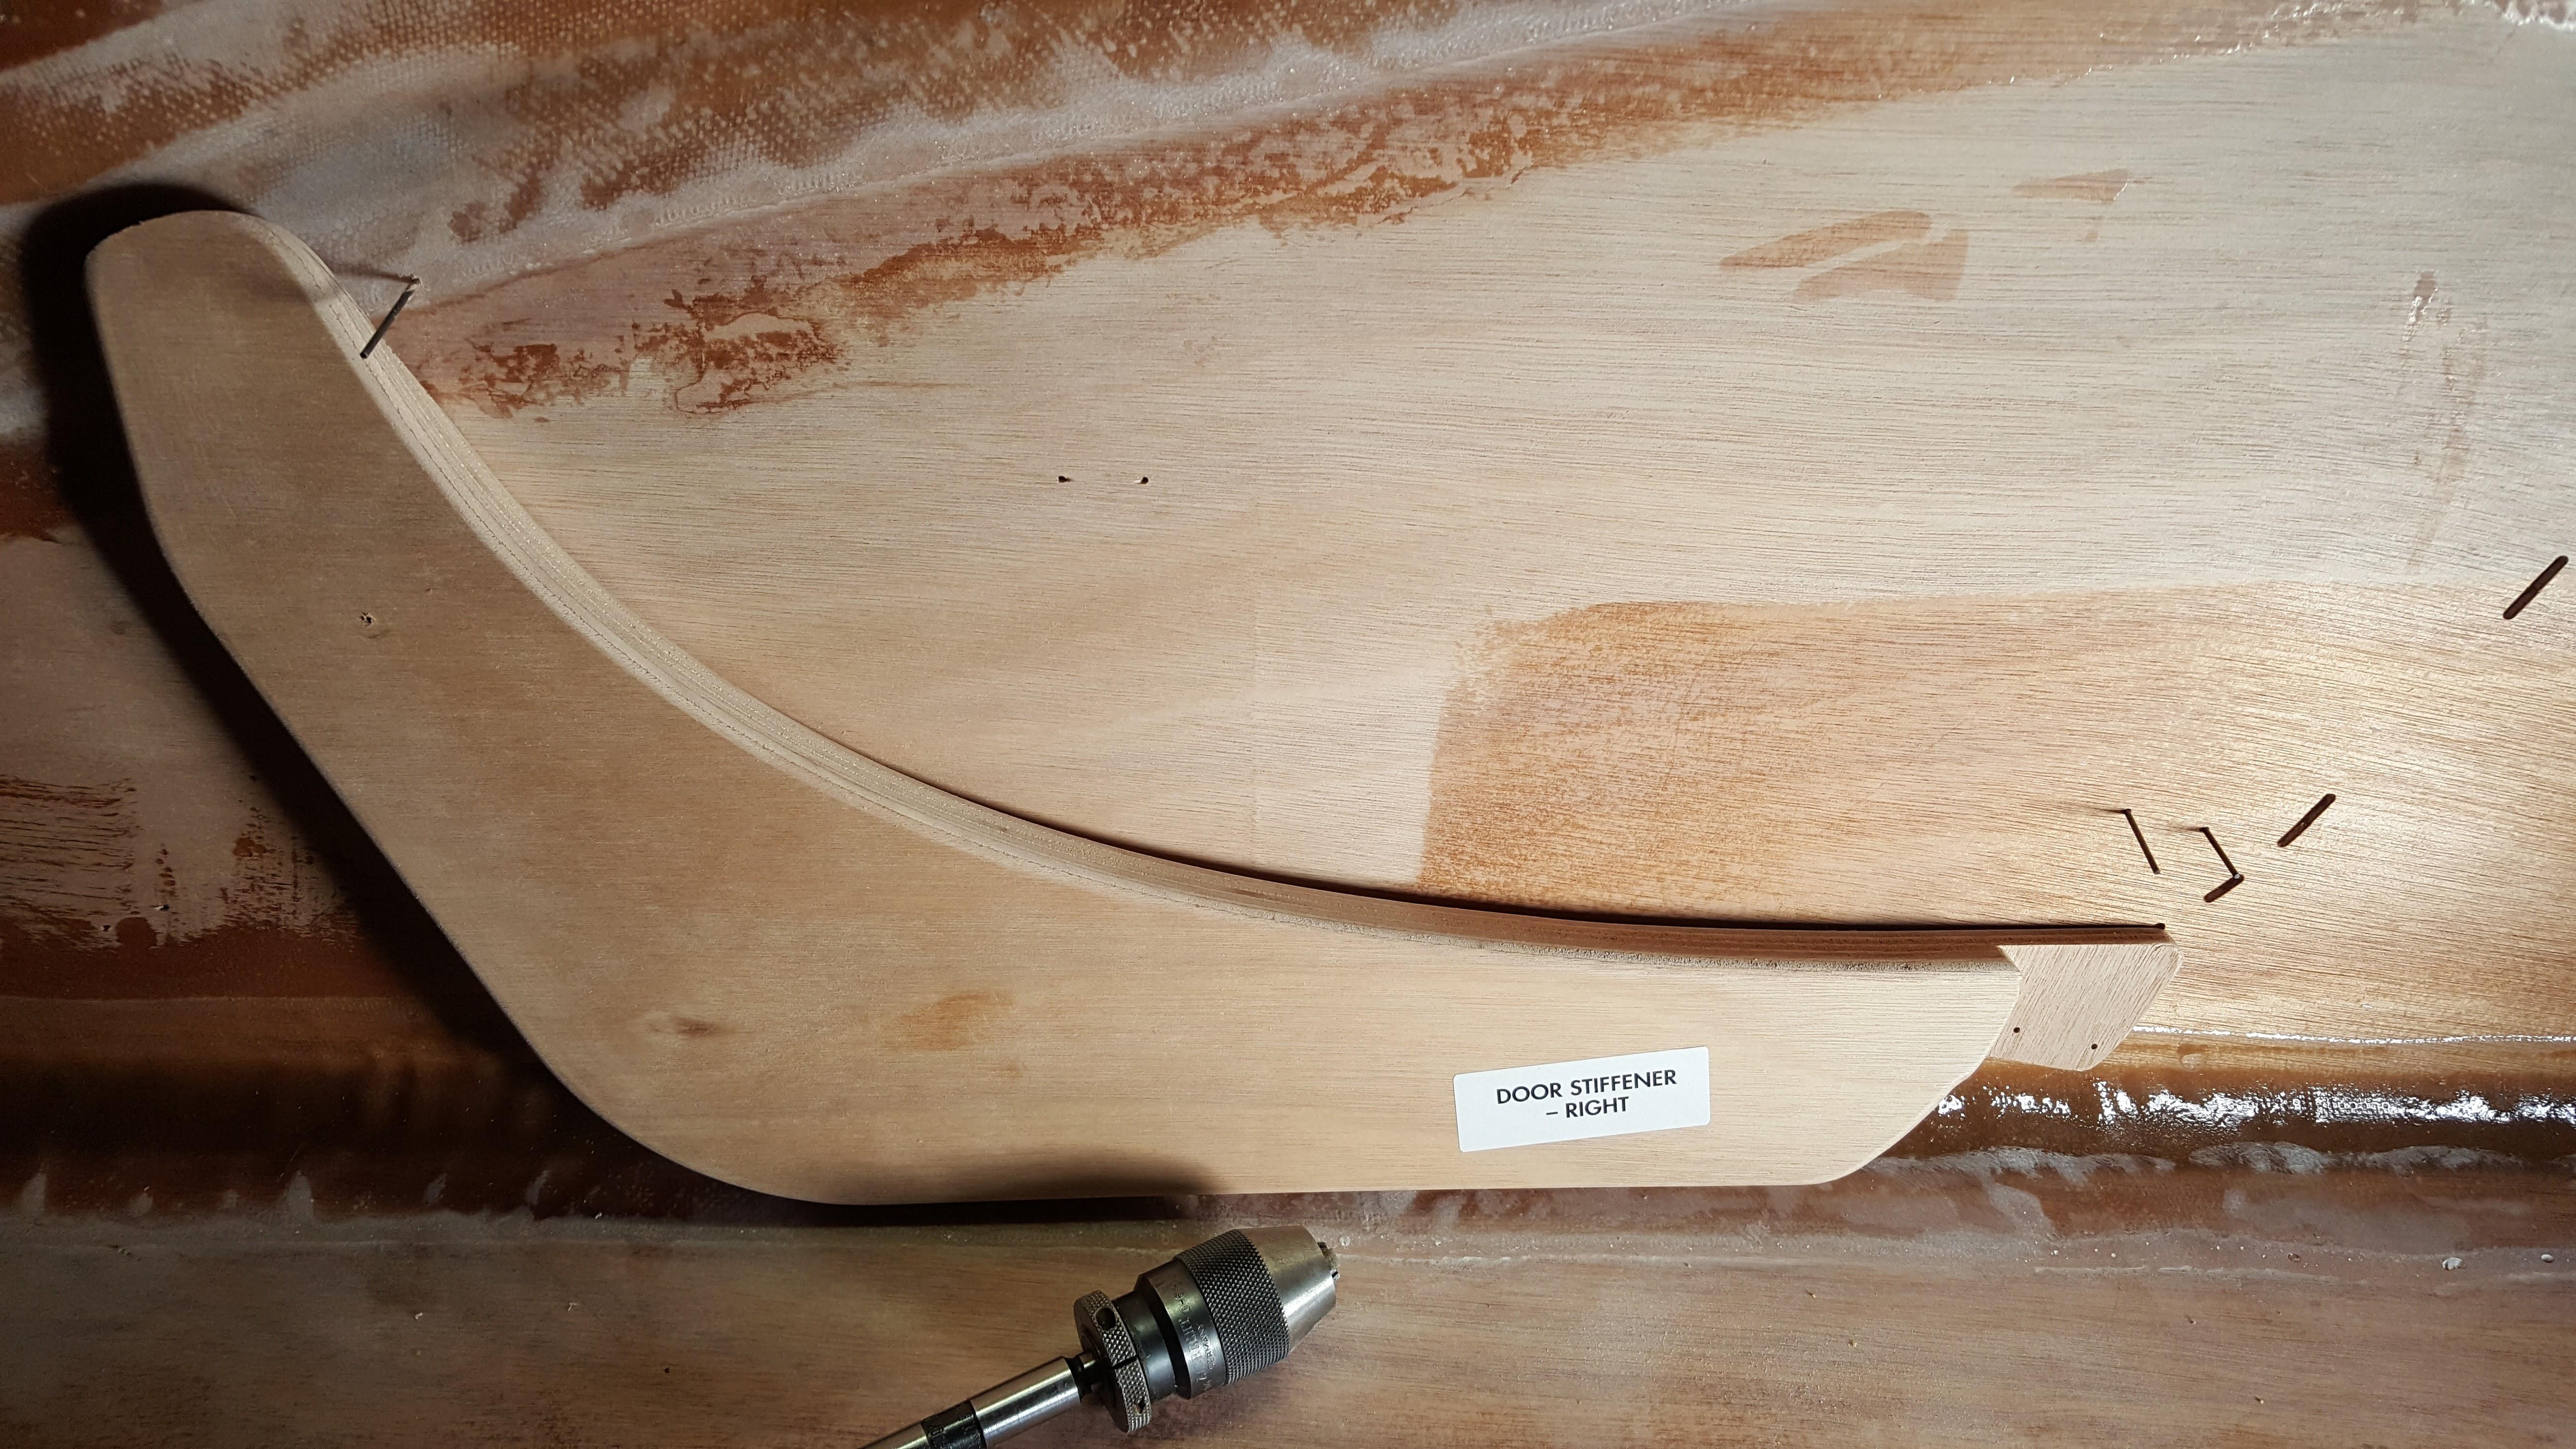 </p>
</p>
<p style=”text-align: left;”></p>
<p style=”text-align: left;”>And here it is after installing:</p>
<p style=”text-align: left;”>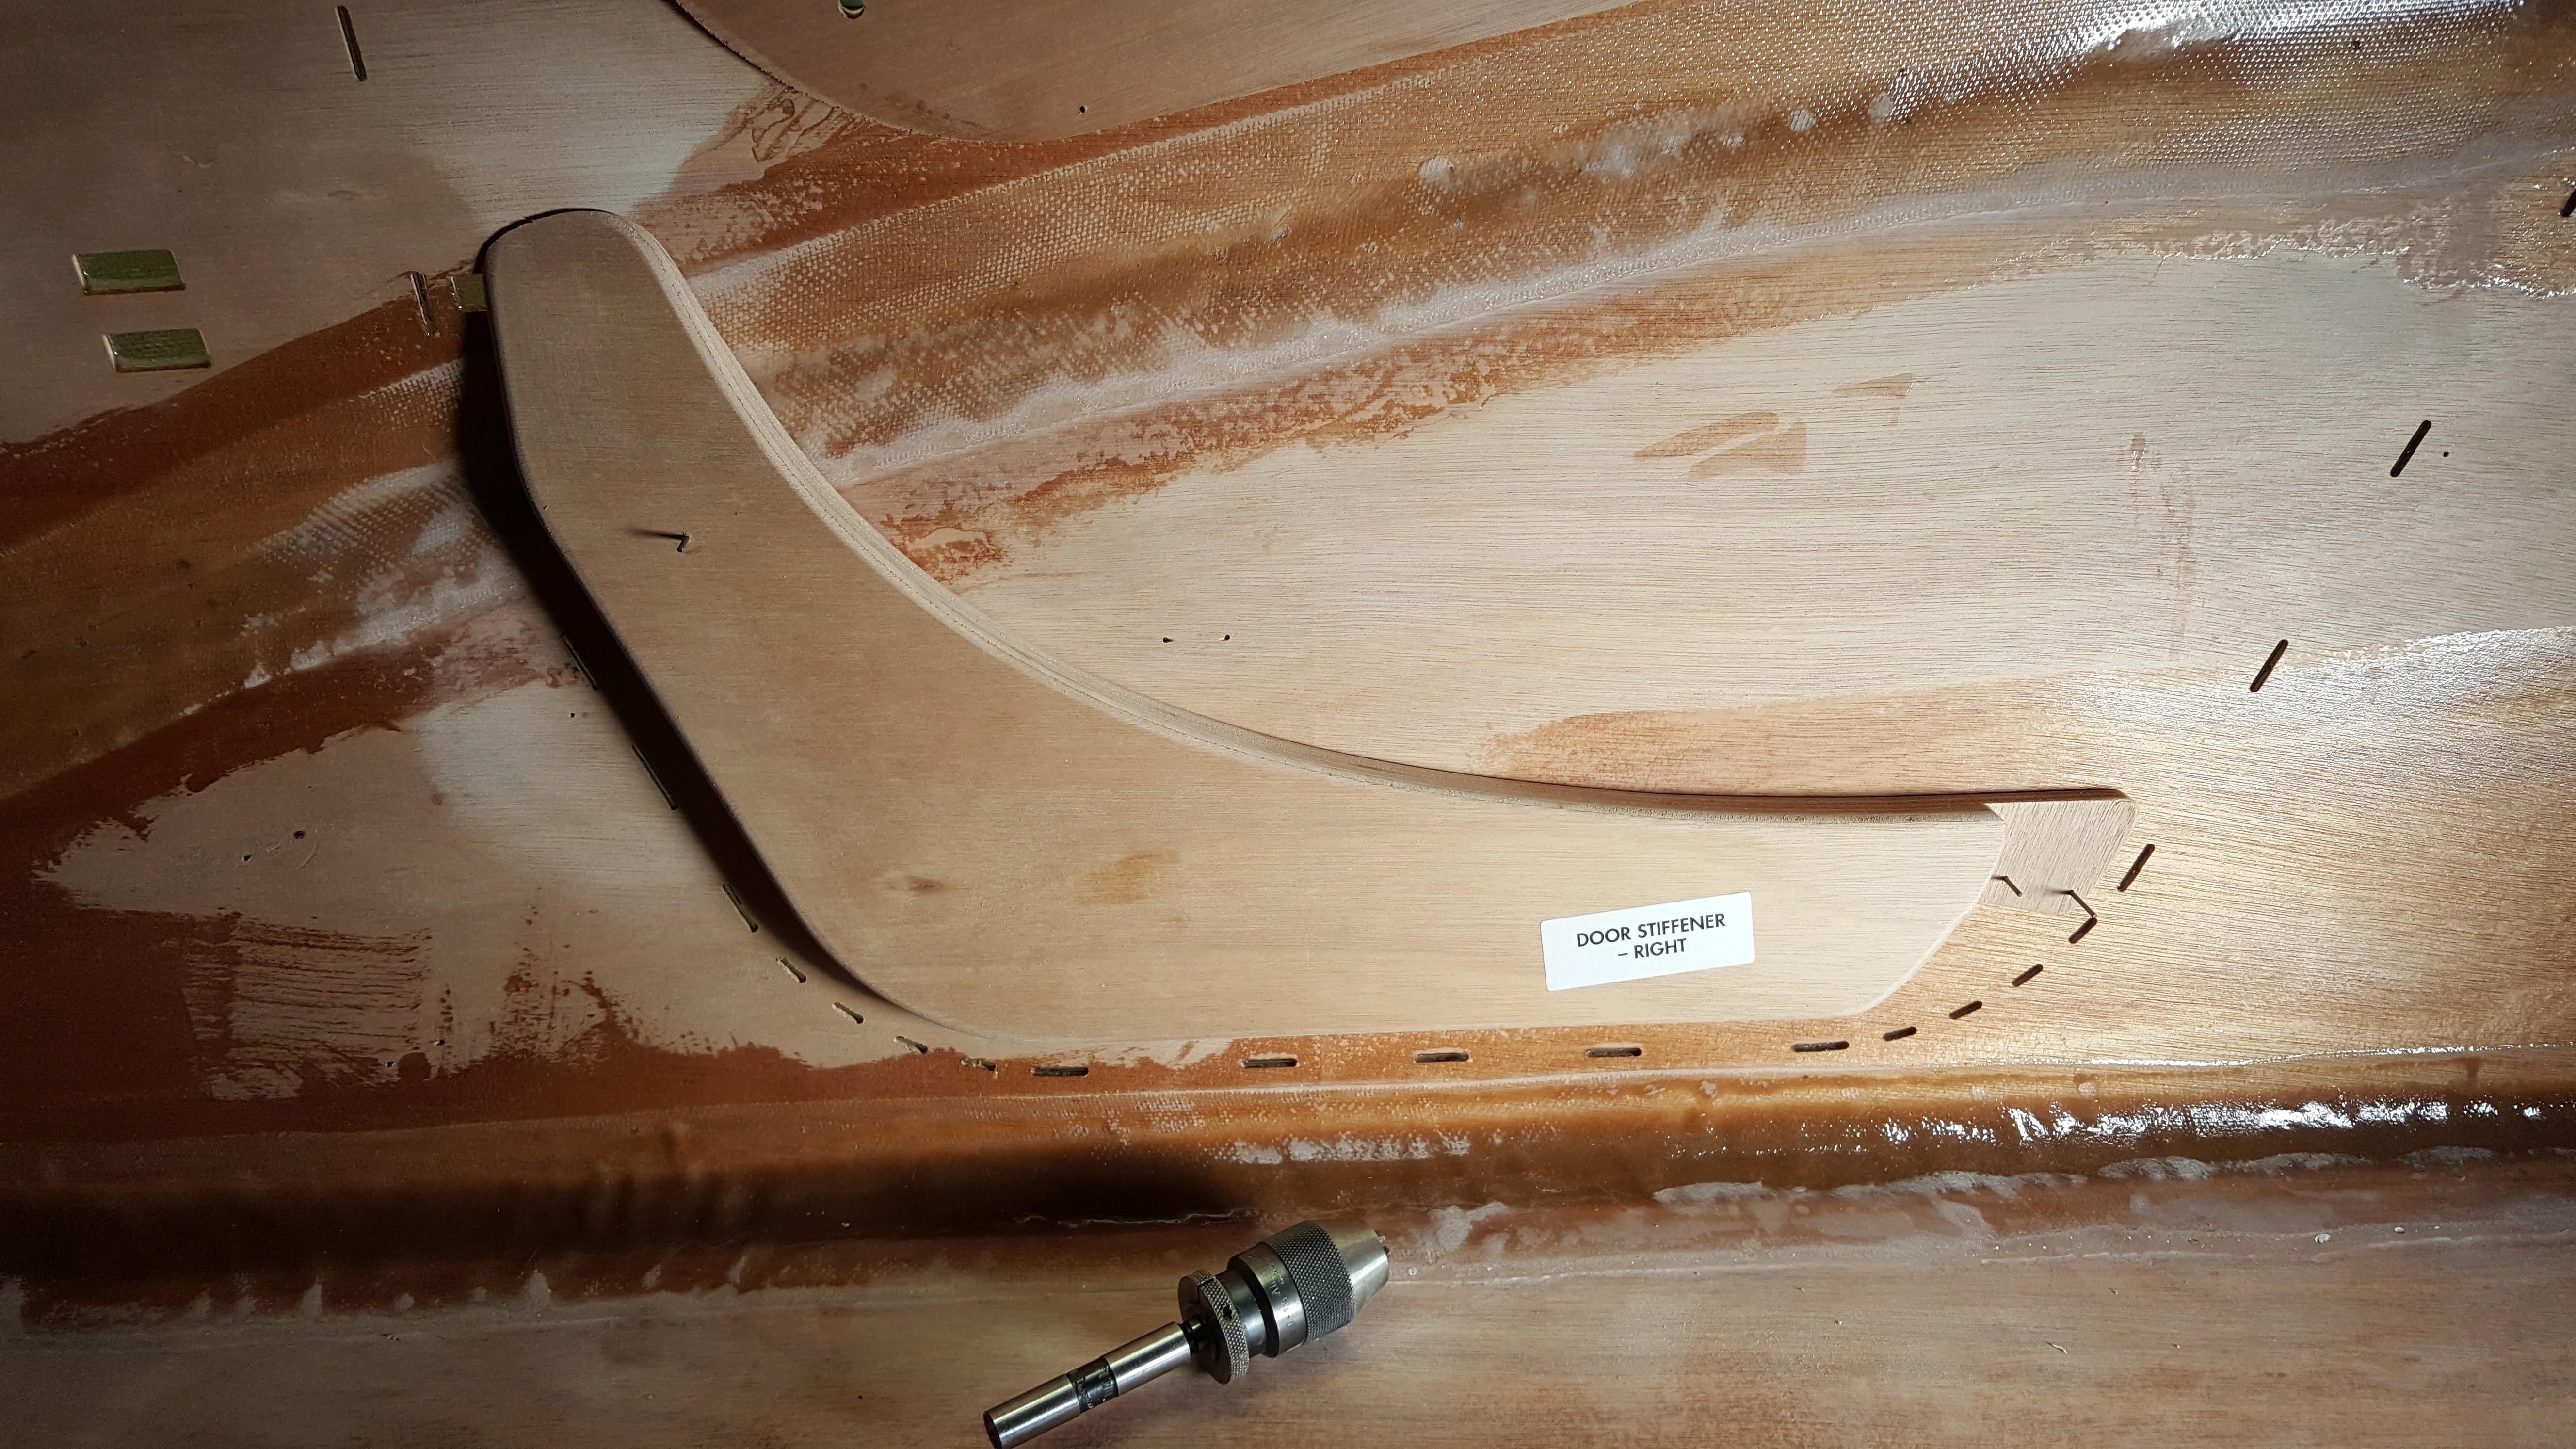 </p>
</p>
<p style=”text-align: left;”></p>
<p style=”text-align: left;”>Once I mixed up the epoxy cell-o-fill and spread it on the back, it was just a matter of lining up the pins, pushing it together and leaning a heavy weight against it. I used one of the metal plates that came with my hydraulic press. Worked great and didn’t get in the way like the clamps do when it came time to remove the excess epoxy mix.</p>
<p style=”text-align: left;”></p>
<p style=”text-align: left;”>-Bob</p>
<p style=”text-align: left;”></p>July 1, 2017 at 11:13 pm #962ParticipantGotta love how that last post had all the HTML markups mixed in. I didn’t type a single one. It’s the forum software screwing up.
July 1, 2017 at 11:25 pm #963ParticipantOne thing I learned after it was way too late was to connect the dots, so to say. At this stage:
verify that the side panels #3 and #4 line up exactly right. Yes, we’re told this, but I thought everything was fine. Till it came time to draw the lines to mark where I was cutting out the doors. One side wasn’t as perfect as I’d like. Nothing sandpaper can’t fix, but it’s probably best to use a straight edge and hold it dead center along the oval cuts (dotted lines) and make a tiny pencil mark right at the edge of the panel so you can see how the panels and door cut out lines will match up. Hindsight is 20/20.
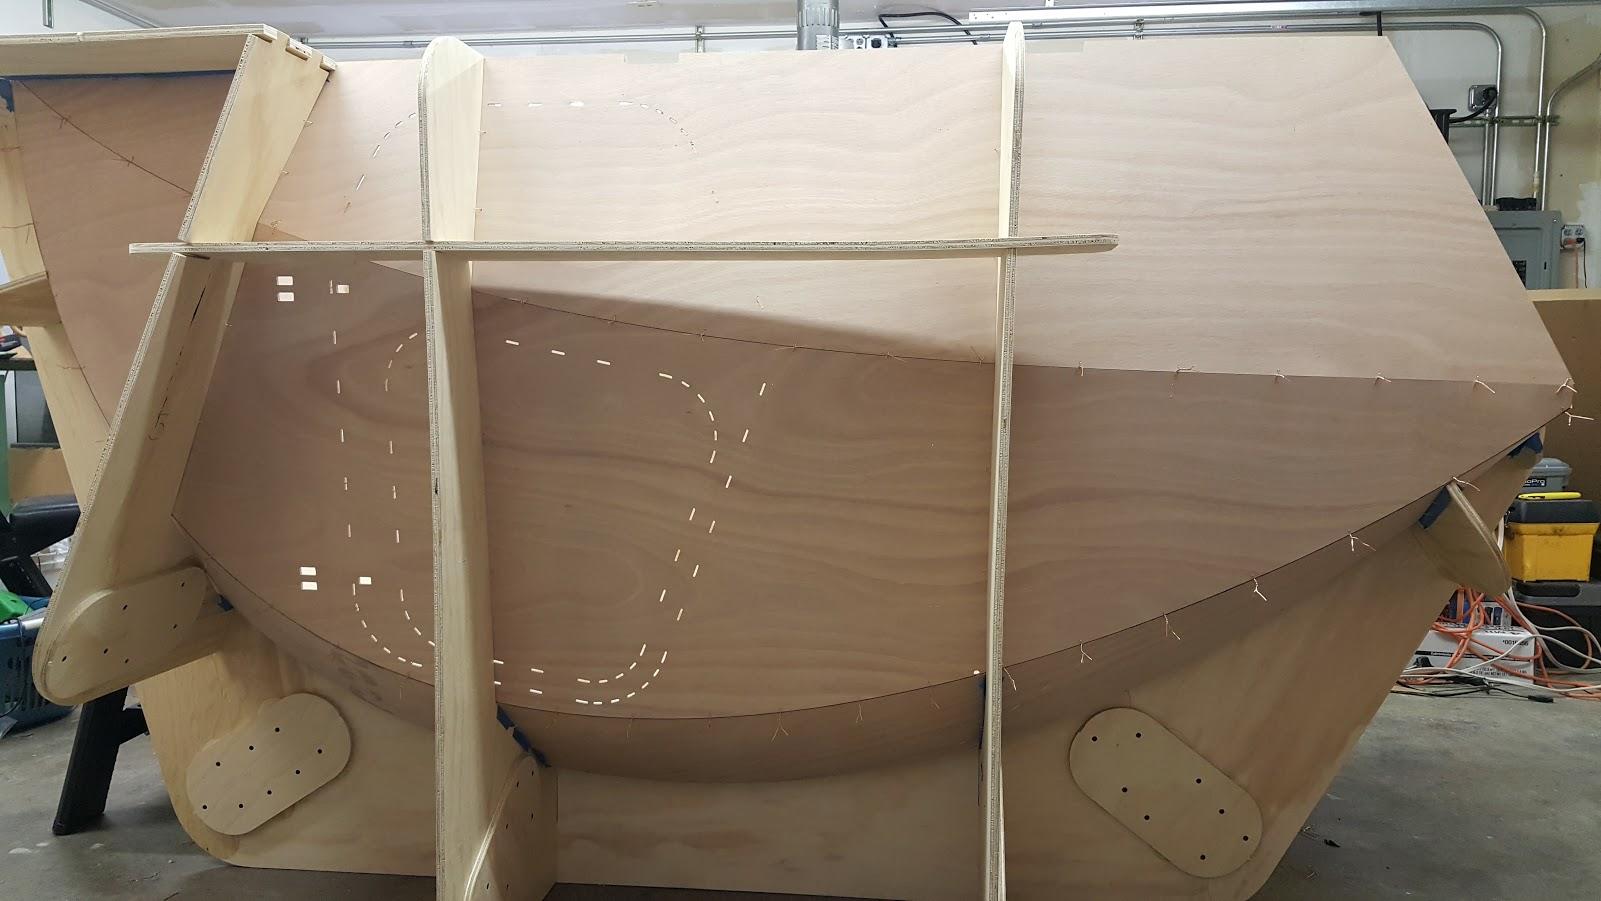
July 1, 2017 at 11:30 pm #964ParticipantUse a round over router bit to round over these stiffeners BEFORE you install the galley flat. It was impossible to get to the ends of the two outside most stiffeners due to interference from other bits of the camper.
Do it at this step. Not after installation:
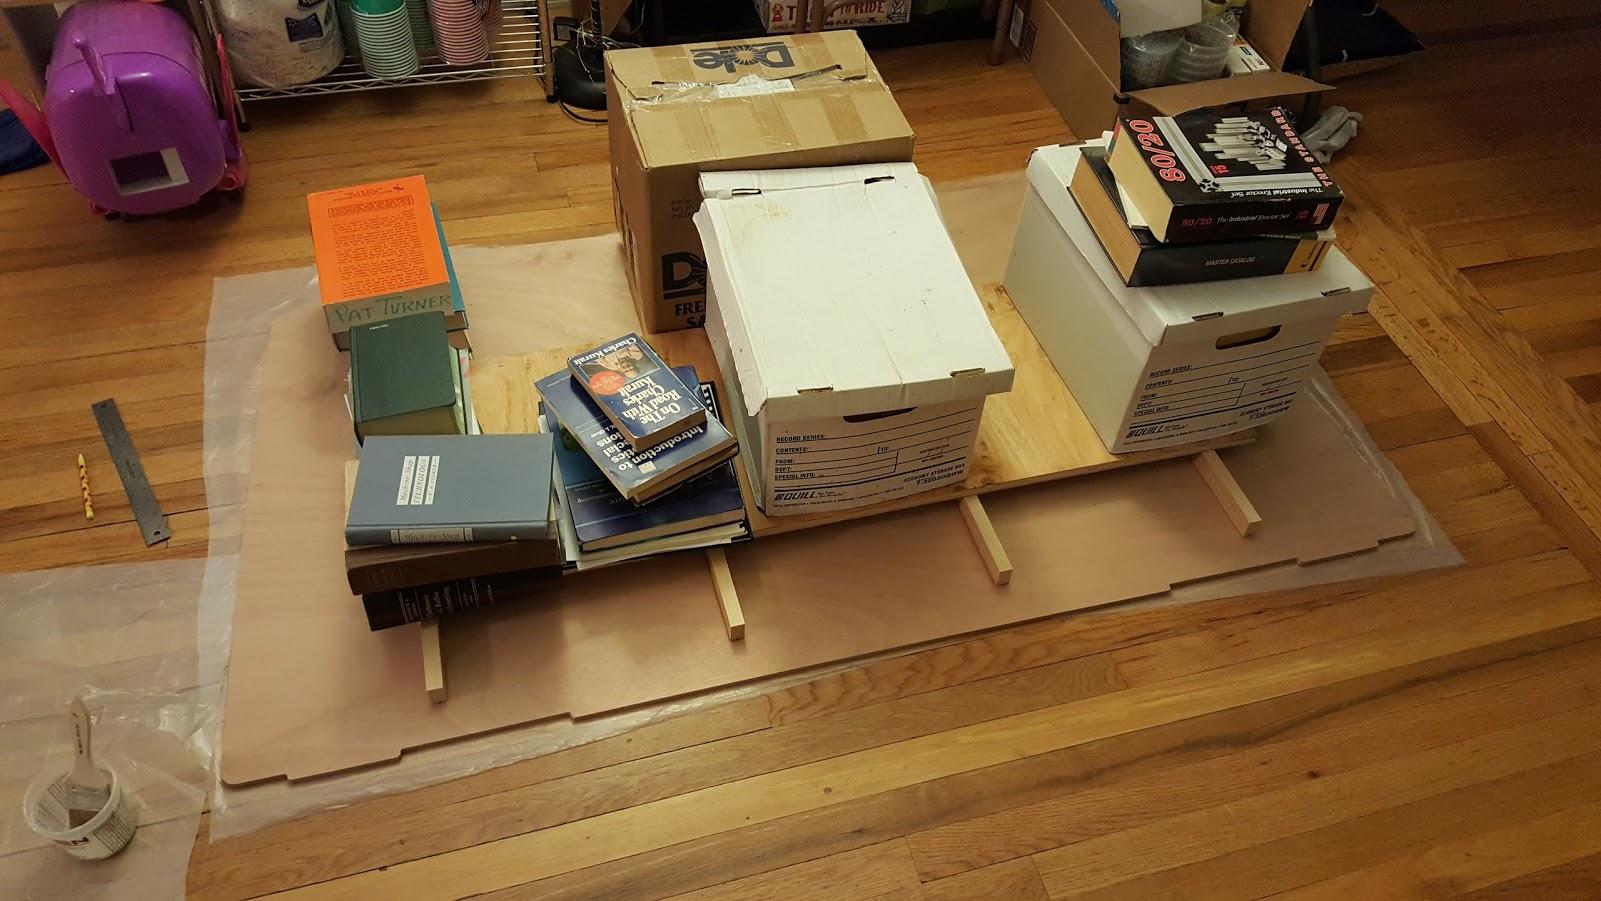
Also, use lots of physics and computer science books to hold everything together while the epoxy sets up. I made little pencil marks at each end to line up with the holes drilled into the flat. The bars did shift slightly, but it was rather easy to push them back where they should go once the epoxy is on them.
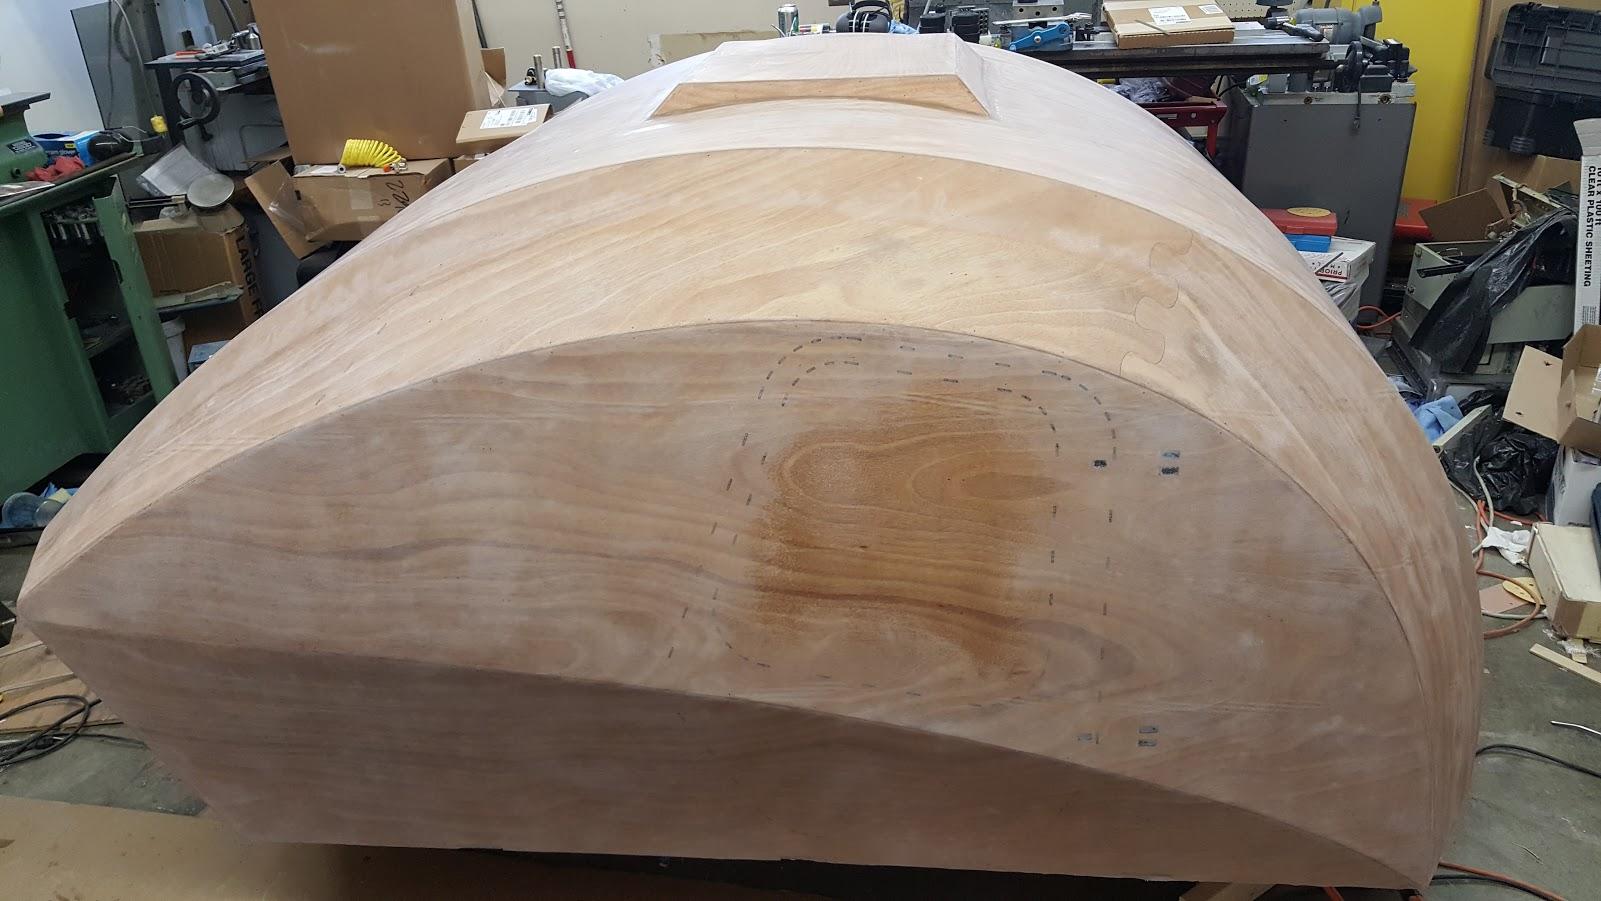
July 1, 2017 at 11:37 pm #965ParticipantTo save a bunch of time, I installed the roof vent box before cutting out the doors and installing the transom. Why not? I was able to time the epoxy fill coats and sanding just right so I didn’t waste any time on it. Also, make sure you are conservative on the cuts for the roof/vent box. Mine barely fit without falling in. The hole was too big, even though I cut exactly on the line. Well, perhaps not too big, but really really close to being too big. If I had to do it again, I’d leave a good bit of the dashed/dotted pre-cut lines showing so I don’t risk having to deal with a hole that was too big for the roof box. It’s trivial to sand the extra down once the whole assembly is flipped over. Not so easy to put material back if you take away too much.
 July 1, 2017 at 11:41 pm #966Participant
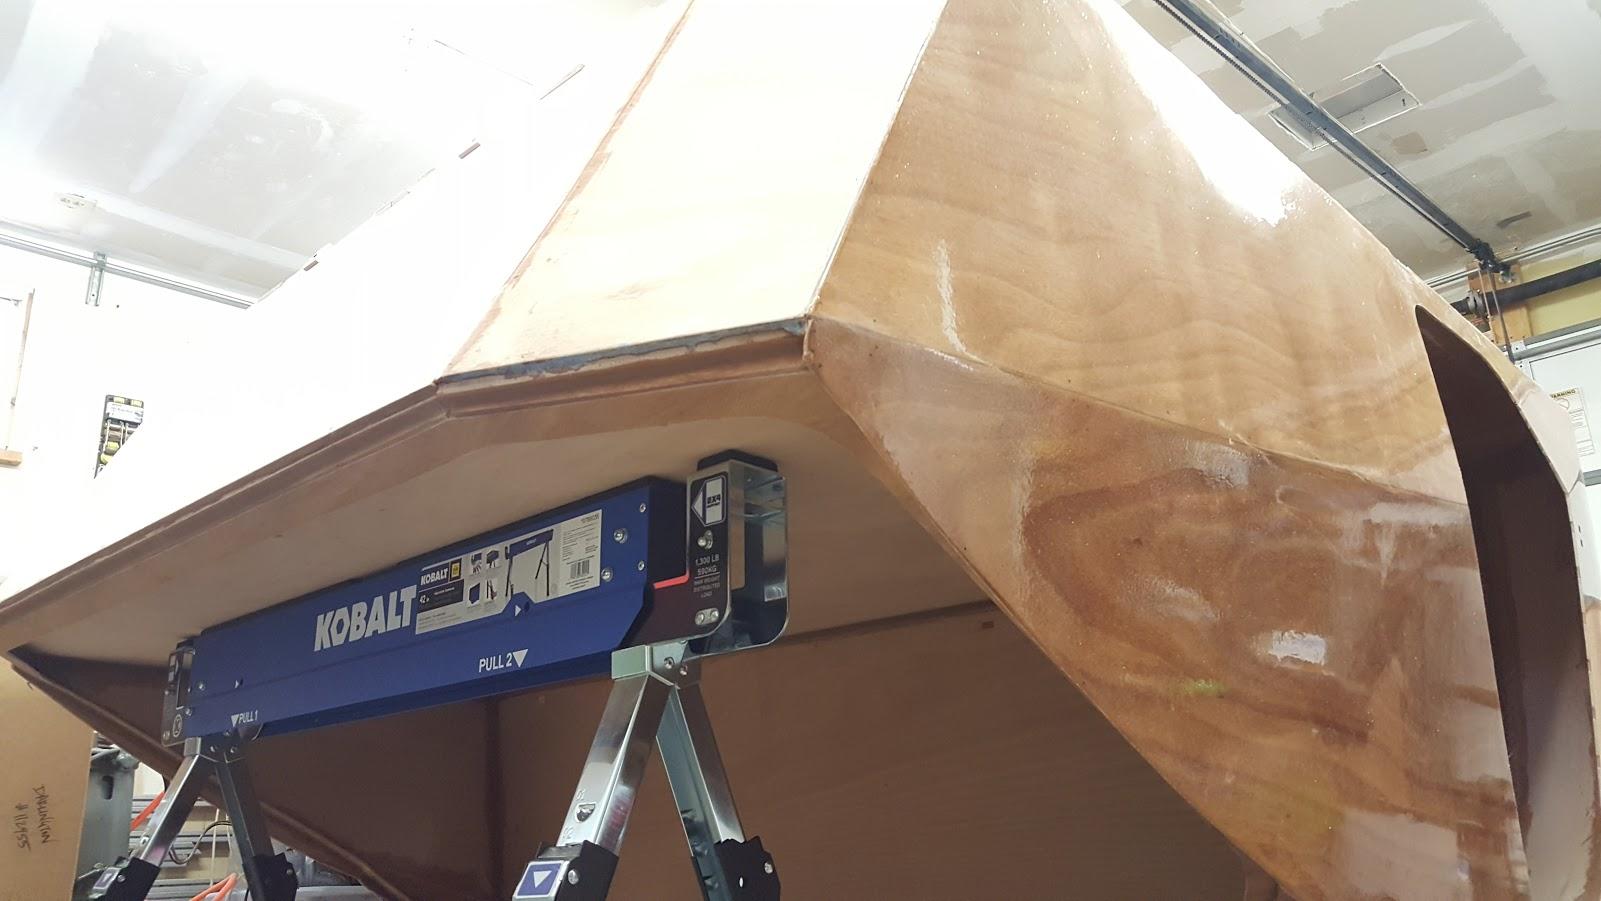
Get yourself one of these: https://www.lowes.com/pd/Kobalt-42-in-Steel-Adjustable-Saw-Horse-1-300-lb/1000105591
One of the settings is just the right size to support the galley flat when the camper is upside down. For $35 it’s worth it to not screw around with making a 26.6875″ (or whatever the manual says) sawhorse out of 2x4s and screws.
 July 2, 2017 at 4:19 pm #967
faithie999
Participantthese are great tips. hopefully new owners will find this forum before they start. I didn’t find it till several weeks into my build.
I thought I had aligned #3 and #4 panels until I prepared to cut the doors out. one side was perfect; the other side was off about 1/4″. it will be OK, but there will be a bigger gap than desired between the door and frame. someone on this forum said “if you want to build furniture, build furniture”. a good reminder for us anal-retentives.
thanks to Stevie for the advice on making smooth fillets. just in time to make “pretty” fillets on the door hinges.
July 3, 2017 at 10:32 am #969ParticipantDisposable plastic spoons are excellent for spreading fillets into joints. Work well for mixing epoxy too.
A Foredom rotary tool was indispensable for me. More powerful and durable than a Dremel flexshaft.
I fabricated his & hers cabinets that I mounted on either end of the bulkhead. The shelf can hold only so much. They secure personal objects inside the camper too. Mine are 10″ 12″ x 4″.
July 4, 2017 at 7:36 pm #975apkley
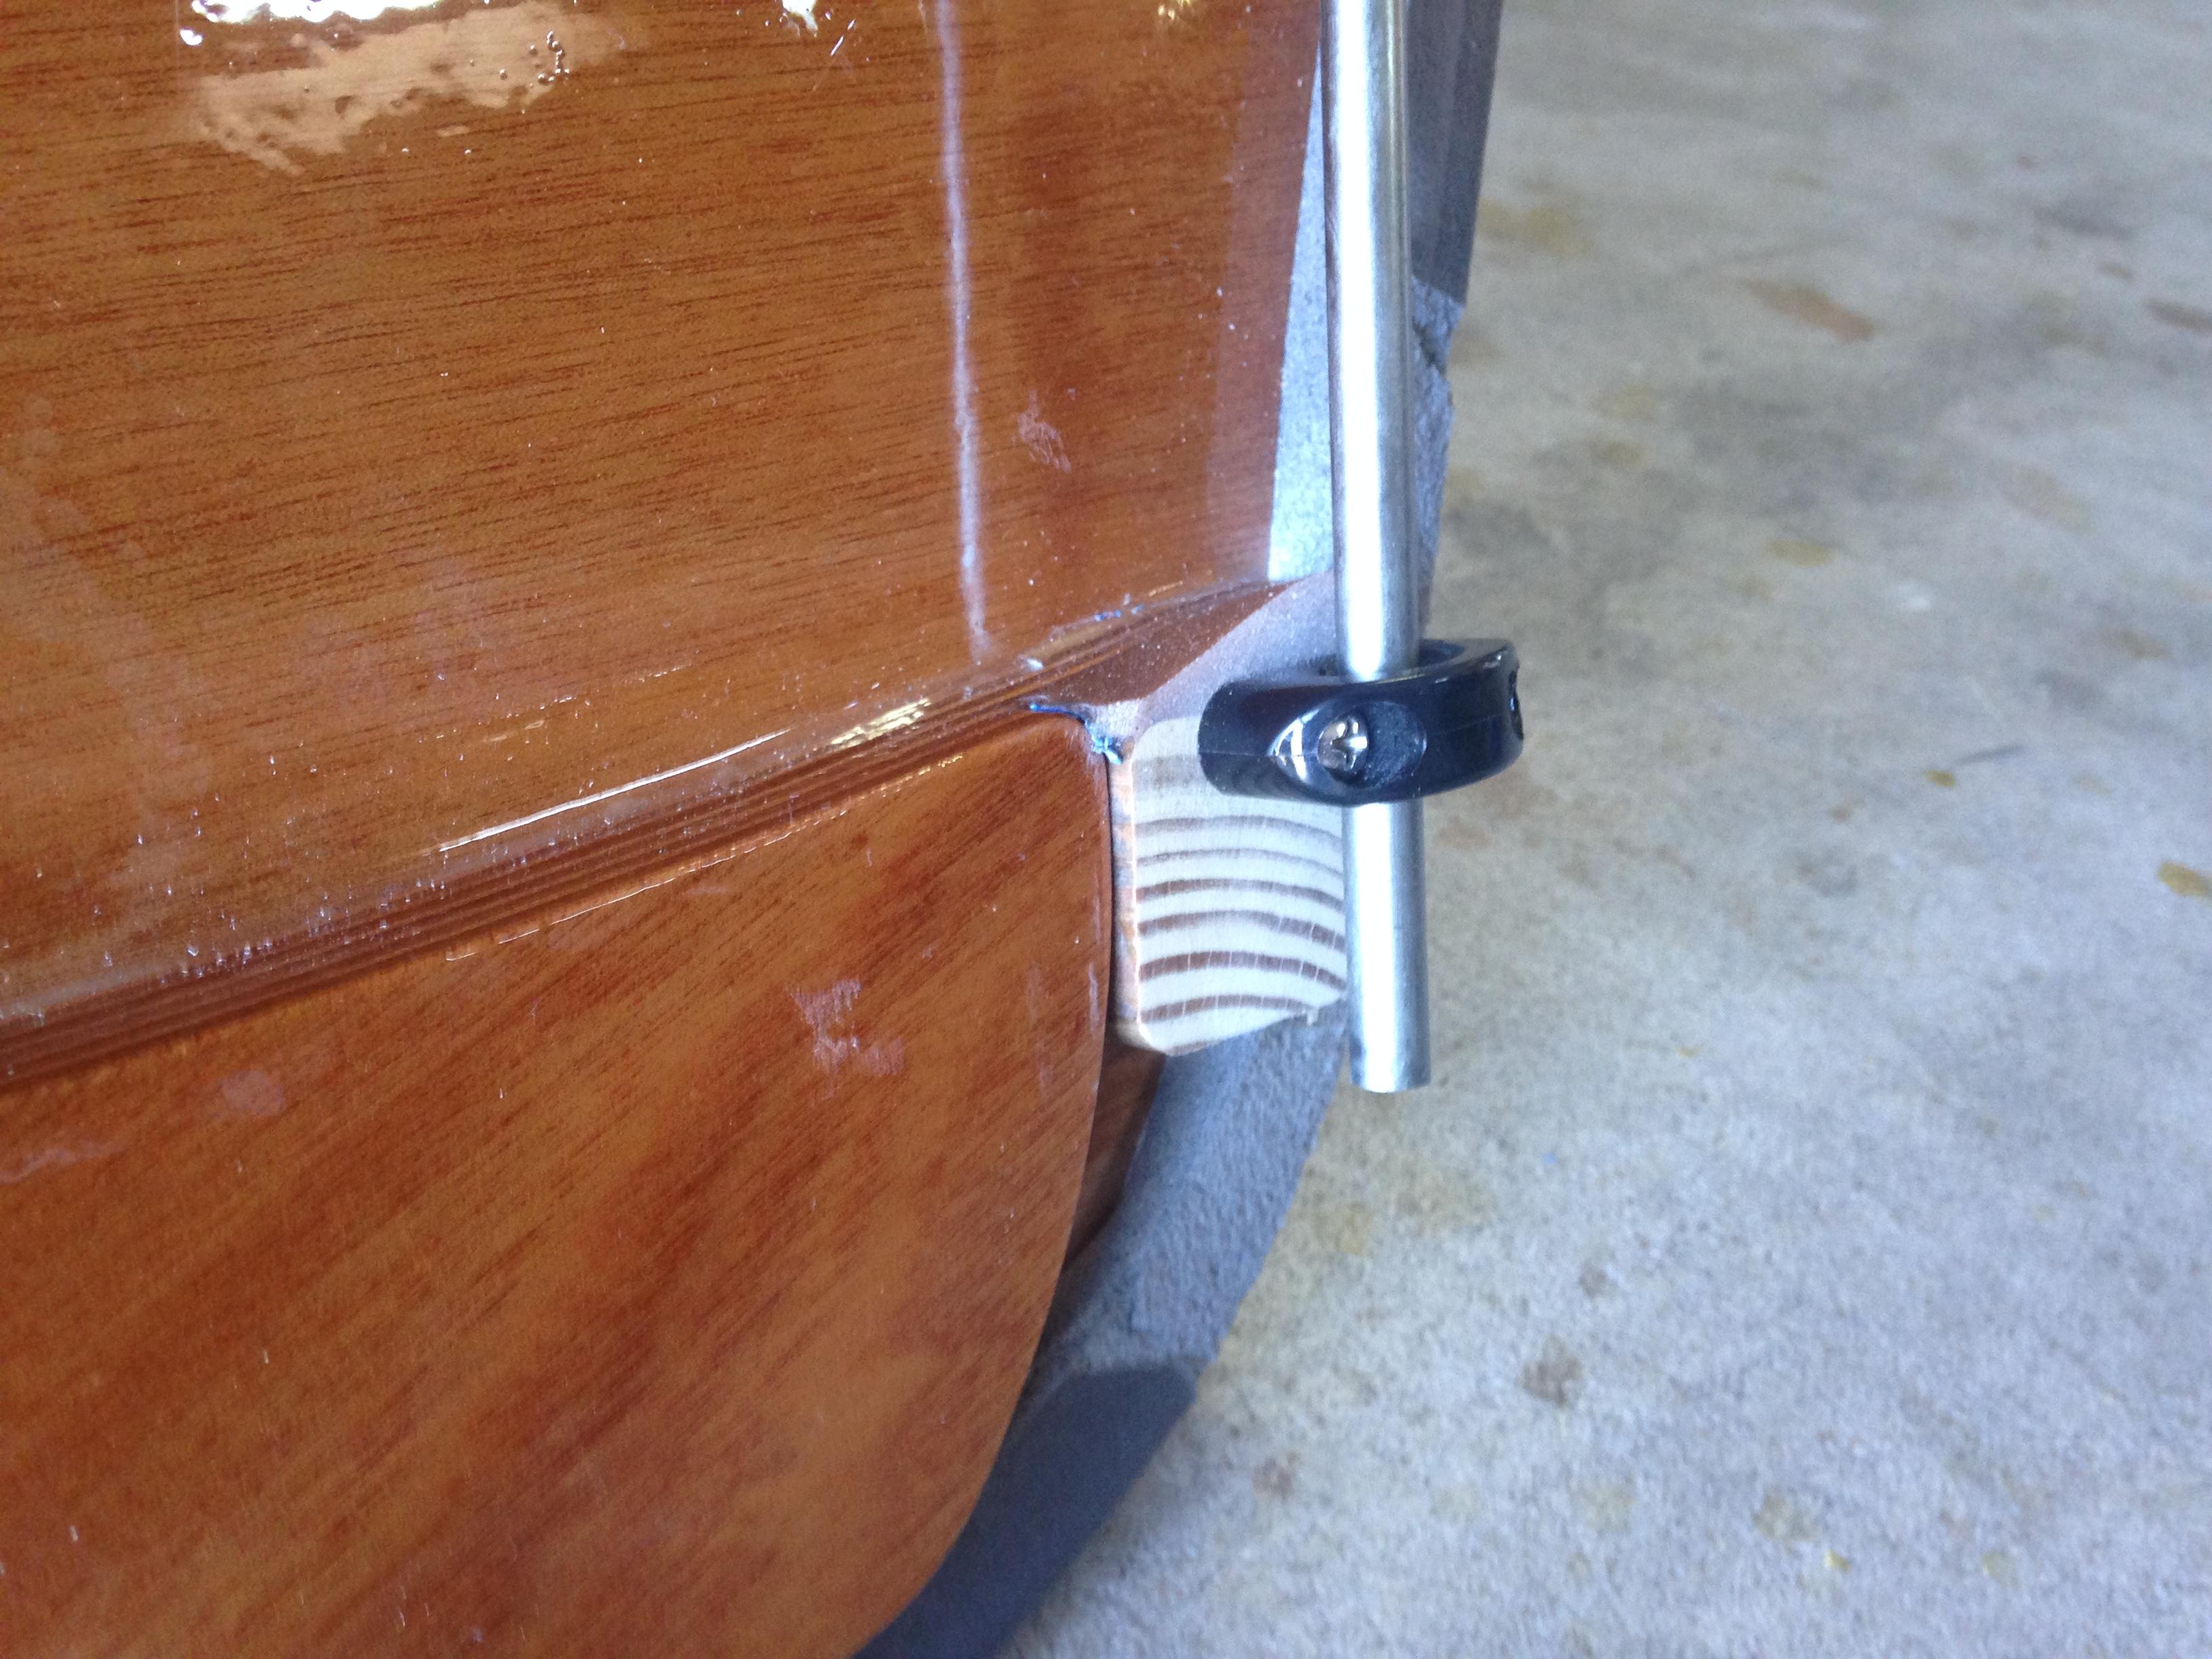
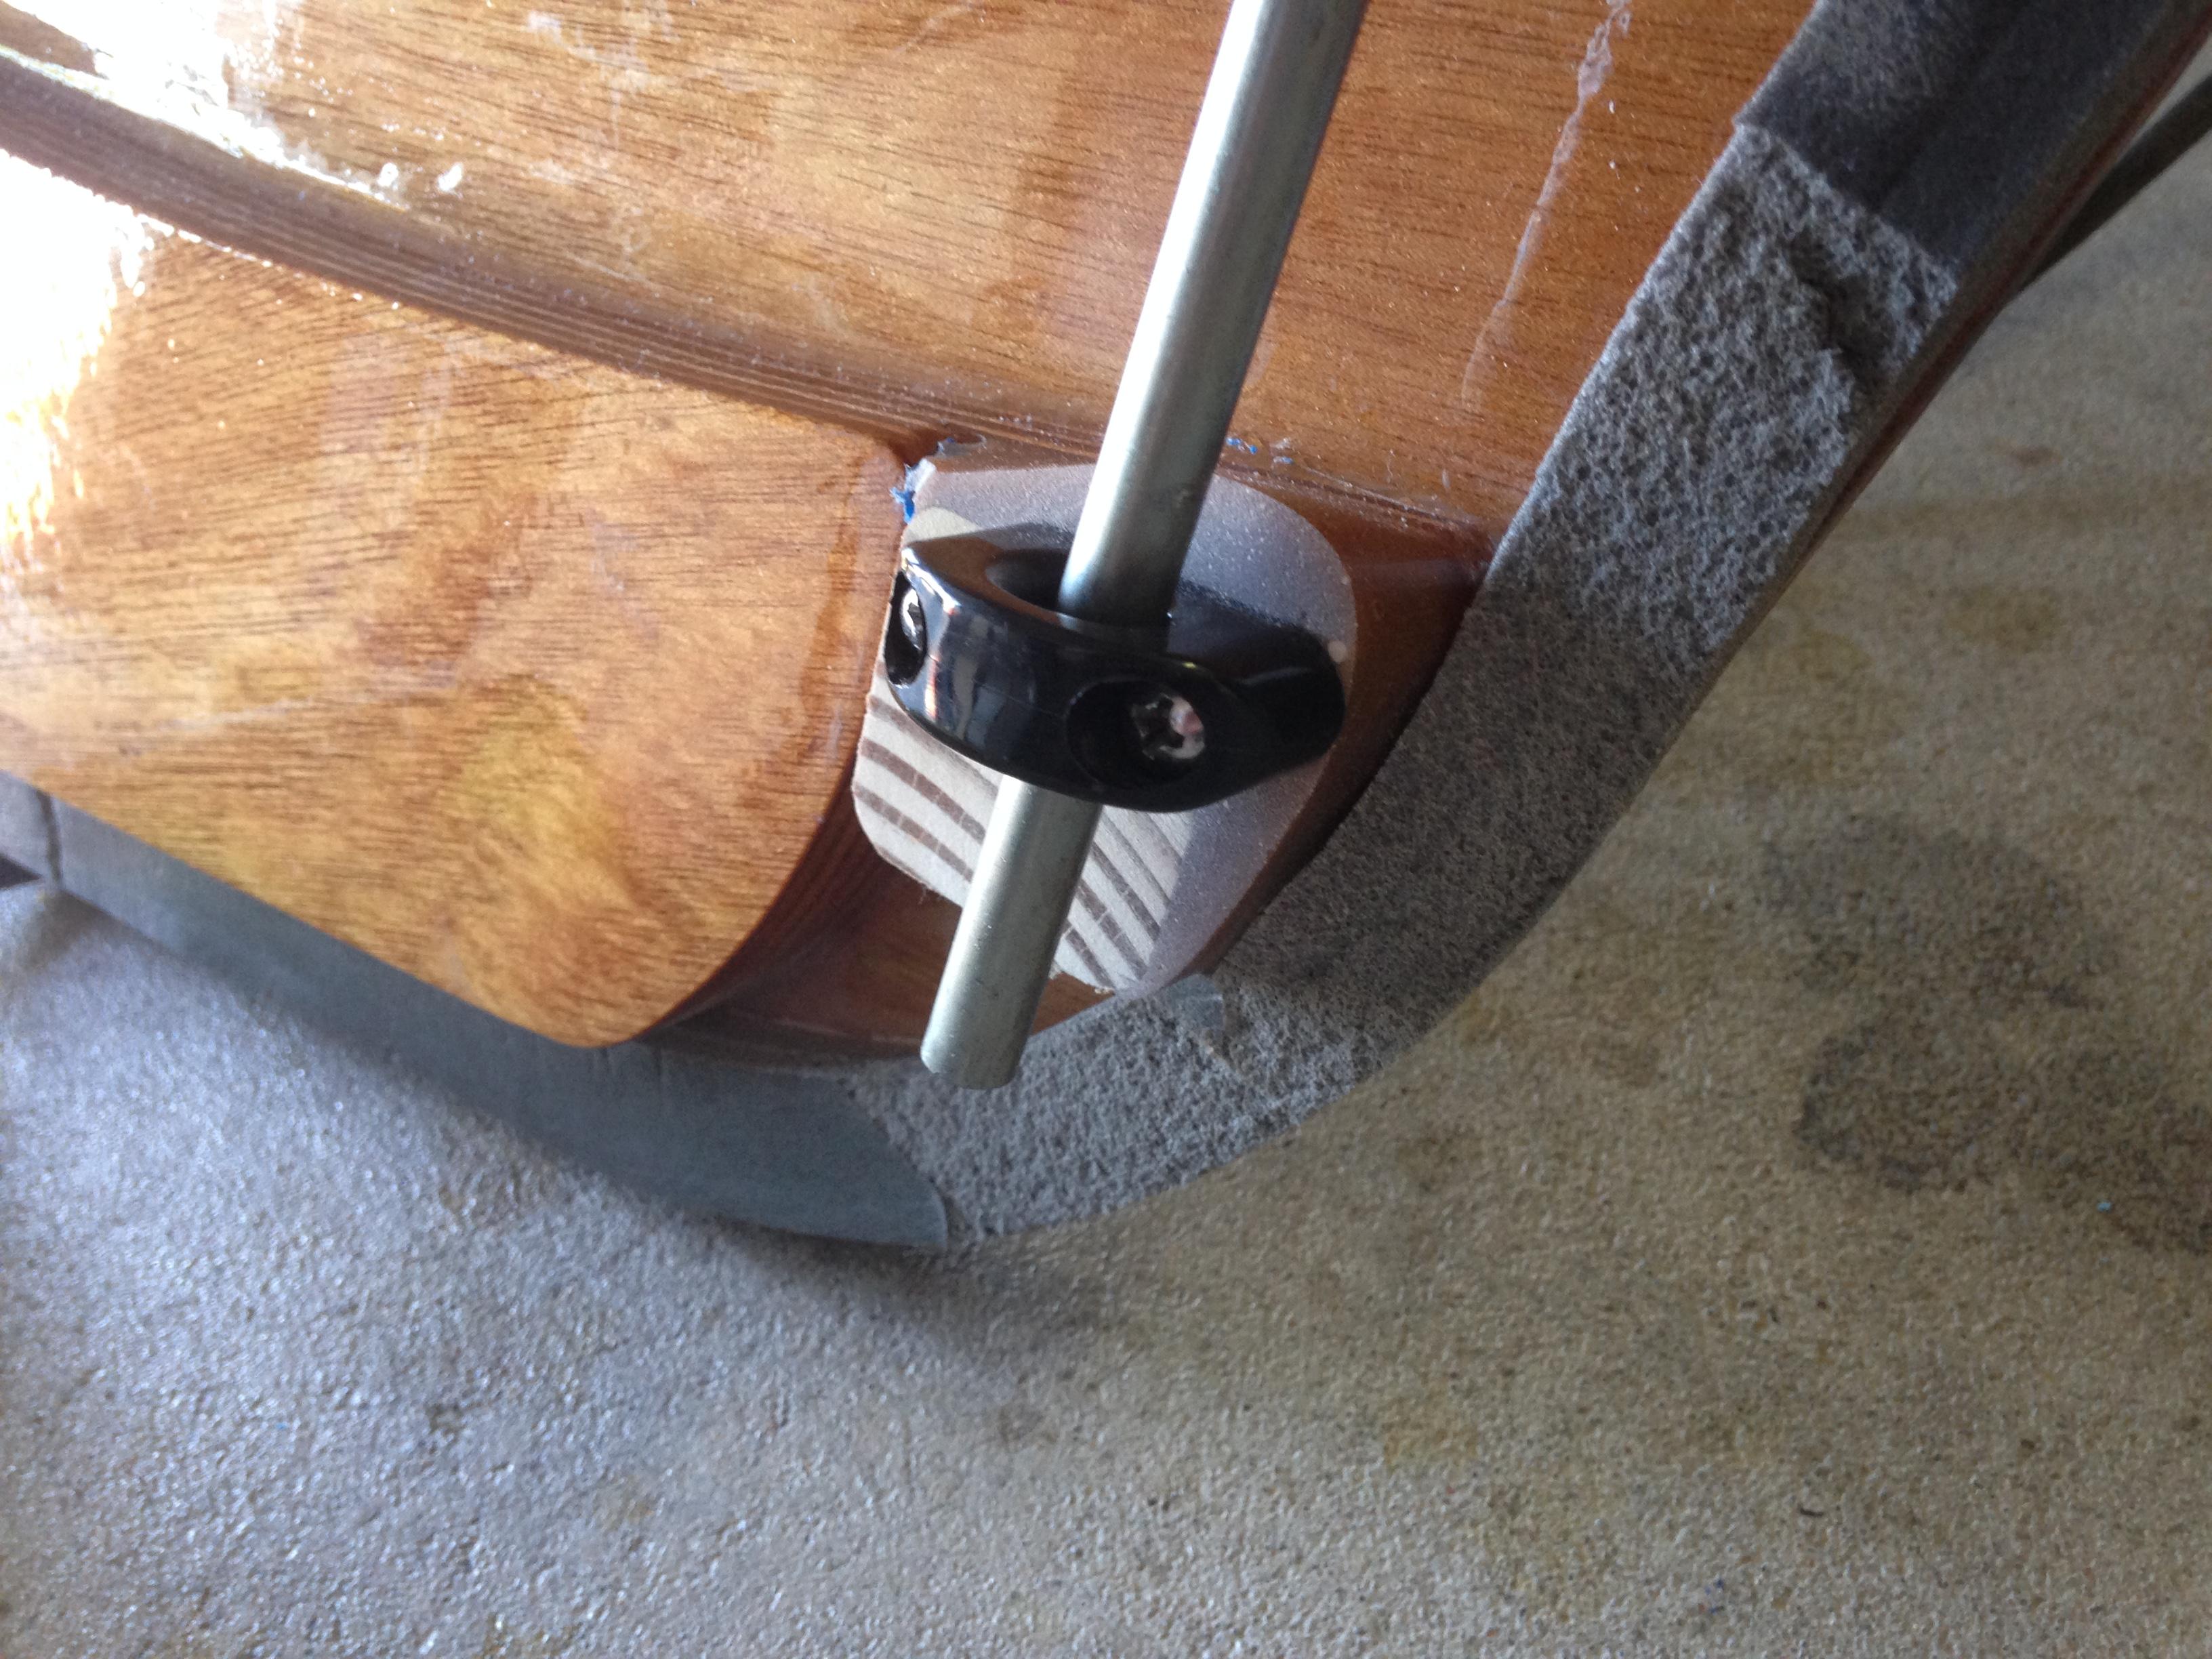
ParticipantAll, when you install the door hardware… the fair leads for the door actuating rods on the door and the door sill will not line up, especially the lower fair leads. This is due to the doors’ tendency to spring out after cutting. The manual offers a (weak) solution of adding washers to correct the difference. If you try this, you may have to get longer screws because the tension on the fair leads may pull them out of the door sill.
After trying to add a wood spacer – also an insufficient solution – we created a simple guide mold using tape applied to the edge of the door stiffener and filled it with wood flour epoxy (similar to pouring concrete). Ensure the mix is thick enough to be “wood” while runny enough to fill the space with no air bubbles. When dry, sand to the appropriate distance and place your fair lead. Drilling pilot holes is also a good idea.
 July 5, 2017 at 11:57 am #977
StarMan
Participantso it wasn’t just my being off or careless. The alignment is JUST WRONG (all CAPS for emphasis) The removal of the routed area on the stiffener causes alignment to be off. Oh, don’t pre-cut the rod length to the directions!!!!!!!! Dry fit and cut as needed. I cut mine about an inch longer than directed and only had to remove a little to fit.
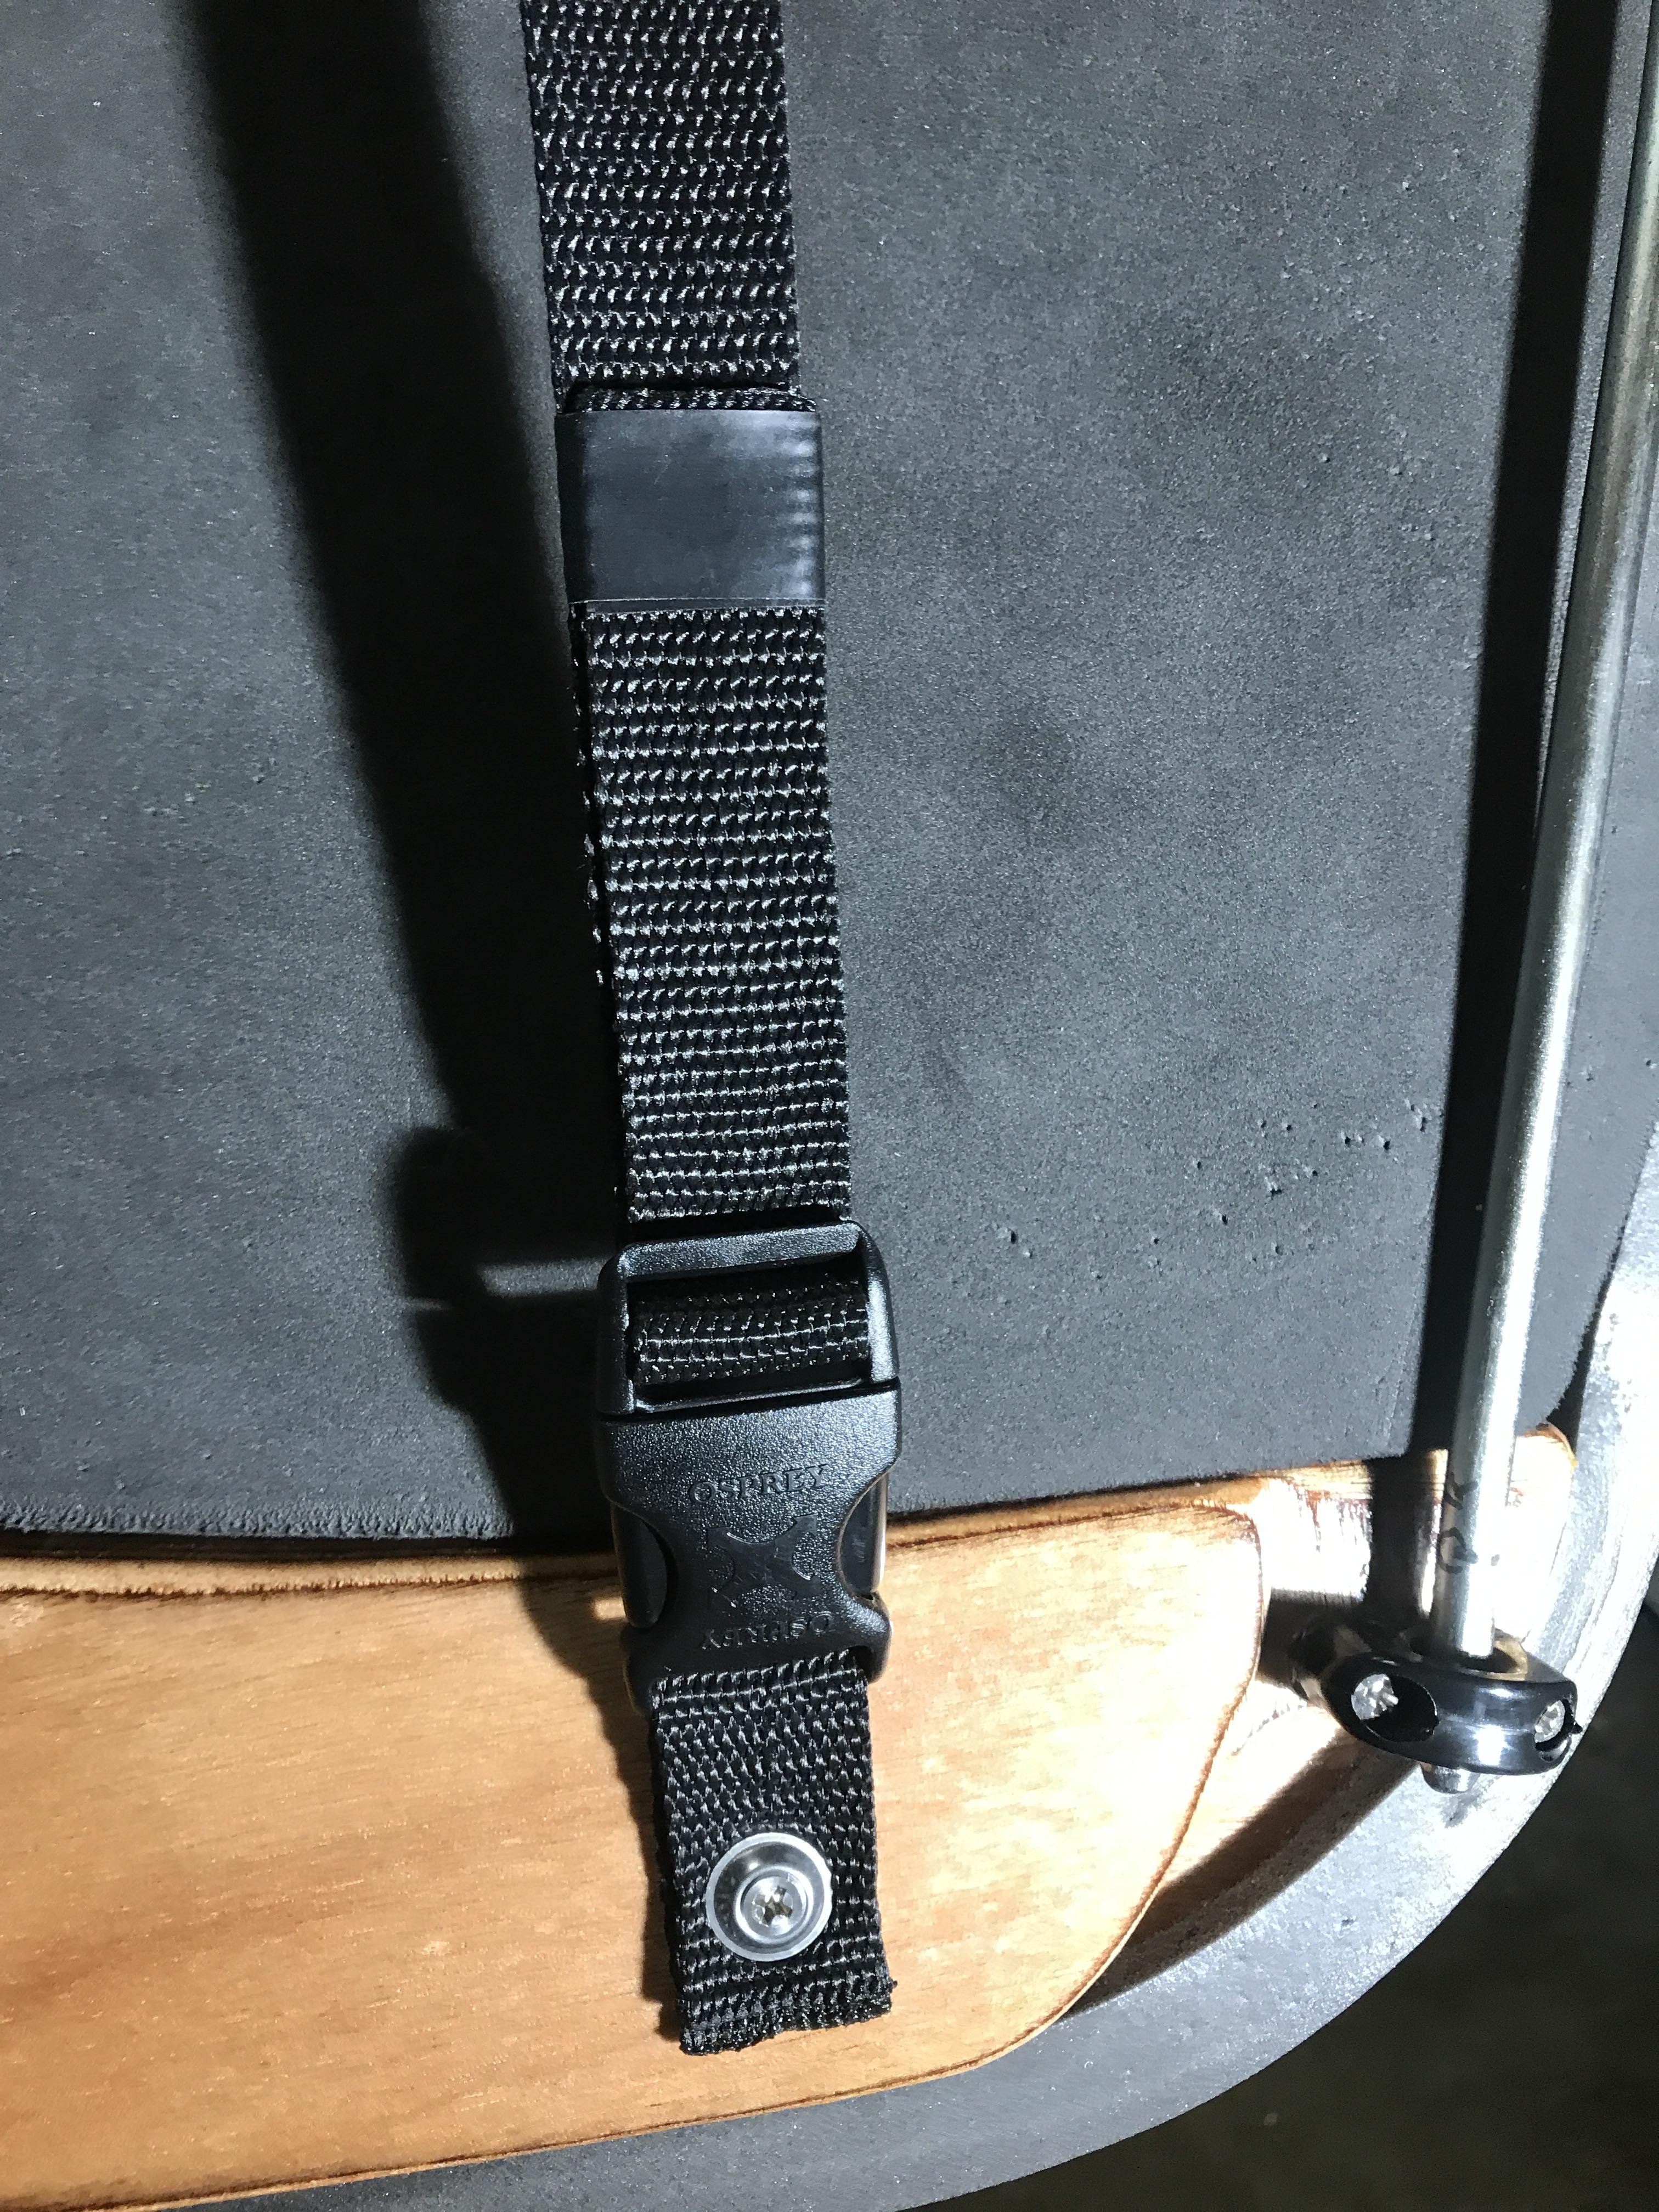
I only had one of the doors really bow out. I just couldn’t figure out how to accurately put enough tension on the strap. So, below is my solution. I added a backpack strap buckle to the provided strap. Now if conditions change over time, I can fix with a tug.
 July 5, 2017 at 12:52 pm #981
friz
ParticipantI had the same issue with the routed door stiffener. I figured mine was one of the first kits and they would have changed it by now. This needs to be a service bulletin.
July 5, 2017 at 1:34 pm #983ParticipantSnap links for the straps! Brilliant idea!
July 5, 2017 at 2:05 pm #984ParticipantTo facilitate rod engagement, I tapered the ends of mine on a bench grinder. I figured that would persuade the rods to pass thru the fair leads without hang ups.
-
AuthorPosts
- You must be logged in to reply to this topic.