Forum Replies Created
-
AuthorPosts
-
madebymike60
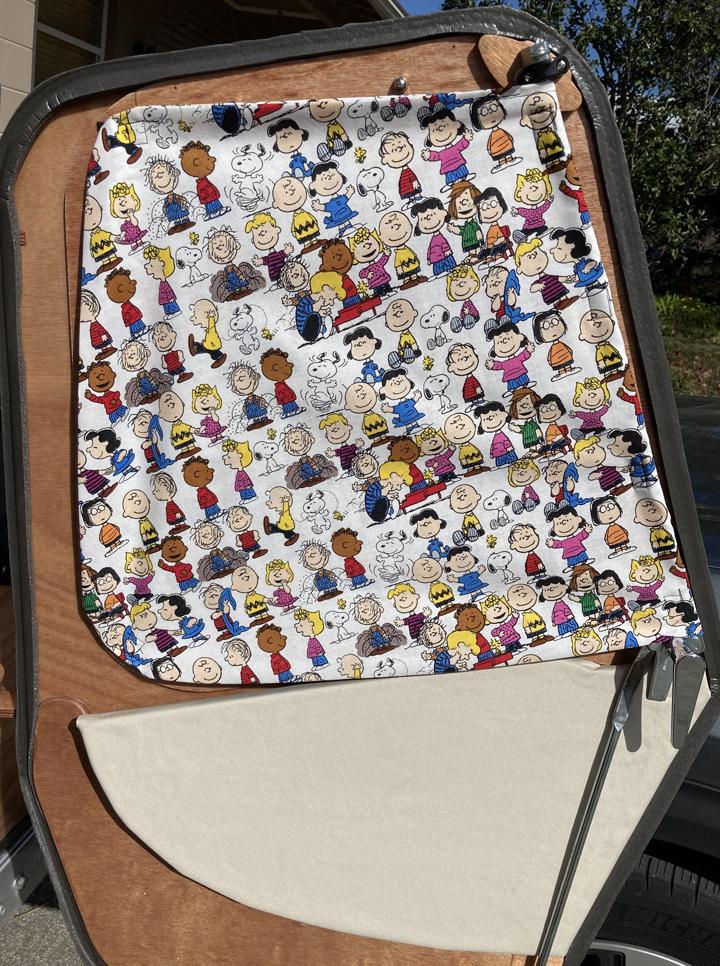
ParticipantA fabric covering isn’t hard to sew. If I can do it (with the help of my daughter) then just about anyone can. I doubled up the fabric up so that the Peanuts characters are on both sides. Velcro holds the fabric wrapped around the metal door rod (the sewn-on mating pieces match up) and on the hinge side where adhesive back velcro is on the door and pieces are sewn at the top and bottom corners of the fabric.
-
This reply was modified 4 years, 1 month ago by
madebymike60.
ParticipantA colorful and/or fun fabric is also a good idea and it’s hard to beat Peanuts. The fabric is doubled up so that the characters are on both sides. Velcro holds the fabric wrapped tight around the metal door rod (the sewn-on mating pieces match up) and on the hinge side where adhesive back velcro is on the door and pieces are sewn at the top and bottom corners of the fabric.
 Participant
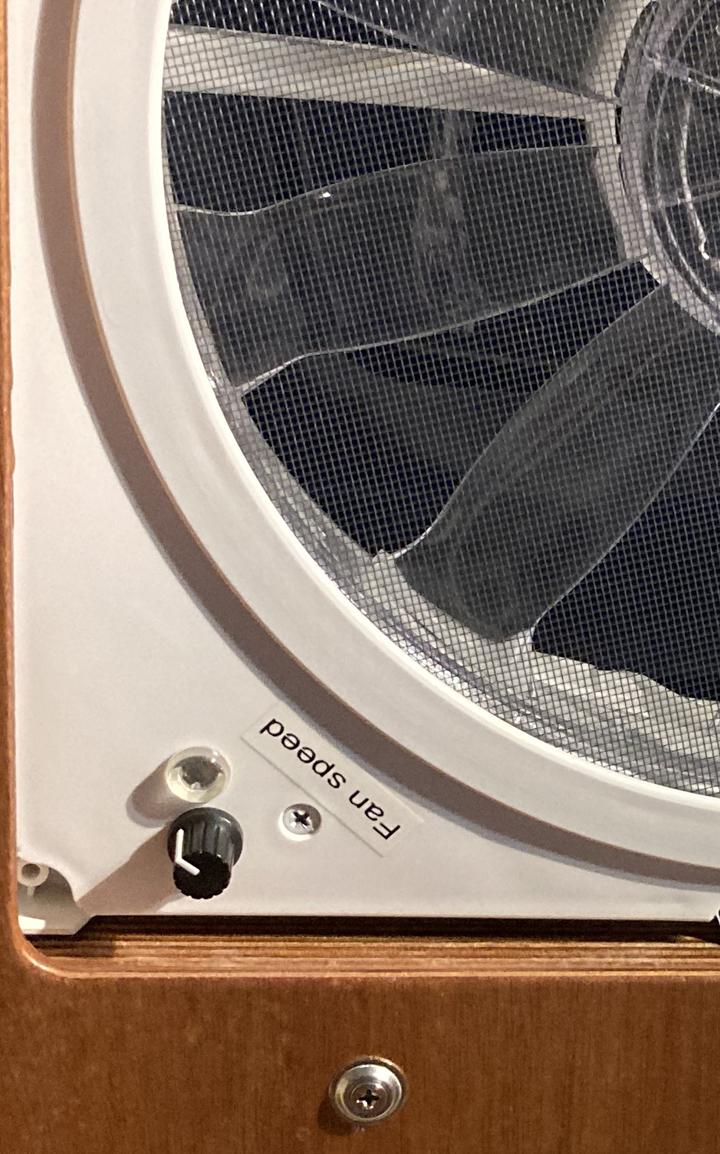
I installed one of these after seeing something similar in a video.
RioRand™ Upgraded 6V-90V 15A DC Motor Pump Speed Controller – (product on Amazon)
I couldn’t find the original video but here’s a similar install. Search for this on Youtube. (I’d post the link but that and a picture make my post disappear.)
Fantastic Vent Relocation/Speed Control Upgrade: Four Wheel Camper Shell Buildout
I think there’s only one corner that it can fit in so you just have to make it work there. I don’t remember needing to cut any plastic but the circuit board with mine was a little too big to fit like in the video above and had to be installed slanted and just hot glued in place. A little searching might lead you to a slightly smaller one that will fit better (easier) but the one above was fine.
The way it’s wired, which I think is correct, means the 1-2-3 speed switch on the fan gets by-passed and just needs to be anywhere but ‘0’ to work. The rotary knob will make it go from barely on to what was speed ‘3’ before. I leave mine on low and turn it off and on at a 12 volt switch panel on the shelf, increasing the speed if needed. It can run much quieter now and was well worth the effort.
-
This reply was modified 4 years, 1 month ago by
ParticipantFYI about the Costco flooring coverage. I bought ‘one’ online where it comes as a two-pack (48 square feet) which will be enough for what I said above. I saw it for the first time in a store and it’s sold in single packs – 24 square feet – so you would need two. Also, online it was blue/black or red/black and in the store I was in it was grey/black.
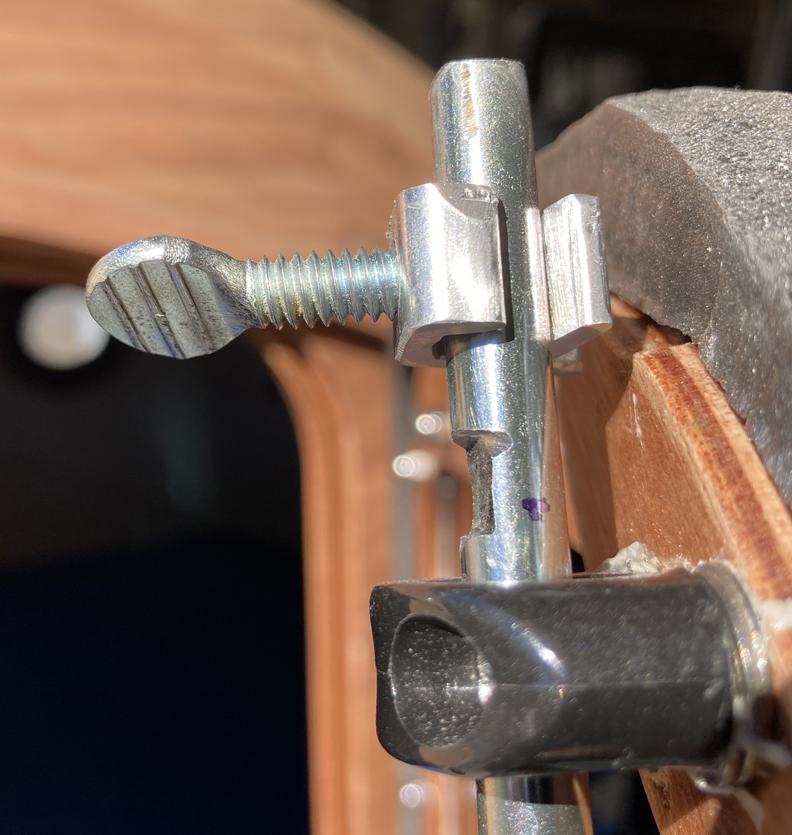
ParticipantSo here it is with a notch cut which will make it pretty much impossible to lower the rod with the screw tightened at the notch. I used a rotary tool to start it and cleaned it up with a small file.
 Participant
I haven’t even used my camper yet and already there were scratches from moving things around in the galley so here’s what I used to prevent that. It’s some leftover laminate flooring that I cut to fit this side of the galley. The left side has some electrical that’s ‘locked down’ and I didn’t want to change that set up. Anyway, this will keep the floor in better shape for a while.
 Participant
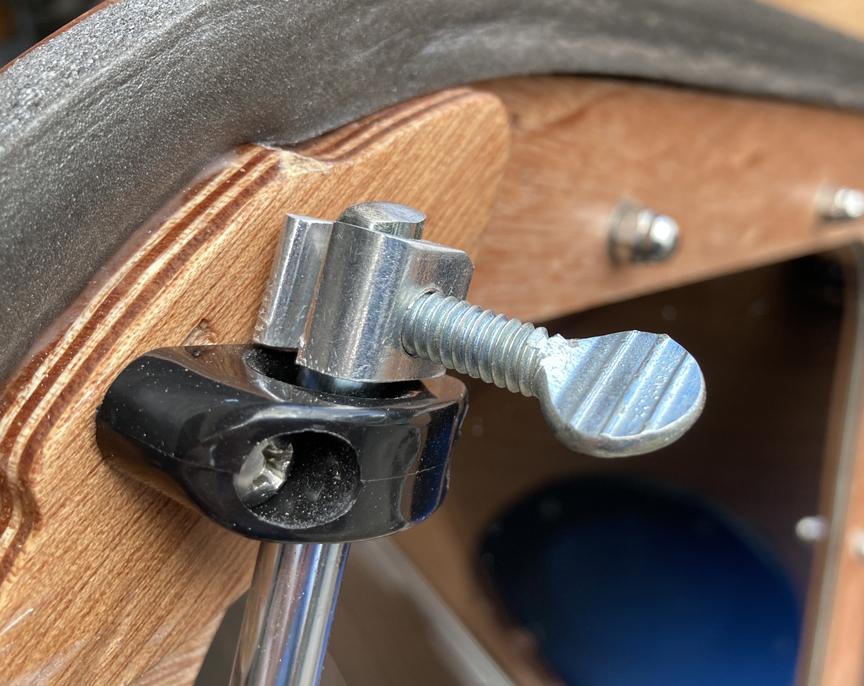
Inside, it looks like this. As long as you can tighten the screw enough, it should make it very hard for the door to be opened from outside. I turned the handle until the door was beginning to bend and the lock held but I may flatten the side of the rod for even better grip.
 Participant
Here’s another door lock idea. I had some old window locks similar to (and maybe exactly like) ‘Defender Security U 9819 Sliding Window Security Lock’ on Amazon but I can’t guarantee they’re the same. Mine fit onto the door rods but were too big for the door to close so I cut the ends of a couple to shorten them. Here’s what I ended up with.
When the set screw is loosened, the rod just slides up and down through the lock. Tightening the screw, with the door closed and handle turned, prevents the rod from being able to slide.
ParticipantI went with a tri-fold 4 inch foam mattress and added a ‘plush extra deep pocket down alternative mattress topper’ to it. The topper was a special buy of the day at Home Depot recently and it’s quite comfortable.
 Participant
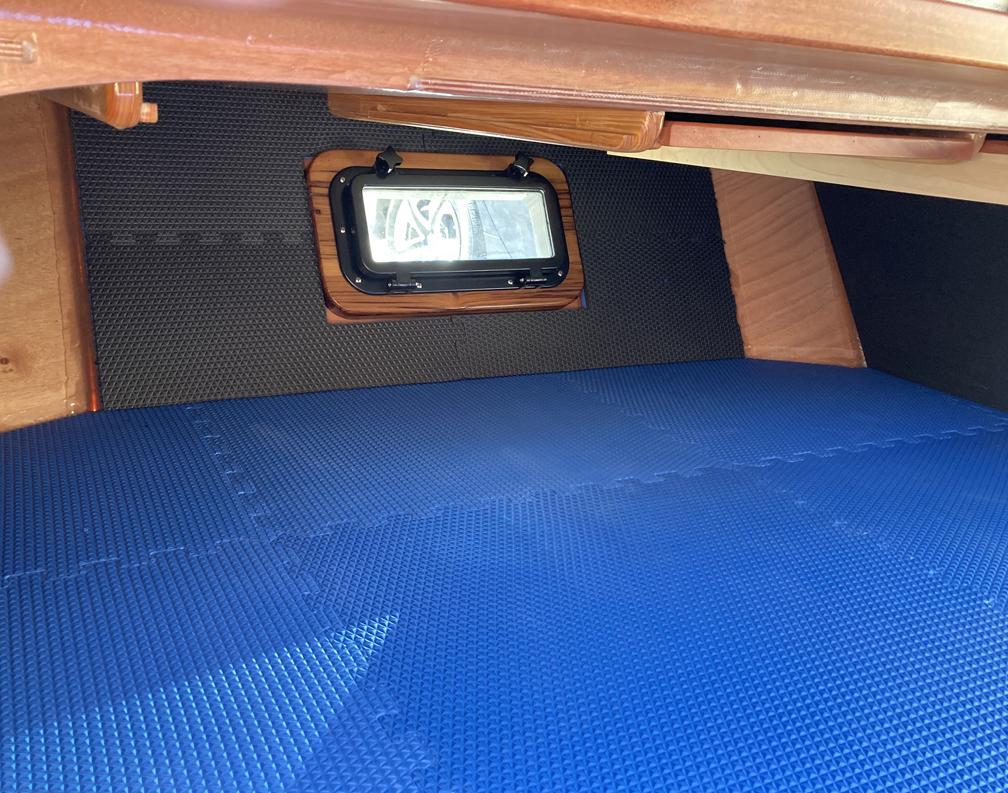
The ‘Norsk reversible foam flooring’ from Costco has just enough material to cover the floor of the camper plus the transom/quarter panel areas. You’ll have to piece together enough for the back but it works. The flooring is blue on one side and black on the other so what’s in the picture is from one package. There was still enough to cover the quarter panels, I just hadn’t done it yet. The black on the far right is kit insulation covered with black outdoor fabric.
 Participant
Here is the better (smaller) of the two side gaps with the galley hatch supports detached. The other side is a little bigger but still pretty small. There’s very little room for water to even get in and what does should not get past the two gaskets. With the supports attached, the gap is about double.
 Participant
My galley also leaked to start with. I’ve tried a few ideas and one or more seems to have solved the problem. I’ve only tested with a hose so a good rain while driving might prove that incorrect. Anyway, for background, I partially glassed inside the hatch and installed a stiffener as well. The gutter gasket and kit foam gasket were both installed as well as I could, following the manual. Finally, I replaced the hatch supports for stronger ones because of extra weight – stiffener, lights, two latches, etc. Here are the things I tried to prevent leaks:
First I replaced the supplied foam with this. After reading in another post a response from CLC about how the two supplied gaskets are not necessarily supposed to meet to keep water out, I thought this one would work better as a ‘drip edge’ because it comes a little more to a point versus the flat surface of the supplied foam. Where it changes direction at the top of the hatch, it doesn’t adhere nice and flat, like the supplied foam also didn’t (for me anyway). I pushed a small amount of butyl tape putty into those gaps and it seems to be working. Time will tell though.

Second, even though my galley hatch fit pretty well, I used two cam latches about two feet apart to hold it closed instead of the single clasp in the middle. Two latching points narrowed the gaps between hatch sides and camper a little more than one.
Finally, what seems to help quite a bit was detaching the hatch supports. With them in place there is 40 pounds of force pushing up on the hatch at two different spots. I unhooked the supports at the top, secured the two latches and the gaps between camper sides and hatch were noticeably smaller. They only take a few seconds to reattach so I’ll likely leave them loose while traveling and/or if rain is expected.
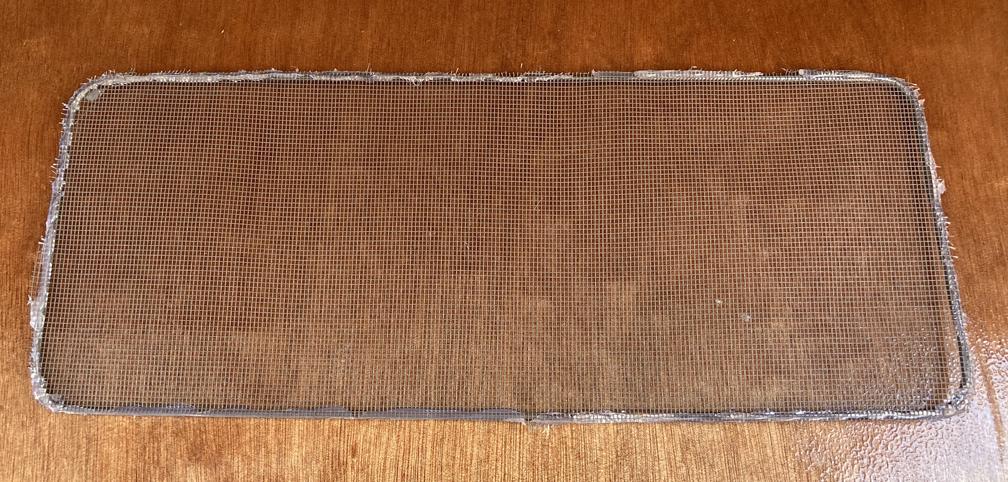
ParticipantHere’s a screen for the porthole. I bent some pretty stiff wire into a shape a little larger than the opening of the window and hot glued screen to it. It’s not pretty but will work fine. It will only be in place when the window is open and just hangs on the plastic inside.
 Participant
Here’s how it turned out from inside the camper. The frame is made from the same reclaimed wood as the front two round ones and is thick enough so the plastic trim ends up flush on the outside. My slide out ‘table’ and drawer are at the top and right.
 Participant
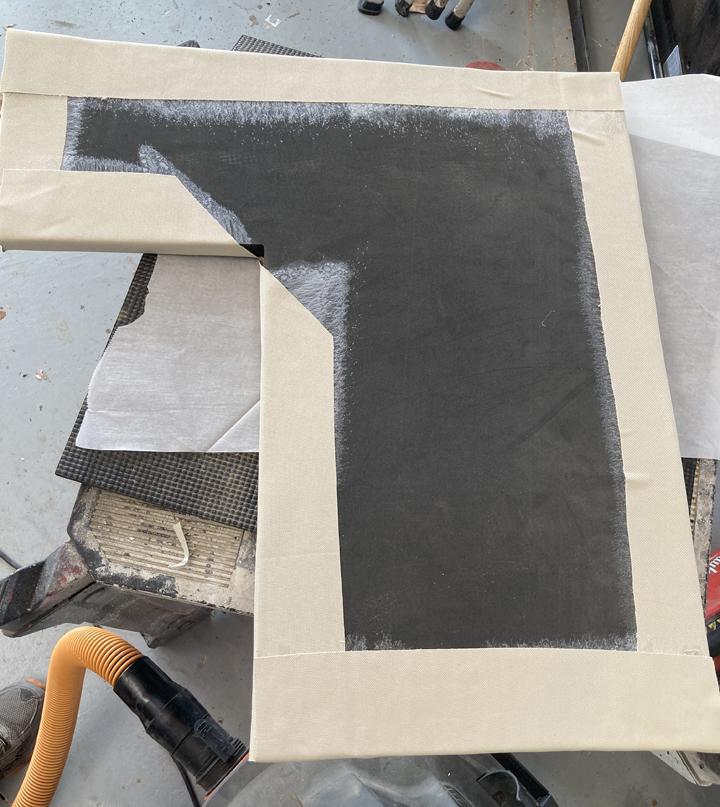
Here’s the back side of the same piece, just to show some cuts and folds. This was an easier piece to cover – ones with curves generally do not look this neat. It’s a good thing you can’t see the back of many of them.
-
This reply was modified 4 years, 1 month ago by
-
AuthorPosts