- This topic has 15 replies, 5 voices, and was last updated 7 years, 2 months ago by
Boardwalk.
-
AuthorPosts
-
February 7, 2017 at 6:33 pm #558
tomtnt
Participantstarted the project right after Thanksgiving and officially finished up today after installing my last foam headliner panel and trim piece for the fan. Pictures pending better weather but some thoughts:
1. All-in-all, great kit, easy to follow and forgiving regarding little mistakes. I’ve never done a stitch and glue before and I’m not the most meticulous craftsman and the teardrop still turned out nice.
2. Possible, but not easy, to do project solo. Hardest part for me was lifting the base onto the shell and lifting the entire teardrop onto the trailer. Would also be nice to have extra hands to mix epoxy while you are doing the large glassing part of the project.
3. I ran out of epoxy but my fault for not being more judicious regarding waste.. had no issues with fiberglass. have large sheets leftover.
4. One of the most useful tip came from this forum regarding applying epoxy to the 3″ strips of fiberglass, rolling it up, and then rolling it out directly over the fillets… this was a much easier method for fiberglassing the filets.
5. When apply contact cement to the headliner and teardrop wall, a heatgun makes the process go by alot quicker!
Two Issues:
1. The vent fan kit – the fan is a high profile fan and does not properly fit into the kit provider. it sits too high on the outside and does not sit flush on the inside… they need to find a source for the low profile fan shown in the manual
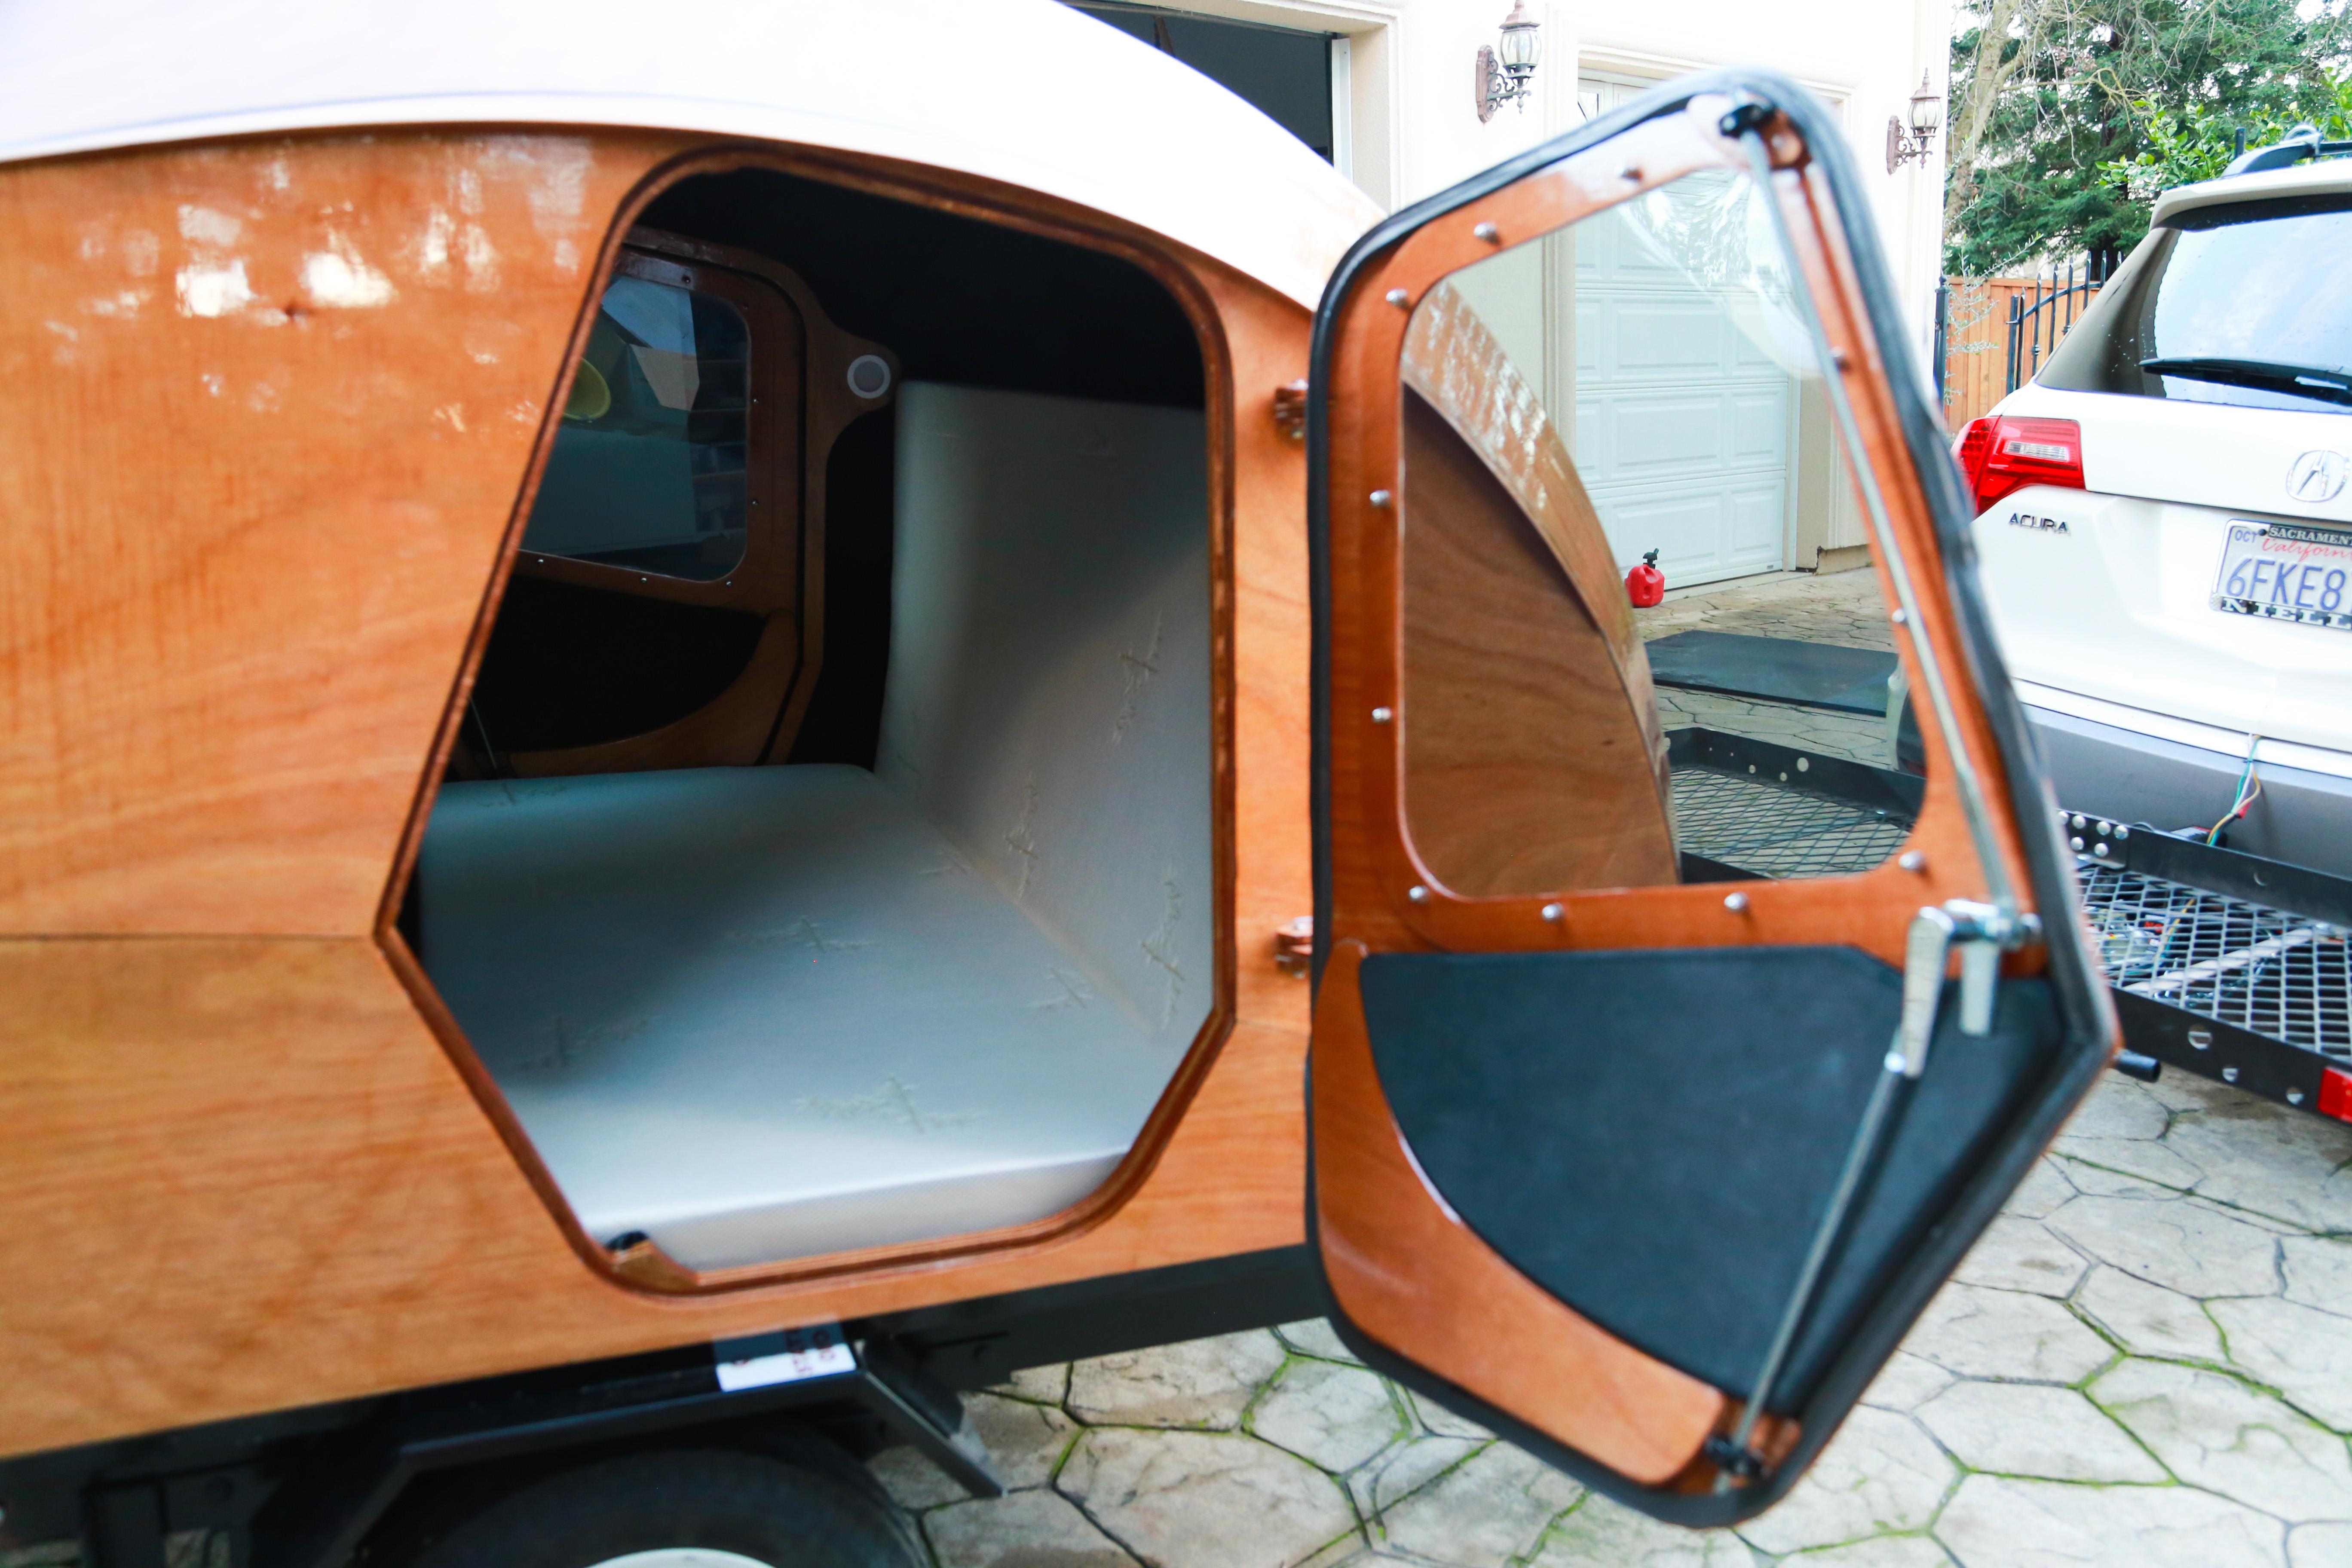
2. 2nd disappointing component of the project: the door doesn’t sit completely flush – there is a whole thread on this….
February 7, 2017 at 7:52 pm #561friz
Participantlet us know if you find a better fitting fan. I’m in the same boat. I’m tempted to cut the flange off and glue it in the hole with sealant.
February 7, 2017 at 11:02 pm #562SOMDTD
ParticipantC0ngrats! I glassed the bottom of mine today as well as the inside glass on the vent hatch. Largely doing mine solo. Starting on the doors in the day or two. And have a week off work soon so planning on a big push.
Did you do much for the electrical system? Defender.com delivered a pair of fans today.
CLC is working on something to do with the vent fan, I was asked to “wait a week to order it” so I hope to avoid some of the vent fan issues ya’ll are talking about.
February 8, 2017 at 2:40 am #567Participantgood to hear about the vent fan issue but tough luck for those who have already purchased/installed!
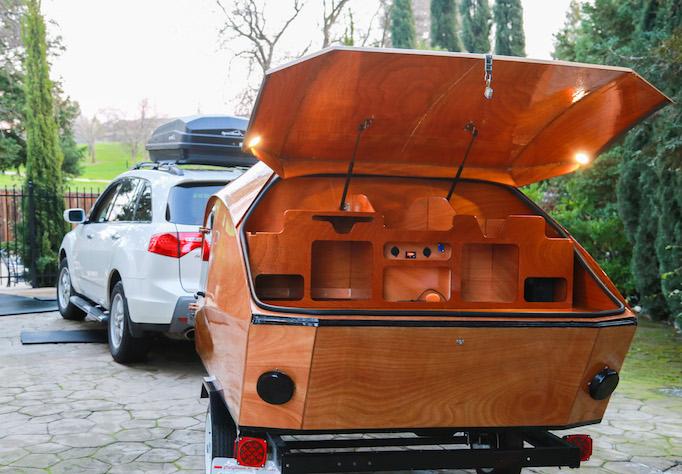
For electrical, I have 2 lights in the cabin, vent, 1 small fan controlled with a bank of 4 switches. I also have USB/12v cigarette adapter. I tried to go minimal – I didn’t really like the overly cluttered look of the CLC demo unit..
In the galley area, I have a voltage monitor, usb adapter, 12v cig. Still trying to decide on lighting. trying to figure out what the light the CLC demo unit uses- looks like a 12inch modern loooking lightbar.
I didn’t bother installing speakers. I much prefer portable sound system like an Alexa Tap.
February 8, 2017 at 8:35 am #569ParticipantOn electrical, I am going the opposite. My goal is to have a panel that rivals the cockpit of an F-16. I will build in a laptop connected to a panel mounted monitor // TV along with a marine stereo head unit. Speakers in the cabin and the galley. I will use a powered digital TV antenna and use the tuner in the TV for over-the-air broadcast TV reception — which is surprisingly widely available! Also putting a dedicated 4G WIFI hotspot. 115V inverter, as well as pass-through 115V (for use when “shore power” is available). I have located a 250 watt electric heater which ought to be enough for the small cabin volume. Considering this is as well : http://www.climaterightair.com/applications/rv-trailer-air-conditioning-and-heating/climateright-5000-btu-a-c-heater.html
It’s $500 but for the primary purpose I plan to use the TD for it might make sense.
I’ll use it for camping and such of course, but my “couple times a week” use will be a portable break / nap “pod” for work. My work involves real time operations control that runs 24/7, and I’m “on console” on a 2-on, 2-off schedule. When working a night shift, having a napping spot from 0100 to 0300 sounds mighty nice. I have to remain on call and close by, of course.
February 11, 2017 at 7:43 pm #581Participant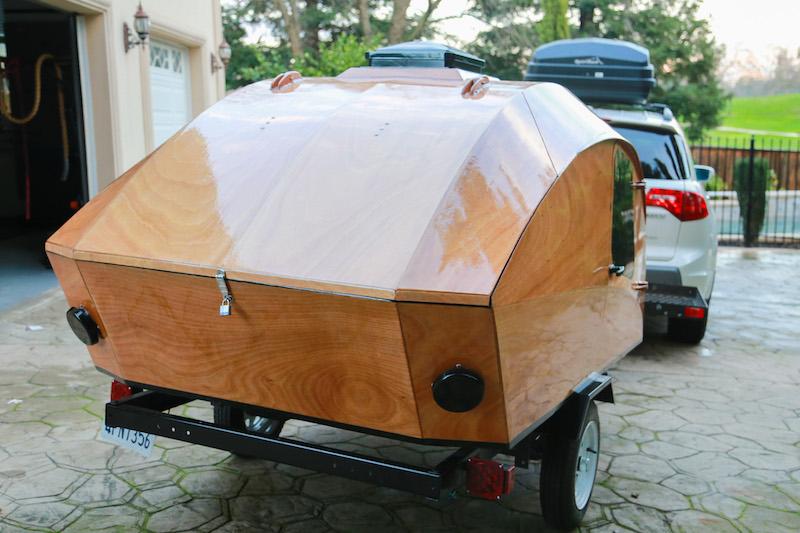
 February 11, 2017 at 11:39 pm #584Participant
Nice job! If you are ever passing through Southern Maryland…..
February 13, 2017 at 7:33 pm #594ParticipantNice job!
If you don’t mind my asking, How much varnish did you need?
-
This reply was modified 7 years, 2 months ago by
friz.
February 13, 2017 at 8:09 pm #596ParticipantI am going to have a auto body shop spray clearcoat on mine, inside and out. I have a buddy that owns a shop and he will do it for material cost, as long as I show up 99% ready to shoot.
February 13, 2017 at 9:36 pm #597Participanti think I used either 3-4 quarts.. I put on 4 layers in most areas…. I’ve lost track of all the little things I’ve spent money on! I ended up buying the varnish locally at the west marine store…
with the clear coat, do you still need the varnish for color/UV protection or just the clear coat?
I’m going to be so sad the first time I take this thing on the road and get a rock ding on the finish… I can’t believe CLC has over 10K miles on their demo unit? looks great! anyone notice any major road rashes up close?
-
This reply was modified 7 years, 2 months ago by
tomtnt.
February 14, 2017 at 8:12 am #600ParticipantI spoke with John Harris with regard to the clear coat and UV protection. He says that it provides the nessessary UV protection just fine. Among the reasons to do clear coat is that the resultant finish is considerably harder than varnish and more resistant to abrasion (rock dings, and trade show wear in CLC’s case). Another is that it being an outsourced step, it’s a one day in the shop and done thing, not an insignificant thing. Downside is that it’s expensive. Retail at a typical auto body shop is probably pushing $1000. Me, I have a “hook up” (to use an old Navy term) and it’s going to be about a hundred bucks and a case of beer.
One still has to sand to a fair thee well! Clear coat will not substitute for inadequate surface preparation. I will go down to 320 with the DA sander and wet sand with 400 on the outside. I will be having it shot before I install the door latches, windows, and mushroom vents; and I will have the galley hatch off. We’ll clear coat inside and out!
February 14, 2017 at 9:24 am #601JakeM
ParticipantLooks great!
I did a DIY clearcoat, but only because my father has the spray gun and some experience (I think he said he paints a car about once every five years…). Our coat wasn’t auto-shop perfect, but it saved a bunch of time and cost about $200.
February 14, 2017 at 12:16 pm #603ParticipantDo you only need to varnish or clear the surfaces that get direct sunlight? I’m not sure i want varnish on the floor of the interior or on the floor of the galley. I would think that varnish would be to soft for these surfaces.
February 14, 2017 at 6:43 pm #604Boardwalk
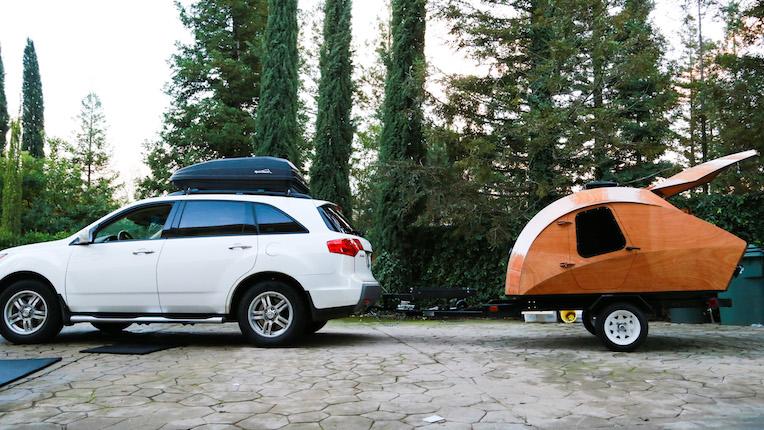
ParticipantMan, that’s nice. I am all signed up and ready to go for the TD class in June. I would prefer a black trailer like yours over the clear aluminum, so I may swap the trailer out once I get home. Keep posting pics and/or updates on your experiences. I plan to create a small webspace for my adventures in Annapolis in June.
February 14, 2017 at 6:44 pm #605ParticipantForgot to ask, what mattress are you using?
-
This reply was modified 7 years, 2 months ago by
-
AuthorPosts
- You must be logged in to reply to this topic.