Welcome to TeardropForum.com › Forums › Teardrop Builders’ Forum › Stained CLC Camper Build Progress › Reply To: Stained CLC Camper Build Progress
Progress update (Time Spent To Date ~50 hrs): It has finally cooled enough that I could make substantial progress. I’ve also been very successful with coloring the thickened epoxy for the fillets using the alcohol dye, and am very happy with the results. I’ve learned some lessons along the way that I should share, most of which revolve around minimizing additional sanding because I’ve dyed my parts.
1) Do not use blue tape to label your parts if they are dyed, it will lift little fibers of wood when peeled off and will require touch-up. Obviously there are areas in the build that require masking so touch-up is inevitable.
2) Thoroughly sand parts before pre-stain and dye, pay close attention to areas that had stickers from CLC’s labeling process. The stickers they use leave a heavy residue.
3) To minimize epoxy seeping through stitch holes and small gaps during panel glue-up use CA glue. The CA glue followed by the kicker will seal any gap or hole nicely. Failure to do this will result in bubbled up drips on the outside of the camper shell that will require sanding before the big glass job. I will need to buy another bottle of both CA and Kicker before the camper is finished.
4) The fiberglass ribbon supplied with the kit has one side that is thicker because of the weave. I trim this edge off carefully right before gluing it down which makes for a smoother application with less sanding in the future.
5) Be careful of vertical clearance when you flip the camper onto the transom side to do the bulkhead and galley hatch stiffener. I had room to do this in my garage but the garage door was opened during this process and hit the camper. Thankfully no damage done, but if it wasn’t propped up securely or aligned differently this could have been catastrophic.
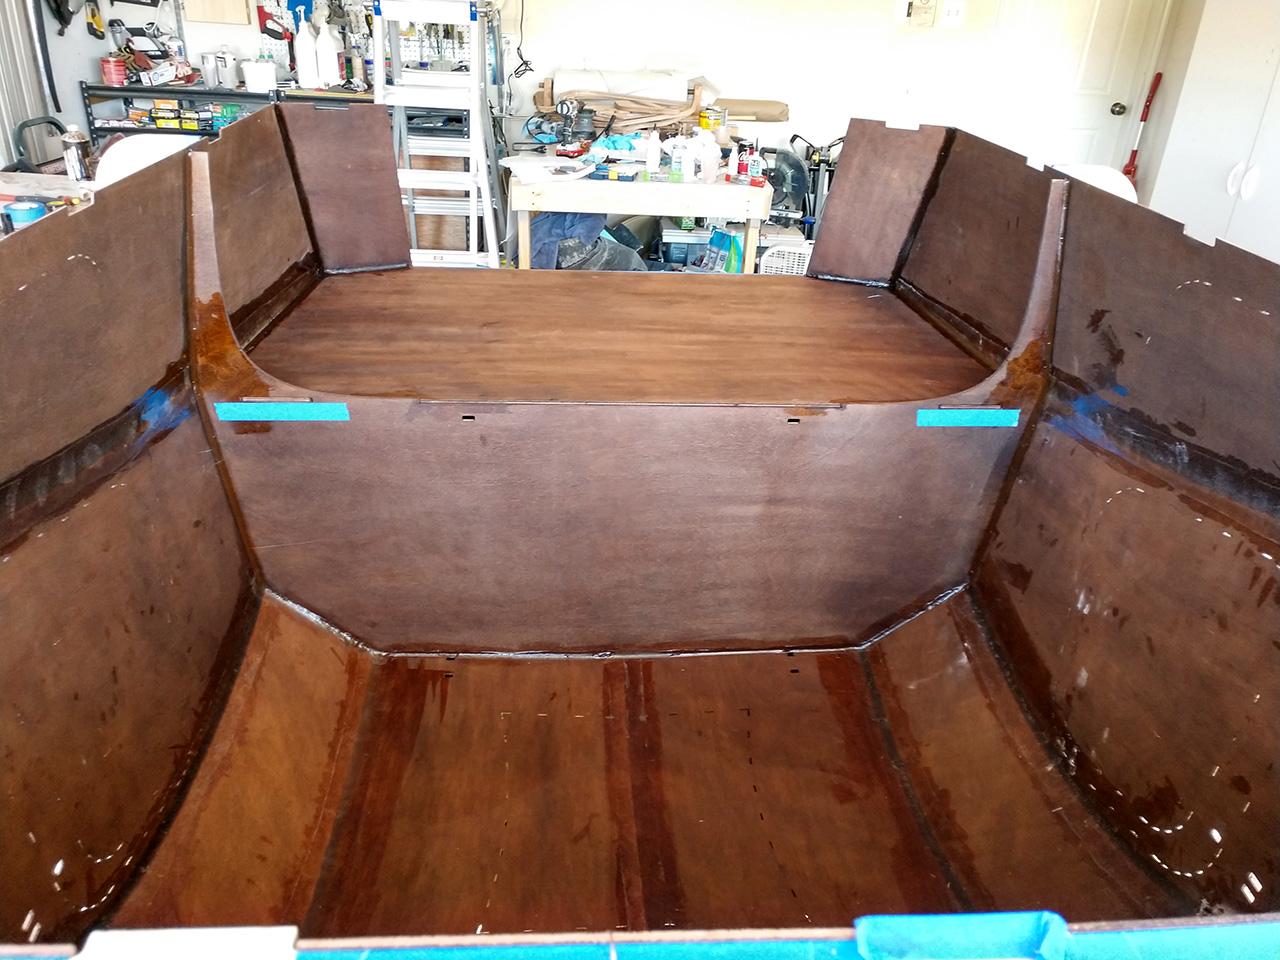
Galley Flat: Now the galley flat was a little snug. I ended up sanding the side edge just a little bit and removed two frame stitches from either side of the shell to get it to slide down perfectly. I caution anyone during this step to be very careful with the snug fit and sliding it into place. I had some blow out of the veneer where I forced it a bit too much. Luckily the epoxy fillet covered this up.
You will also notice I’ve omitted the galley stiffeners. I’ve done this because I plan to double up the galley flat on the top side. Stiffeners will be added between the doubled up layers in more strategic positions to support my custom galley module and sink, as well as creating a cable chase for electrical and plumbing. (Added bonus of a nice flat galley bottom with extra foot room)
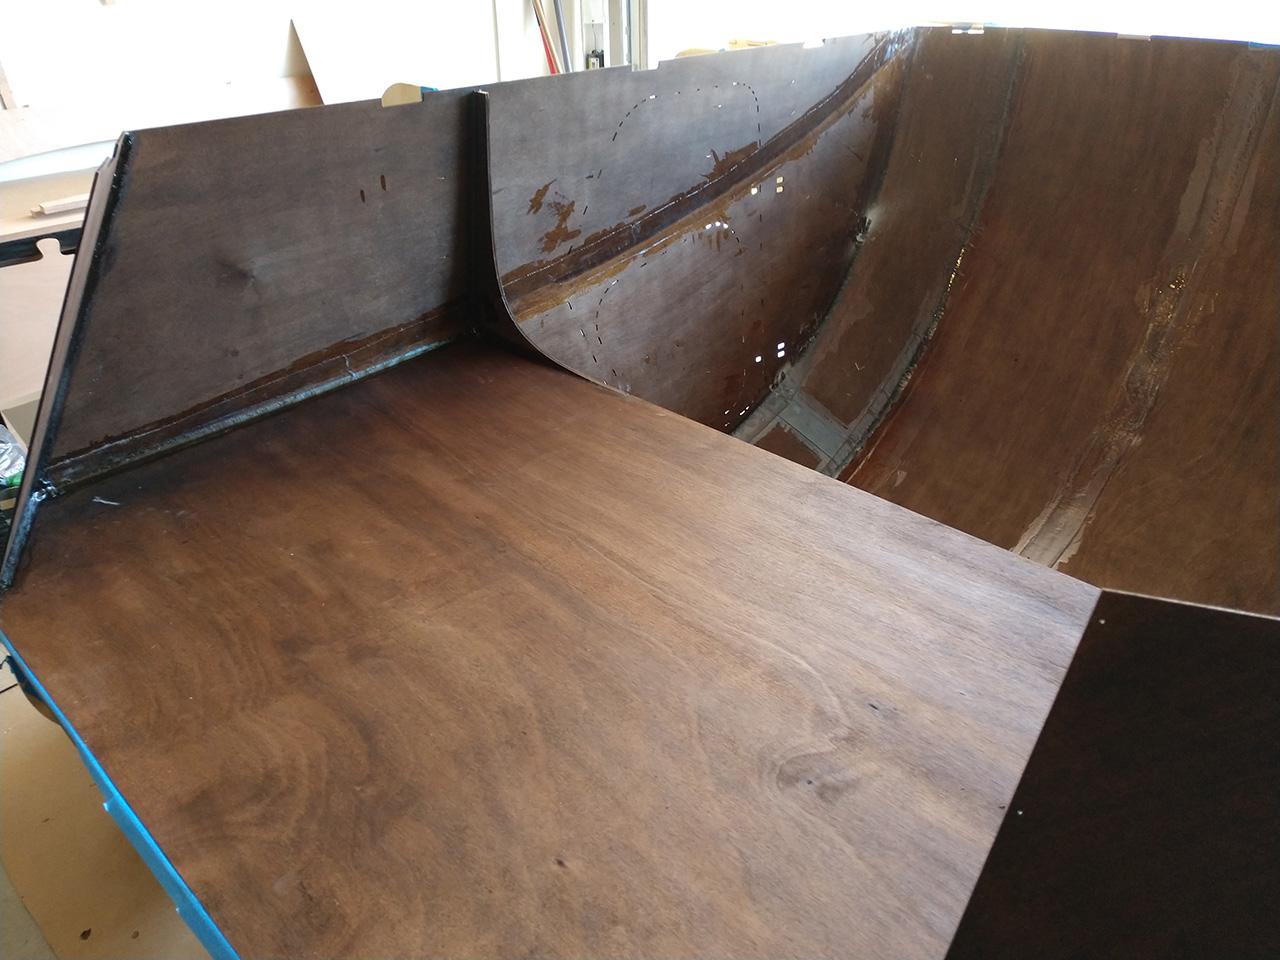
Transom Panels: The transom left and right panels are a bit tricky to stitch and glue. These panels have no frame support and the angles and geometry are very important for the hatch to line up and transom panel to fit later. For this process I stitched the panels as instructed but also stitched the middle transom panel in temporarily until the fillets cured. This helped me align the panels and ensure the space between them fits the middle transom panel perfectly later on.