Forum Replies Created
-
AuthorPosts
-
StarMan
ParticipantMy lights shown above are just battery (3 x AAA) LED pucks. They say that I can get up to 60 hours with a set of batteries. I just got a brick of rechargeables. They have 4 colors and even a remote…….6 pack at Costco.
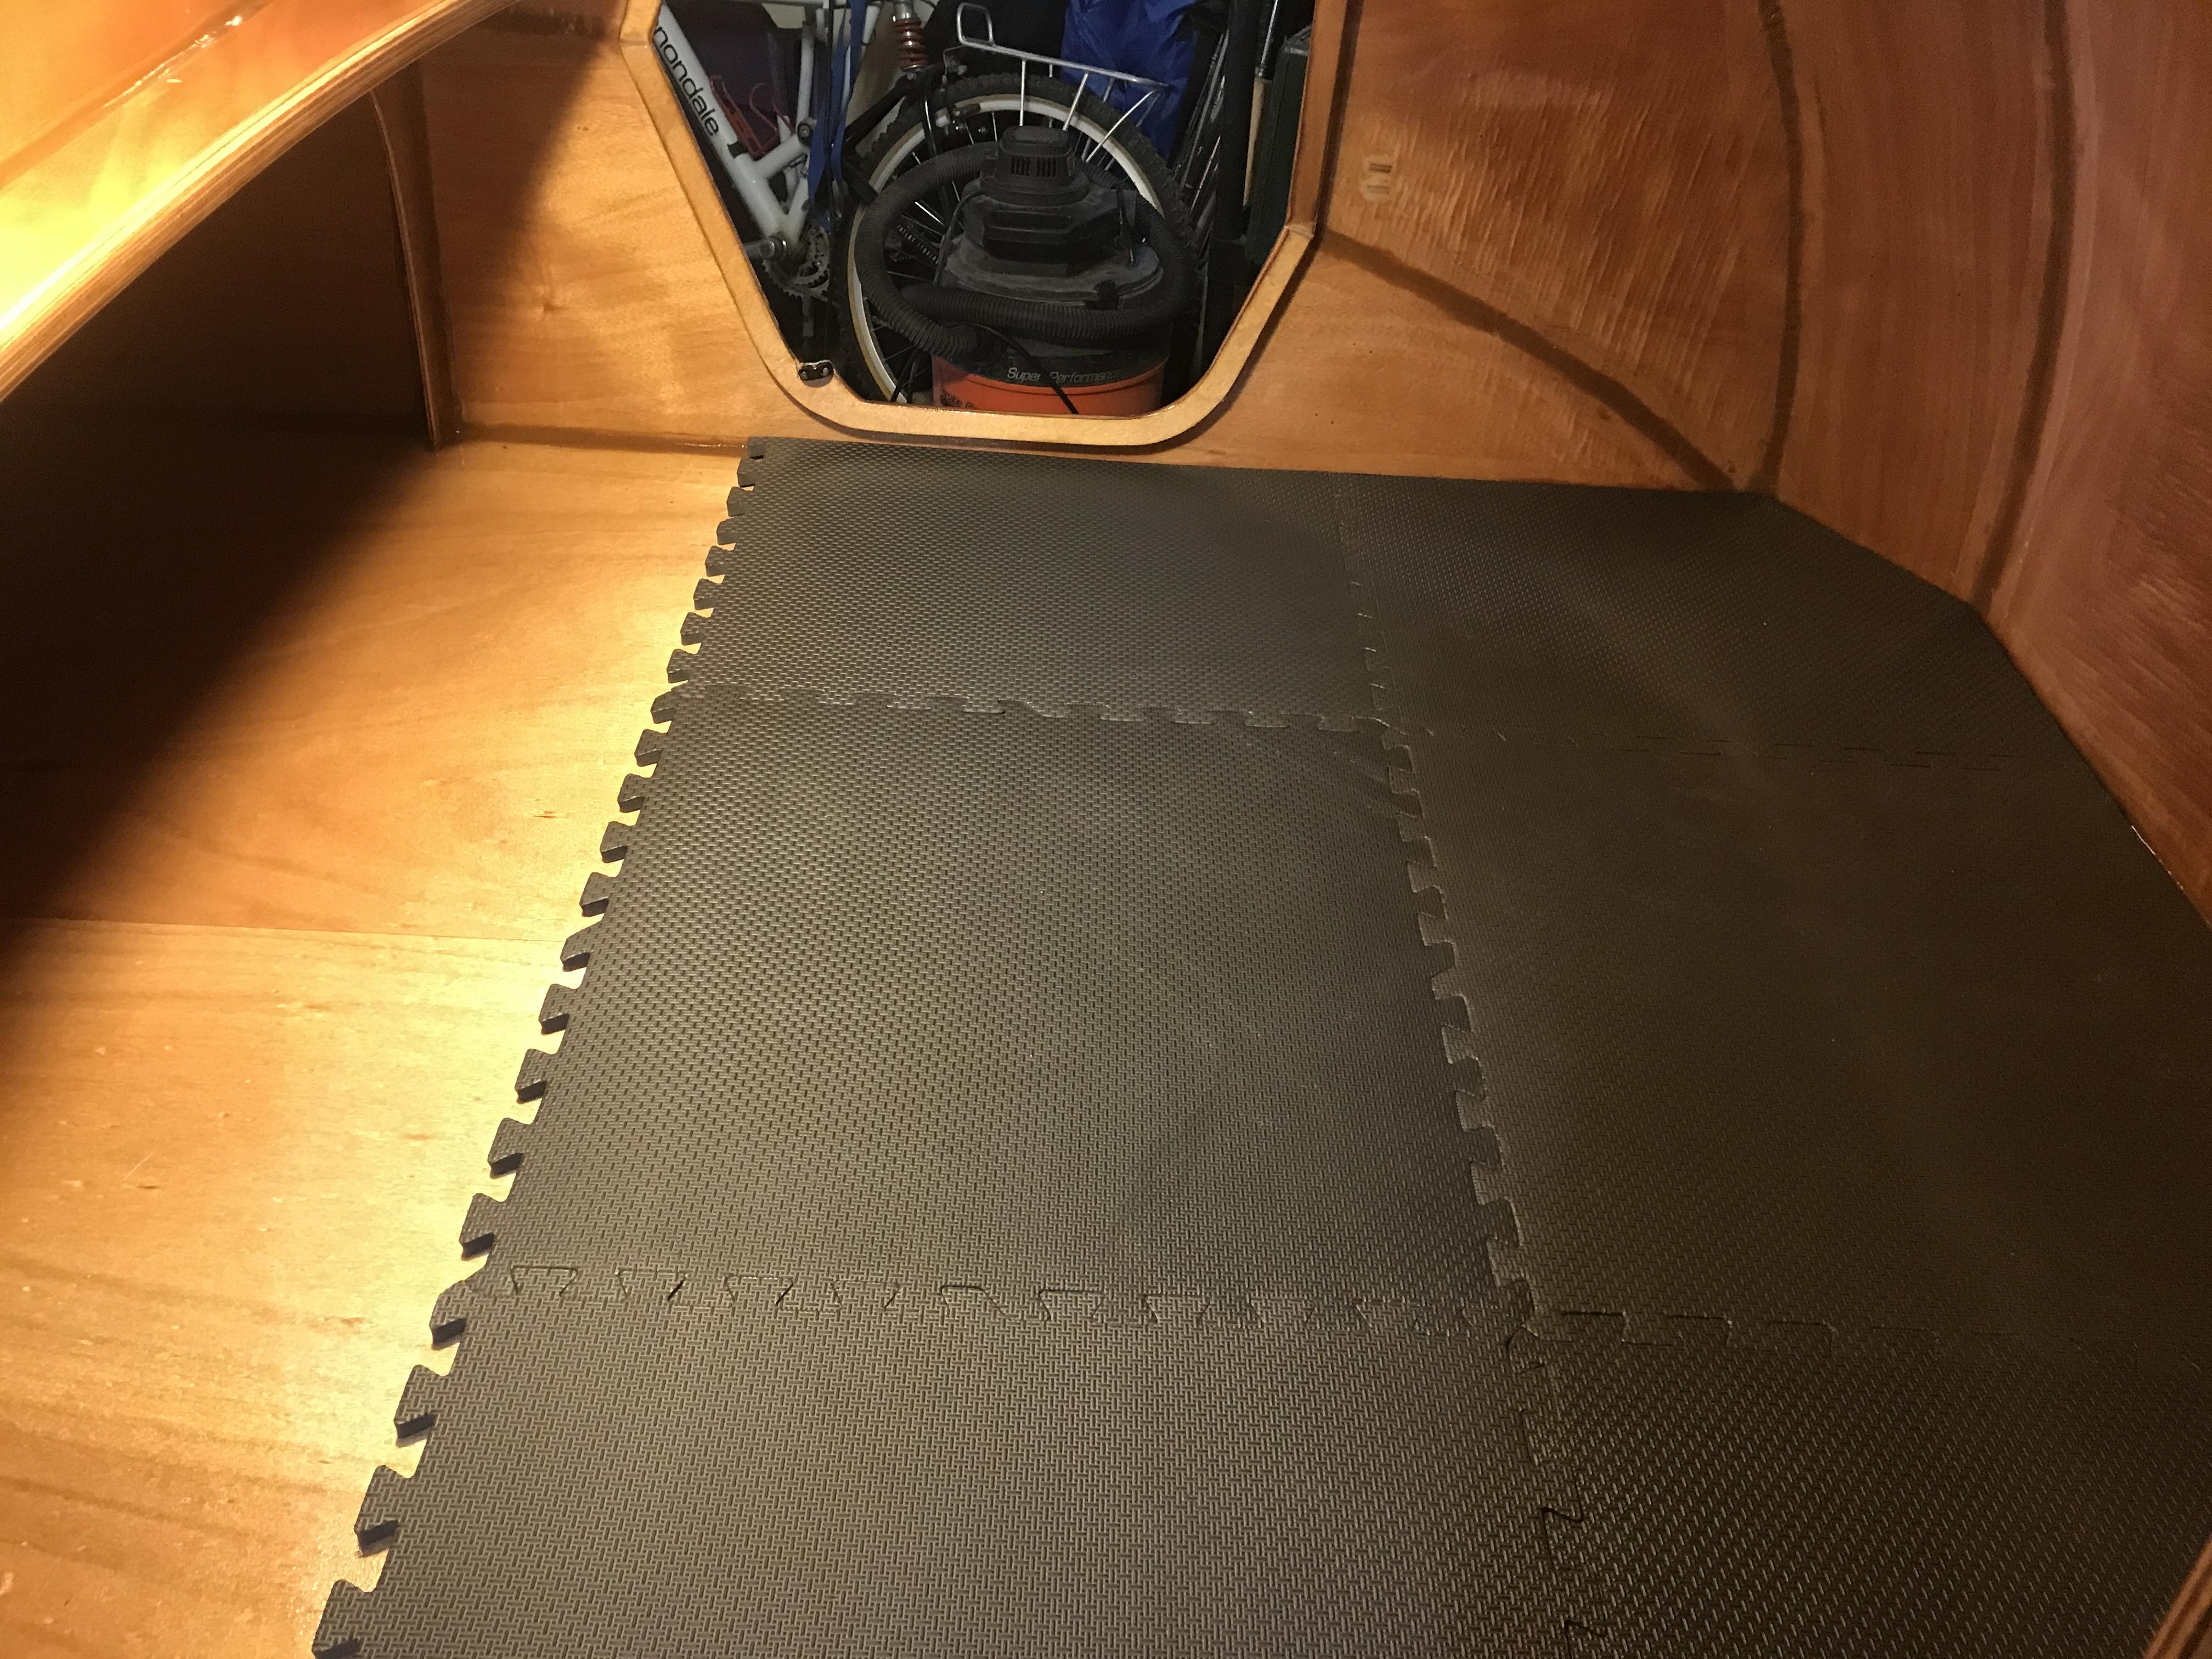
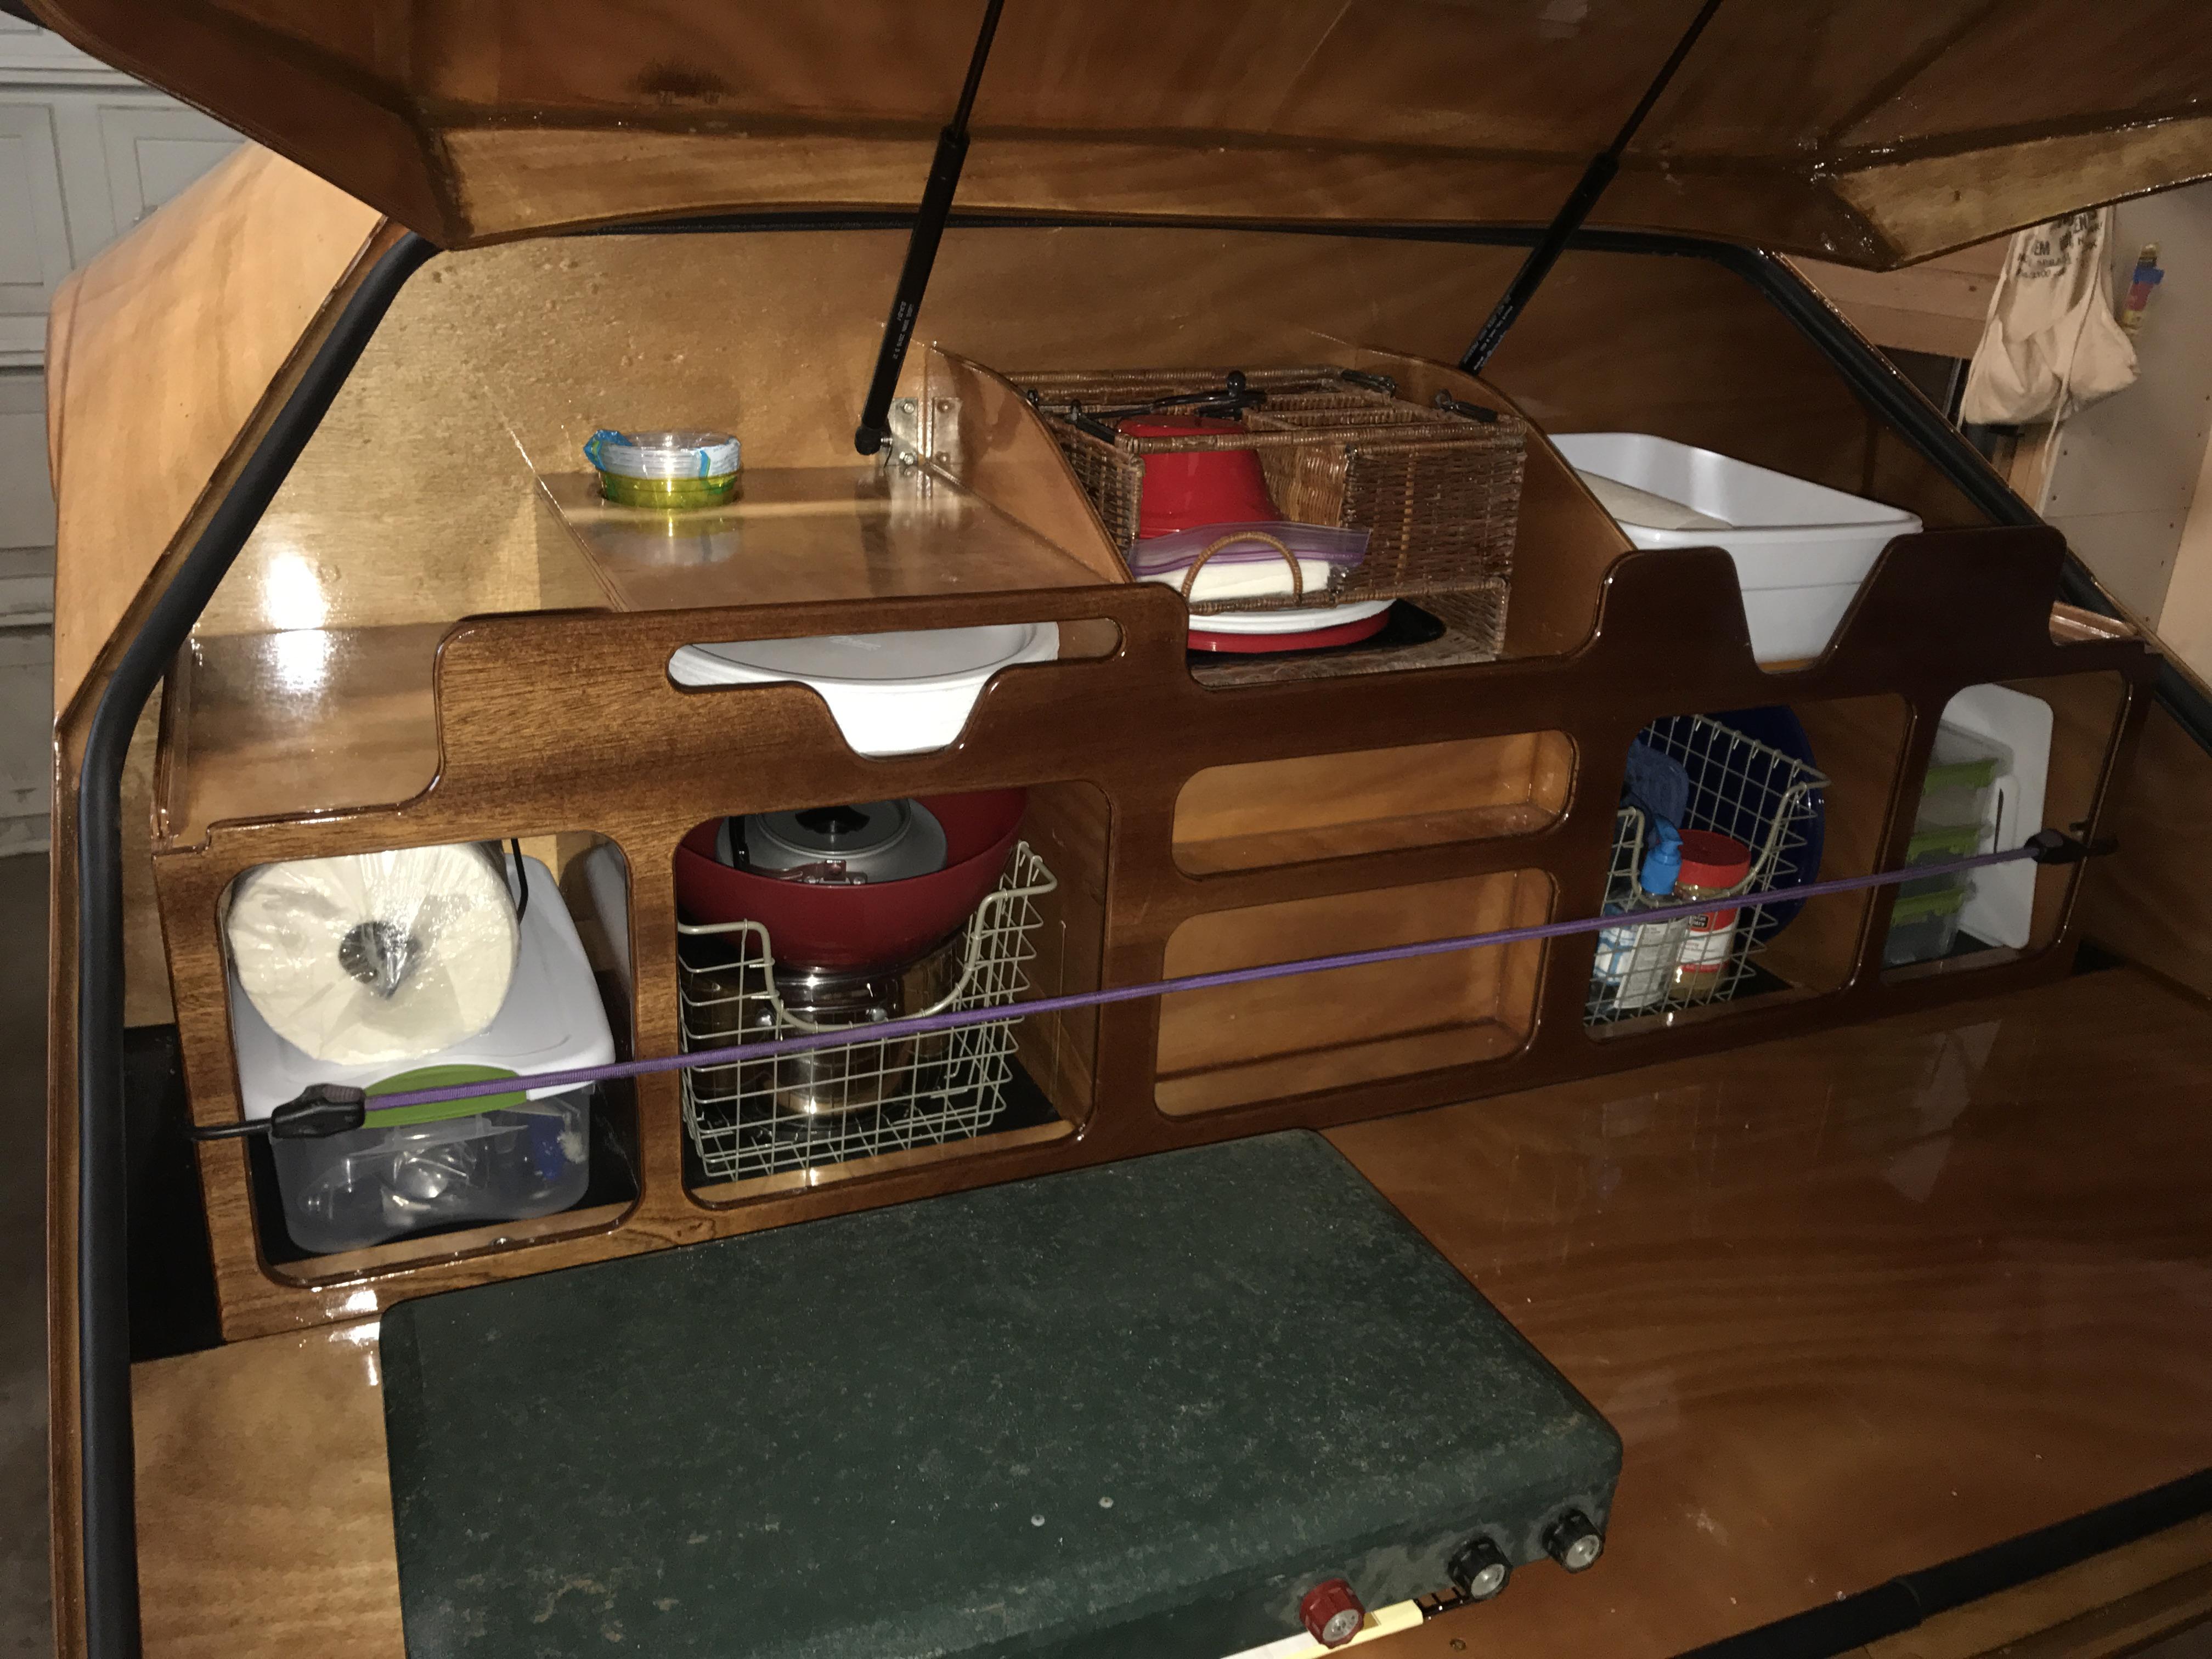
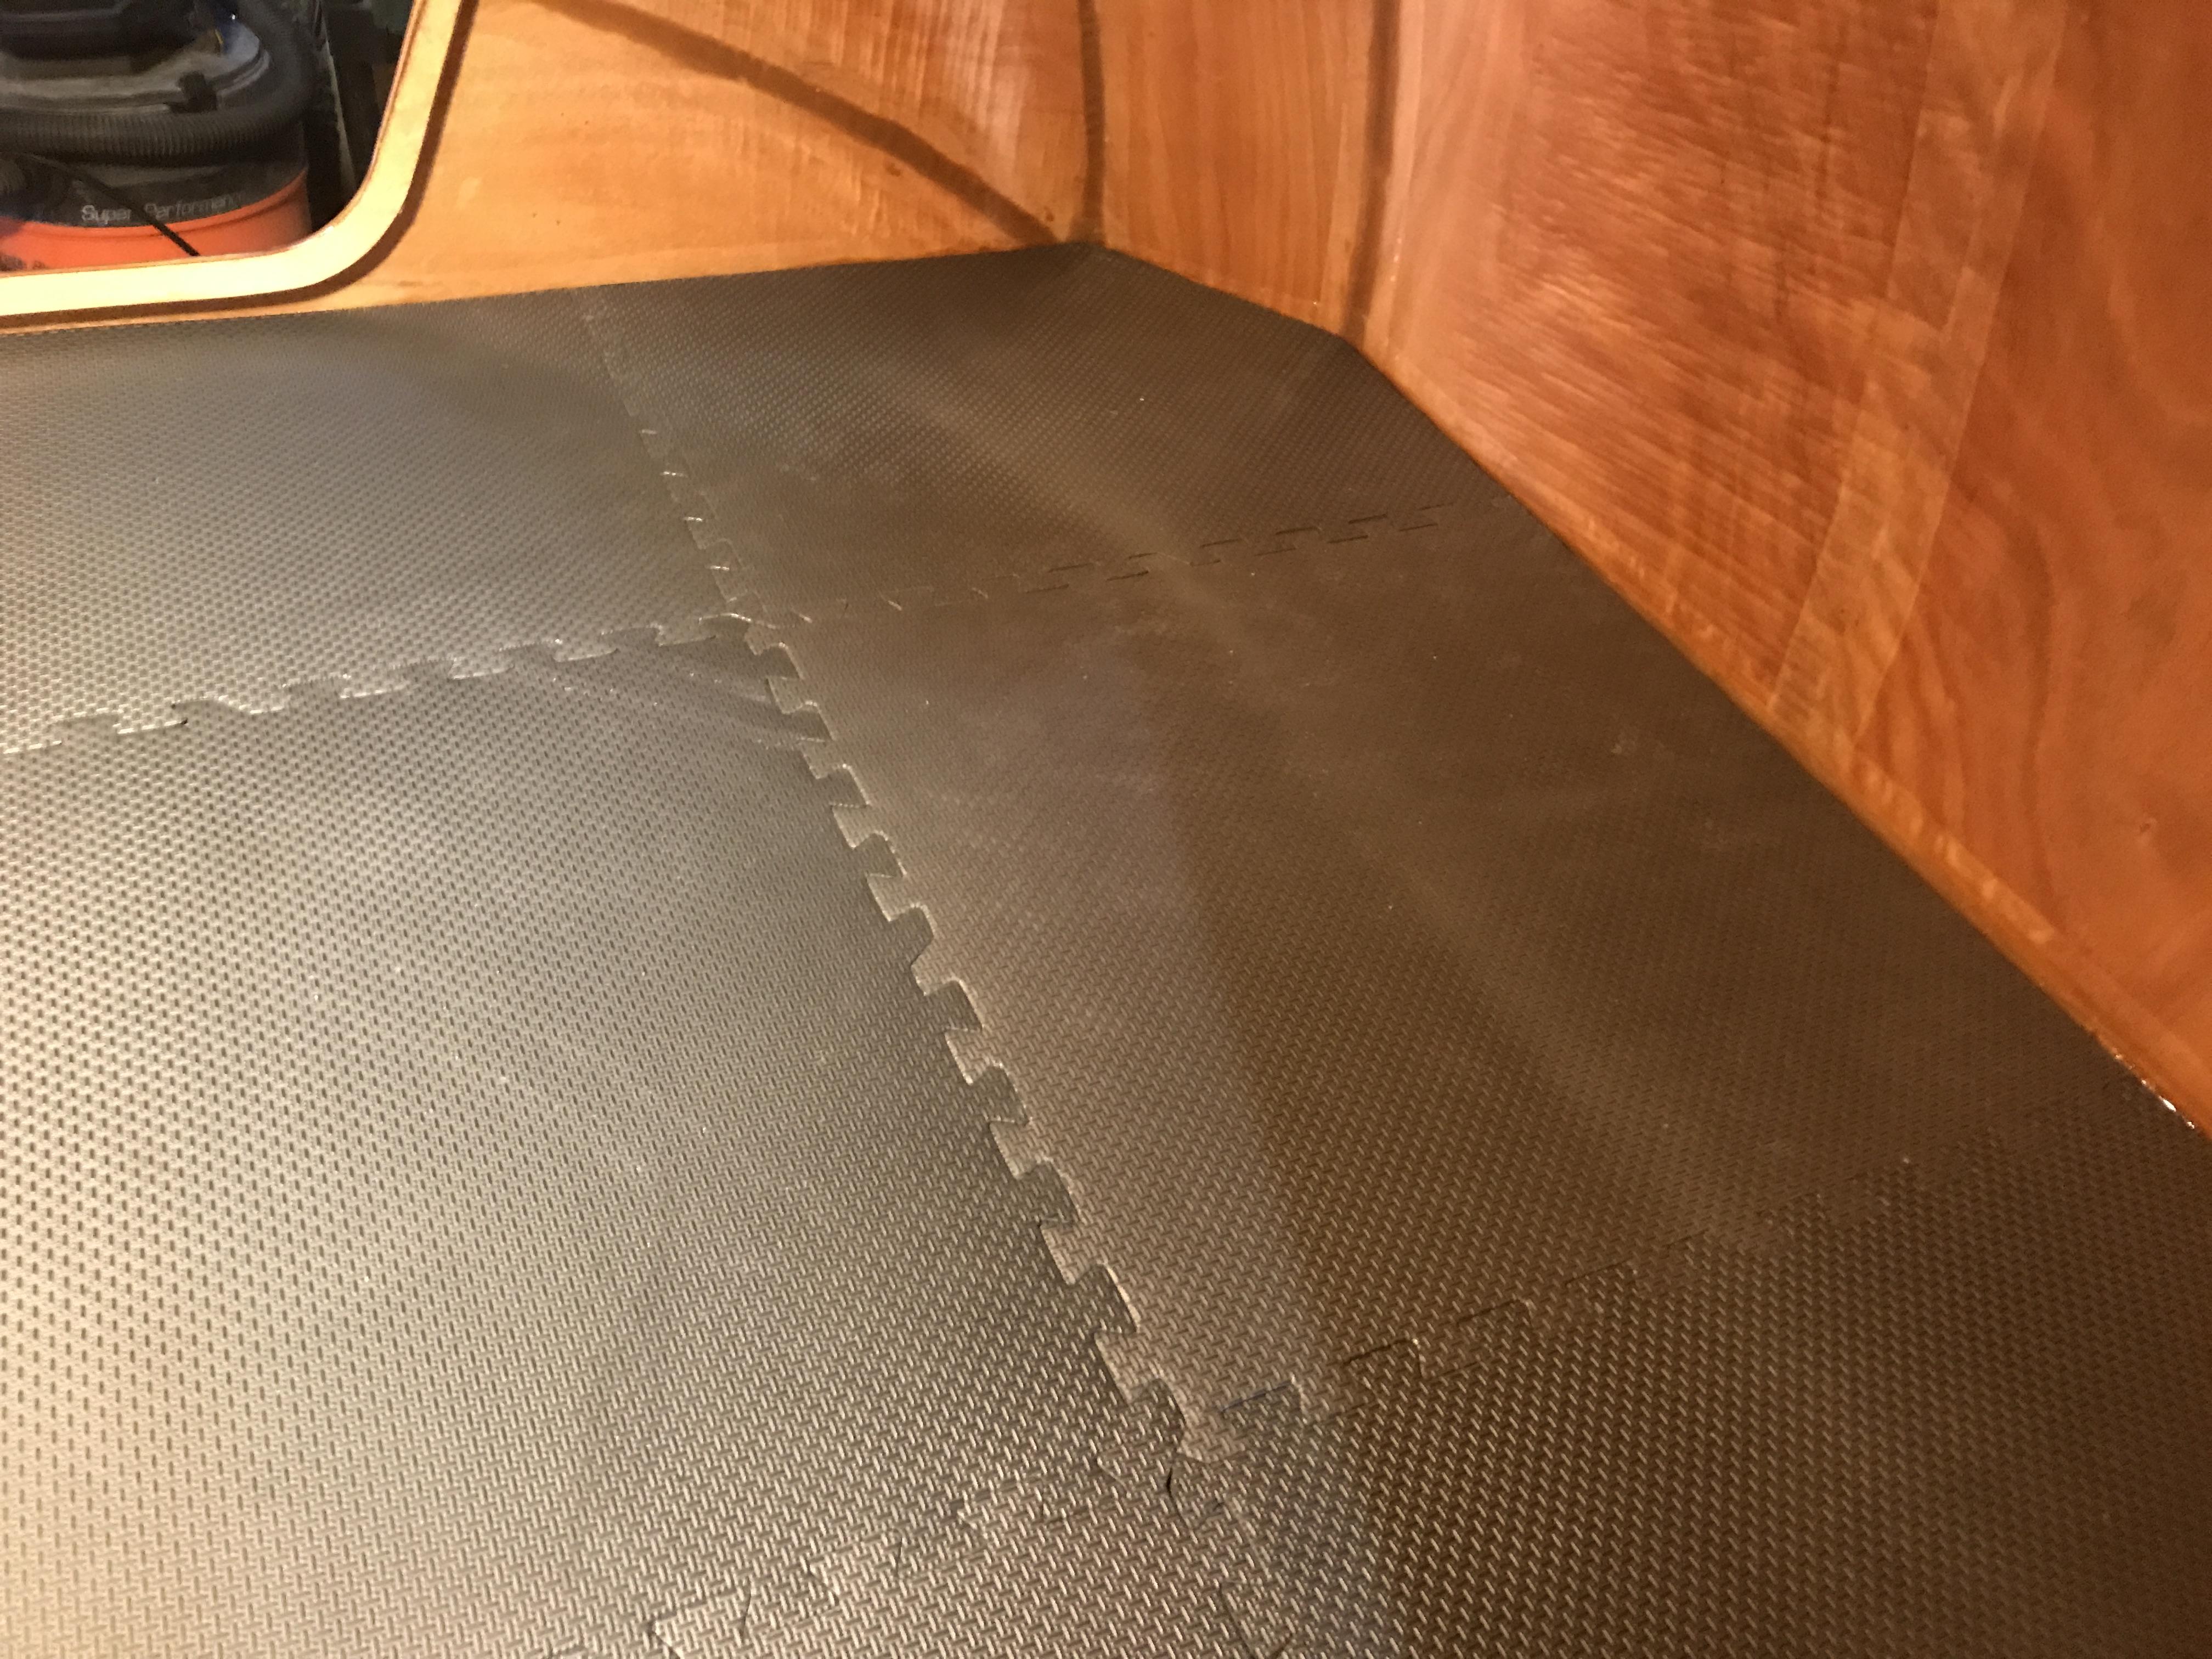
ParticipantI used the same foam flooring product for the entire bed area to also cover the transom/footwell. I purchased two packet of the foam flooring at Costco for about $9 each pack. Stuff gives some grip and added insulation and padding. I then covered the walls with the CLC foam.
 Participant
Mushroom vents FOR SALE! (i’m going a screen on the doors system instead)
Contact me off-list if interested.
Set of four – Black
Reduced price of $50 and I’ll pay shipping! (Note I did not receive any mounting bolts with my order – don’t know if it even comes with them. It does have the center bolt!)
frankgilliland <the at symbol> gmail <dot> com
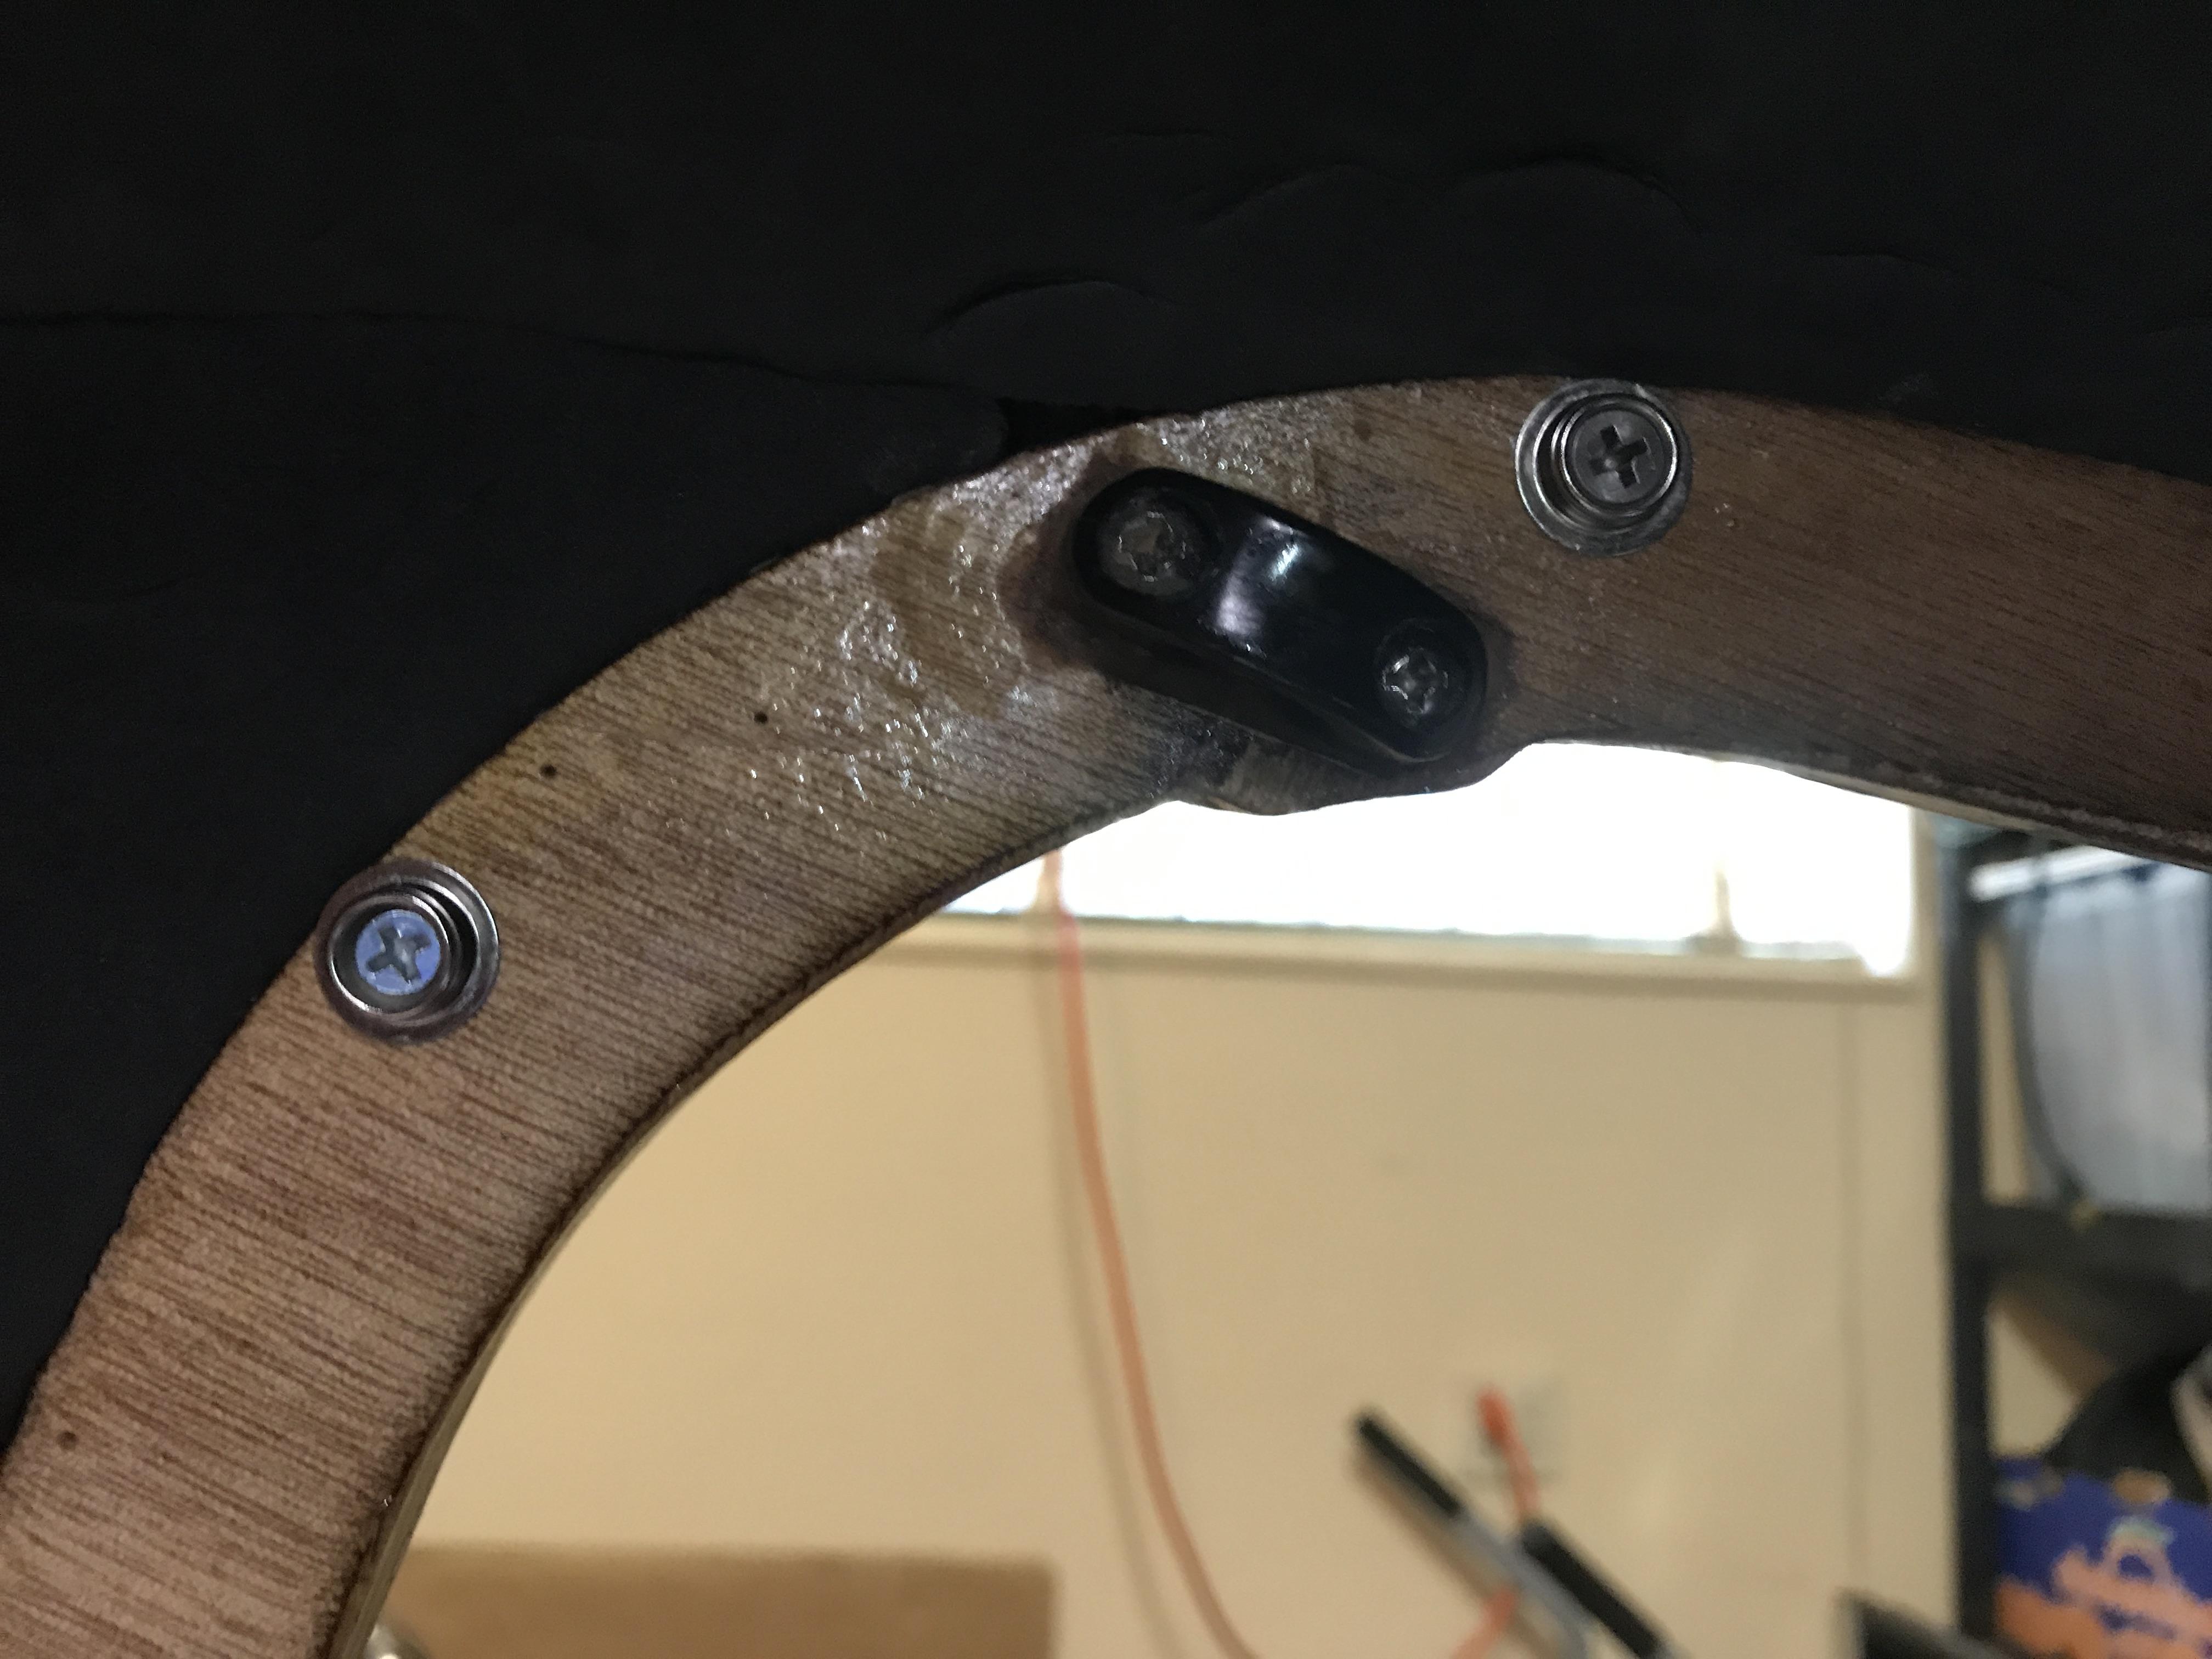
ParticipantSo off to the fabric store to get velcro. Then I saw how easy the snaps are to install……..so, snaps it is. This should come as a kit from CLC.
My wife sewed nylon edging on to allow the snap to have a place to grab. We used standard tent grade netting. When removed the whole screen fits in the palm of your hand!
 Participant
1)I sanded and rounded/routered the edges
2) then epoxied all surfaces with 2 coats.
3) 2 coats of varnish on most surfaces that are on the inside portions before assembly (Much easier to do when flat)
4) assemble using CA Glue and thickened epoxy following the fillet schedule in the Hymnal.
5) once assemble and filleted, I touched up as needed with varnish (especially outside surfaces)
Wood glue can cause problems with lines showing wear it is squeezed out. I would use epoxy.
 Participant
IMHO
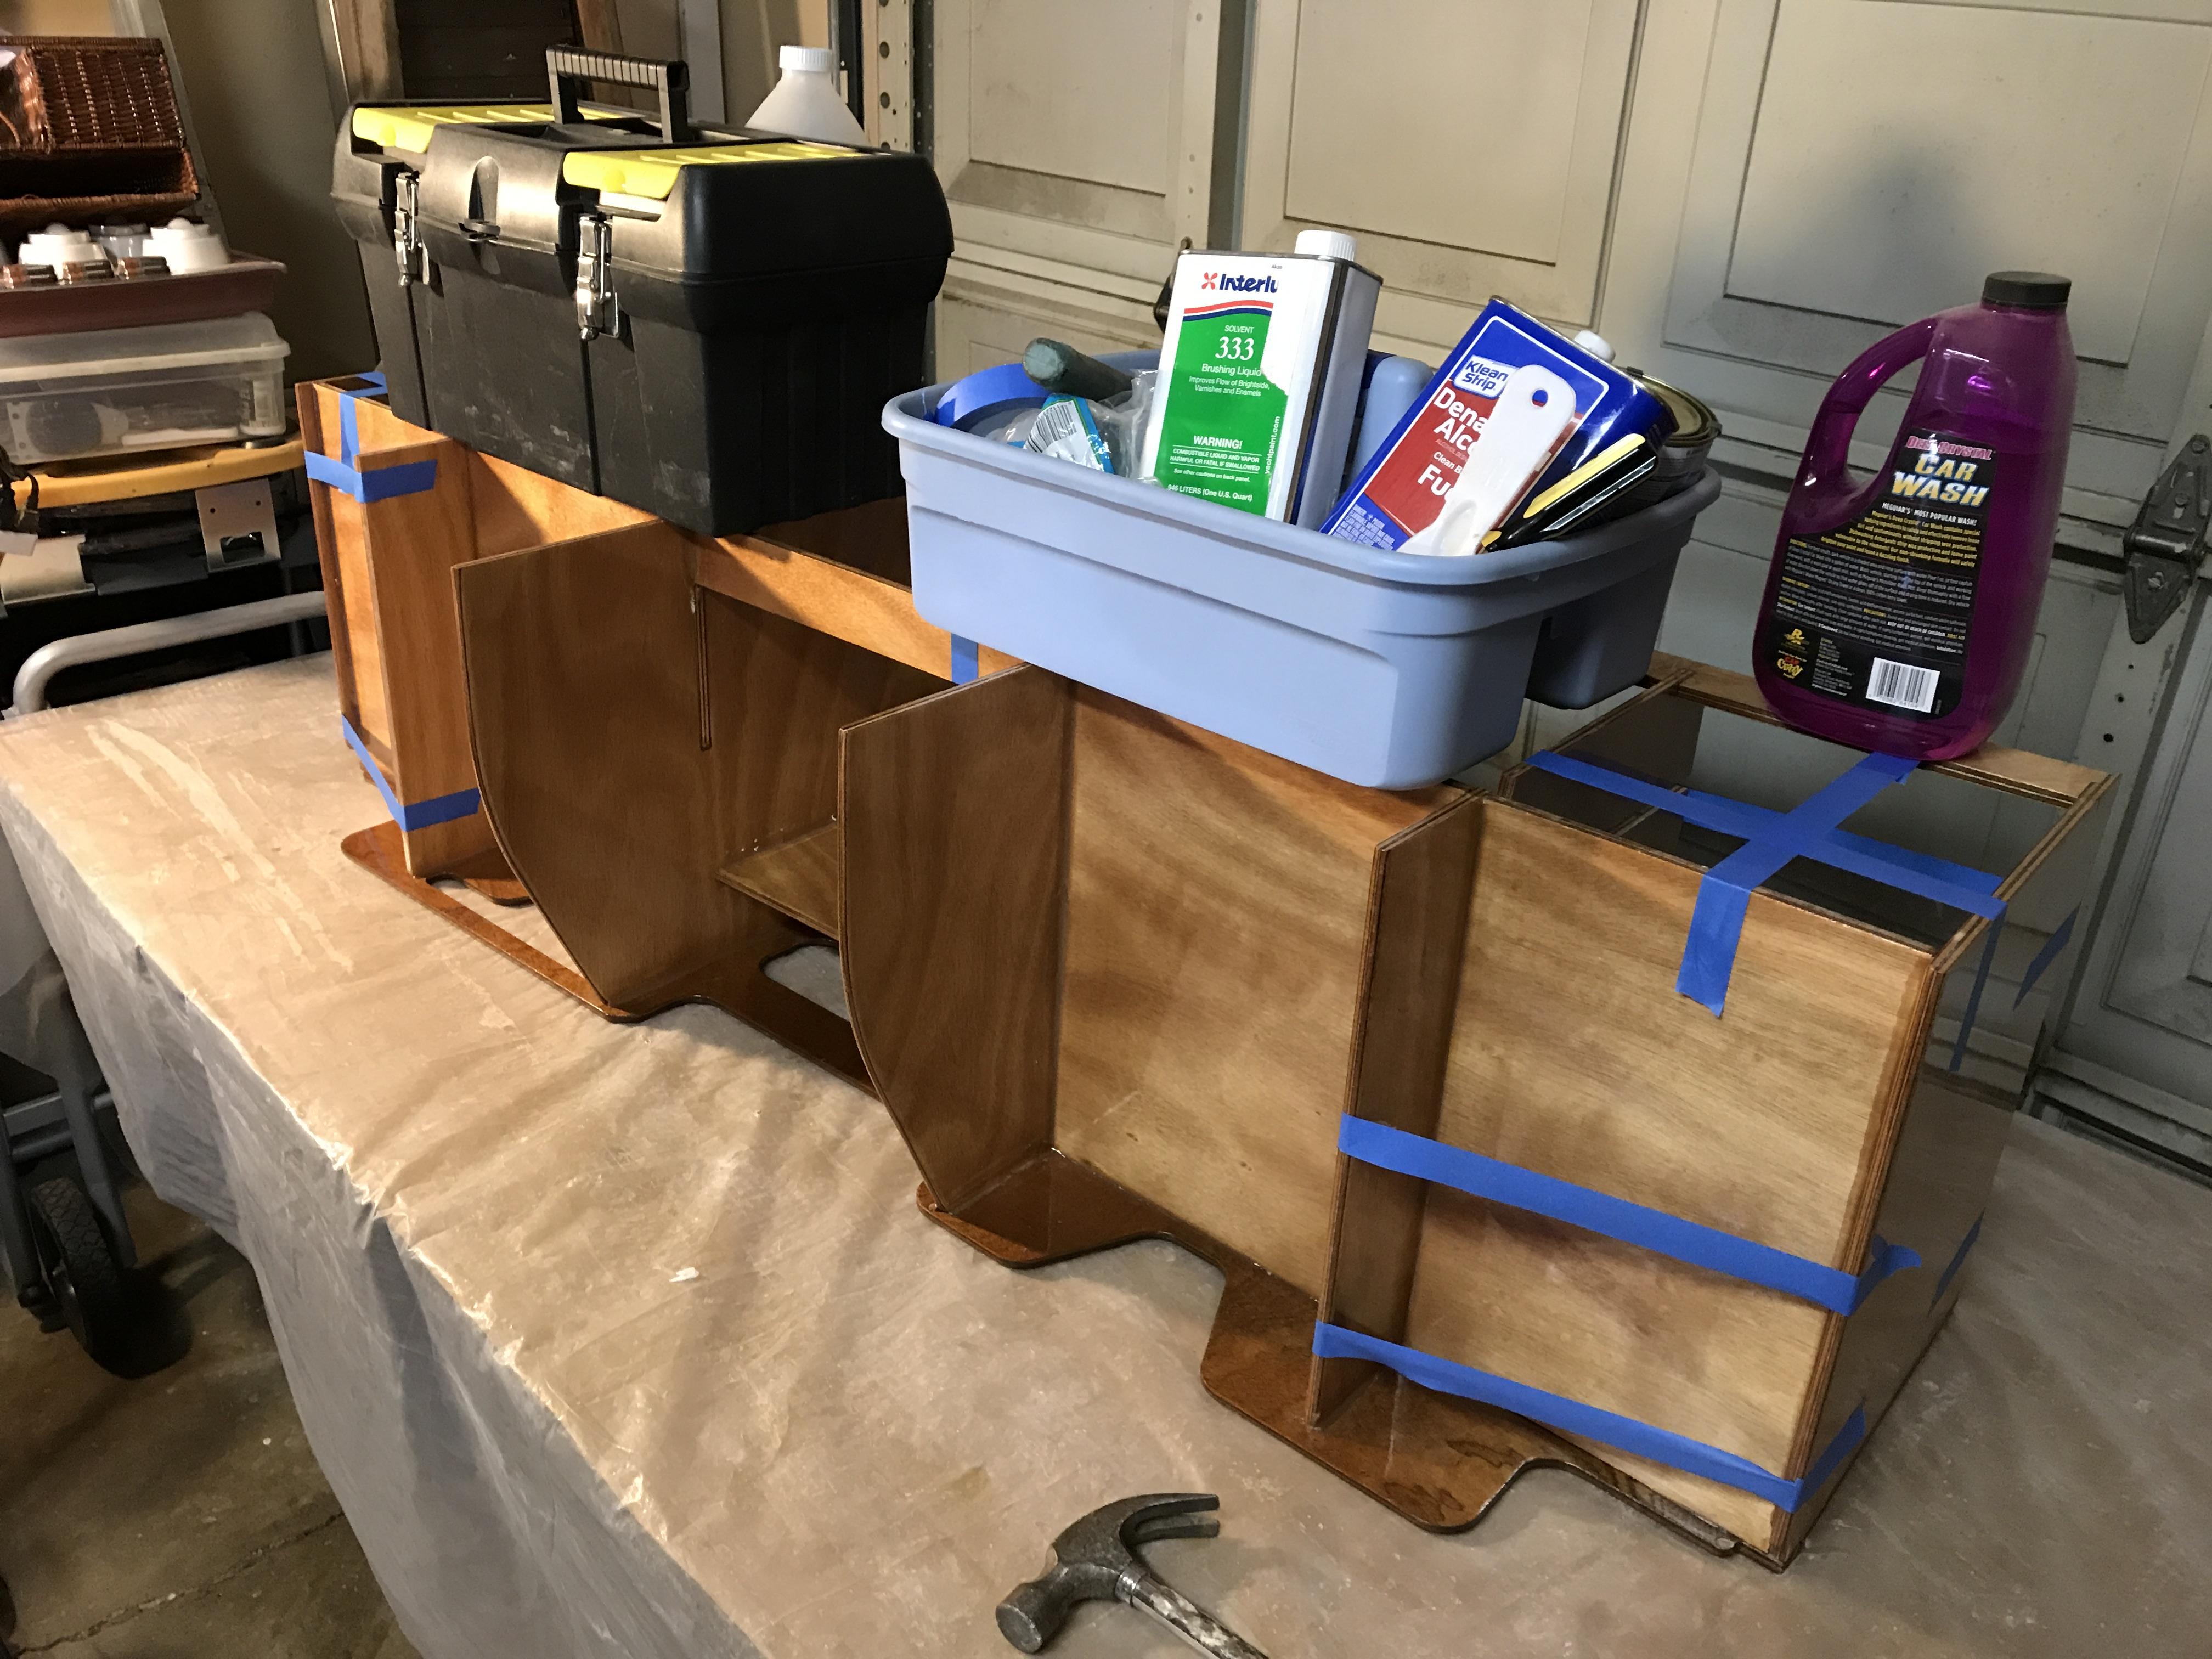
I just sticked with the paint and varnish as suggested by CLC. I have done a fair share of finishing and painting over the decades. I found the Interlux Brightside paint to be very smooth and easy to apply. So far the finish seems tough to the touch. By that I mean it is not brittle nor flaky. The paint is meant for marine applications so I feel pretty confident in suggesting it. The Varnish by Interlux is little bit more touchy to apply. It has a viscosity that I found a little to thick. I added about 5 to 10 percent of the thinner they make. And once you open the can, be ready to use it. There is a very short partial can shelf life.
If you don’t have a lot of paint practice, try I few test runs first on say the cut outs of the windows or the vent. You don’t want to be leaning how to do the roll and tip method on the fly. See the boat building video series on the CLC web site for a video of the painting and finishing techniques.
Timing wise I would wait until ALL or most of the drilling, sanding and fiddling is done. (mostly sanding) You don’t want dust to spoil your finish. At least make sure you have a warm, clean and well vented space.
******************
I only need 2 quart cans of the varnish – 3 coats of outside, galley and bulkhead. (I would think most people use three)
I used about half a quart of the Primer for the bottom – 1 coat. I am old school and ALWAYS use a primer on ALL pf my painting.
I used almost all of a quart can of Black Brightside – 2 coats.
Participantapkley,
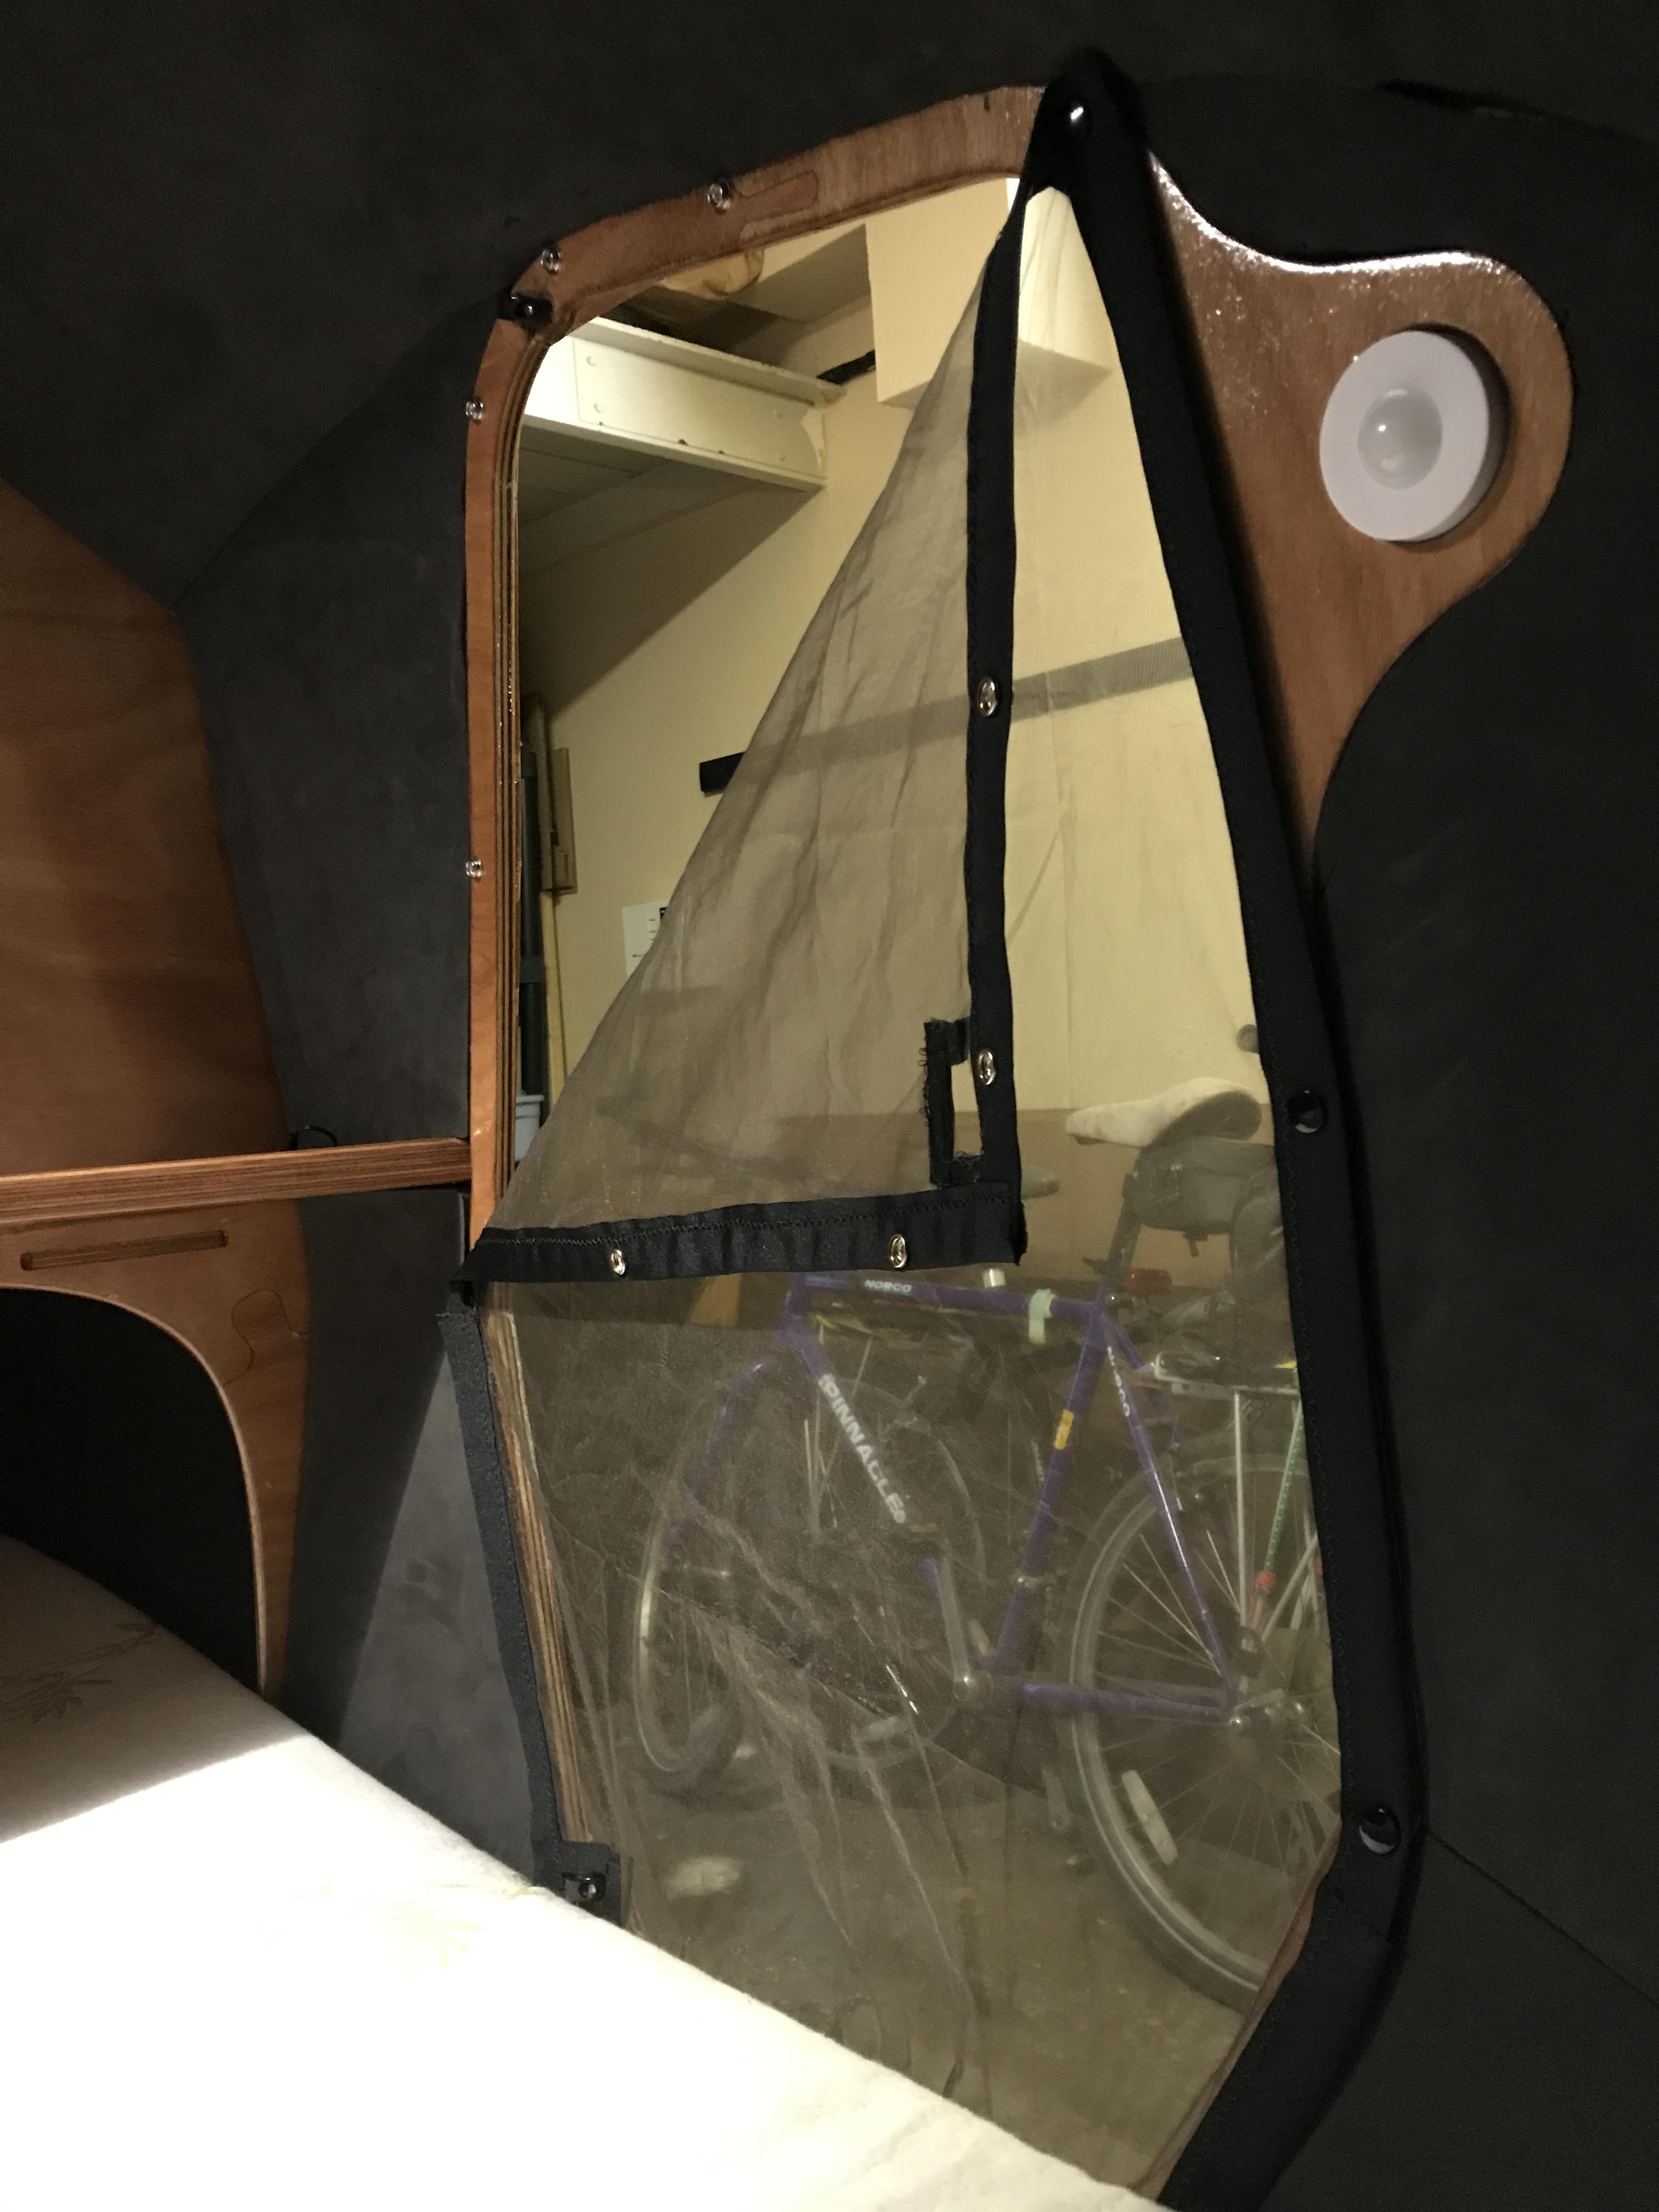
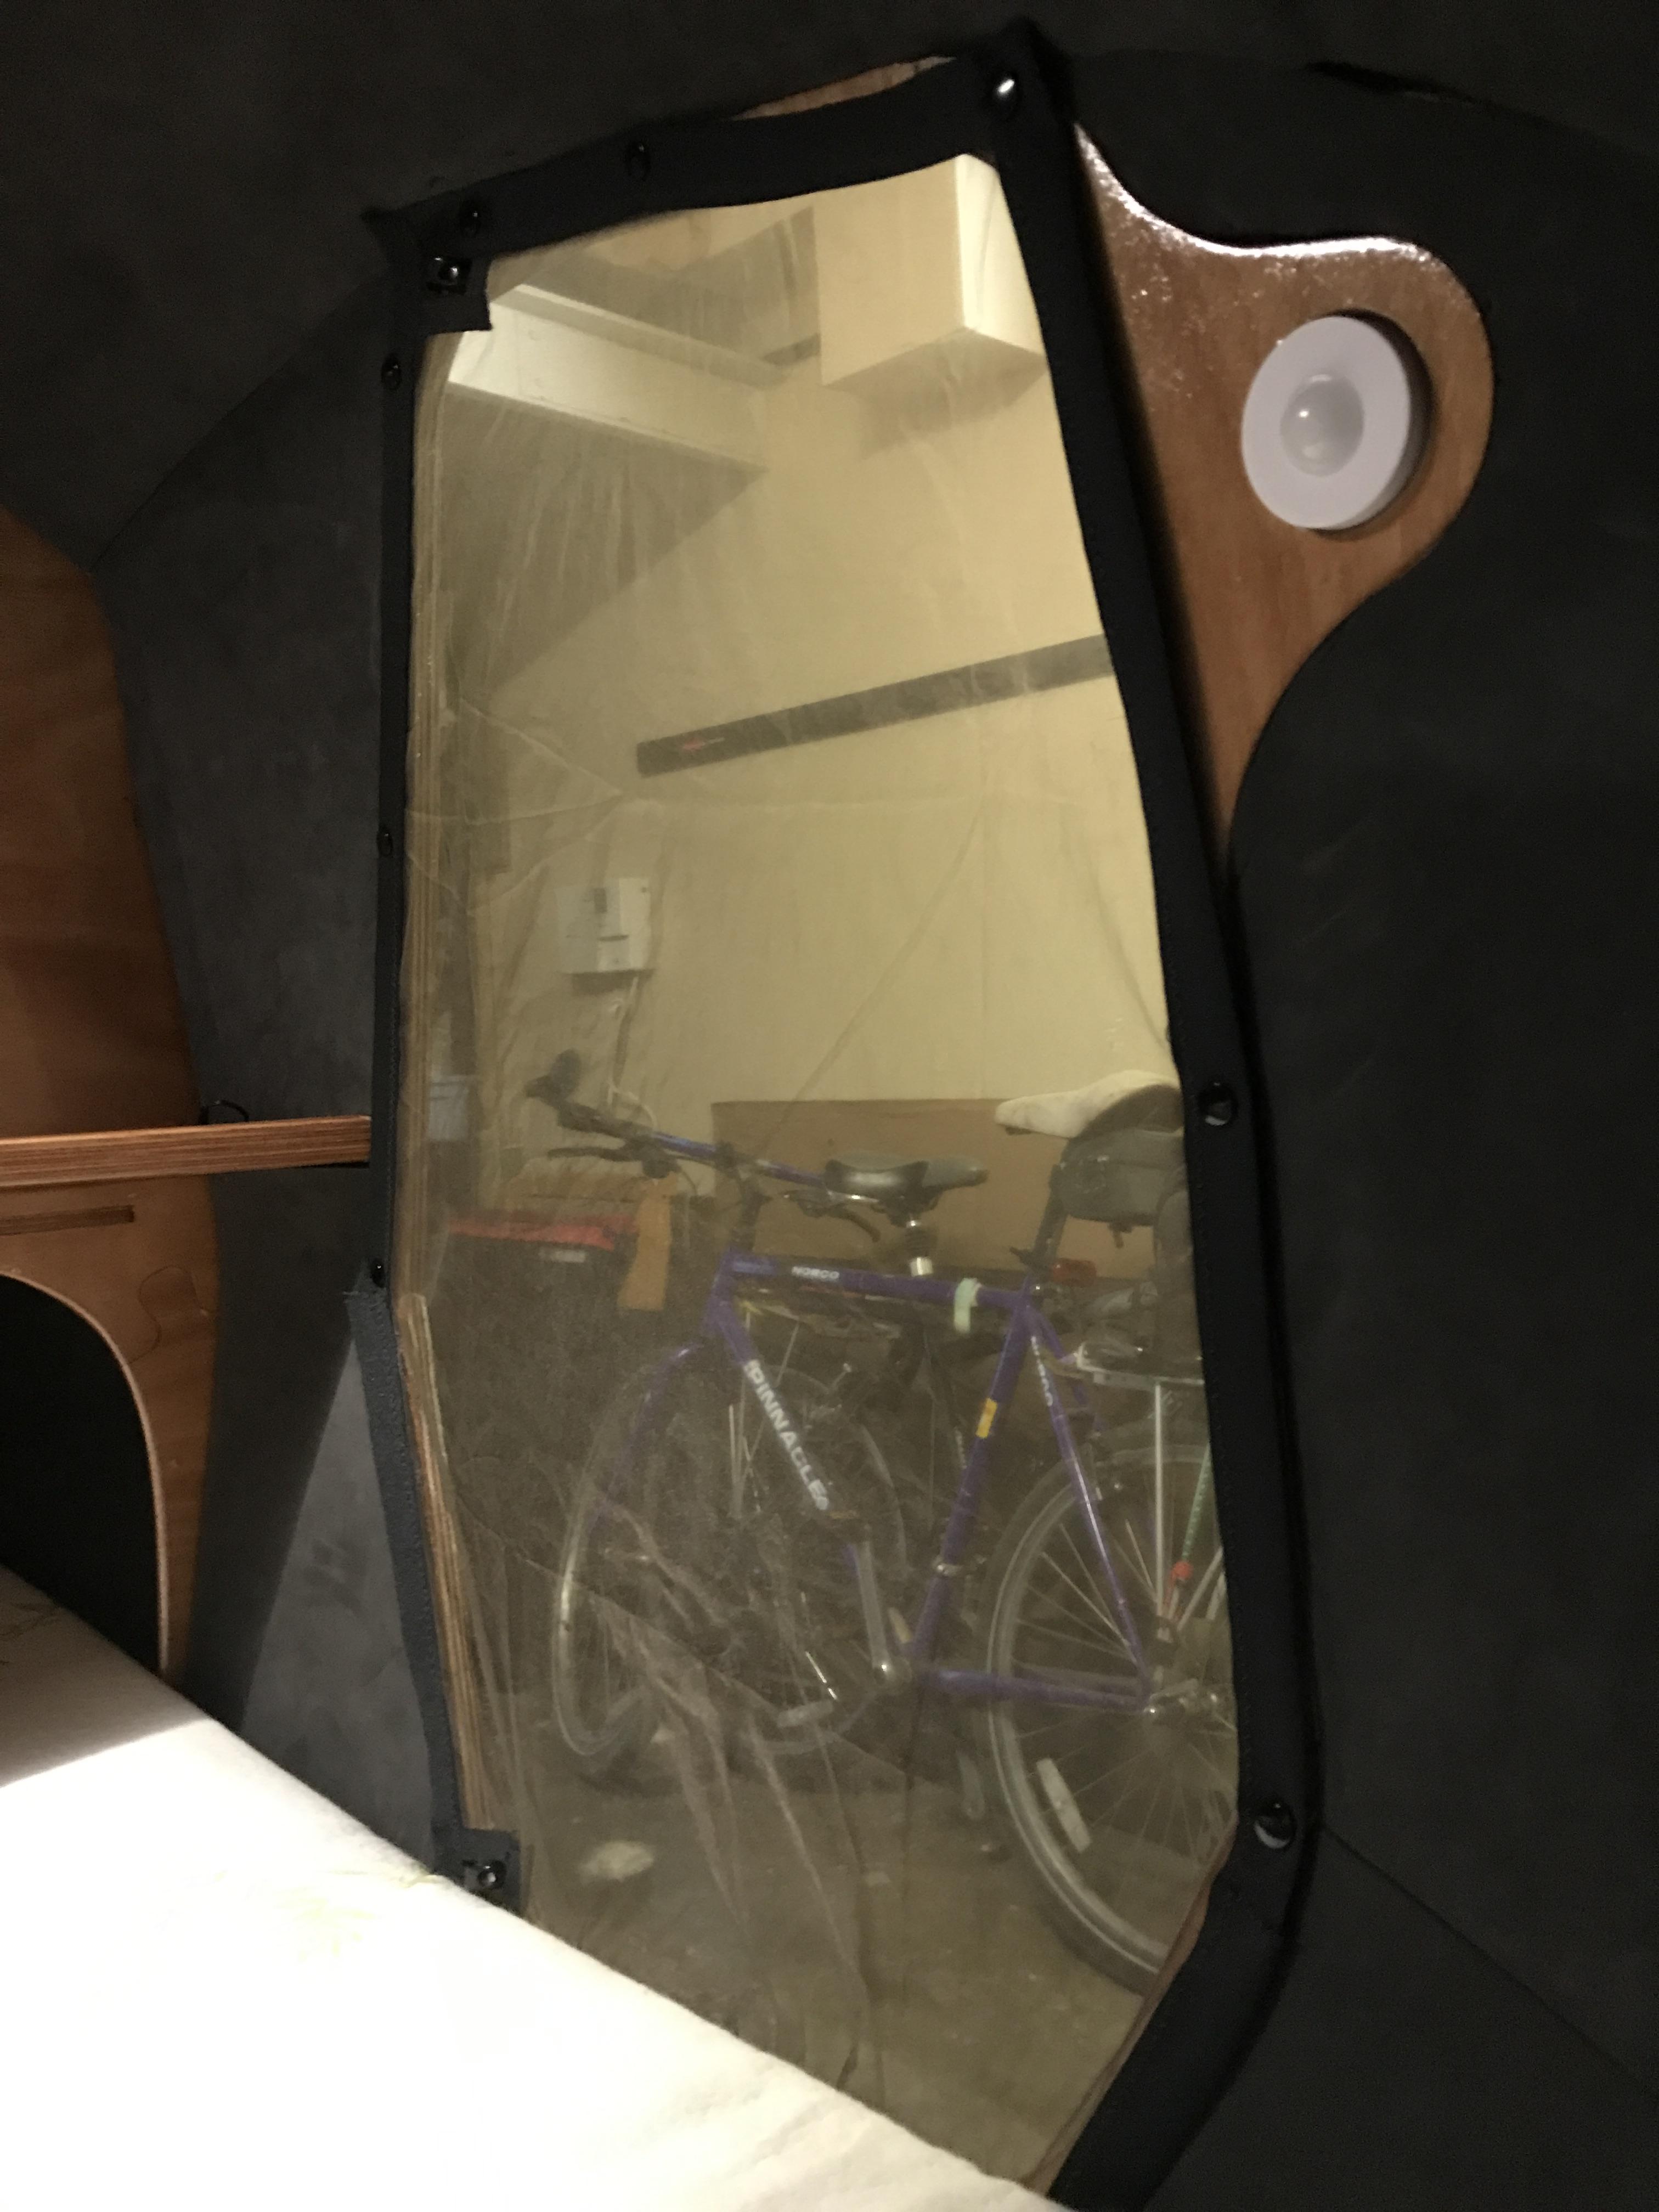
I haven’t installed the Mushrooms. I am just not in the mood to cut more holes into the project. I am waiting to see what ventilation needs are required before. So, going on a trip or two first. I am first going to make a screened cover for the door(s) like the one posted on the forum. I will use velcro instead of the snaps i think.
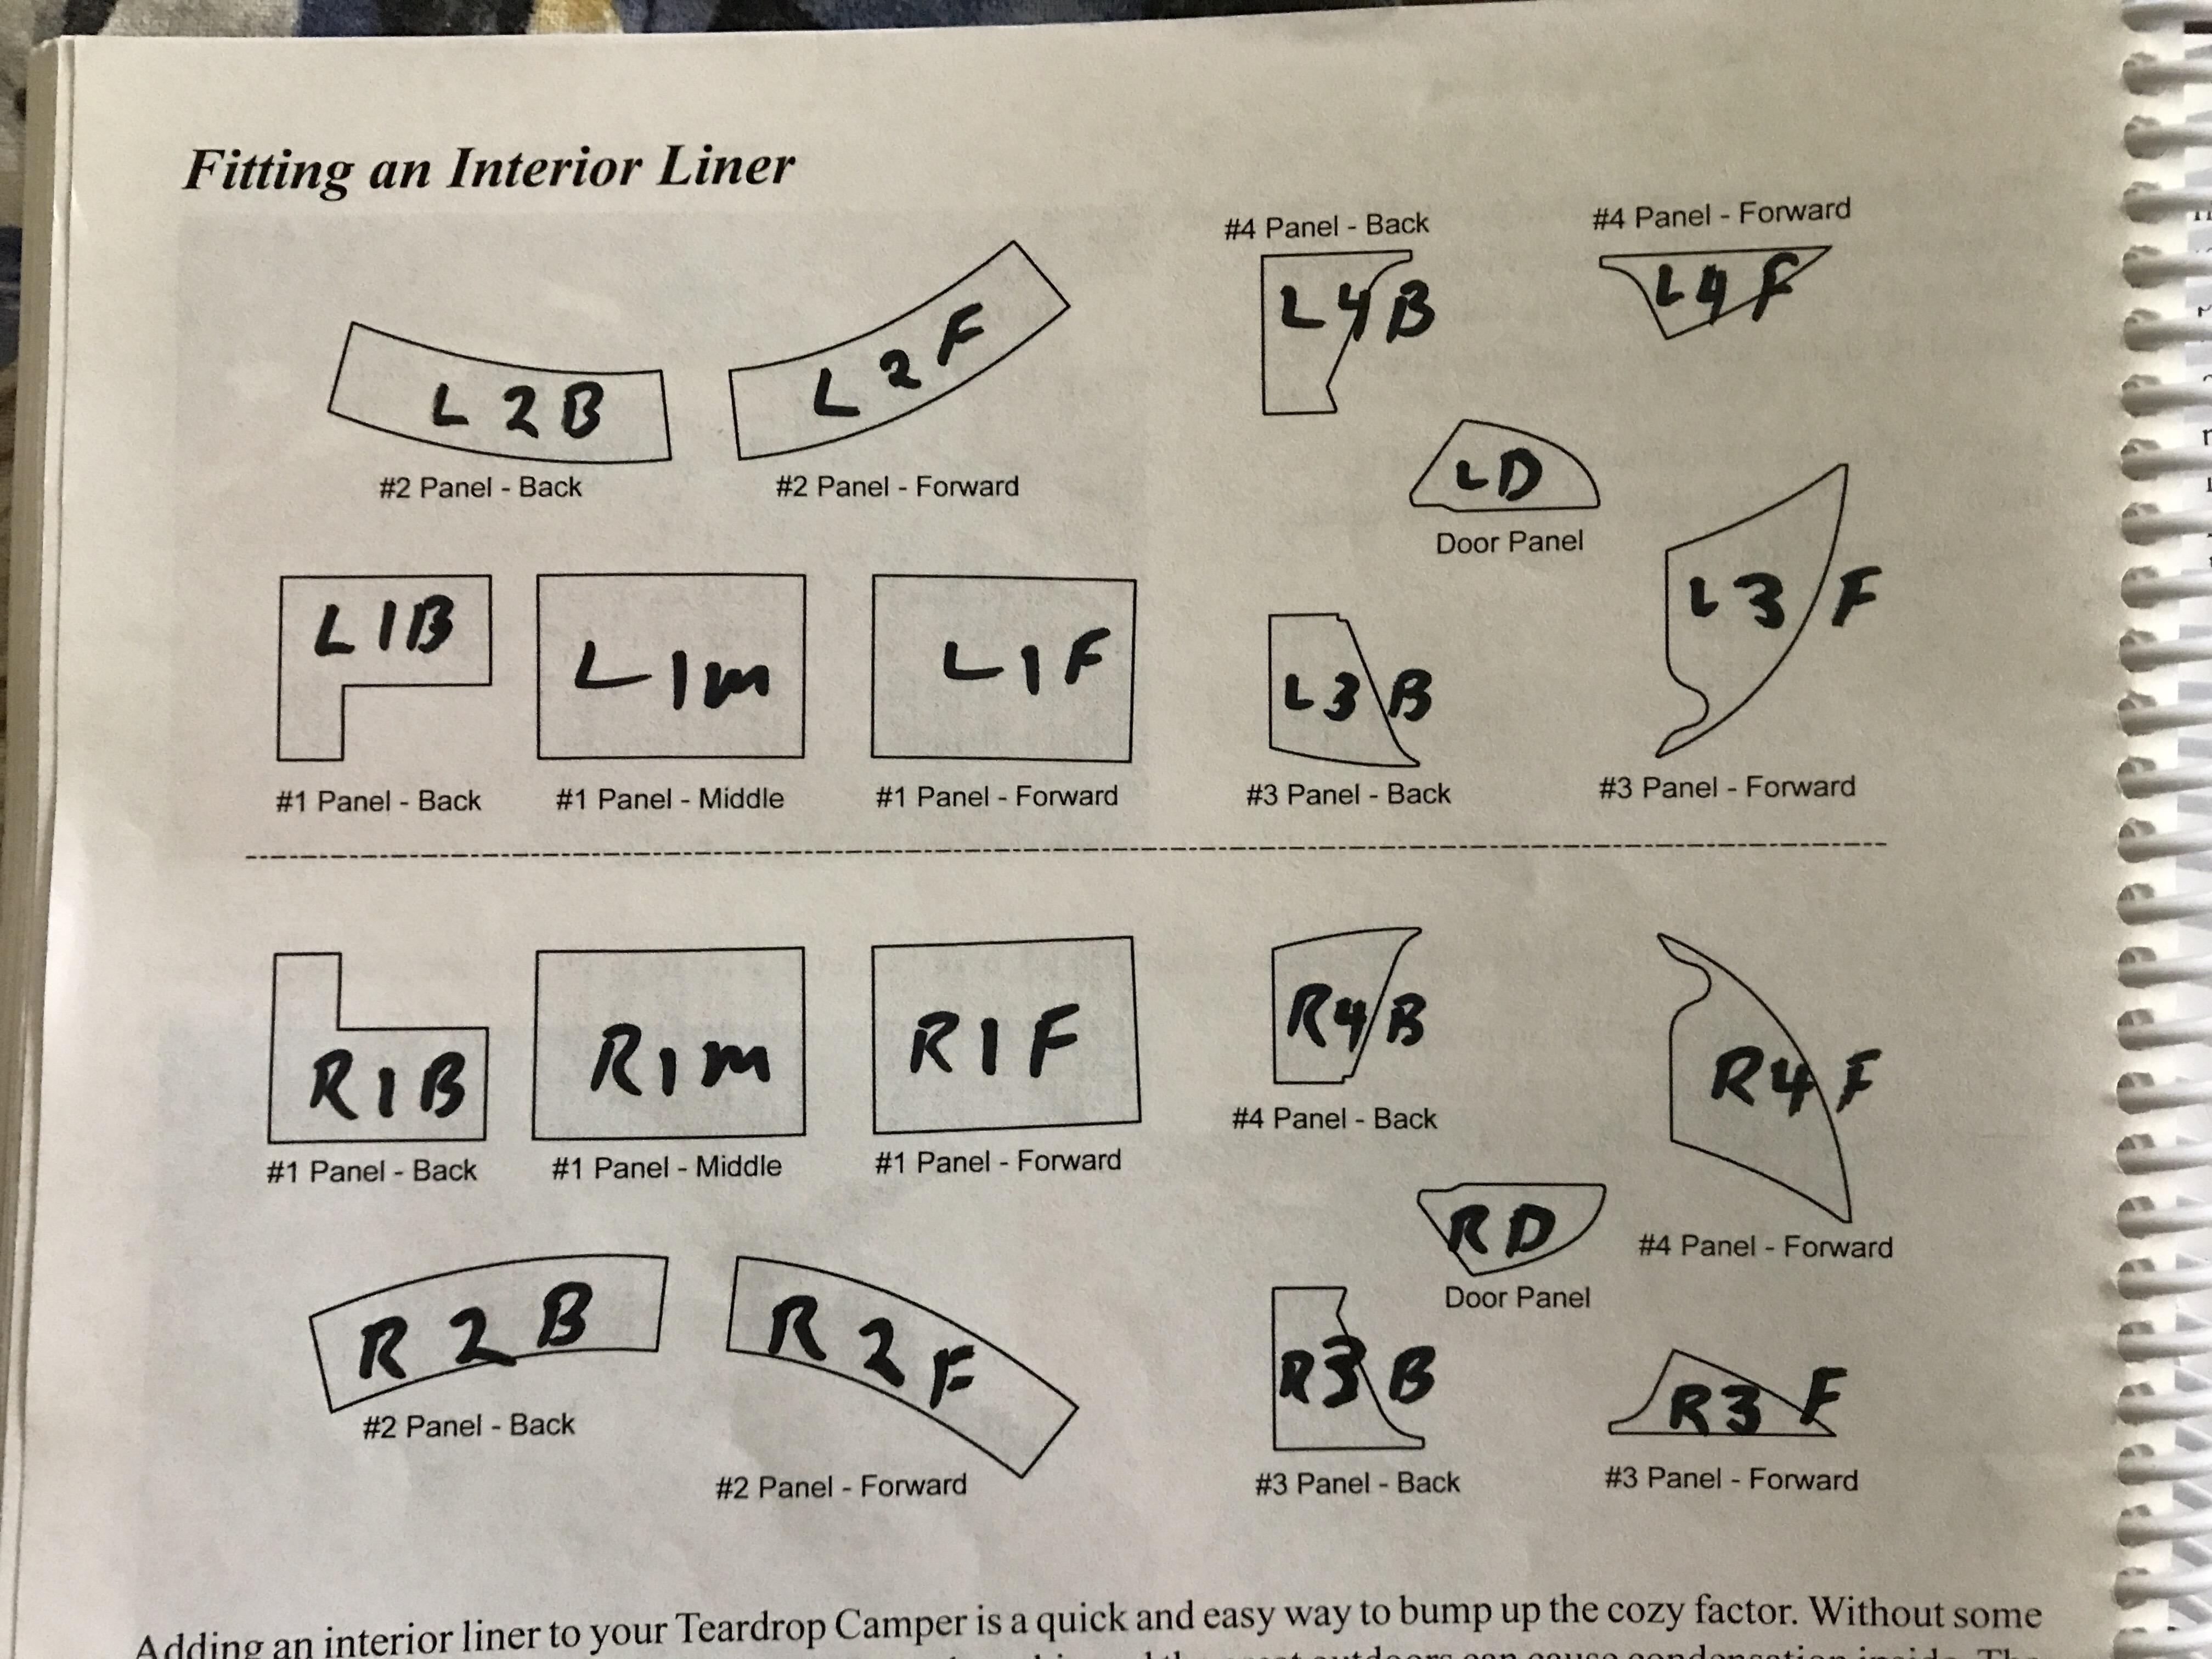
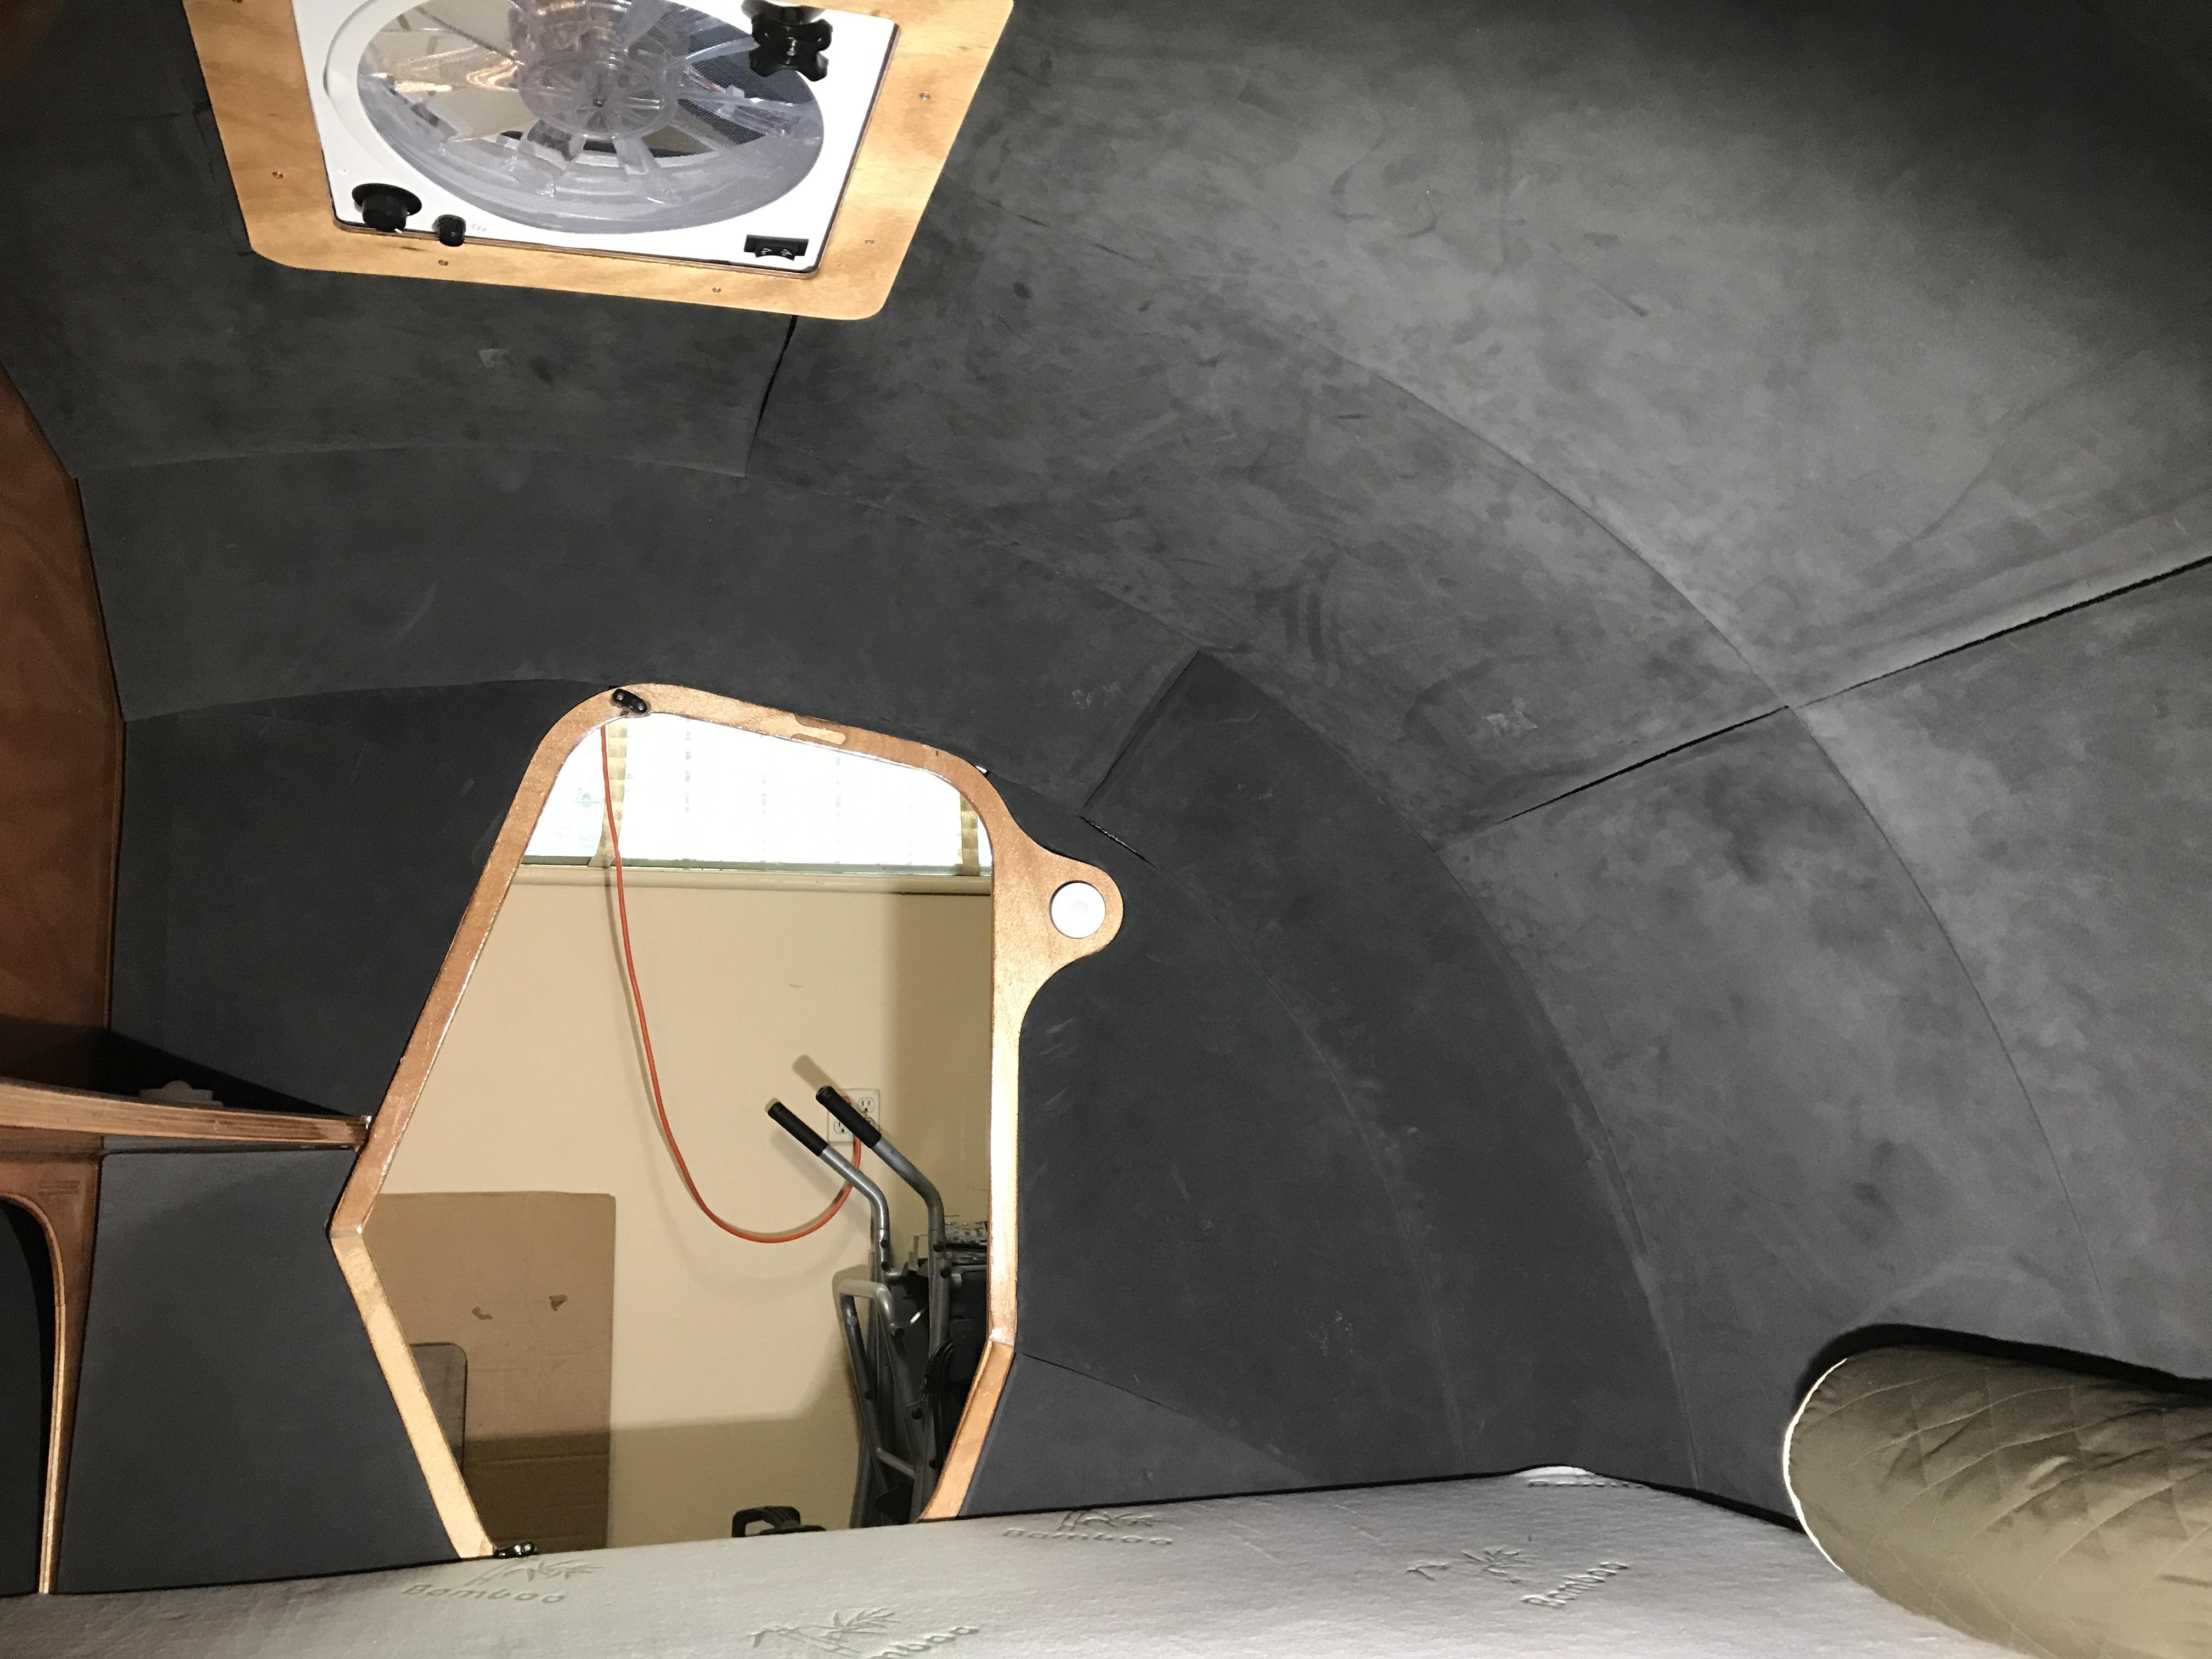
ParticipantOh, one more note about the liner. The Hymnal describes rounding the edges. No matter what I tried I just didn’t get a satisfactory look. So I opted to just leave the edges alone. I think it looks just fine. I did round and trim near the edges especially at locations of the filets. But this is done on the back side.
ParticipantLiner install is NOW complete. Living is California now has at times been a pain when it comes to purchasing certain Chemical Based products. I accidentally purchased the Water-Based Contact Cement. (DO NOT USE!)
This Product from DAP is not in any way usable for this application. The foam liner just soaks it in and will NOT work. (DO NOT USE!)
So I took it back and got the Good-Old-Stinky Real Contact Cement. This stuff stinks to high heaven. So wear an appropriate breathing filter.
Be very careful on which piece goes to which location. I wish that the pieces were labeled to make this easier. So, it is up to you to dry fit and label which surface is out and which orientation is correct. I labeled the back of the panel with a sharpie indicating the panel ID and its orientation. The labeling also guarantees that you don’t accidentally apply contact cement to the WRONG side. I also had a lot of overlap a few panels and a gap of about an inch at the back side of the vent. I save the trimmed pieces and filled i the gap.
One last note is to be very careful when placing the liner to the contact cement, once it make contact…….well, it makes FULL contact. You can not remove or slide into place. Photos show my labeling scheme and the finished result.
 Participant
I can not believe the timing on this. My wife and I were working on the exact same thing. I was pulling up some photos for her to see possible options. Her thought was to mount somehow the netting on the outside. I thought it better on the inside. Your photos sealed the deal. Inside wins. we are going to try using Velcro instead of the snaps.
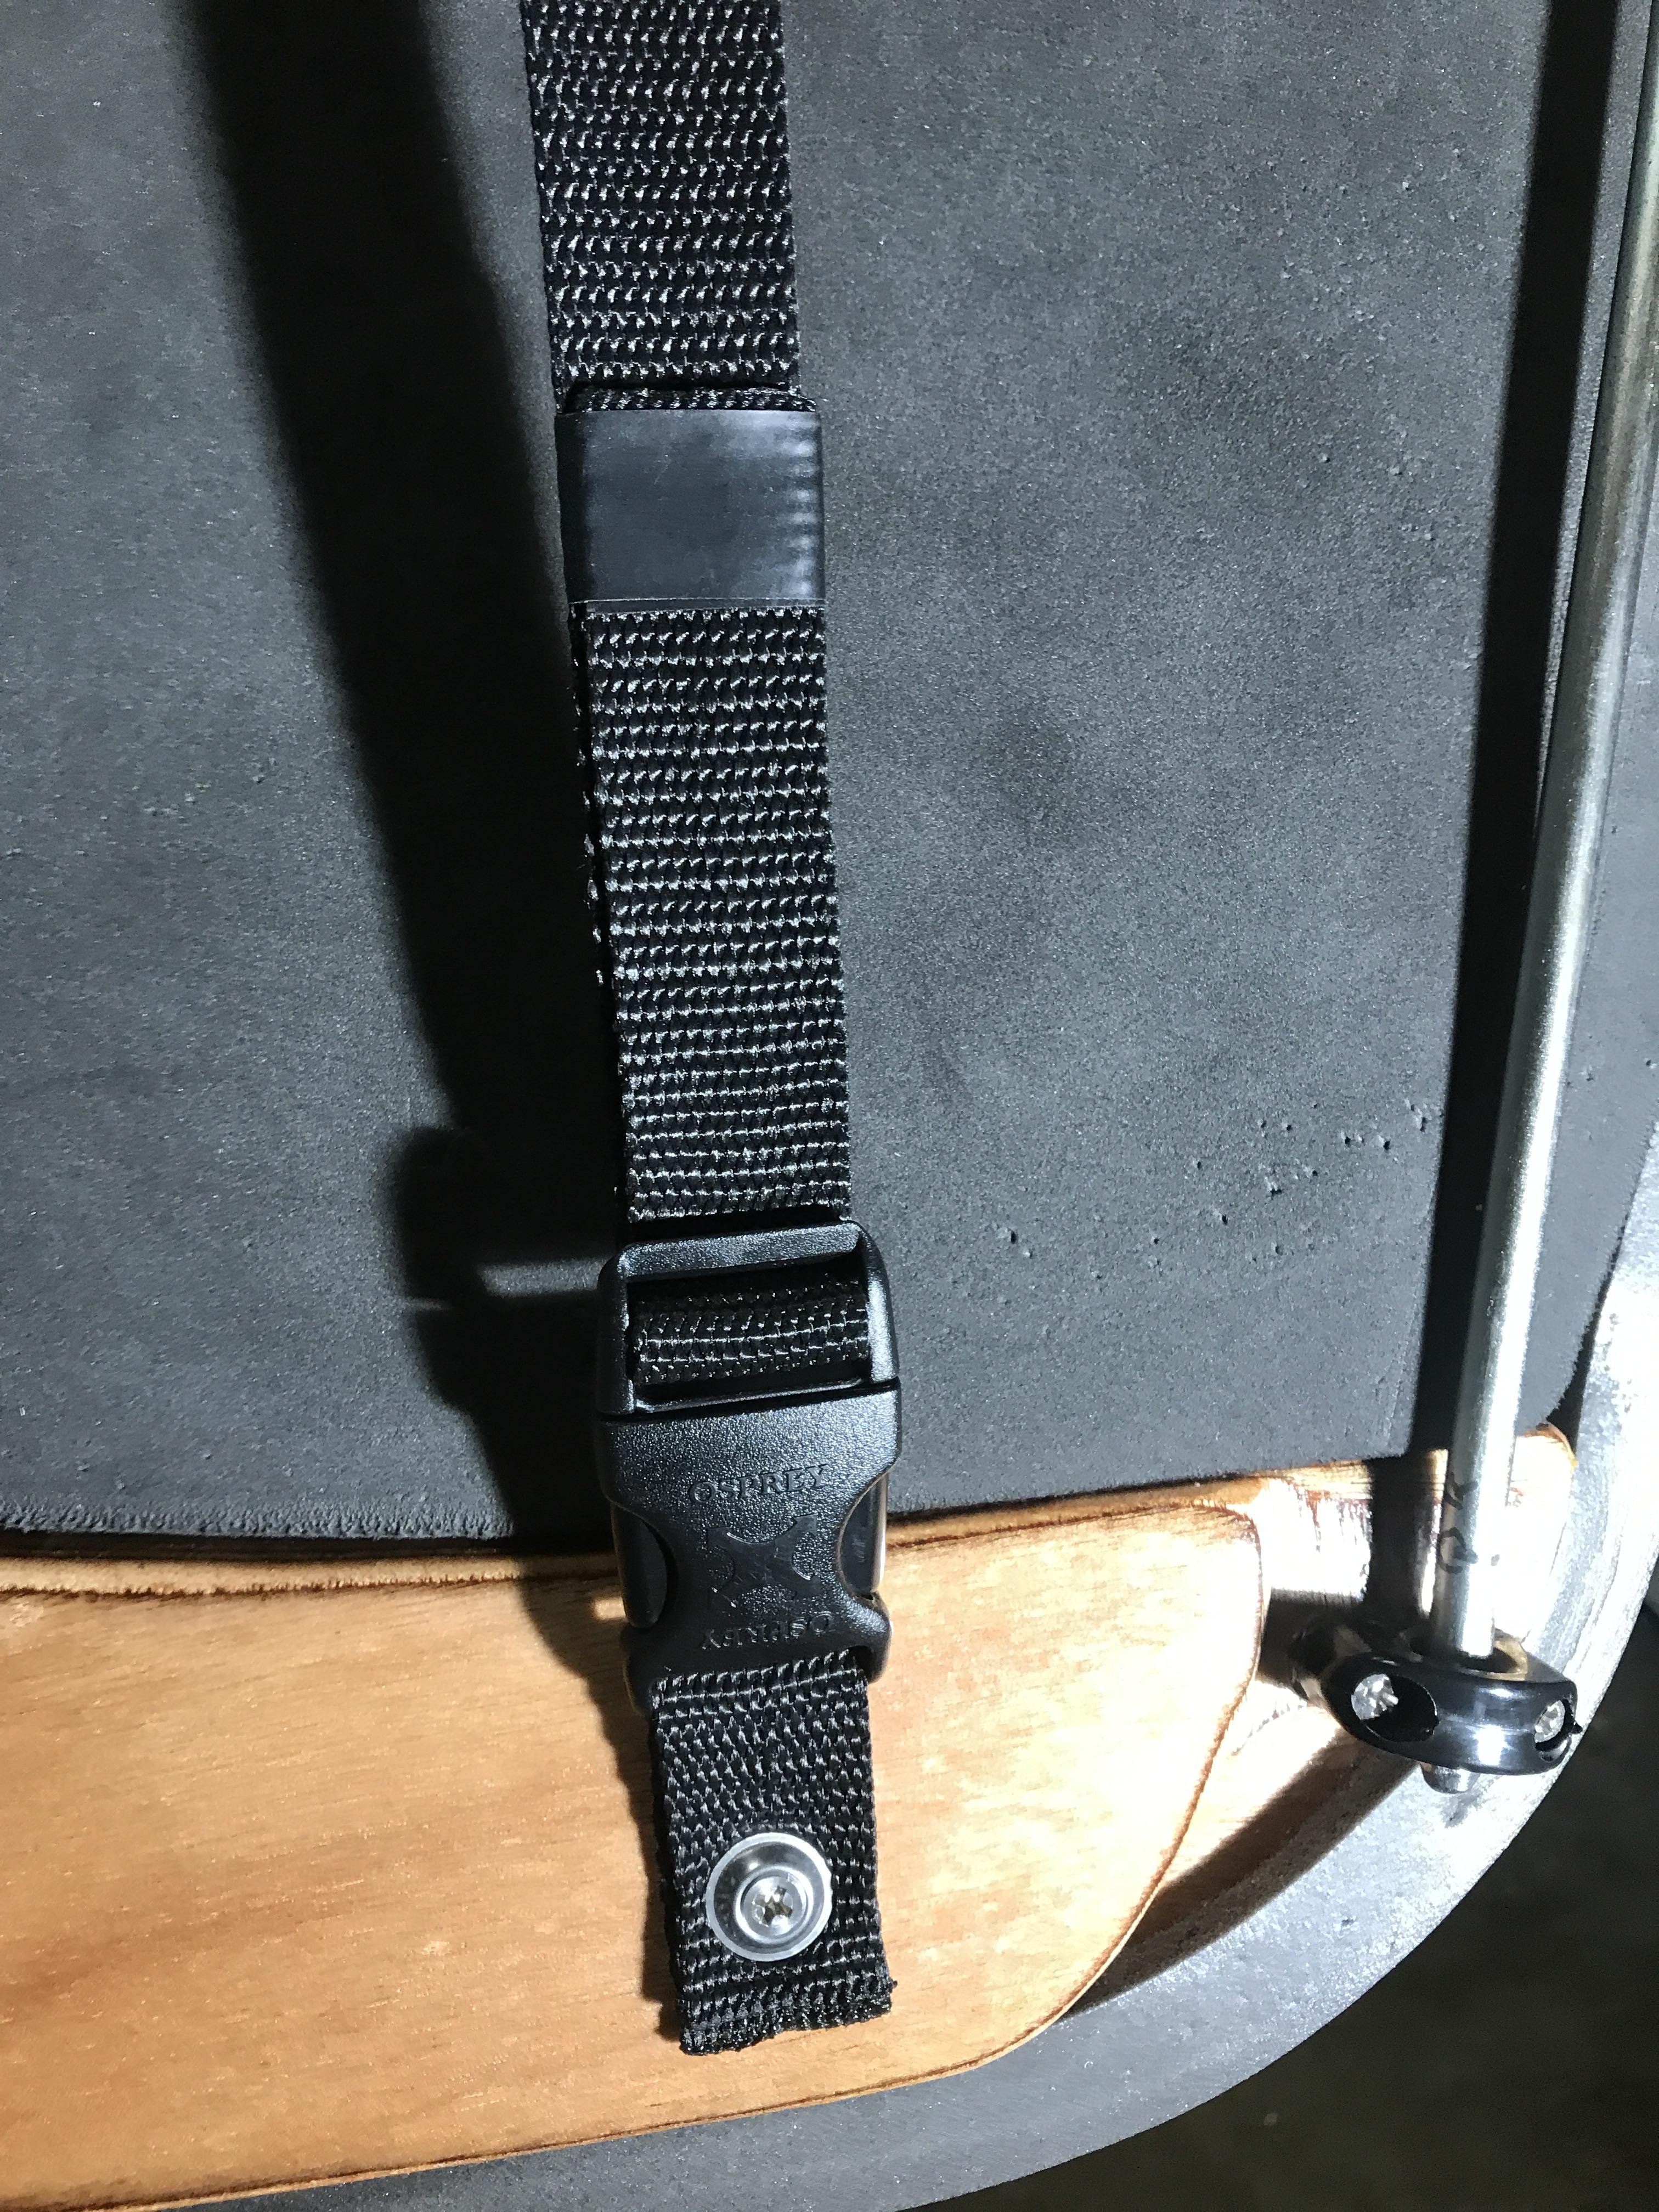
Participantso it wasn’t just my being off or careless. The alignment is JUST WRONG (all CAPS for emphasis) The removal of the routed area on the stiffener causes alignment to be off. Oh, don’t pre-cut the rod length to the directions!!!!!!!! Dry fit and cut as needed. I cut mine about an inch longer than directed and only had to remove a little to fit.
I only had one of the doors really bow out. I just couldn’t figure out how to accurately put enough tension on the strap. So, below is my solution. I added a backpack strap buckle to the provided strap. Now if conditions change over time, I can fix with a tug.
 Participant
One more Pod Kit ready for the road.
Frank
Sacramento, CA

Used Floor Mat Product for deck for added insulation, padding and grip.
 June 21, 2017 at 6:17 pm in reply to: First CLC Teardrop class is under way, live on our Shopcam #947Participant
I have been following off and on on the live feed and your posts. Could you focus a video on the door issues that many of us are having. It would be interesting to see an up close view of the alignment and relax shape fixes. One out of the five should need some fine tuning!!!!!!
Are there any other issues that have come up in the class that can be posted in a bulletin or a video post.
ParticipantI also ran into both length and height issues with the door actuation rods. I am glad that I dry fitted the doors first before cutting the rods. If I had cut according to the manual, then I would have had two pair of short rods. The height level for the guide/fairlead is off by a bunch. I had to use a combination of adding washers and insetting the guide/fairlead on the door seal. There needs to be a fix for the height mismatch. (the alignment holes were perfect) Is a Tech Bulletin out for this?
I also had some relaxing of the door shape on one door. this added to the mismatch issue requiring me to push in on the door handle and the lower corner at the same time to make the door flush. Any thoughts besides the door strap technique?
ParticipantGap issue:
I am about to install the headliner. I just dry fitted the headliner and have discovered why some folks are having gap issues. The #2 forward and back panels need to be oriented correctly they may look uniform but there is a subtle curve and fit that can only be seen if you first dry fit them.
I labeled them so that is can orient them correctly once I am ready to use contact cement for the install. I am going to use standard Contact Cement for a permanent install.
The#1 Forward and Middle panels also have slight curve differences, that require them to be mounted in the one out of four possible ways.
There is a significant overlap on the all of the #1 and #2 panels. I guess carful trimming is in order.
I am going to just soften the edges with 220 sand paper. 1/2 inch round seems a little too much for me. I would rather make for a softer edge than to possibly eat up a panel with a router……
-
AuthorPosts