Forum Replies Created
-
AuthorPosts
-
RowingBoatmanSteve
ParticipantThanks Sandman – the teardrop build was a great excuse to learn something new! I used marine grade components throughout to keep future maintenance to a minimum – I guess only time will tell if the (small) additional cost pays off…
Participant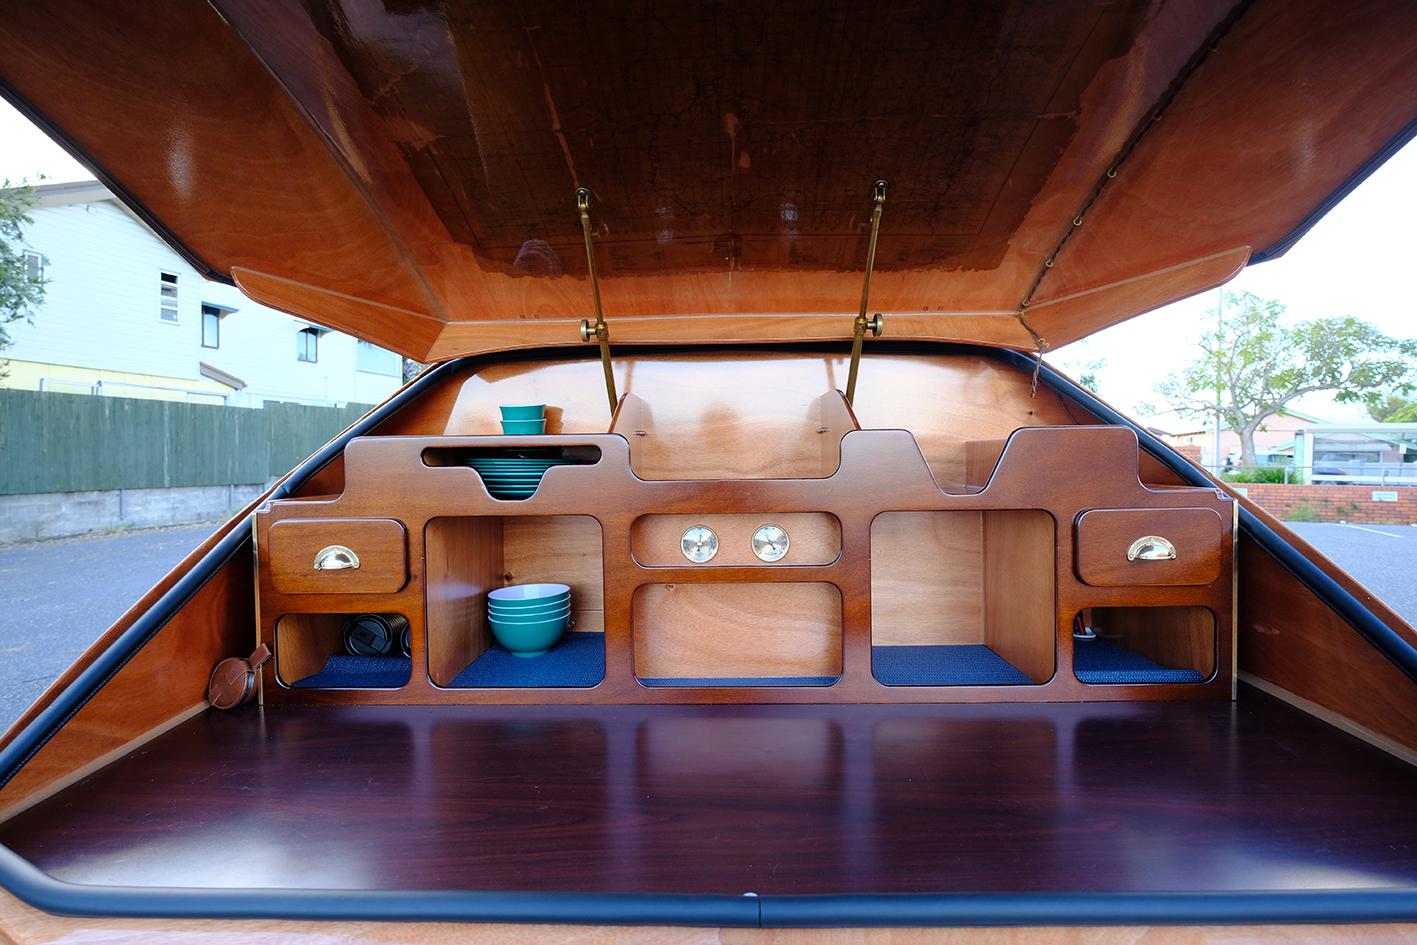
The completed galley space with no electrics visible, apart from a cloth covered wire running up to power a LED strip light in the hatch lid overhead.
Participant
This photo shows the galley module being fitted over the completed electrics, hiding it from view. Fuses are accessed by removing the drawer (upper right side), and the battery isolation switch is easily operated through the lower right side opening. A 25 Ah LiFePO4 battery is situated in the ICC below the camper shell.
Participant
Adding labels will help to make sense of the wiring design for any future upgrades…
Participant
I also added LED strip lighting to some of the openings in the galley module (eg on left of photo)…
Participant So I chose to conceal the wiring, fuses and busbars behind the galley module, while still providing access to the isolating switch and fuses…Participant
The bonus to adding an extra lateral stiffener to the galley hatch is that it conceals any lighting you might choose to fit later. This photo is taken from inside the galley looking aft.
Participant
The stiffener was epoxied to the lid at the “green” stage of the cloth /epoxy cure. A fillet was added to either side of the extra stiffener…
Participant
I chose to add a layer of fiberglass to the inside of the galley hatch also – this helps with adding stiffness to the hatch, and was done prior to bonding the additional stiffener/grab handle…
Participant
Care was taken to ensure the new addition wouldn’t clash with the galley bench top or its planned contents (stove etc)…
Participant
I matched the profile of the stiffener while the camper was still in the building form…
Participant
The added bonus is that it acts as a grab handle when closing the lid of the galley. I gave a nod to the shape of the teardrop when cutting the holes in the ply…
Participant
A final photo of the inside of the space, showing the two pairs of hinges and the cut front panel (that is hidden by the small shelf on the galley side).
Participant
And here is the pass-through in action- a hot breakfast served in style…
Participant
The hinged section simply hangs vertically as the lid is lifted. Friction hinges are used at the rear joint to keep the lid open as required…
-
AuthorPosts