Forum Replies Created
-
AuthorPosts
-
rovineye
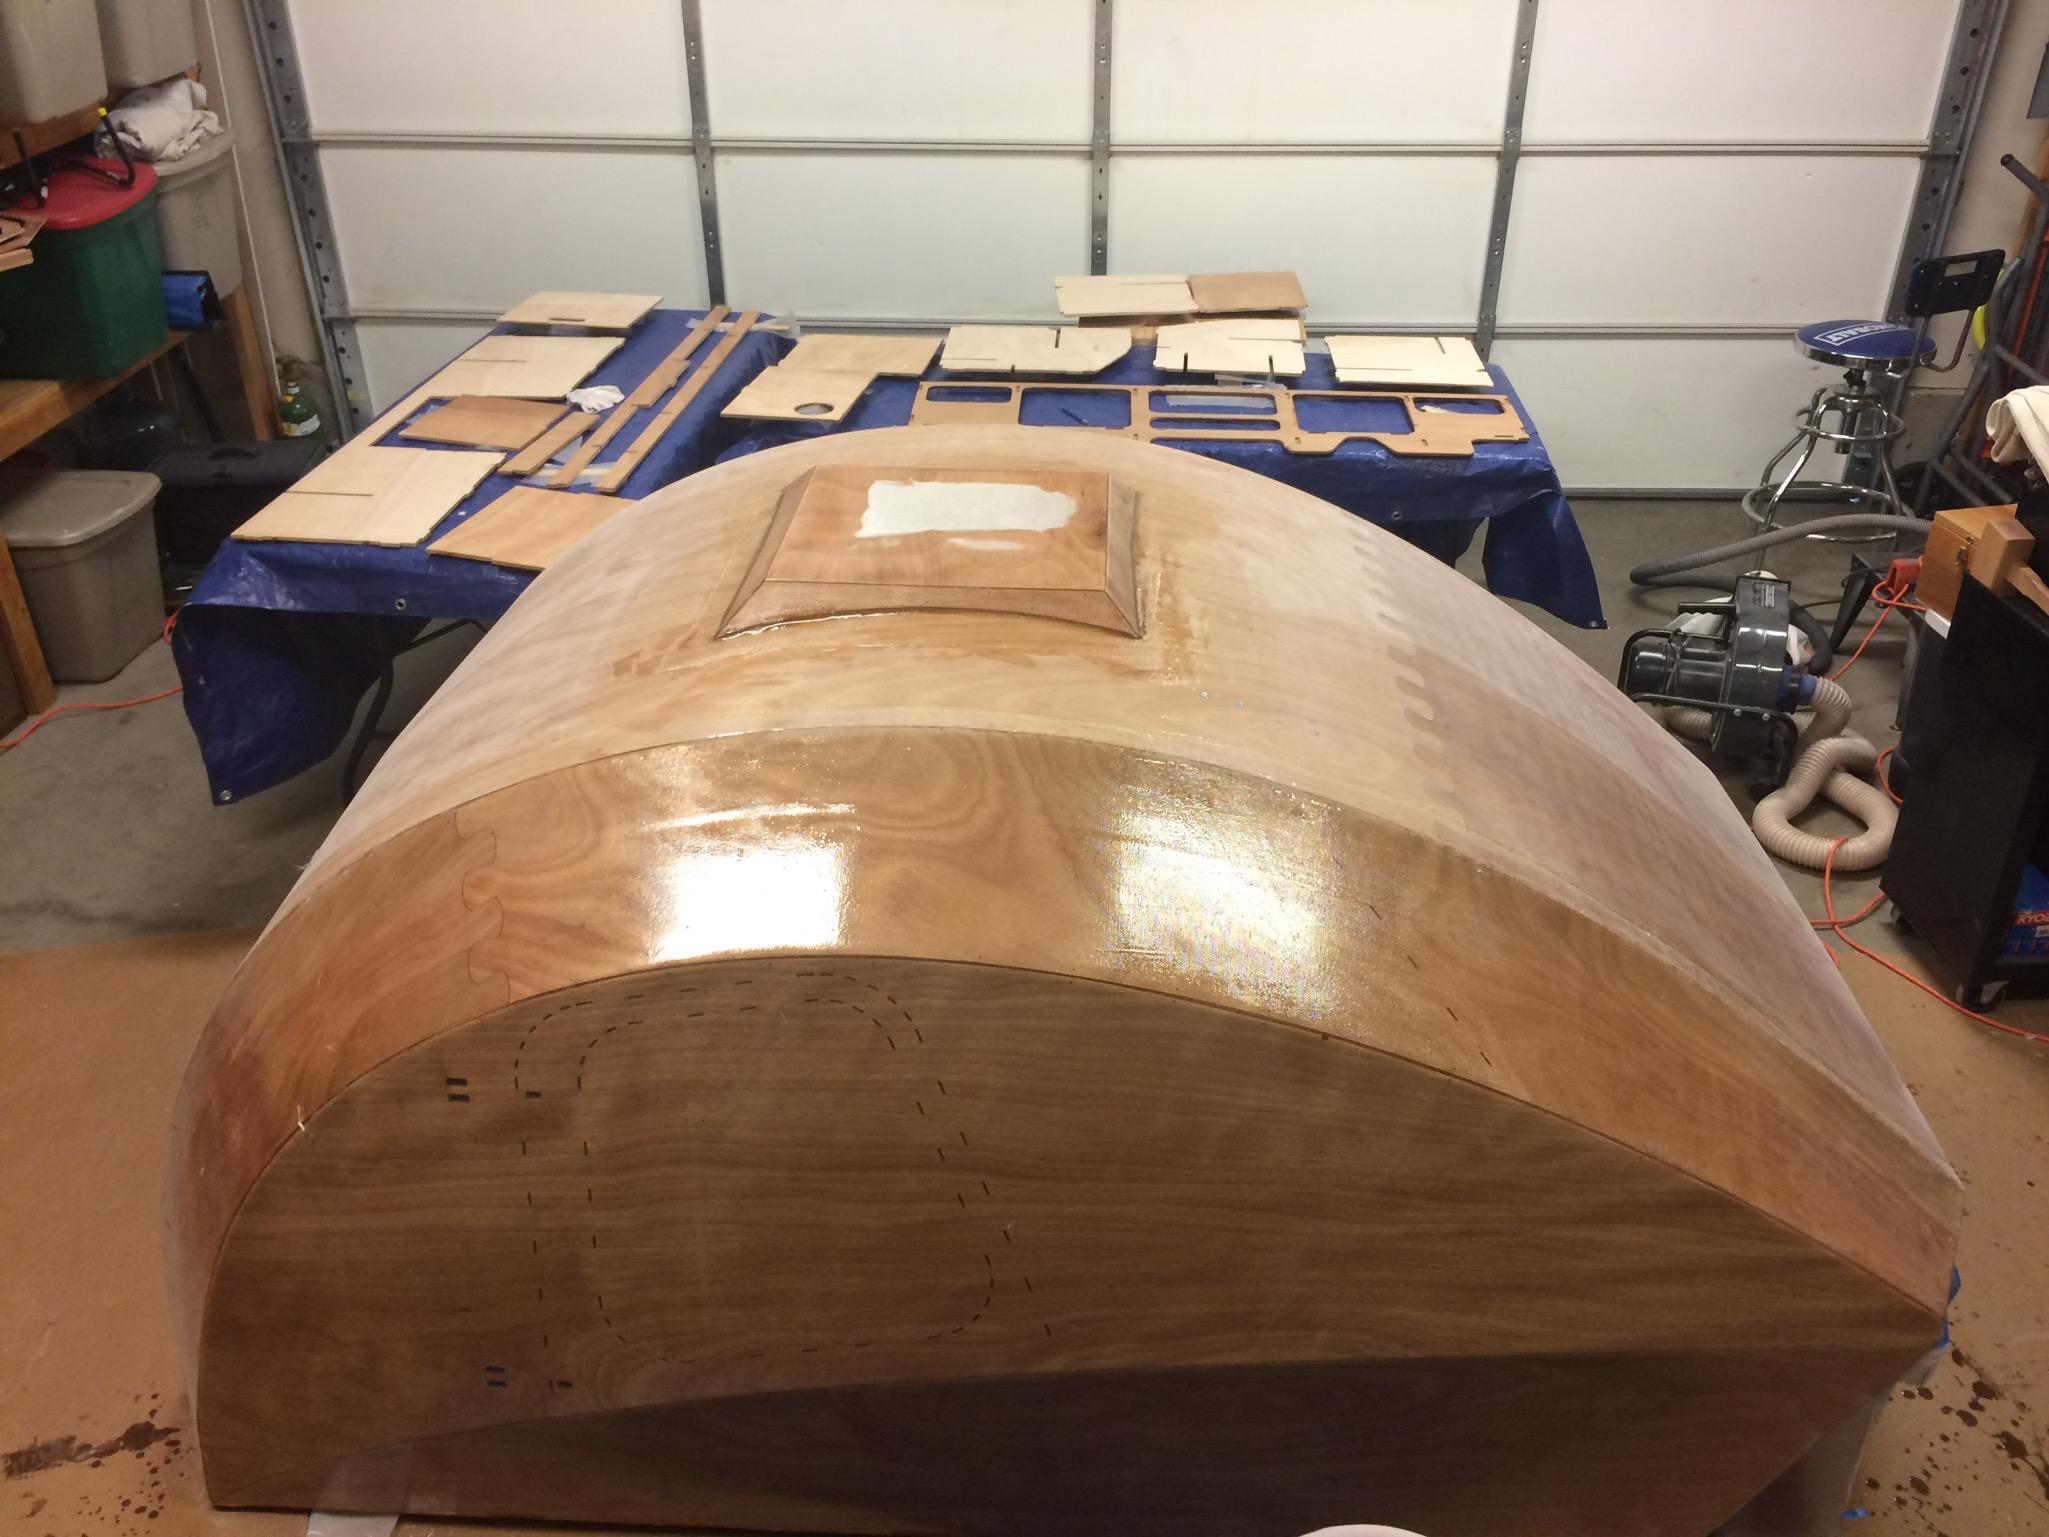
ParticipantLike several others, I mounted my vent hatch bezel early. I had sanded the top and one side already. You can see the near side isn’t sanded yet.
I cut the hole small, but it still barely fit without falling in. Yesterday I re-drilled sealed stitch holes and wired them to hold in place, added a bead of thickened epoxy except at wires, and tightened them from inside (last time crawling I hope!). This morning I sanded some rough epoxy drops, eased the edges of the bezel, fine sanded, filleted, and fiberglassed. Piece of cake compared to fiberglassing top of shell. Used spreader, no darts needed.
Behind the TD you can see galley pieces always ready to use up extra epoxy. I sanded a few pieces after epoxy, and I only plan on one coat of epoxy and two of varnish. It isn’t exposed much and of all the TD parts this is the easiest to take off and refurbish if need be.
Pinking shears, pinking shears, my kingdom for pinking shears. I should have started with a sacrificial pair but kept forgetting to pick one up. I think it would have helped with stray fiberglass strands. Next up, more sanding on this big bass drum.
 Participant
Bill,
Looks like a simple solution. I may give this a go.
BTW, what style gooseneck lamps are those? I am looking at some now and like that style. Looks good with that mounting ring!
Participantmpilone,
Quite right about trying to cut the wetted tape. Challenging but I got it done. I cut the tape to length, lay it over plastic on foldable table, wet what I can then double back the tape over what is already wet, zigzagging until it is all done the rolling it up. End result is the same.
ParticipantMy first puzzle joint looks about like that. I am working on hatch supports now and my skill, while not mad skills, are definitely better. Like Stevie says, your subsequent work will improve vastly! I hate the look of that joint every time I look at it but I know it will be covered by headliner so I try to ignore it.
Eric had a suggestions about rolling up wetted tape before laying into place. I responded to it today so it should come up in a recent response list. I strongly advise that method! It is not as messy as it would seem.
-
This reply was modified 6 years, 10 months ago by
rovineye.
ParticipantI passed on this technique as it seemed too messy. I finally gave it a try when joining panel 2 to 3.This is the way to go. I am using it with all glass tape. Wish I would have done it from the start. I use a brush vice spreader before rolling up and and only need a few dabs on the edges once rolled in place.
April 14, 2017 at 6:49 pm in reply to: Anyone own one in the Oregon, Washington, Northern California areas? #719ParticipantI’m a few hours north, but my camper is still in boxes waiting for some warmer weather (soon, soon). I tested the camper out when it was visiting in Port Townsend. I am 6’2″ heavy set, and had no issues at all. Could not make my head and toes touch at the same time. And getting in and out is very very easy. But it is a big investment and hopefully you can find one to test out. before mine is completed in early July.
-
This reply was modified 6 years, 10 months ago by
-
AuthorPosts