Forum Replies Created
-
AuthorPosts
-
cpieper
ParticipantVery Nice!
ParticipantWhere are you in Michigan? UP or Lower? I will be relocating my almost done teardrop from near Green Bay, WI to near Minocqua, WI likely in June/July. I’m moving so I had to put my build on hold… All I have left is varnish and final hardware installation.
ParticipantI happen to work at a company that makes paper towels… For years, we had paper towel rolls in our rest rooms (now we have the fancy no touch towel dispensers…). In the old days, a very effective towel rack consisted of a hole on one end and a U on the other end. Both of these could be made with a piece of plywood. They used a 1″ dowel for the rod. These worked quite well. That’s what I plan to do.
ParticipantThe height of the galley flat is 42″ with 12″ wheels on the Trailex trailer. The height would be 40″ with the 8″ wheels. I’m tall, so the larger wheels work best for me.
ParticipantI recall having to shave mine a bit. I think they still look nice — I wouldn’t be concerned about shaving a bit off.
ParticipantI like the door latch design as is (although I haven’t installed mine yet). I do like that this latch matches the hinge style, I don’t like that it’s bulky… But the action is real nice and it pulls it down nice and tight. I figure if someone really wants to break in, I’d rather have them cut my latch than put a hole in the shell… 😉
ParticipantOK, you guys are going to think I’m nuts, but the following shows what I did for my latch setup… (I hope I can figure out how to post pictures…). First, I should explain that when I cut my back hatch out, for some reason it seemed to spring a bit and the fit at the back wasn’t as good as I wanted it to be… The center back of the lid did not sit flat on the lower back end of the galley. To remedy this, I added a strongback to the lid to pull the warp out of it… I also made a toggle clamp latch to help pull the lid shut tight.
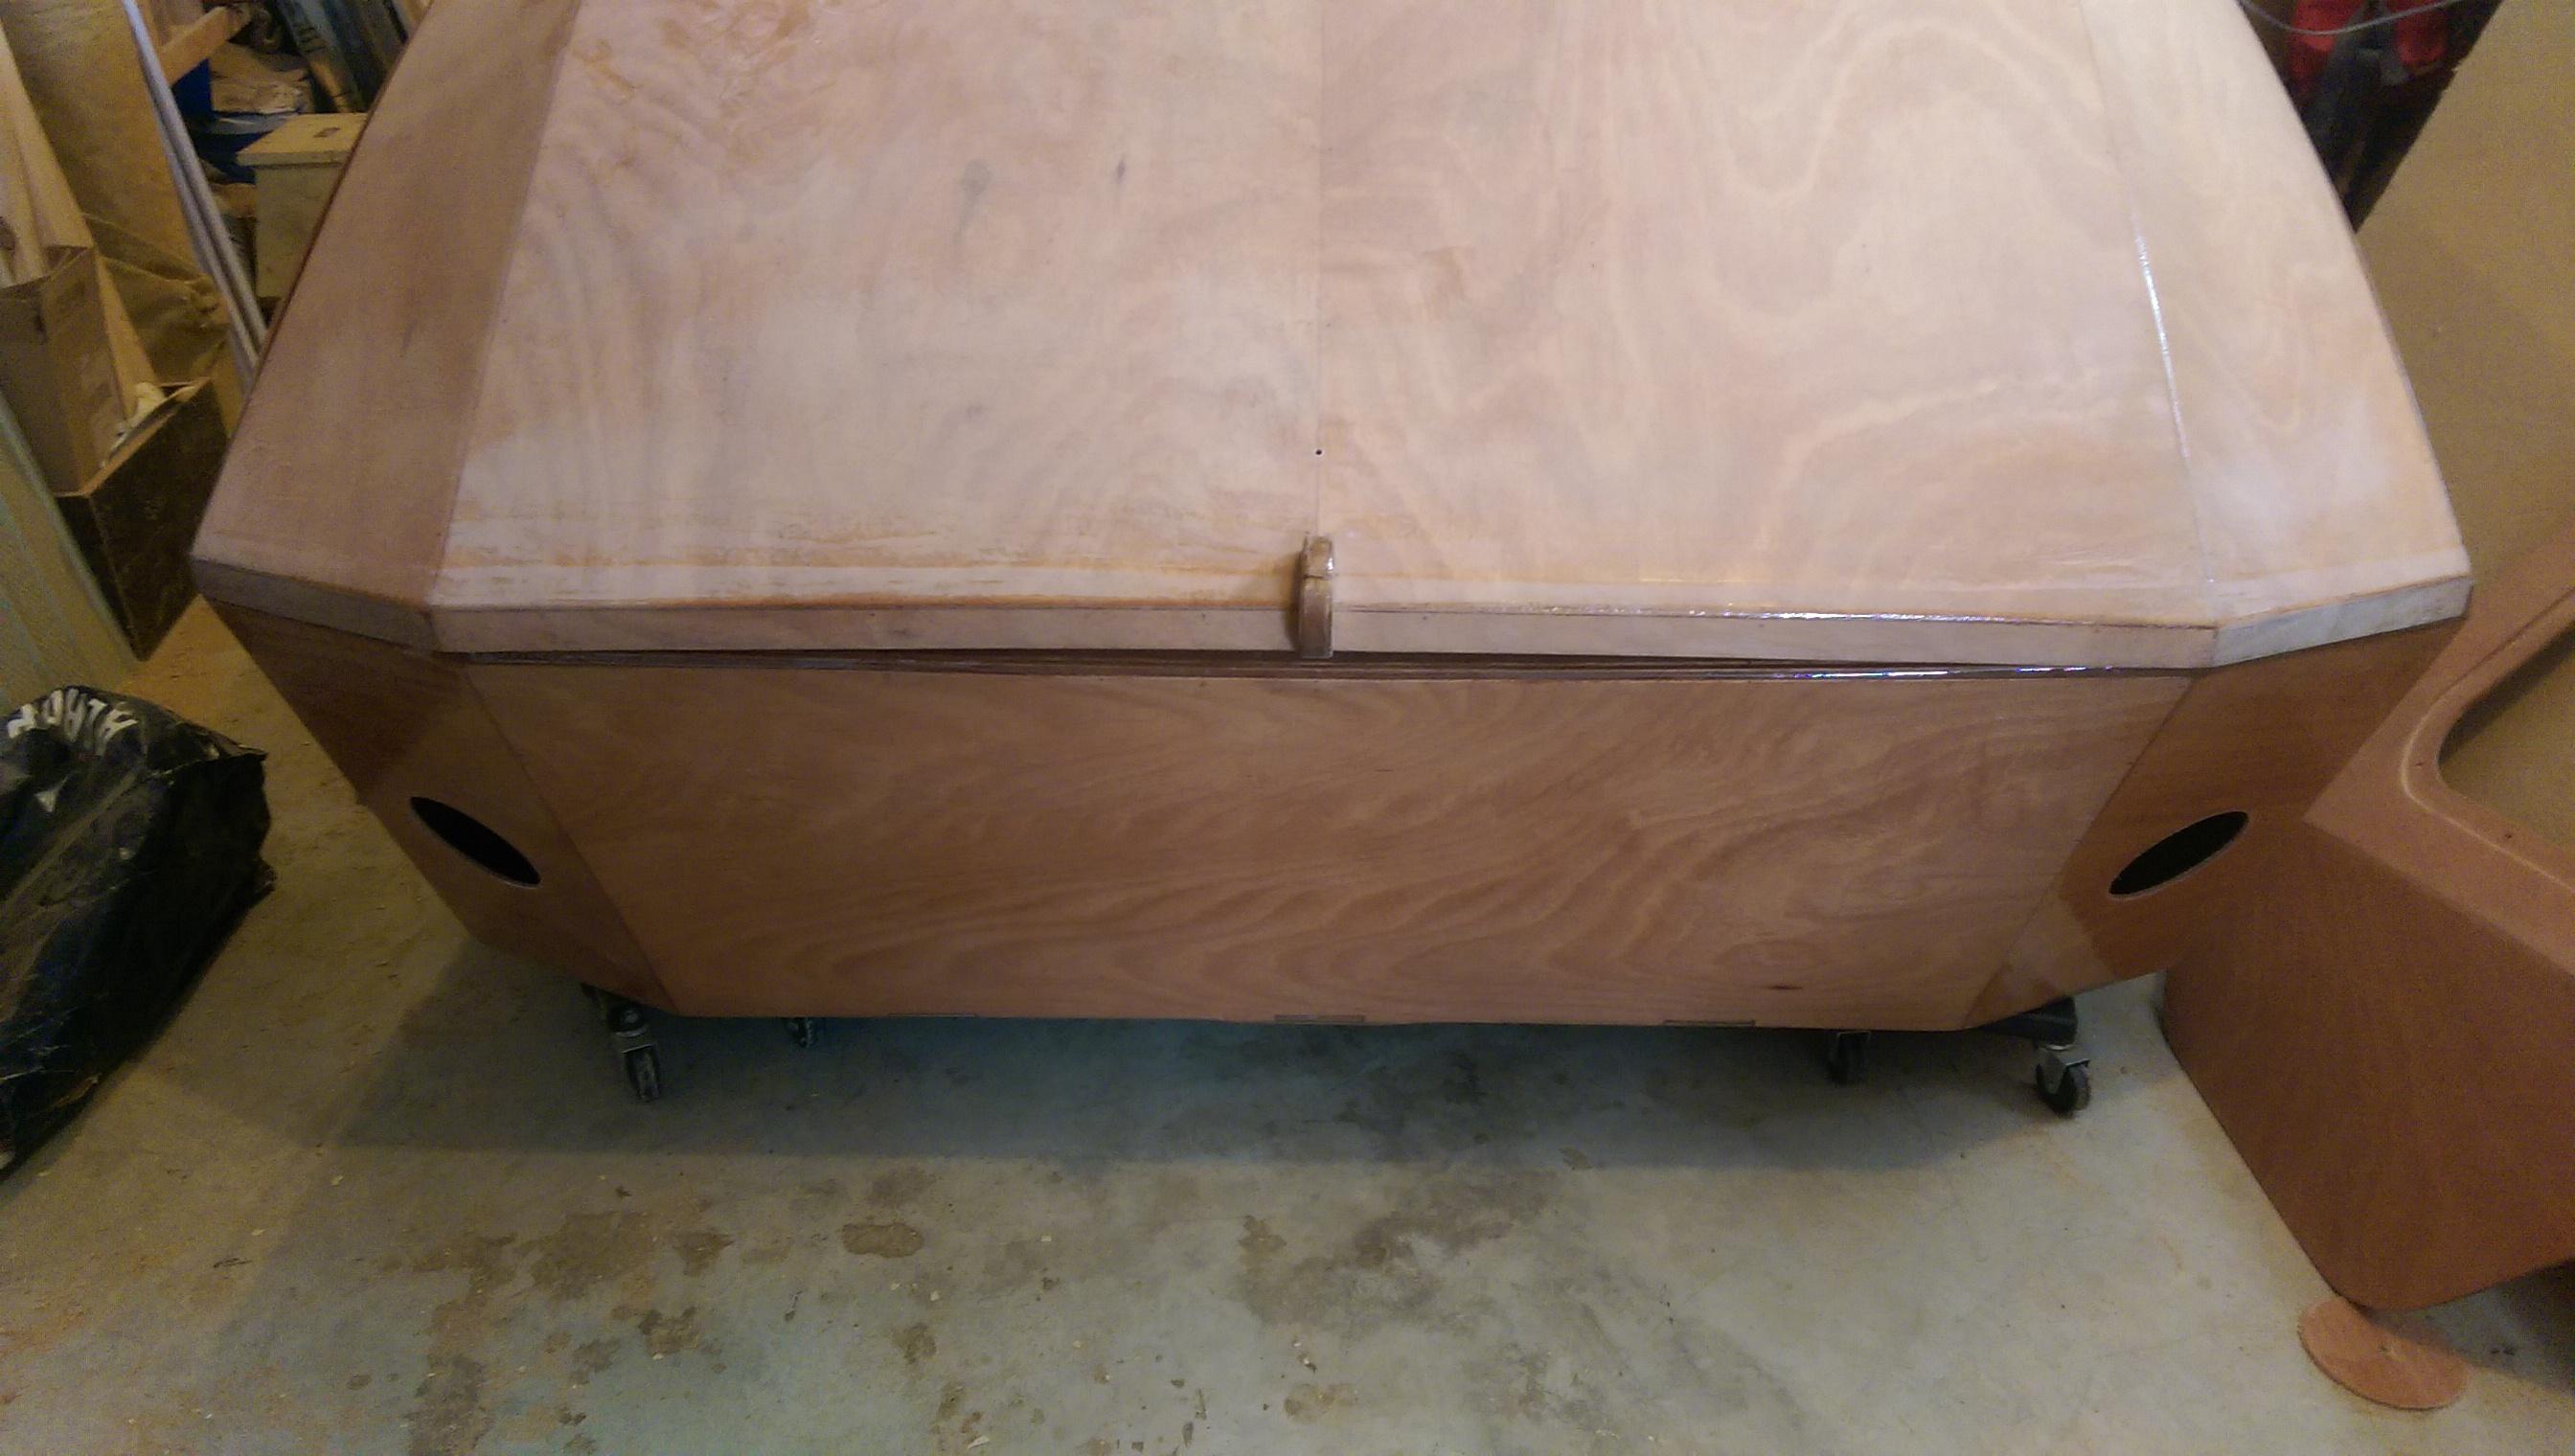
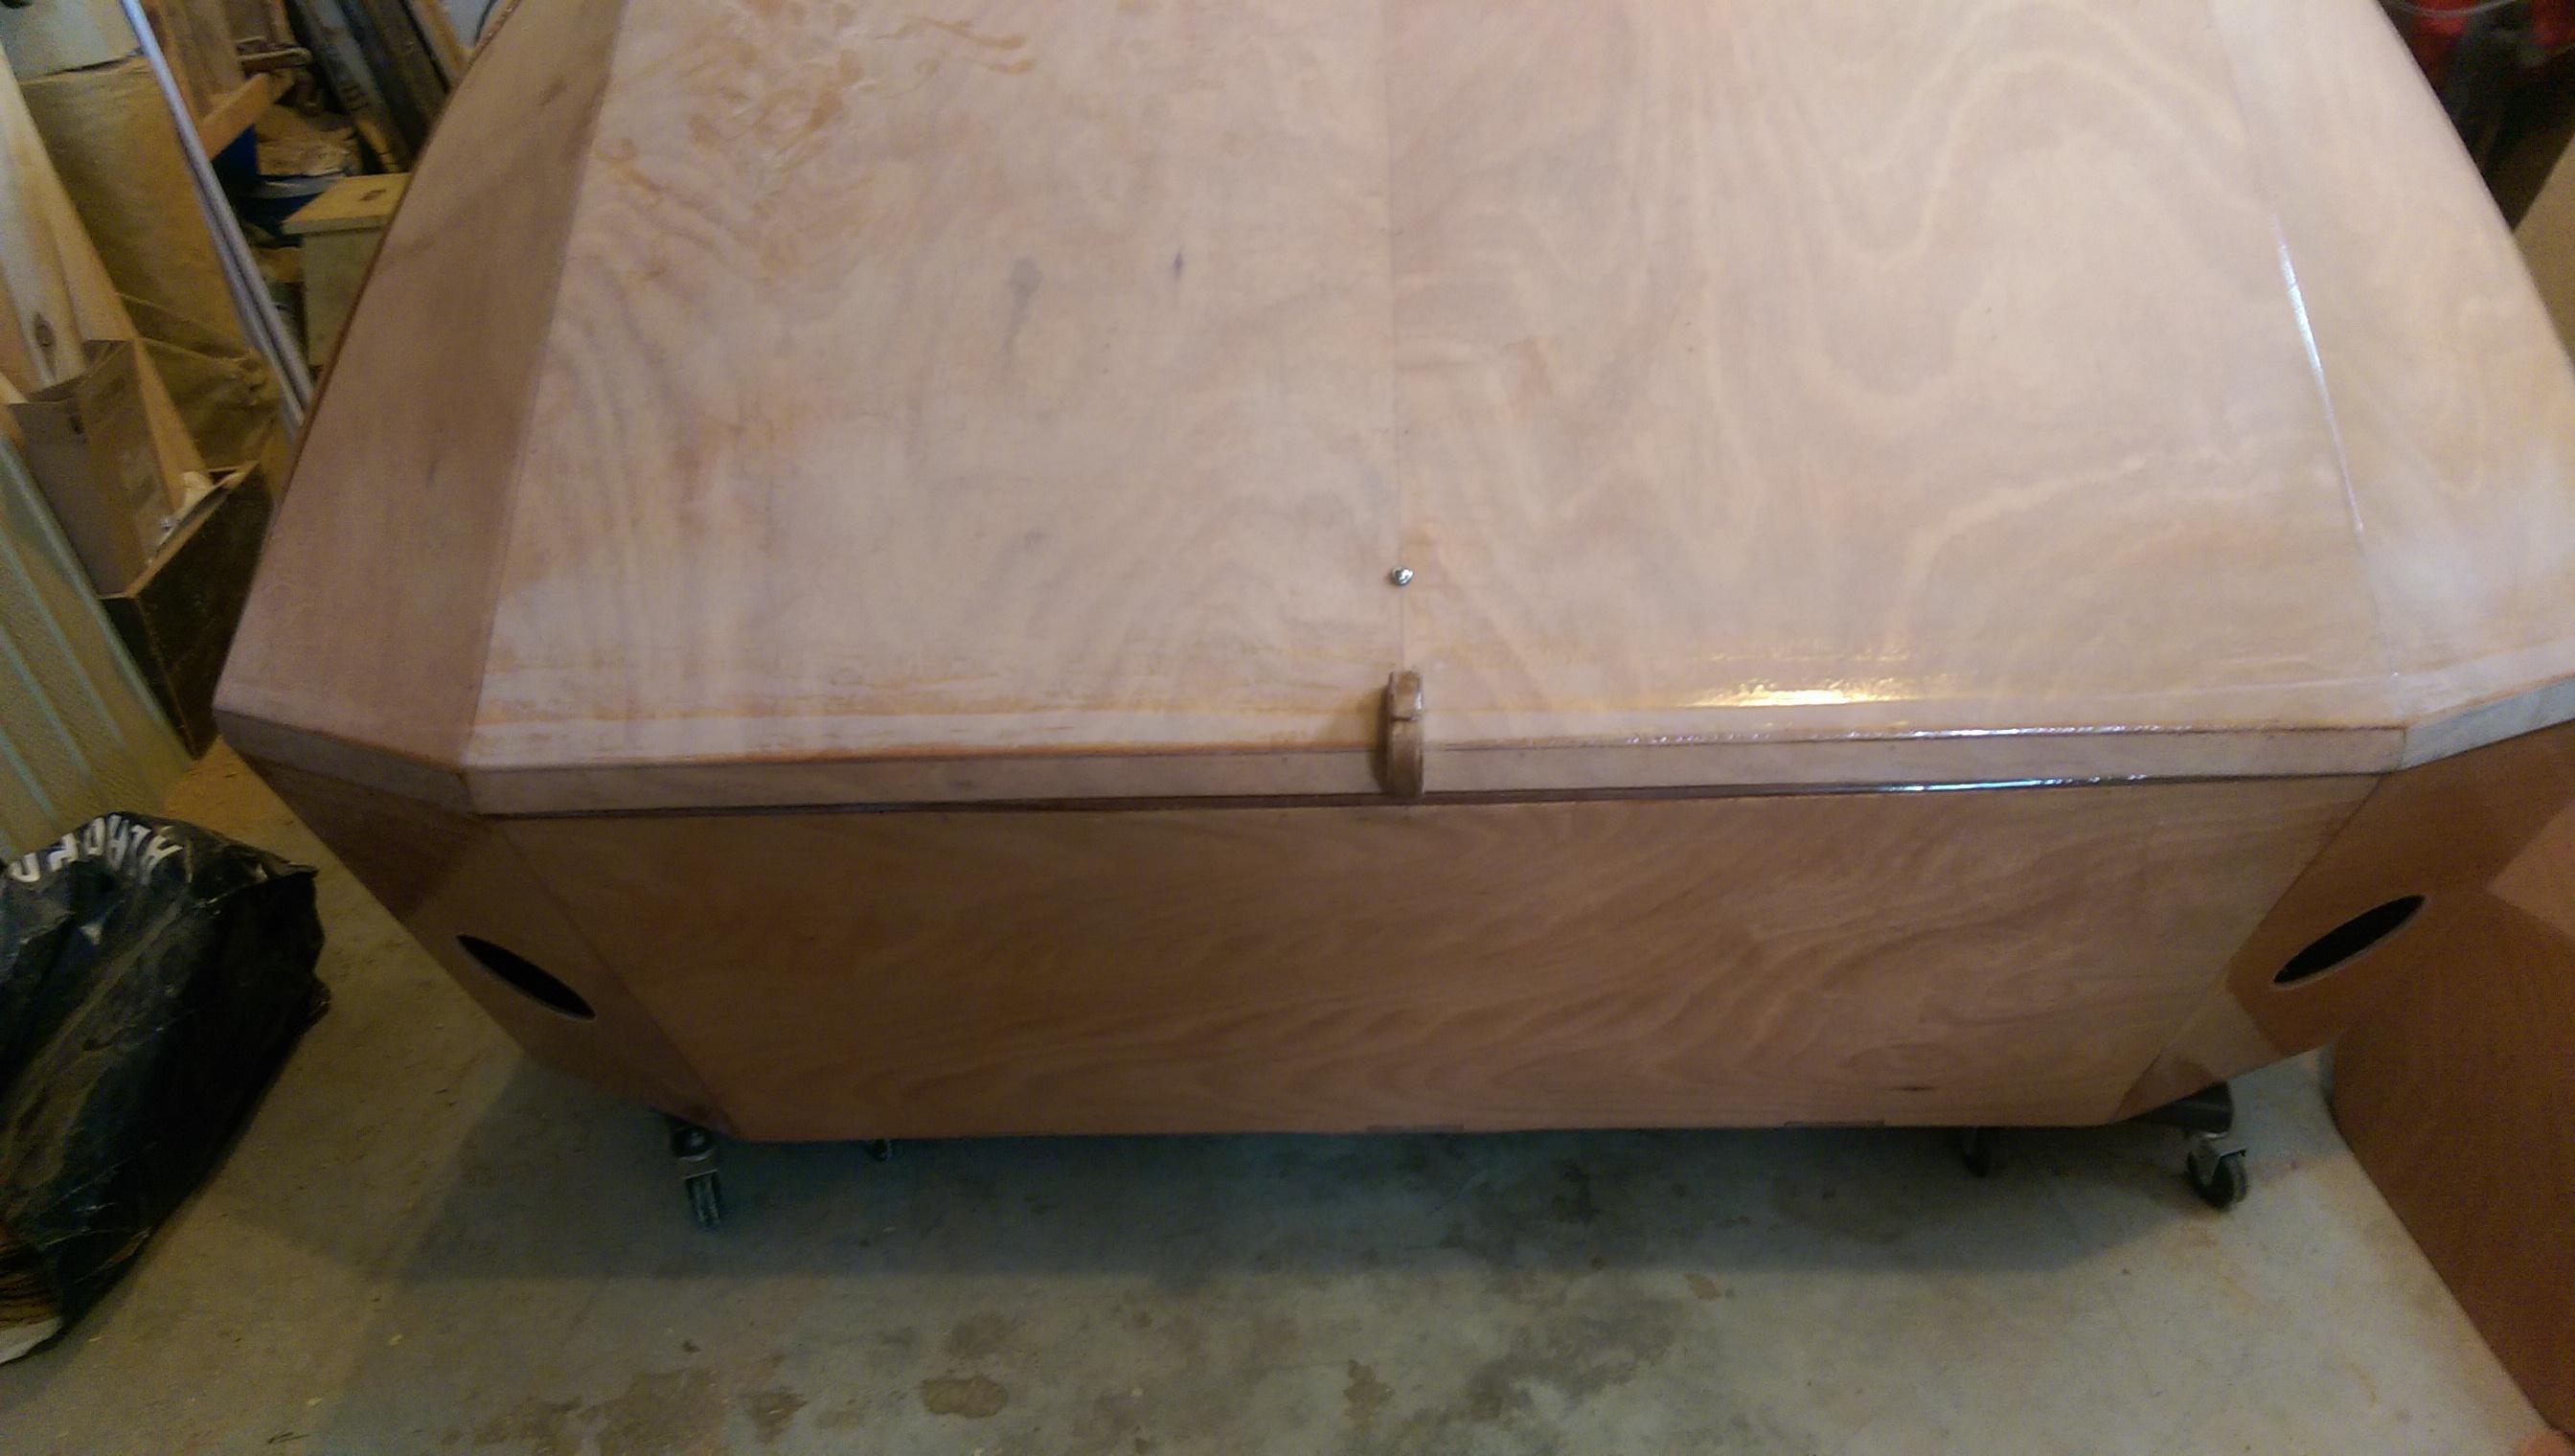

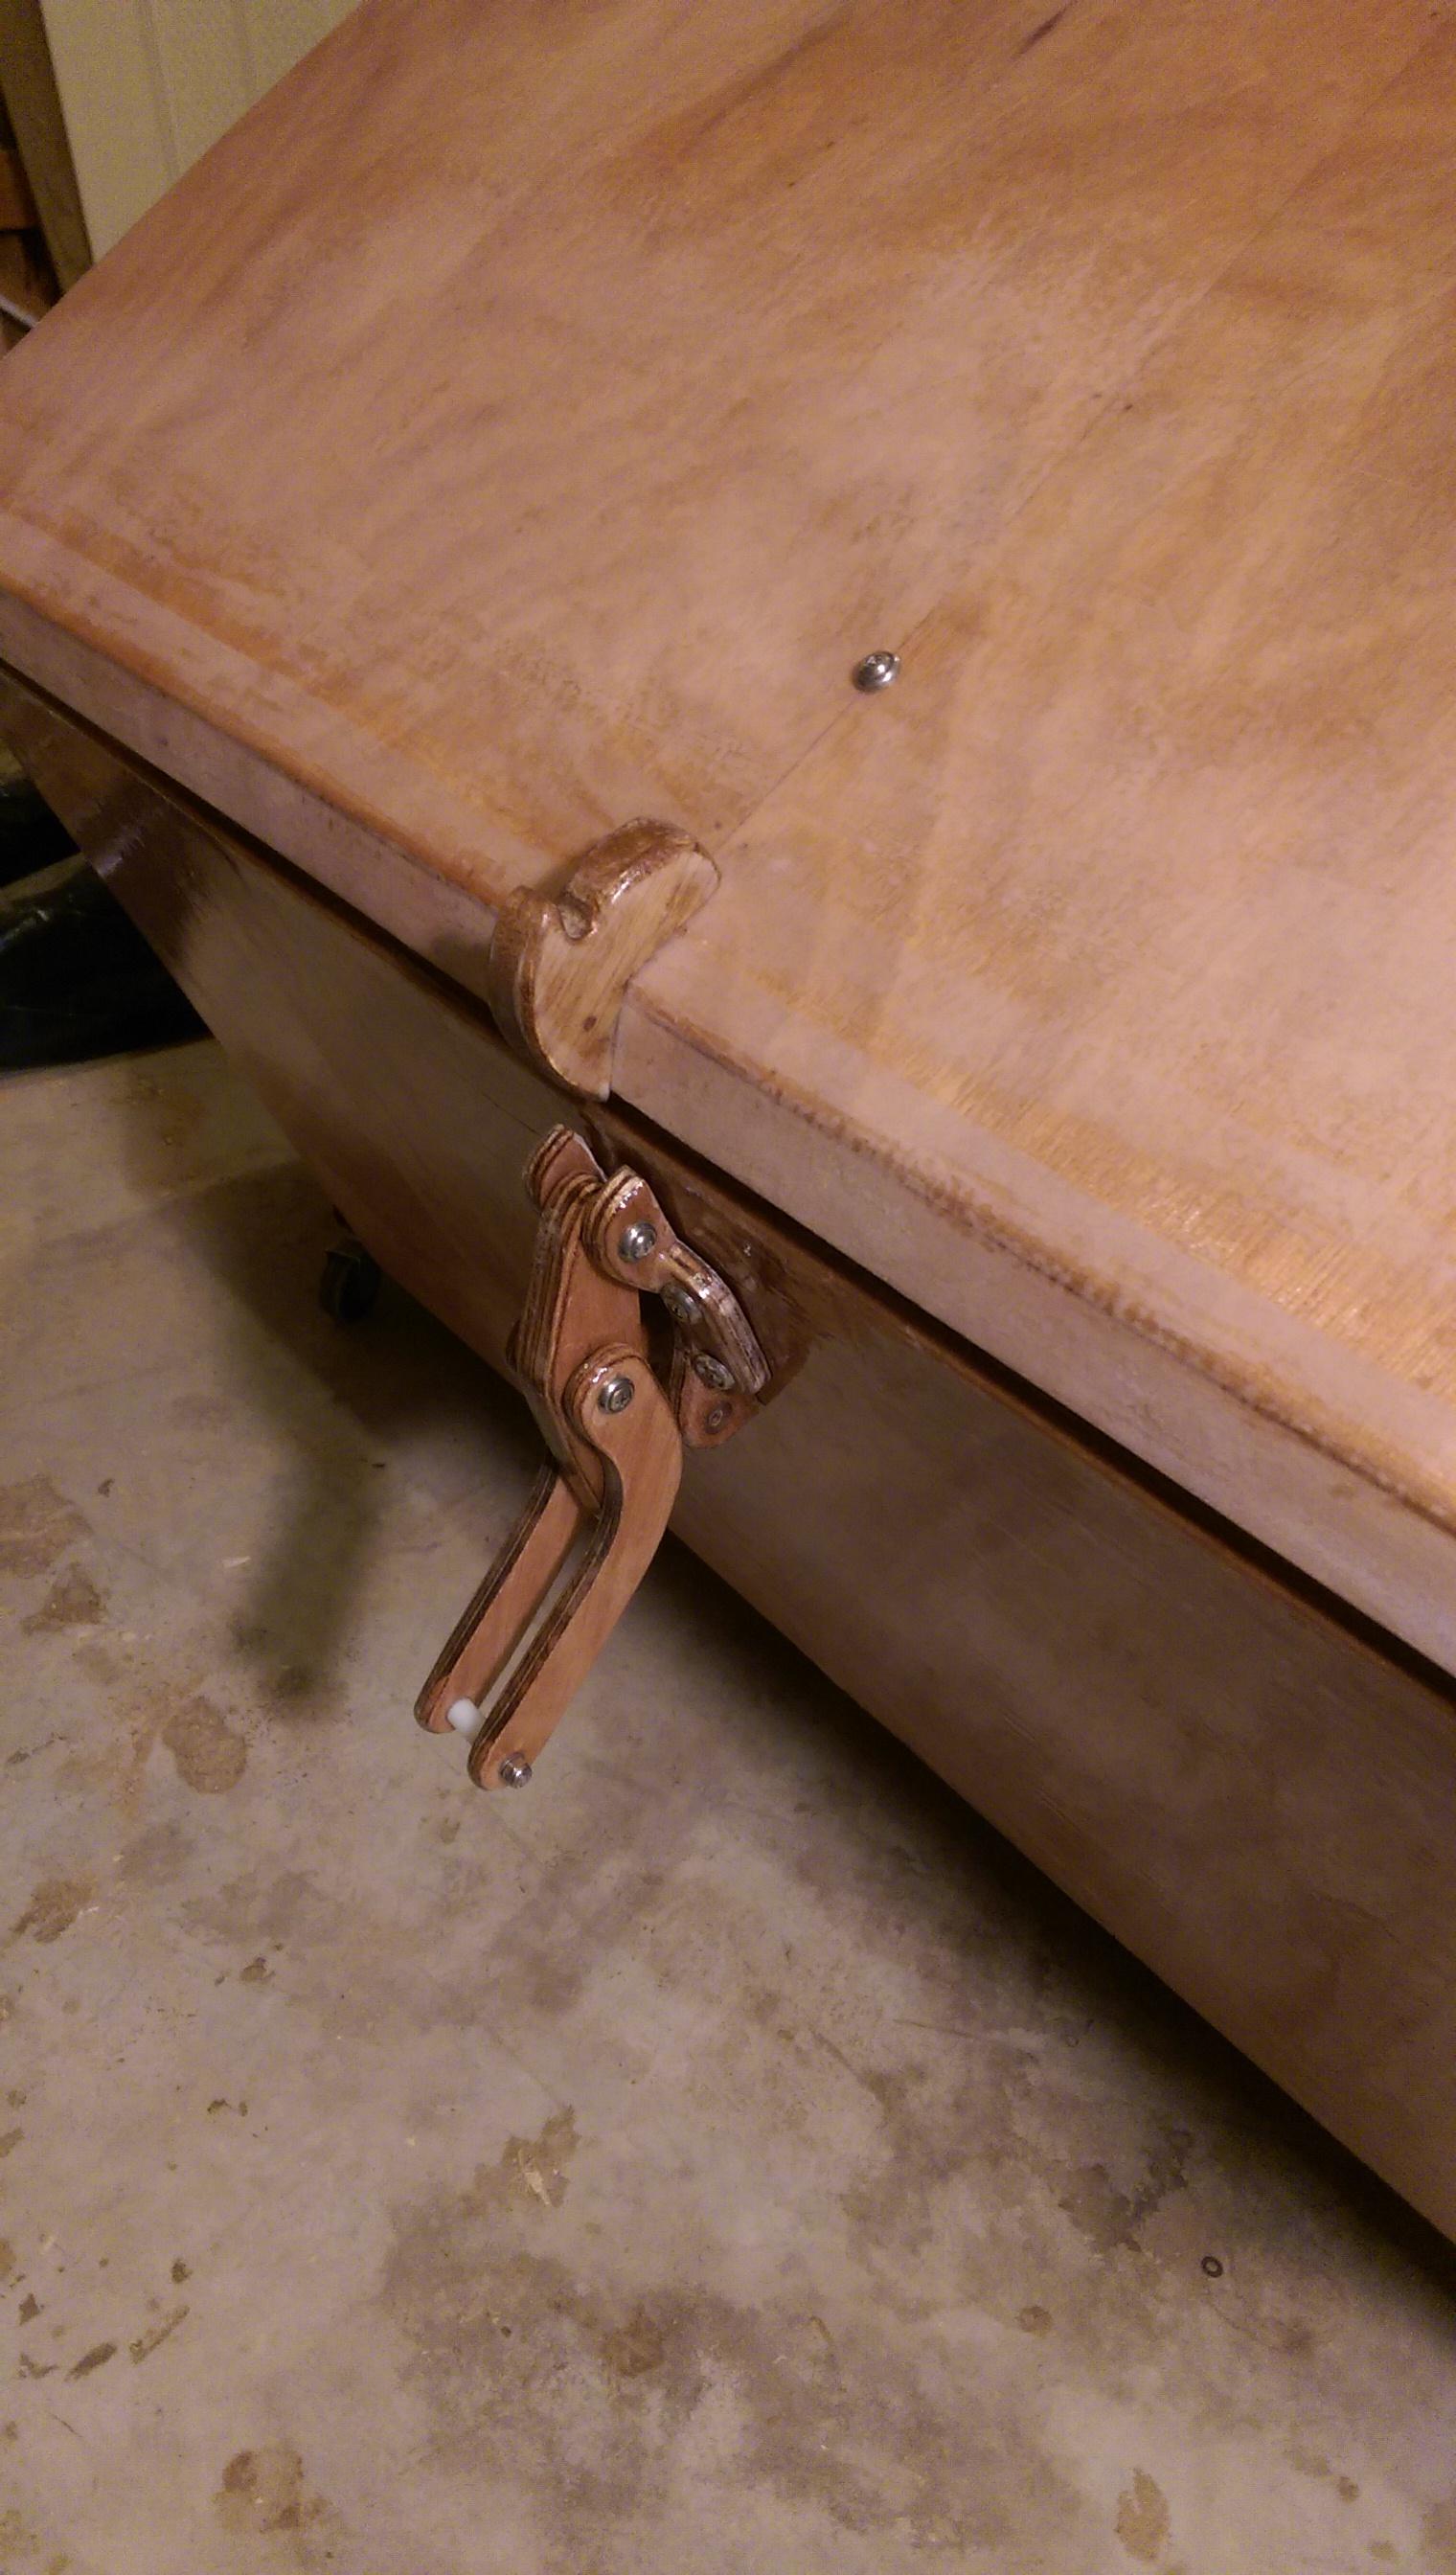

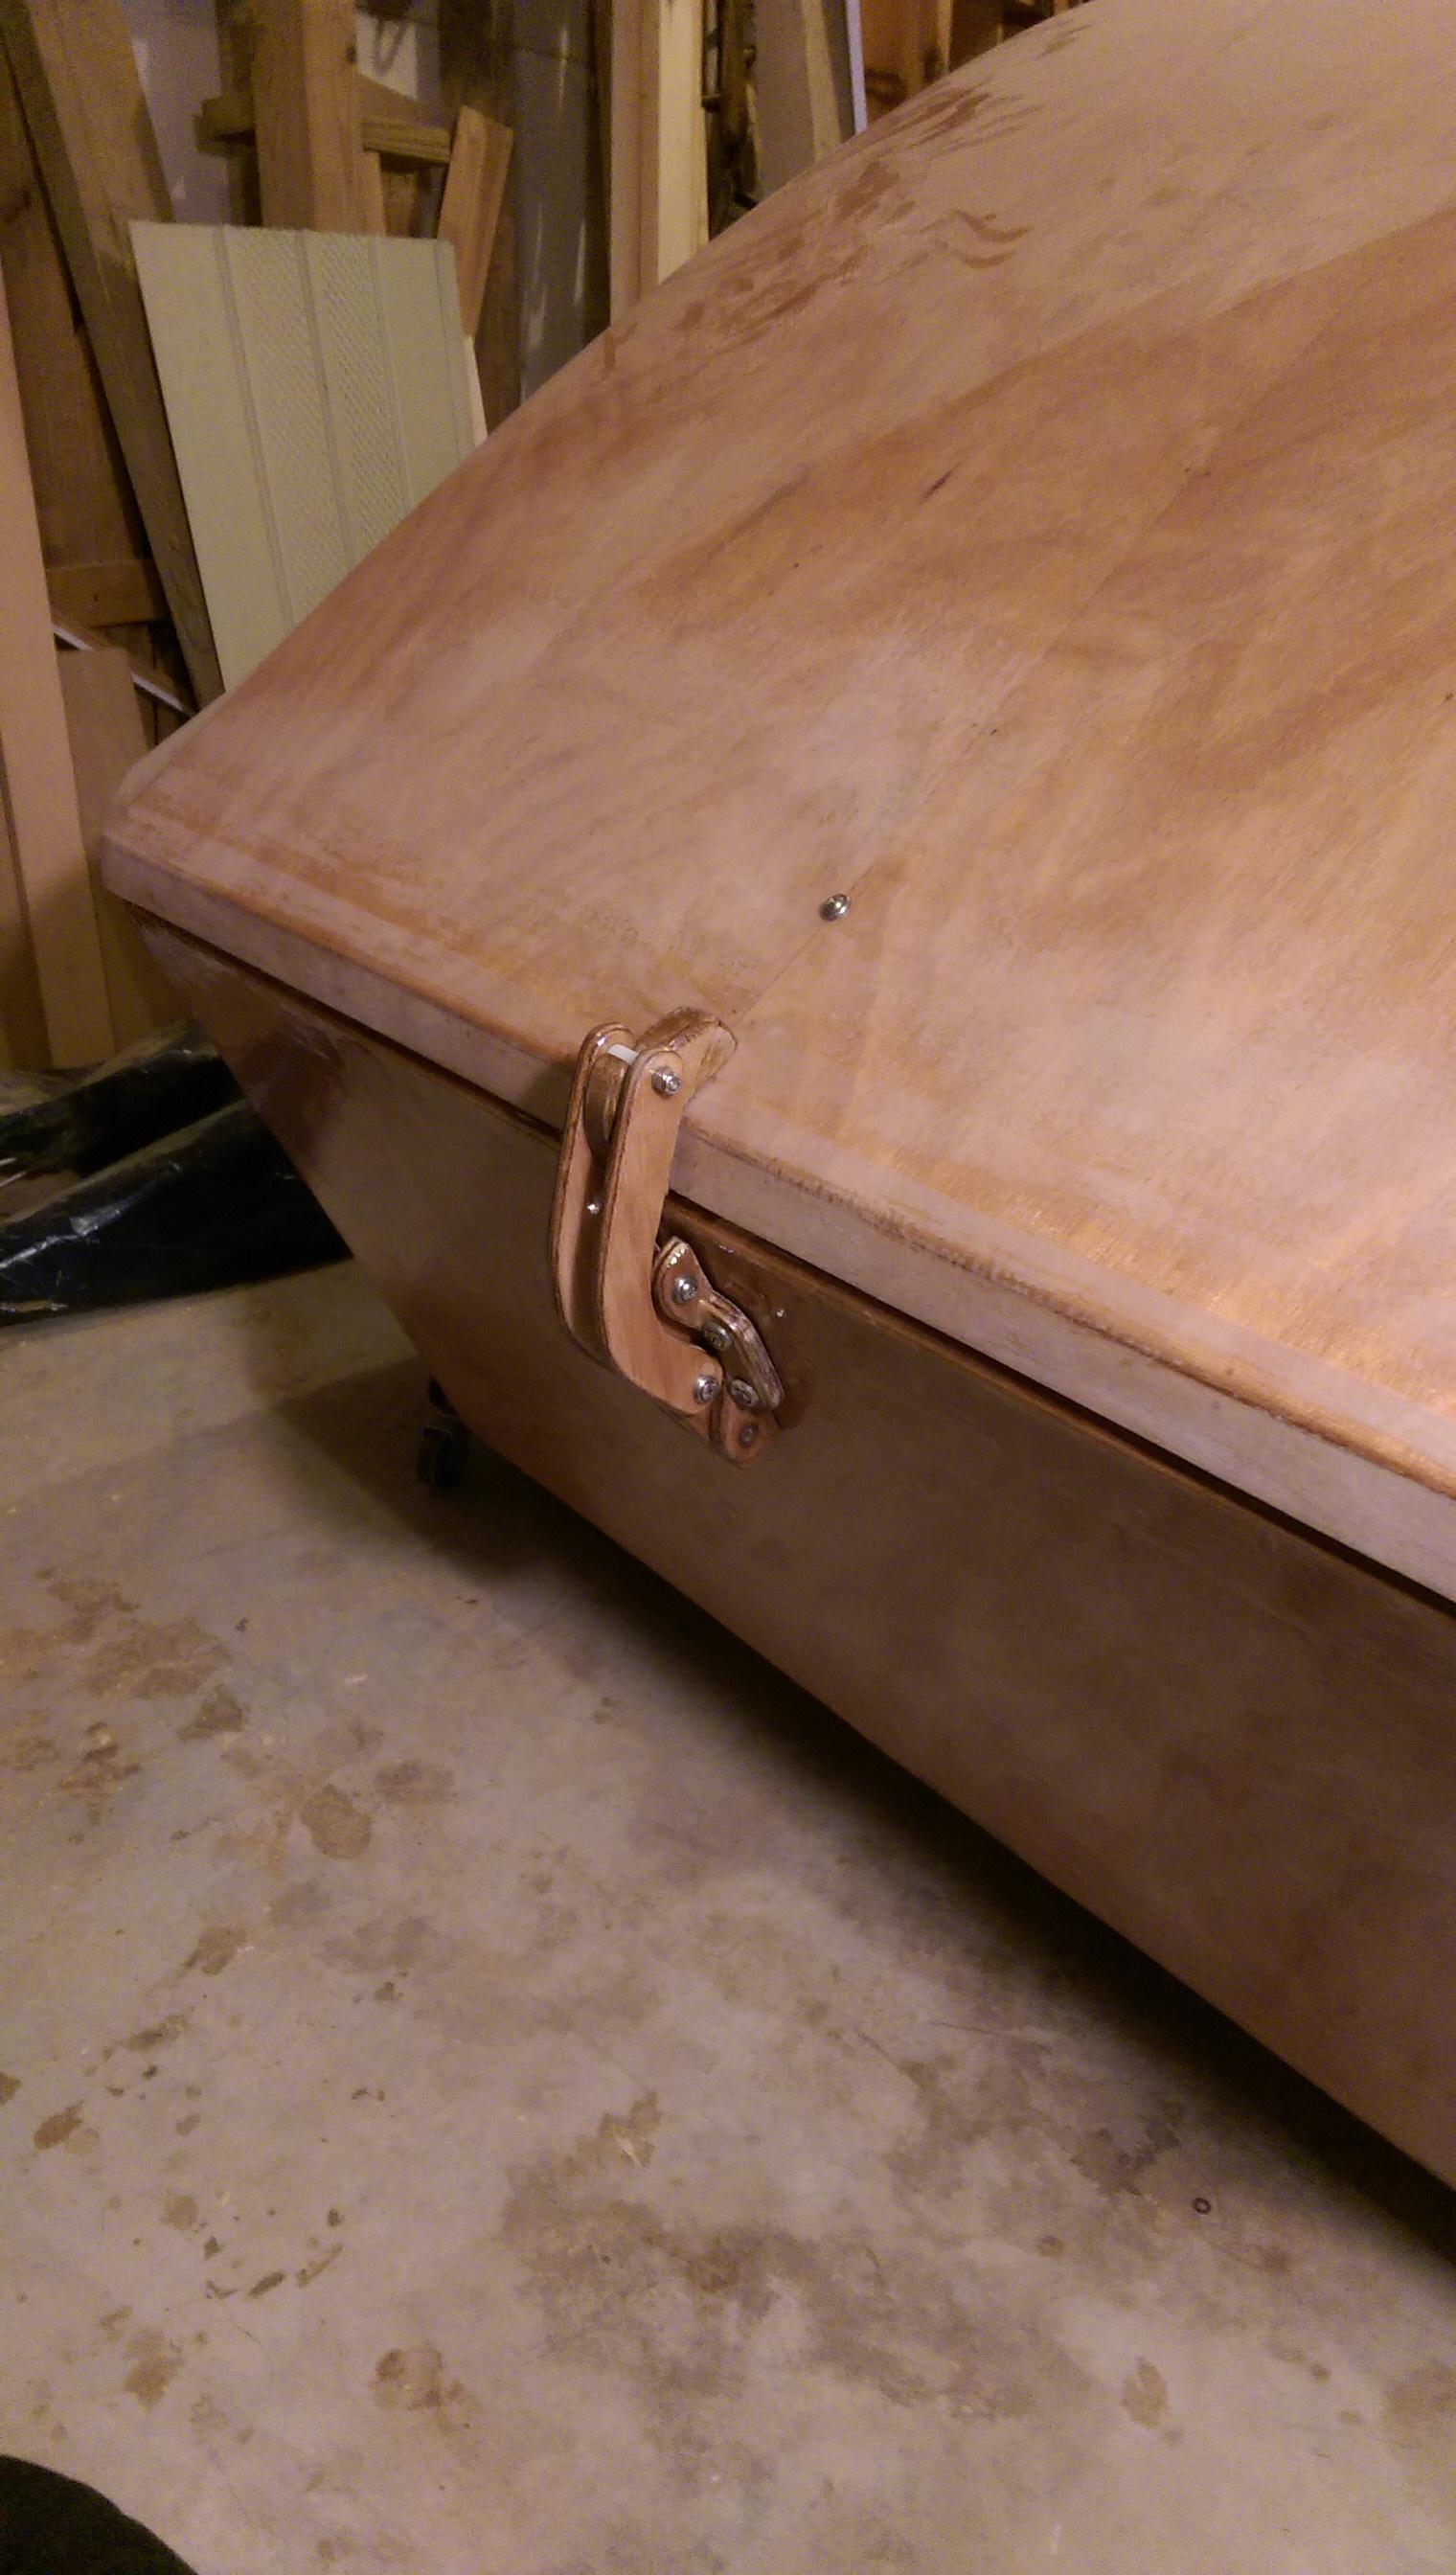
Due to the geometry of the latch, when it is closed, the tension on the latch arms keep it closed (toggle concept). I did this for two reasons; 1) to provide clamping force and 2) because I didn’t like the idea of putting a metal latch on a wooden sculpture… I’m interested to hear your thoughts about my crazy plan…
Note, the screws holding the latch in place are not tightened in these pictures. I need a helper to hold the nuts on the inside of the camper while I tighten the screws… I’m working solo today…
-
This reply was modified 7 years, 2 months ago by
cpieper.
ParticipantCould the inner spacer be chamfered (or rounded) with a router and then the opening in the bezel enlarged a bit? That might ease the knuckle busting… I don’t have my fan yet, so I can’t perfectly visualize whether or not this is feasible. Thoughts?
ParticipantThanks for the great tips on setting the hinges. Unfortunately, too late for me… Regarding the treatment of the hinge pin holes, I did something somewhat different being concerned with having bare wood exposed which would ultimately rot/discolor… I wasn’t clever enough to think of drill/fill/drill, so I bought some nylon sleeves (3/8″ OD) and drilled out the hinge pin holes to accept these sleeves. I epoxied the sleeves in place and use long SS screws (#8 as I recall) as the hinge pins. The door action is very good. This might be overkill, but that’s what I did…
ParticipantThere are some places where darts may be necessary, I don’t recall specifically (the instructions will tell you when you may need them), otherwise, in general, pulling the cloth on the bias (45 degrees from the weave pattern) will allow it to conform to some pretty extreme contours. Experiment with this while dry and I think you will find it works well.
ParticipantI haven’t mounted my camper to a trailer yet, but looking ahead I see that there are some rubber vibration dampers that go between the camper and the mounting surface. This will help dampen high frequency vibrations. Regarding the stitch and glue (wood/fiberglass/epoxy composite) construction’s flexibility, it is less “brittle” than pure fiberglass because of its layered construction. Thin layers are able to bend without breaking… The structure is able to bend elastically (without permanent damage) a fair amount, so unless the trailer is bending a significant amount, I believe the stitch and glue construction should be more forgiving than a fiberglass shell. I base my belief on my experience with my composite boat structures and also happen to be a structural analyst in my day job…
ParticipantIn many cases, I was able to manage solo (I’m a big guy and used to working solo) — however, there was higher risk of a problem (damage to the camper, a tool or me). I assessed the risk and tested the process before committing to doing it solo. I did get a helper for a few short steps such as when I had to flip the assembled camper over, but I was able to do all of the other steps solo.
I plan to get the Trailex trailer in the spring when I finish the camper off. I did look at some other trailers, but figure if I’m putting all this work into the camper, why not go for the deluxe trailer… I’m sure that others will work, but one that I found (and aluminum trailer from Northern Tool) looked good but after looking at reviews I found that it was only rated for 55 mph… I would rather spend the money for a trailer that I know will work and is light weight. I’ll be putzing with my camper a little over the winter, but mine is essentially all assembled and coated with epoxy. I have to cut a few holes for vents and electronics when I purchase those. I’m kind of on hold until I save up the money to buy the second wave of stuff. I’ll be storing my unit in my shop for the winter.
I just discovered this forum a few days ago… I wish I would have had it available and known of it when I was in my building phase. I see a lot of good information here and it is inspirational to see what others have done or are doing. This is a great project! Just read the instructions carefully and poke away at it. If you have more time when you’re working on it, there are steps that can be done in parallel (versus performing the steps in the order they are written). When I had more time on some days, I would look ahead in the instructions and find things to do that didn’t depend on the thing that I had just finished. This helped me accelerate my progress.
Good luck to you and enjoy your project!
ParticipantI forgot to mention one of the most important group of tools and that is clamps… you need a lot of these… spring clamps work well — 30 – 60 of these (you can never have too many clamps)… My clamp collection grows after each new project… I probably have over a hundred by now.
ParticipantThere is a nice list of recommended tools on p. 17 of the instruction manual. The list is similar to those of other stitch and glue projects. Many are common tools (drill, 1/16″ bits, screwdrivers, wrenches, pliers, wire cutters, scissors, utility knife, sander (e.g., 4″ random orbital), safety equipment (respirator/dust mask, safety glasses), some are less common such as Japanese pull saw (not essential, but useful), block plane (extremely useful) and one or more wood rasps. You will also need some consumables such as disposable gloves, sand paper, foam brushes, chip brushes, low nap foam rollers, plastic spreaders… Hopefully, you have access to the manual and can take a look at the list provided.
ParticipantThat’s a good question… The static load limit likely means that the unit is not accelerating (or moving with wind resistance). I would think that a worse case loading could be during a hard braking incident with a load having a center of mass well above the camper top — this would put a moment (torque) on the mounts/rack which may be problematic. For example, if you had a 150 pound load but it’s center of mass was high, this would cause a greater moment during breaking than a load of the same weight that has a lower center of mass… There probably isn’t an easy answer to this question, but it makes sense to keep in mind the difference between a static load and a dynamic one.
-
This reply was modified 7 years, 2 months ago by
-
AuthorPosts