Welcome to TeardropForum.com › Forums › Teardrop Builders’ Forum › Dan's Build
Tagged: Varnish
- This topic has 91 replies, 11 voices, and was last updated 2 years, 1 month ago by
pwebster25.
-
AuthorPosts
-
May 7, 2018 at 11:38 am #1819
Dan
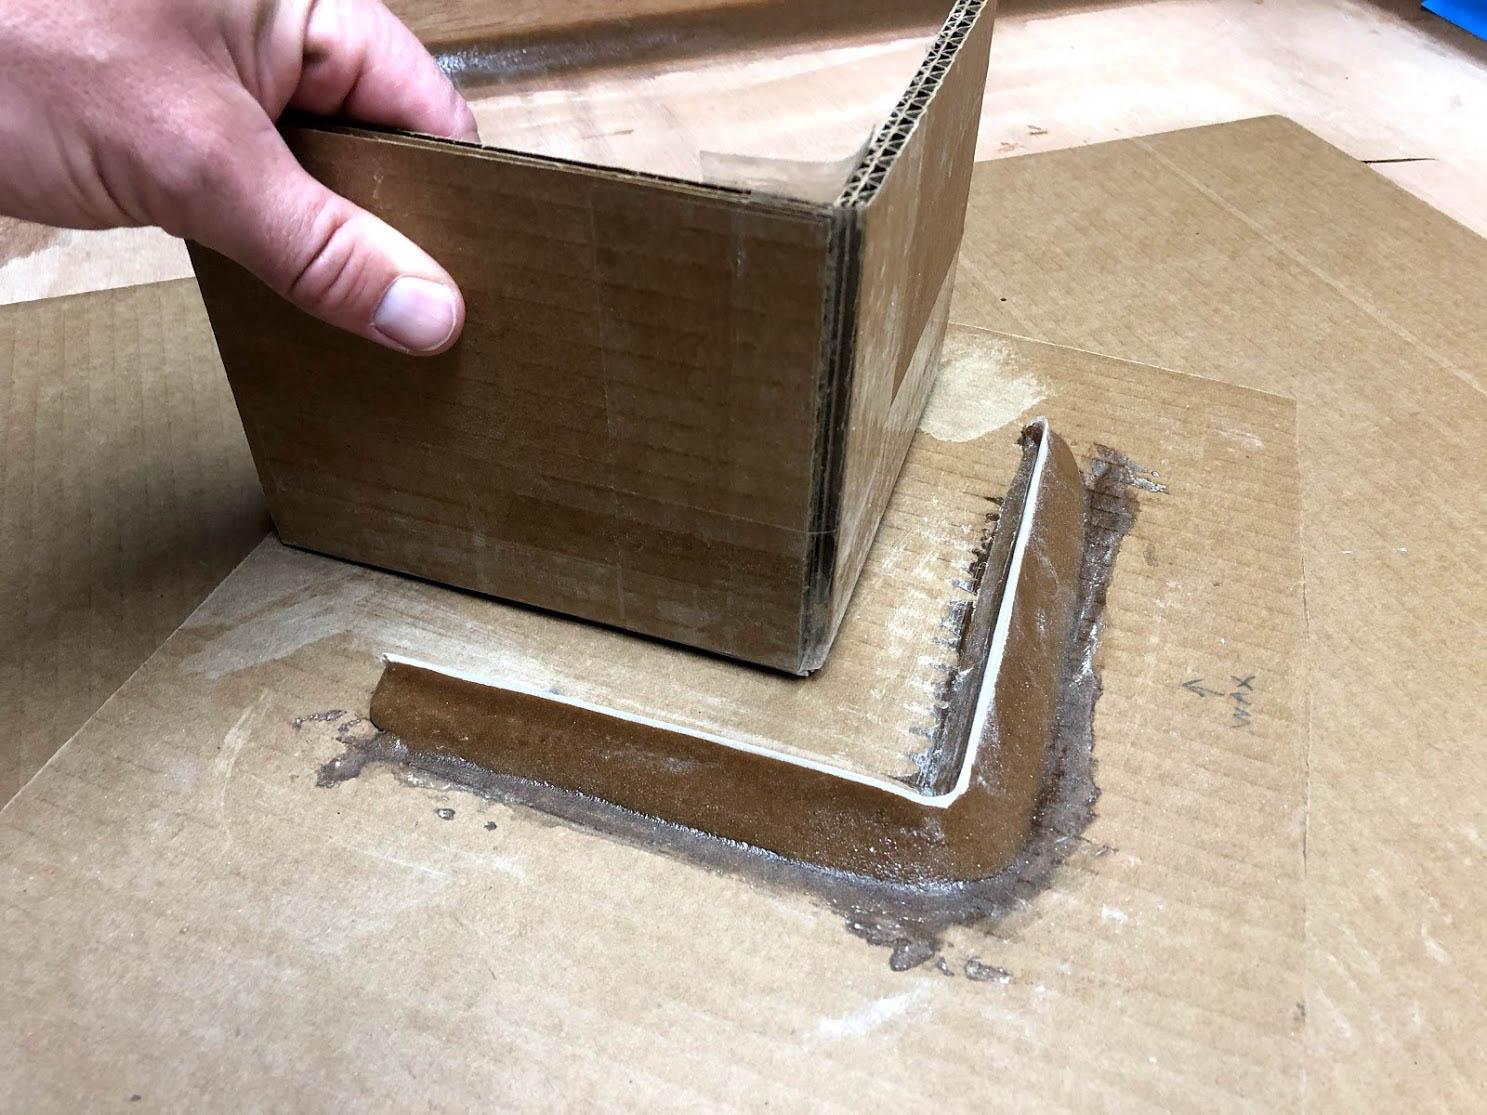
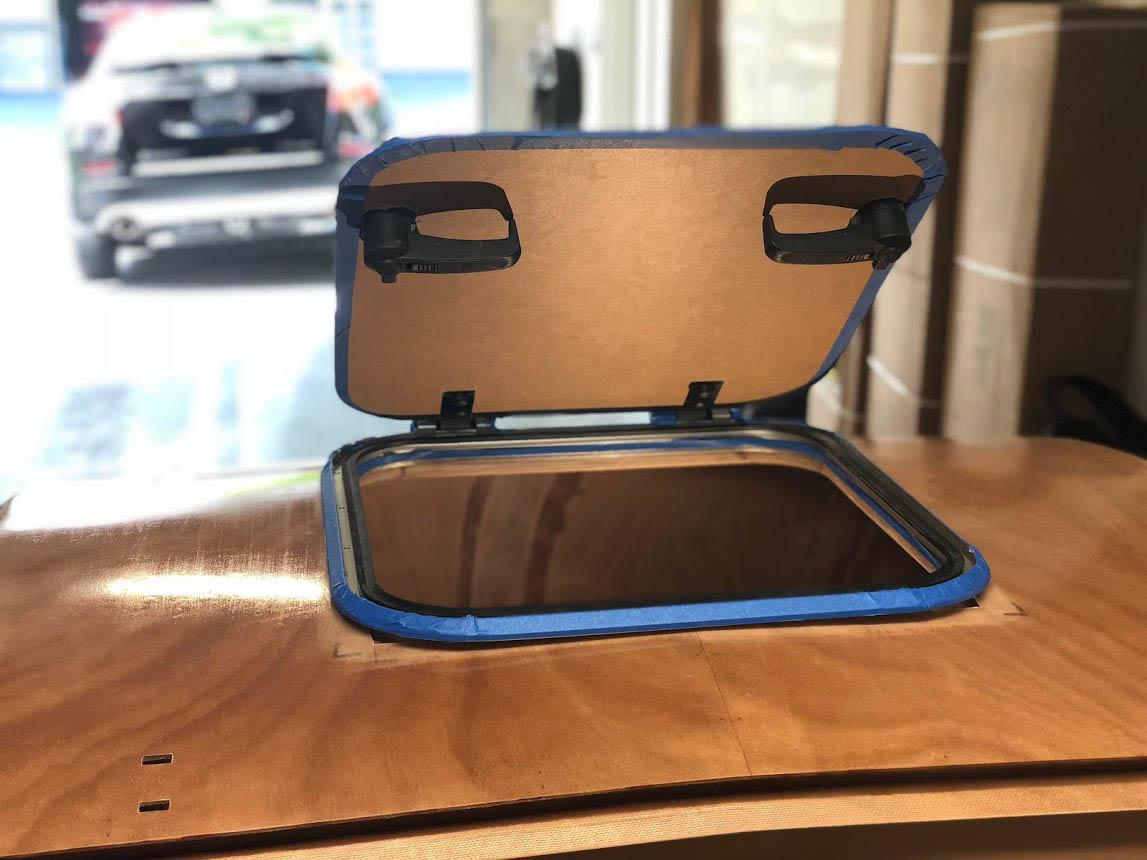
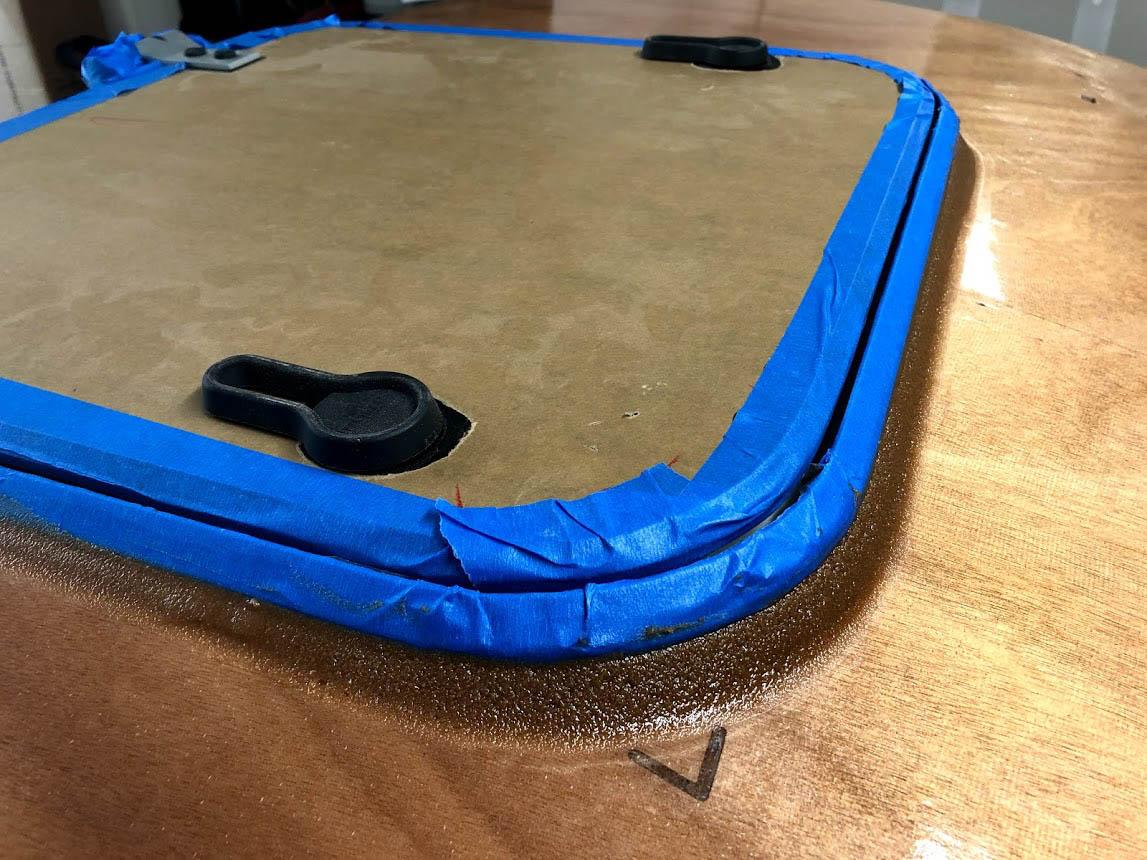
ParticipantOk, I’ve got the top hatch inside bezel just about how I want it and I figured out that I can just fillet around the exterior bits. Packing tape turns out to be an excellent mold release to keep the epoxy from sticking to stuff. I made a test article out of cardboard and packing tape which released from the epoxy fillet super easily. With that knowledge I taped up my hatch and will probably finish installing it this week!
My only other progress is installing the cabin shelf and getting the starboard side door frame prepped.
 May 11, 2018 at 5:47 pm #1834Participant
Got the starboard doorframe epoxied in last night. Top hatch this weekend.
 May 14, 2018 at 3:01 pm #1841Participant
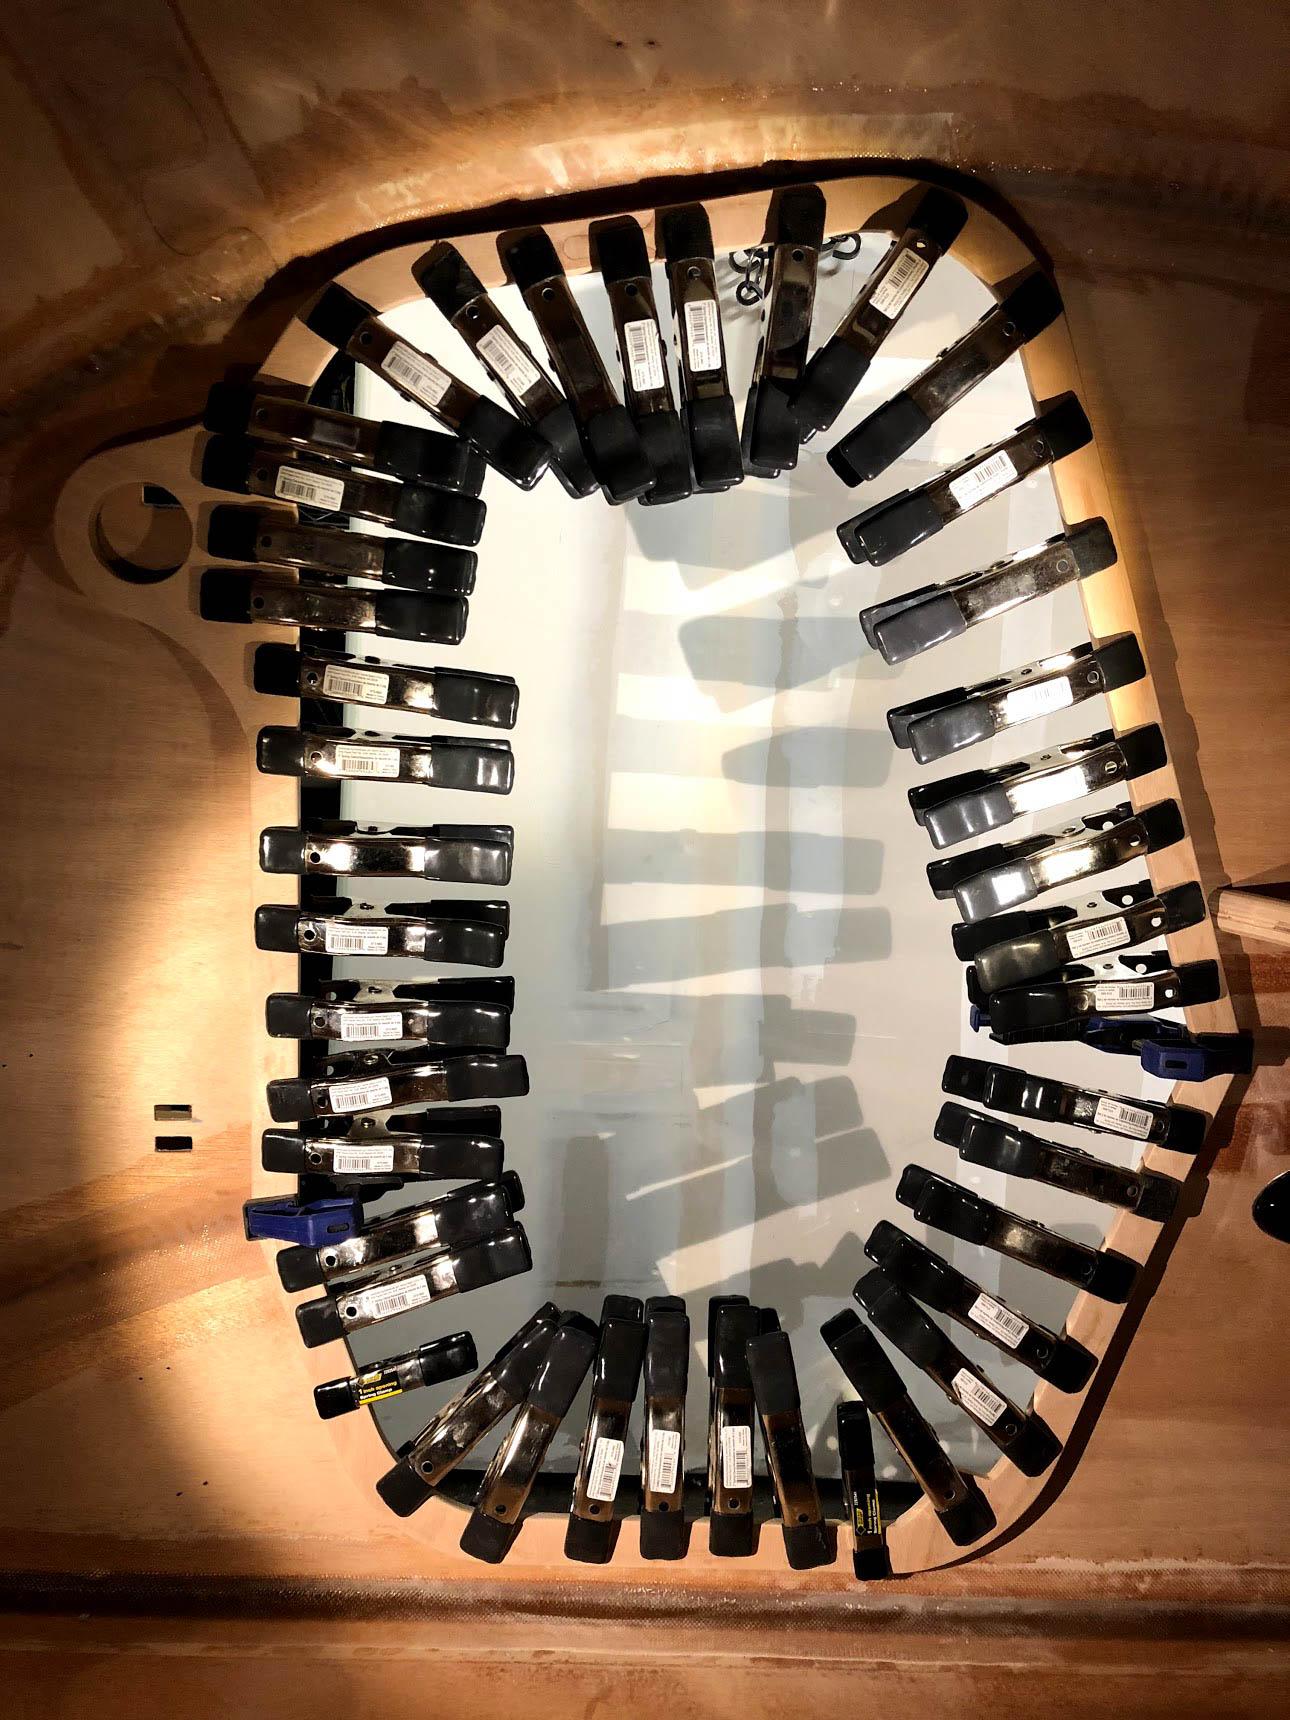
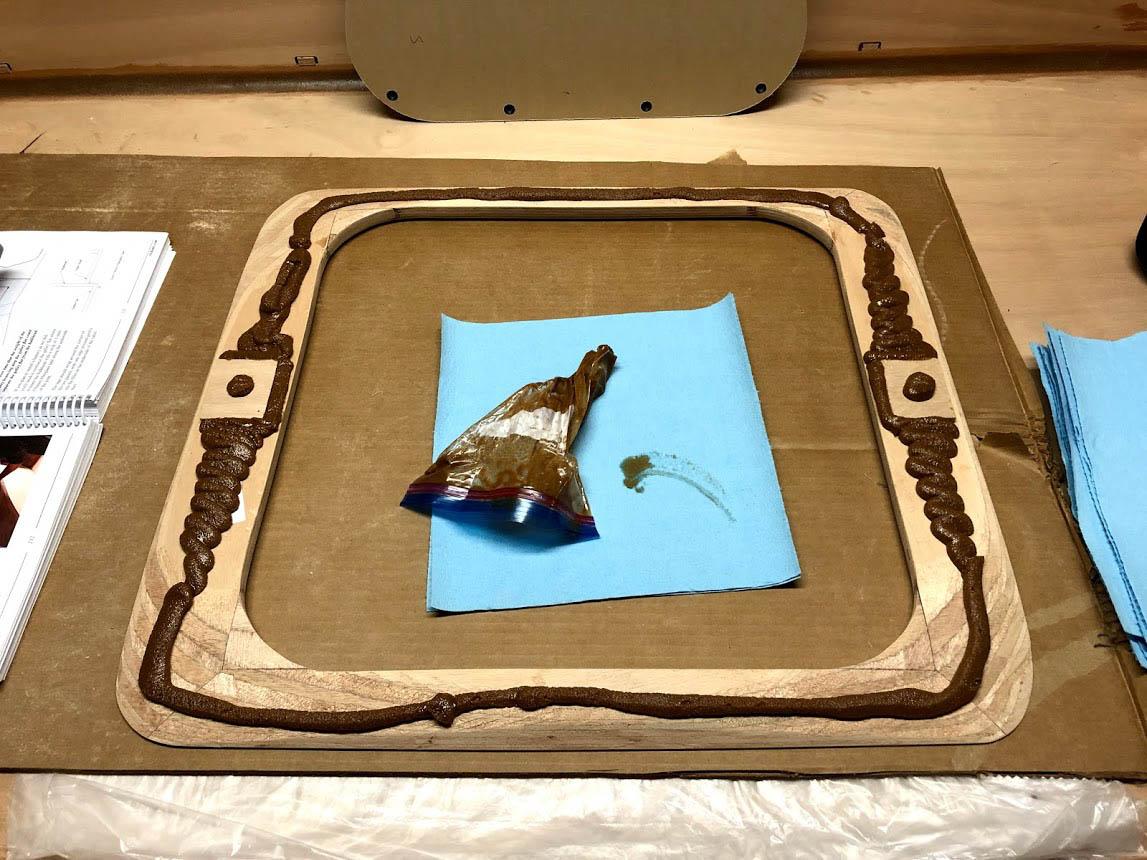
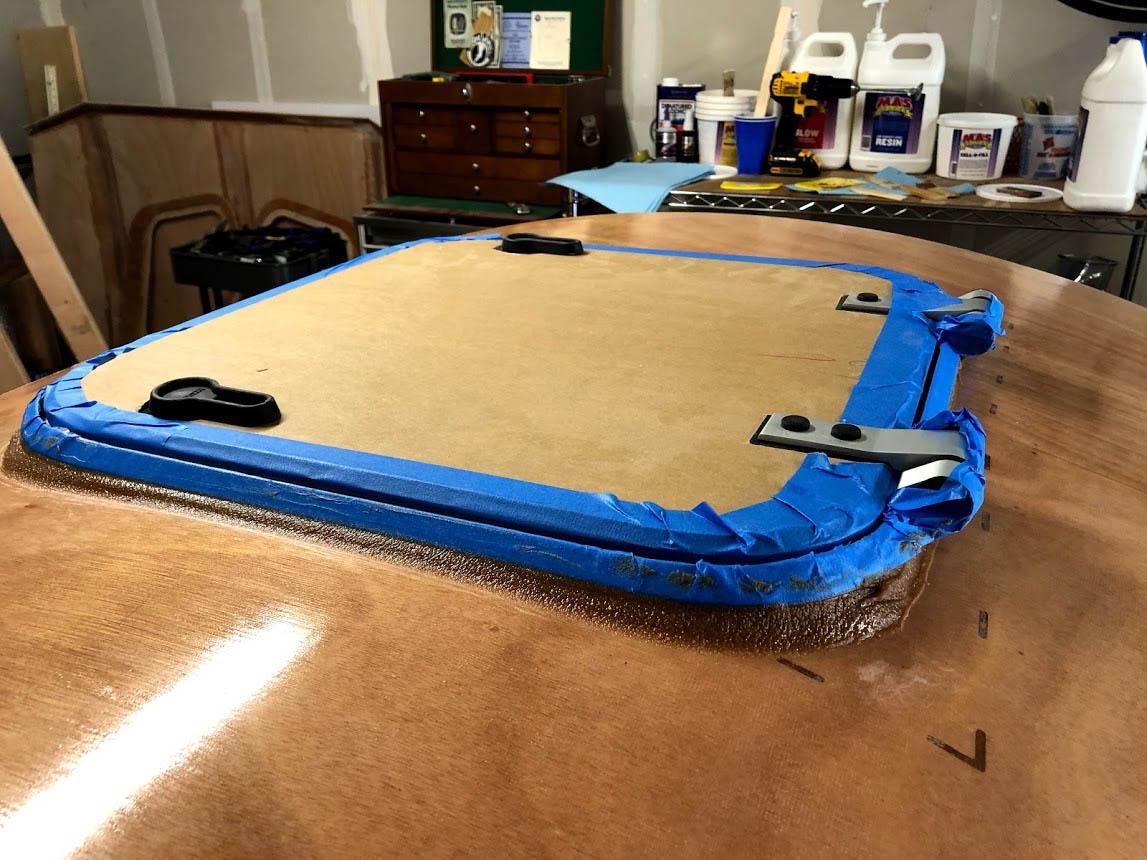
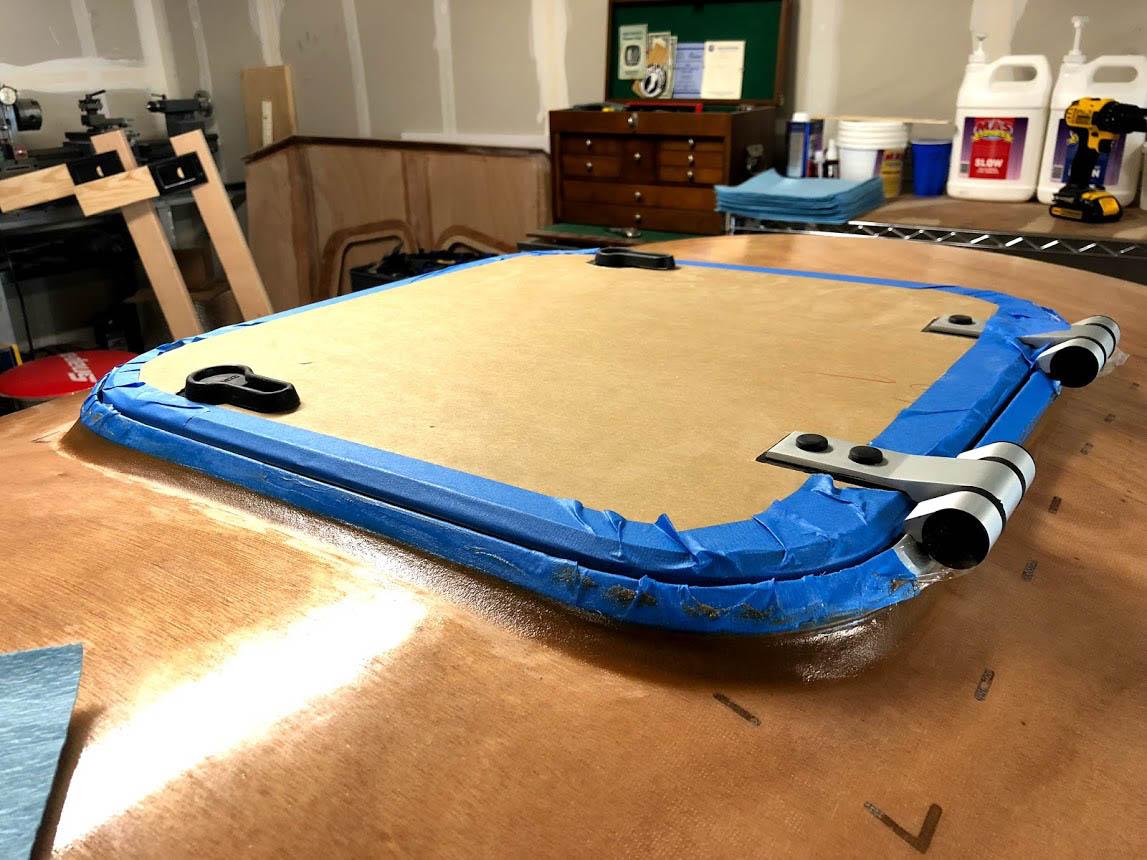
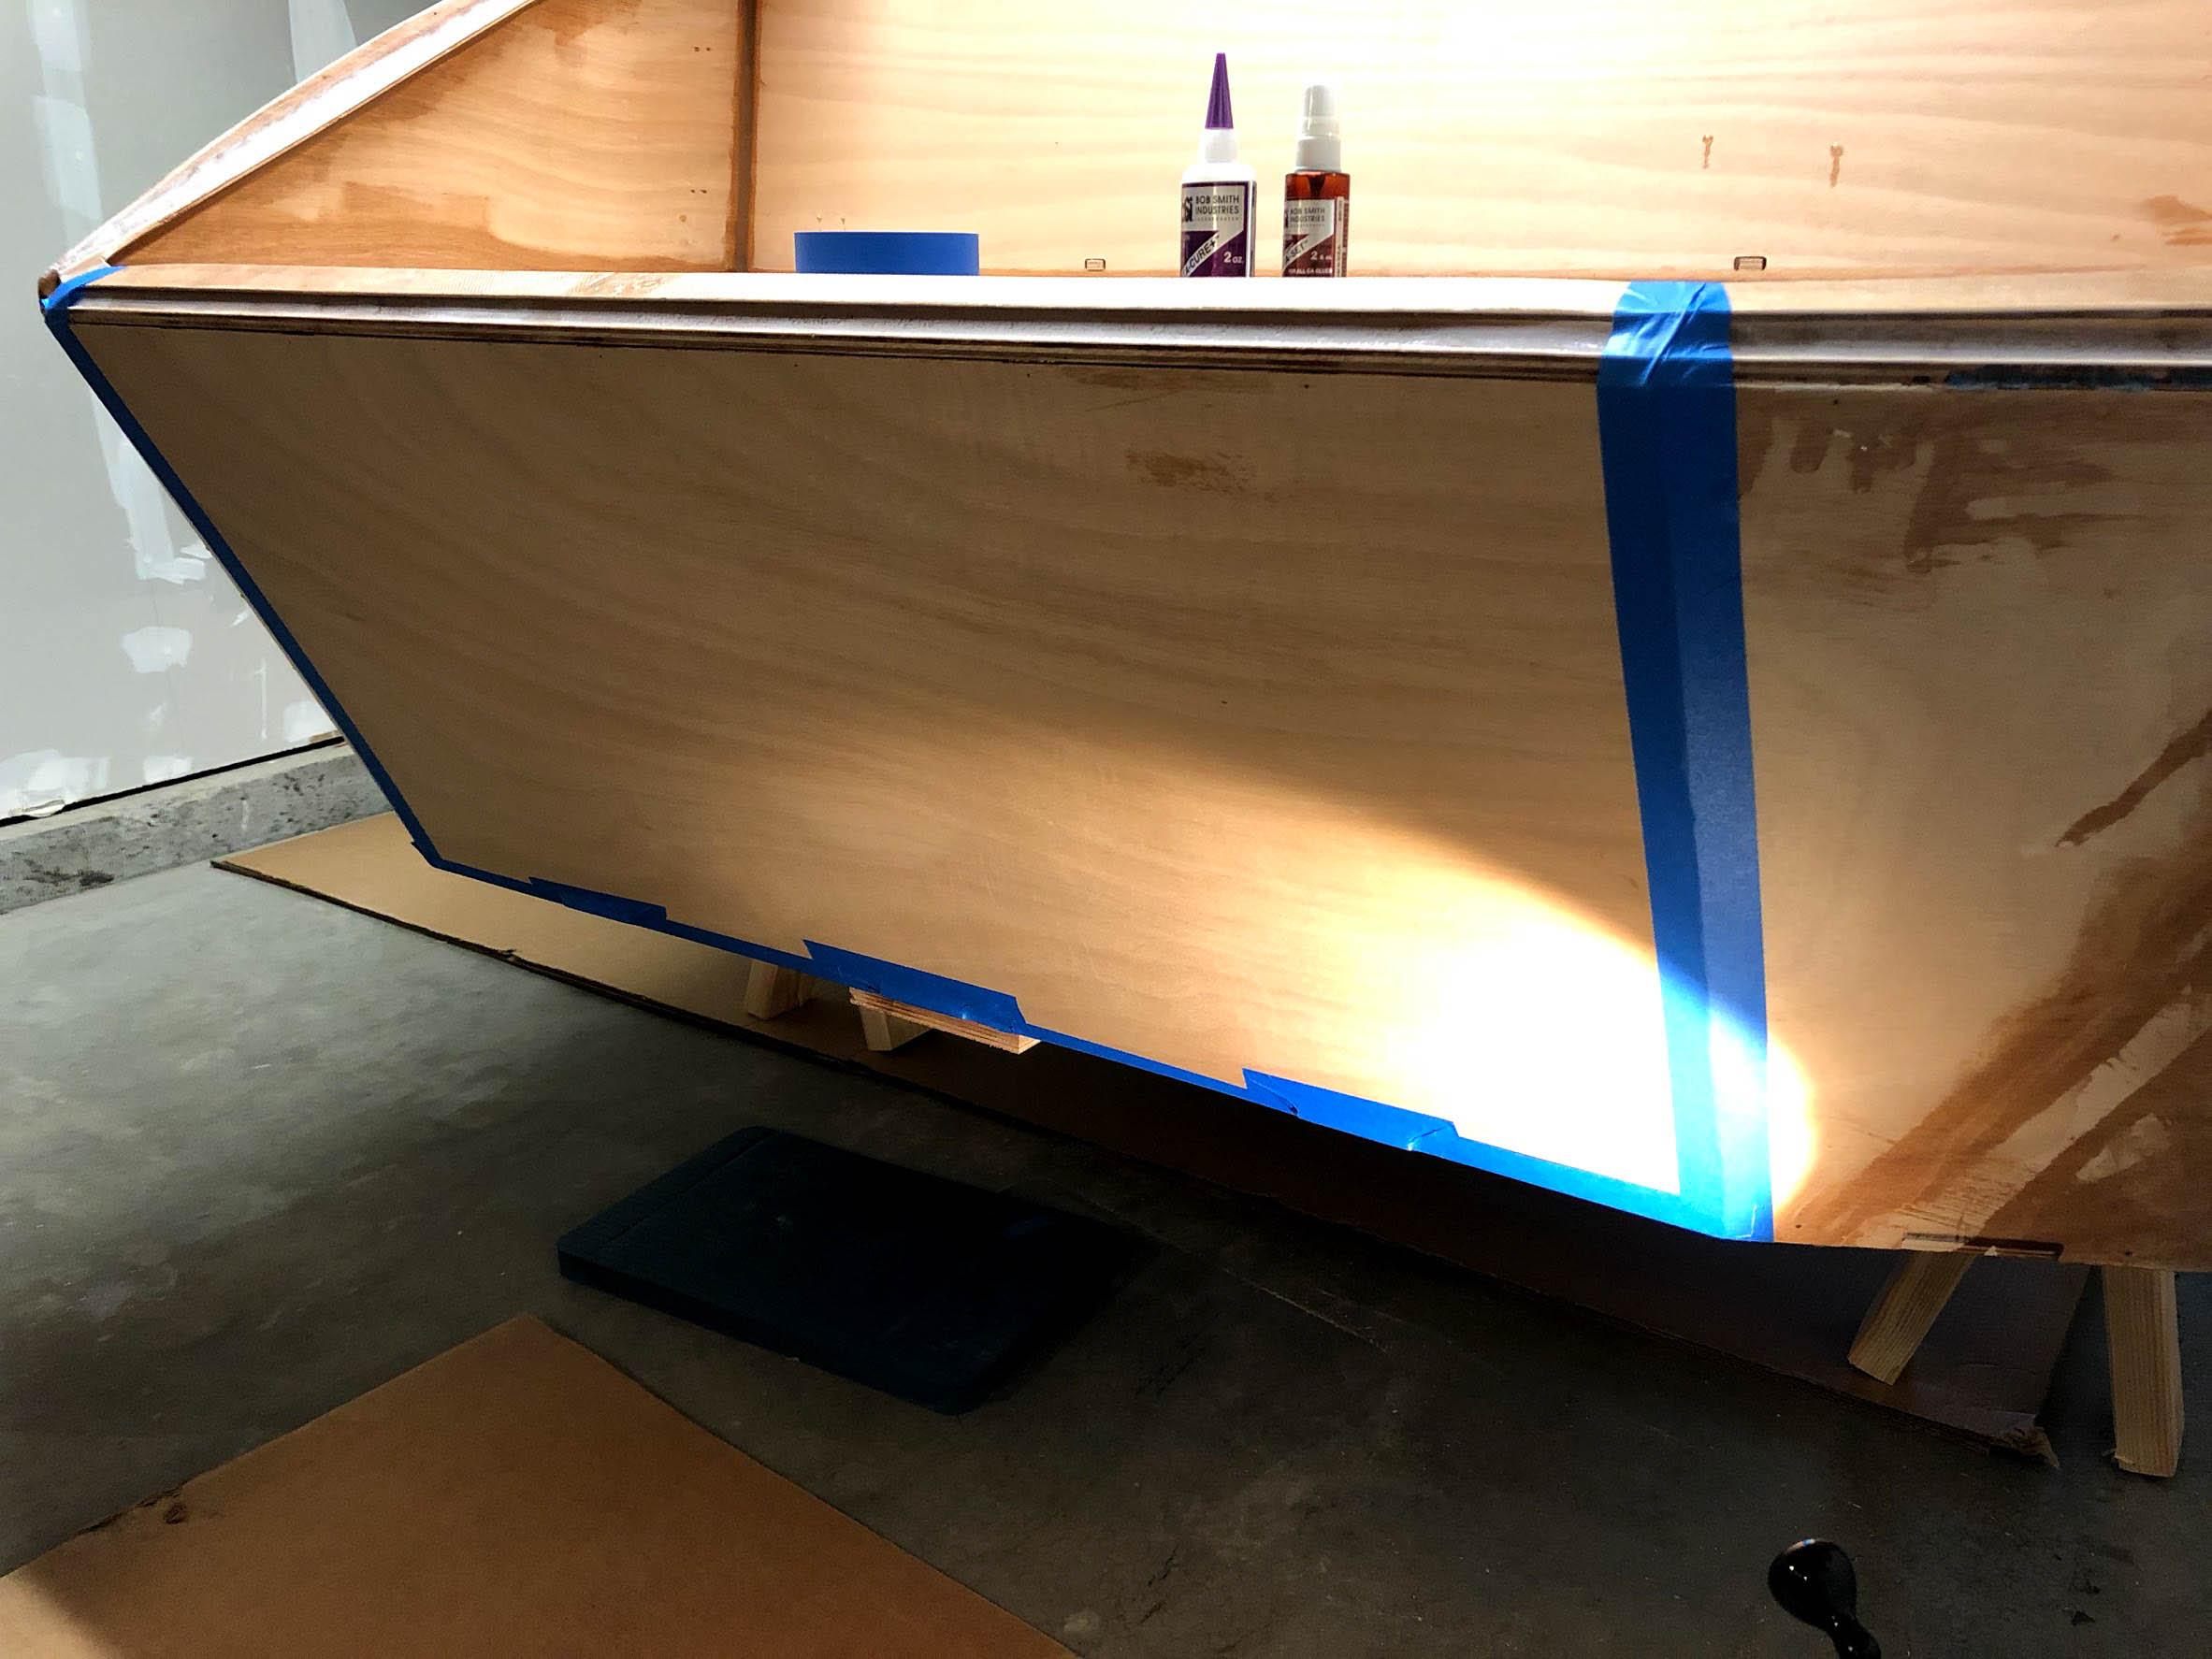
Ok, this was the big weekend. I finally pulled the trigger on my top hatch! It went pretty smoothly overall. First I epoxied in the frame to get everything held in the correct shape. After that epoxy cured enough I was able to do the hatch itself. Here’s the frame getting ready to be clamped. This wasn’t enough thickened epoxy. I had to make another batch to finish the fillet.
Here it is the next day with the hatch removed. Those two clamps squished the top of the shell down just a bit and the cured epoxy is holding it in that shape. Now to fill in the gaps then set the hatch in place and fillet it.
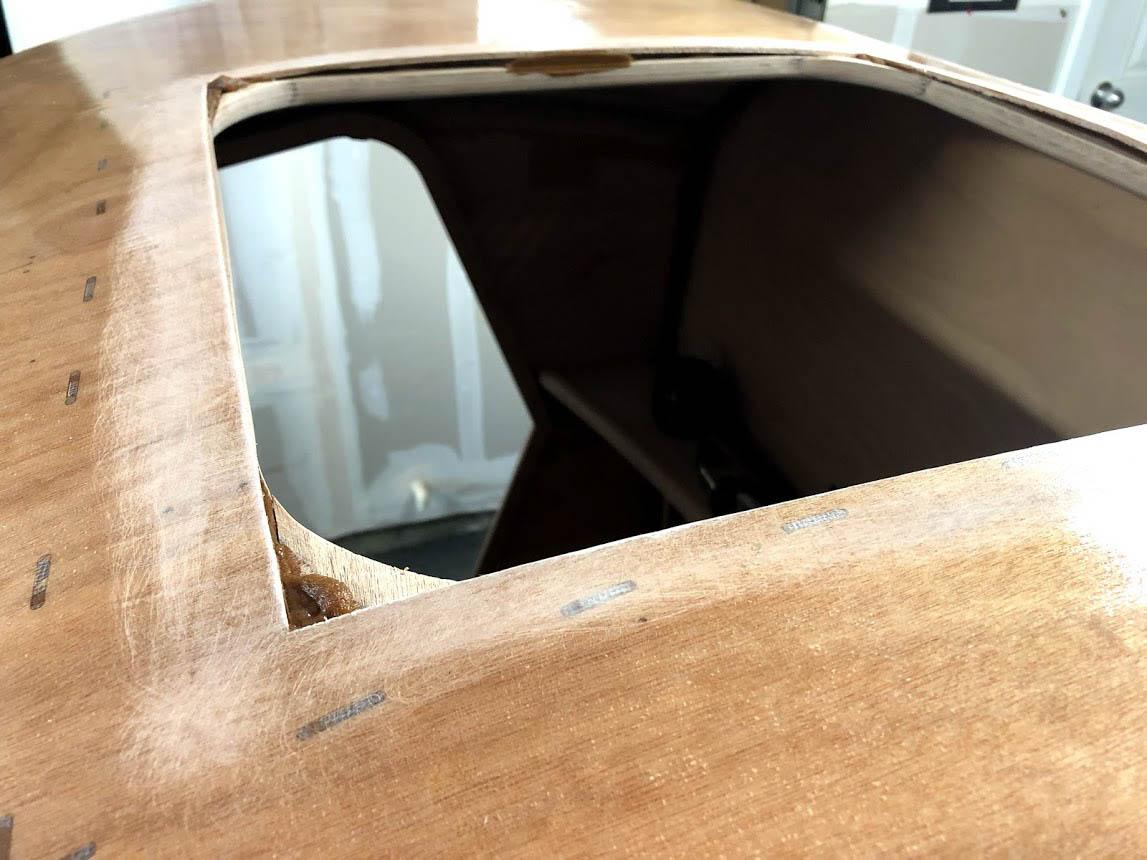
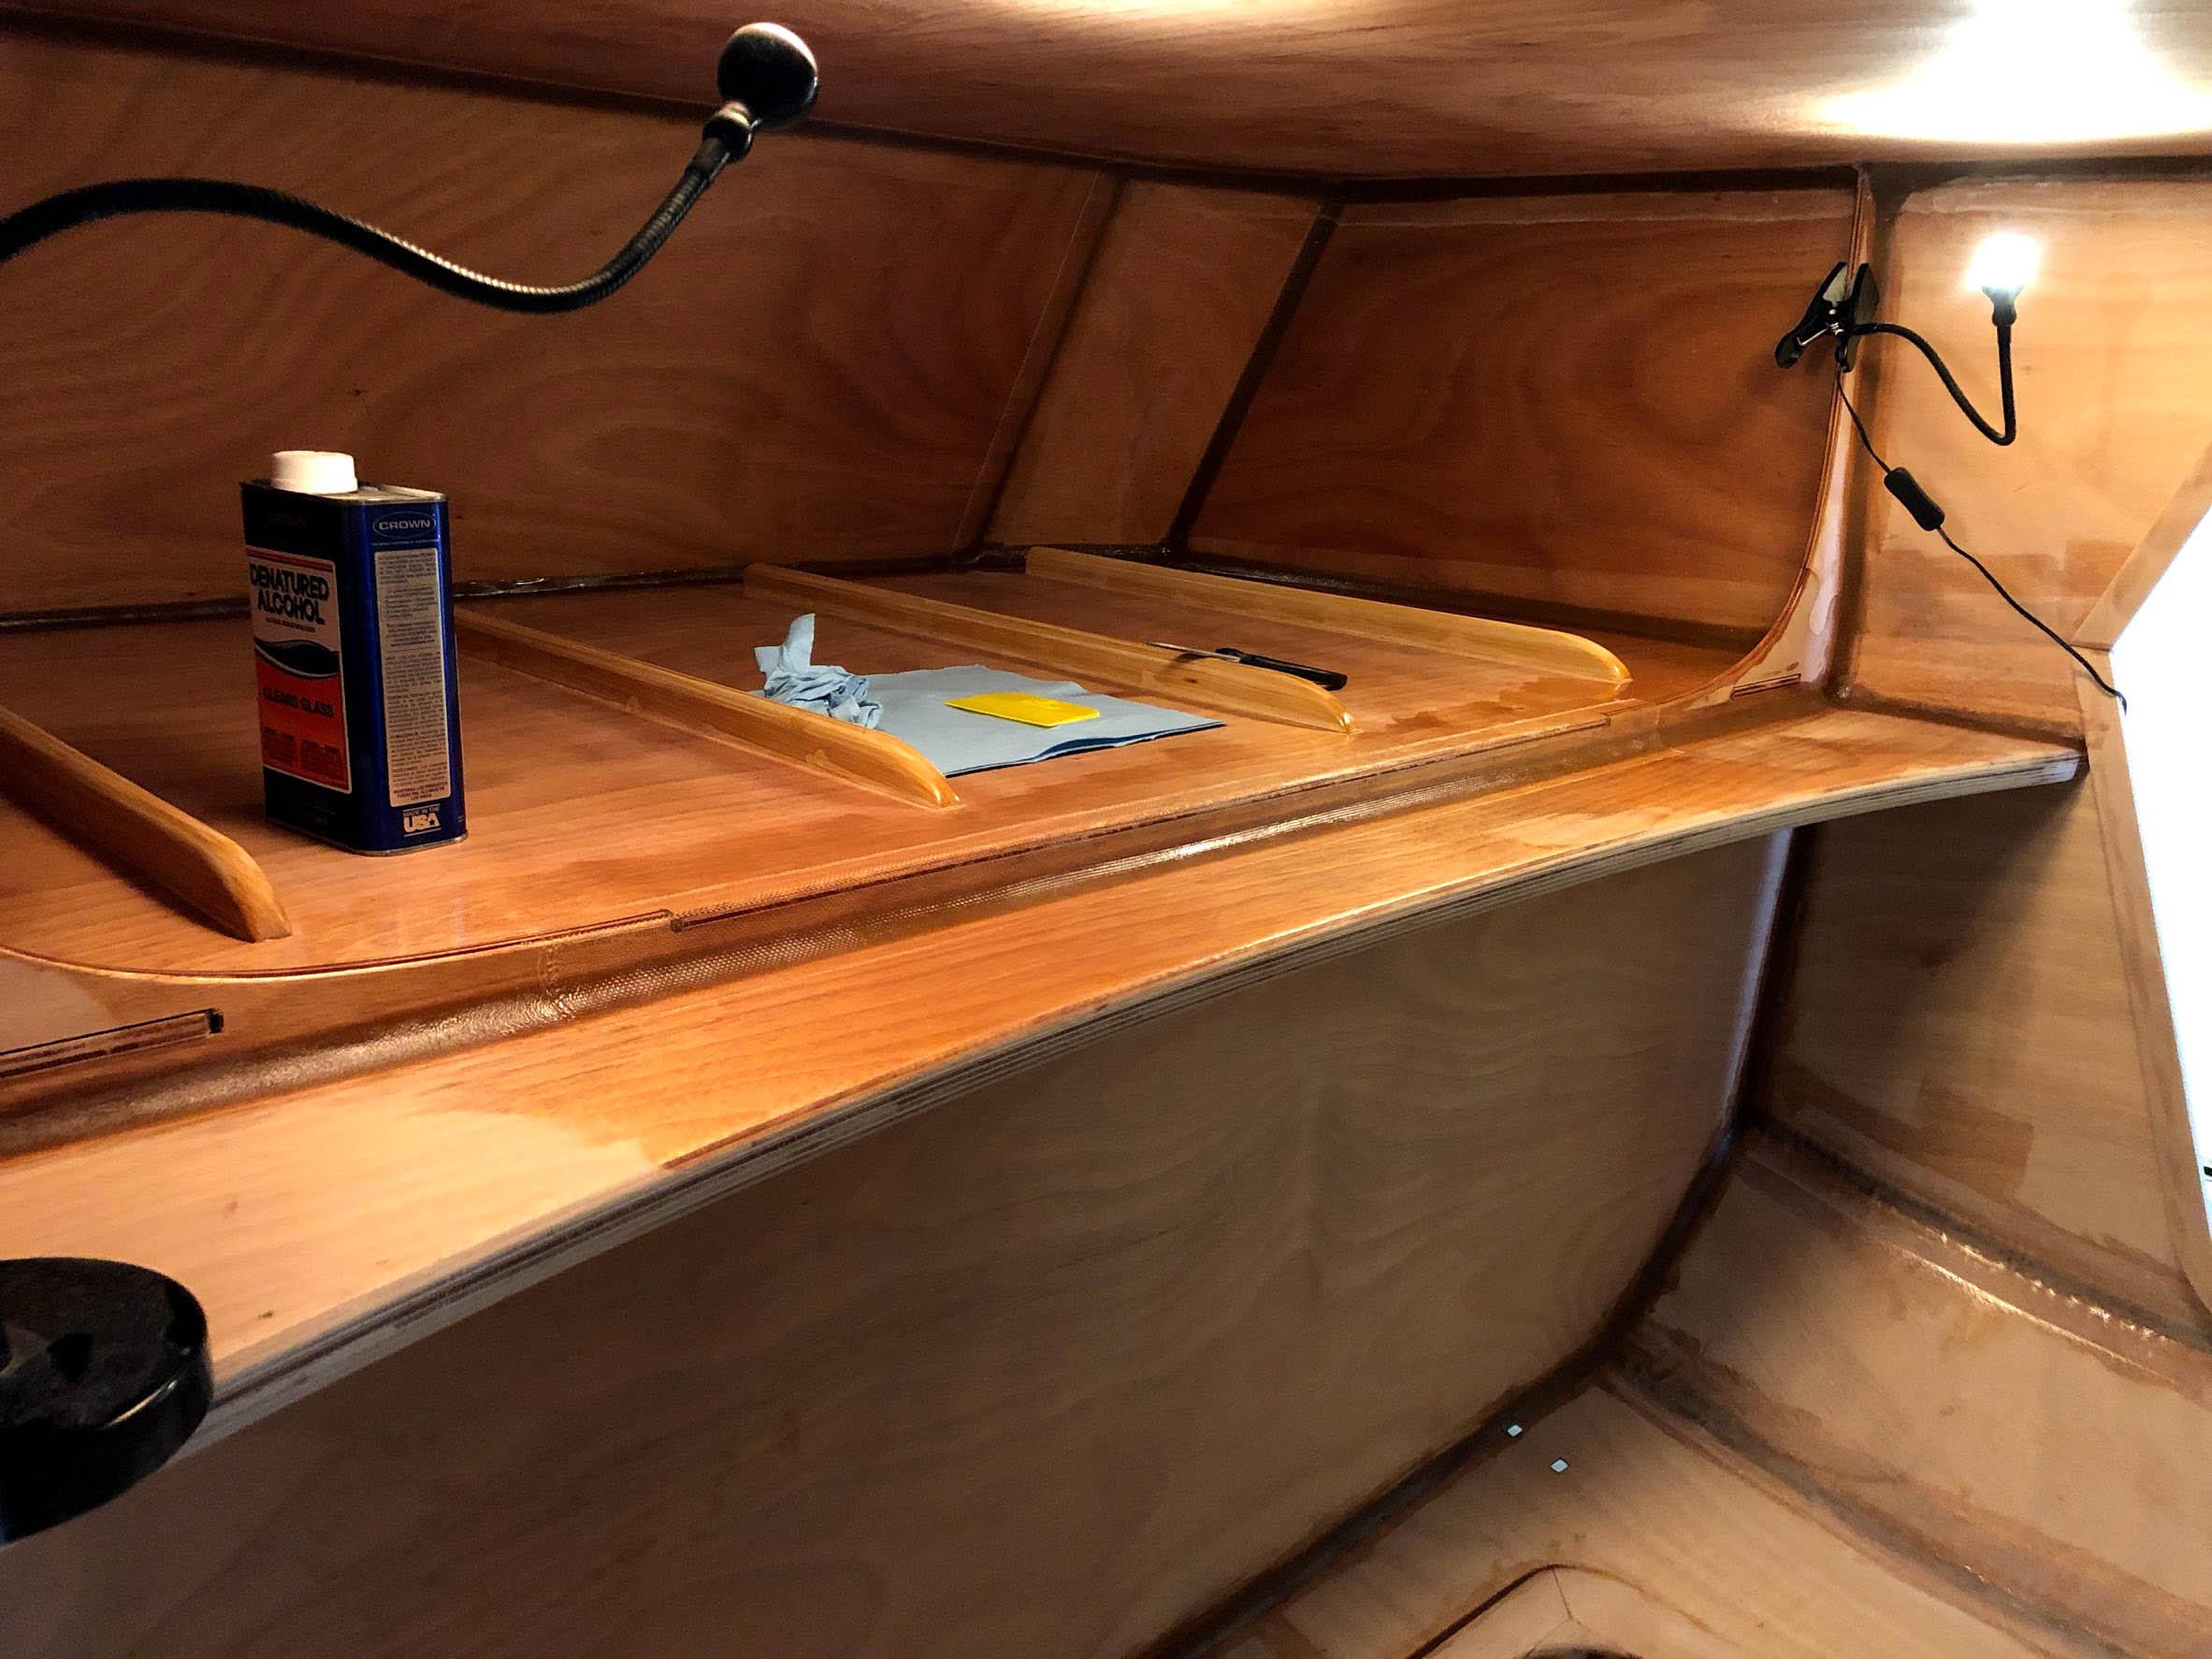
Then wait an hour and do some smoothing with denatured alcohol.
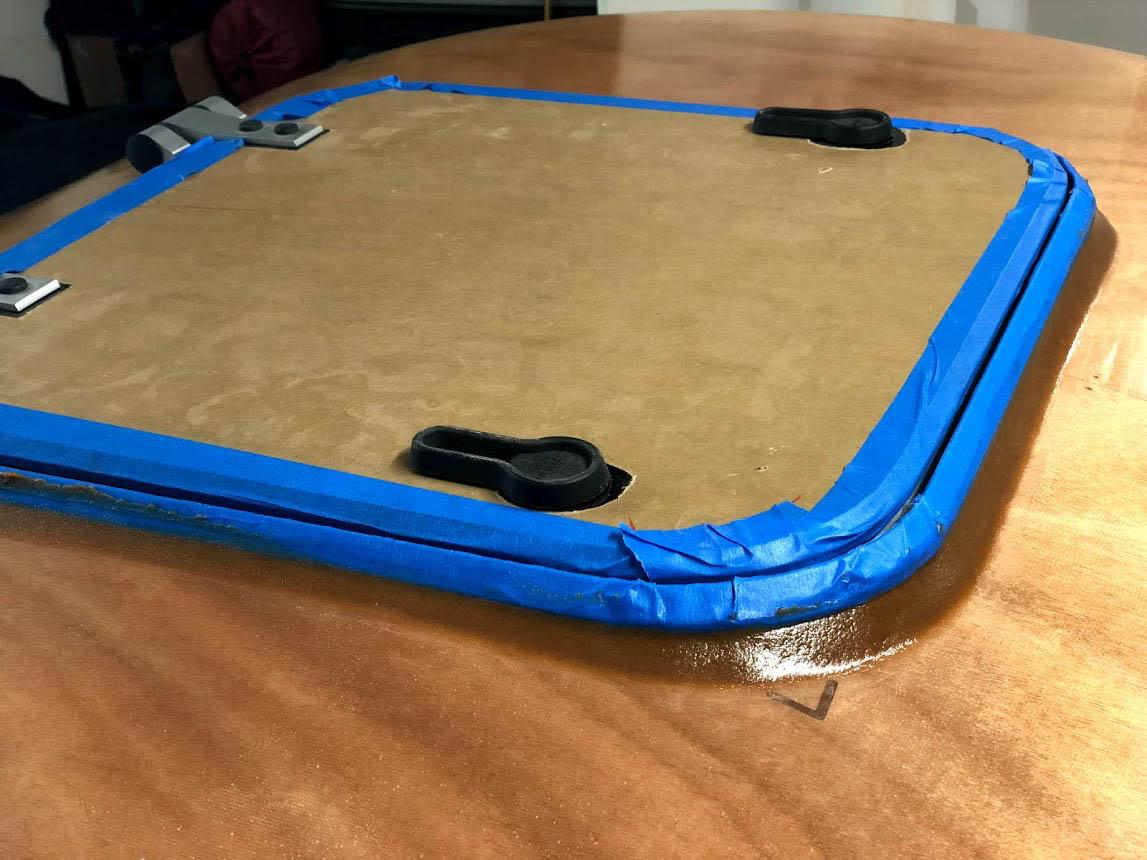
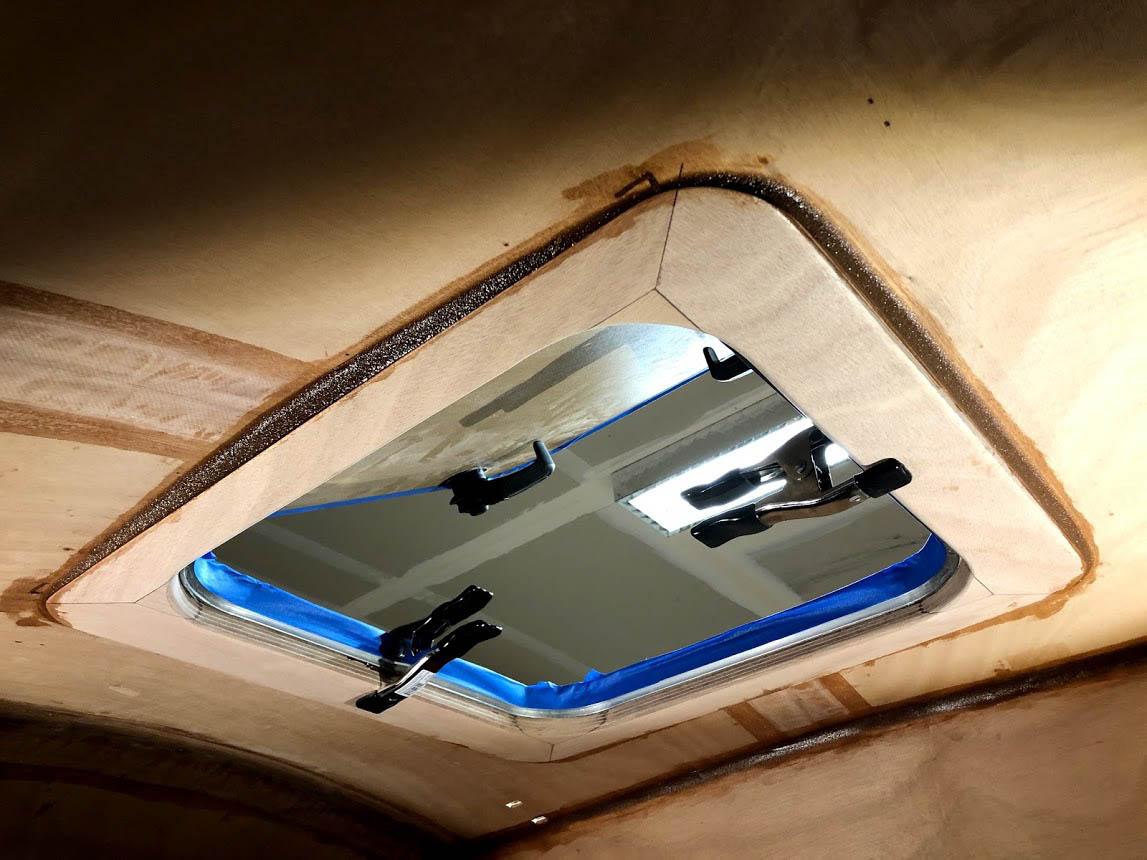
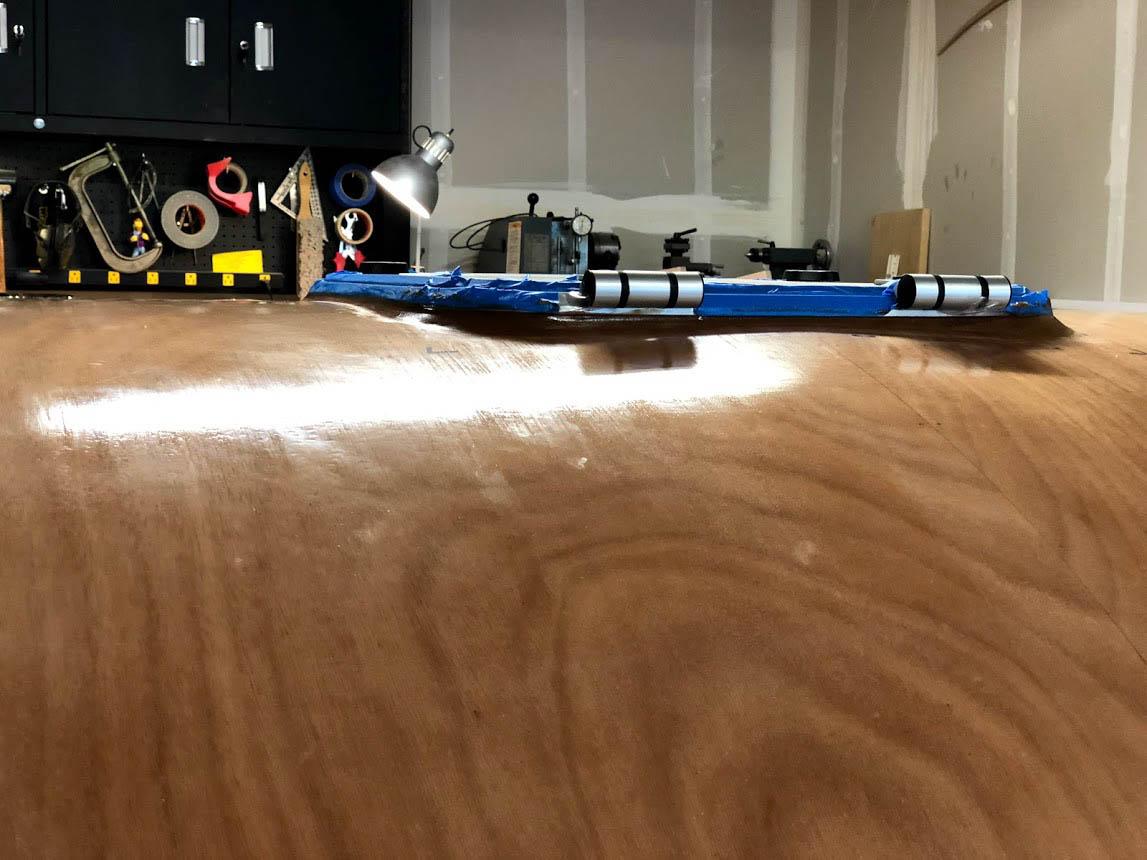
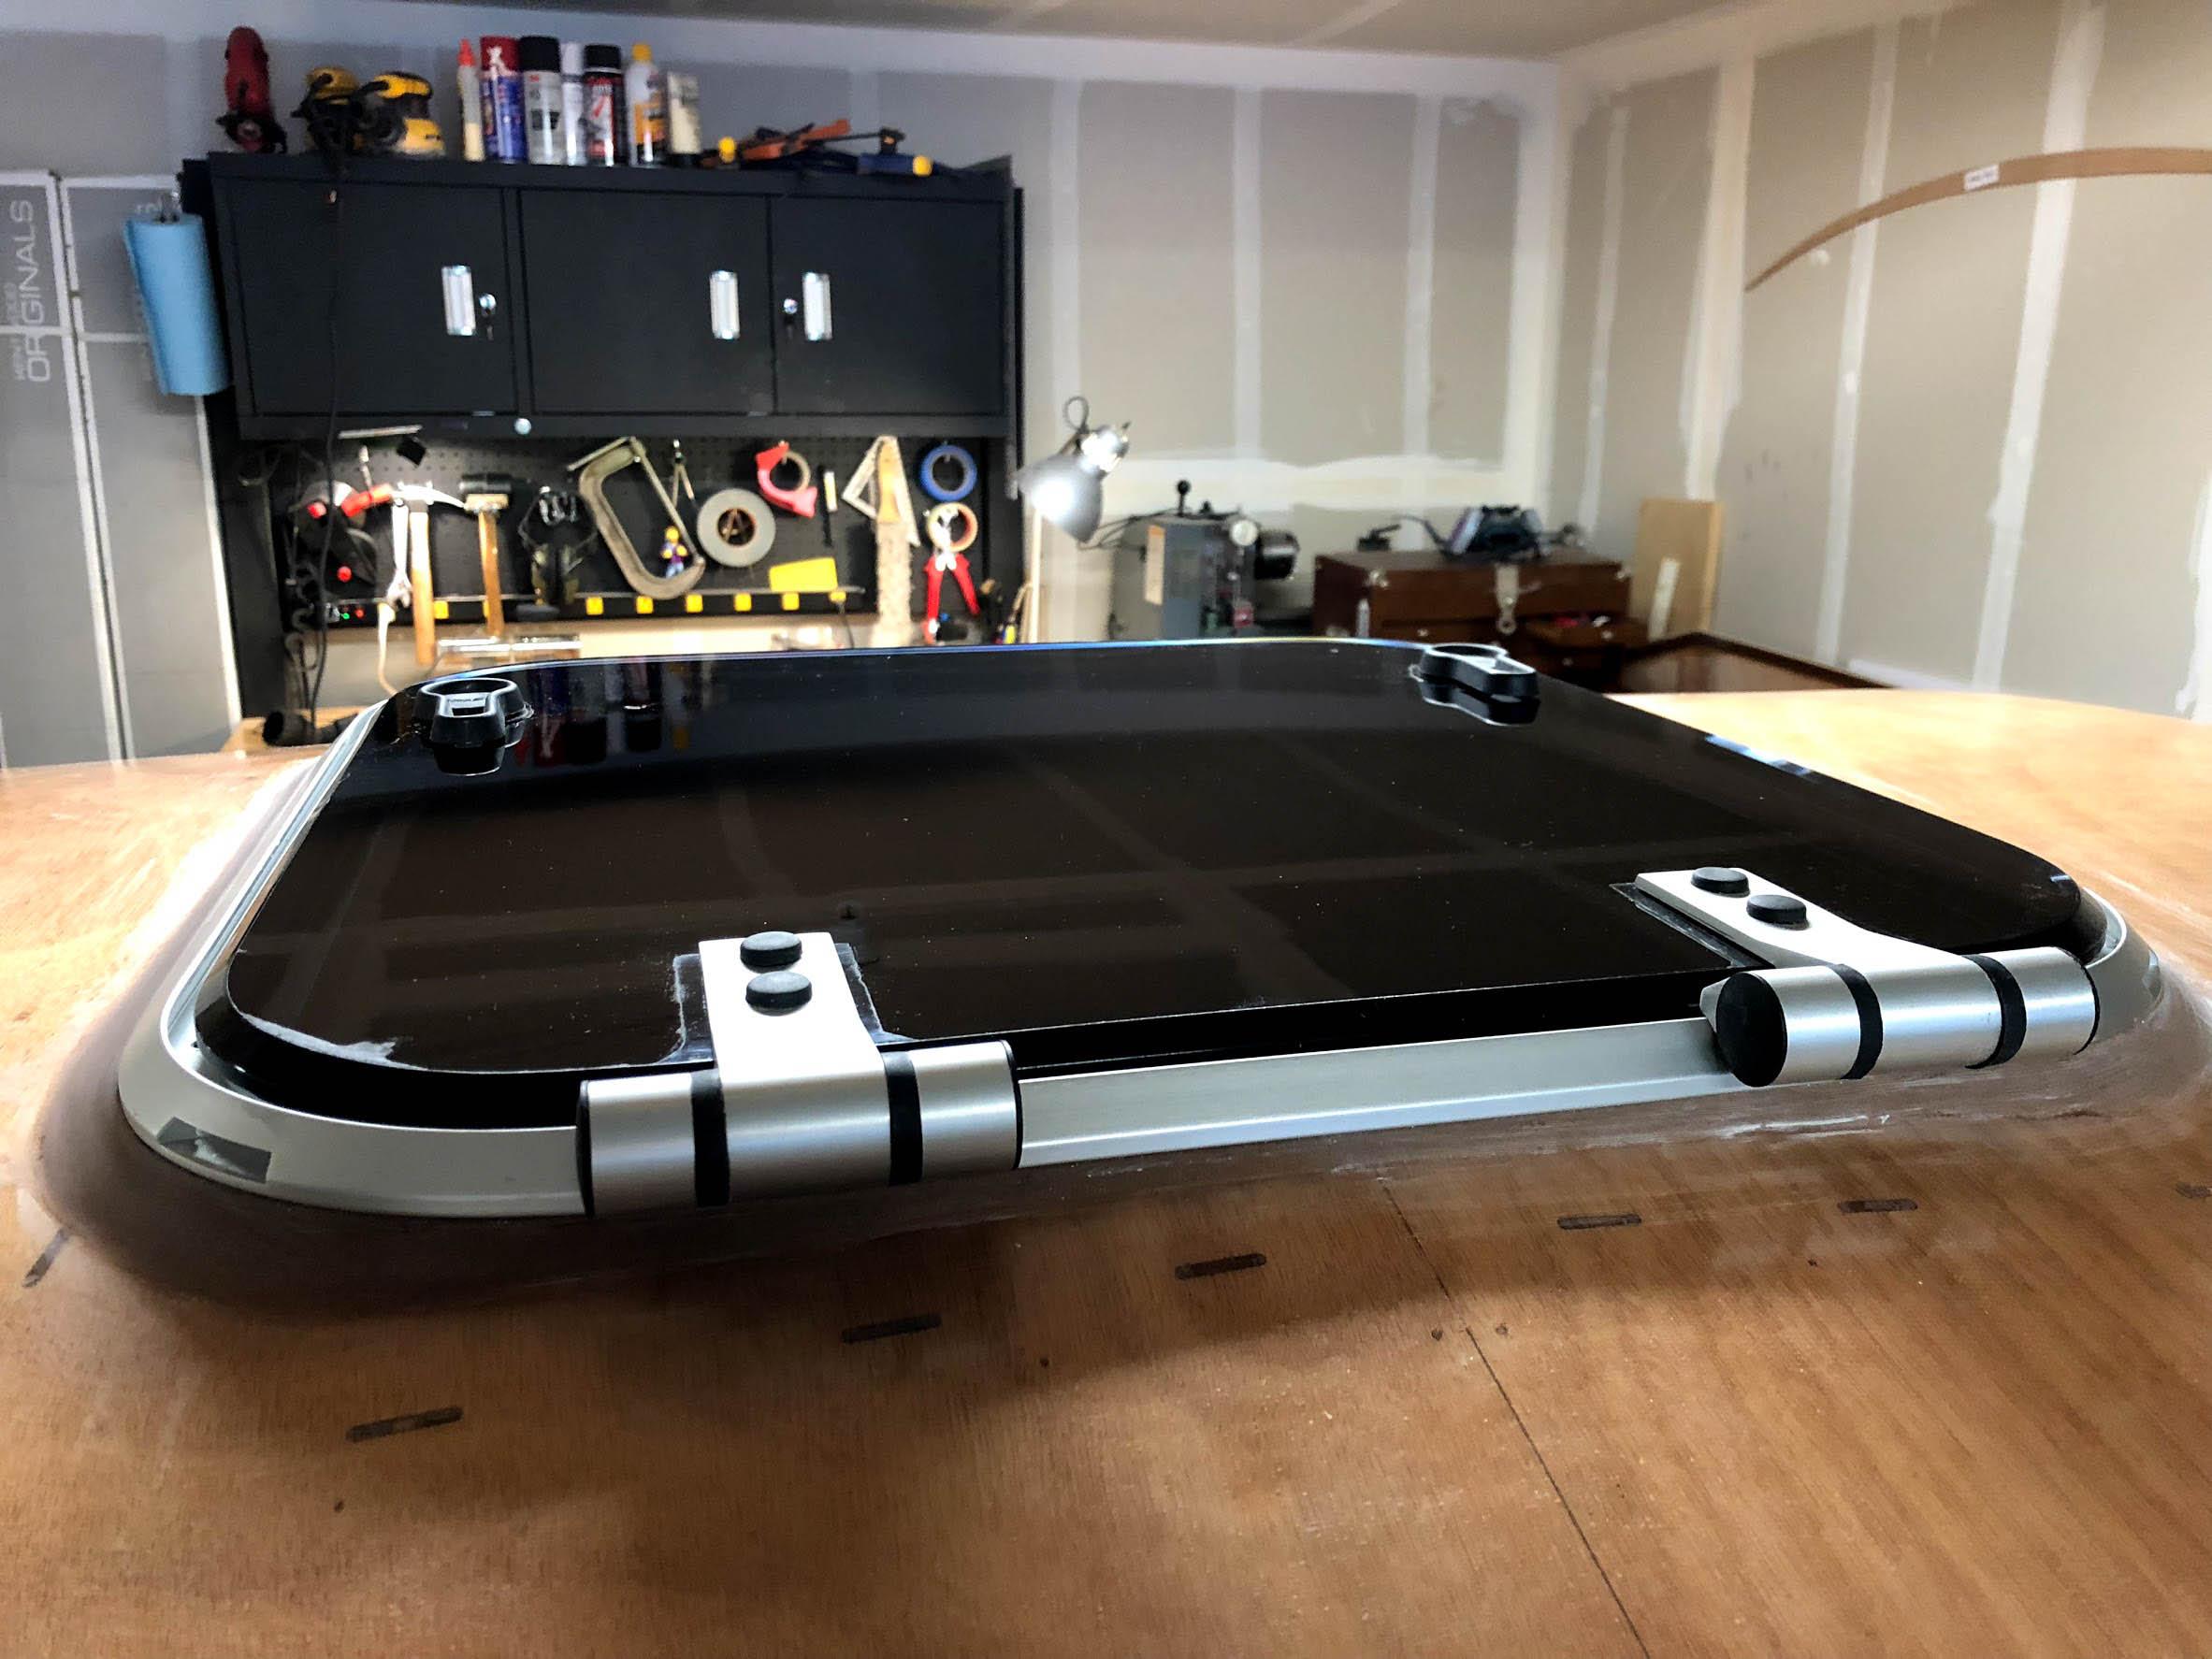
And here’s one of the main reasons I wanted this kind of hatch… it’s looooow profile!
Some hours later and after some careful hammering, I got the hatch out to remove the protective tape. Now I just need to clean up that mondo fillet and I’m calling the top hatch pretty much done. I’ll bed it with butyl caulk and screws.
-
This reply was modified 5 years, 11 months ago by
Dan.
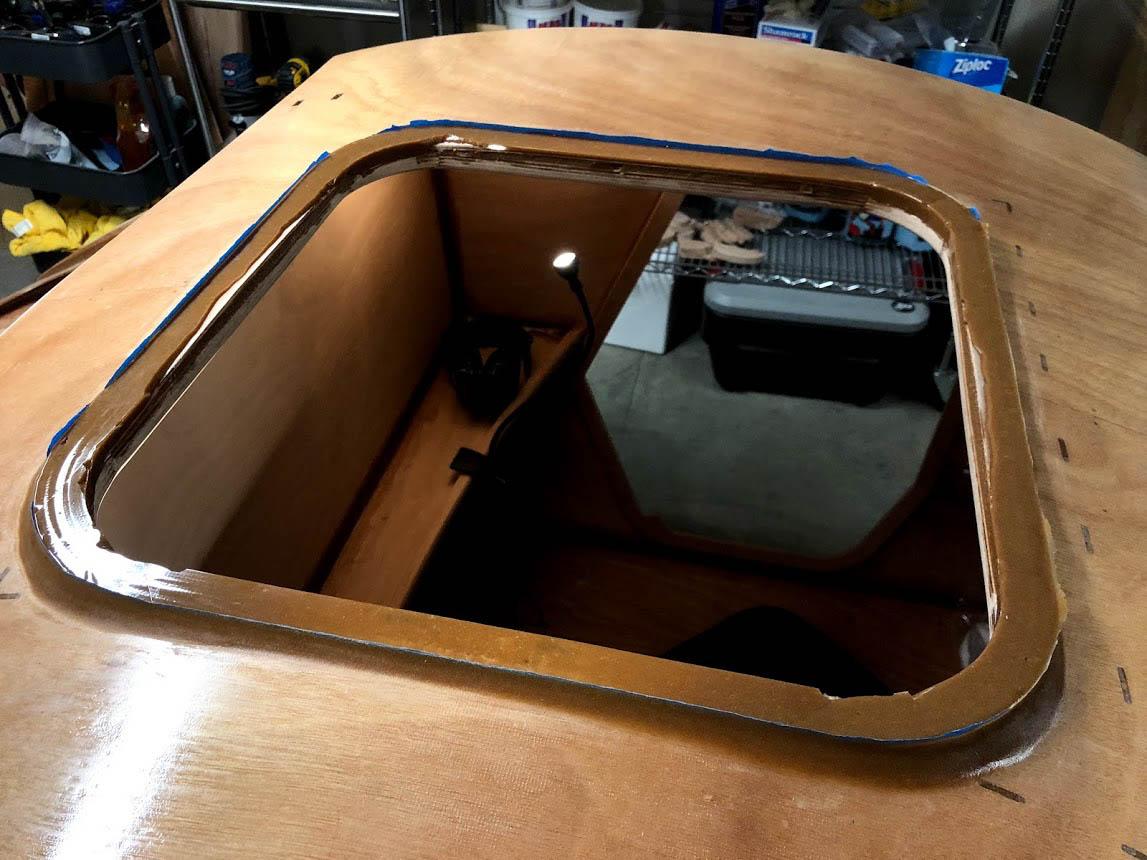
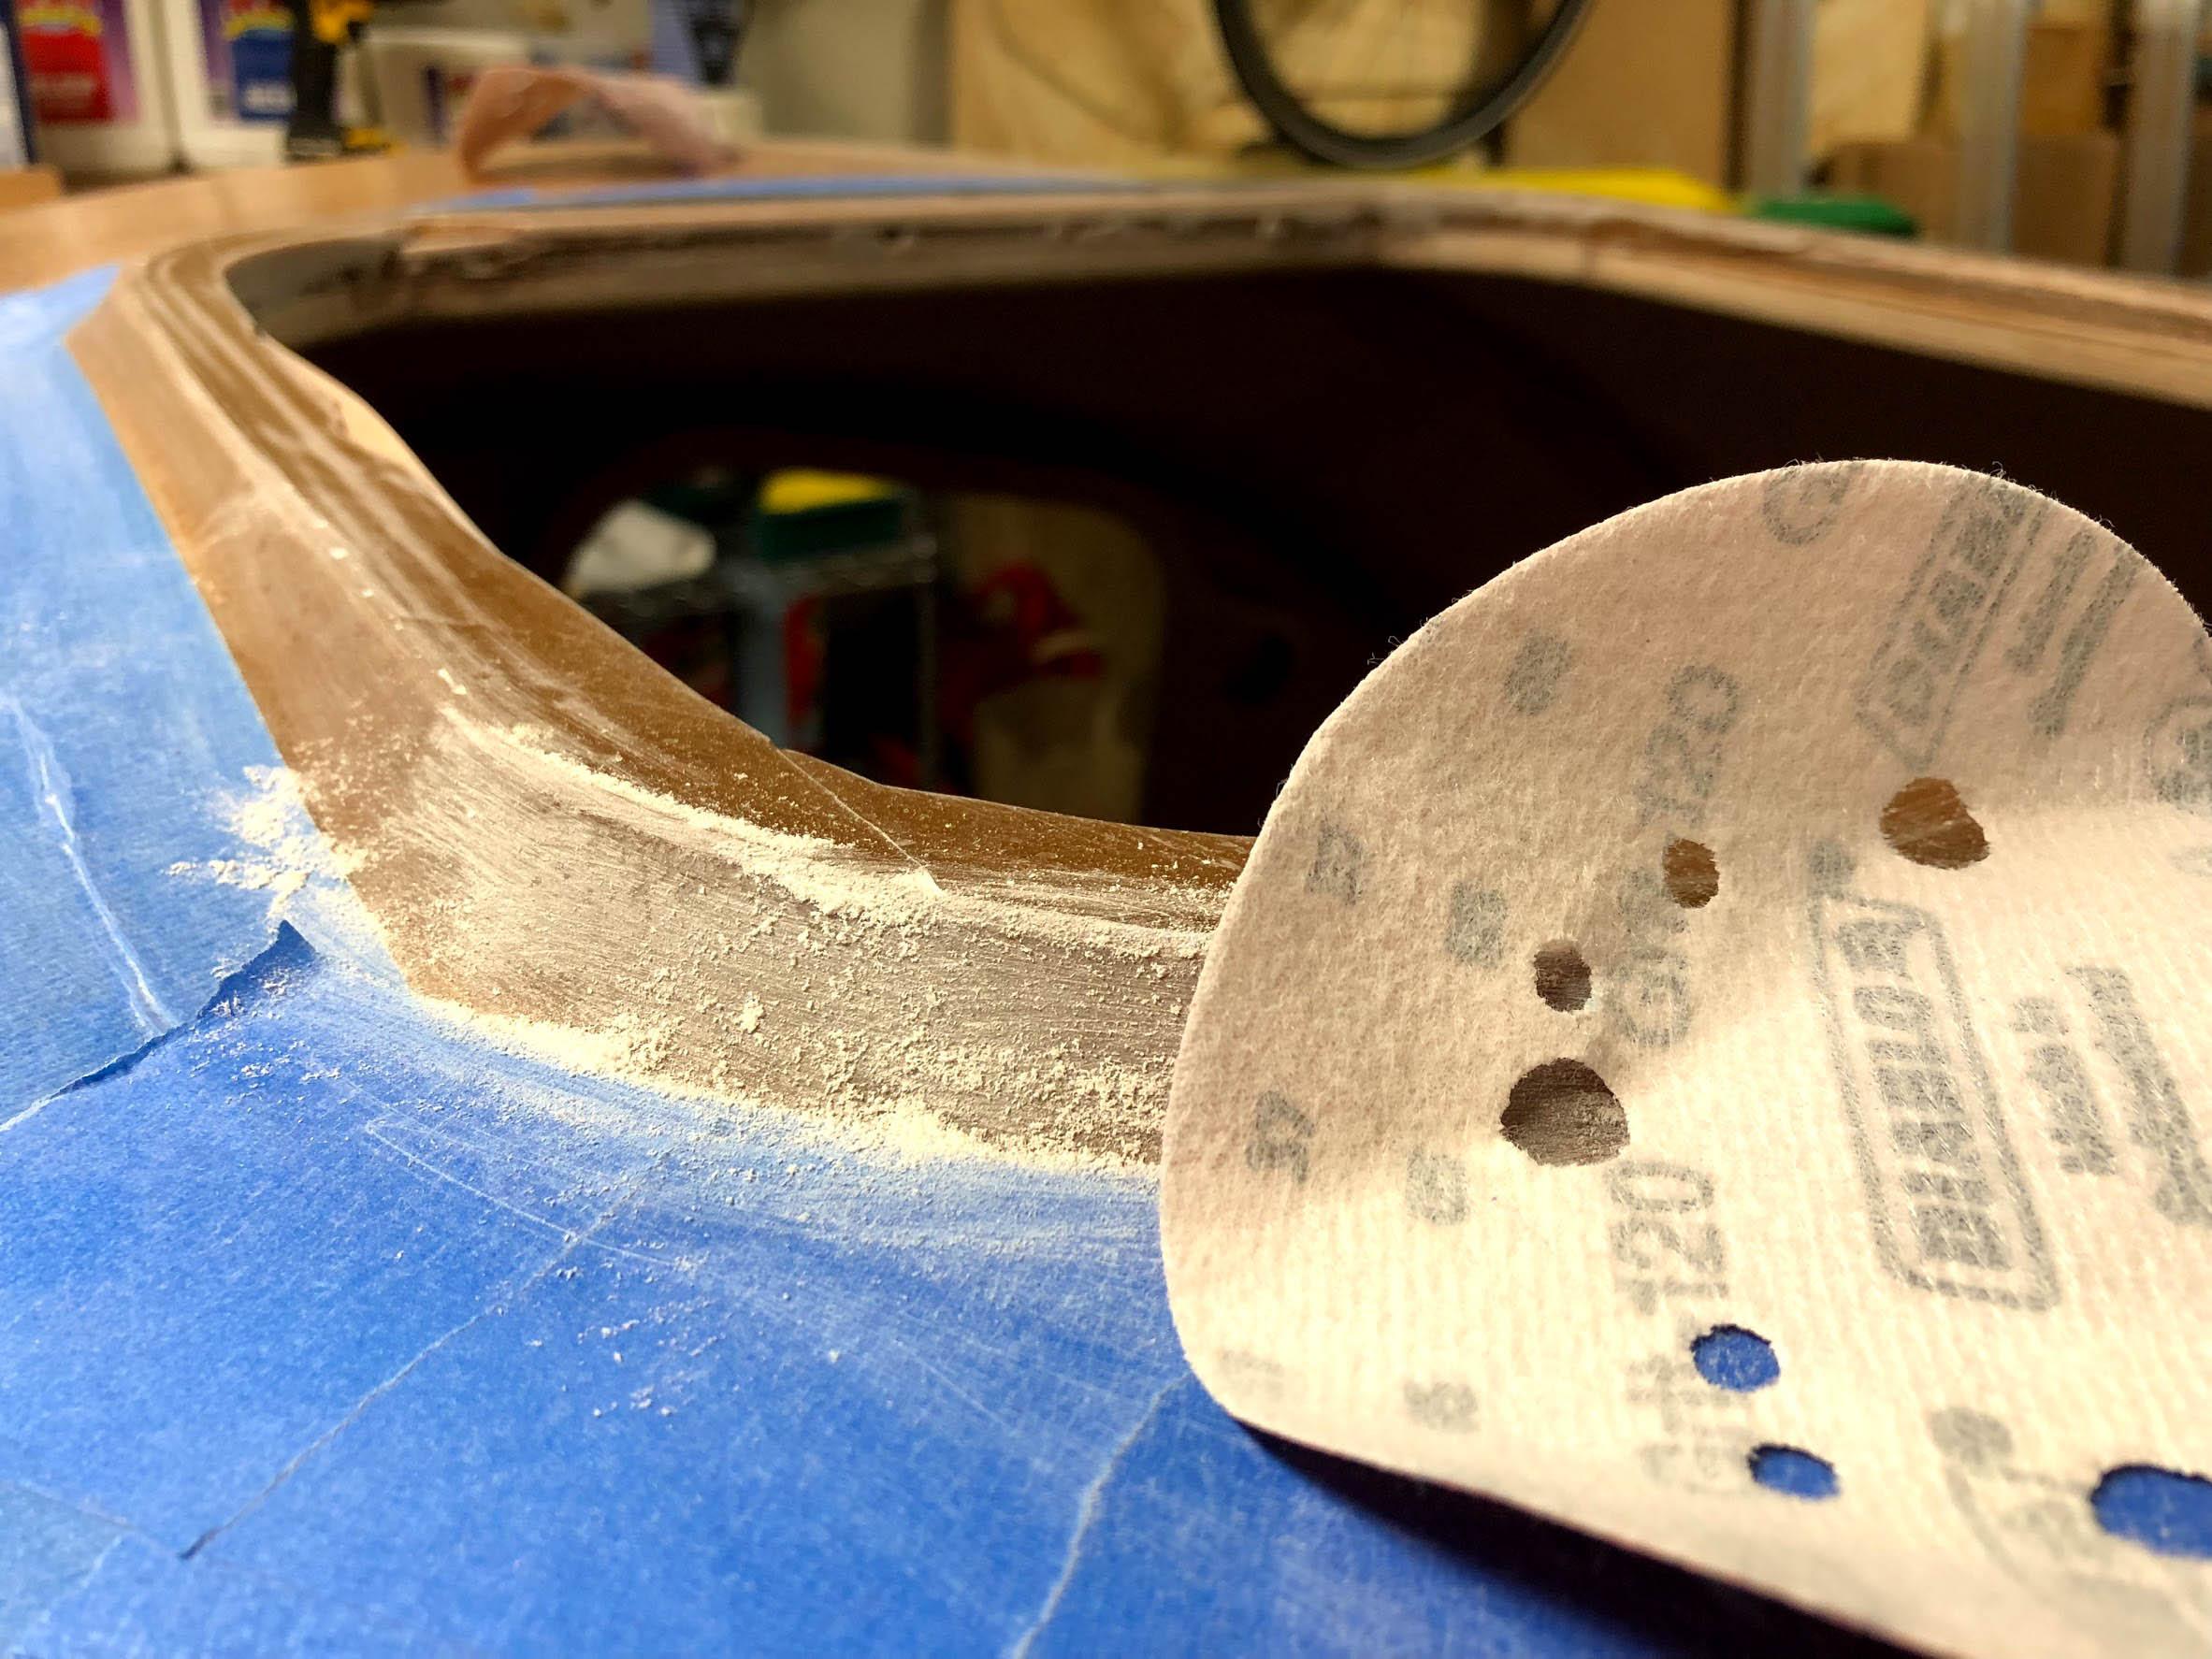
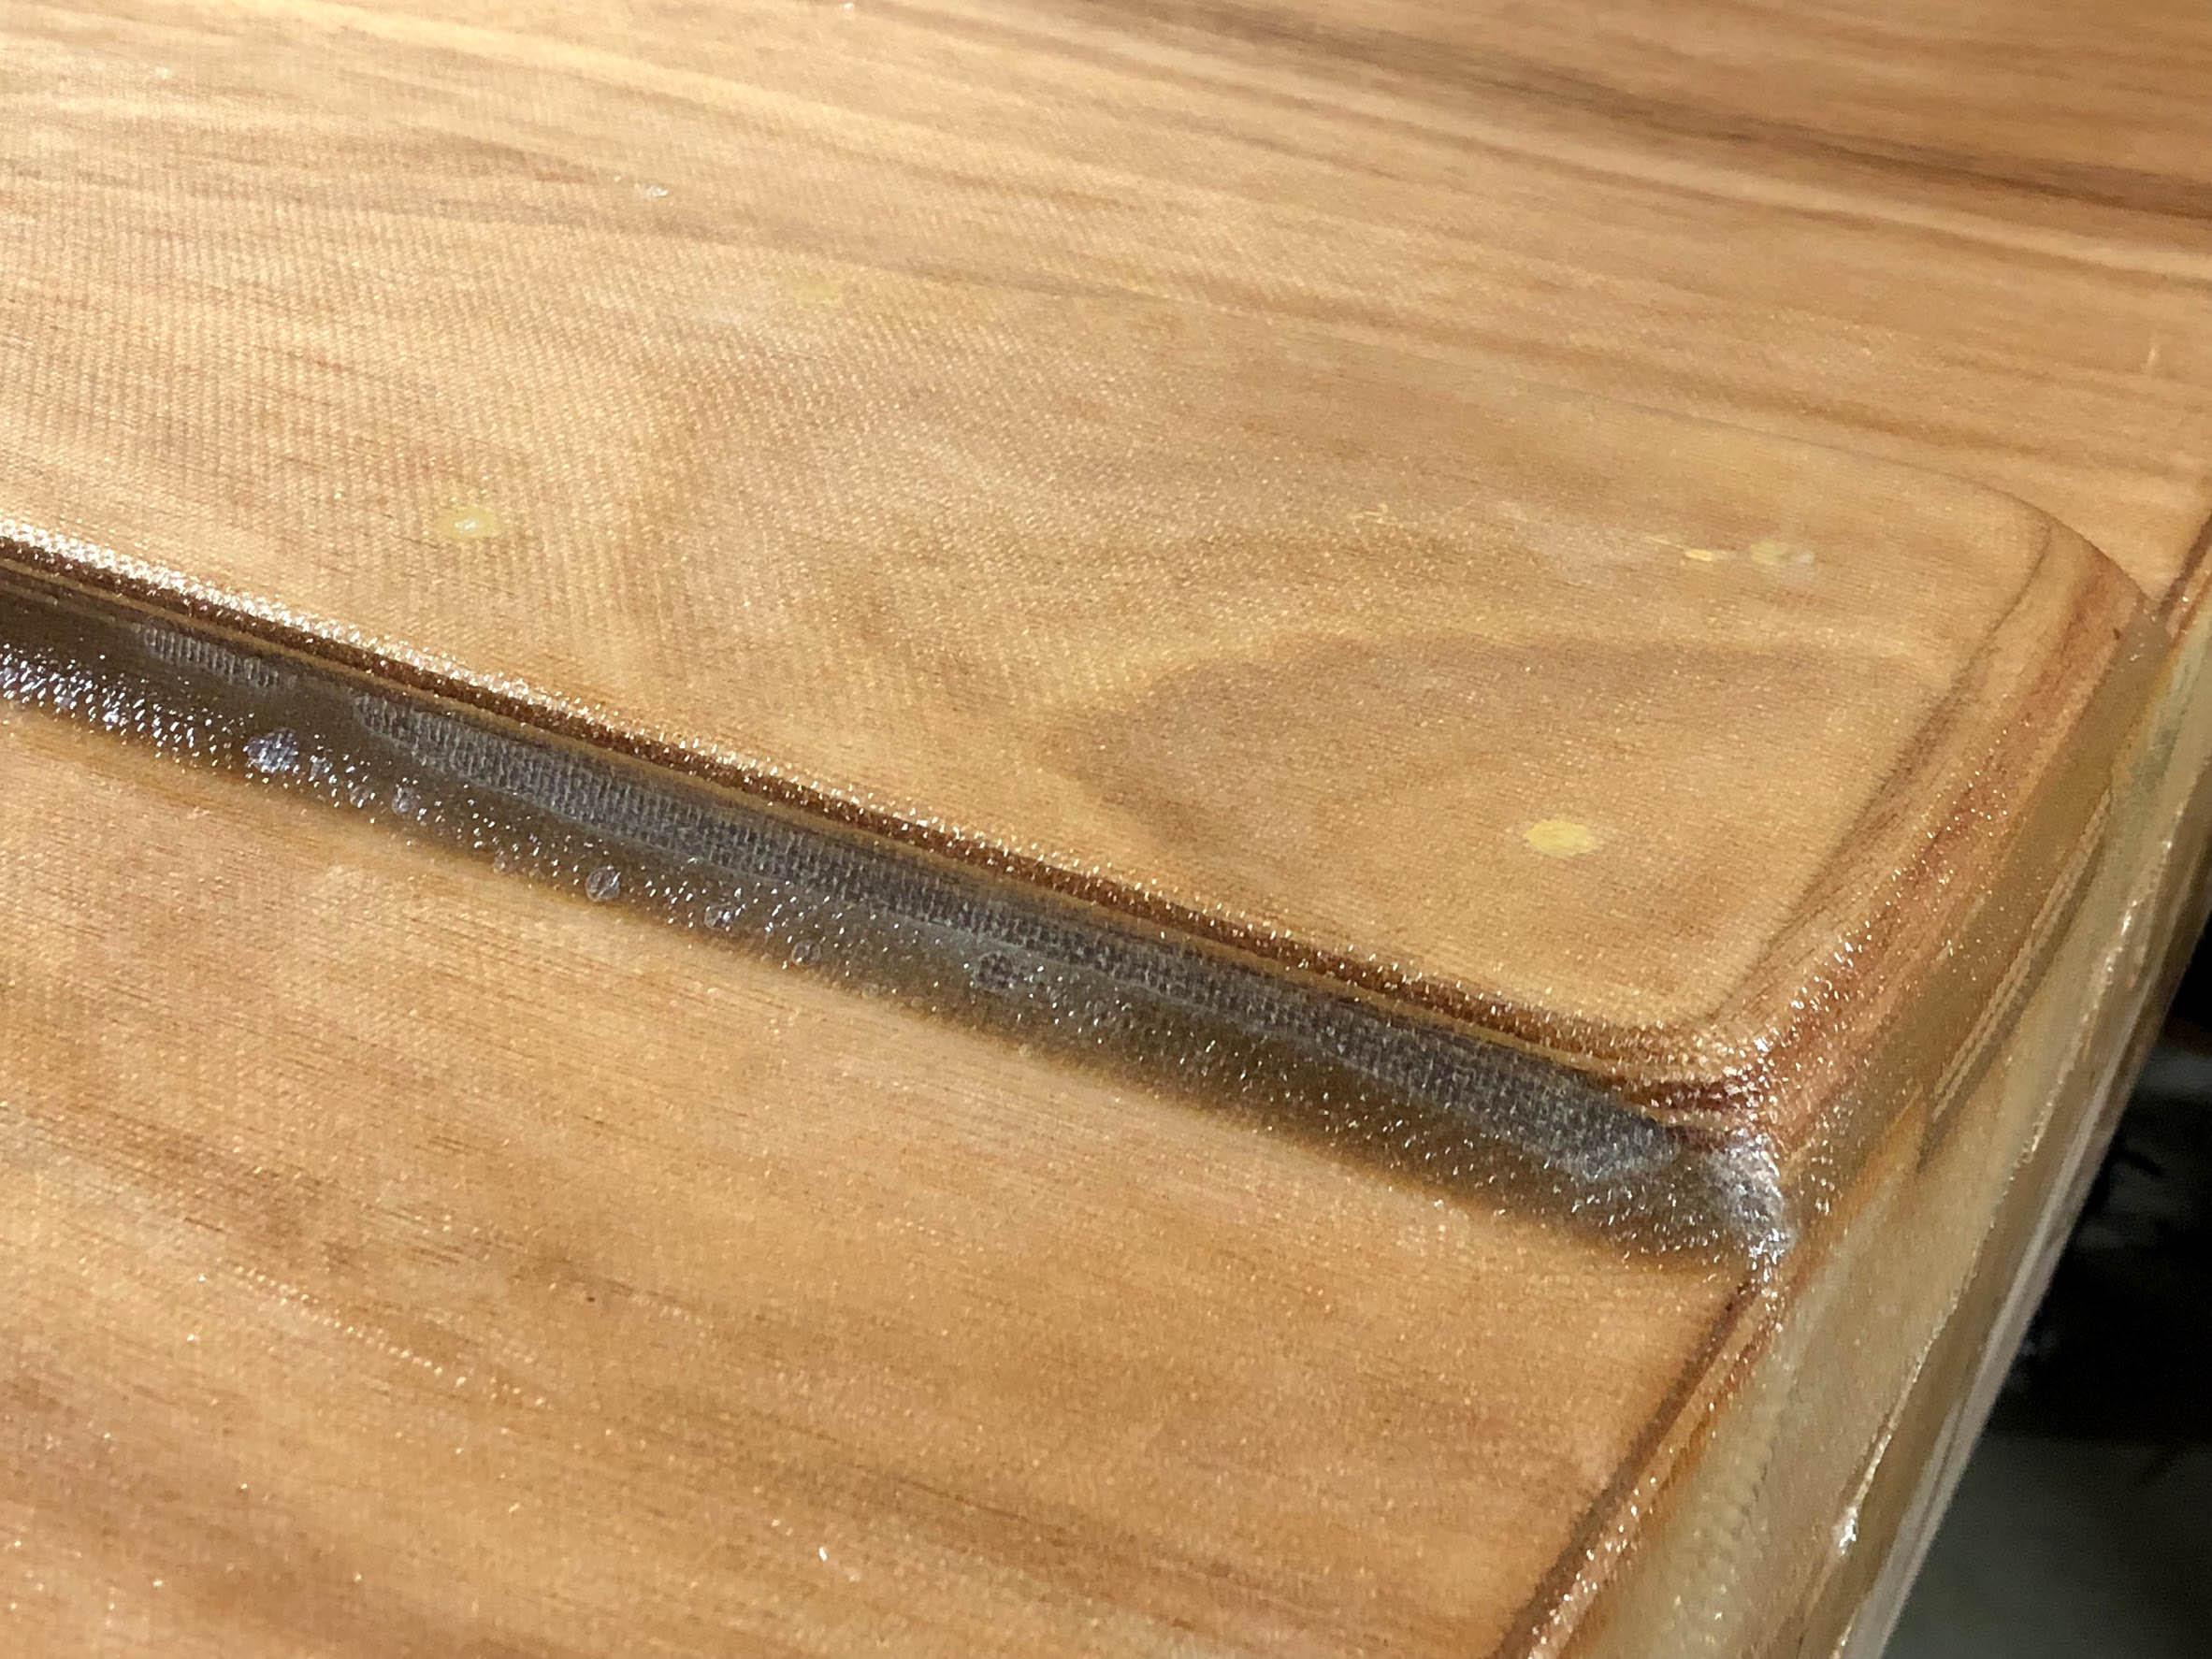
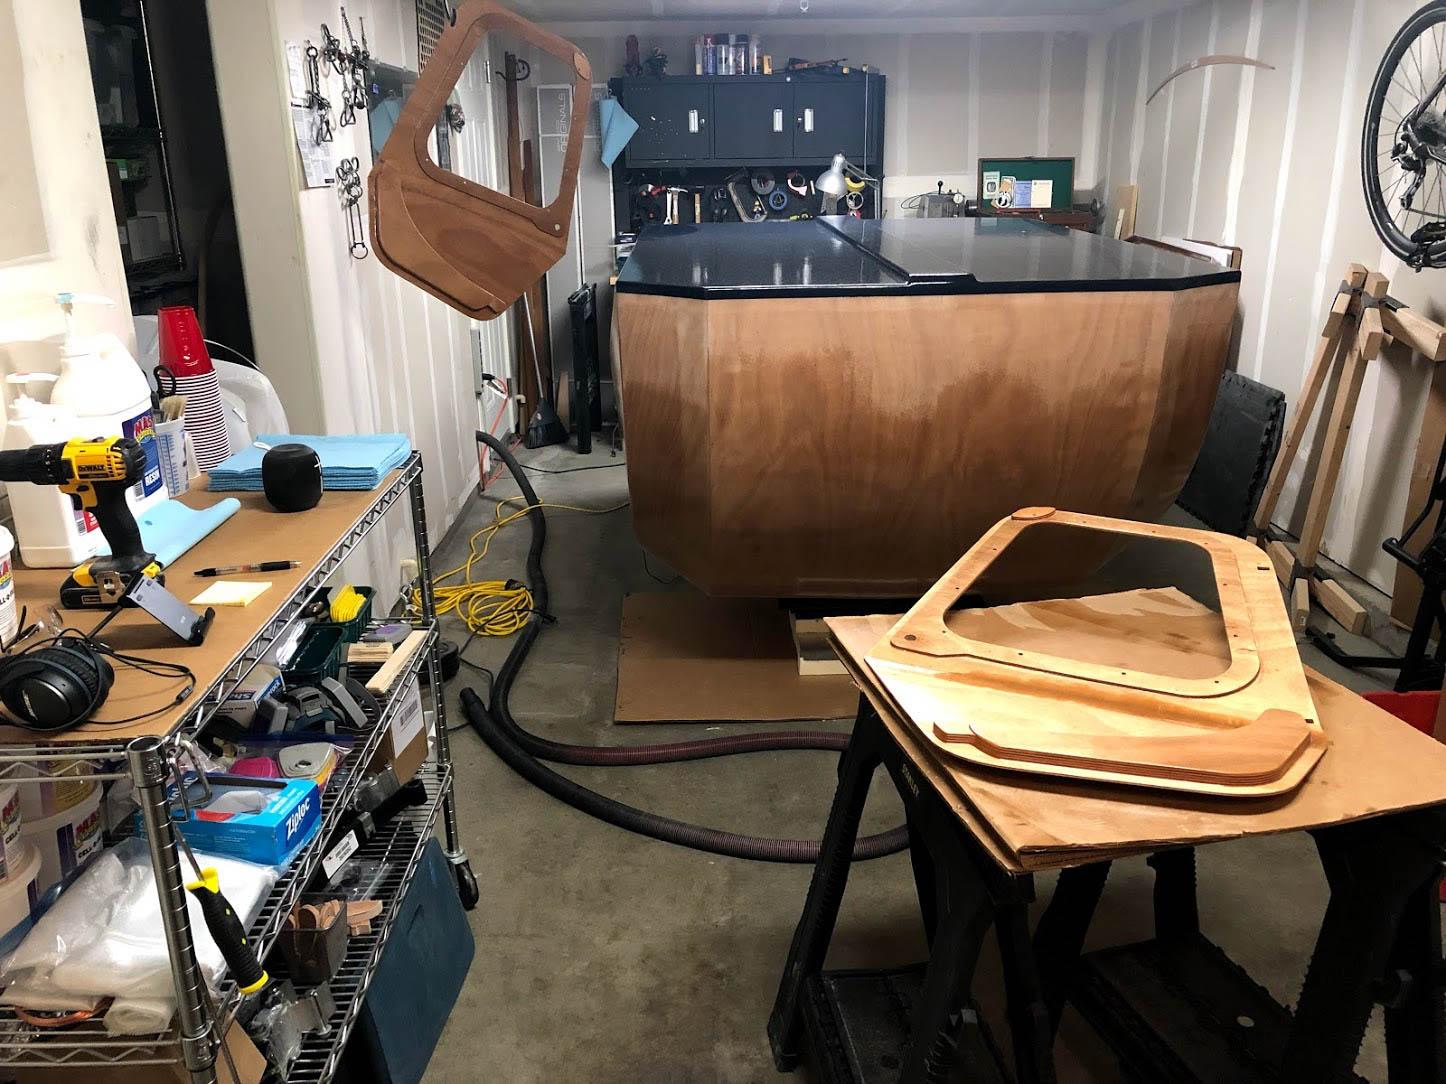
May 25, 2018 at 2:21 pm #1851ParticipantI did a bunch of cleanup on the top hatch fillet. I both sanded and polished the exterior of the fillet and filled voids where thickened epoxy hadn’t fully squeezed in. The fillet will get a coat of un-thickened epoxy and then varnish along with the rest of the shell when I do the final finish. I added cel-o-fill along with the wood flour when I was thickening the epoxy for this fillet, so it is somewhat lighter in color than all the other fillets and hopefully will blend with the color of the shell a little better in the end.
Then I wet-sanded the rough edge of the hatch lens up to 600-grit and finished it with polishing compound to get it optically clear. I am very pleased with the result of that.
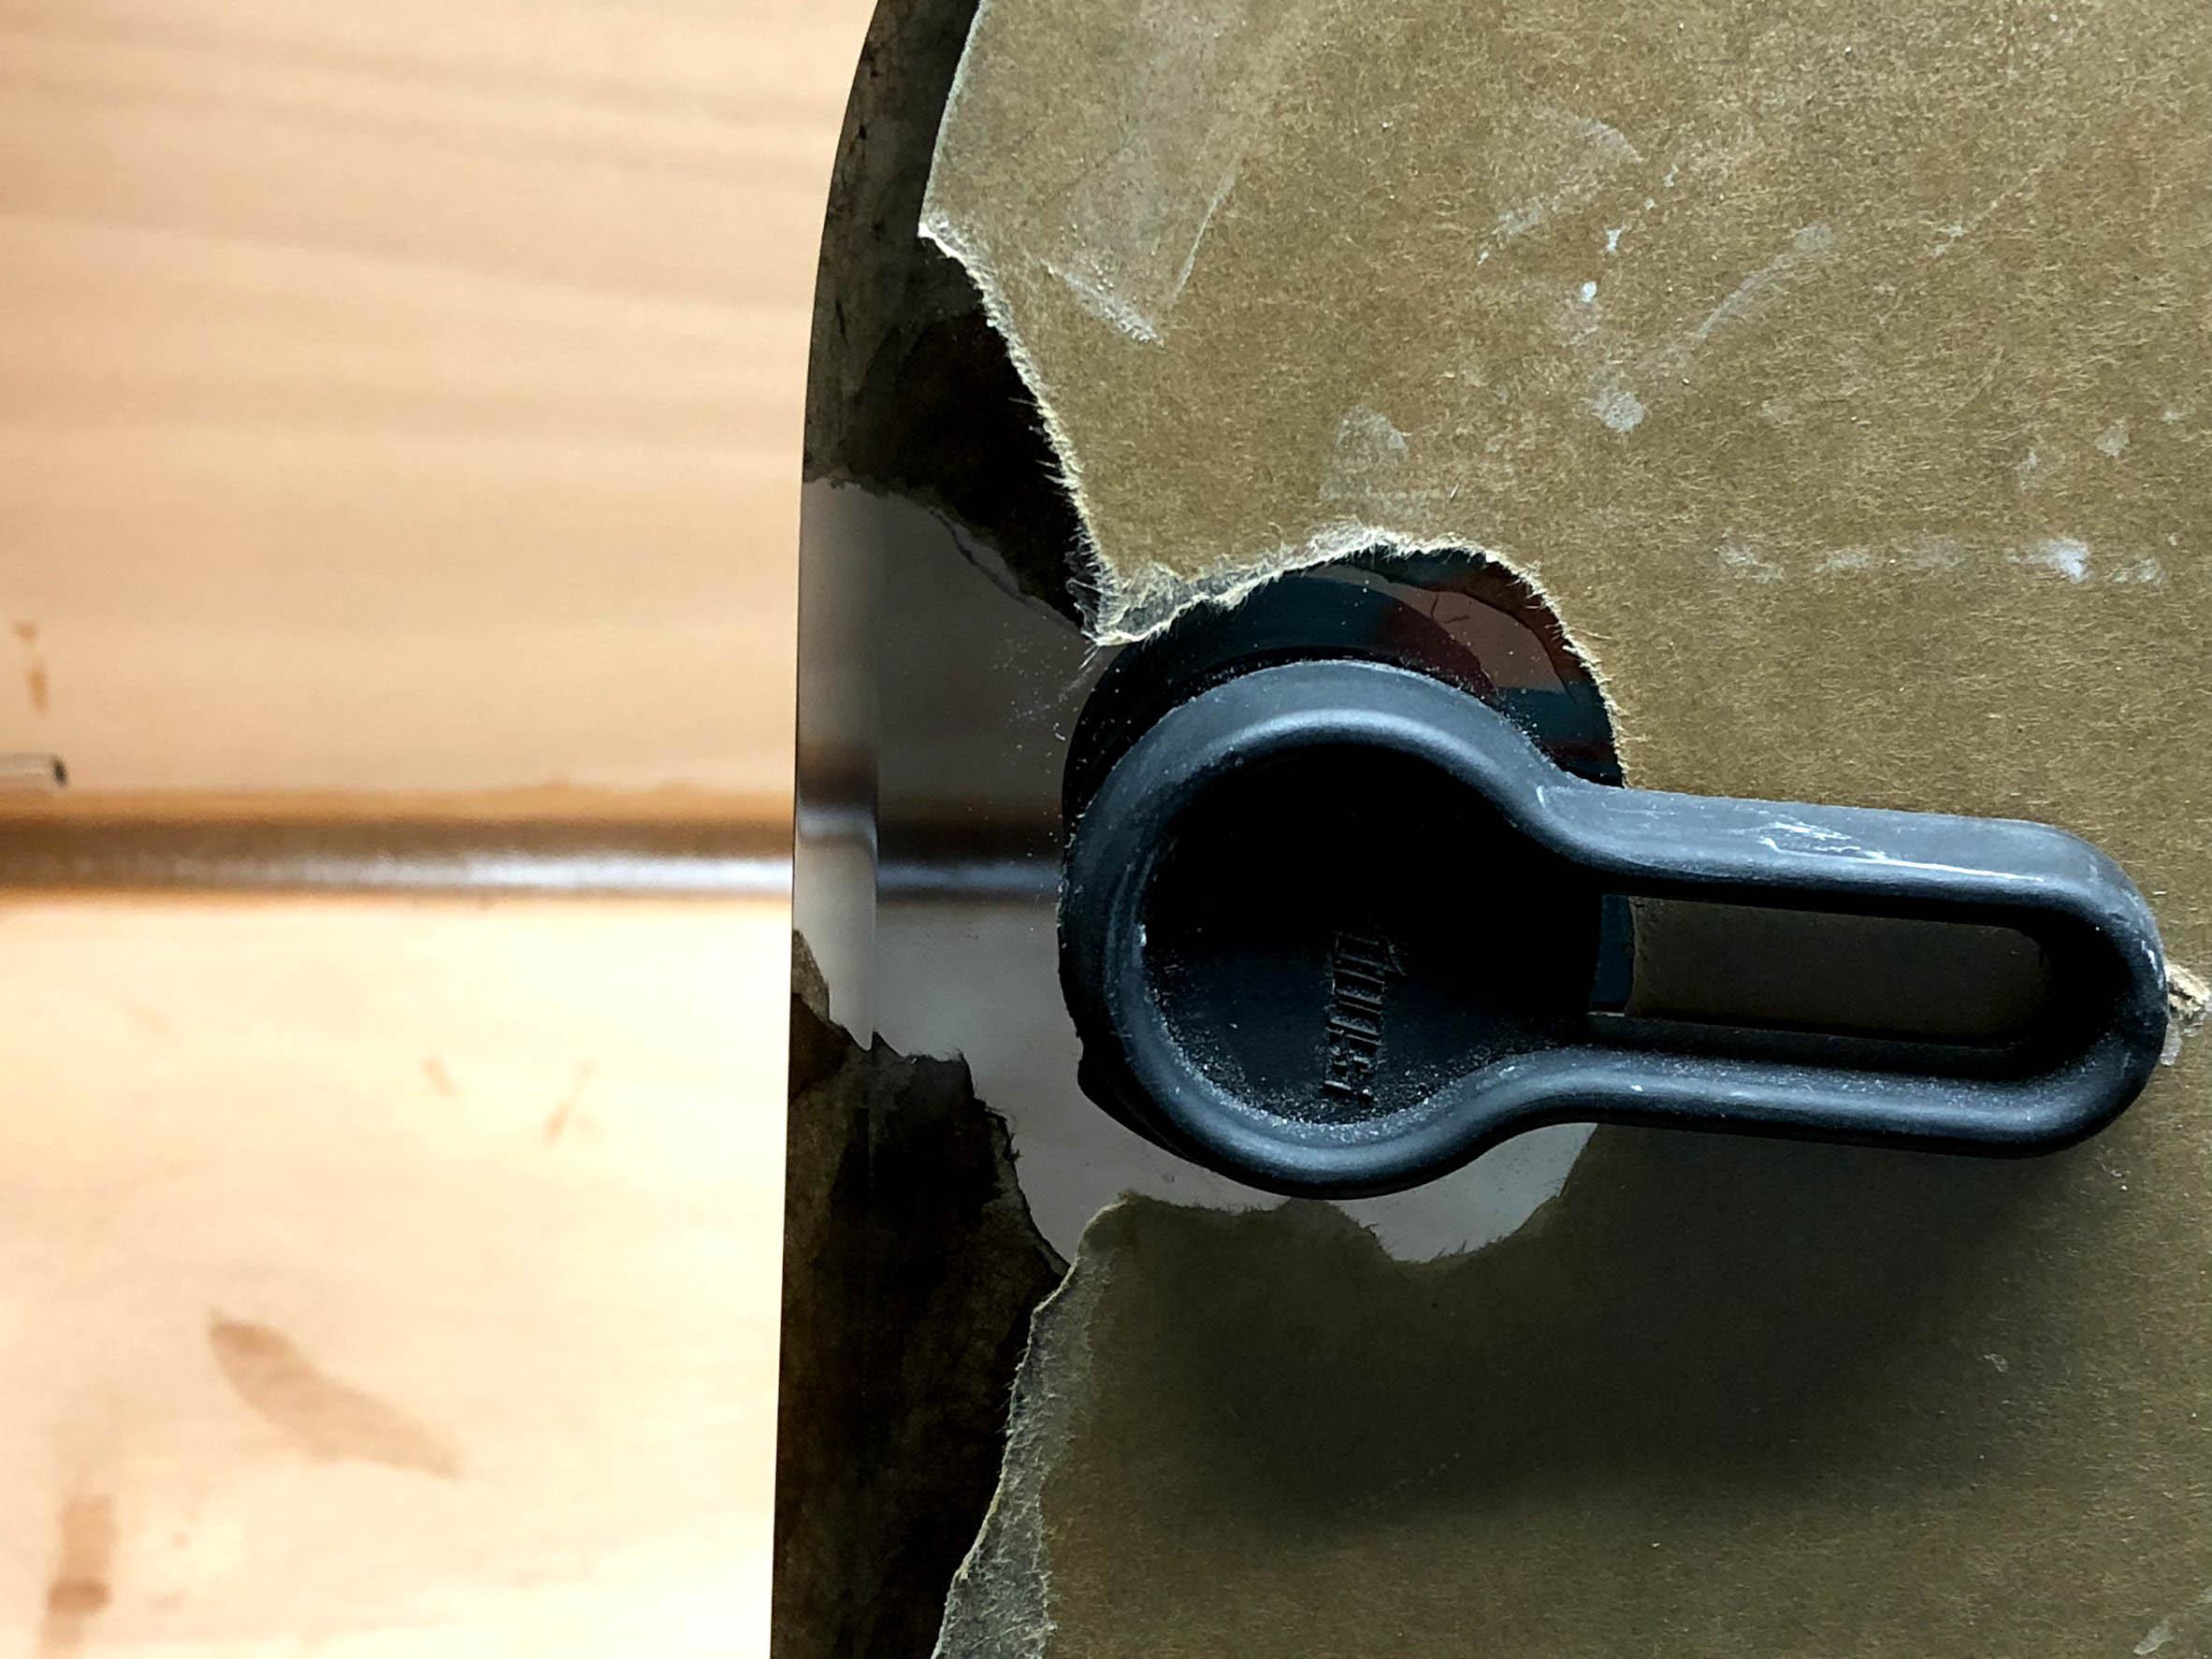
After that was done, I couldn’t take it anymore and removed the protective film from the hatch. Behold:
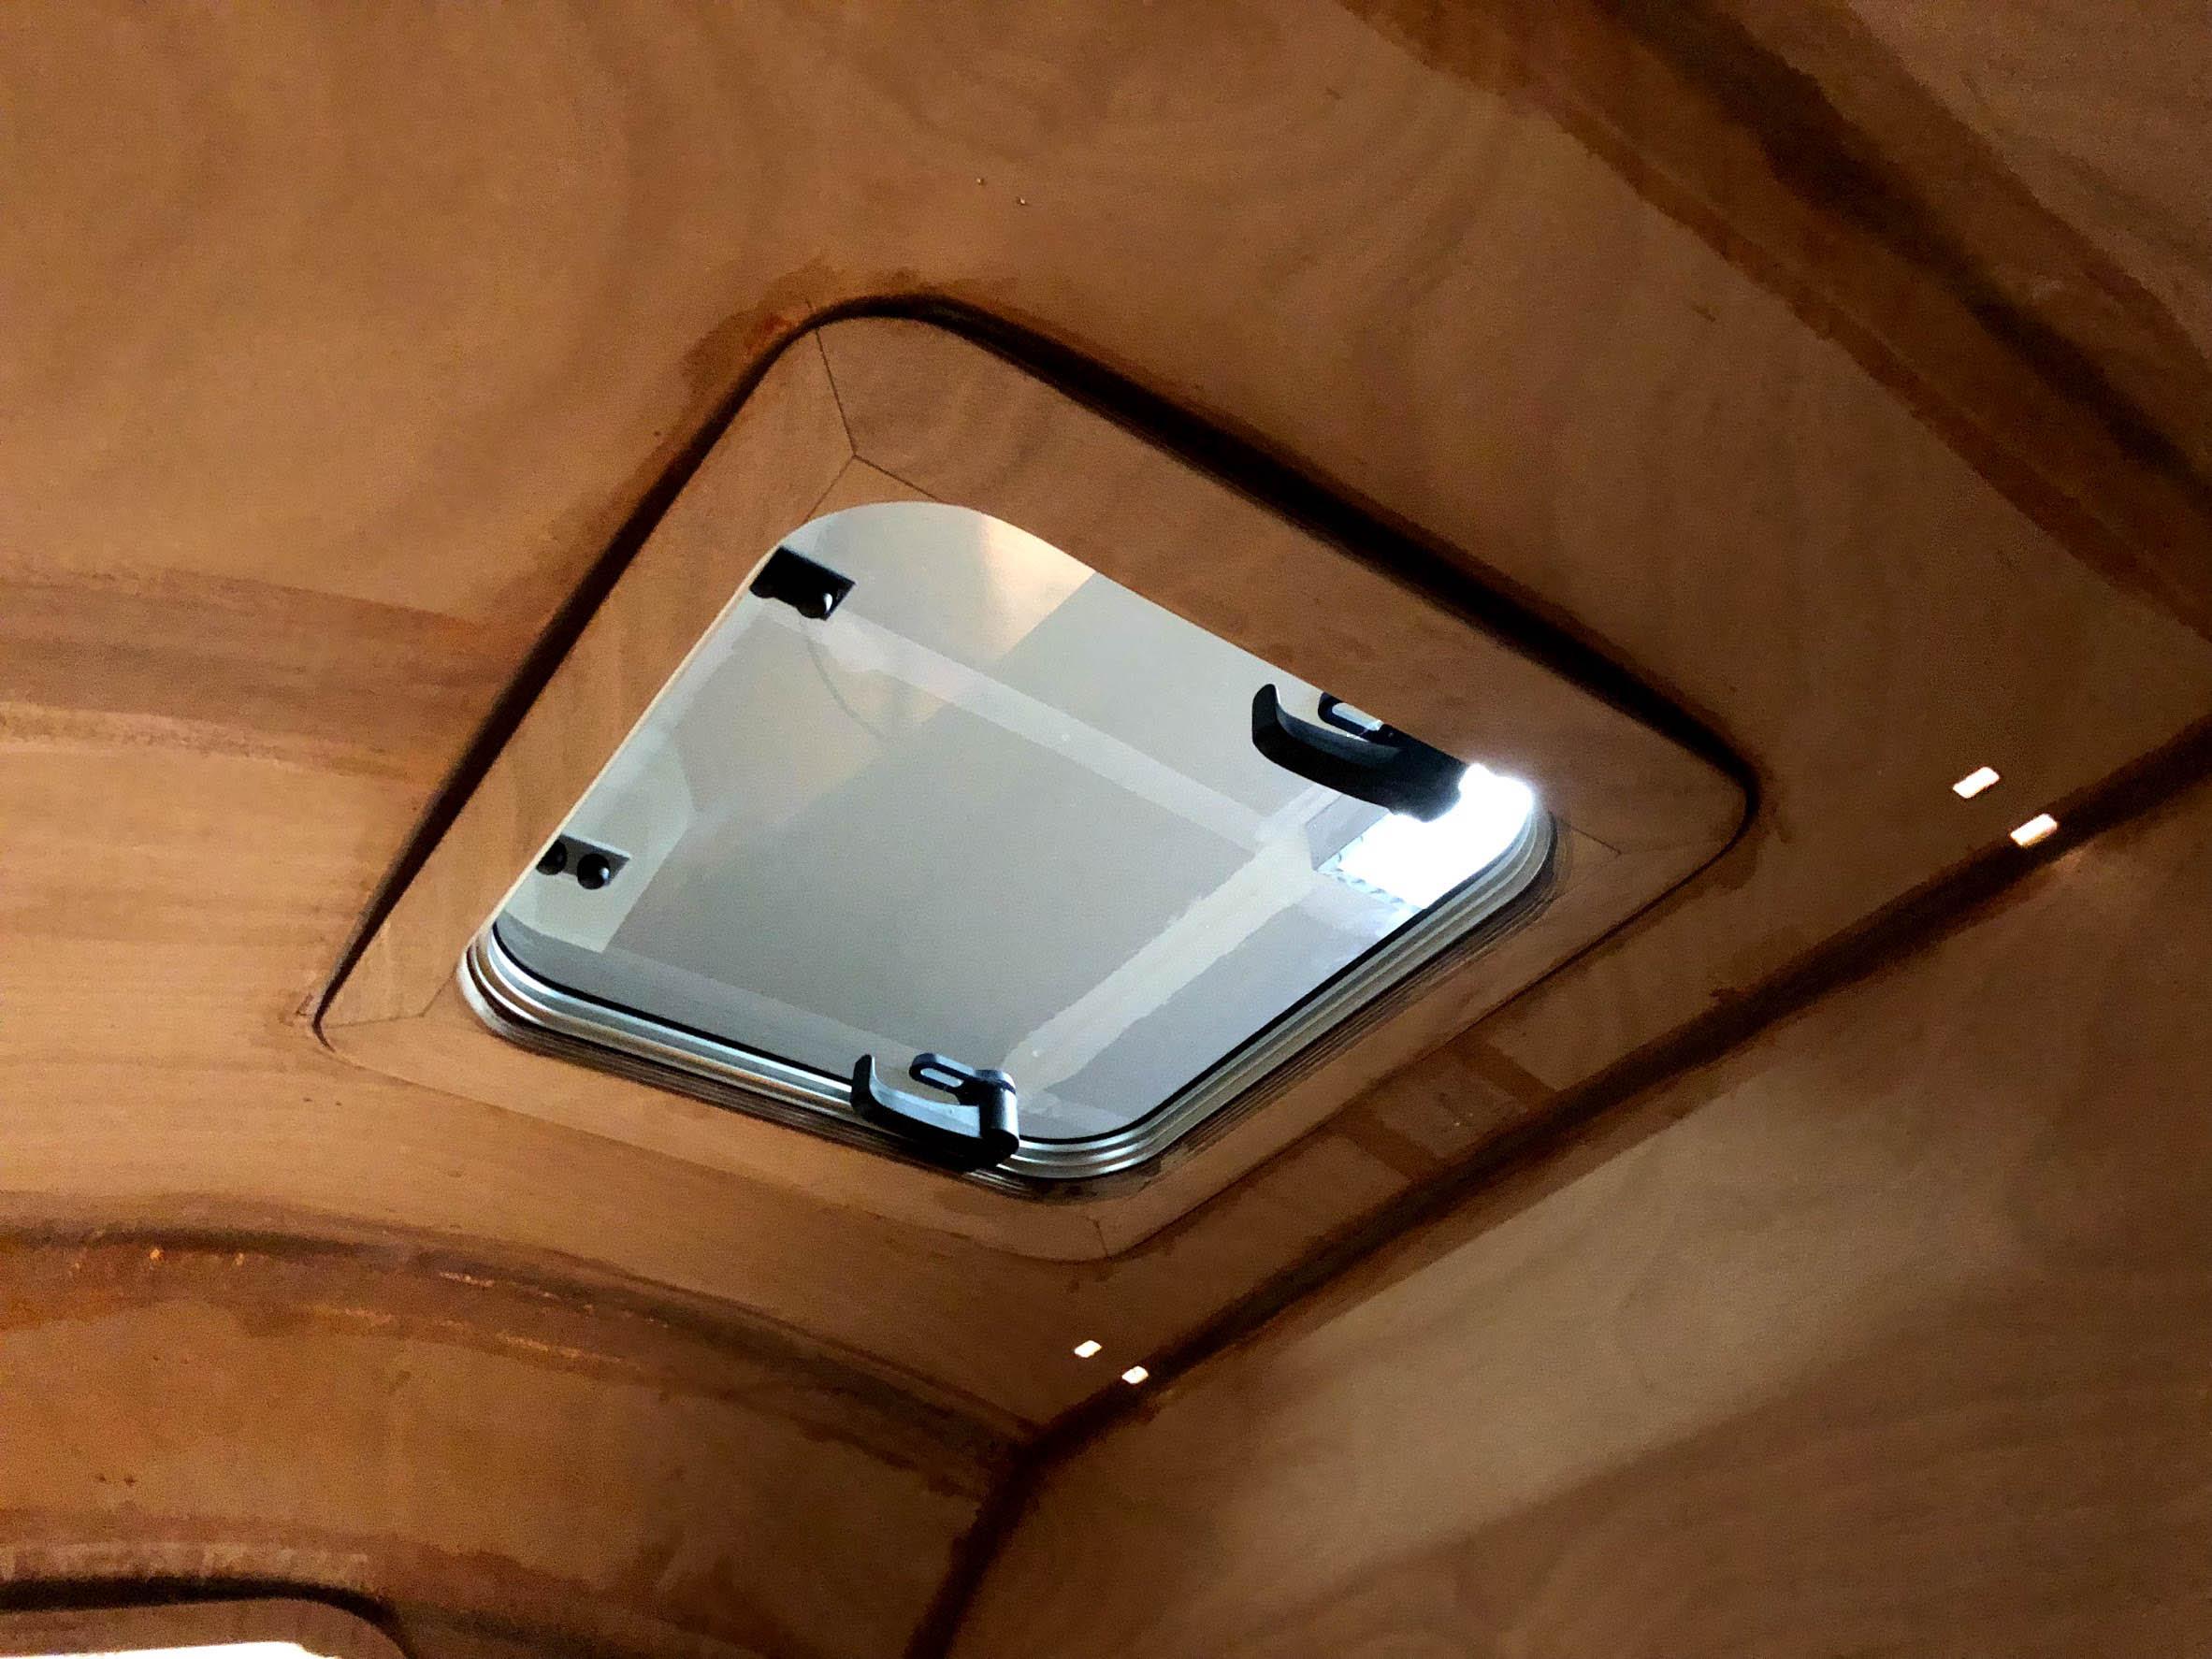
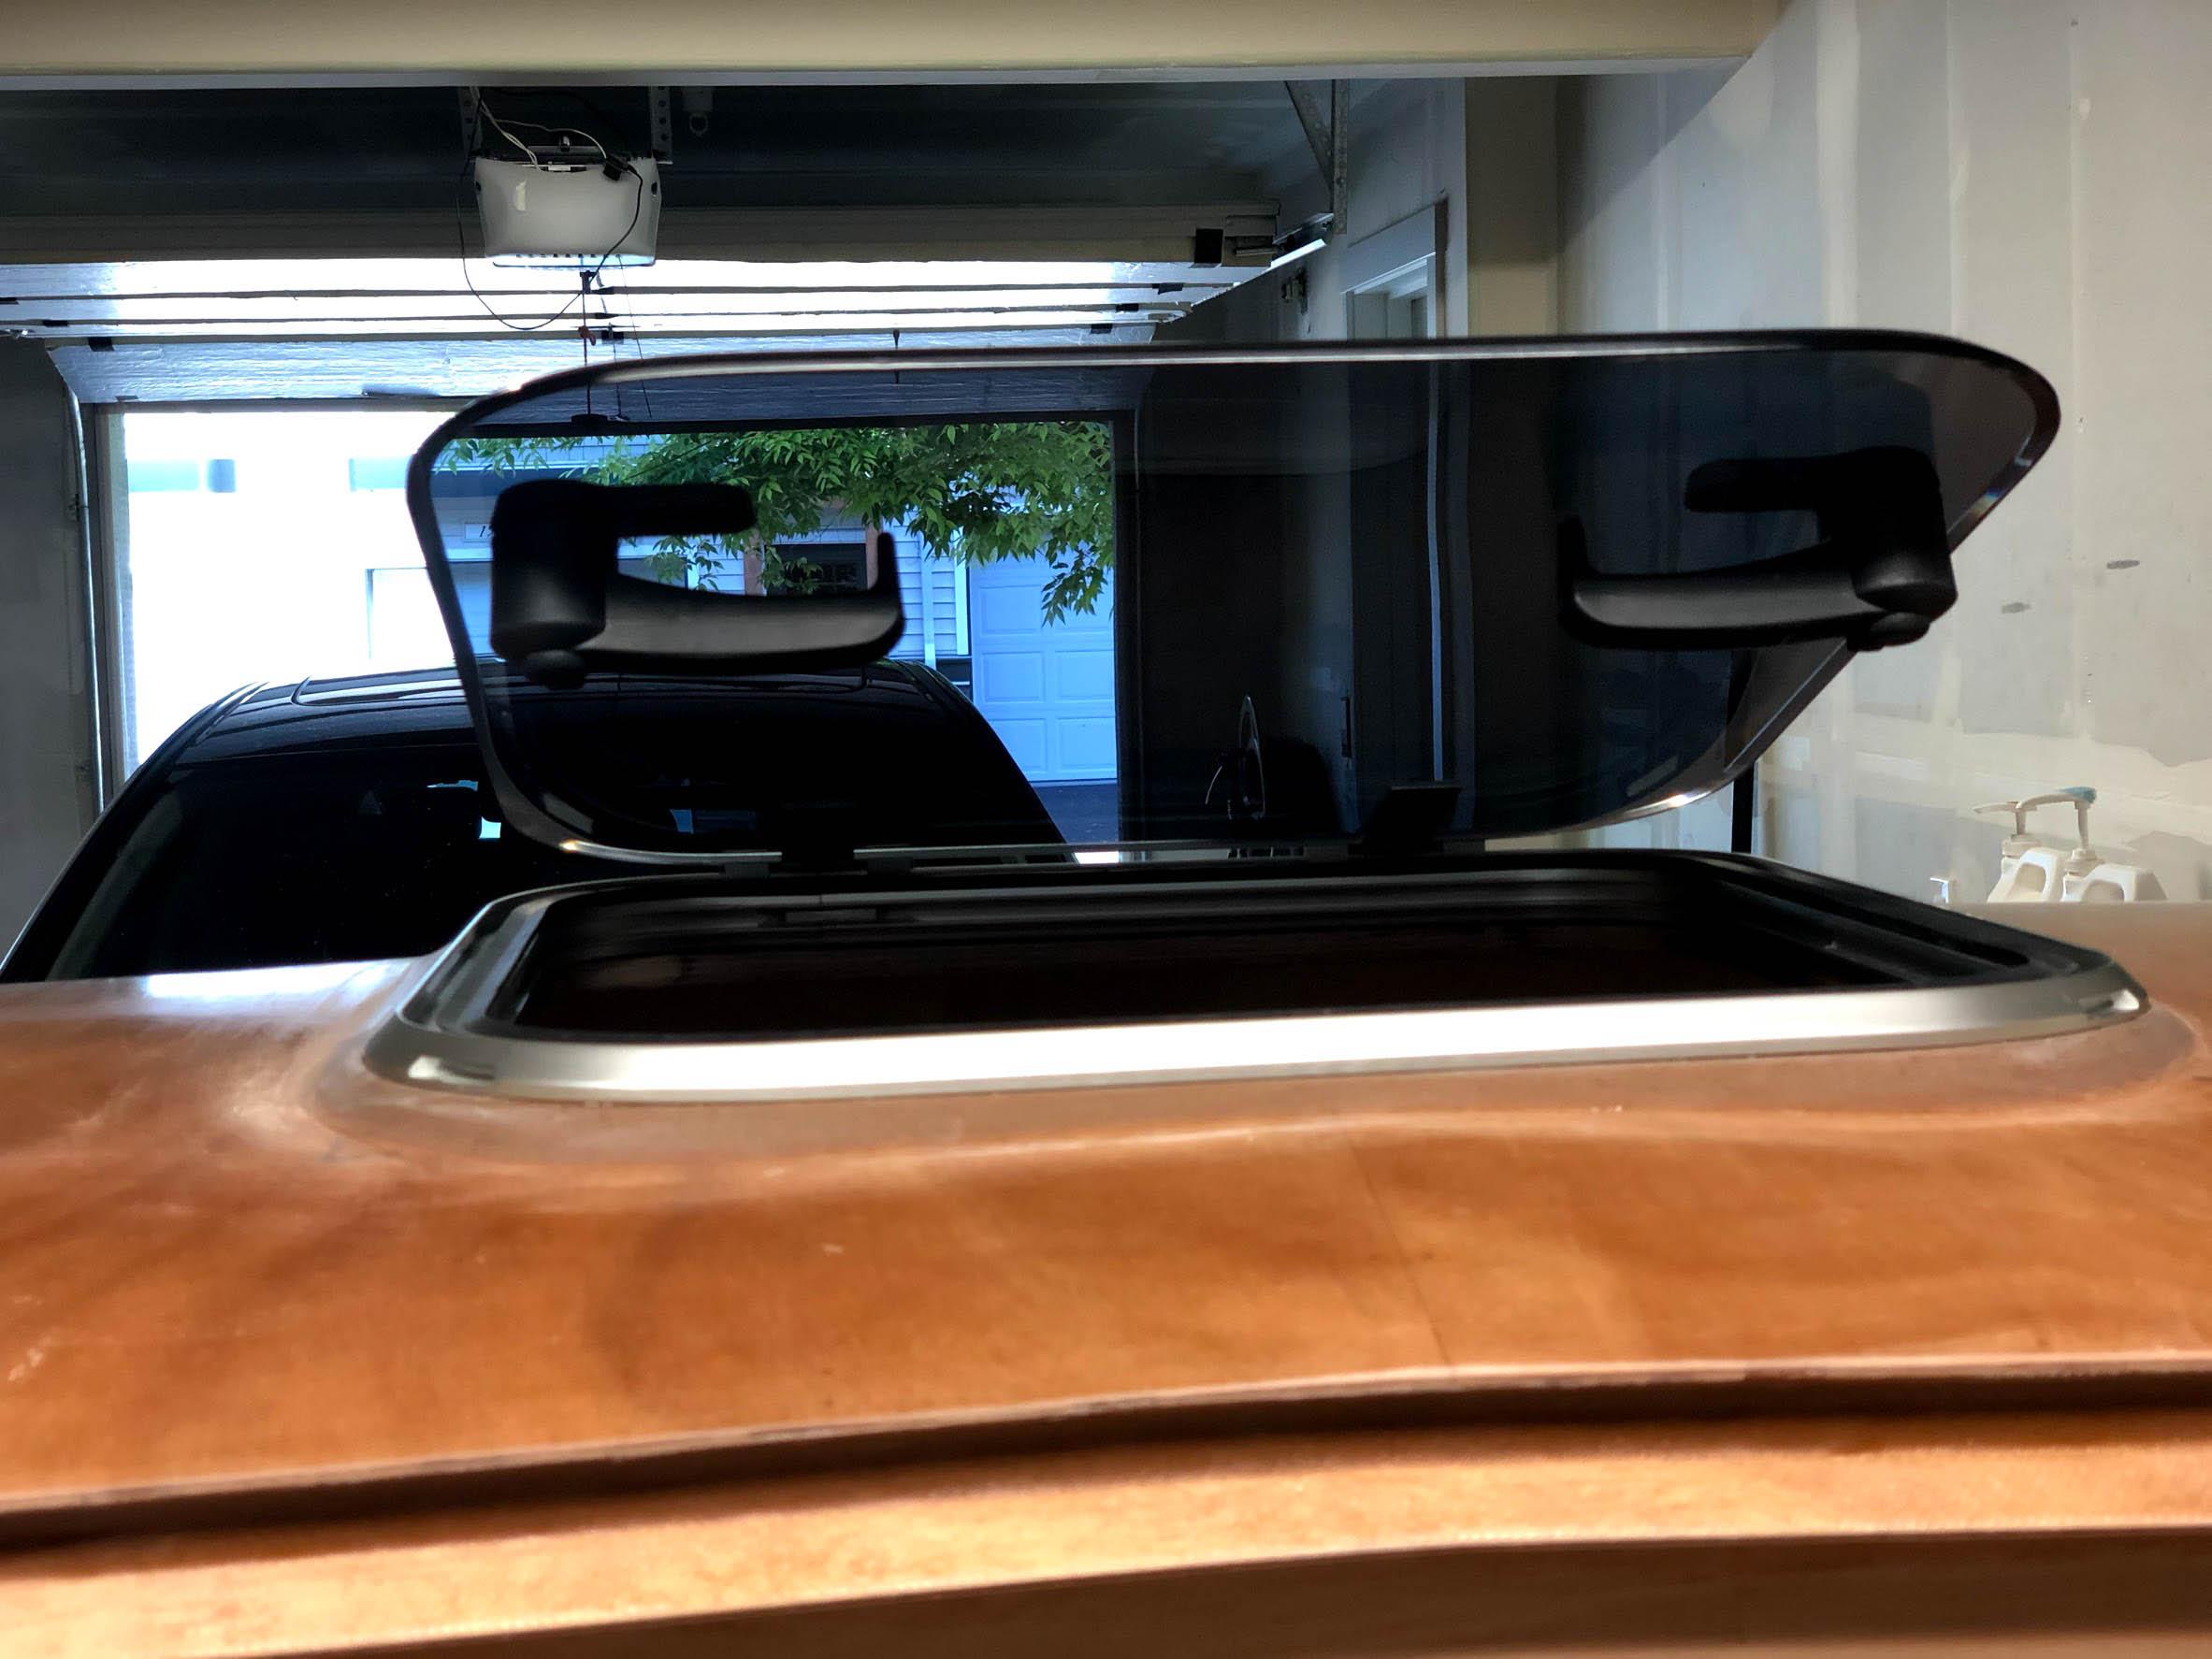
Pictures can’t really do it justice. I somehow got everything square and even and shiny. I am sooo happy with the result! So now the hatch now goes back in its box while I finish things up. It will eventually be bedded with butyl caulk and carefully screwed down.
Next, I installed the transom panel. No need for copper stitching… I just held things in place and tacked with CA glue. Then gaps got covered with masking tape to prevent epoxy squeeze-out.
Nearing the end of the project… I’m finally getting decent at fillets.
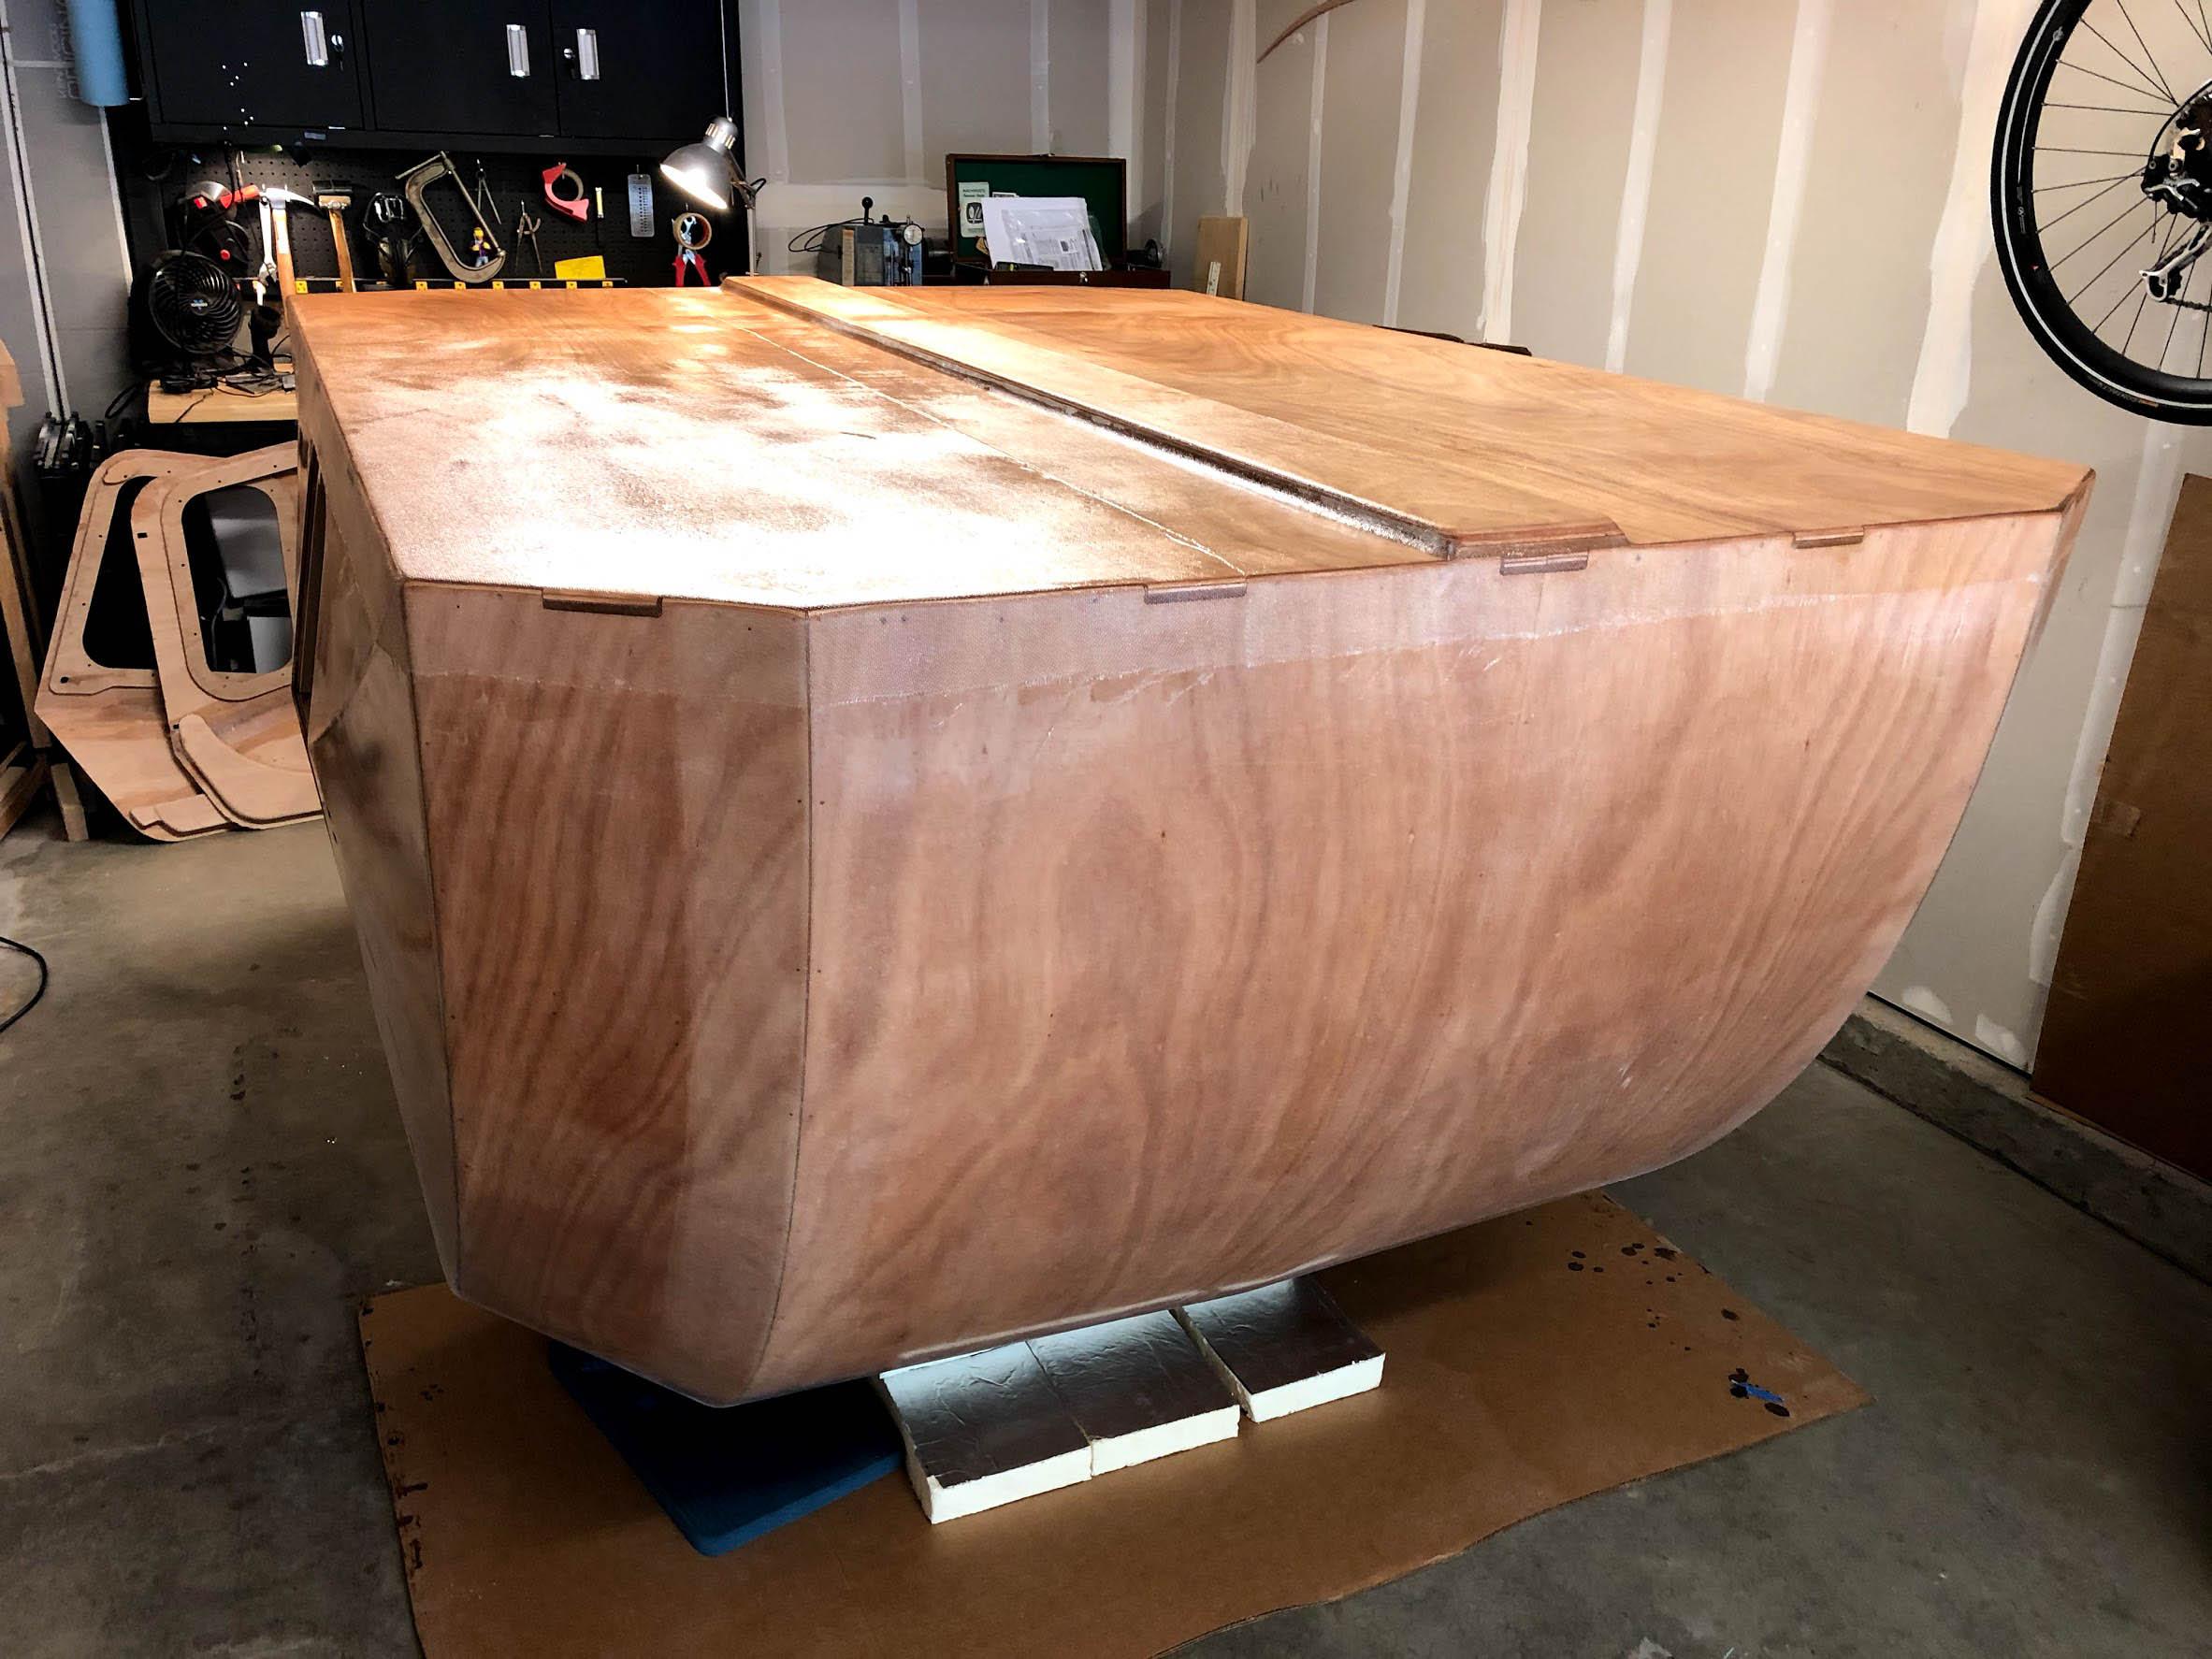
Next we got the whole thing flipped over for bottom finishing. That top hatch fillet and frame is very strong!
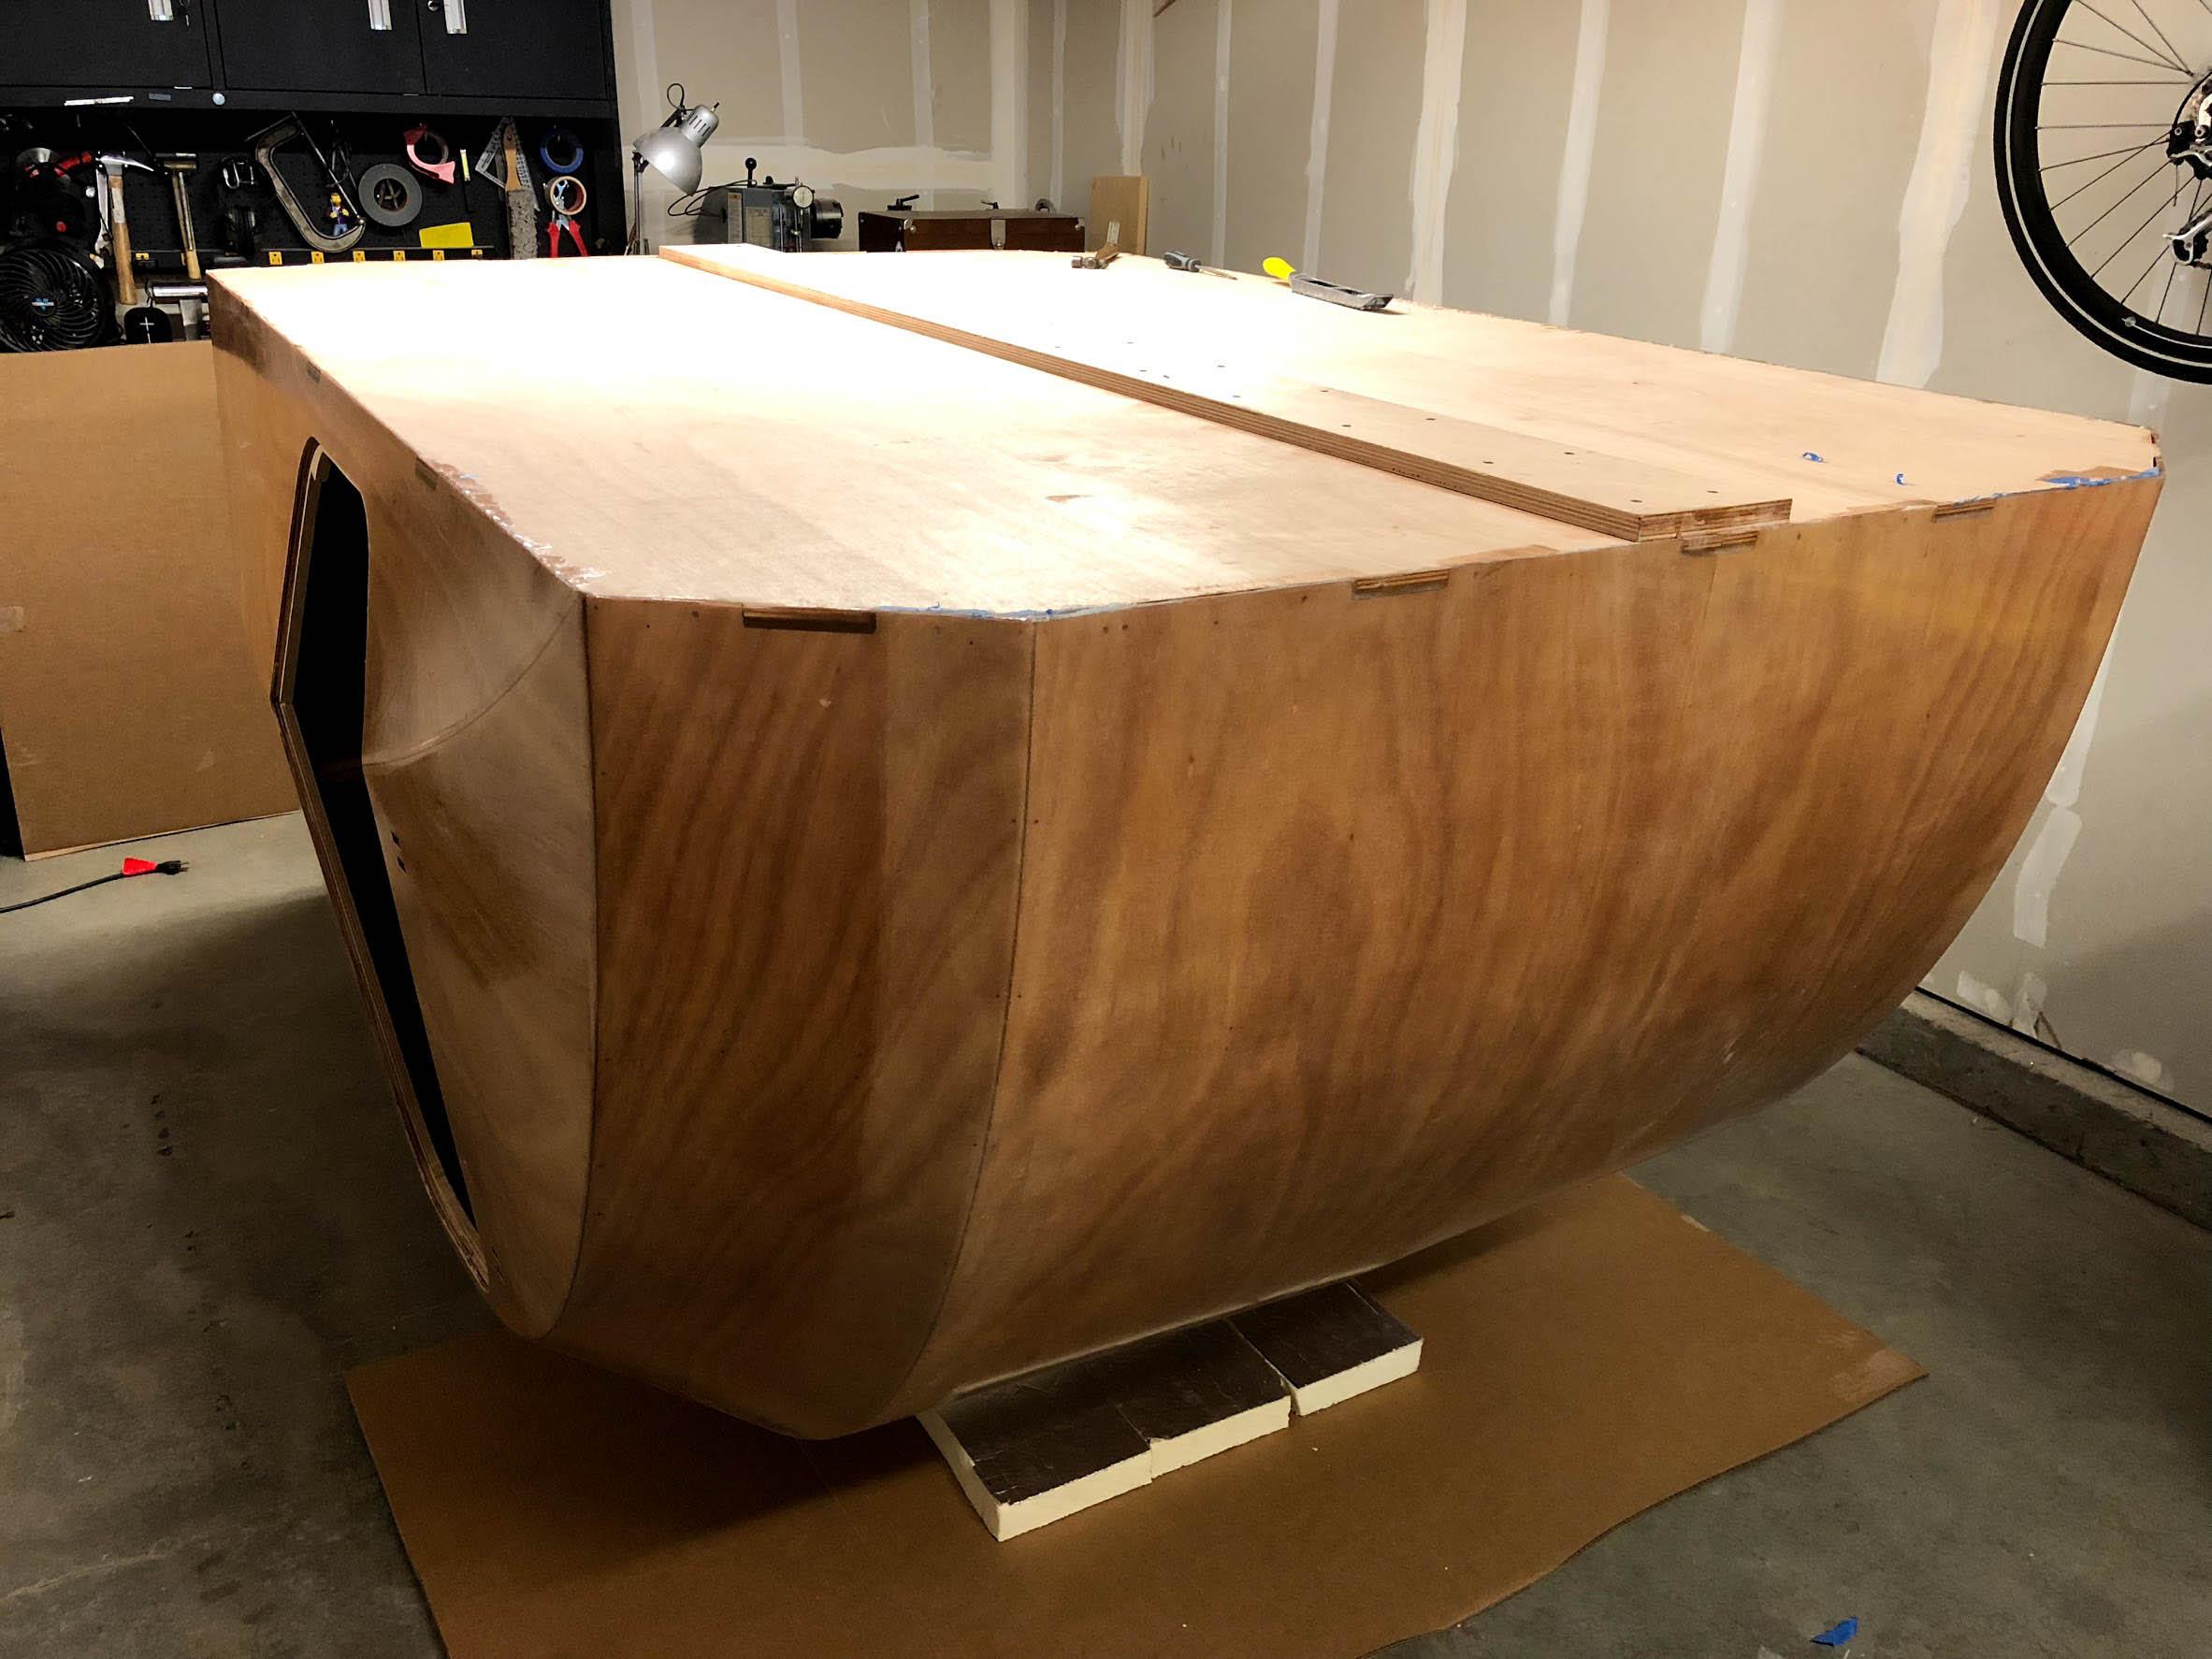

A little 60-grit sanding and gap filling to do then we’ll be ready for glass.
May 26, 2018 at 1:28 pm #1853abrightwell
ParticipantLooking good. I’m thoroughly impressed with how clean your glass job is on the inside of the transom. Well done!
-Adam
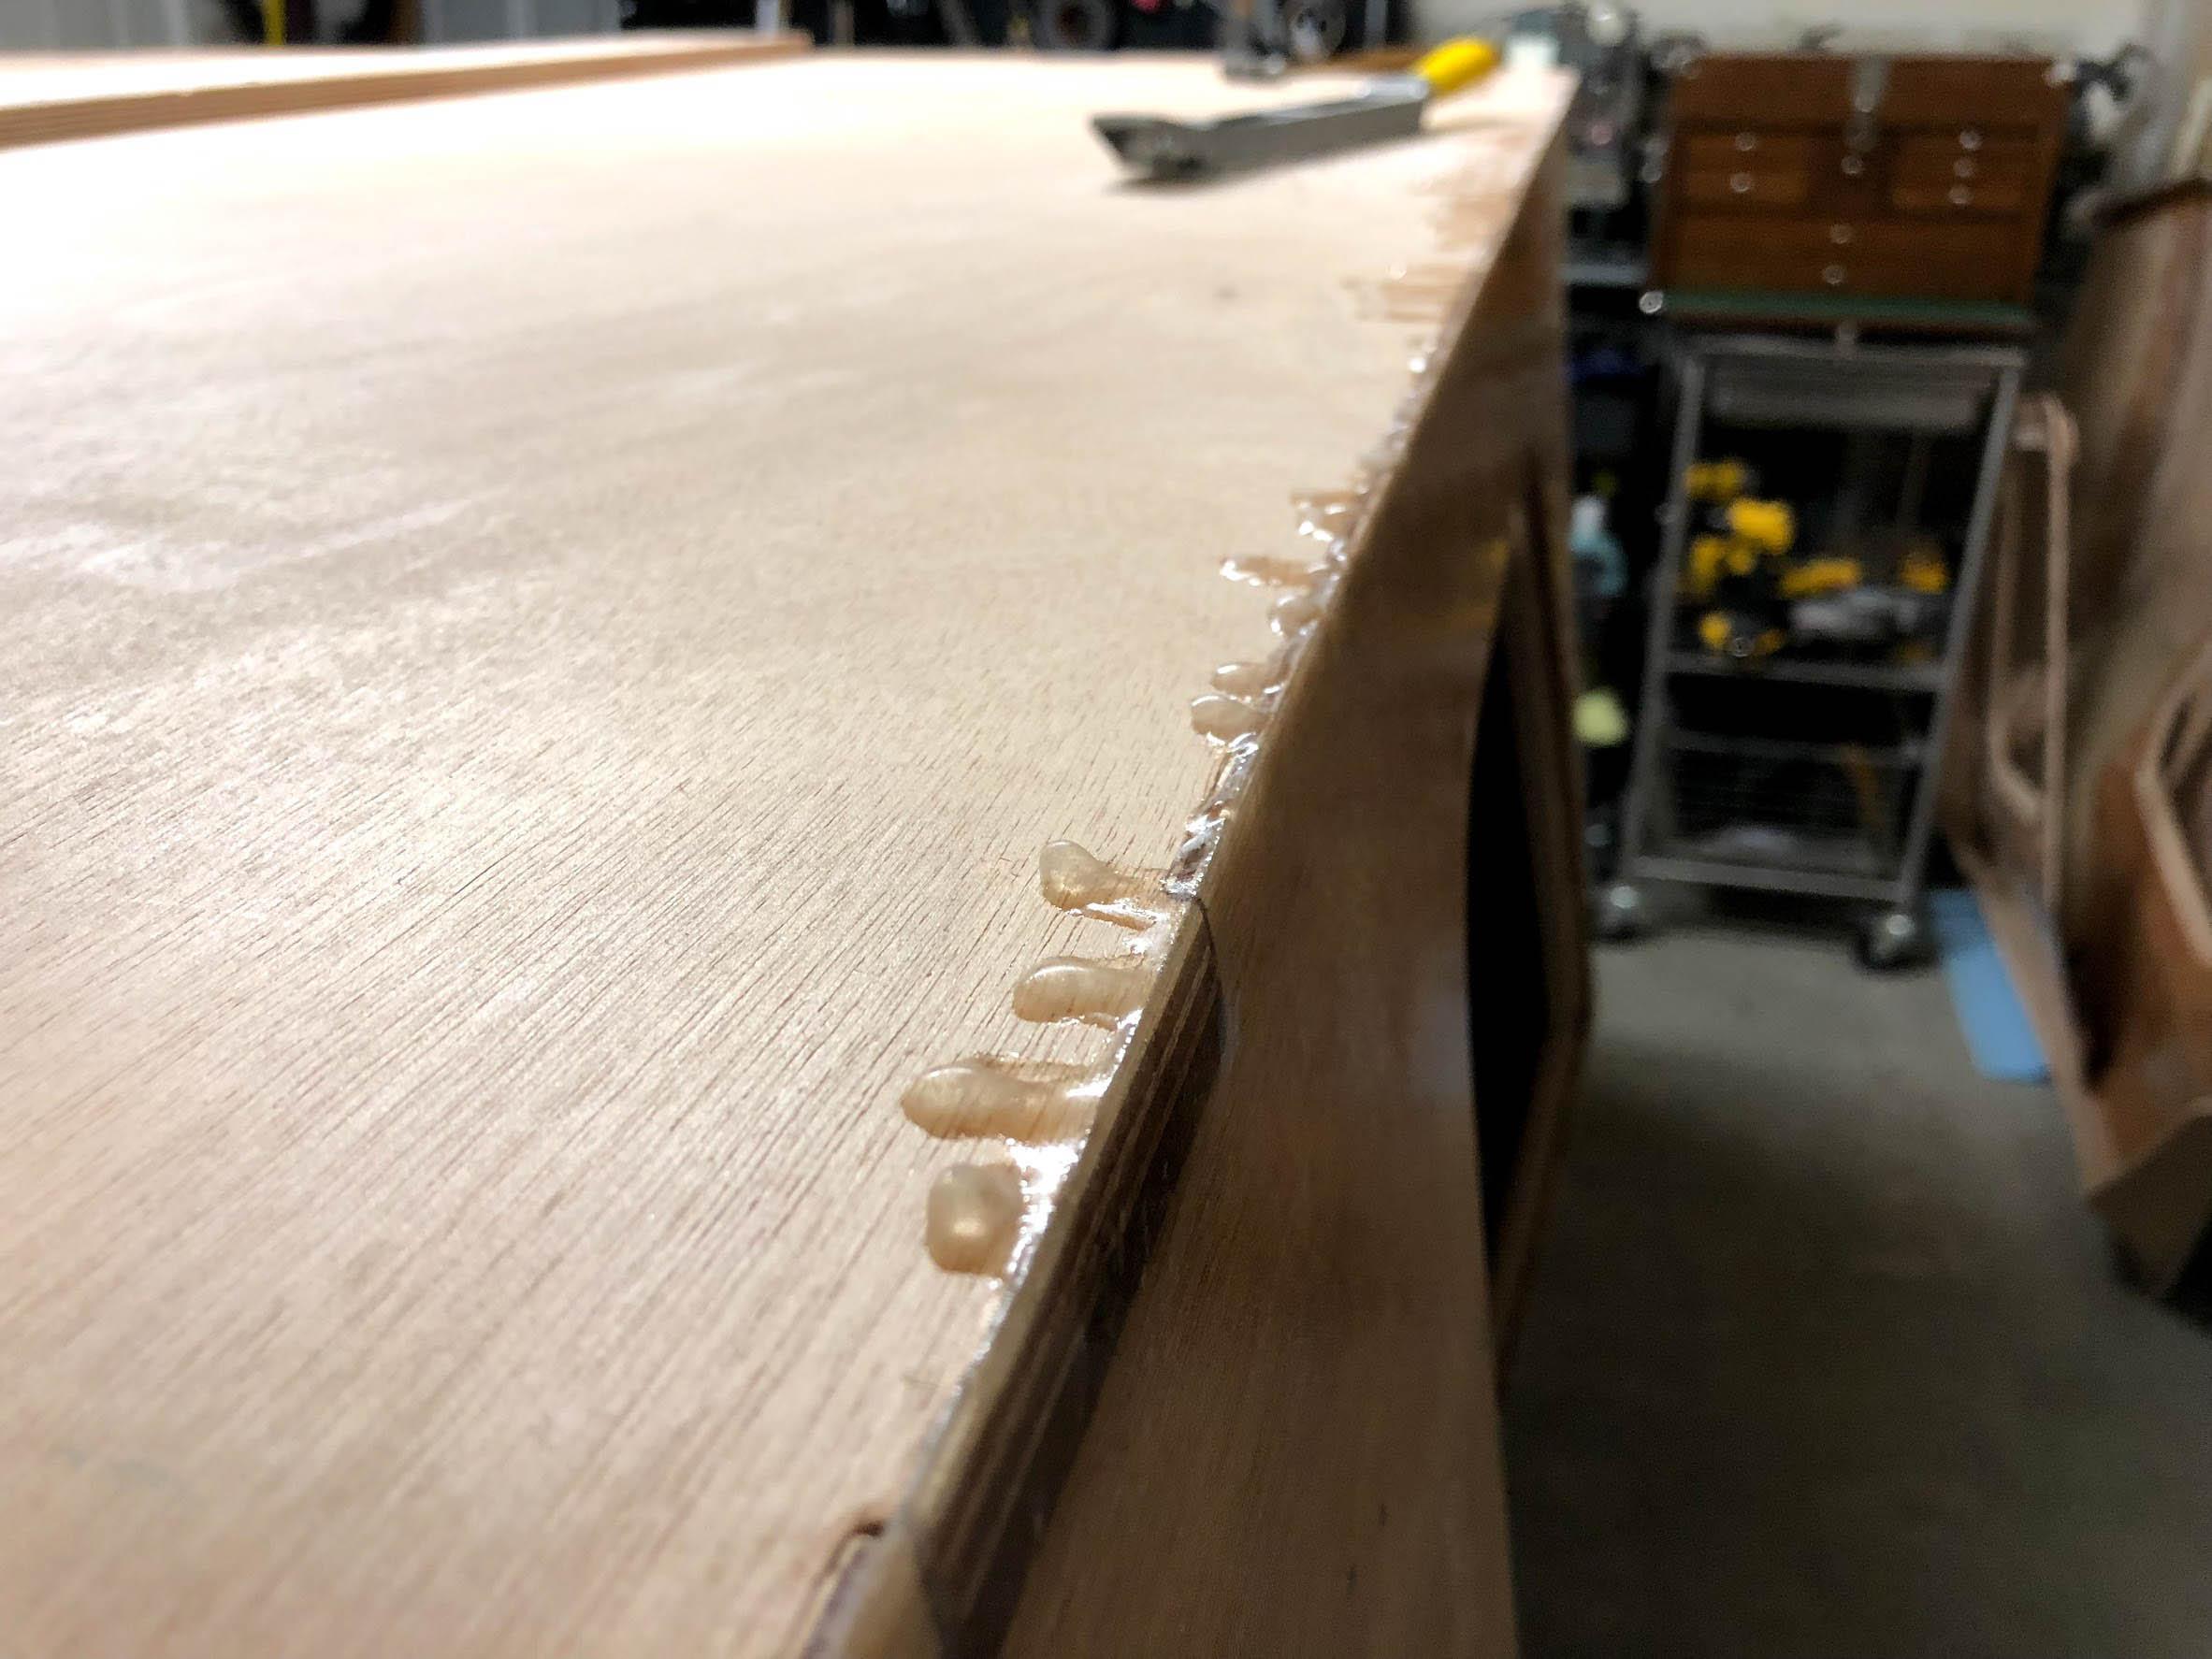
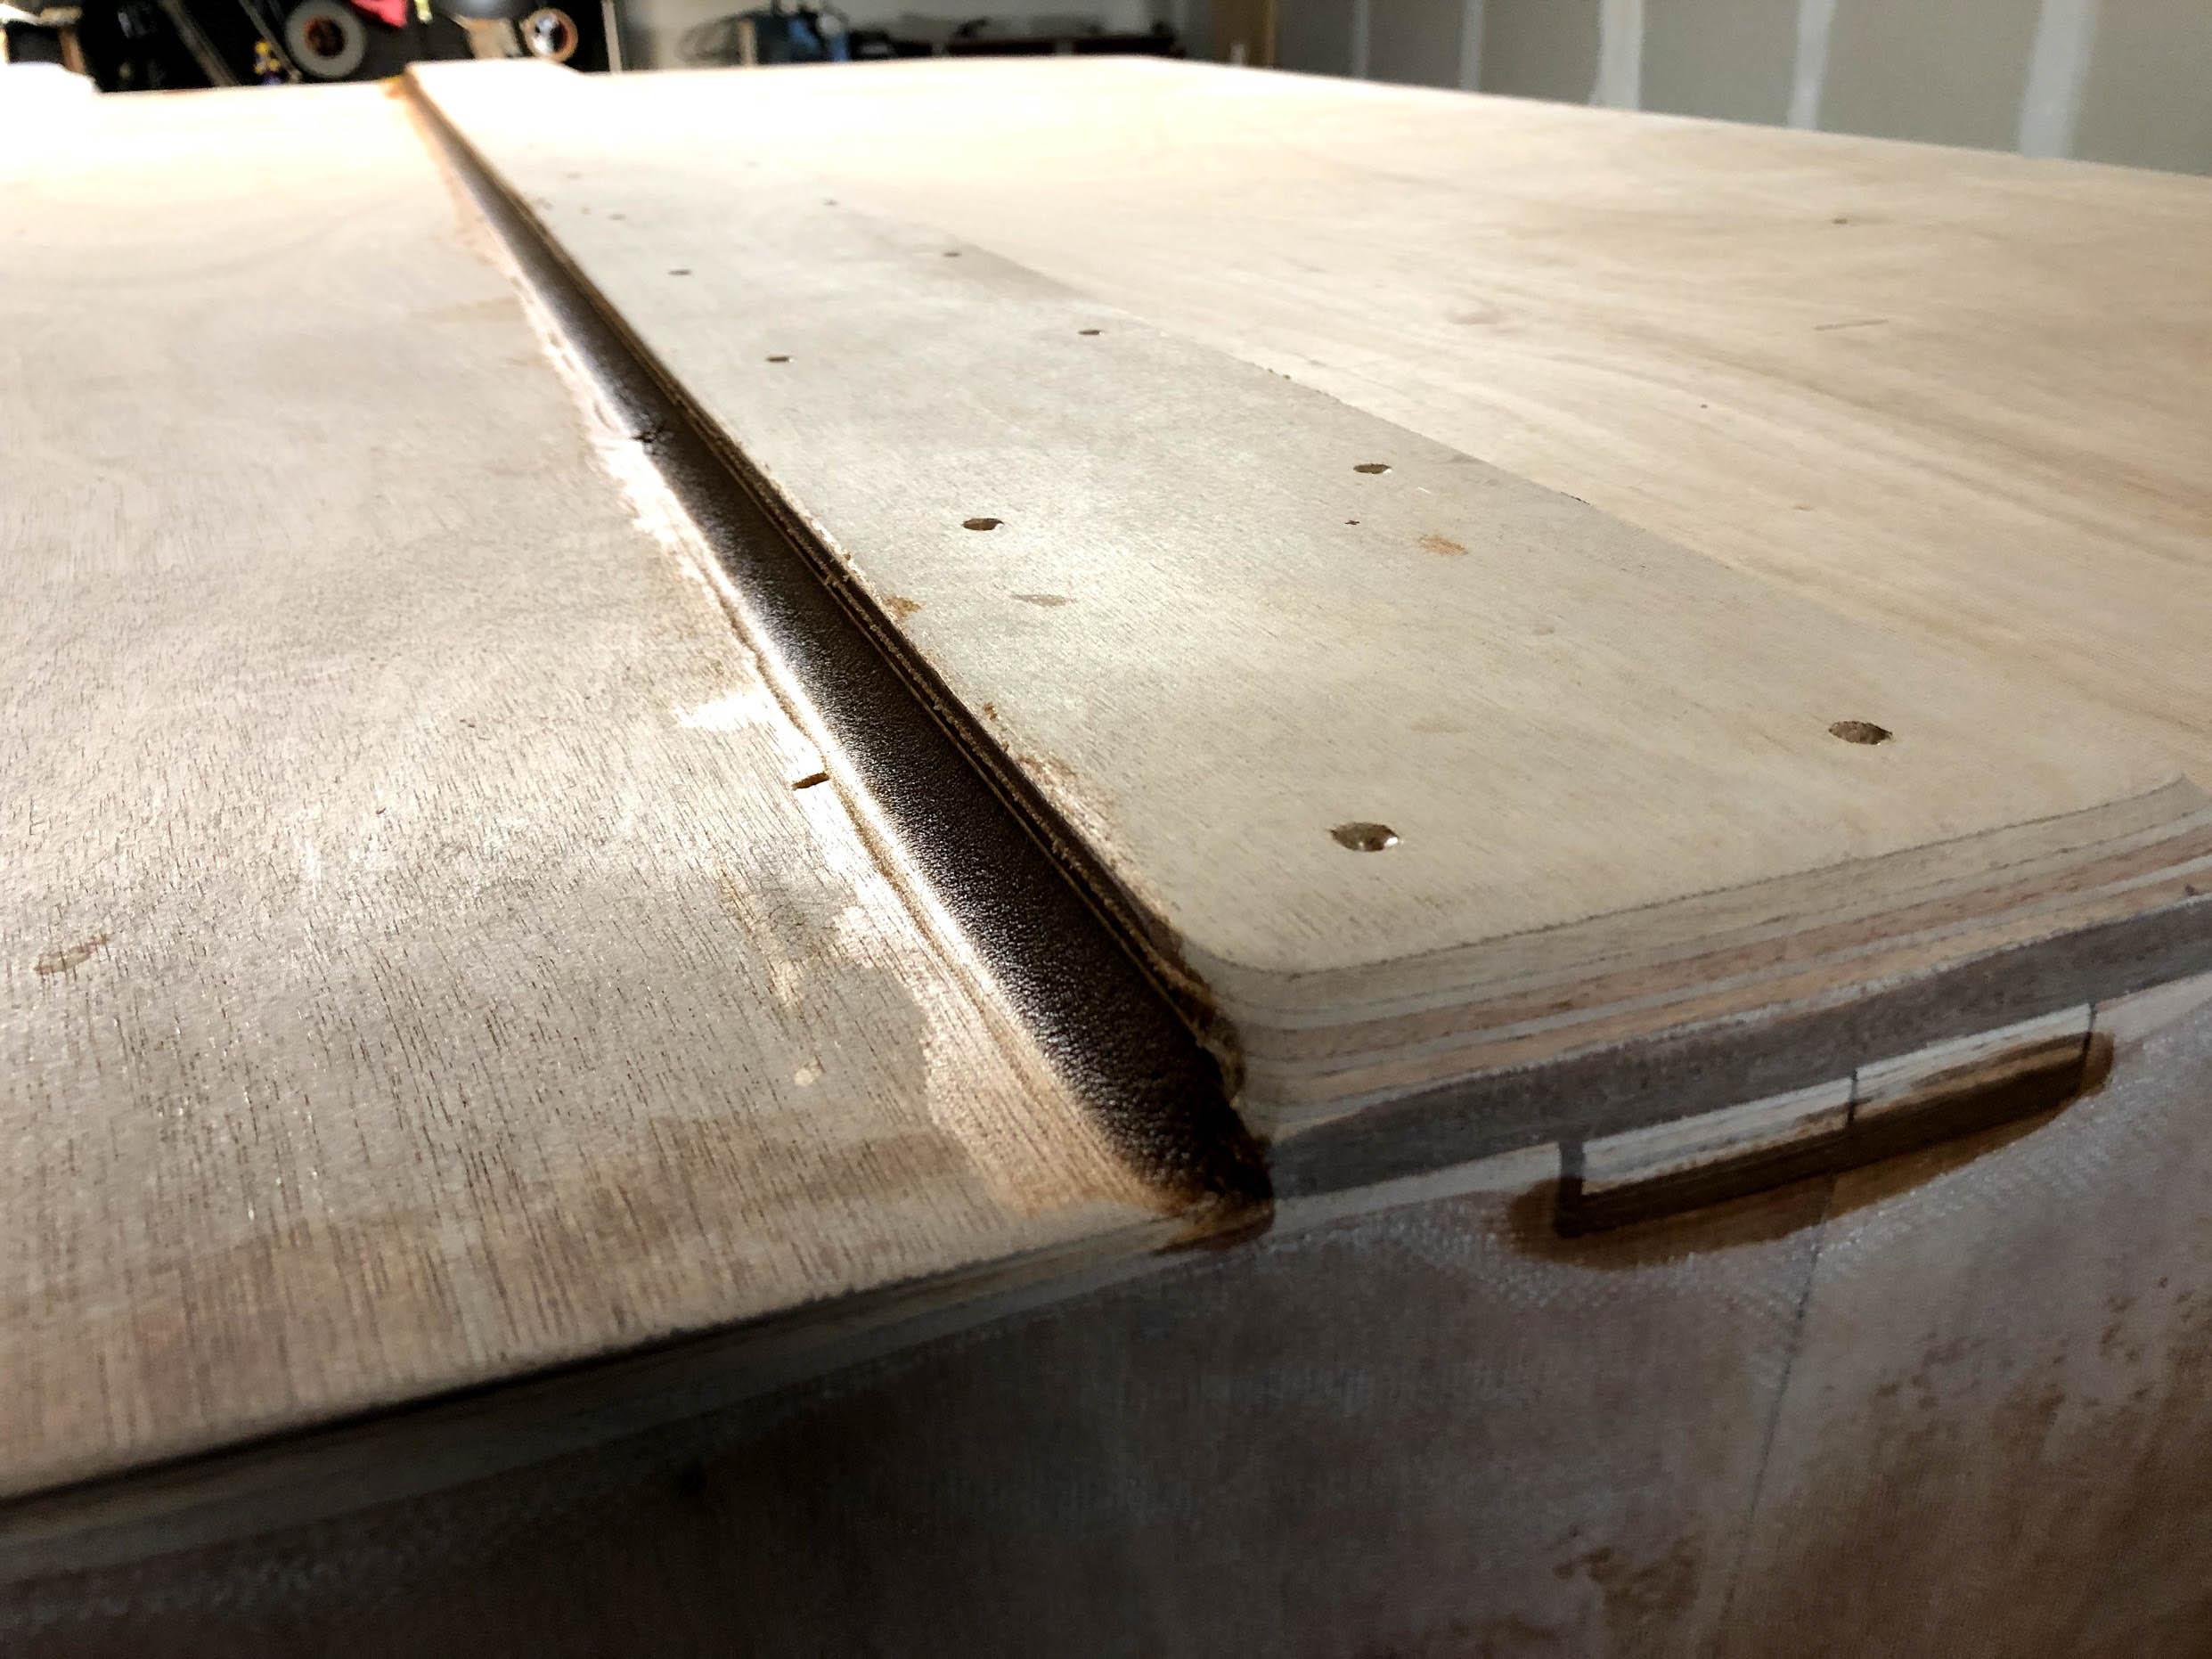
May 29, 2018 at 5:09 pm #1856ParticipantGot everything cleaned up, filled in, and ready for glassing. Couldn’t get the 1/2″ radius on the butt block like I wanted because the router bit I have hangs down too far. I only was able to get the 3/8″ bit to fit in the space I had.
Pro Tip: round-over the butt-block before installing it. You will have a much easier time if you do that. The manual should mention this… and I should have thought ahead and done it even without the instruction. Even better would be to rip-cut the edge at a 45-degree angle and then sand down. You wouldn’t even need a fillet if you did that.
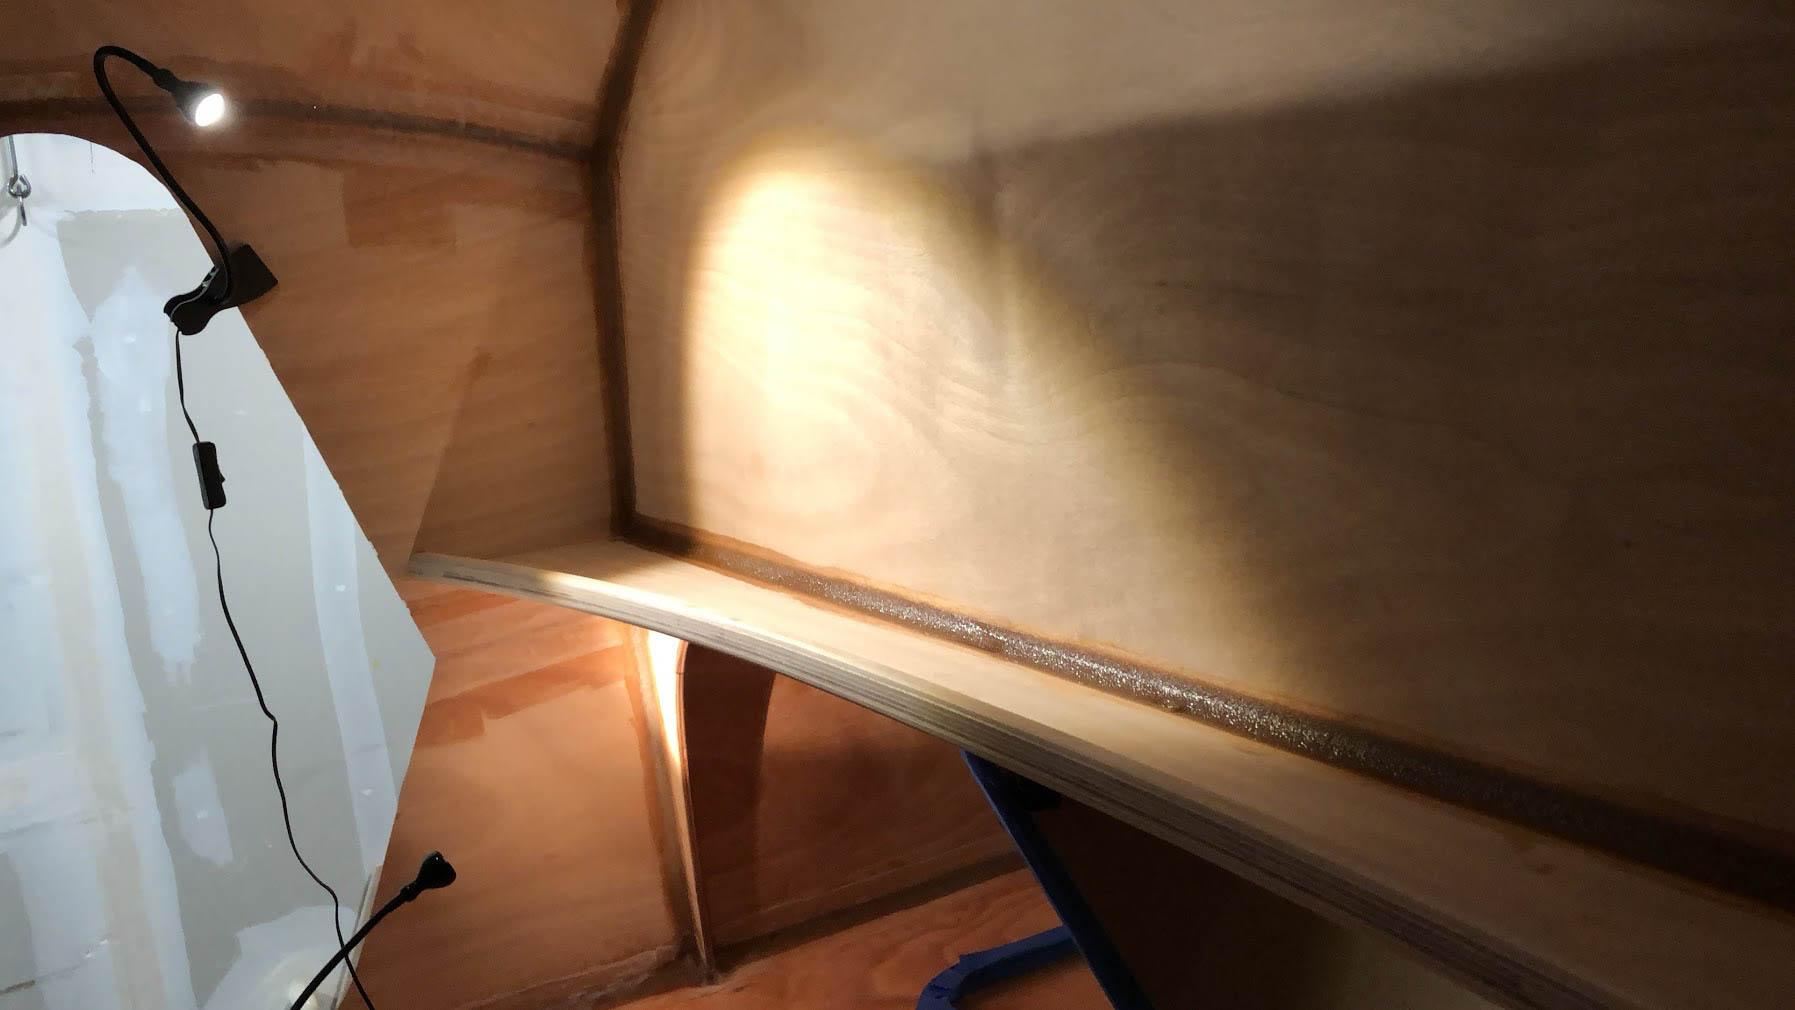
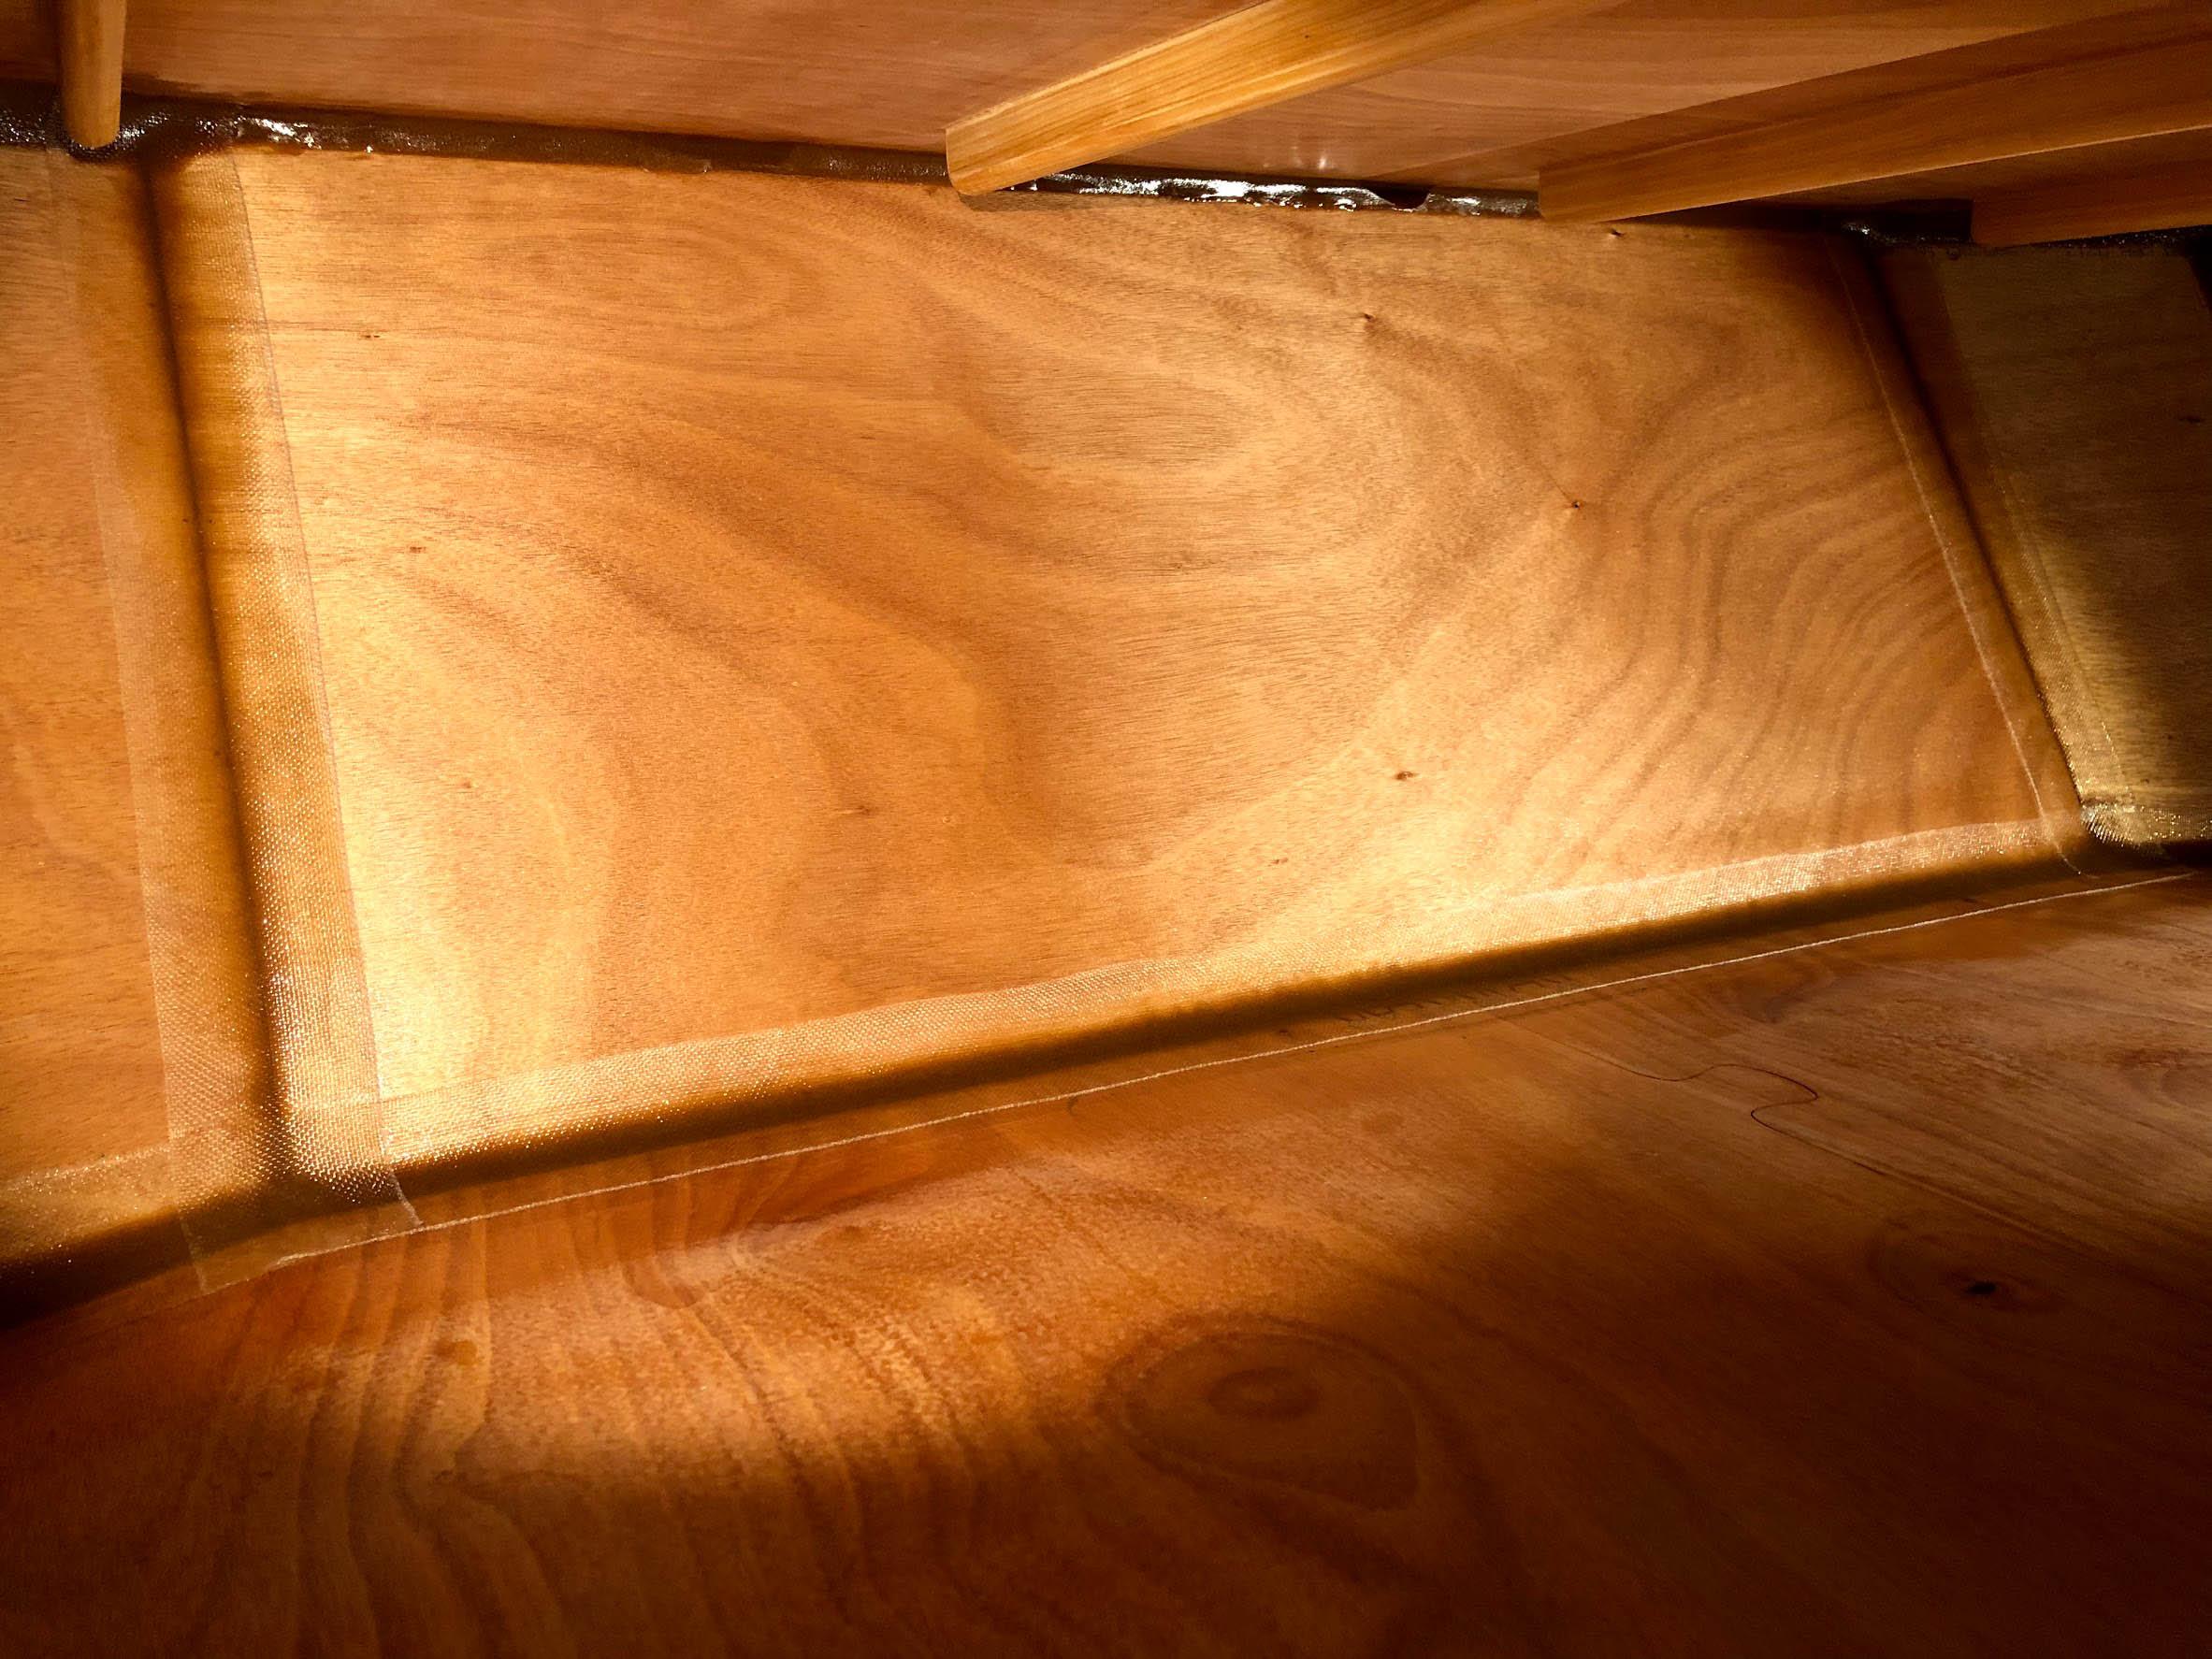
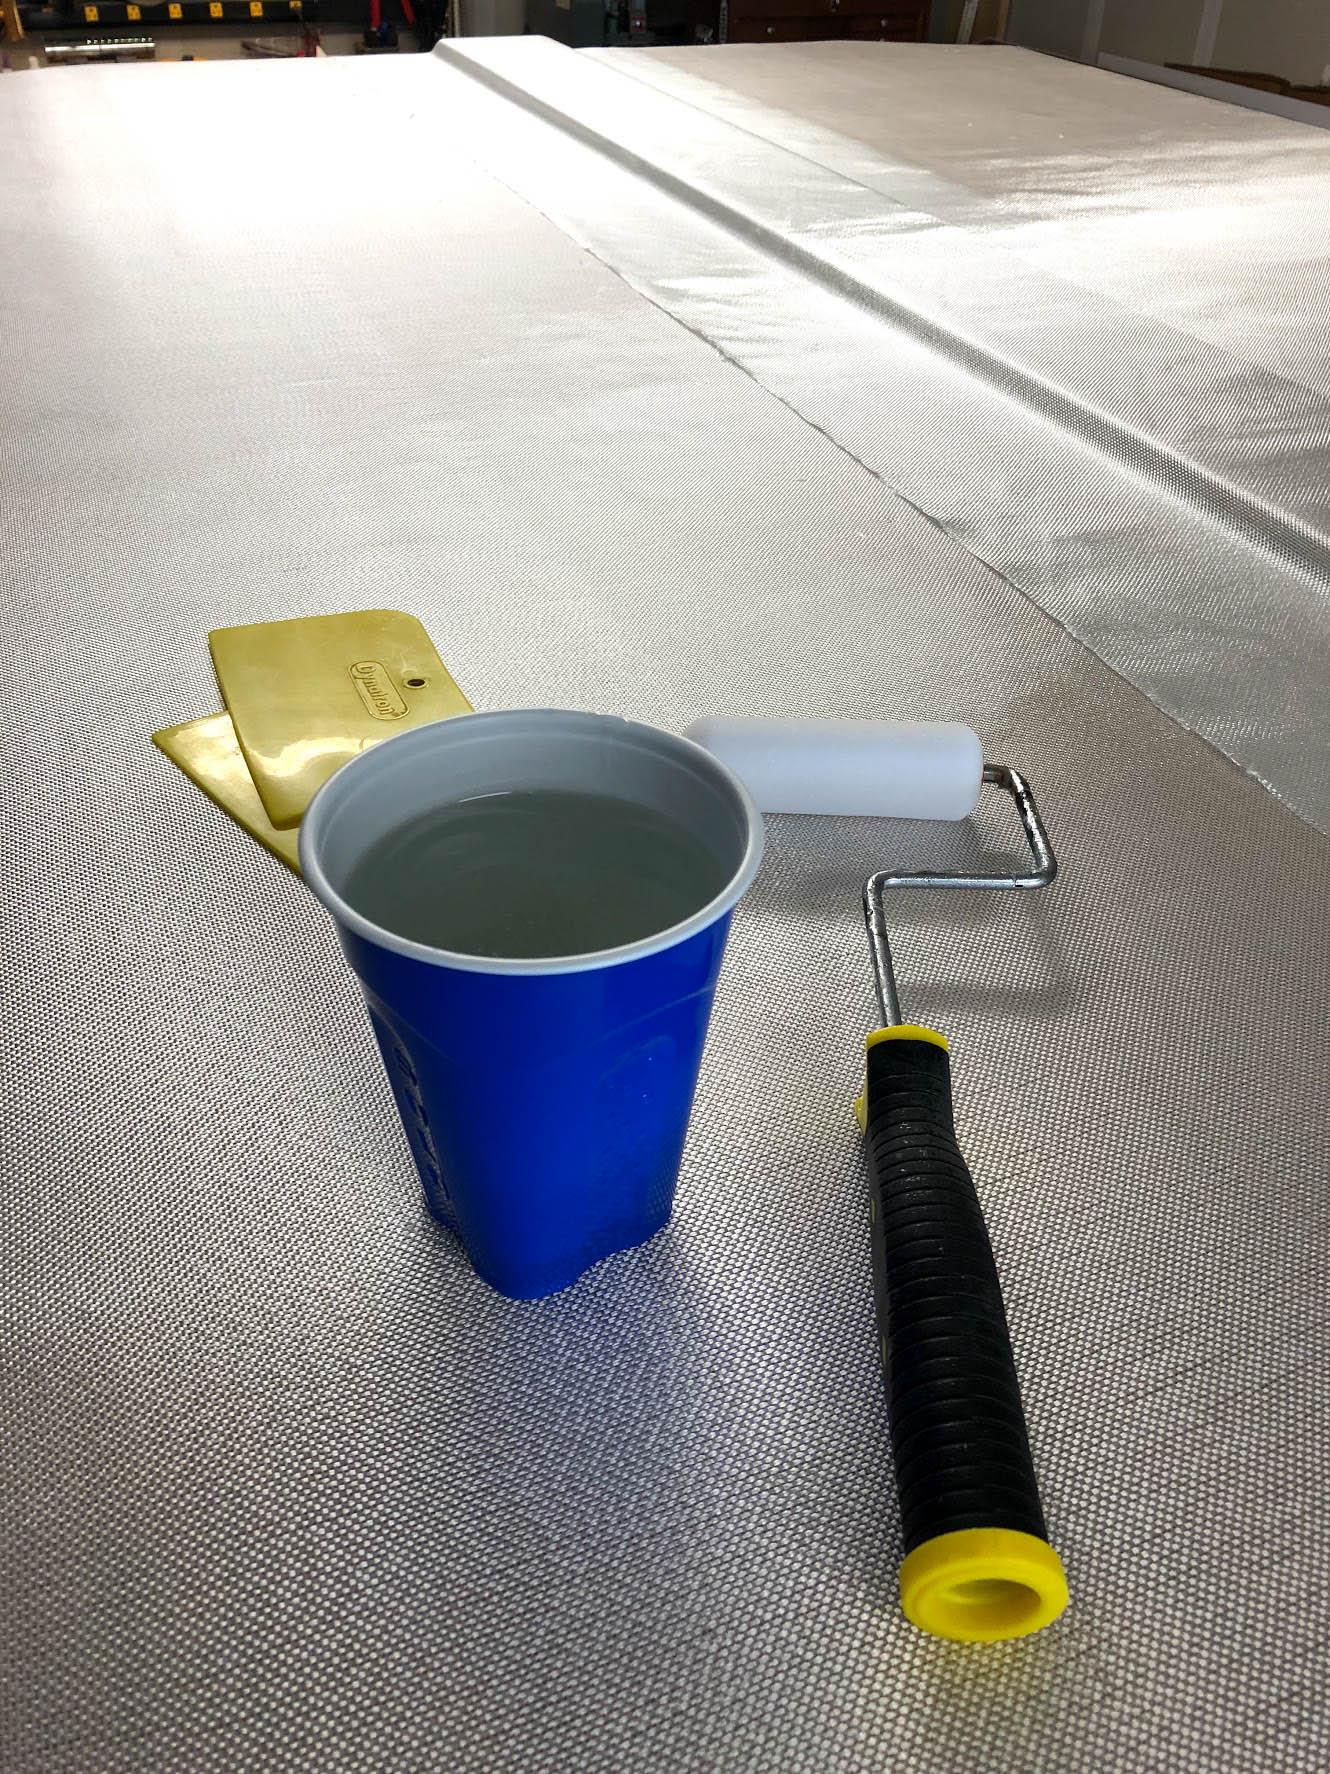
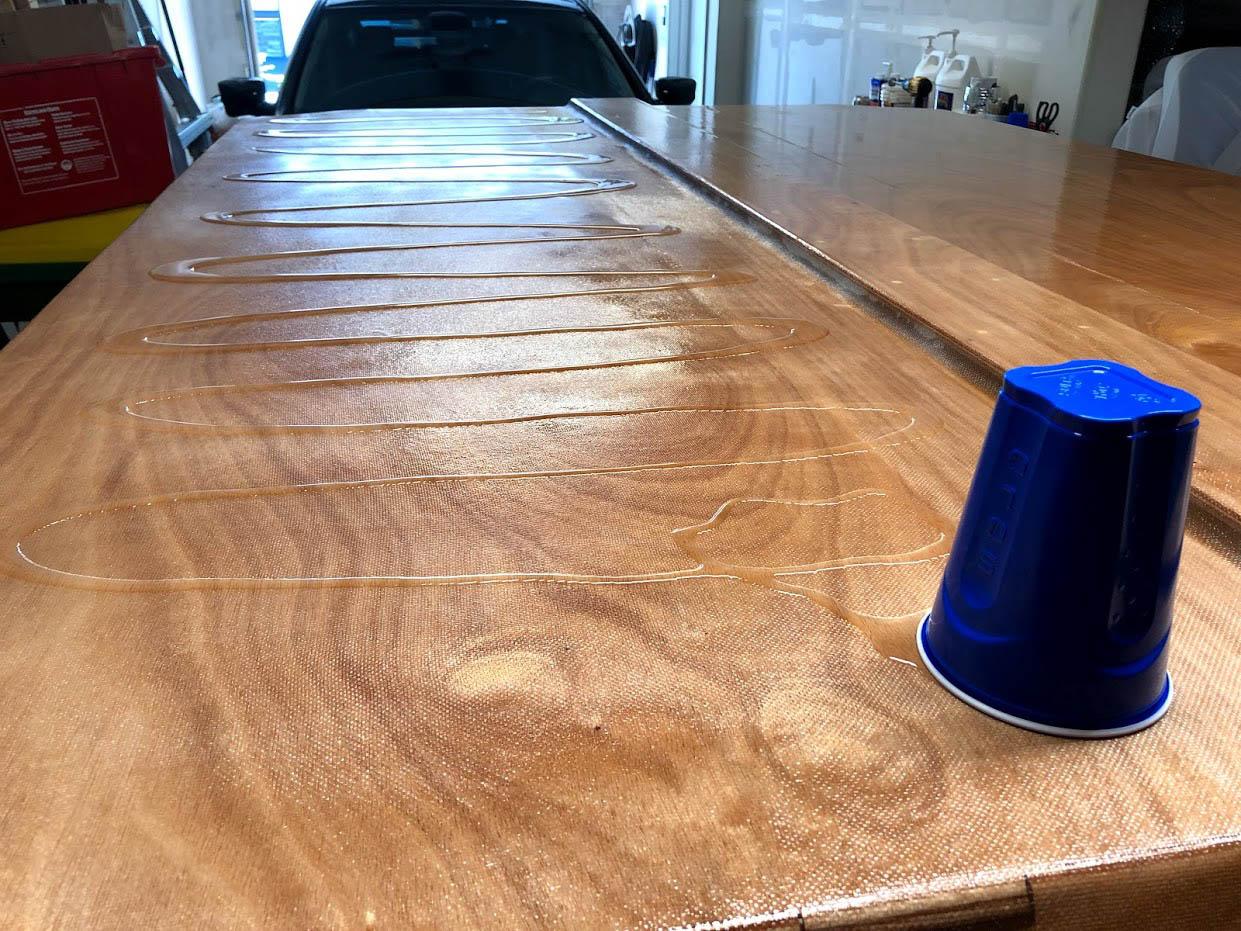
While I was filleting things, I also finished the cabin shelf fillet and glass. This is a good example of pre-wetting the fiberglass before application.
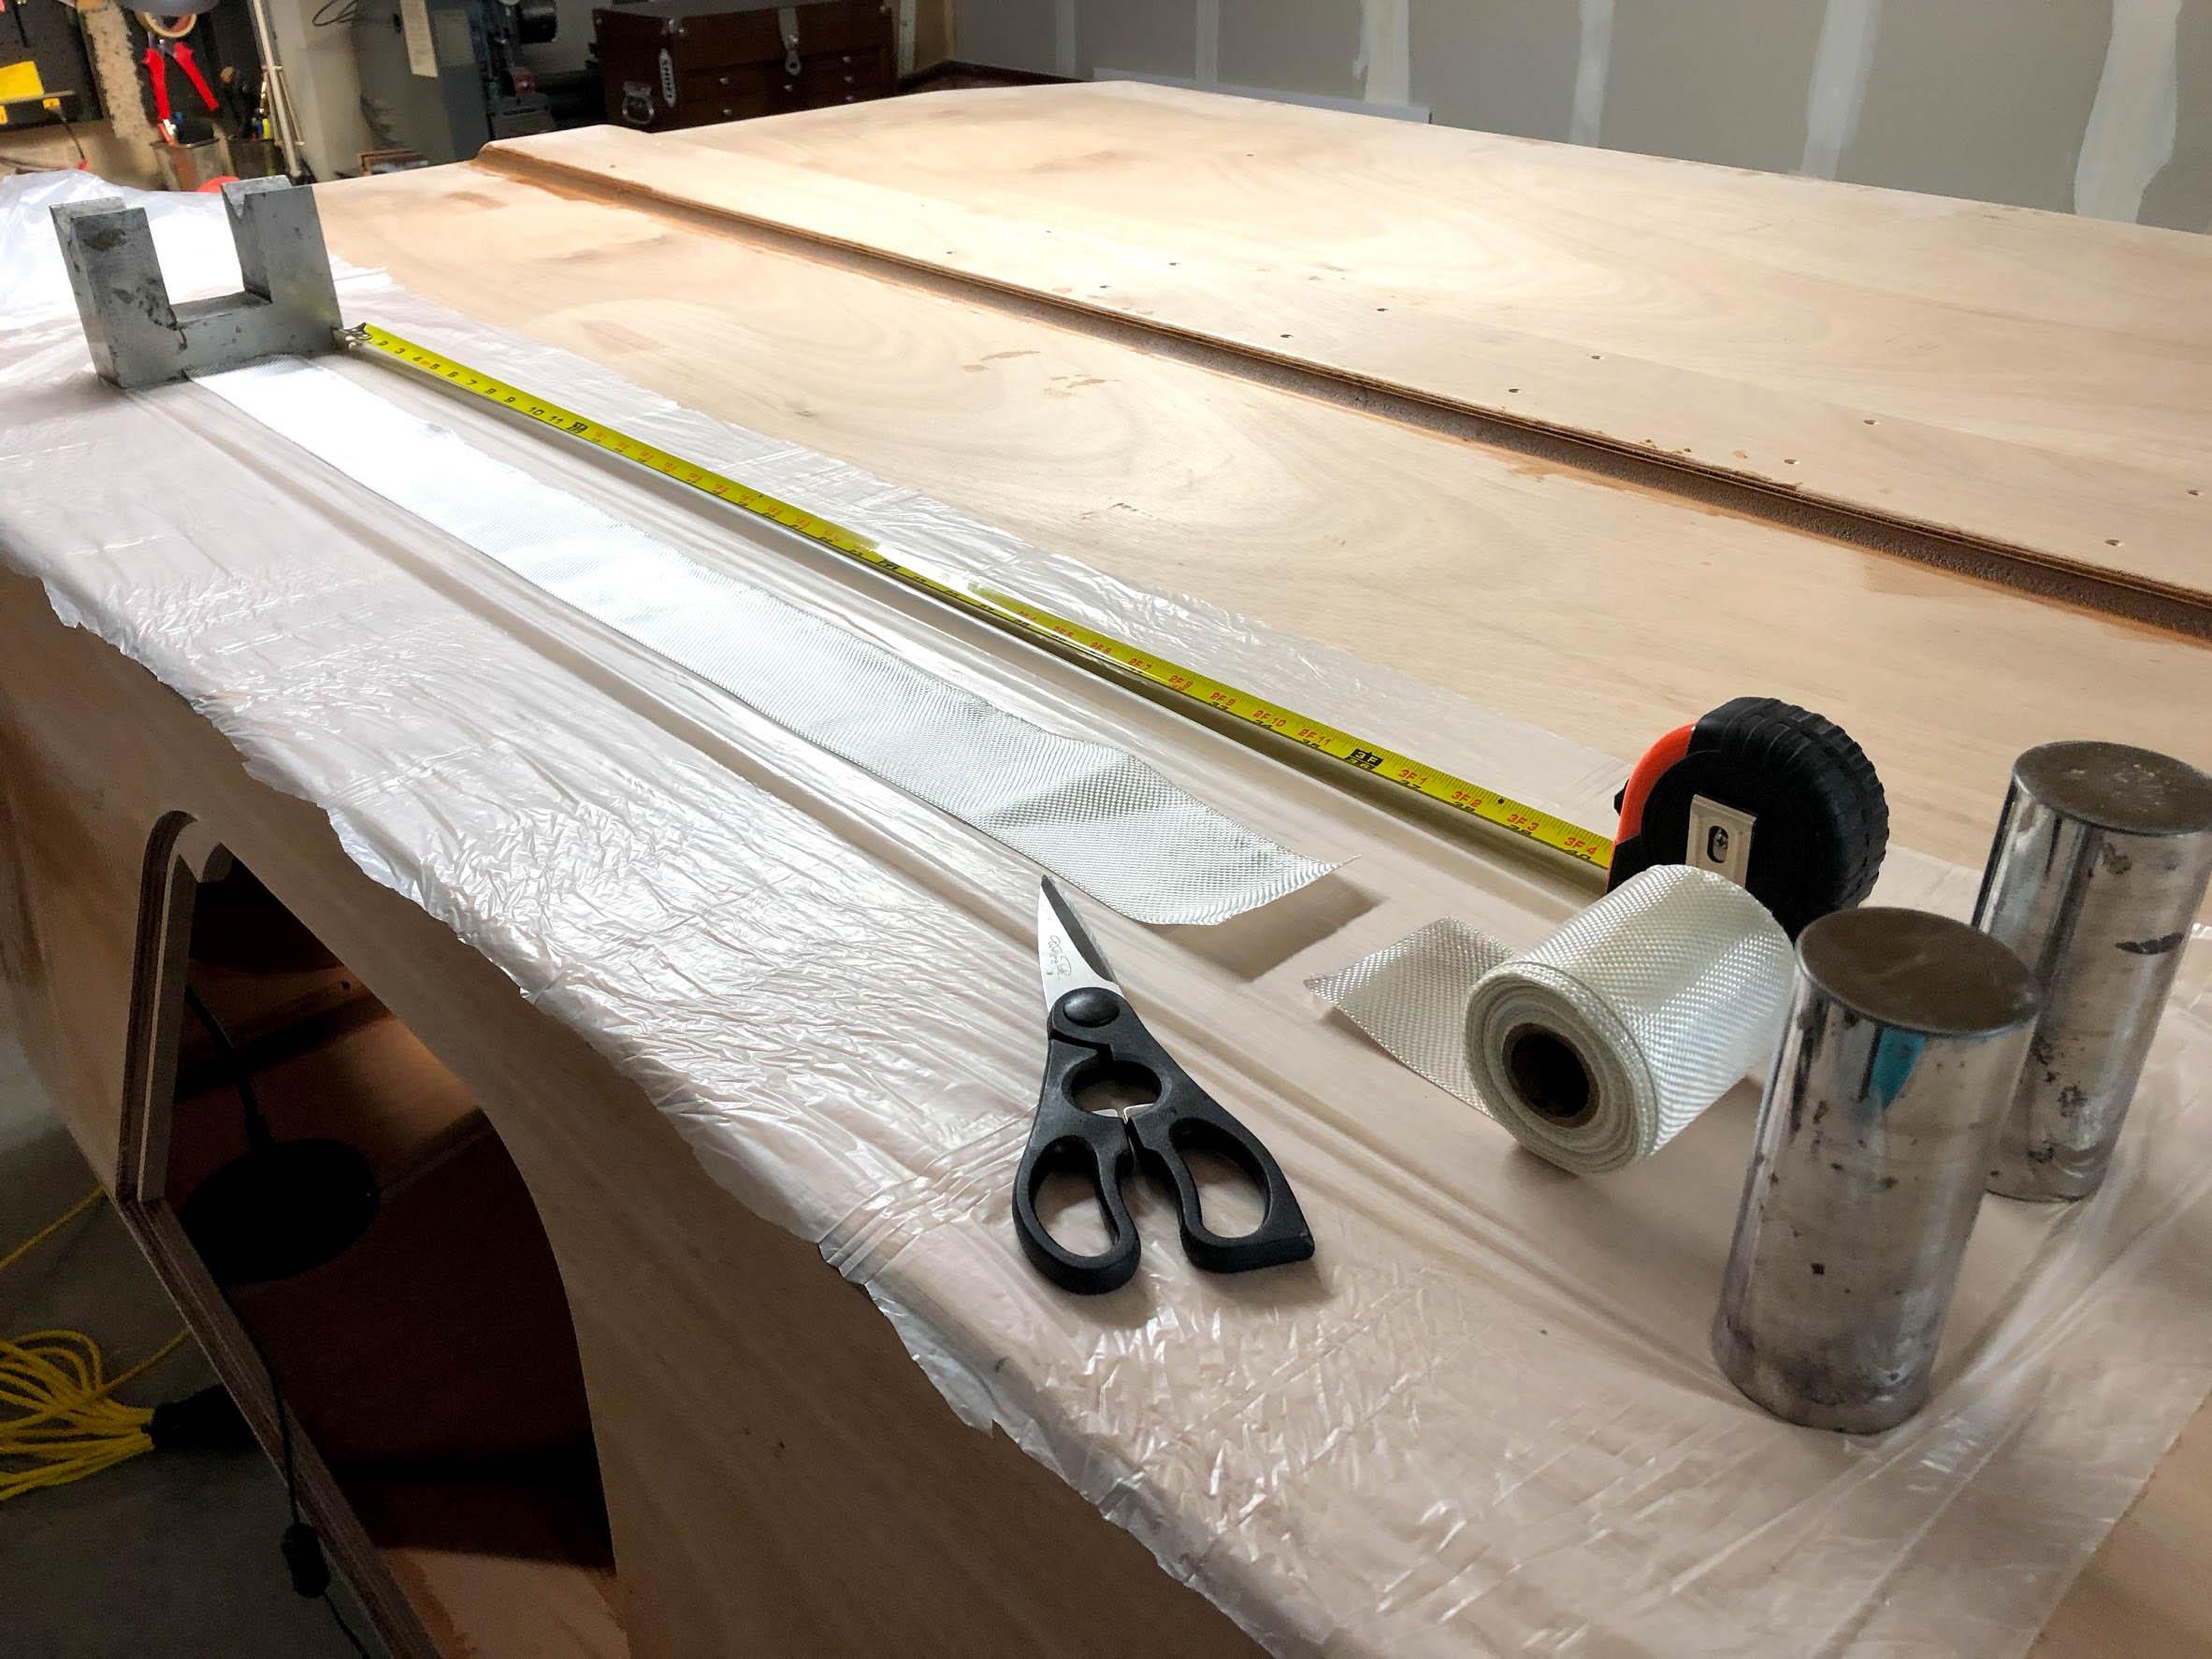
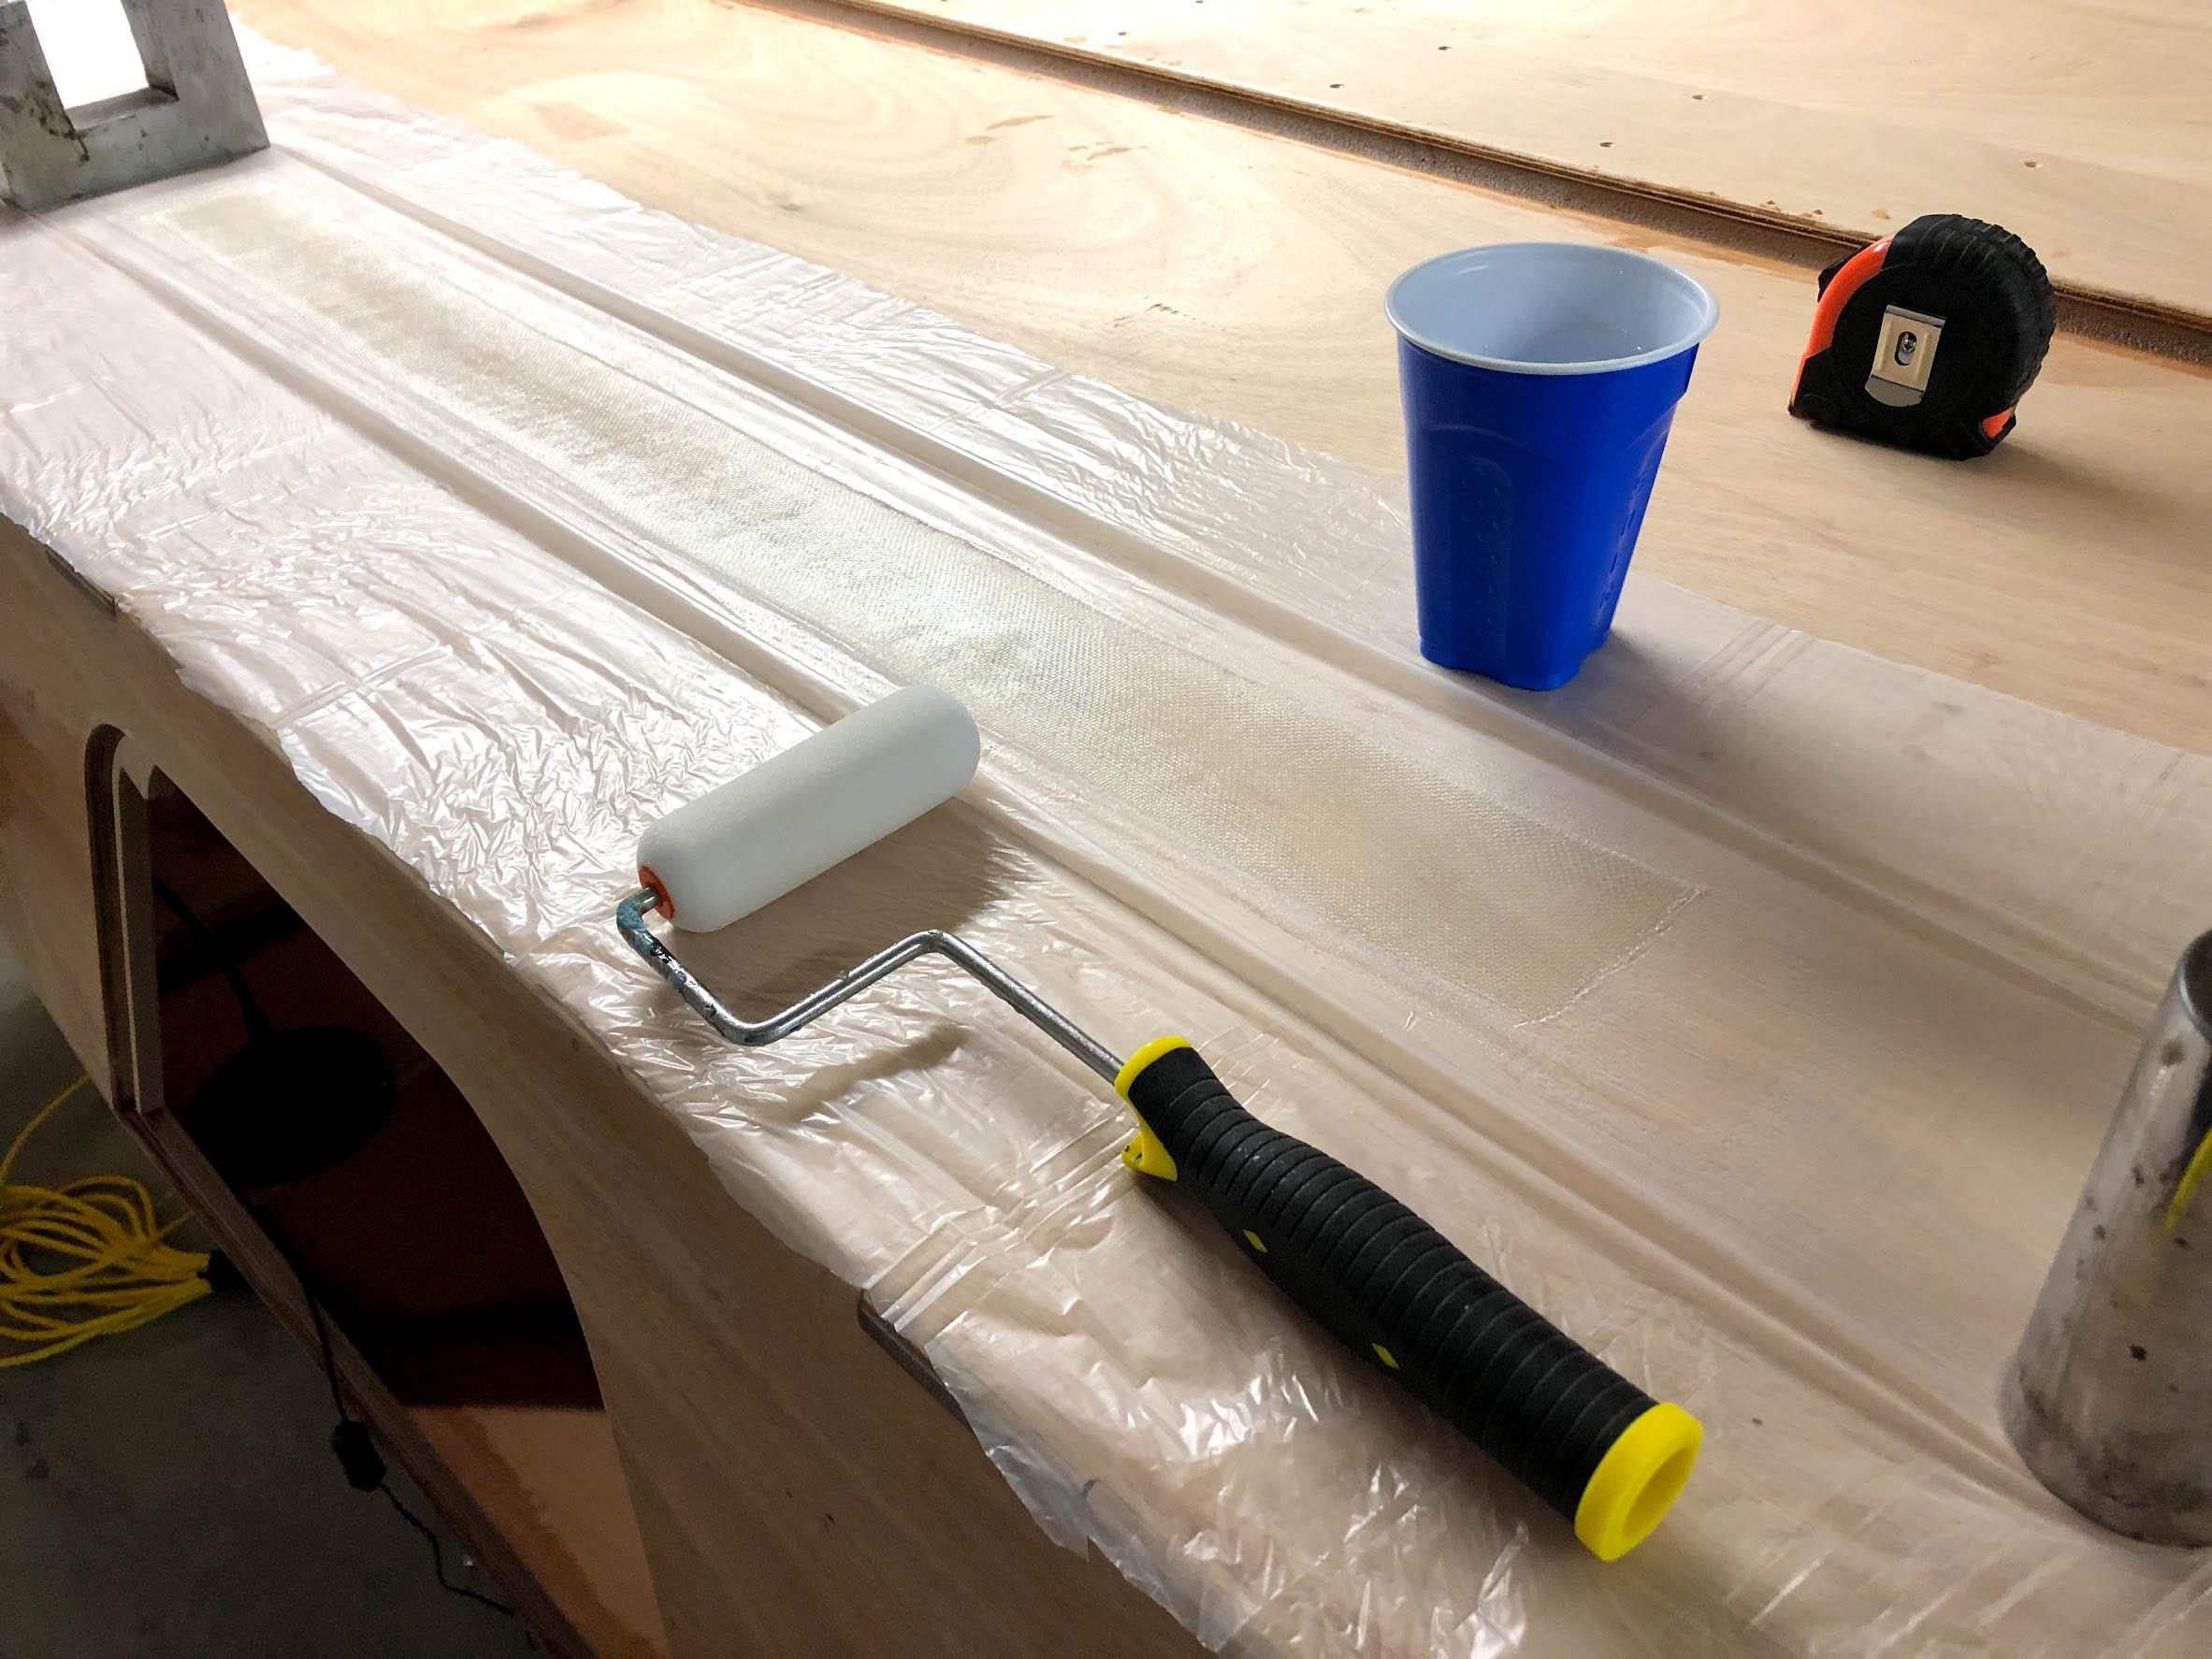
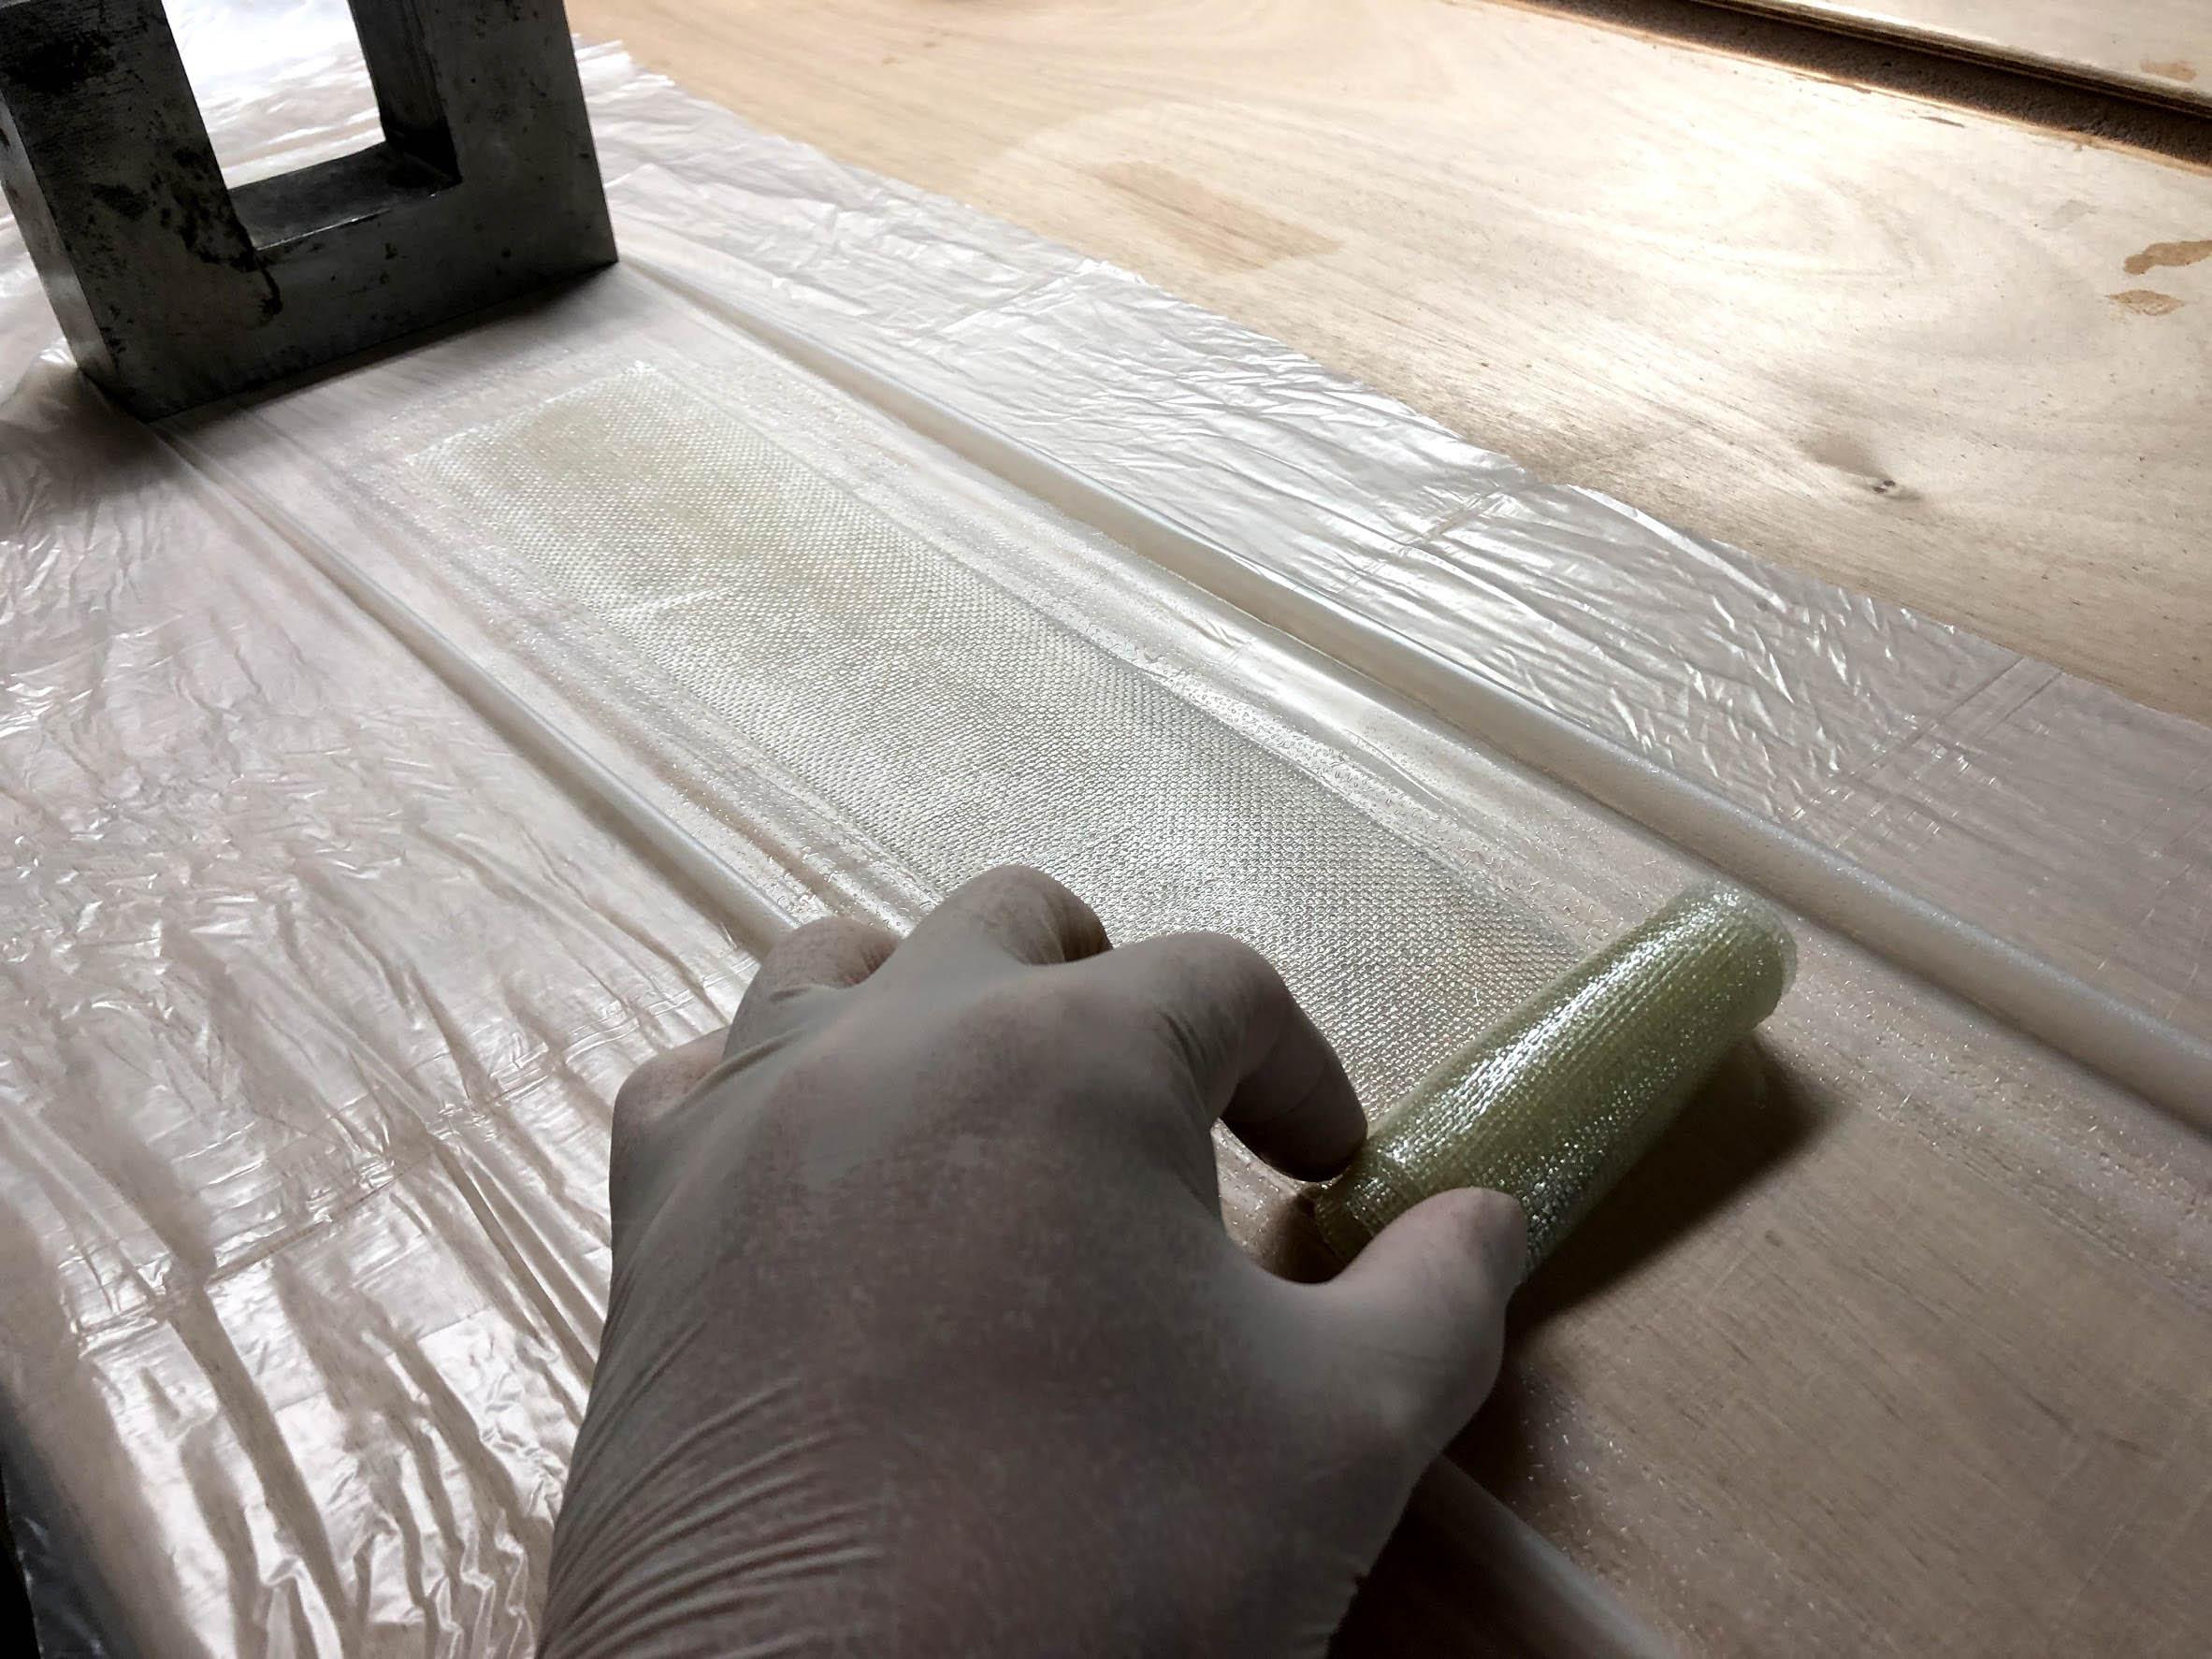
On to the last big fiberglass job. Lots of lessons to re-learn coming up in … 3 … 2 … 1 …
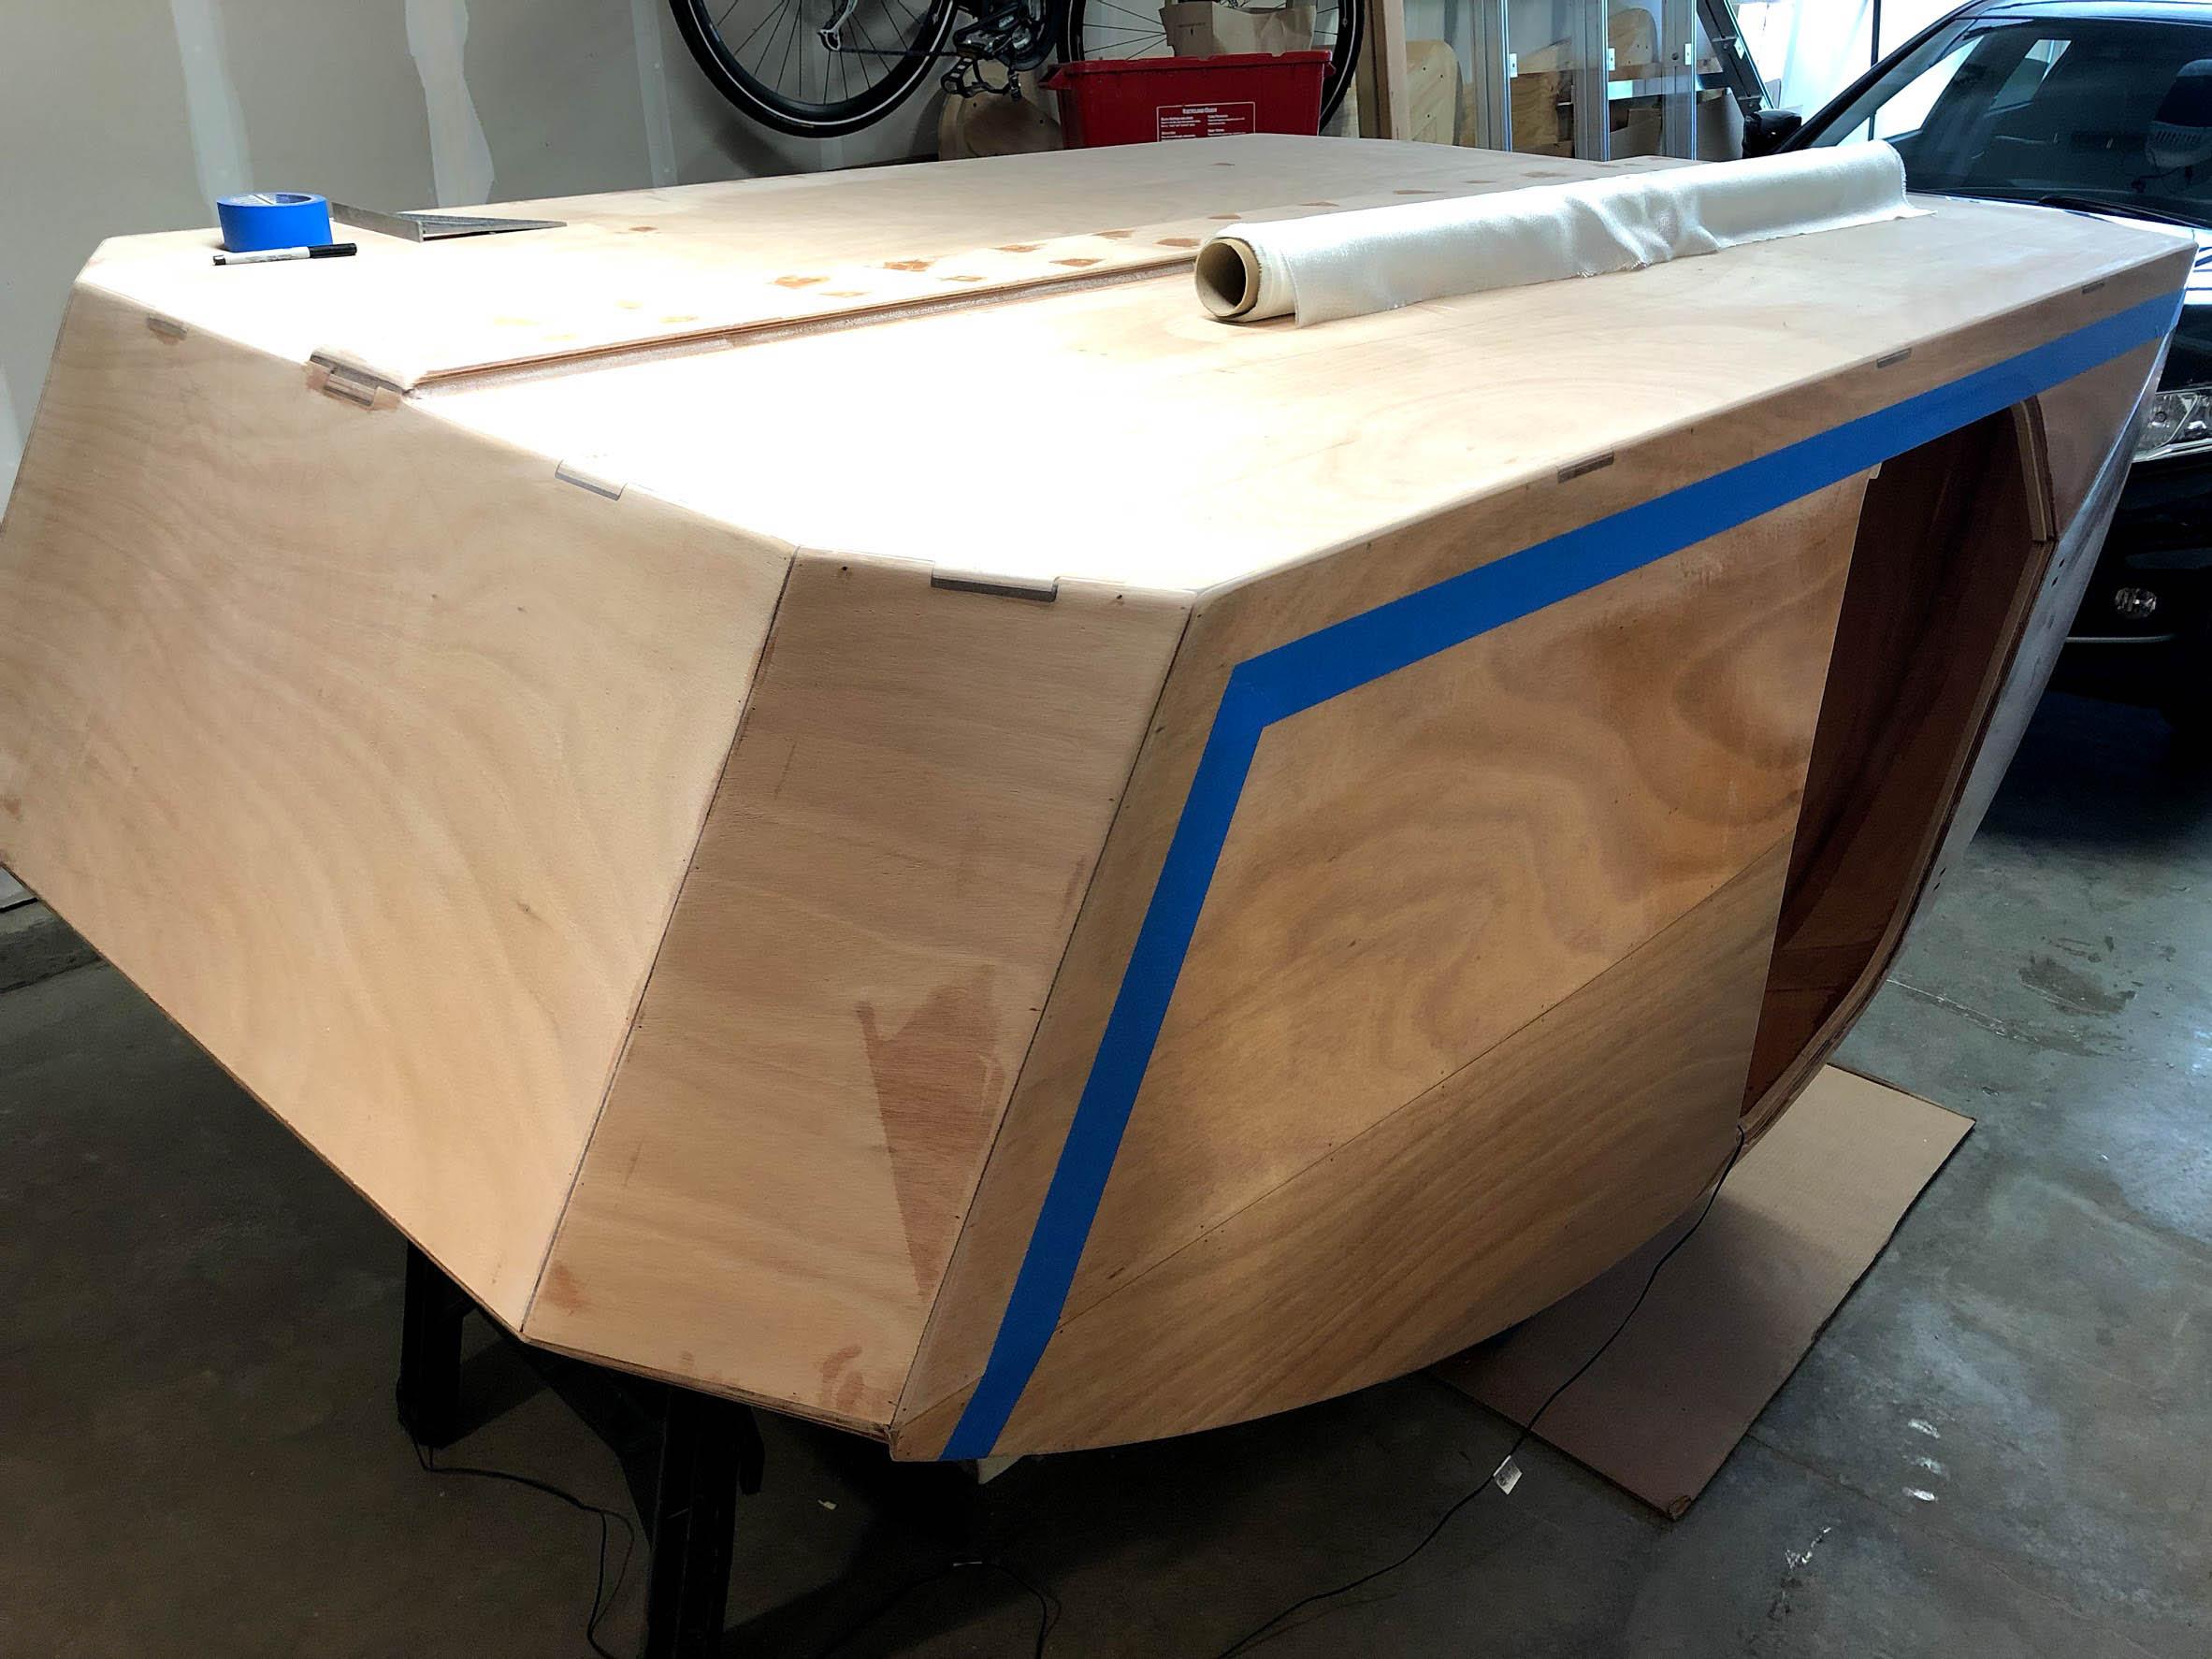
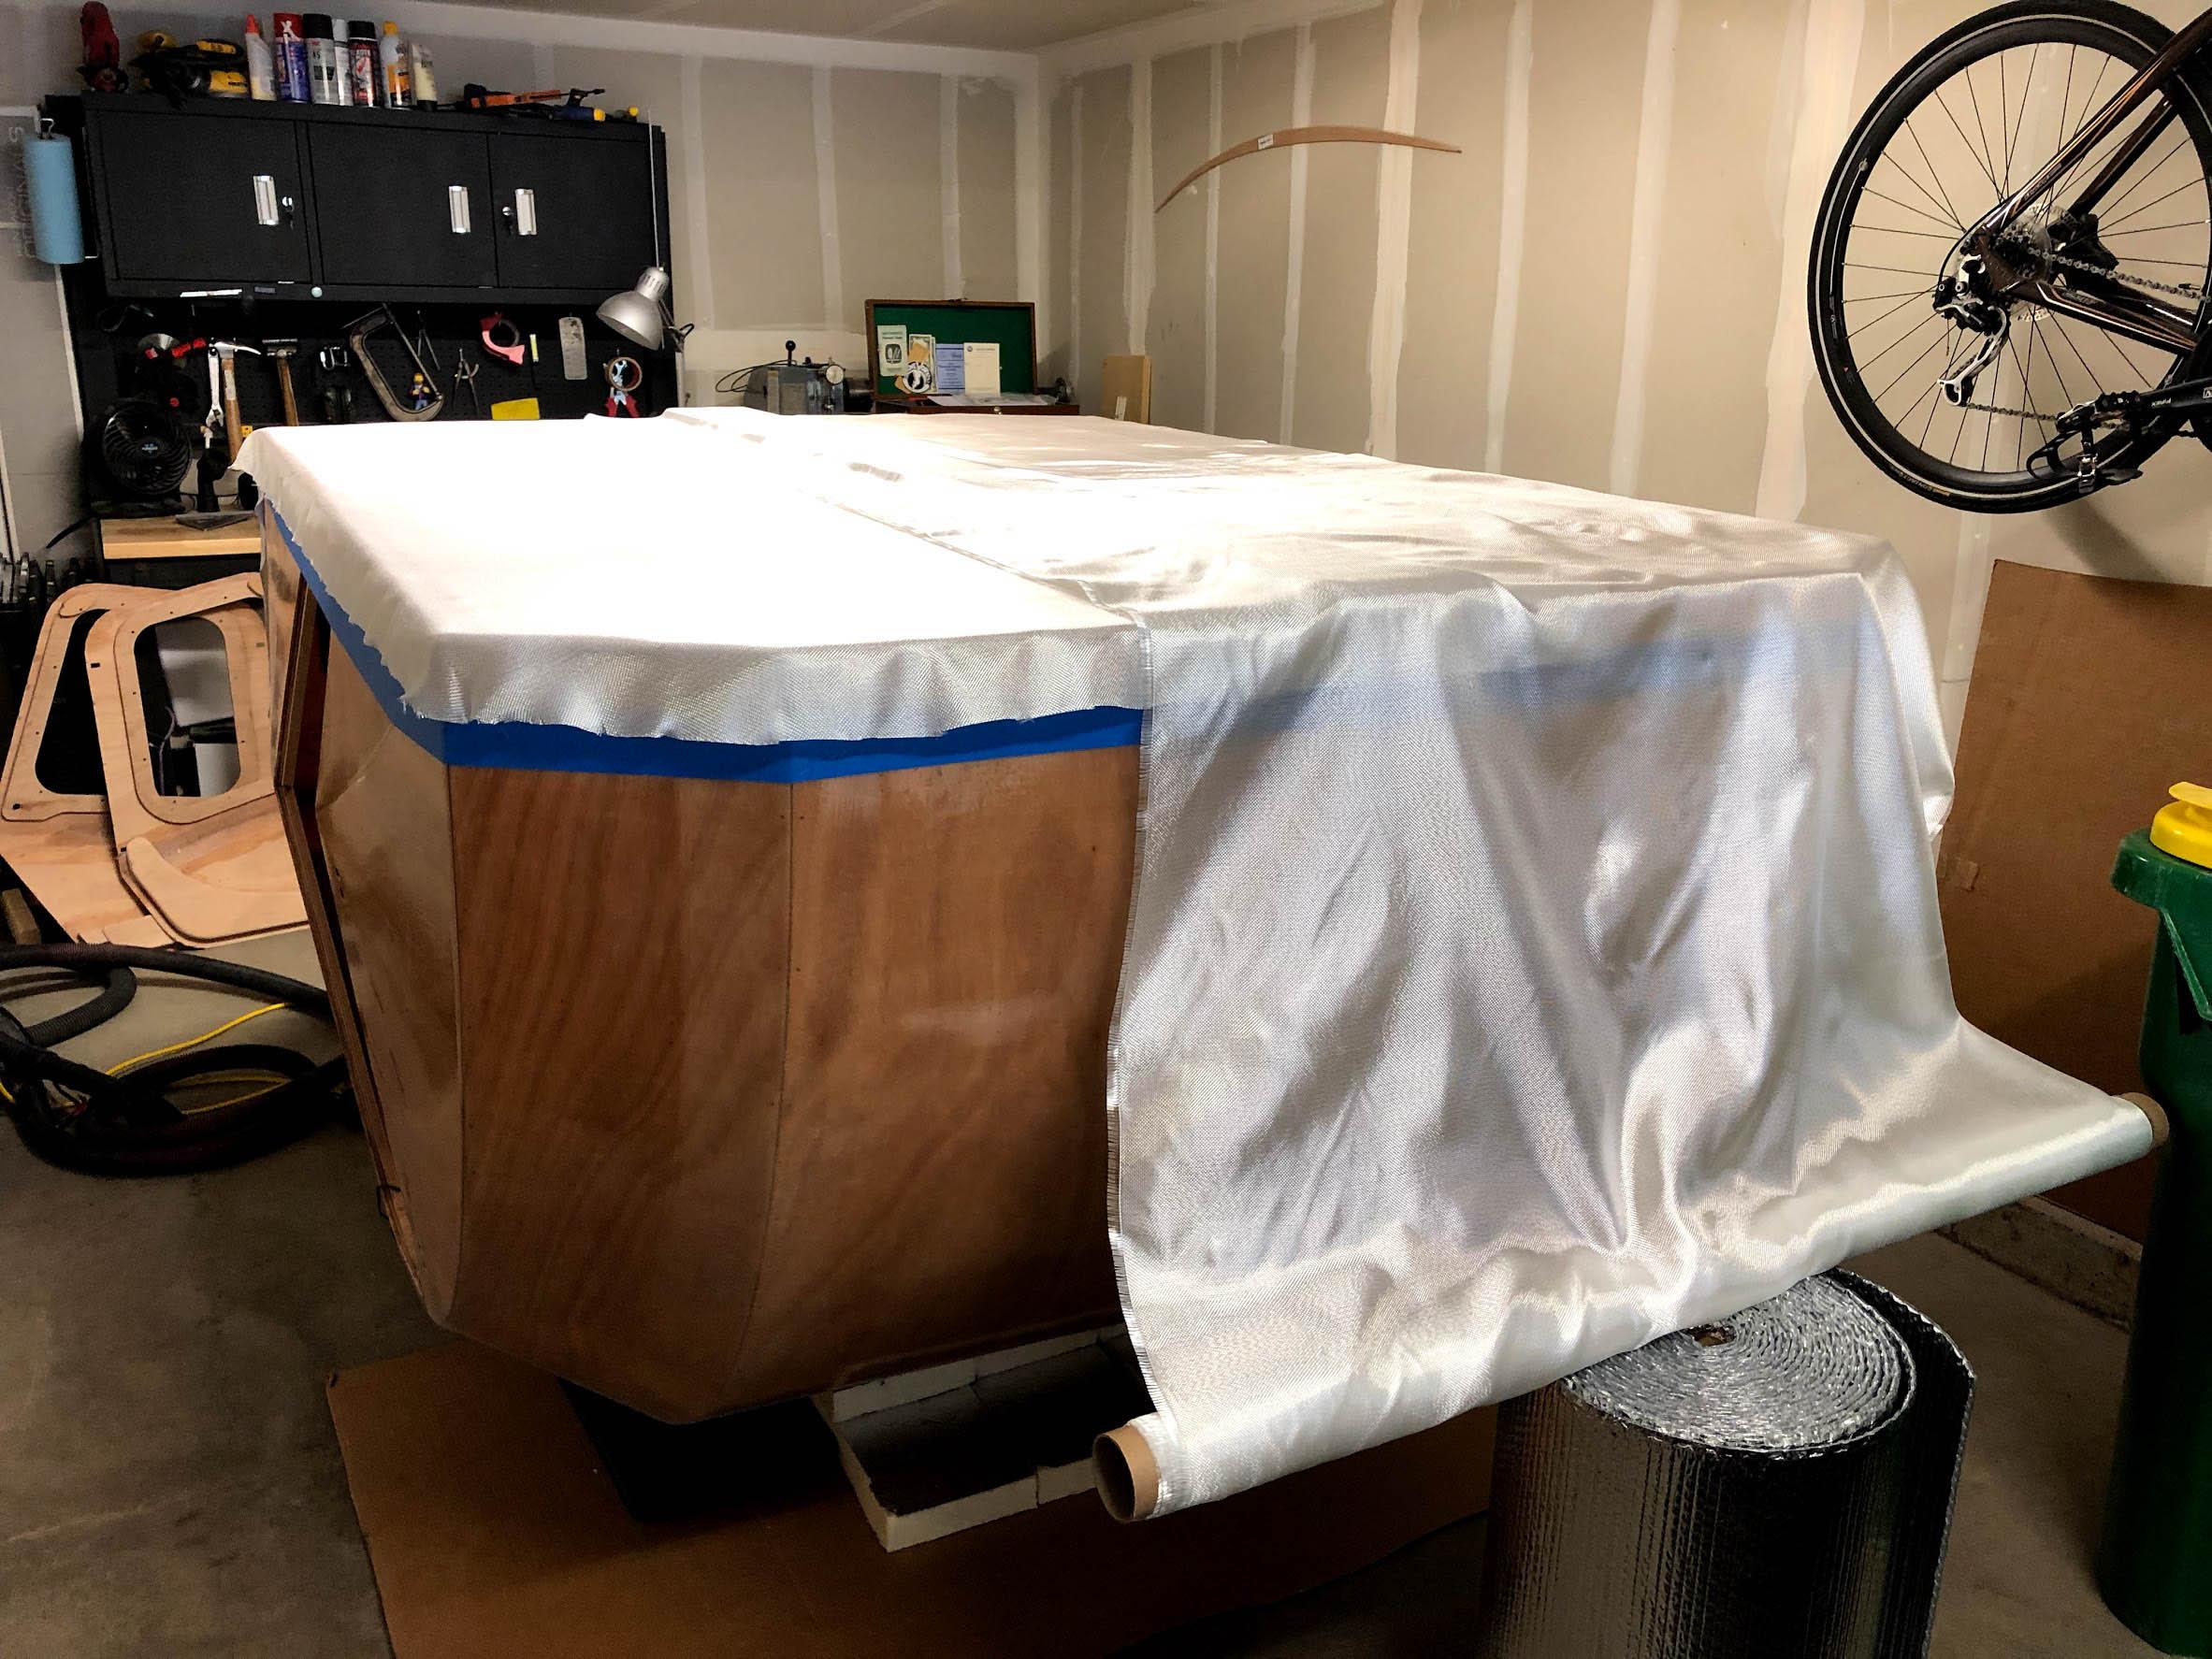
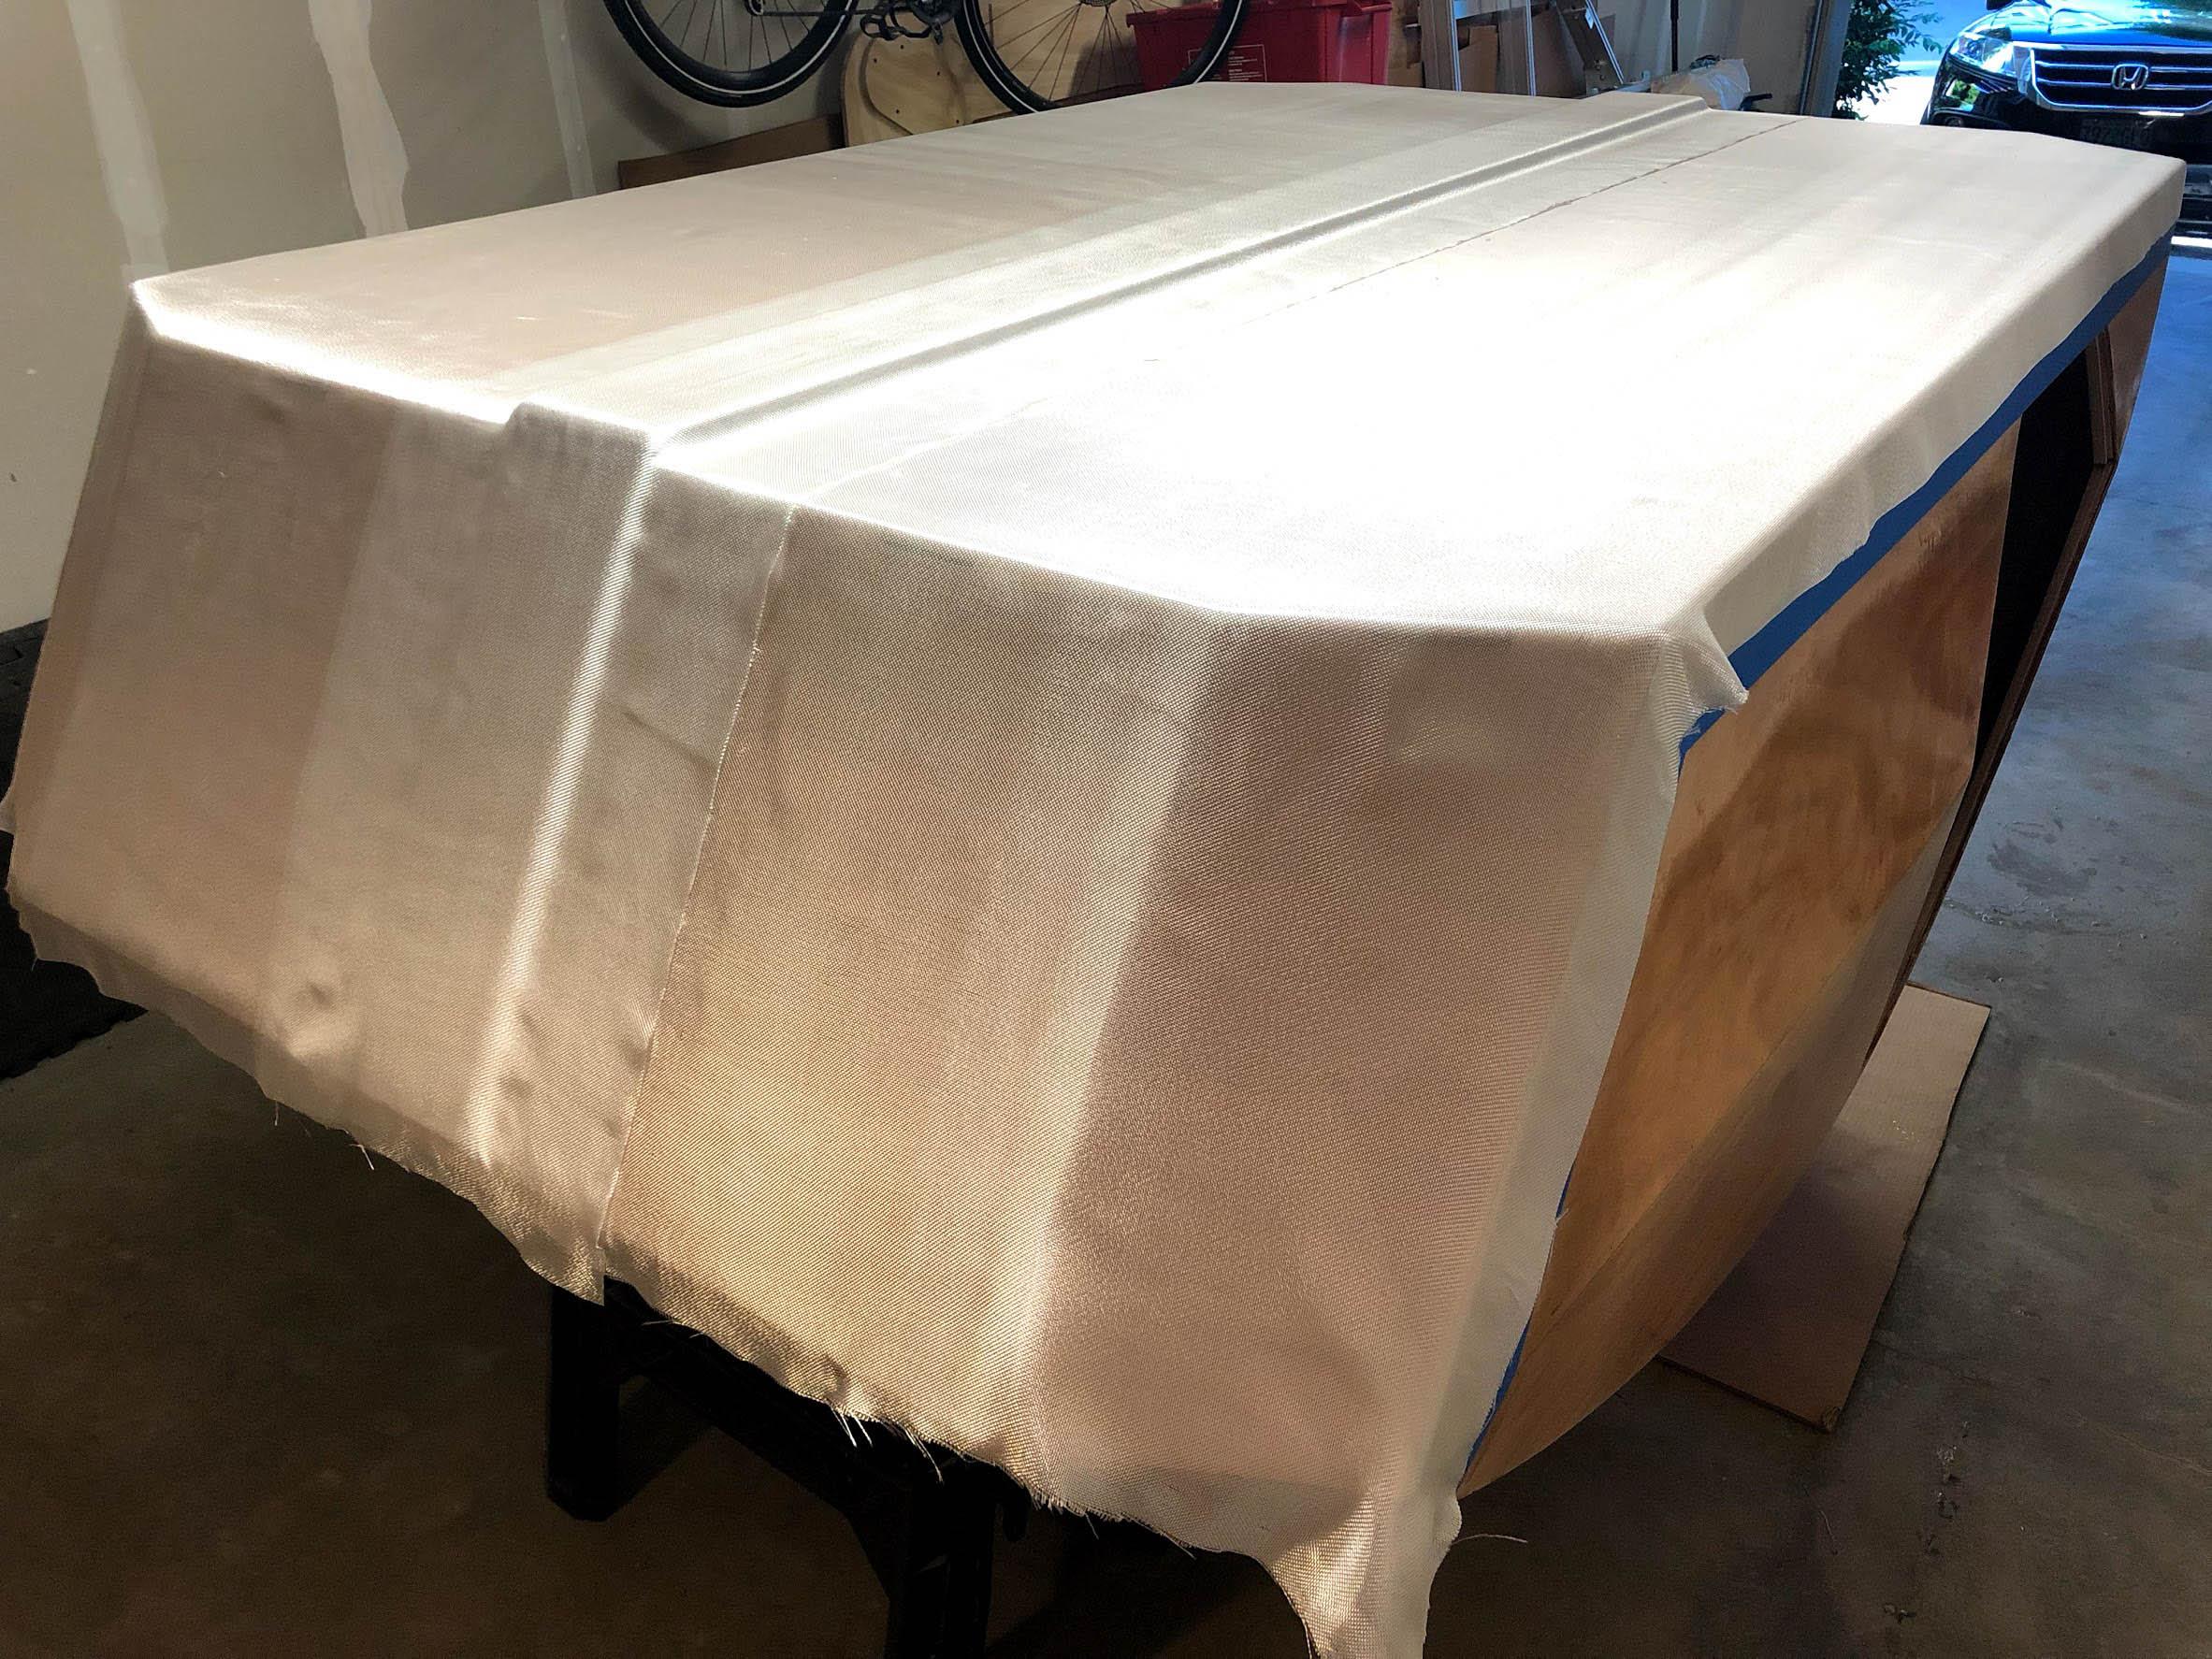

Ok… first lesson learned. I should have absolutely NOT done both sides at the same time. I have neither the experience or innate skill to do a quality job of it. It’s OK, but not half as good as it should be. I tried soooo hard to keep bubbles from forming at the butt block but I just couldn’t get them all out. With the two layers of cloth and insufficient radius on the block itself, I was doomed to failure. It would have been possible, I believe, if I had only one layer of cloth. Or a better radius.
Pro Tip: Do one side. Let it cure for a few hours. Then do the other side. Especially if your butt-block isn’t as rounded as it should be.
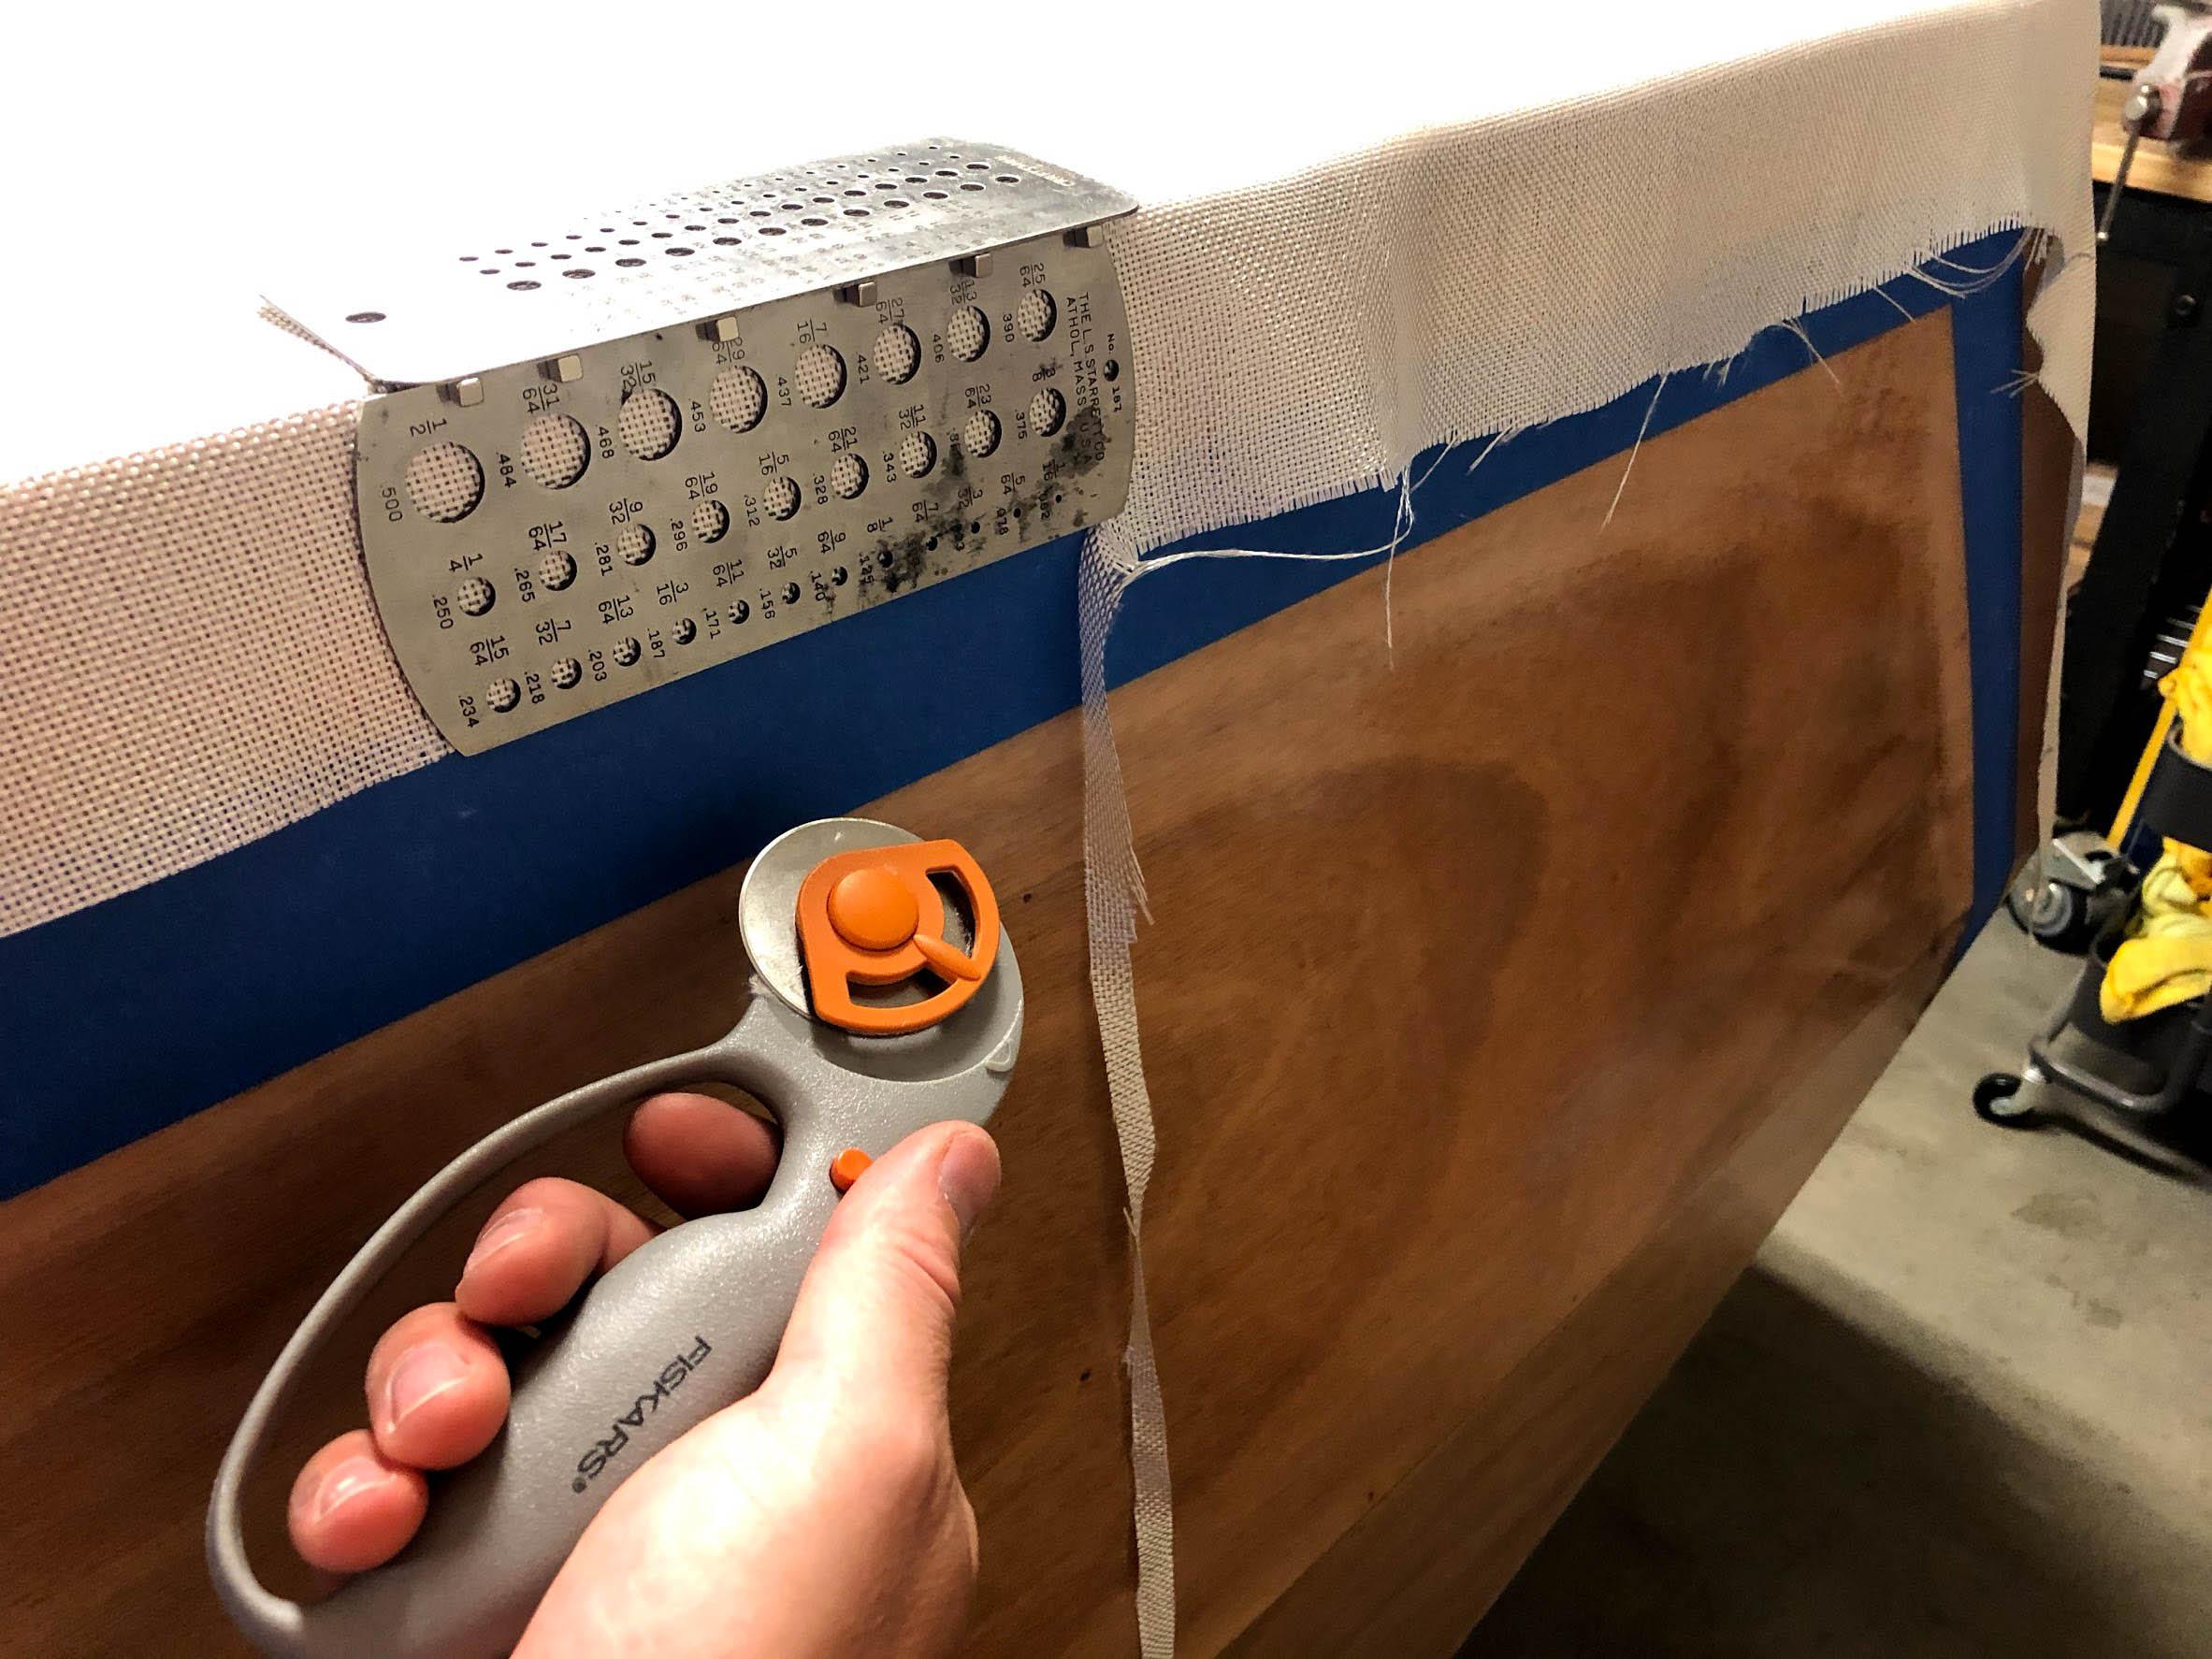
Second lesson is to keep the cut edge of your cloth near the butt-block, as they show in the manual, not overhanging the side like I did. If you have it overhanging like me, forget about the tape. The cut edge loves to fray and come apart (as you know) and removing the tape from under the saturated cloth makes a sticky, stringy nightmare you’ll be chasing with scissors. You need the reinforced edge of the cloth down there to keep it all together.
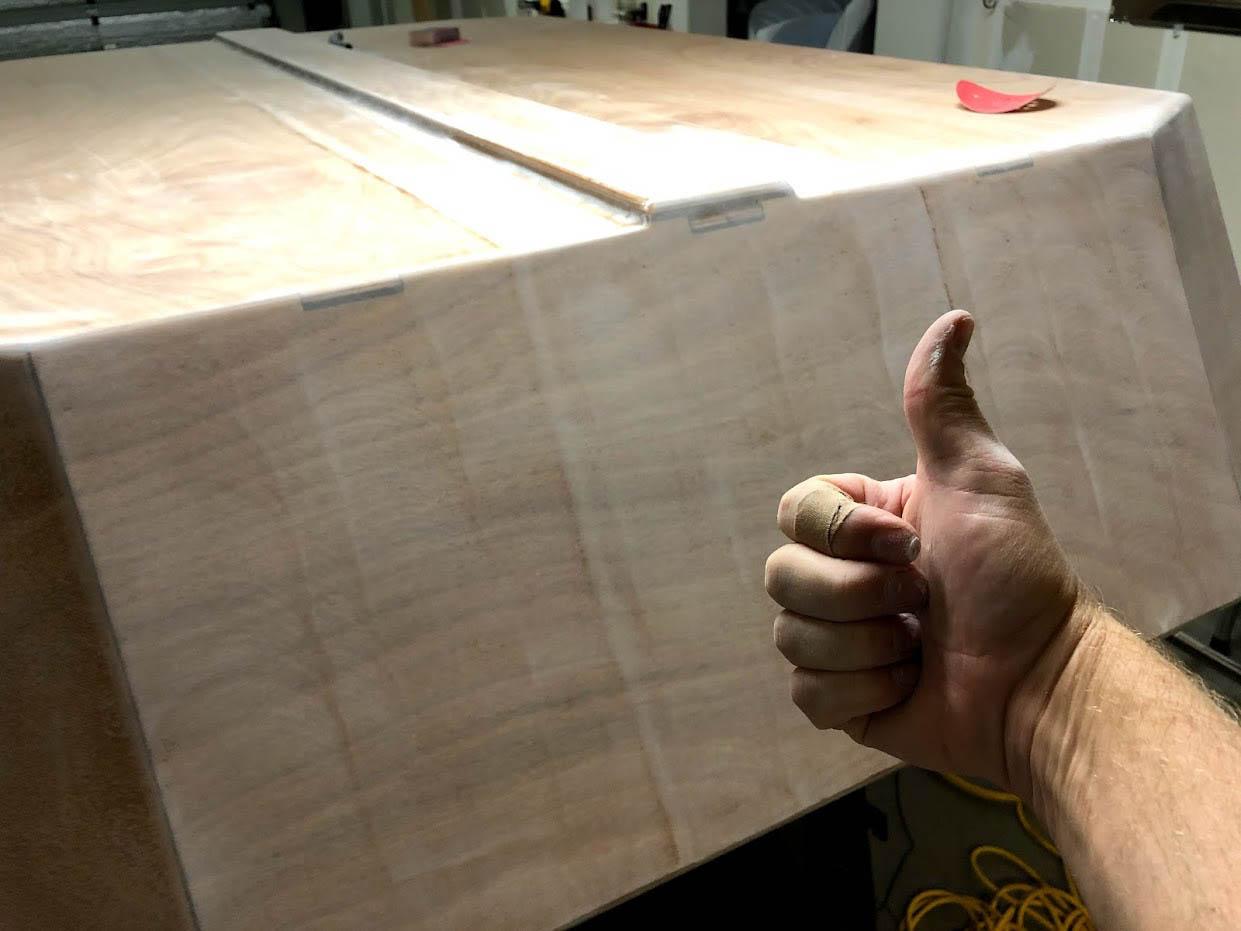
Man, I’m glad this step is done. I’m going to give the bottom a second coat of epoxy an then probably paint.
Also, I’m basically out of epoxy (I have been making over-sized fillets for everything). I was afraid I would run out while doing the bottom glass but I went ahead anyway. My last jugs of resin and hardener are alarmingly light. I ordered another gallon of resin and half-gallon of hardener so I’ll have enough to finish the interior and the galley.
May 29, 2018 at 9:01 pm #1857rovineye
ParticipantI took the bearing off my router bit and freehanded the 1/2″ radius. After practicing on scrap, it was not too hard to feel the right bite to the bit. The outcome was very good. Even with that radius, it was one of the more difficult places to get the cloth to lay down, and in the area where I was most concerned about since it isn’t visible and most exposed the environment.
I did both sides at the same time. Not sure one layer would have been any easier to get to lay down. Sure felt good to get that part done!
May 29, 2018 at 9:12 pm #1858ParticipantI got lucky, I suppose. I was able to get away with only 2-3 small bubbles. But I’ll agree it wasn’t easy getting it to lay down on that edge. At any rate, I came back with an epoxy syringe, drilled a tiny hole on both sides of the bubble at the top and filled it with epoxy. Problem solved. 😉
May 30, 2018 at 8:00 pm #1860ParticipantI’ve have a pack of syringes coming from CLC with my extra epoxy. I’ll do some filling… probably. I’m sooo eager to get this thing turned back over and mounted on the trailer. Hopefully I can get a fill-coat and some paint on it by this weekend.
Need to figure out what paint I want to use and what color… probably just black.
May 31, 2018 at 9:48 am #1861ParticipantI know the feeling. I was so happy to get mine flipped back over and on the trailer. It is kind of a momentous event deserving of a toast or something similar. 😉
I ended up using Total Boat Wet Edge in Flag Blue on the bottom, #4 panels and transom (I absolutely love this color). I also used Total Boat Topside Primer, followed by three coats of the paint. I was pleased with the results. Though, I think with any paint you’ll want to give it at least two days to fully dry. When I did mine, I luckily had about a week in between painting and mounting, so it wasn’t an issue. What I’ve read else where is that despite being dry and safe for work handling after 48 hours, such paints truly take a few weeks to cure fully. I’ve definitely noticed a difference in paint that was a few days dry vs a few weeks, so maybe there is something to it. 😉
Since it is on the bottom I guess it isn’t AS big of a deal, but it seems like you are meticulous in your process which I highly respect and have enjoyed watching through your posts. So, FWIW, for you or anyone that is is interested, here are some lessons I learned on painting:
- Be mindful of temp, humidity, air flow, etc and thinning the paint accordingly.
- 2-3 thin coats, like really thin creates an amazing finish.
- ‘light’ sand with 320 grit between coats, wipe down with alcohol and tack rag (it’s amazing what the tack rag will pick up).
- wrap some blue tape upside down around your hand and run roller over it with firm pressure. The idea is to get as many particles as possible out of the roller before going to the paint. I was amazed at how much came out and the difference between coats with and without doing that.
- Using an expensive badger hair tipping brush didn’t really seem to matter THAT much (IMO). It certainly gave great results (and probably worth the money), but I felt that I got comparable if not equal results with a mid-grade brush. YMMV.
- Only do small sections at a time and only pour enough paint for the job or even part of the job, the stuff dries fast, especially once you start rolling it.
- DON’T go back over a section. Resist the urge to correct a mistake and fix it in the next coat.
- Unless you are in a paint booth then forget about dust, obviously do what you can to eliminate it, but wet down the floor and keep movement in the area to a minimum after coating. But inevitably something will land in the finish. Let it dry and knock it down with 320 sand paper or a scotchbrite pad in between coats.
Here is what mine looked liked before, during and after painting the shell.
And here is what happens when you don’t account for humidity and temperature, plus how it looked after I got it right. 😉
Also, this is a great video demonstrating the rolling and tipping technique. And here is his discussion about how he did it. I highly recommend anyone that is rolling and tipping for the first time to take the time and read through it, including the comments. It has a lot of great information that I found very useful.
I actually found the painting portion of this project to be one of my favorites. I’m not sure why, but I really enjoyed the entire process. So, I hope some of this helps others and I’ll be looking forward to seeing results. 🙂
-Adam
-
This reply was modified 5 years, 11 months ago by
abrightwell.
June 5, 2018 at 12:26 pm #1872Participant@abrightwell, Thanks for the paint info! I ordered the same paint (I also love that color) along with primer and thinner from TotalBoat. I’ll only be painting the bottom, like CLC did on their show model. Might do a little pinstripe work as well. The paint should arrive this week just after my extra epoxy comes from CLC. In the meantime, I have done a fill-coat on the bottom and nothing else. Next up is filling those bubbles, then onto sanding sanding sanding, followed by paint, then flip and mount… then on to some fun finishing work!
 June 12, 2018 at 2:27 am #1889Participant
Hmm. I just realized I could have taken the bearing off my 1/2” round over bit, as @rovineye did, and clamped a straight-edge in place to guide the router. Oh well.
Bubbles have been filled. Bottom and transom are sanded and ready for paint, which arrived today. I just need to wipe everything down and mask it off. So close to flipping it back over!
Sanded for at least 4 hours on Saturday. They say wooden boat building is 90% sanding. It appears the same is true for teardrops…
 June 13, 2018 at 1:44 pm #1891Participant
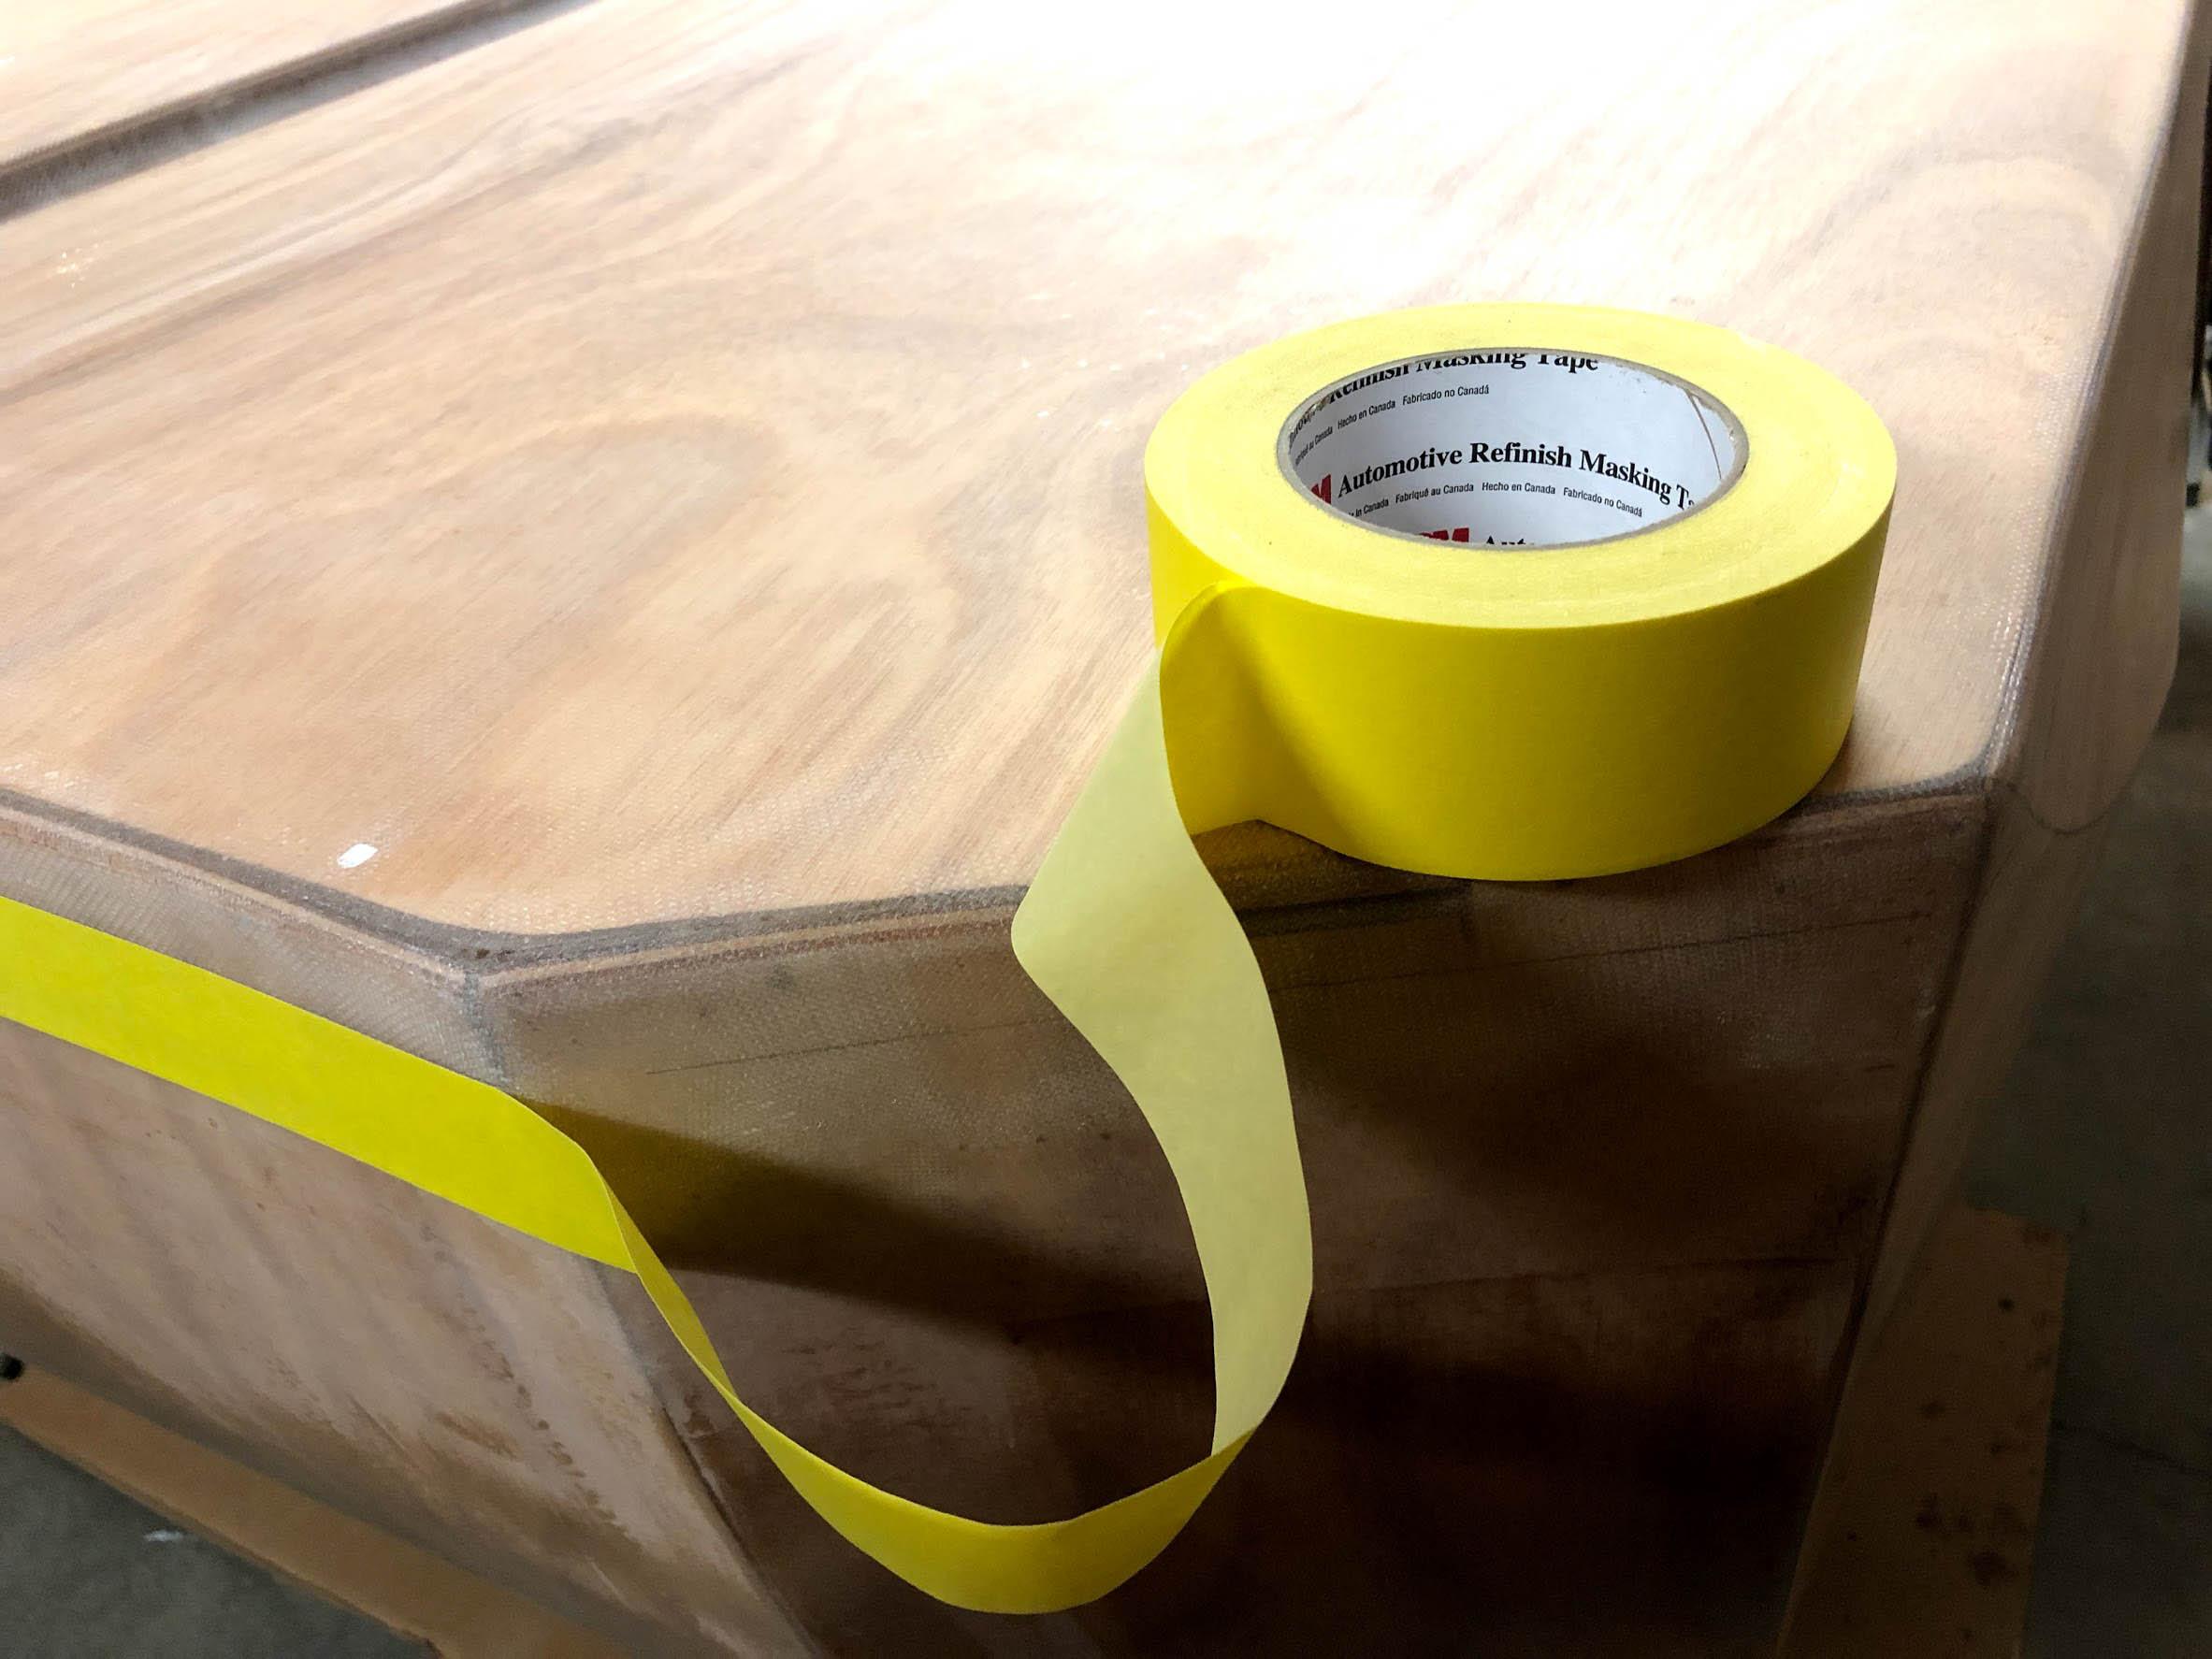
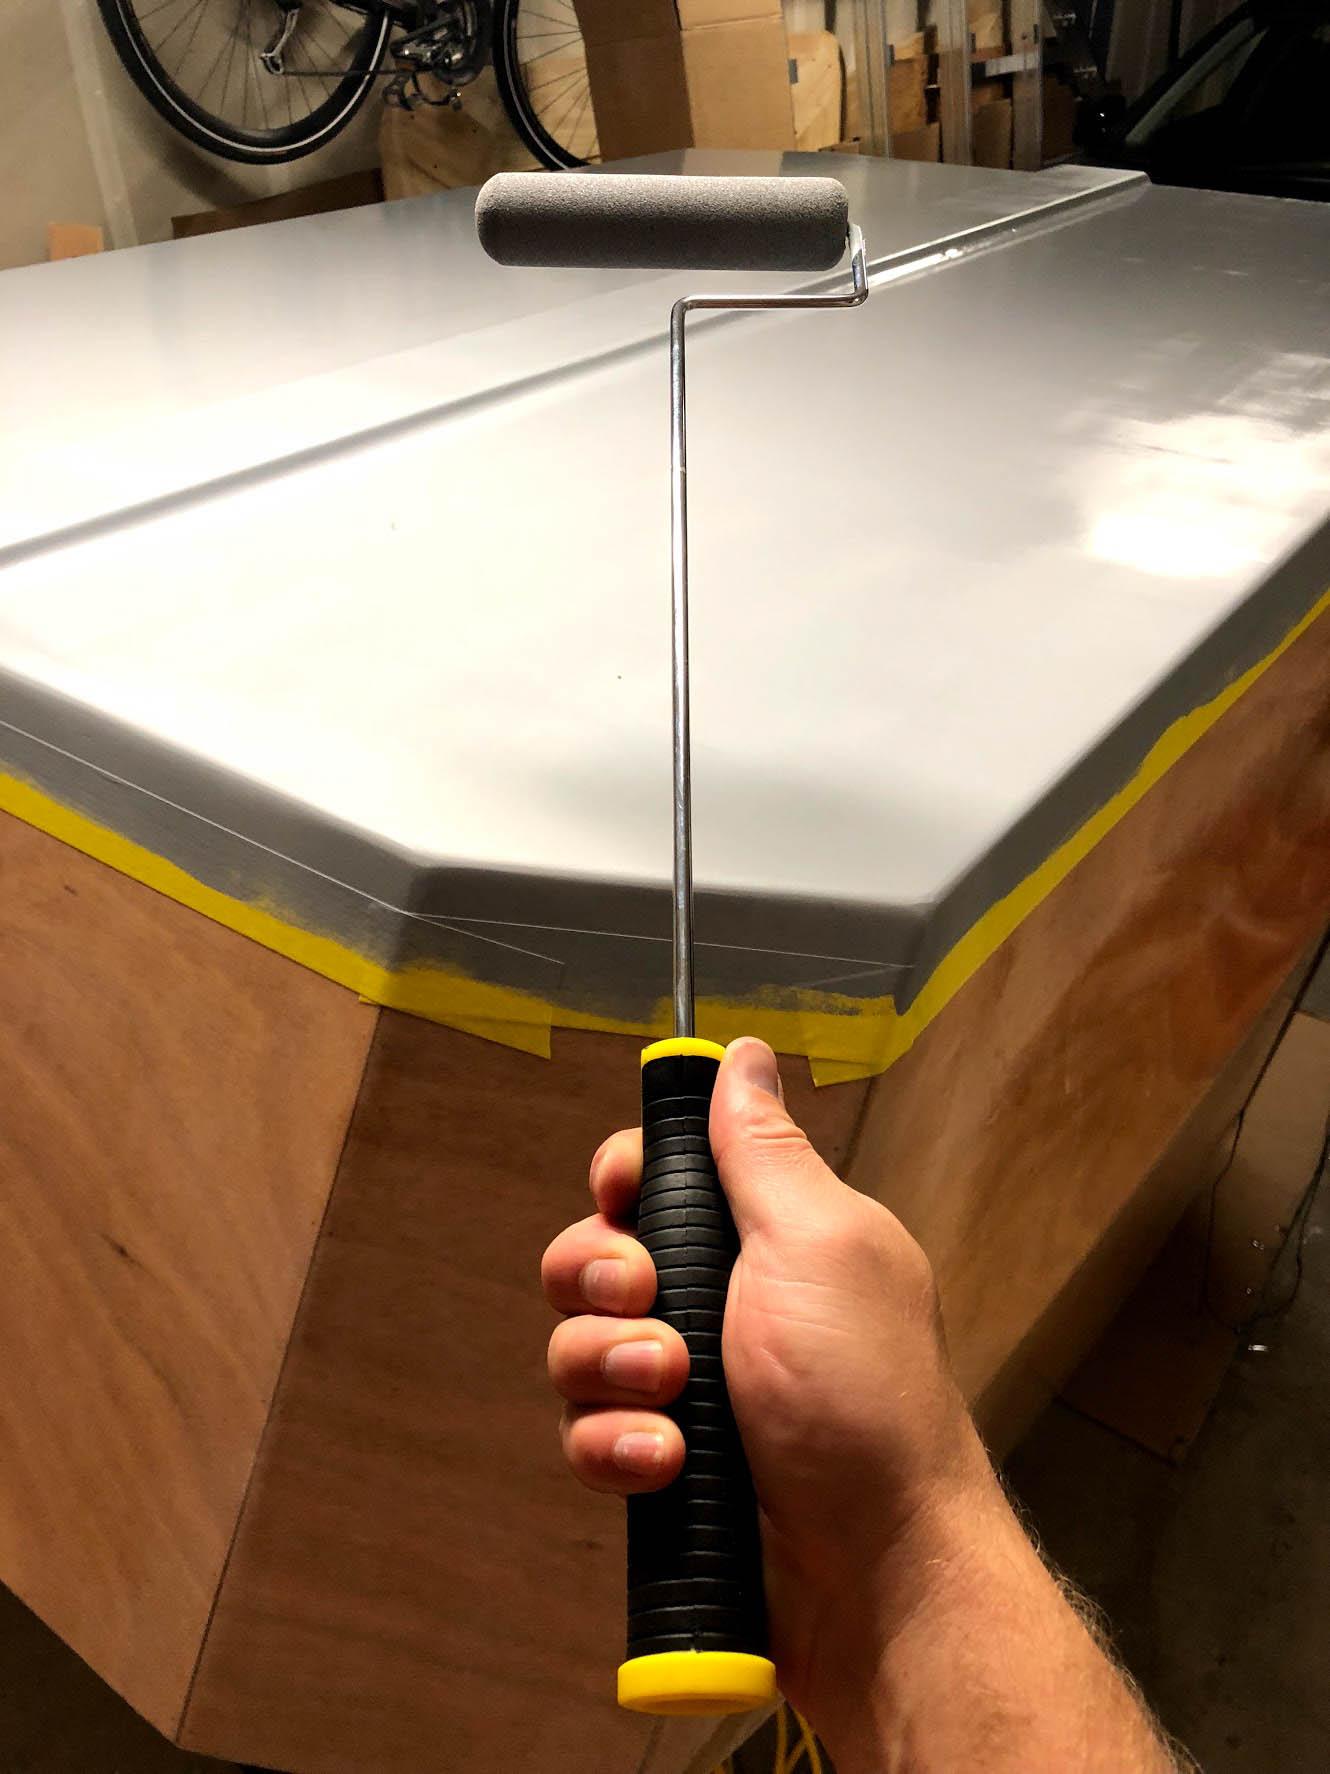
Primer last night. Paint tonight. I sure hope this tape leaves a clean line…
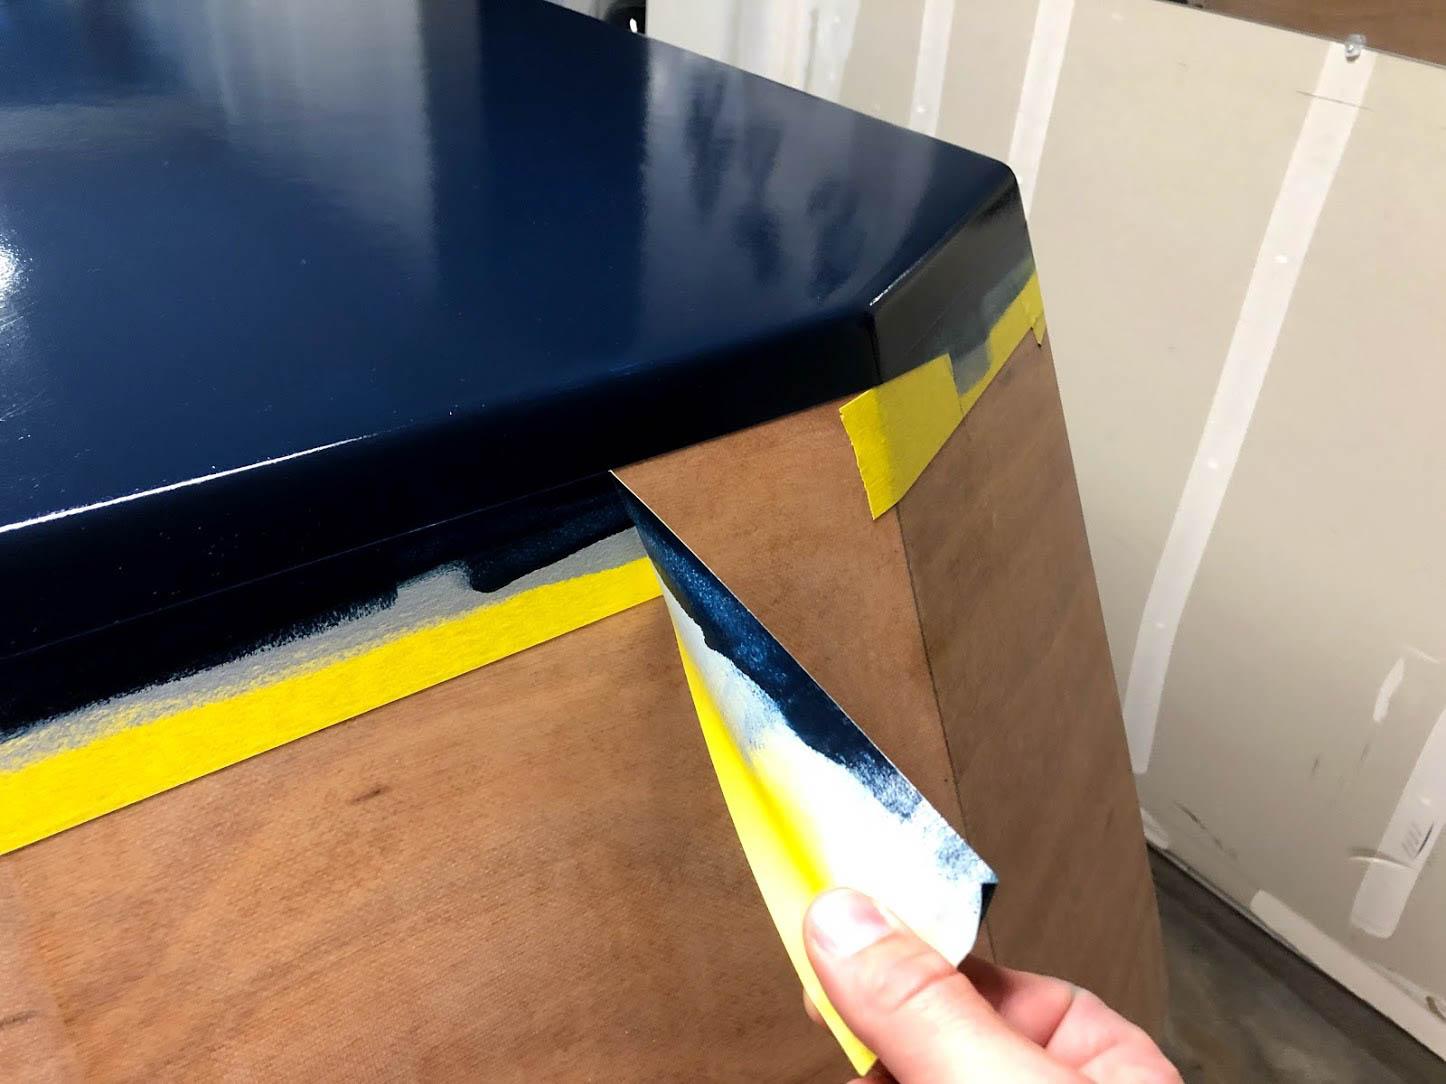
June 18, 2018 at 12:53 pm #1900ParticipantGot three coats of paint on the bottom. It’s not perfect, but it’s way better than just good enough… except for that sexy masking line, which IS perfect all the way around. I can now highly recommend 3M Automotive Refinish Masking tape, procured from my local auto-parts store. After being in place for a week and getting multiple coats of paint, it created a super sharp line and left behind zero residue.
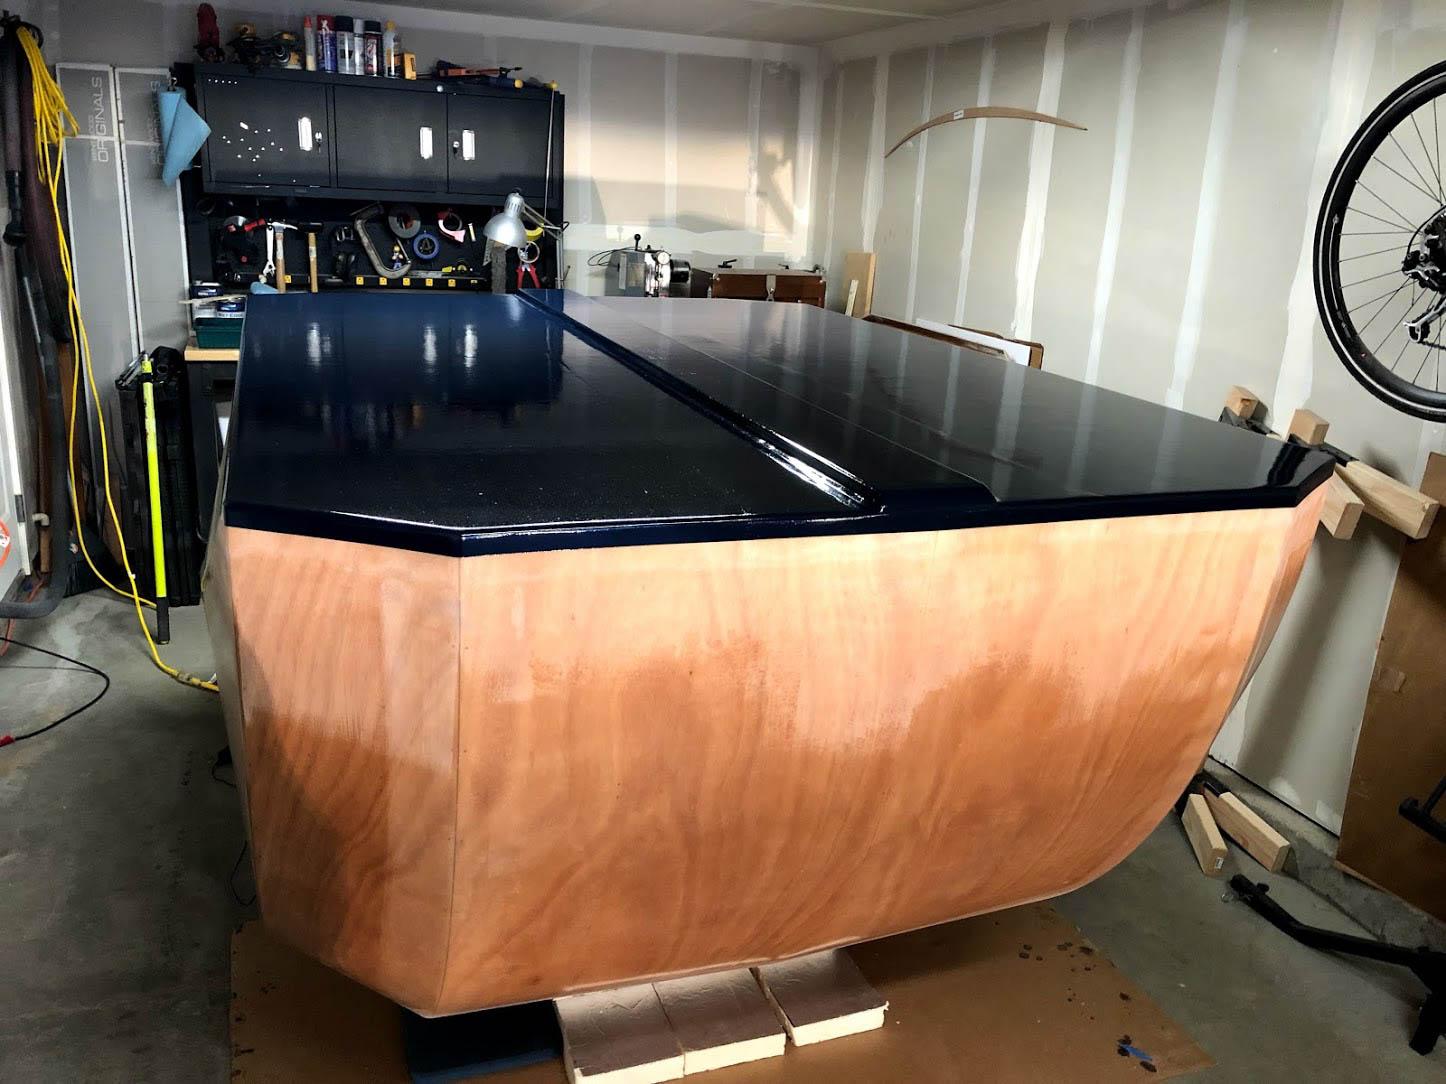
I’ll apply a coat of wax to the painted surface just before flipping it onto the trailer next weekend. Hopefully the paint is cured enough by then. I’ll add some pin-striping later, after installing the eyebrows but before varnish. In the meantime, while the paint is curing, I’ll be working on the doors and galley hatch. I got a coat of epoxy on the doors yesterday.
You can see the huge difference in those fillets on the doors. Those were the first “flat” fillets I did. So sloppy.
-
This reply was modified 5 years, 10 months ago by
June 18, 2018 at 1:17 pm #1902ParticipantSpeaking of the bottom of the TD; when I had mine licensed, the trooper doing the inspection strongly suggested engraving the trailer VIN number into the bottom. They would routinely look there if suspicious of a TD, and since these could so easily be removed from the trailer and be remounted, there would be a possible way to get it back or prove it was yours.
-
This reply was modified 5 years, 11 months ago by
-
AuthorPosts
- You must be logged in to reply to this topic.