Welcome to TeardropForum.com › Forums › Teardrop Builders’ Forum › Alternative way to attach camper to trailer
- This topic has 17 replies, 3 voices, and was last updated 2 years, 3 months ago by
madebymike60.
-
AuthorPosts
-
January 15, 2022 at 9:05 pm #4120
madebymike60
ParticipantHere’s another follow up. There was one more epoxy joint that had failed (also at the front of the trailer) so even though eight others were still holding, it was likely just a matter of time before they failed. I’ve attached mine the ‘proper’ way now switching out eight of the short bolts for ones that go through the camper. I left the two center ones alone to see if the epoxy will hold over time.
For anyone who hasn’t attached your camper and reads to the end of this topic, I don’t think you need to flip the camper to do it. I didn’t when I ‘fixed’ mine and it seems like an unnecessary step. Here are my steps:
1) While under the camper/trailer, drill a 3/8 hole the rest of the way through the aluminum tubing and the camper bottom.
2) From inside the camper, drill a 1/2 inch hole at each location, just through the wood.
3) Tape over the holes on the bottom of the camper, instead of inside the camper, like the directions show.
4) Fill the holes from inside the camper with thickened epoxy, instead of from the outside.
5) After a day, from inside the camper, I re-drilled the 3/8 inch holes. This is where it helps to take your time so that your holes look like the one below and have an epoxy circle protecting the wood. (The black is the U-pol coating.) Two of mine at the back of the camper (the ones harder to get at) needed the coating of unthickened epoxy but the others were good.
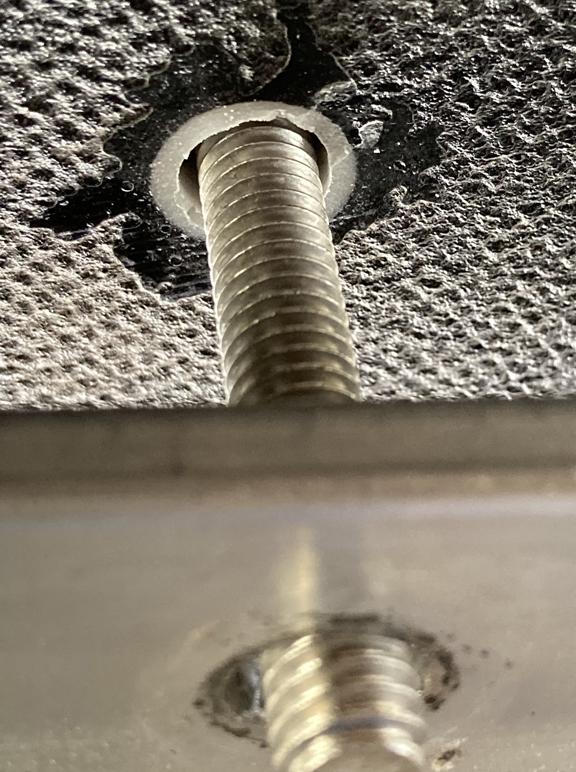
6) The picture above shows one where I put the aluminum and rubber washer back in place but after doing that, I fit a bolt through from inside the camper and tightened everything. For most, the tubing and washer were already in place.
January 15, 2022 at 10:03 pm #4121ParticipantSo I’ve basically traded aluminum tubing for the plastic risers that come with the trailer. But using the kit supplies, it seems you could follow a similar procedure to attach the camper without needing to flip it. Again, a creeper helps for the work under the trailer.
If it’s not already in place, start by setting the camper on the trailer (following the directions to align it) but have the risers in place, maybe using small pieces of double sided tape. Their holes should be lined up with the holes in the trailer mounting brackets. Next, from underneath, you’ll drill a 3/8 inch hole through the camper bottom using the bracket/riser holes as a guide.
The next step might be a little tricky but can be done with a short pry bar or the air shim shown above. (If you use a pry bar, a scrap piece of wood placed against the camper bottom can prevent damage.) At each bracket, raise the camper slightly to be able to slide the plastic risers a little out of the way (for drilling the 1/2 inch hole from above and taping) but still supporting the camper. You’ll drill the 1/2 holes from inside the camper, tape over them from underneath the camper and then fill them from inside with thickened epoxy. A ‘regular’ 1/2 inch twist drill bit (not Forstner, not spade) will use the smaller hole as a ‘guide’ and should work best for enlarging the holes. Wait a day and carefully drill 3/8 holes through the epoxy. If you hit bare wood, coat it with unthickened epoxy. Raise the camper slightly at each bracket again, slide the risers back in place one at a time, add the rubber washers and line up all the holes. Drop or tap a bolt through from the top and tighten.
This is more steps and you do have to work under the trailer more but the trade off of not flipping the camper twice seems worth it. Reply to this if you try it and/or have any suggestions.
-
AuthorPosts
- You must be logged in to reply to this topic.